
|
Page << Prev | 1 | 2 | 3 | 4 | 5 | 6 | 7 | 8 | 9 | 10 | 11 | 12 | 13 | 14 | 15 | 16 | 17 | 18 | 19 | 20 | 21 | Next >> Yurt / Ger Diarywritten by Rene K. Mueller, Copyright (c) 2005, 2006, 2007, 2008, 2009, last updated Sat, January 3, 2015 24. 10. 2005: Door FinishedAdded door handling and simple locking mechanism.
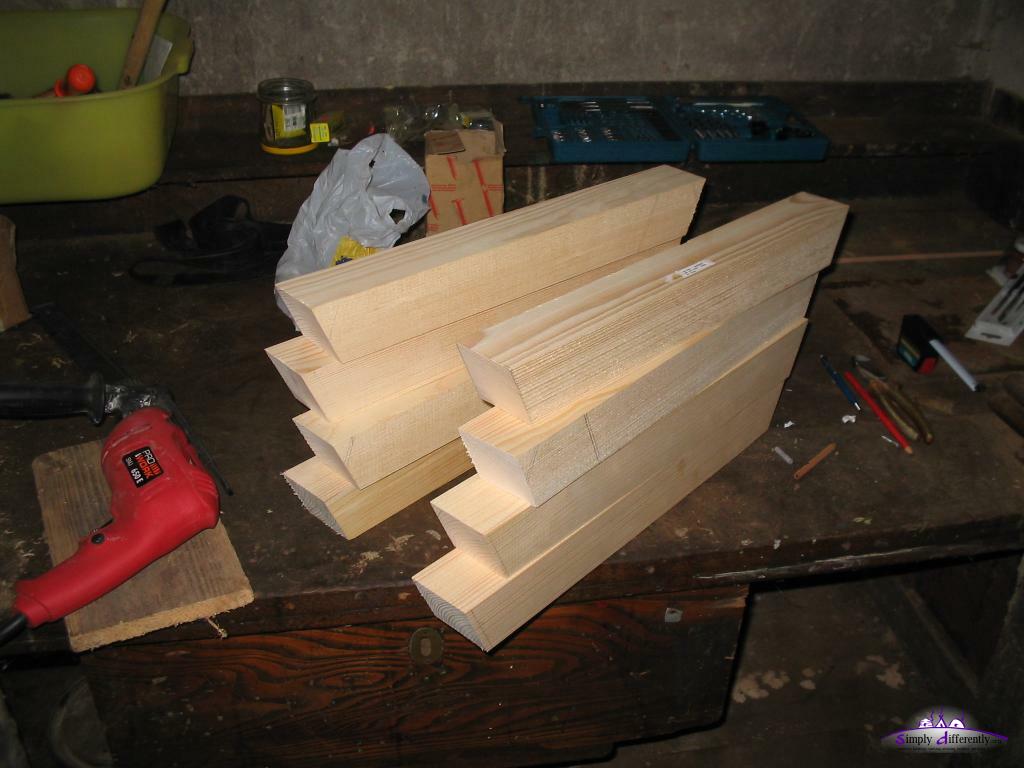
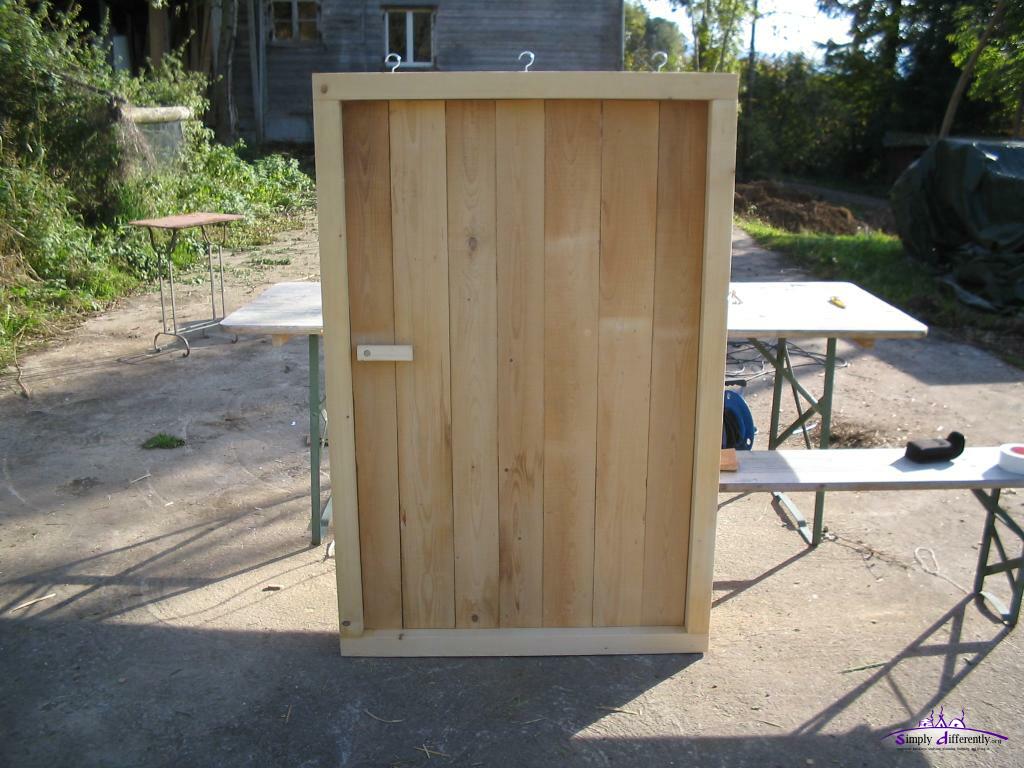 Finished door including a door handle 2005/10/26 14:17 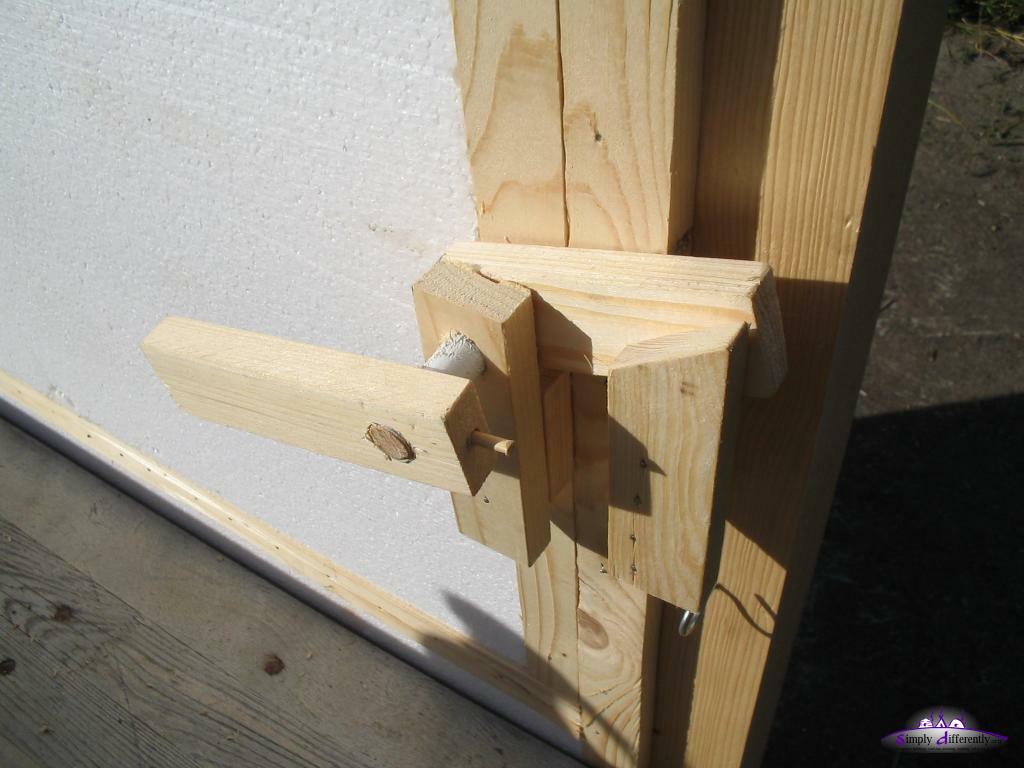 Simple door closing/locking mechanism 2005/10/26 14:17 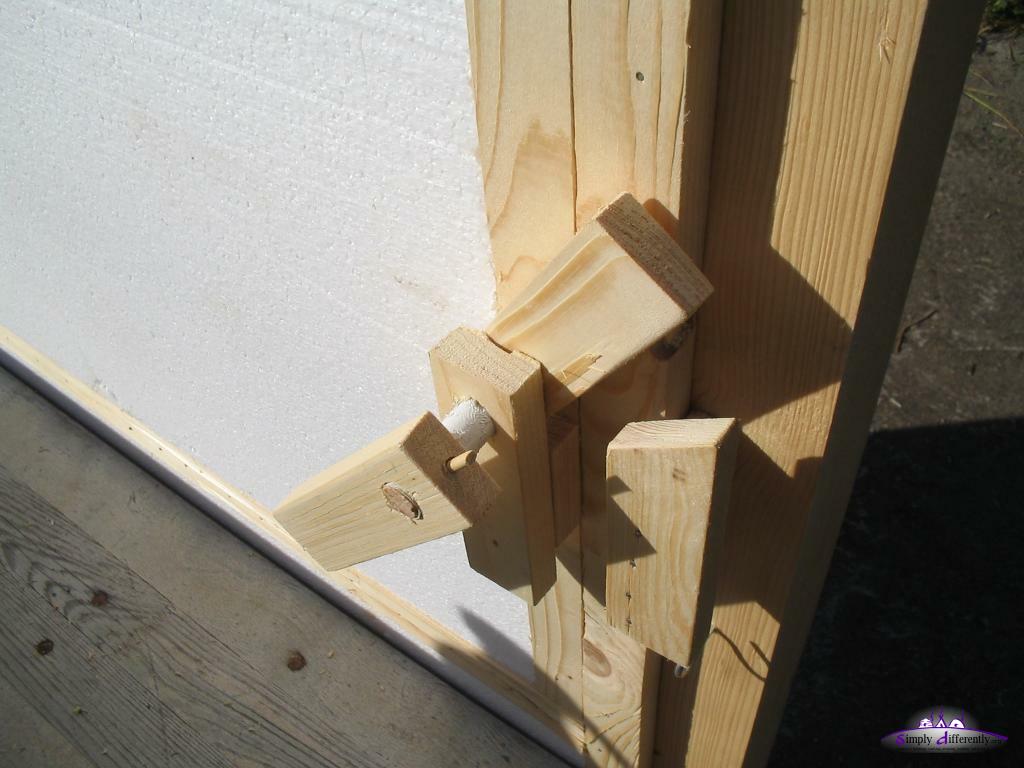 2005/10/26 14:17 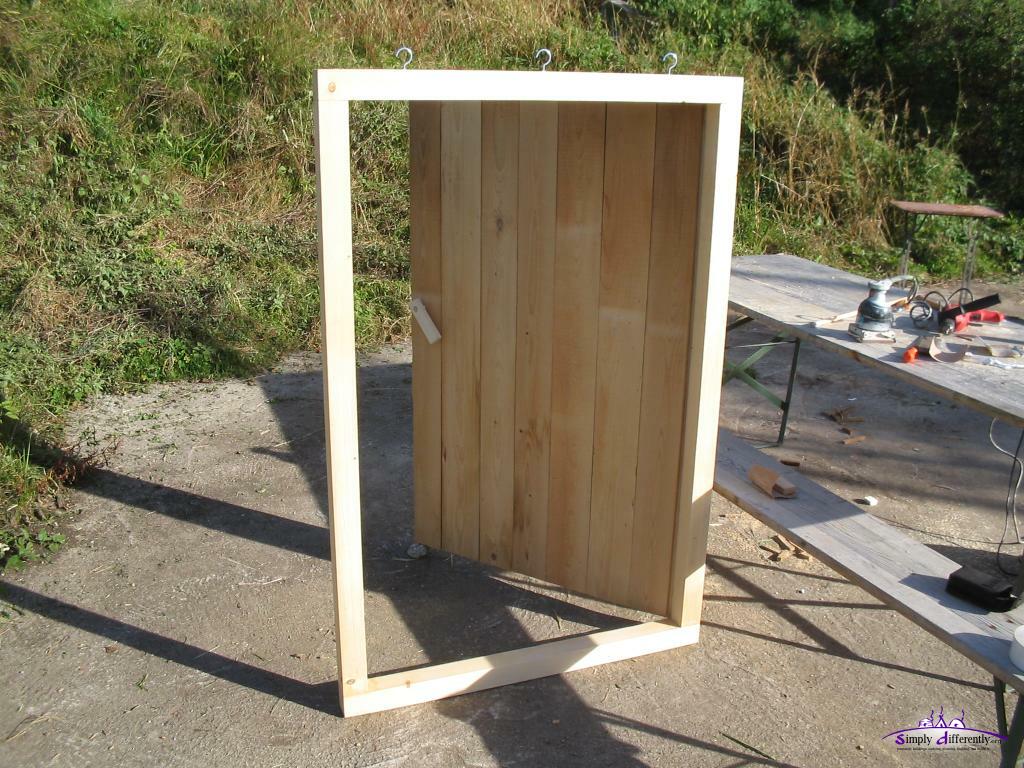 2005/10/26 14:18 22. 10. 2005: DoorFinally did the last thing, the door. I used some laths, with frame and insulated with Sagex. I assemble a simple door locking mechanism with wood next days.
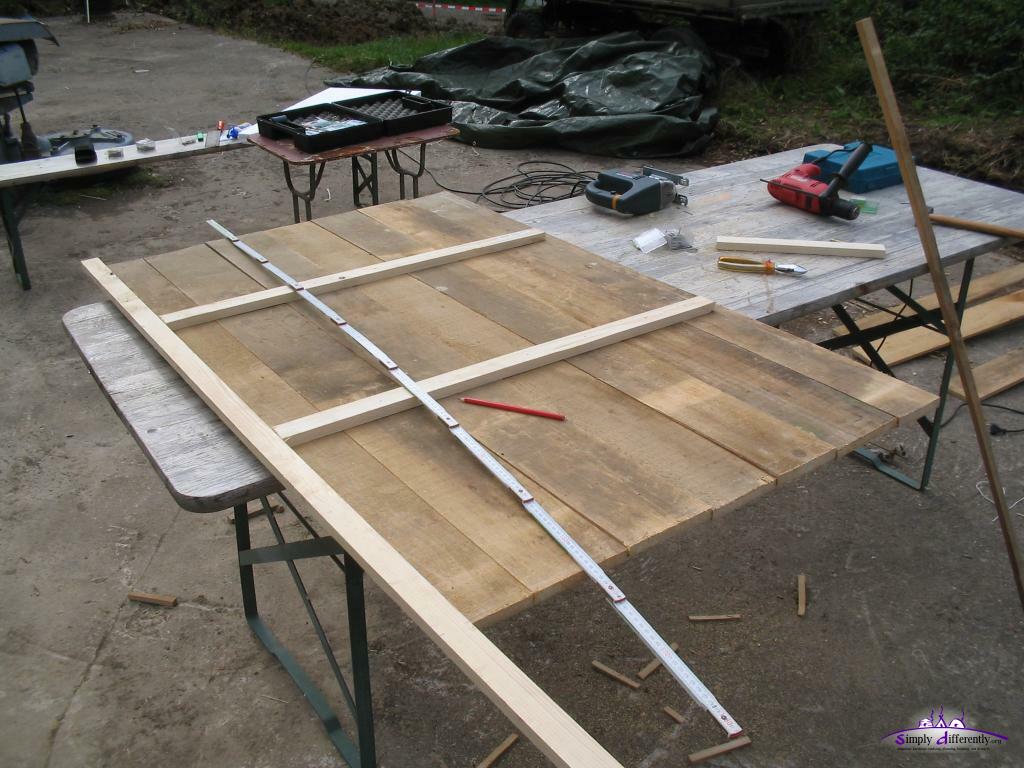 Door construction: laths vertically 2005/10/22 11:56 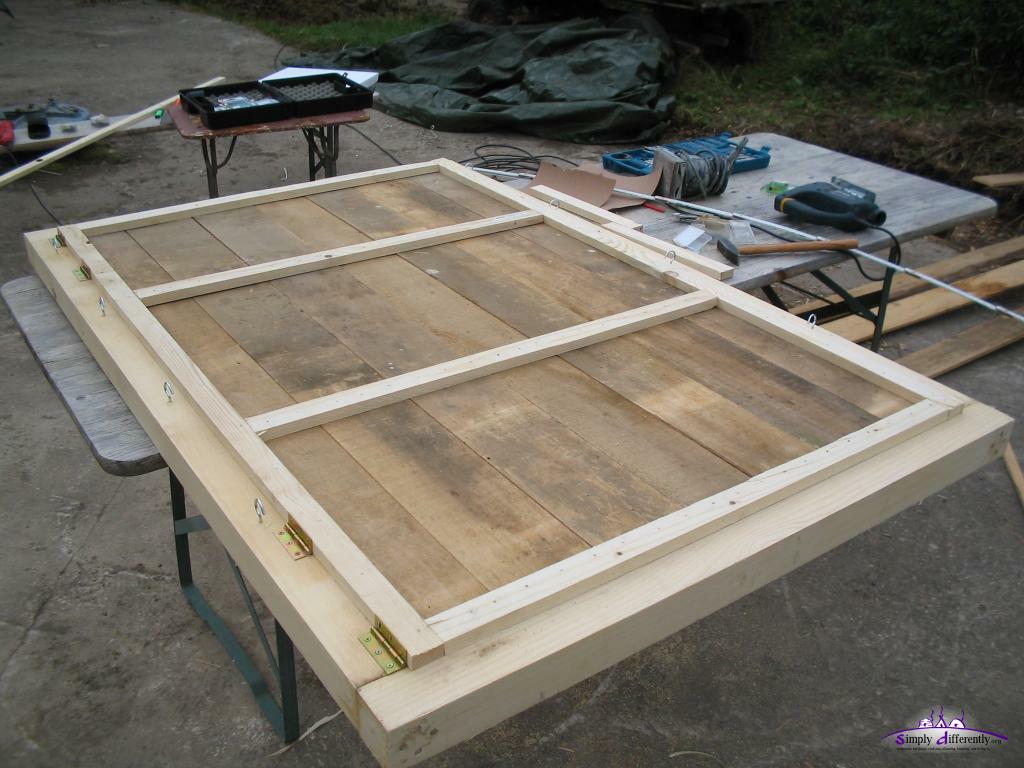 Complete door with hinge 2005/10/22 13:05 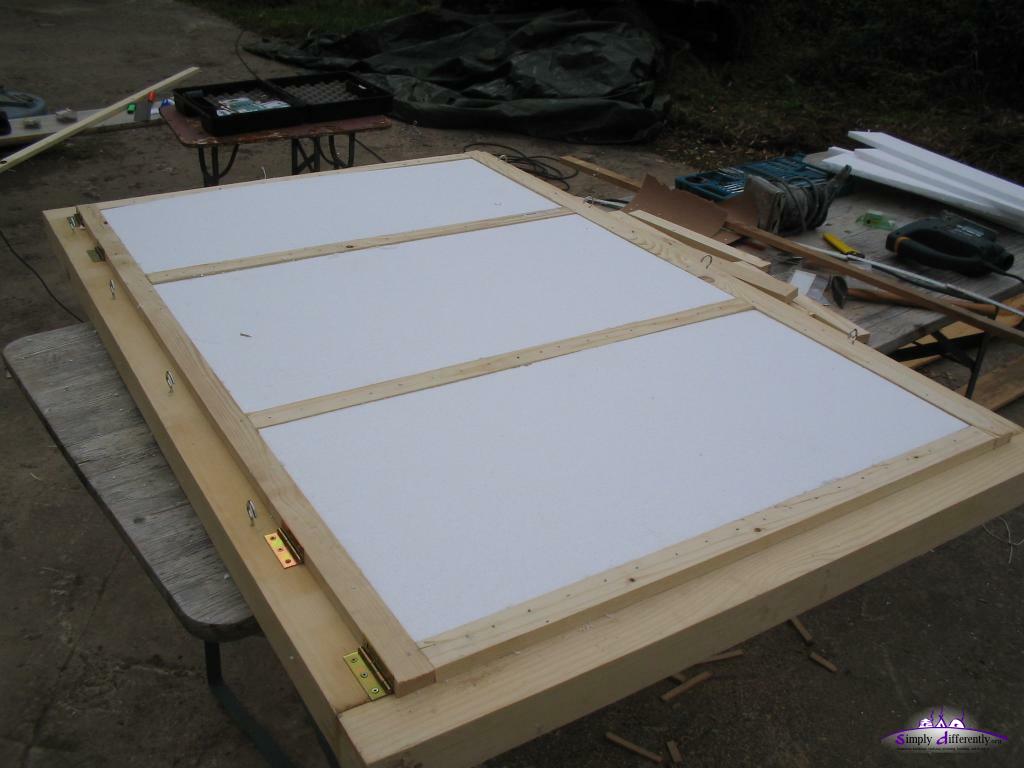 Sagex in between for insulation 2005/10/22 13:20 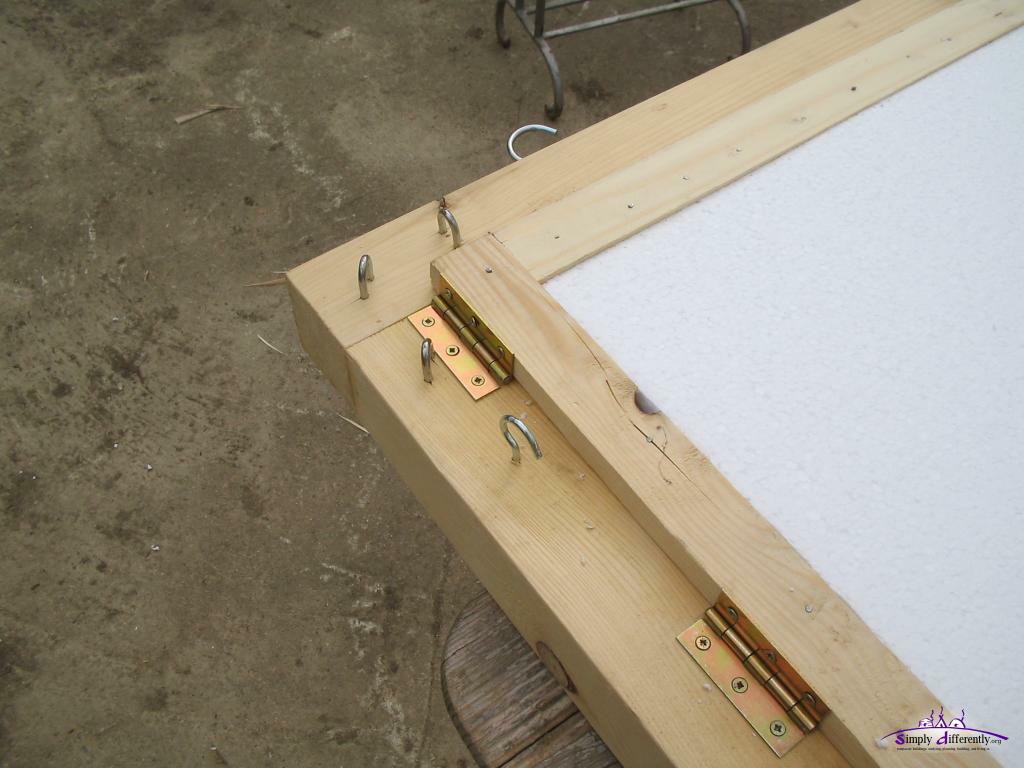 Door closeup: where the main wall/khana rope goes through 2005/10/22 13:31 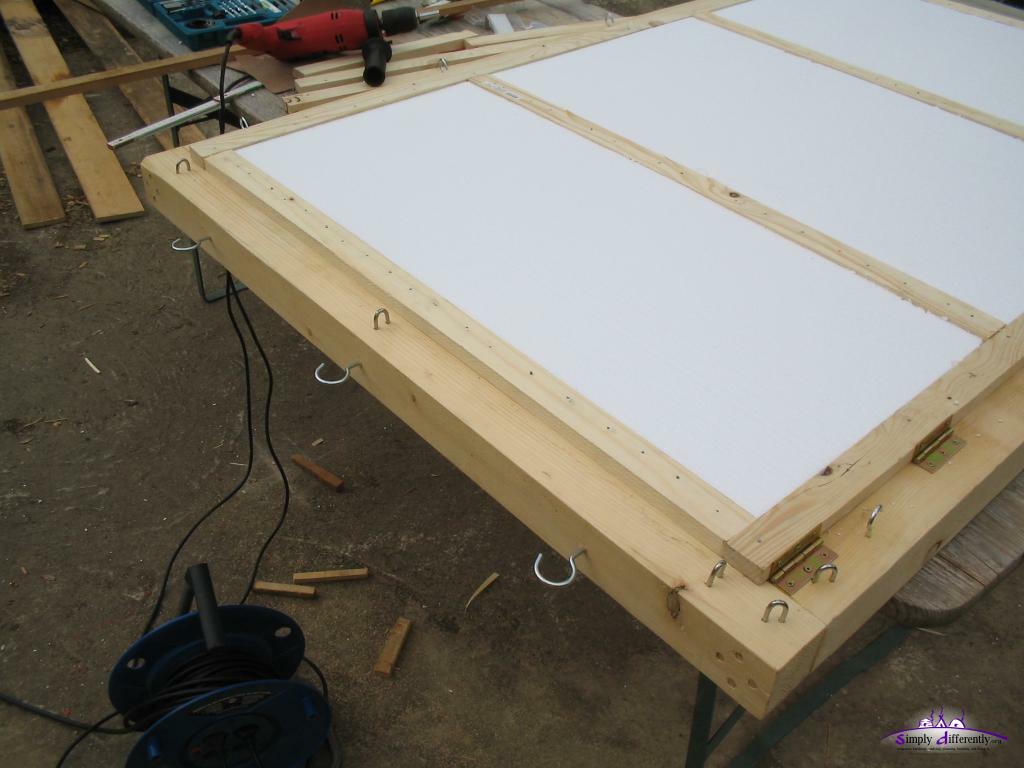 Door closeup: 3 roof poles lie on the door frame 2005/10/22 13:31
The only thing left is the floor.
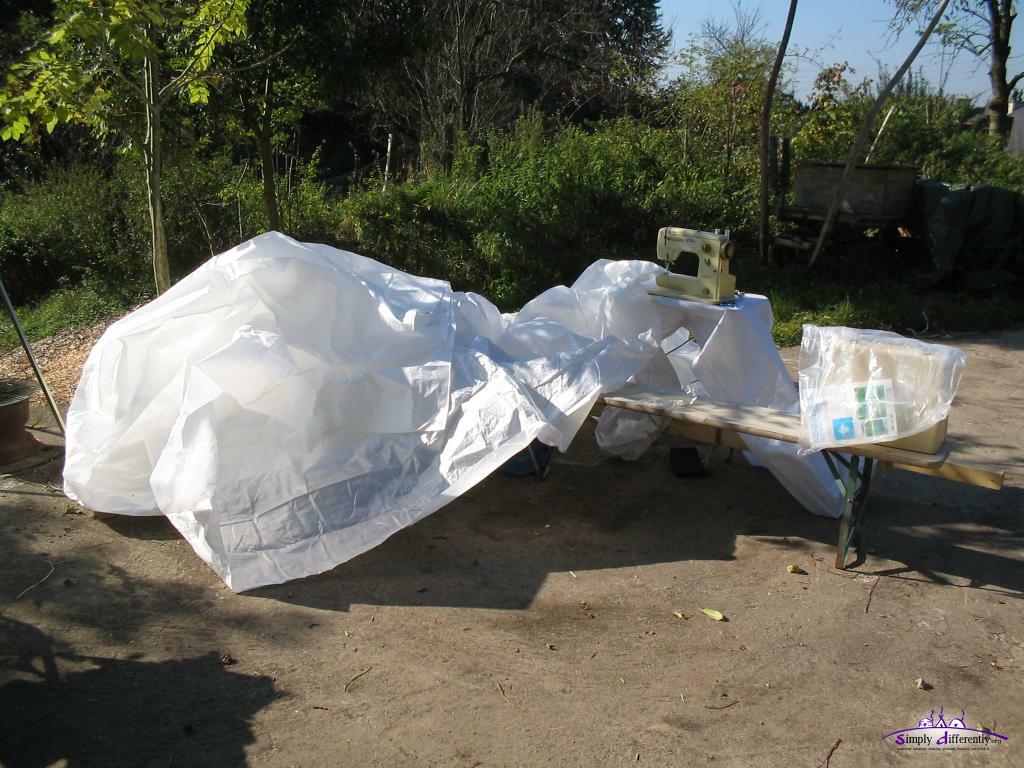
15. / 17. 10. 2005: Cotton InteriorSew the main cotton interior cover, 5 lanes: 6m, 7.3m, 7.5m, 7.3m and 6m again, each 1.5m width, apprx. 1cm overlayed to sew the lanes together. Took a lot of threat more than expected. Also attached cord each meter of the two 10m x 2m wall covers in order to bind them to the main wall rope, made seam for each ends. 14. 10. 2005: Toono Cover & Rain Cover
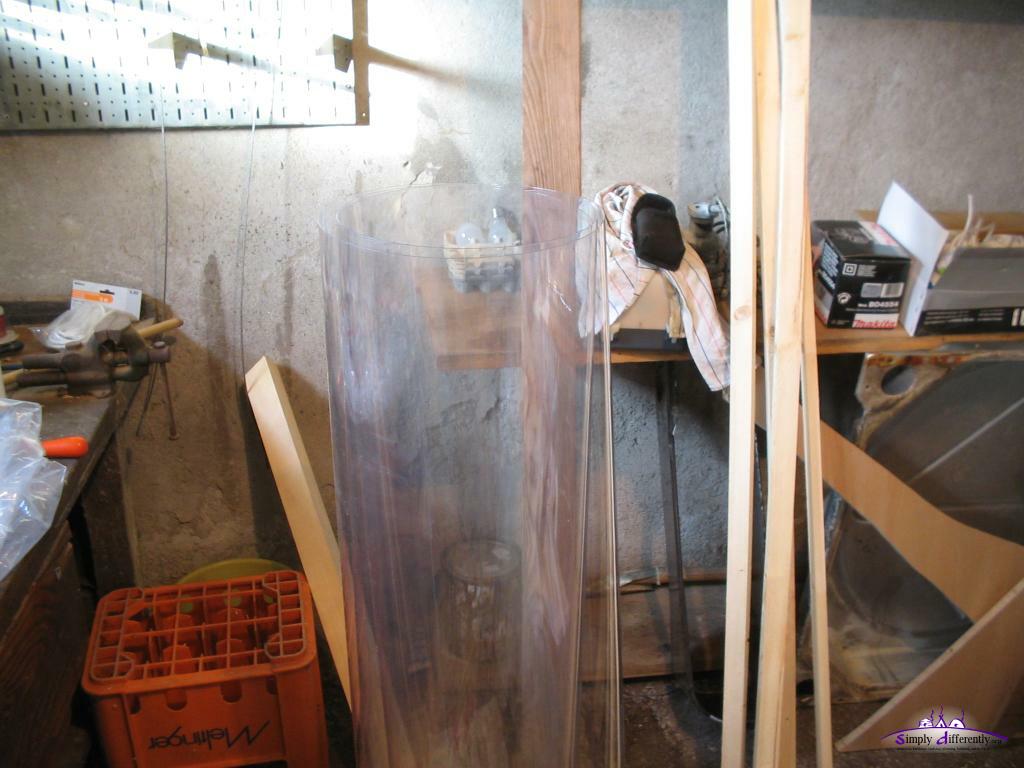 Preparing clear PVC 2005/11/22 14:39 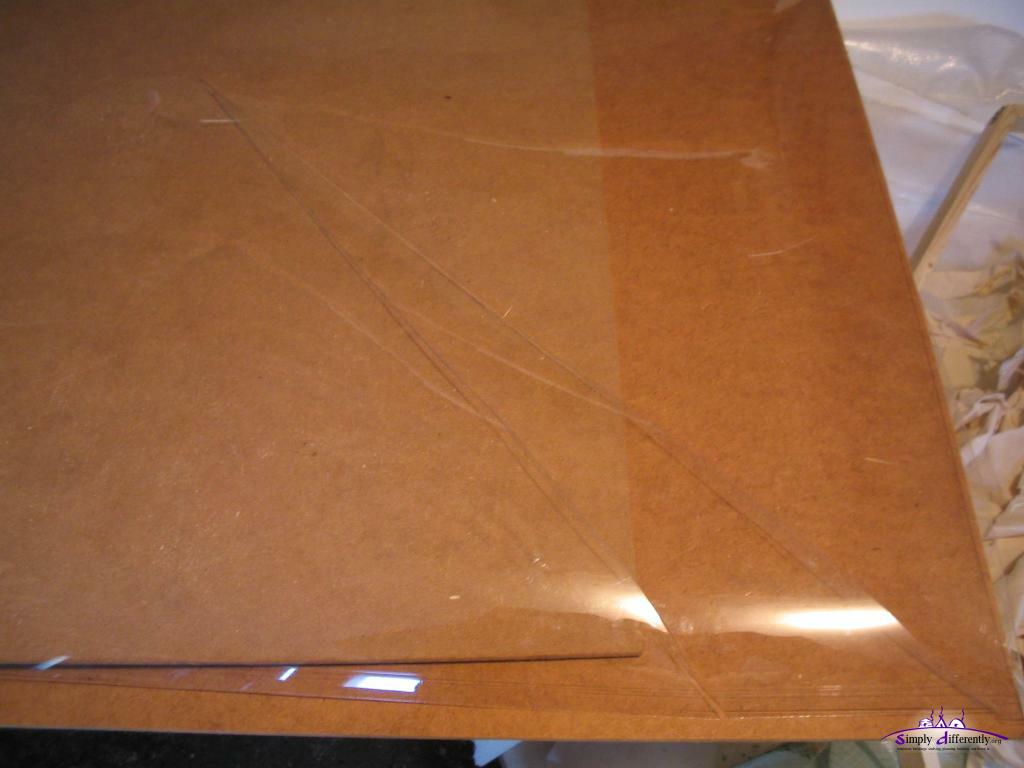 Clear PVC cut-out, to form a cone 2005/11/23 11:00  Roof cover frame segments 2005/11/22 14:39 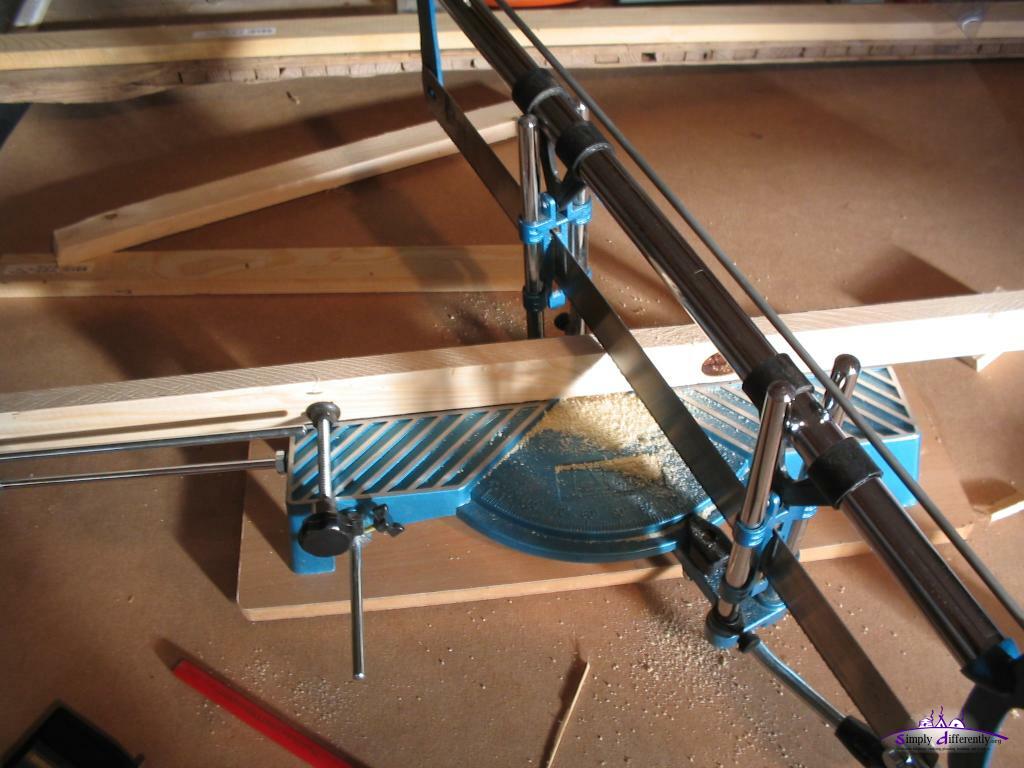 22.5° angle for 8 segment polygon frame 2005/11/22 14:56 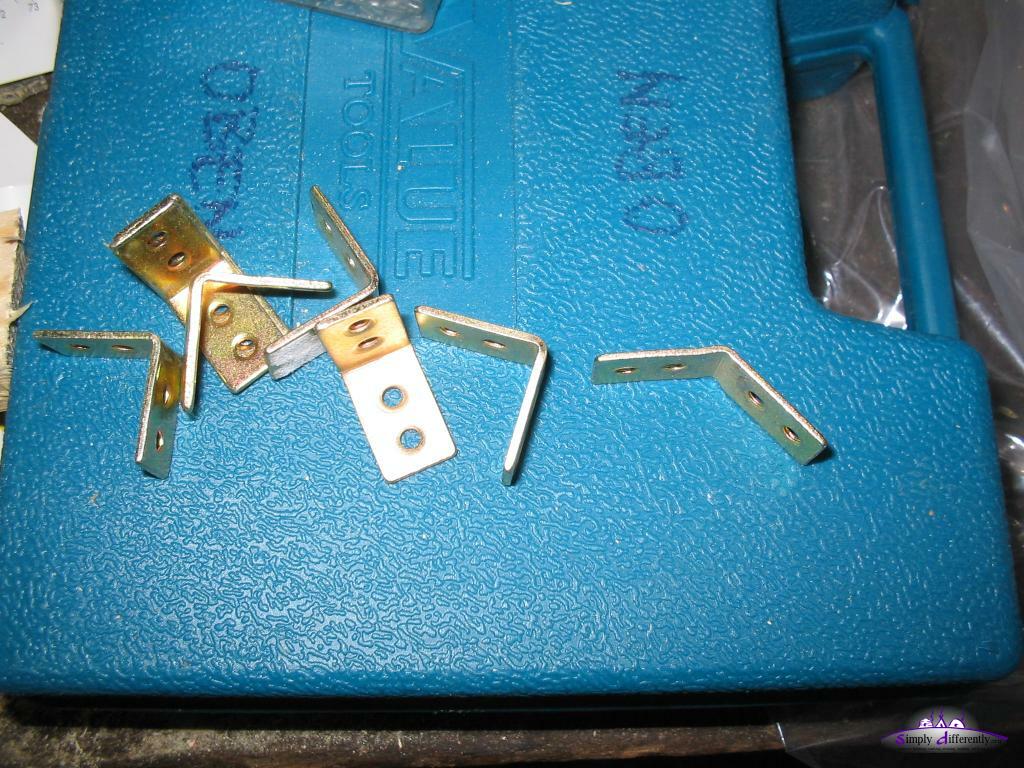 Reenforcement to screw segments together 2005/11/22 15:07 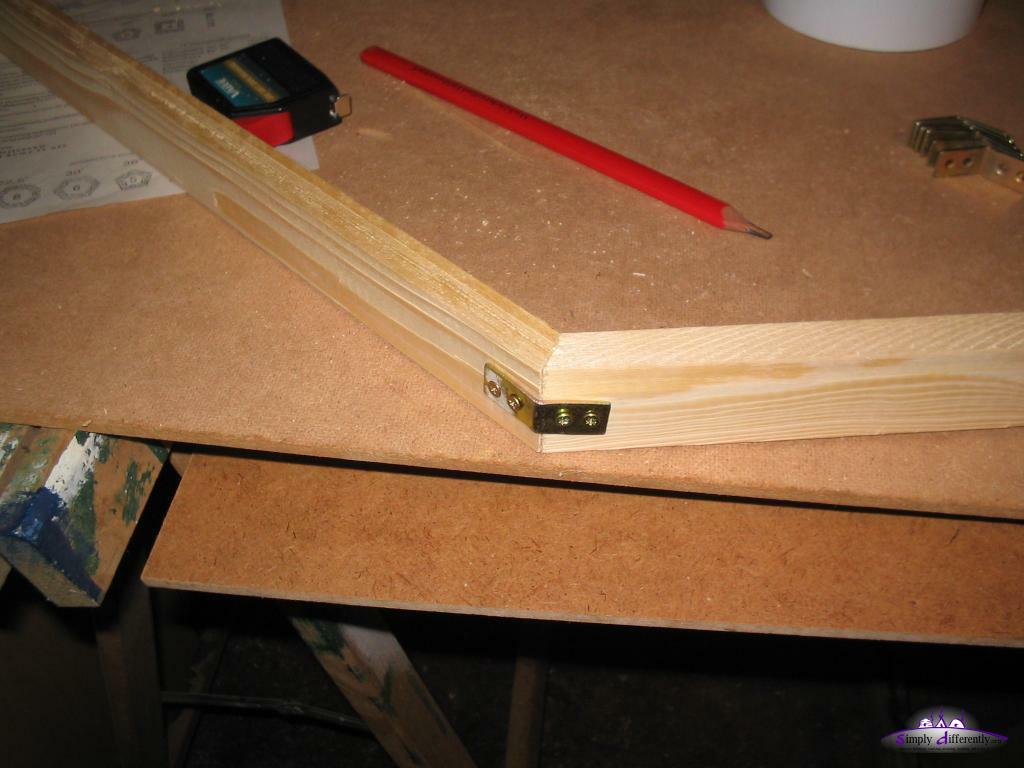 2005/11/22 15:23 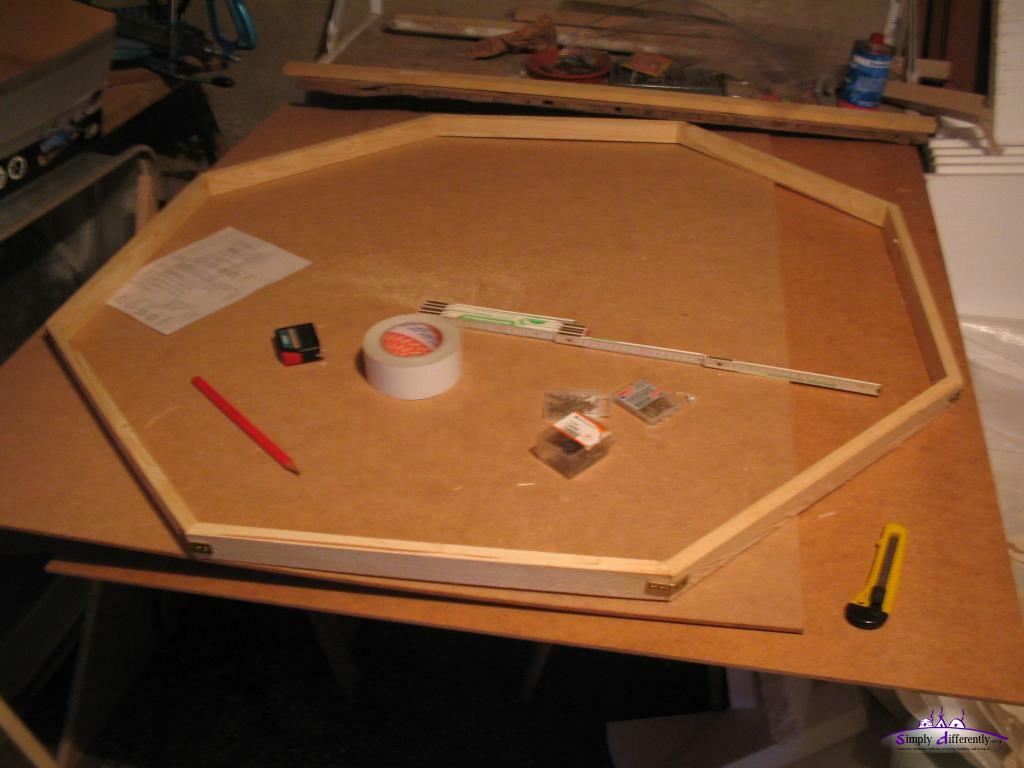 2005/11/22 16:26 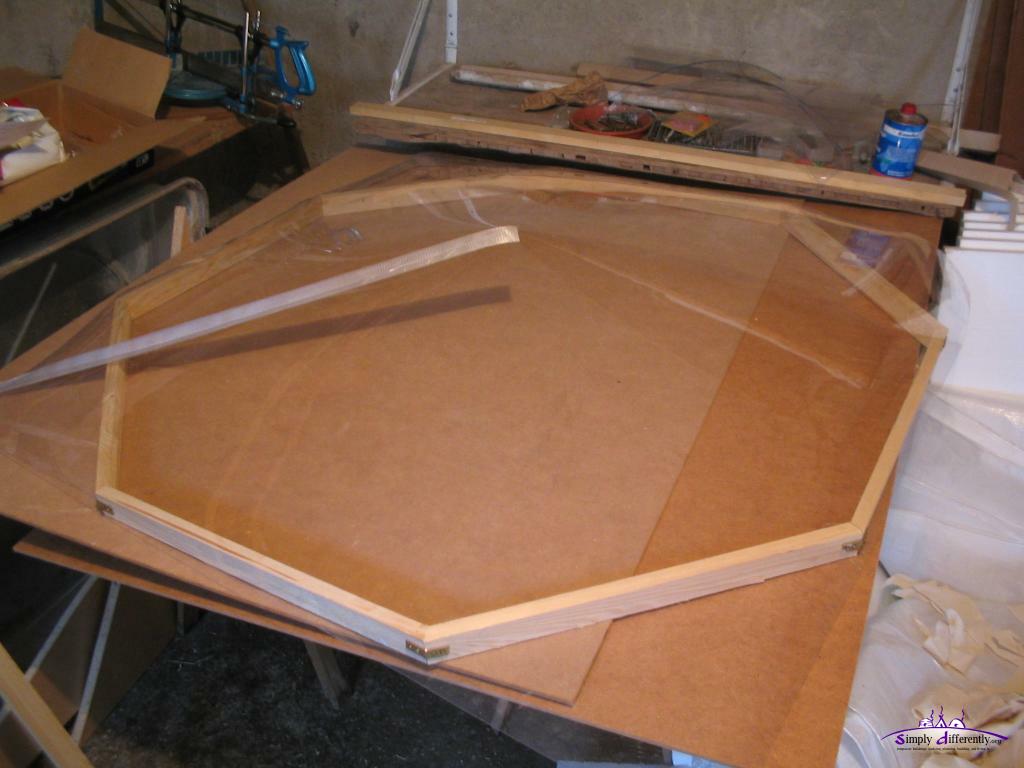 Clear PVC patched, and laid over frame 2005/11/23 11:13 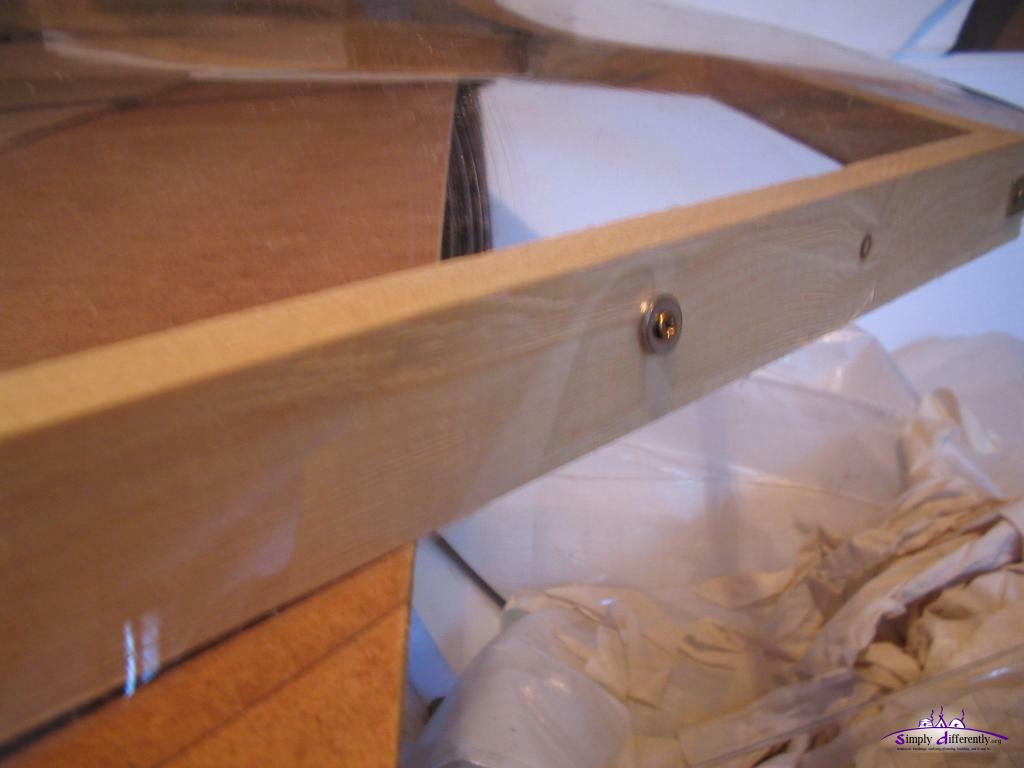 Attaching clear PVC 2005/11/23 12:09 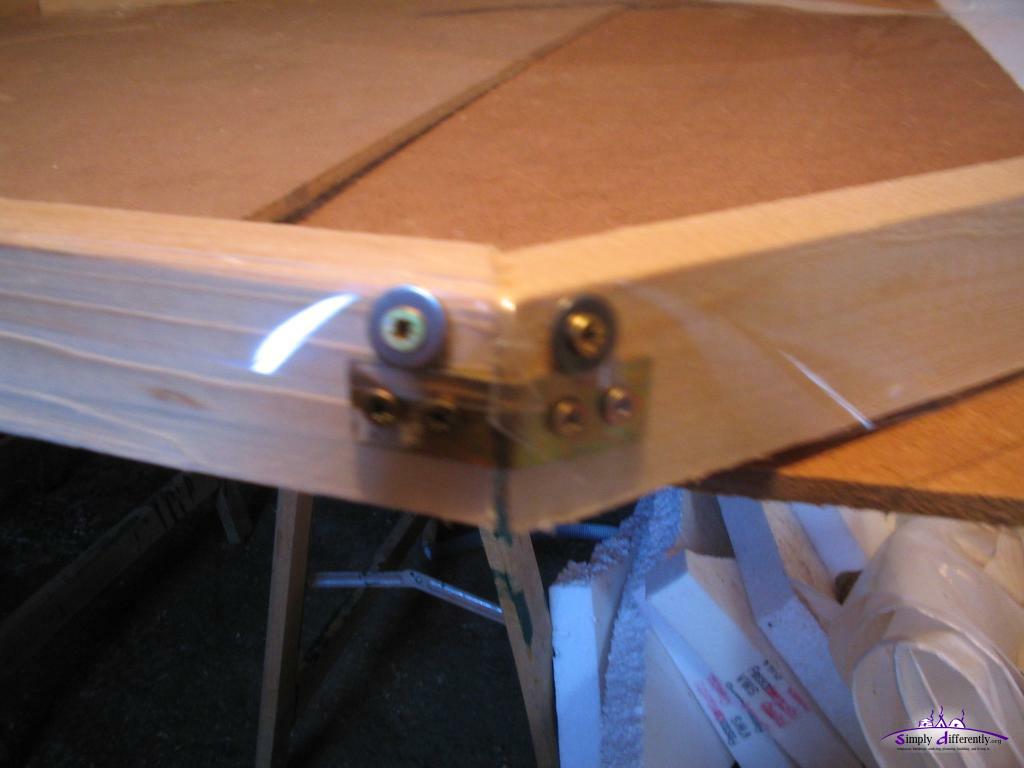 2005/11/23 12:09 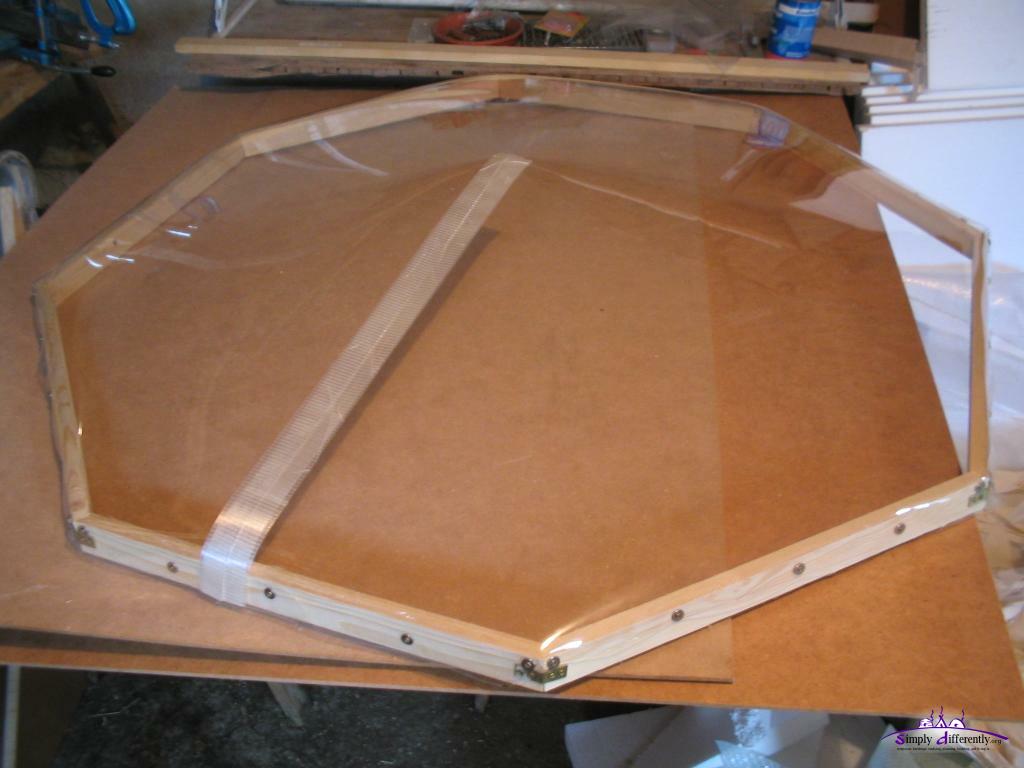 Outer clear PVC layer attached 2005/11/23 13:12 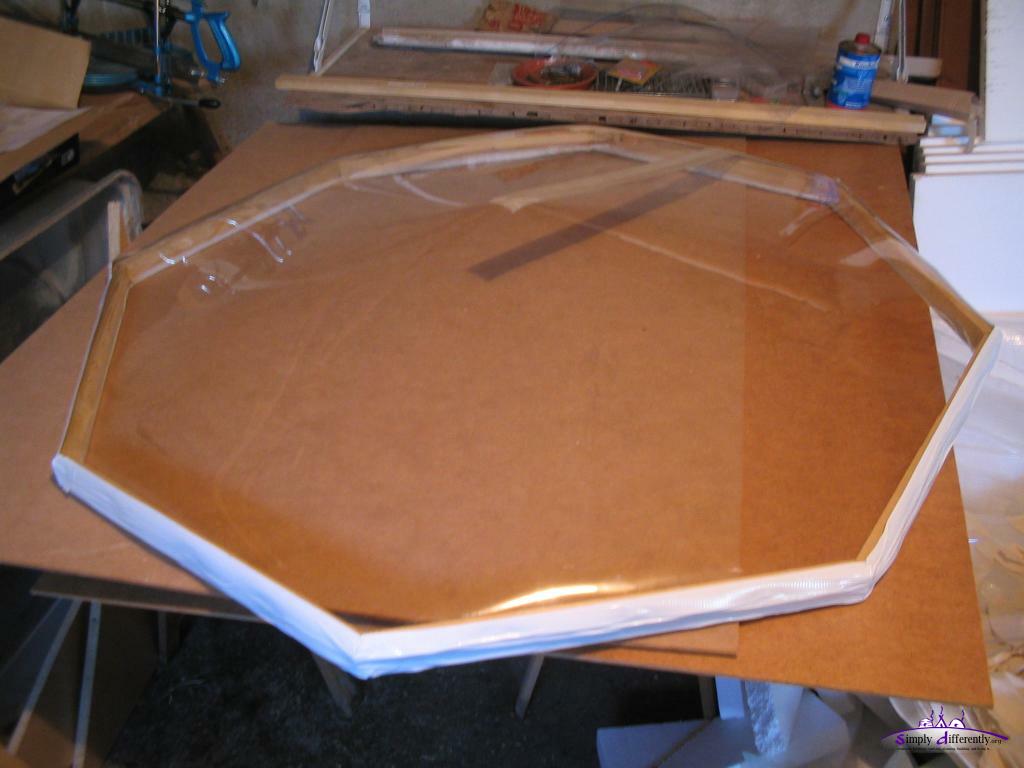 Taped frame 2005/11/23 13:35 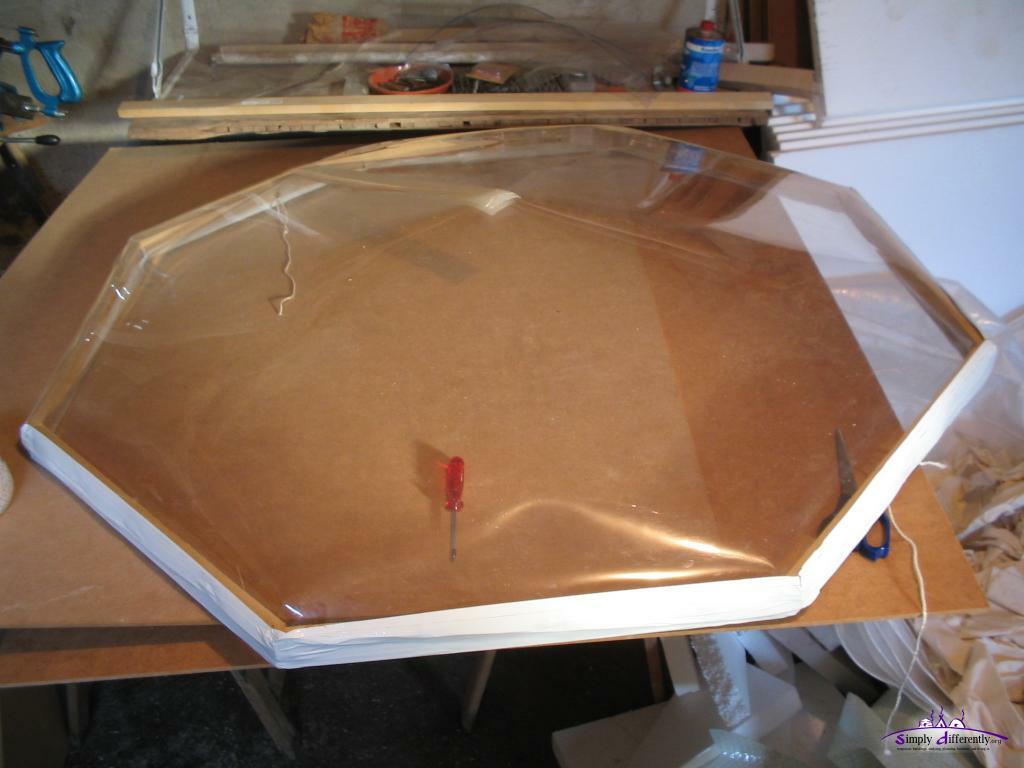 Two layers: one inside, and outside reaching over the frame 2005/11/23 14:49 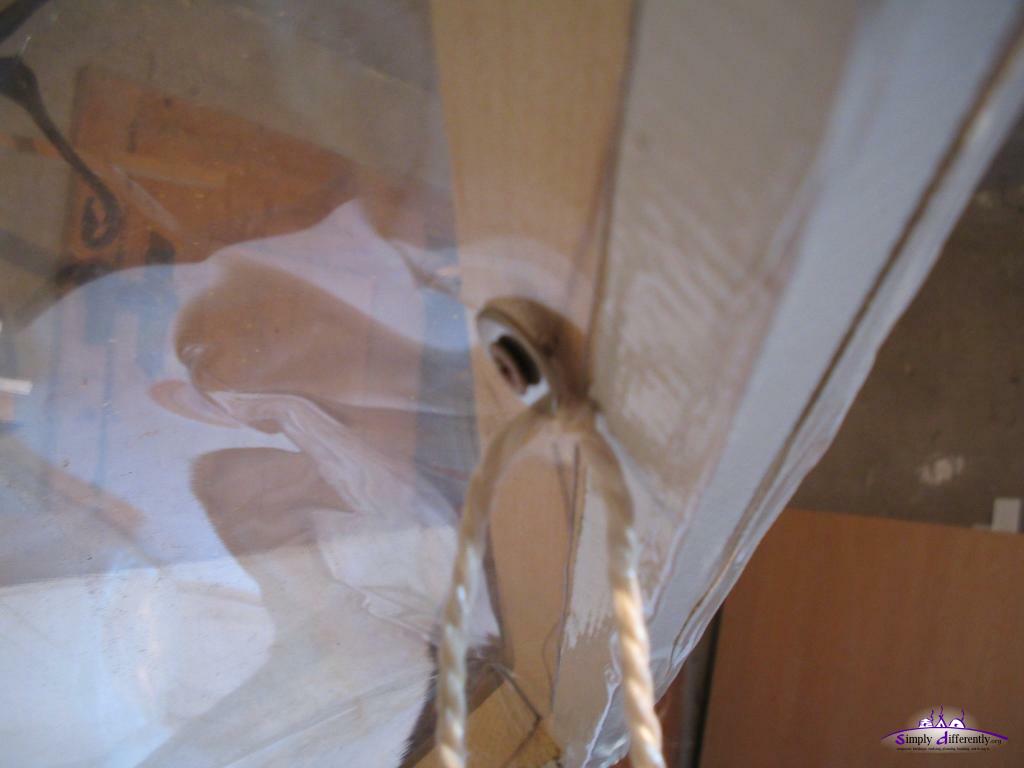 Attaching cord to fixate roof cover to roof 2005/11/23 14:49 The pictures above are from the 2nd cover I made, since the first broke during stormy winds (flew away because I didn't tie it); when I made the first roof-cover I didn't document or photograph each step.
13. 10. 2005: Rain CoverThe last days I took down the yurt again, had to protect wood (crown-wheel / toono, its collar and door frame) from water using wood wax, but also wood lacquer, not yet sure which is better. Today I sew the PE rain cover, from 8x10m -> 8x8m and 8x2m, and fixed the cut making a seam with a cord within. The 6x4m with one cut making 6x2m twice, also sew the seams with a cord. I folded the 8x8m so the center appeared as corner (twice folded), then cut with scissors 2-3cm cut, this made 4-6cm hole, the center; as next step I put the crown-wheel / toono with its collar (where the clear PVC comes on) on the opened cover, and cut out the hole, had 4-6cm spare to the crown-wheel / toono collar. Finally sew along this hole with a strong cord, to have the canvas just fit the crown-wheel / toono and its collar.
 Sewing the roof canvas/cover 2005/10/13 13:40  Sewing in a cord into the seam 2005/10/13 13:40  Roof cover and toono/crown-wheel 2005/10/13 15:01 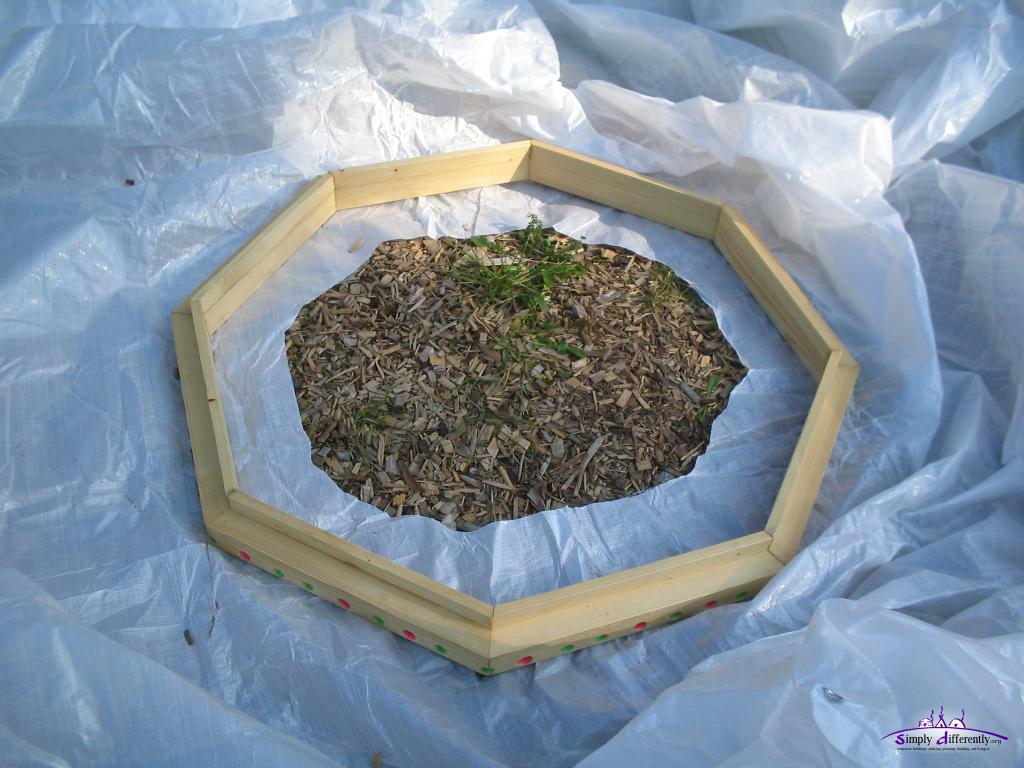 Cutting hole into roof cover 2005/10/13 15:11 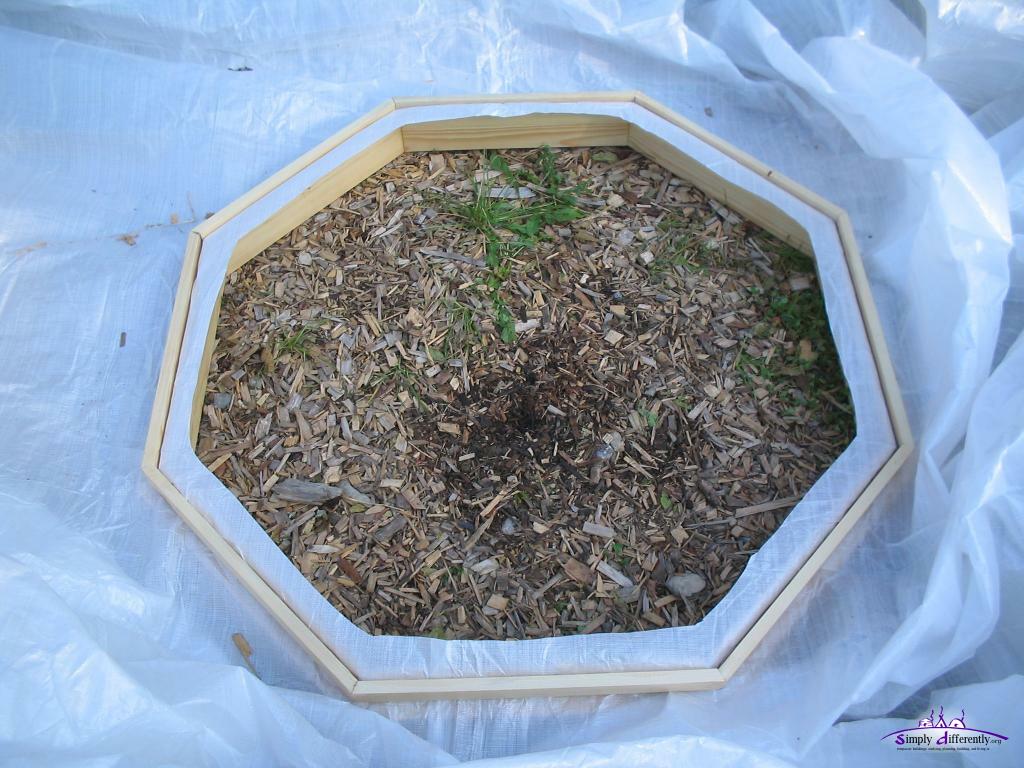 Final roof cover cut, 3-4cm left to the toono, sewing then a seam with cord 2005/10/13 15:22 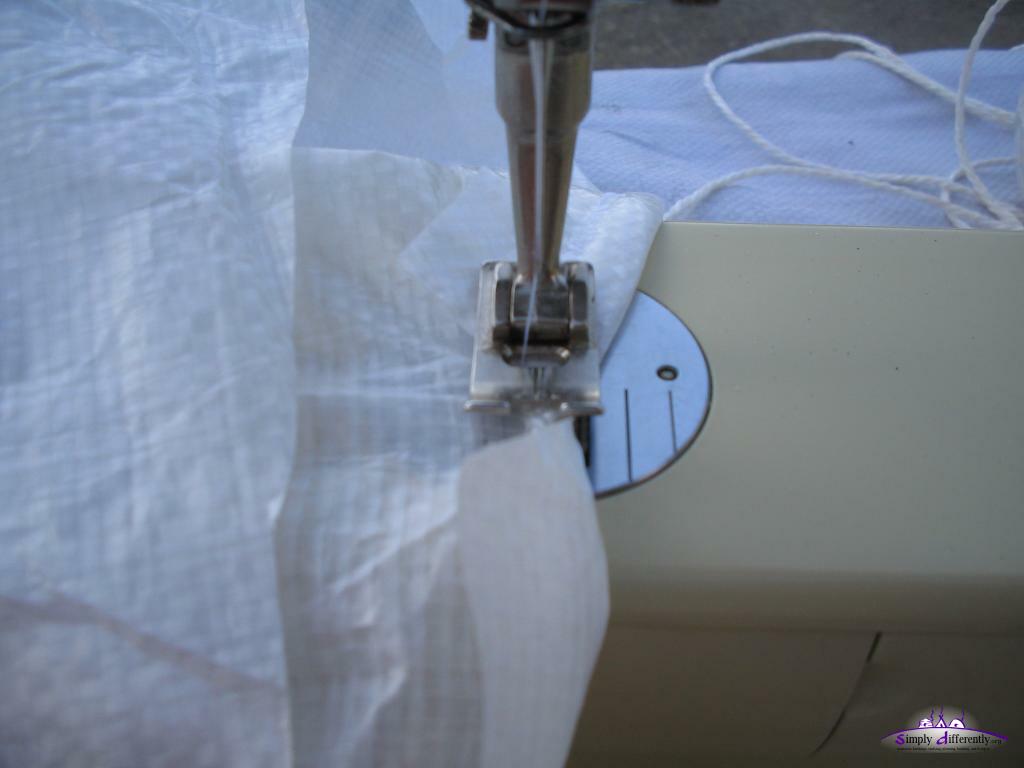 Sewing in the cord to the roof cover where it goes to the toono/crown-wheel 2005/10/13 16:08 The floor wood is coming soon, yet, the floor insulation (Sagex) I have to wait for 10 days to get - so if all goes well October 26 I raise the yurt with all. What's left to do: crown-wheel / toono cover (frame & clear PVC), cotton cover (lot to sew), door and the floor. 7. 10. 2005: First Yurt ErectFinally complete erect the yurt with all roof poles (uni), test-wise to see if the poles, roof angle etc are matching my calculations before I cut the roof poles (just a few centimeters though).
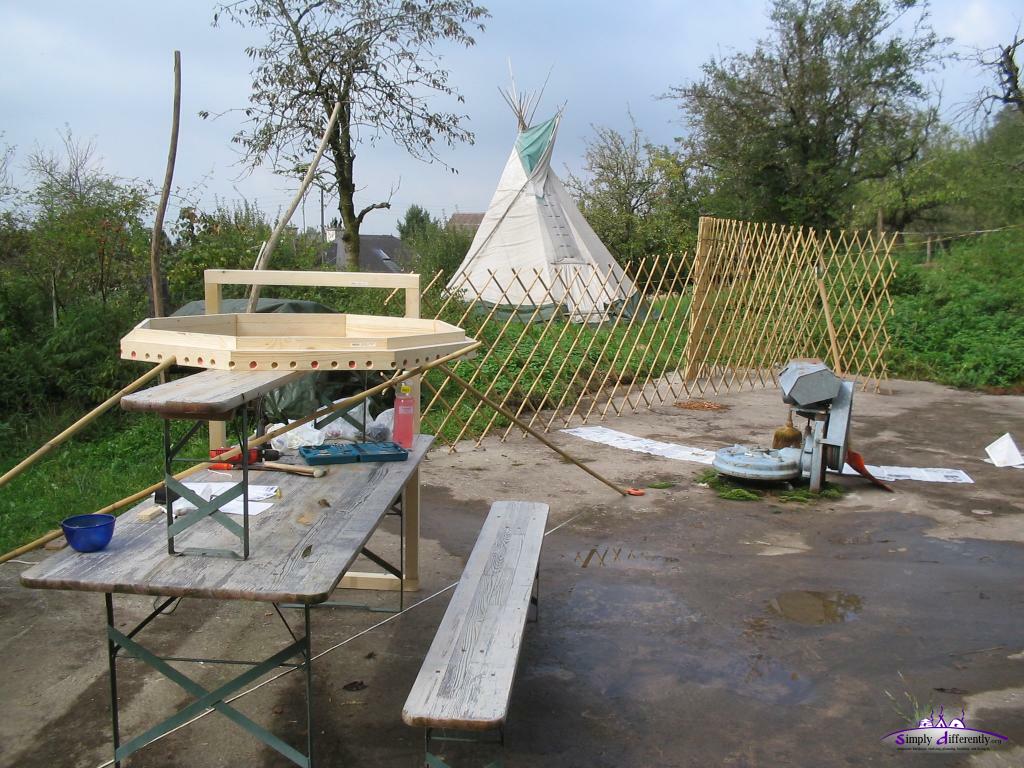 2005/10/06 12:24 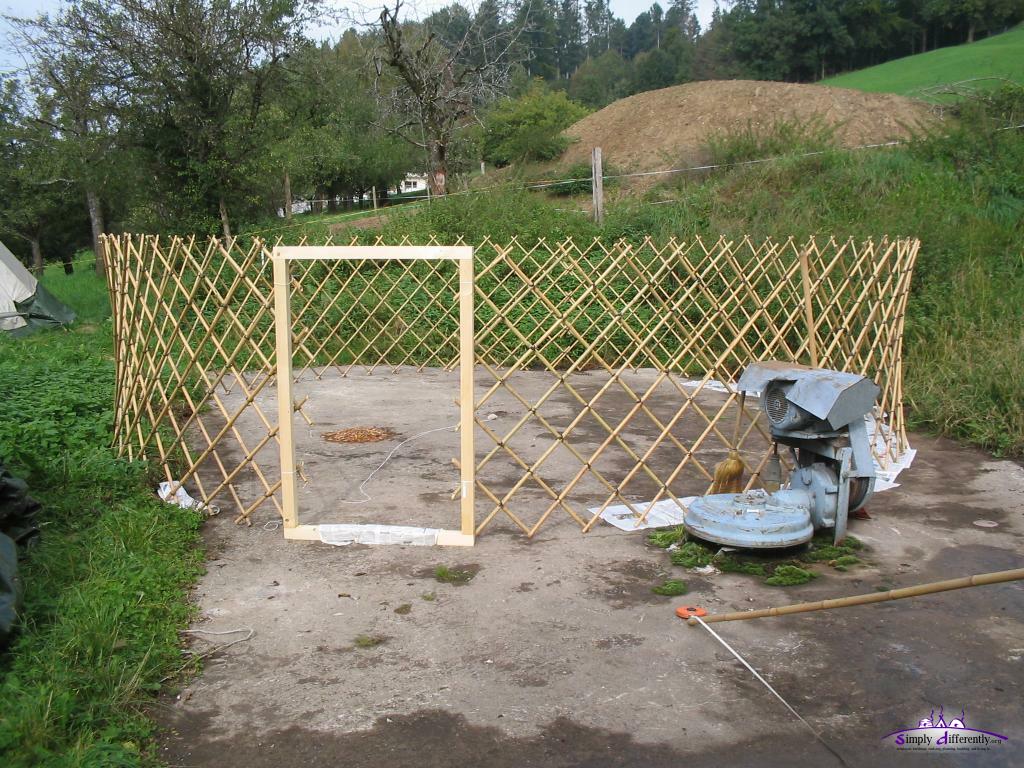 6.4m diameter wall and doorframe 2005/10/06 12:42 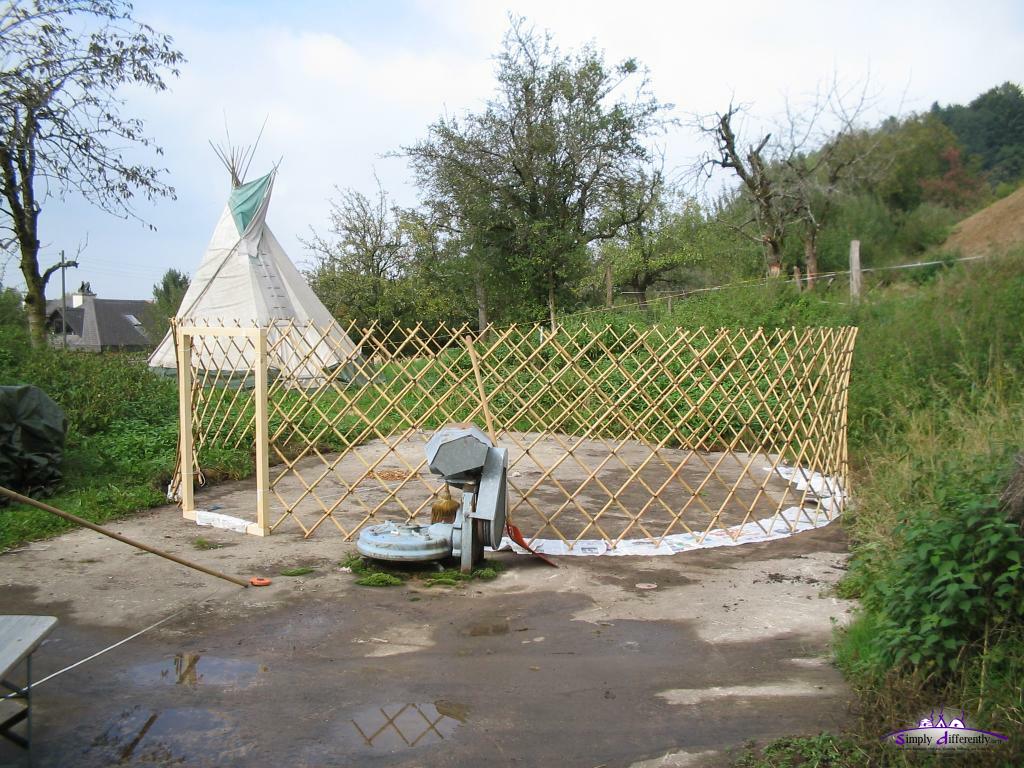 6.4m diameter wall and doorframe and tipi in the background 2005/10/06 12:42 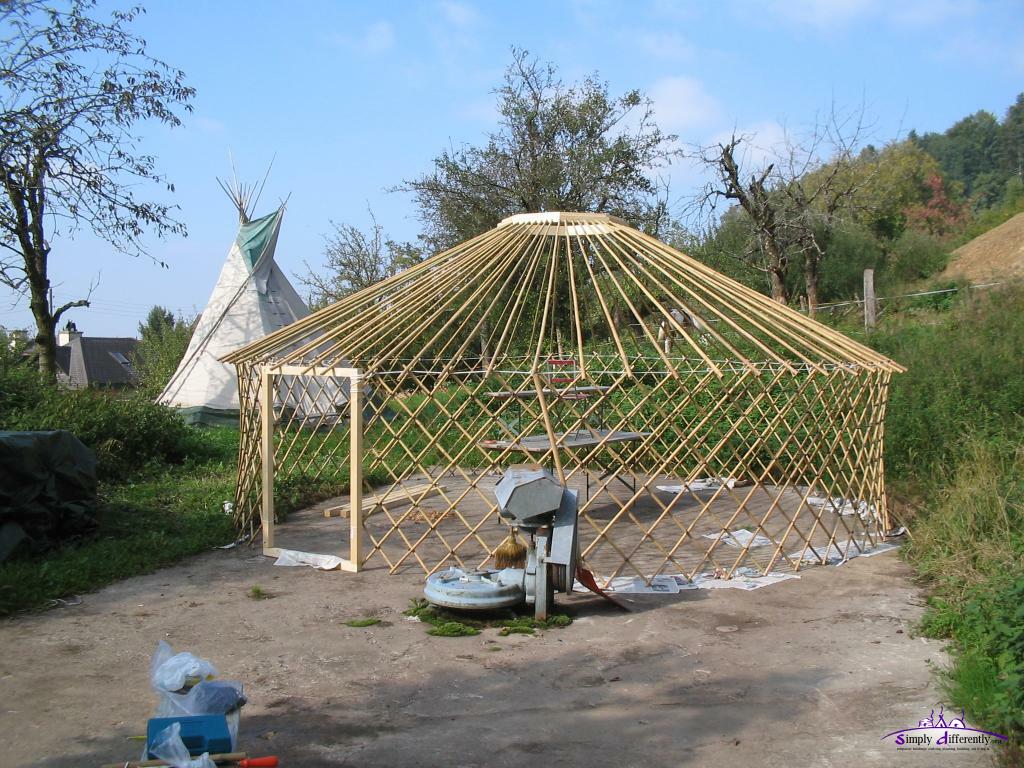 All roof poles (uni) on khana 2005/10/07 13:33  Doorframe closeup 2005/10/07 13:34 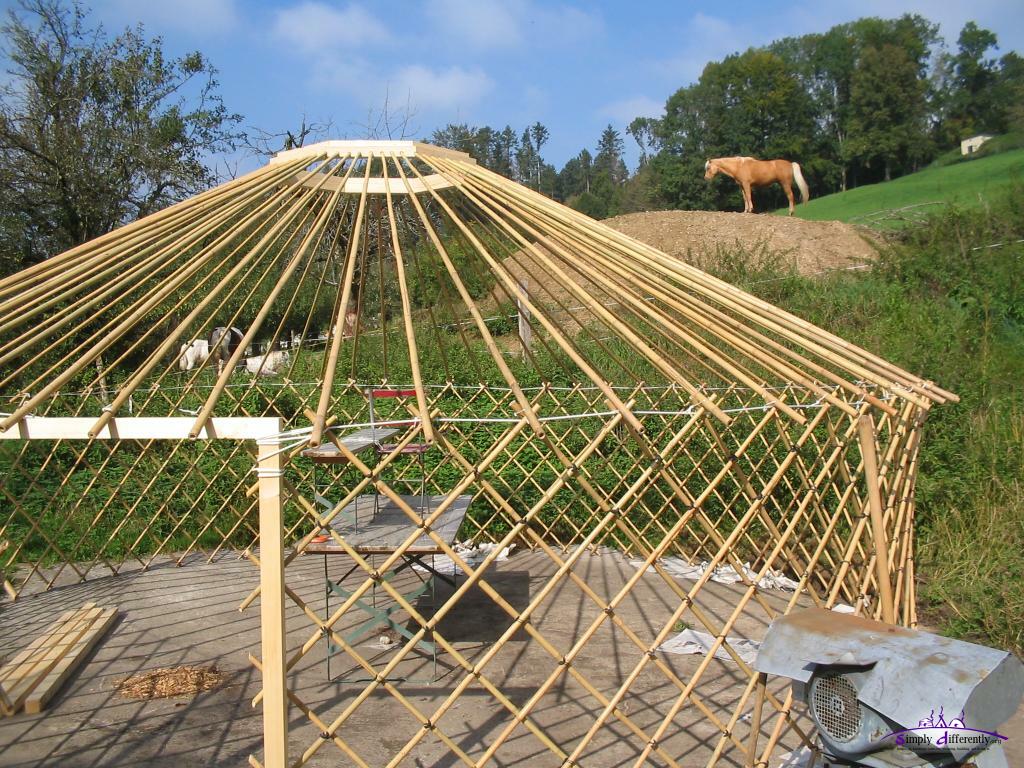 2005/10/07 13:34  2005/10/07 13:34 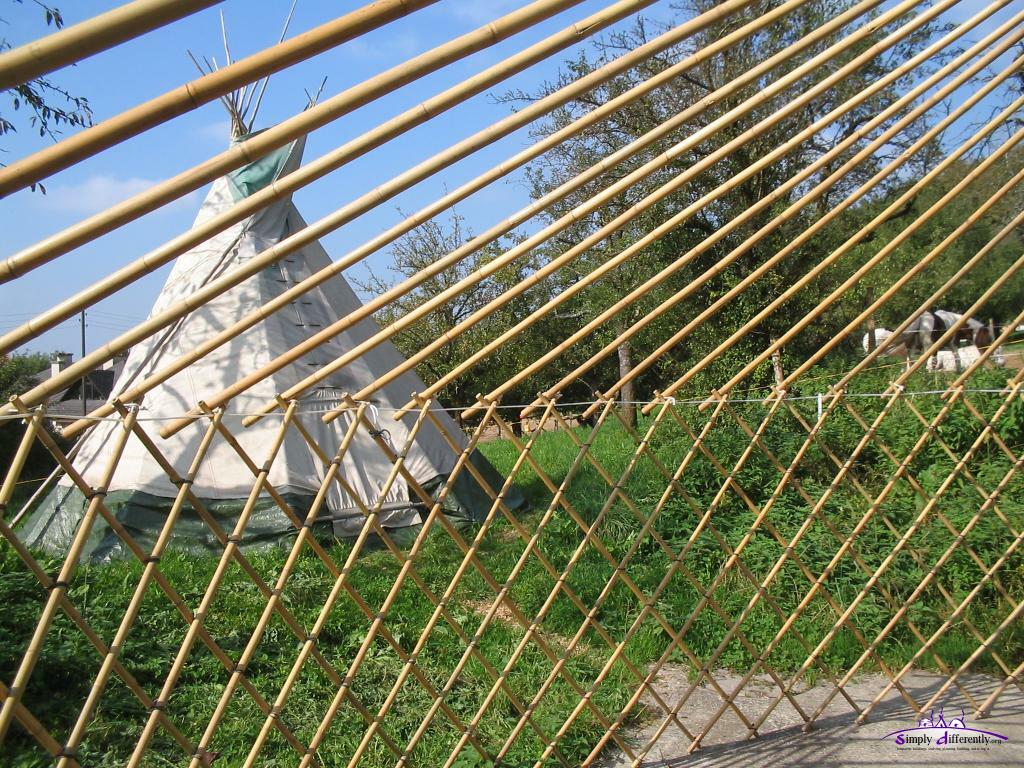 Roof poles a bit too long (need to cut for the final version), cord hole at 2.90m position (2.88m calculated roof pole length) 2005/10/07 13:34 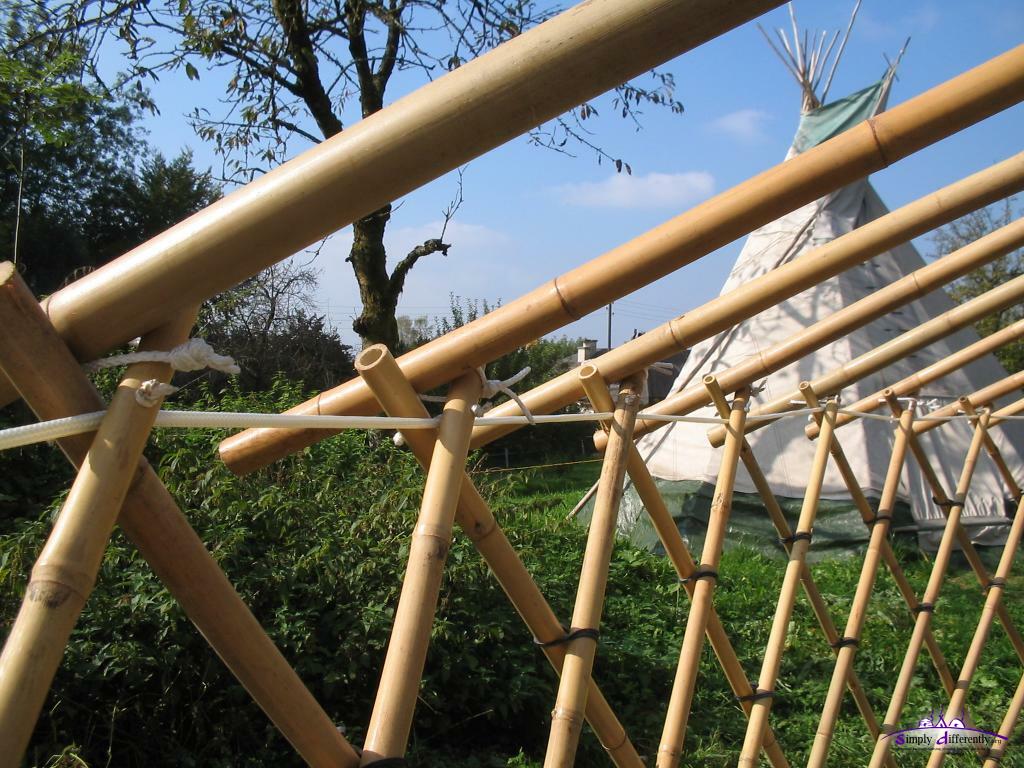 Roof pole / khana closeup 2005/10/07 13:34 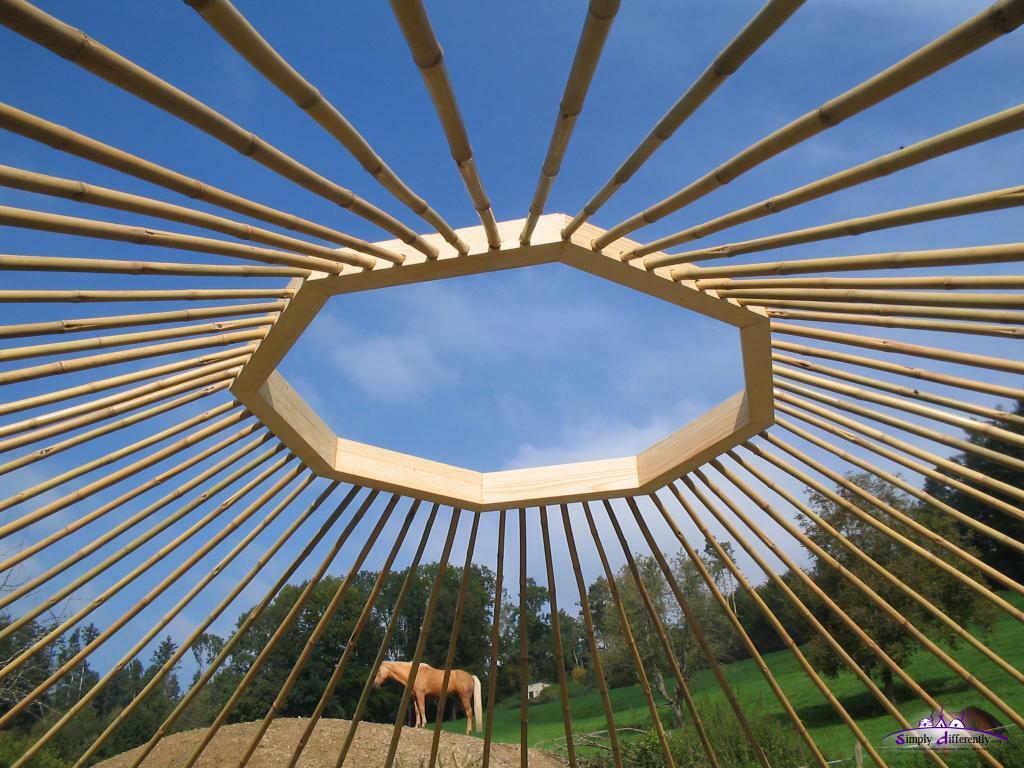 Toono (Crown-wheel) 2005/10/07 13:34 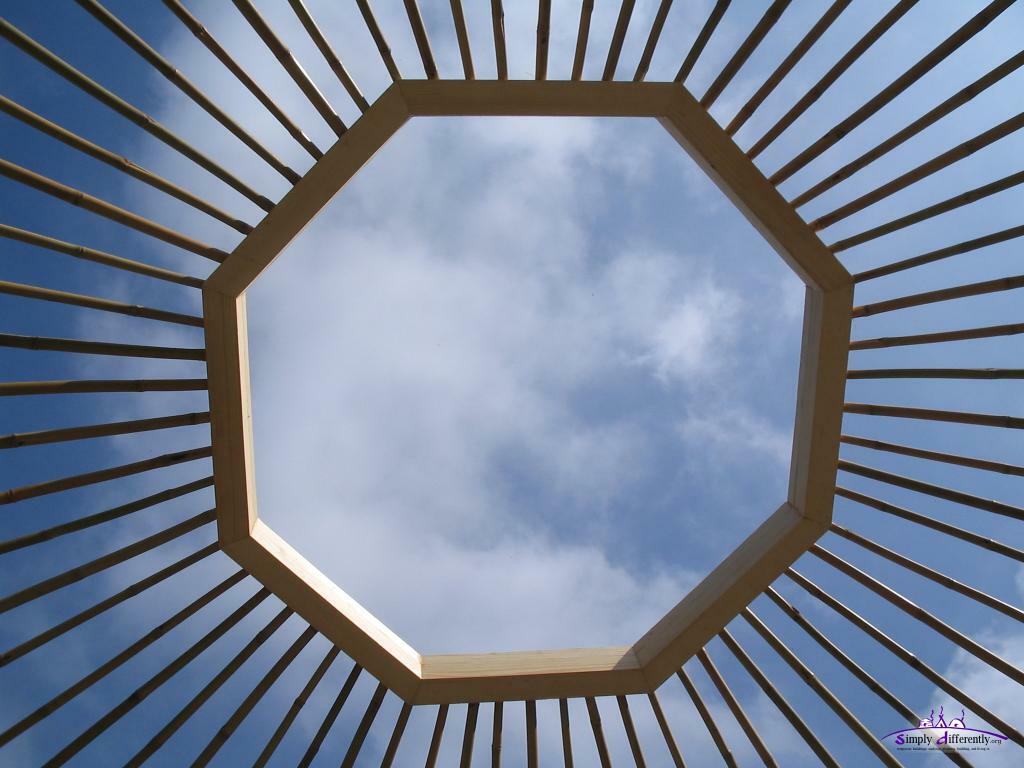 Toono Symmetry - Beautiful! 2005/10/07 13:35  2005/10/07 13:35 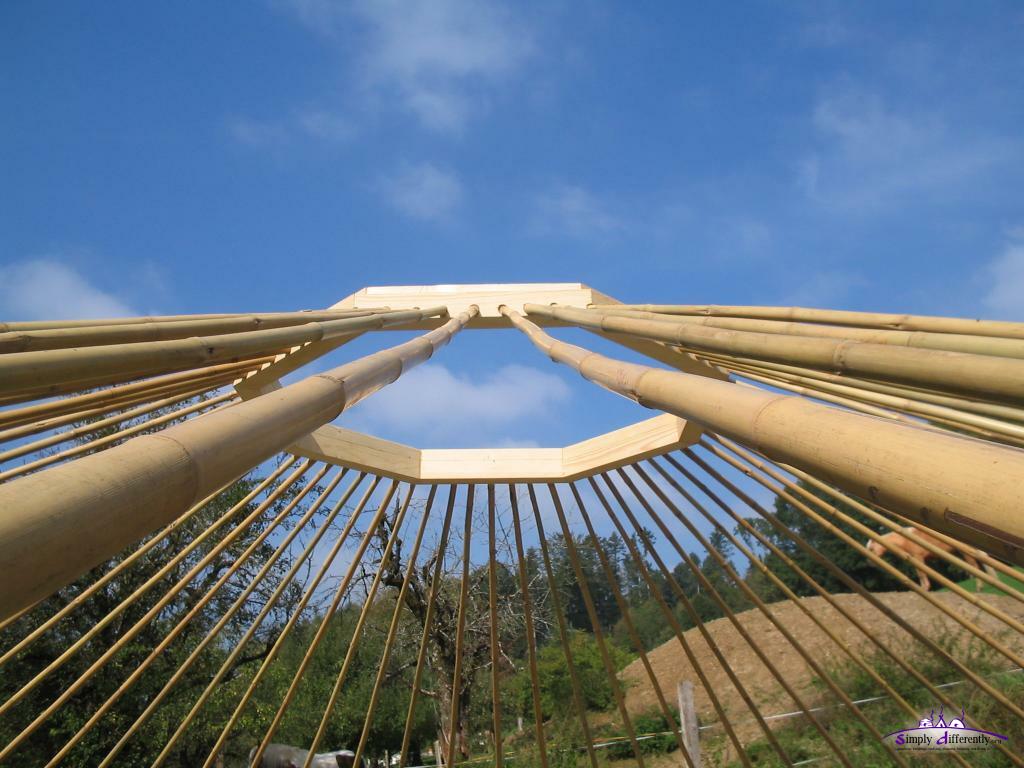 2005/10/07 13:35 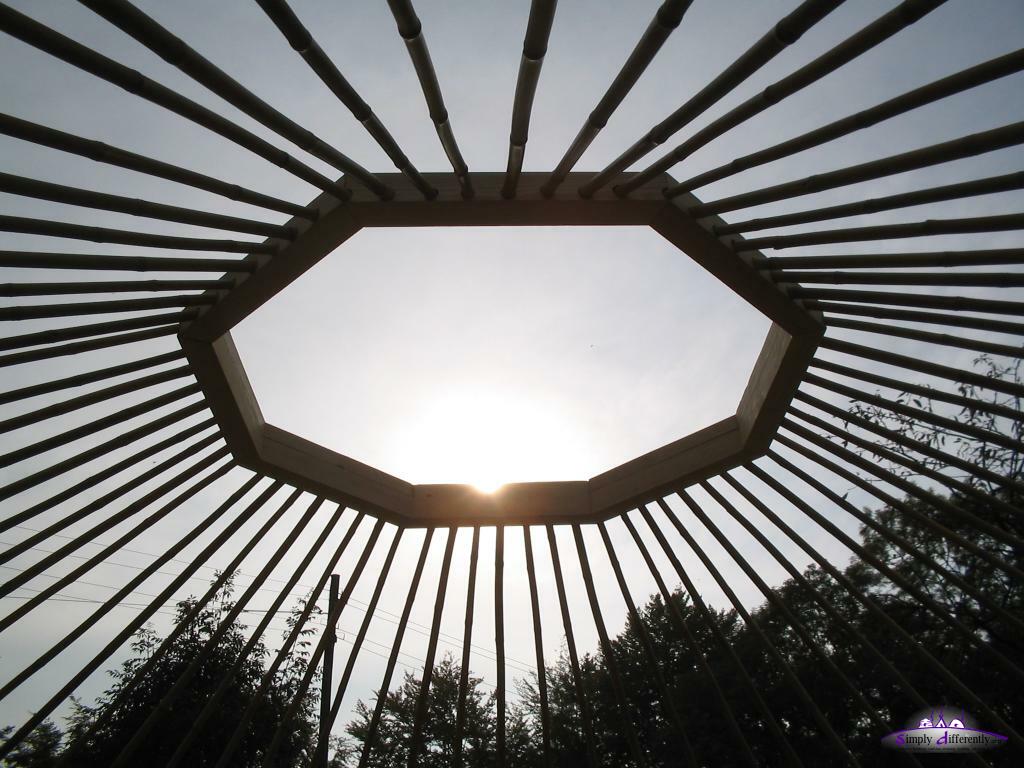 2005/10/07 14:45 Since I had two drilling diameters for the toono (two diameters of roof-poles since I used the smaller end of the bamboo sticks on the toono and bamboo sticks are sorted by thicker ends when you buy them - which meant I had to resort them, and we ended up with four different diameters: 2.0, 2.2, 2.4 and larger than 2.4 (those we took aside, just a few); I took the 2.0cm and 2.2cm diameters. I color-coded the roof poles and holes in the toono (2.0cm: green, 2.2cm: red) so when I put it up I see right away where which poles goes in. Some angles are a bit off, e.g. wrong tilt, wrong angle, but due the length of the roof poles it didn't matter as much, the poles just bend a bit. I also didn't recalculate anything (unlike previously thought), but had the cord on the end of the roof-poles give more or less space as required as I couldn't compensate the unevenness of a 8-segment polygon vs. perfect circle with deeper holes in the toono - glad it worked out this way. So, the 8-segment toono was a good choice, just the segments and their end-angle of 22.5° needed exact cut - the resulting toono with 6 x 6cm profile looks filigree. I calculated 2.88m roof pole length (6.4m diameter, 1.22m toono diameter, αroof 26°), the bamboo poles are 3.05m long, so plenty left. I assumed 2-3cm fitting into the toono, plus some extra as the cord at the end; so I just drilled the hole for the cord at 2.90m, which seems just right after I put up now all roof poles. I also now realized after the first put up that the toono holes for the roof poles are short enough to support different angles, I had a bit little space and the diameter is less than 6.4m, apprx. 6.25-6.30m, and so the roof angle is a bit steeper. When I build it up again with exact 6.40m I assume the roof comes down a bit, good to know I can make 6.20-6.50m diameter - just one thing needs to be kept in mind: it needs to be a near perfect circle so the roof poles truly fit and are pressed unto the toono, no sloppyness allowed there. The main rope on top of the khana I moved between the junctions (over a junction and next under the junction) all around, and then tightened it several times til the rope at strong tension, then I began to put up the other roof poles (started with 4 and then the rest).
Anyway, I'm impressed by its beauty in real life, the toono with its roof poles in it looks like a sun . . . 5. 10. 2005: Making of Toono & Cover (Cont.)I'm a bit delayed with updating the diary. Haven't been working on the yurt each day, and also was a bit slow when I had to glue wood (waiting til a part has dried and then doing the next part etc). So here a few photos of the state currently with my yurt developement. Due to rainy weather I haven't been able to work on the yurt and do some required measurements of the toono plus roof poles.
 Toono 8 segments 2005/09/28 09:42 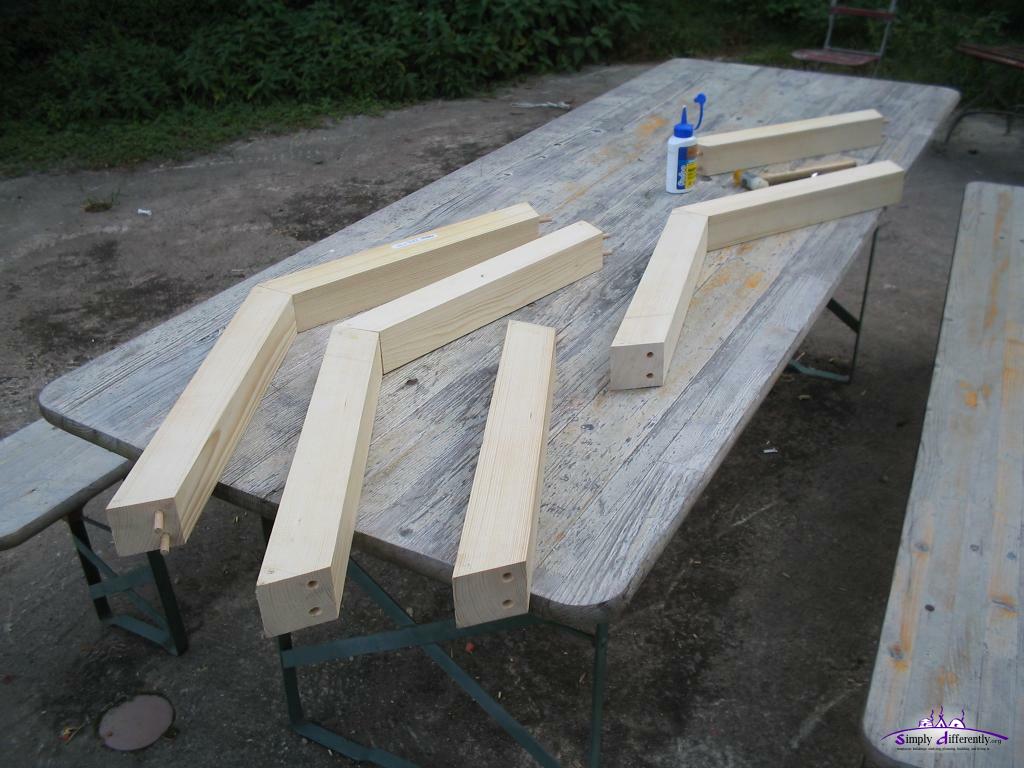 Putting together two segments 2005/09/28 11:35 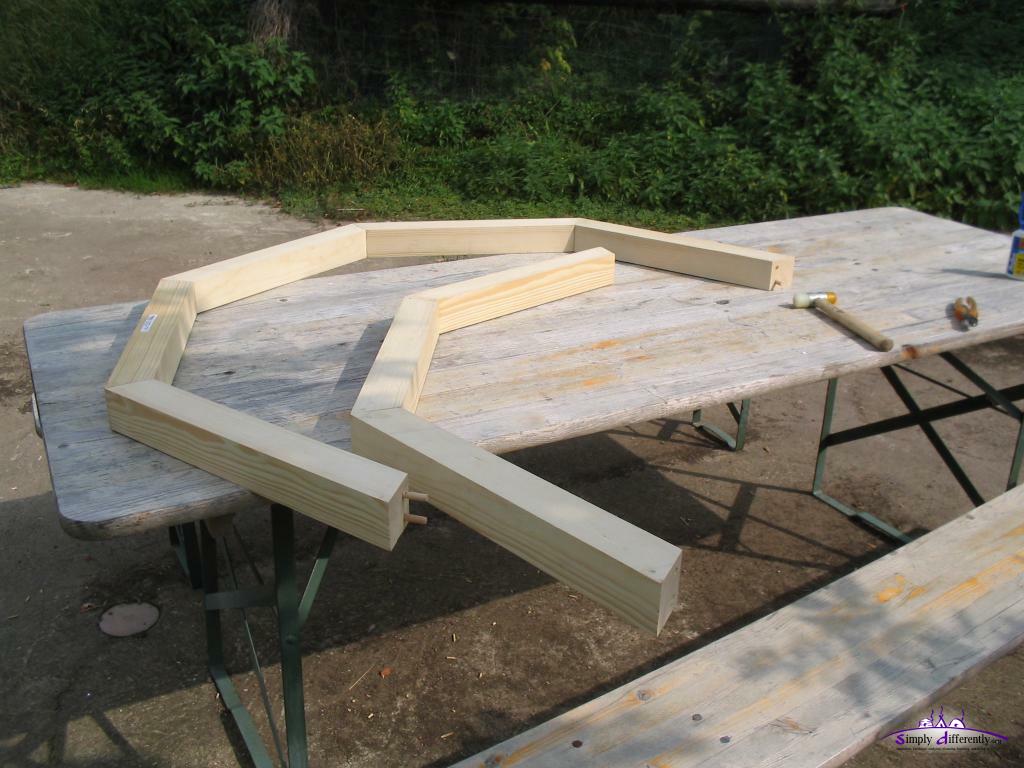 And so on ... 2005/09/28 11:56 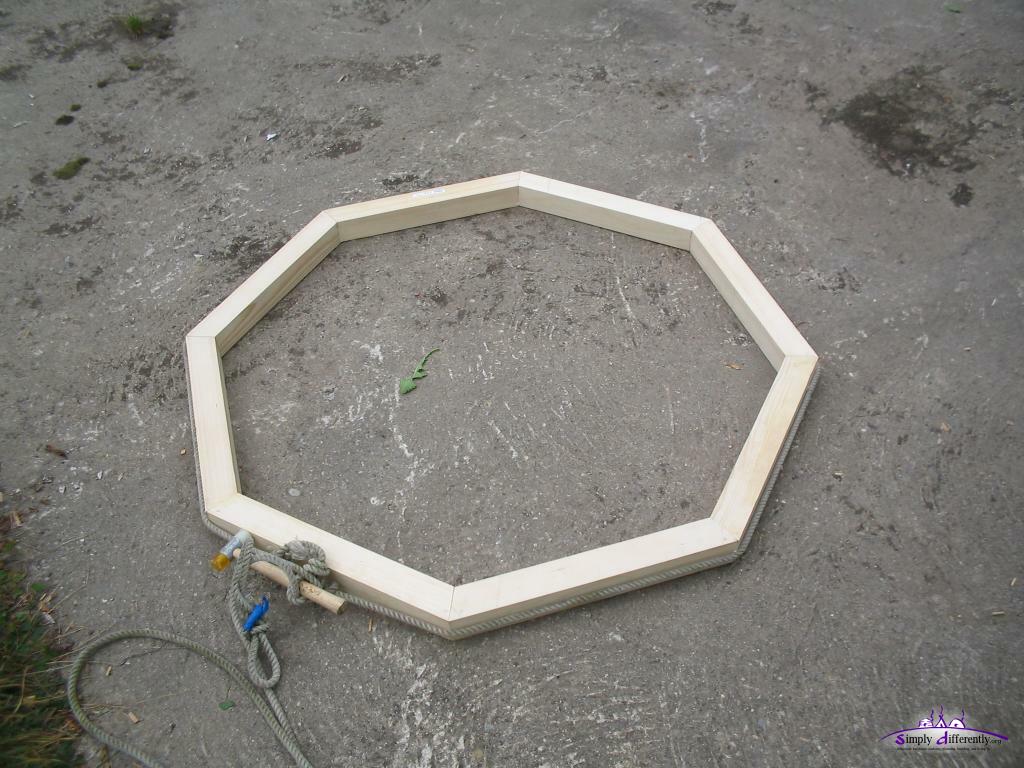 The toono finished, without roof pole holes, glued and tied with a rope to press together for 12 hours 2005/09/28 12:07  64 roof pole holes into the toono, 16 per quarter, 24 = 16, means 4 times half the angle of 90° 2005/09/29 14:10  90° divided by 16 2005/09/29 14:10 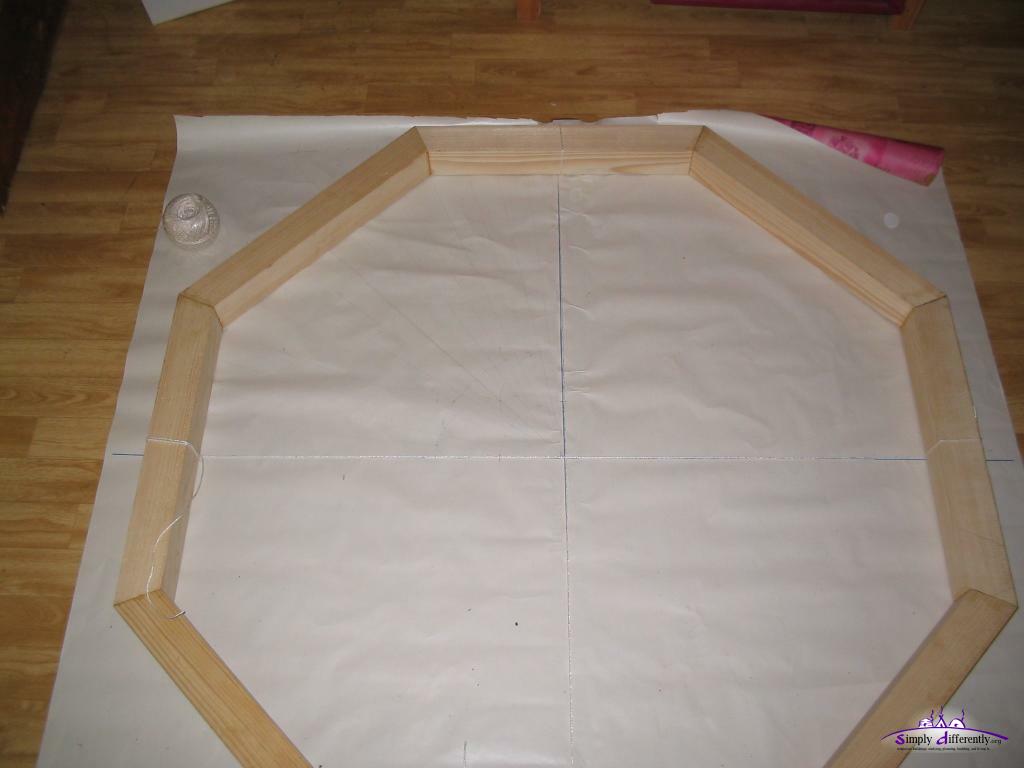 Marking the position of the holes, for each toono quarter 2005/09/29 15:01 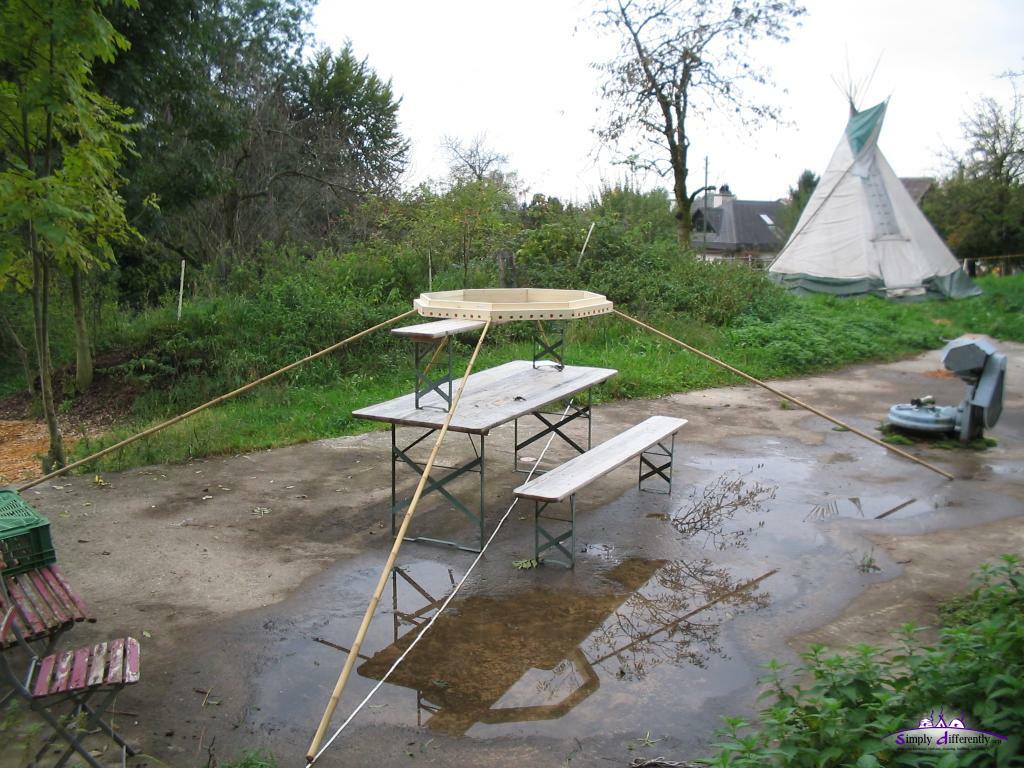 First test of putting 3.05m long roof poles (need to cut to 2.88m) into the toono, diameter as expected (6.76m, with too long poles, finally should be 6.4m); holes with right tilt/angle drilled! 2005/10/05 15:37 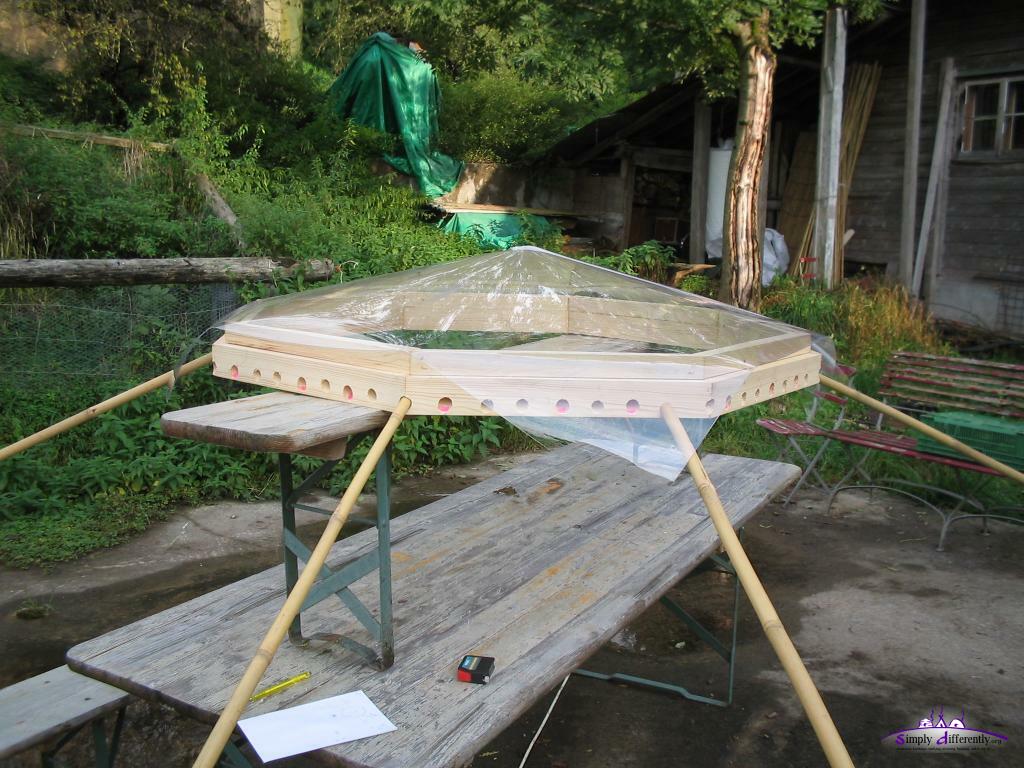 Putting up the toono-cover frame (plus clear PVC, not yet assembled) 2005/10/05 16:02
The next days I sew the canvas and cut the roof-poles and attach some cords for the fixation to the khana. More pictures follow. 24. 9. 2005: Making of Toono (Crown)I bought 6cm square wood lath, 2.5m long, for the door but also for the crown-wheel / toono. A collegue saw the other lath for the 8 segment toono, but I also realized a small bug in my n-polygon calculator, and now I require to decide if the quite thin (6cm) 8 segment toono works, and may have to cut the roof poles individually (aside of the different diameters and required holes), which I wanted to avoid, more calculation required, but might be worth it. 23. 9. 2005: Making of Khana (Wall)The bamboo poles for the wall and roof arrived, and we are using black rubber binders and not drilling the holes, just on the top of the wall, the other holes are done via those binders. The first attempt was laying out the wall poles on the floor which turned out time consuming and not very efficient, the next khana section I did vertically which I did quite faster.
 The bamboo sticks (made in China) 2005/09/20 13:20 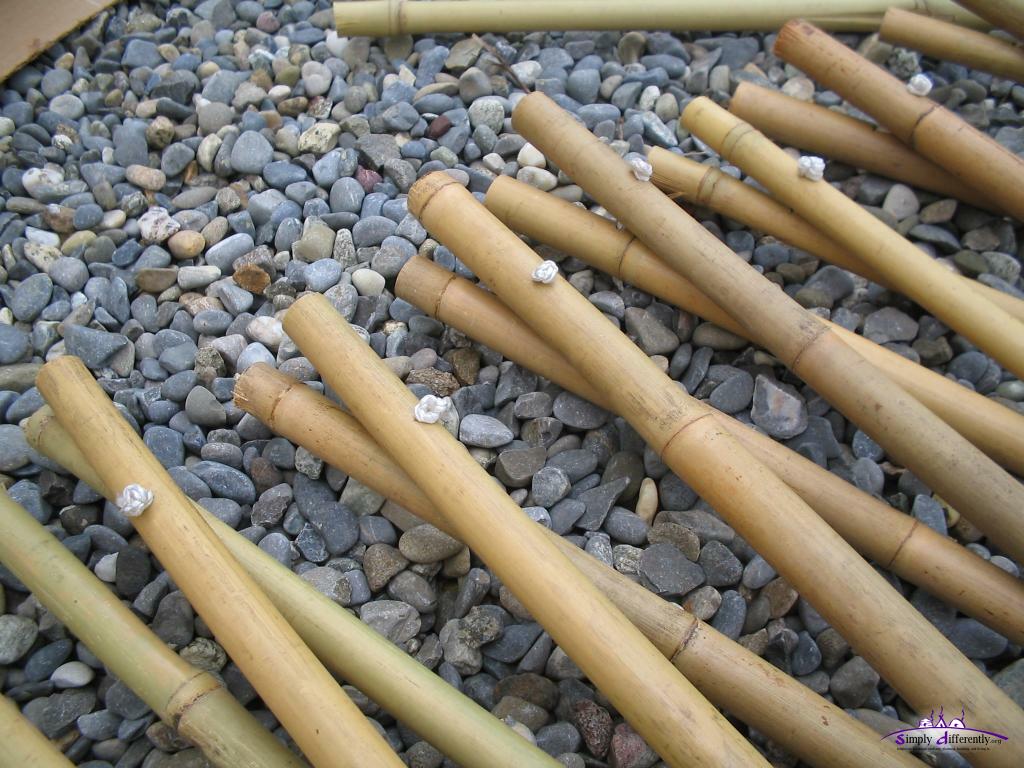 Drilling holes on the top, the rest of the "holes" using rubber binder as connectors 2005/09/20 13:21 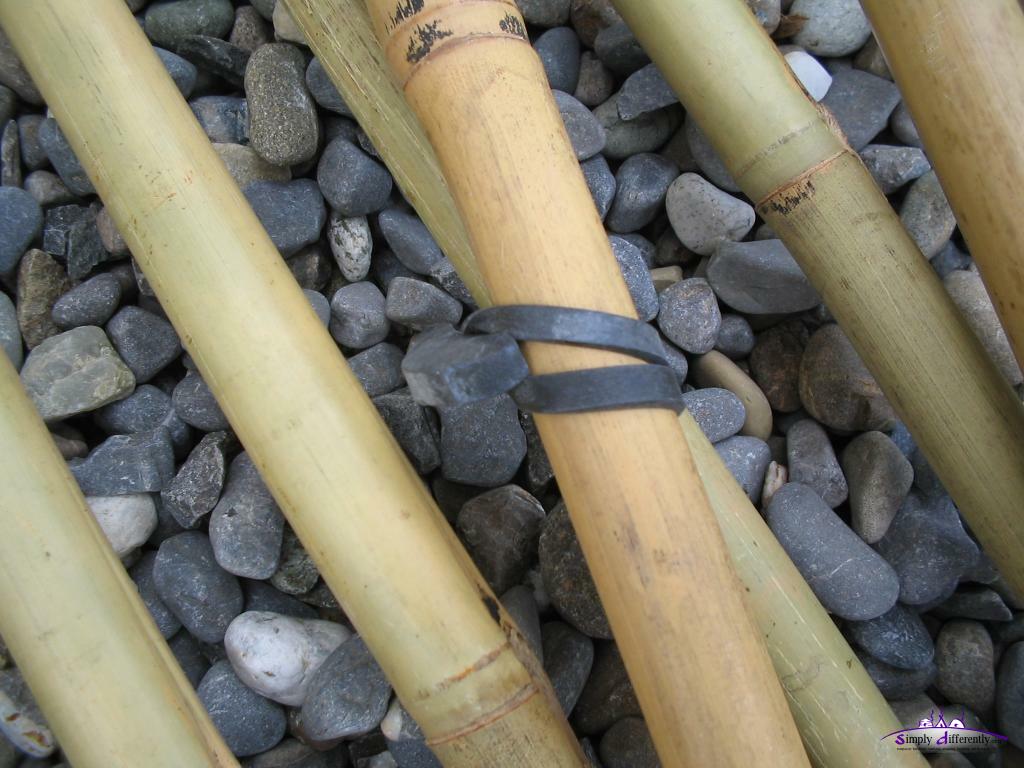 Closeup rubber binder 2005/09/20 13:21 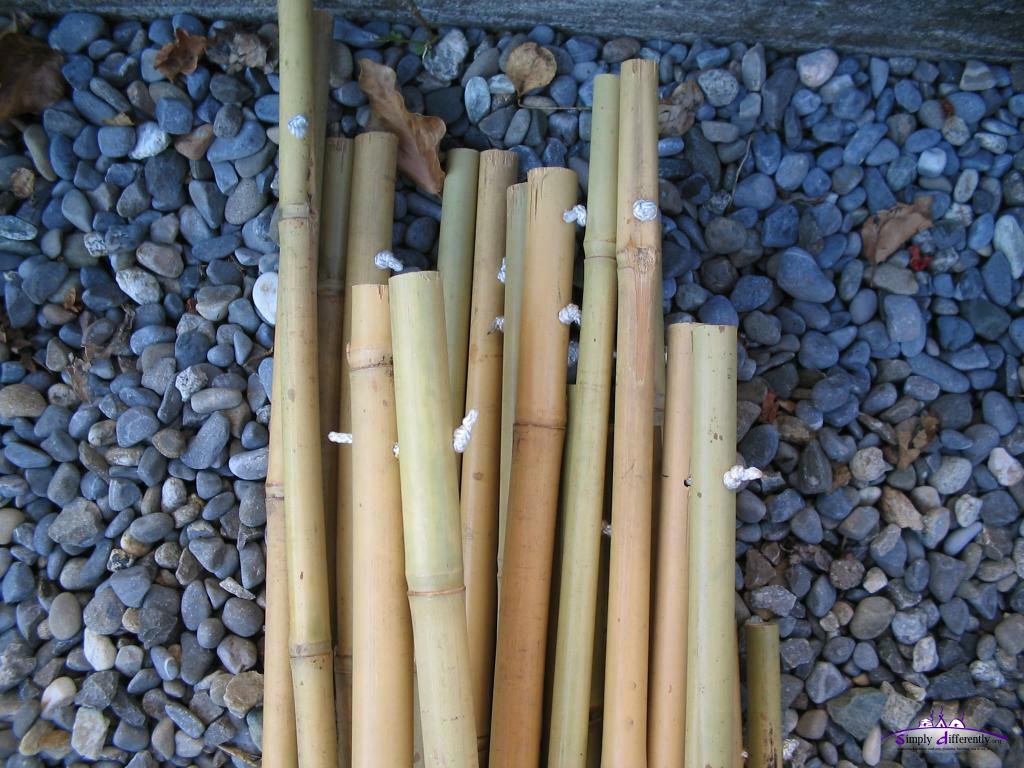 Two poles ("twins") 2005/09/21 08:45  The rubber binder 2005/09/21 08:57  Laying out the lattice wall 2005/09/21 09:51 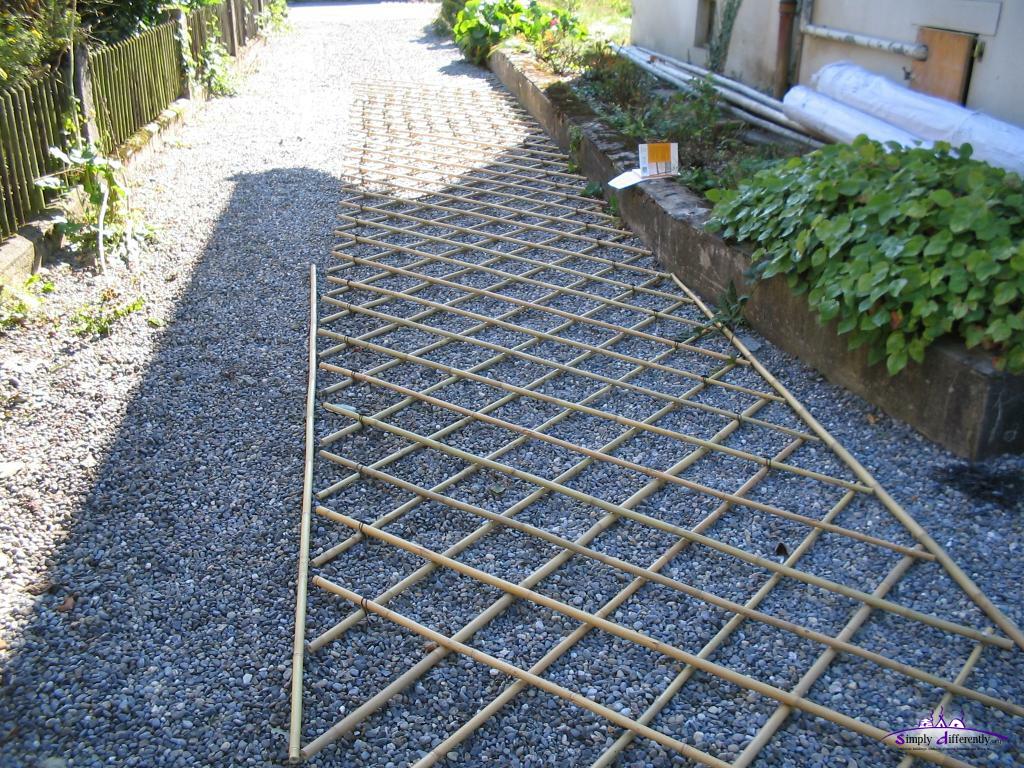 All the way 2005/09/21 13:24 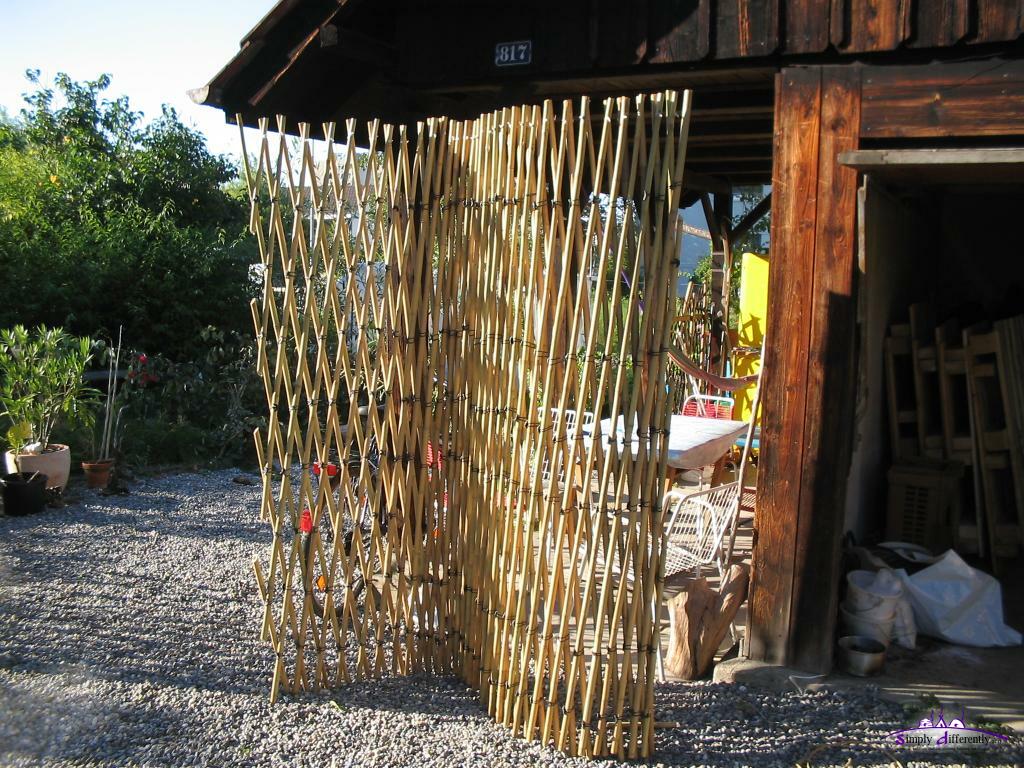 One finished khana section 2005/09/21 15:55 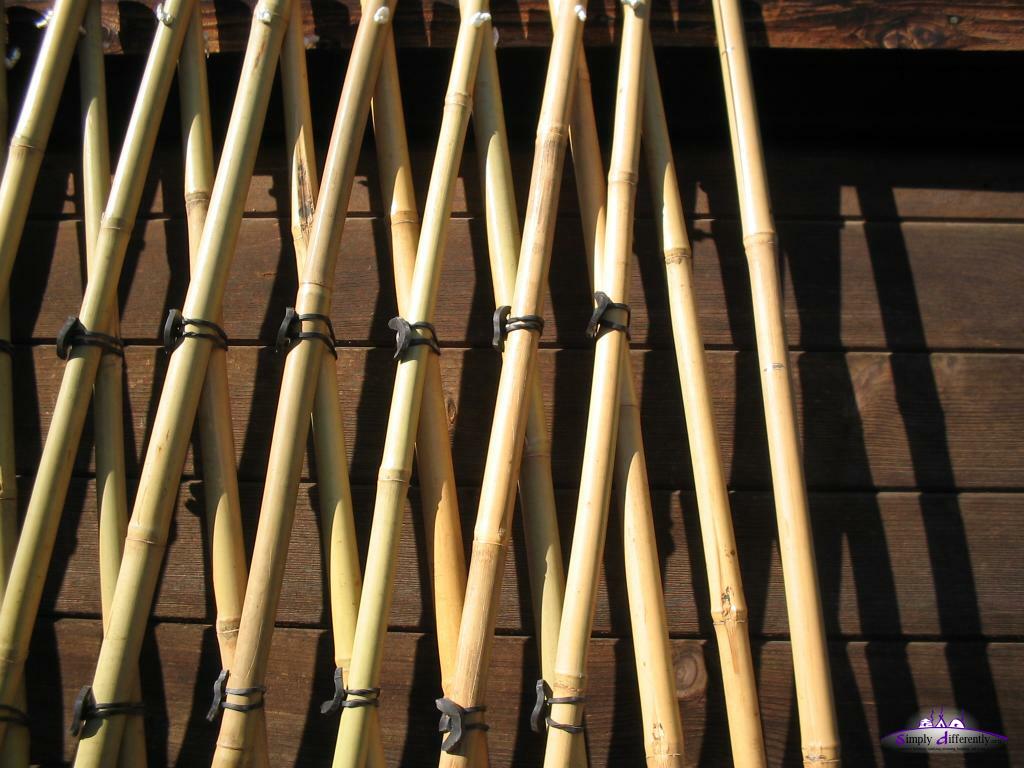 Closeup khana, binding vertically - much easier 2005/09/22 15:03 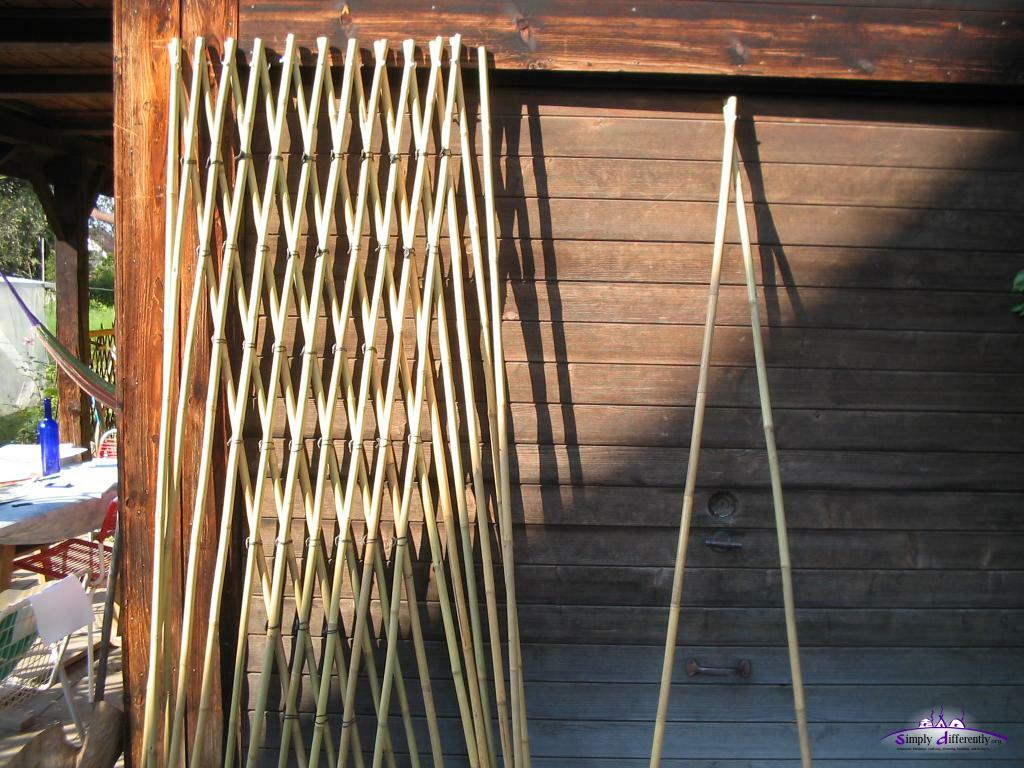 Adding twin poles individually 2005/09/22 15:04 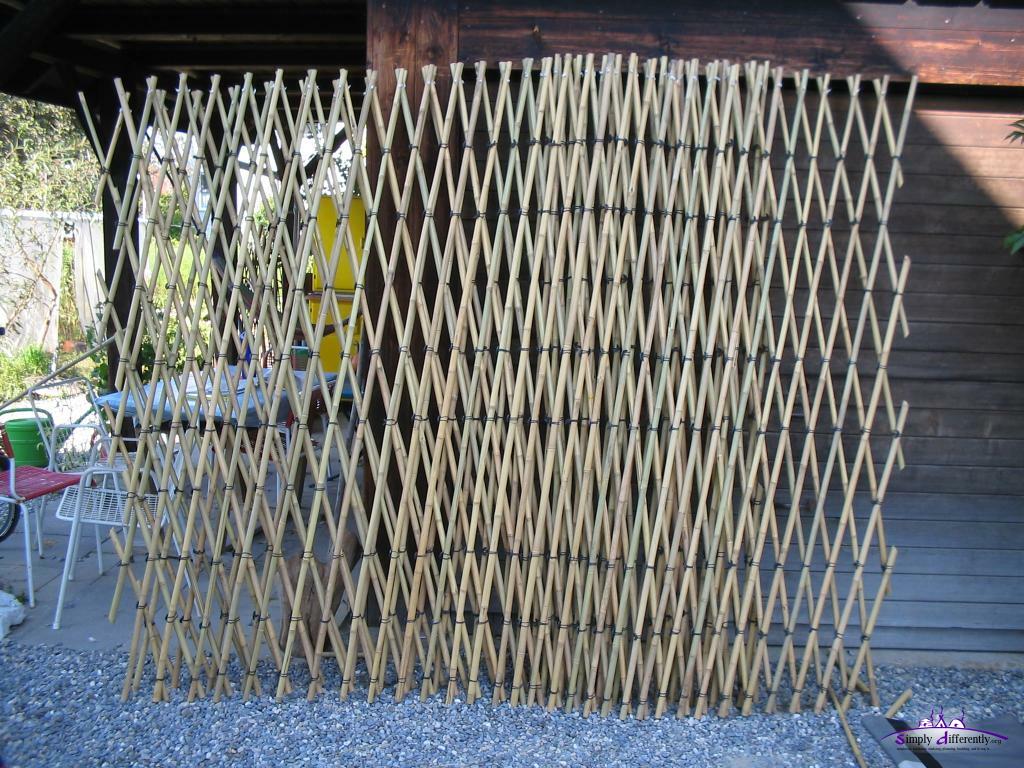 Finished khana, two sections, twice 30 1/2 total 61 junctions for poles, the door will be 3 poles wide 2005/09/23 13:04 So, I decided the make the door 3 times w wide (3 roof poles), also 3 * 31.4cm, 94.2cm - so the khana carries 61 remaining roof poles, two khana section with 30 and 1/2 twin poles. Since I used bamboo two khana sections works, expanding apprx. 10m, but otherwise apprx. 70cm wide when compressed. We also had to sort the roof-poles, since we decided to use the thicker ends on the khana and the thinner ends into the crown-wheel / toono, and there holes need to be drilled - so I got two diameter sizes of roof poles / uni, less than 2.0cm and less than 2.3cm. 16. 9. 2005: Starting: Roof & Wall PolesAfter weeks of planing and calculating & taking notes Melanie got the bamboo poles from a garden wholesale company I researched beforehand:Per yurt:
We require just 64 roof poles, but it was cheaper to get 150 poles (for two yurts) than buying the exact number. The cost per yurt for the poles apprx. CHF 200 or 130, or US$ 160. Page << Prev | 1 | 2 | 3 | 4 | 5 | 6 | 7 | 8 | 9 | 10 | 11 | 12 | 13 | 14 | 15 | 16 | 17 | 18 | 19 | 20 | 21 | Next >> Content:
|
| Home | · | About | · |  Tipi | · |  Yurt | · |  Dome | · | Features | · | Gallery |


Creative Commons (CC) BY-SA-NC 2005-2017, developed, designed and written by René K. Müller
Graphics & illustrations made with Inkscape, Tgif, Gimp, PovRay, GD.pm
Web-Site powered by FreeBSD & Debian/Linux - 100% Open Source