
|
Page << Prev | 1 | 2 | 3 | 4 | 5 | 6 | 7 | 8 | 9 | 10 | 11 | 12 | 13 | 14 | 15 | 16 | 17 | 18 | 19 | 20 | 21 | Next >> Yurt / Ger Diarywritten by Rene K. Mueller, Copyright (c) 2005, 2006, 2007, 2008, 2009, last updated Sat, January 3, 2015 DiaryAs I proceed I will update the diary. Most up-to-date entry at top, first and oldest entry at the bottom respectively last page.05. 05. 2010: LeavingAfter a half year I moved back to Switzerland, as I didn't fit into that french eco-village project. It was a very nice place and enjoyed the nature there immensly. Later that year I sold the yurts to a friend who lives a few hours away were I resided in France.23. 10. 2009 - 18. 12. 2009: Moved to France, Pitched the Yurt Again
 , and came
back to Switzerland, and looking for a suitable place to continue my
passion with the yurt - but this turned out not very successful: either the places
were expensive, or tiny, restricted or otherwise not suitable (I've got a bit picky, why aim for less). , and came
back to Switzerland, and looking for a suitable place to continue my
passion with the yurt - but this turned out not very successful: either the places
were expensive, or tiny, restricted or otherwise not suitable (I've got a bit picky, why aim for less).
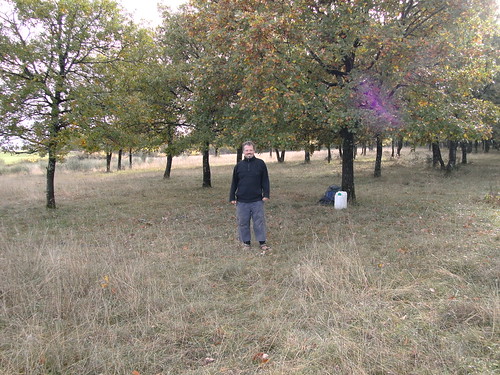
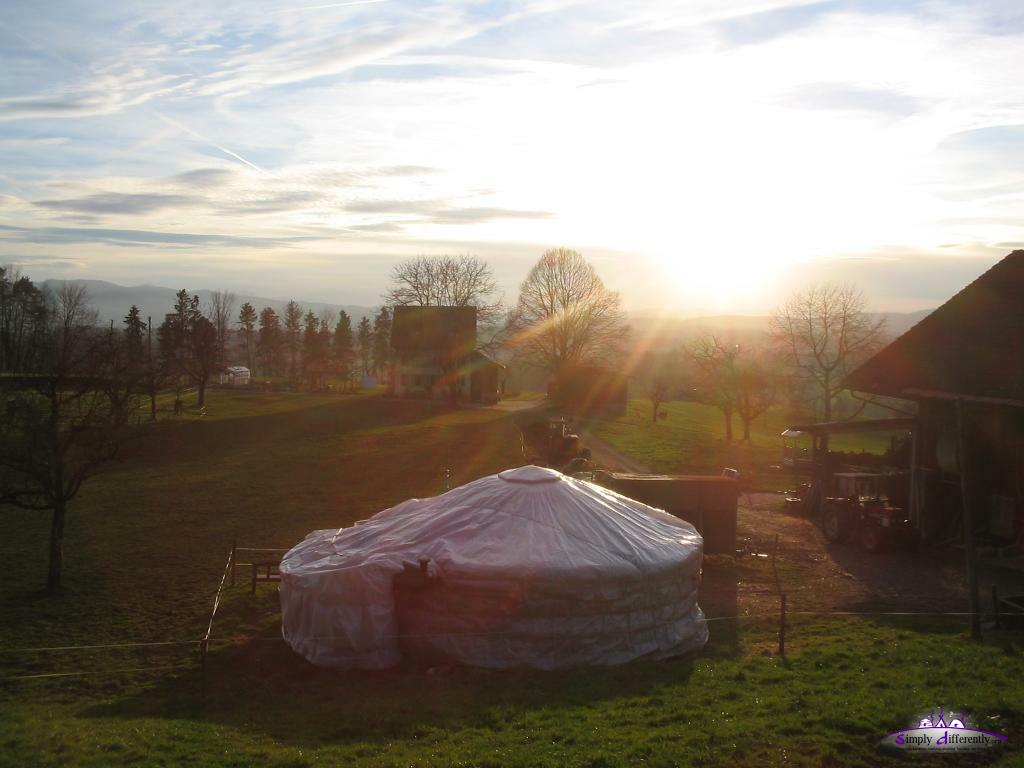
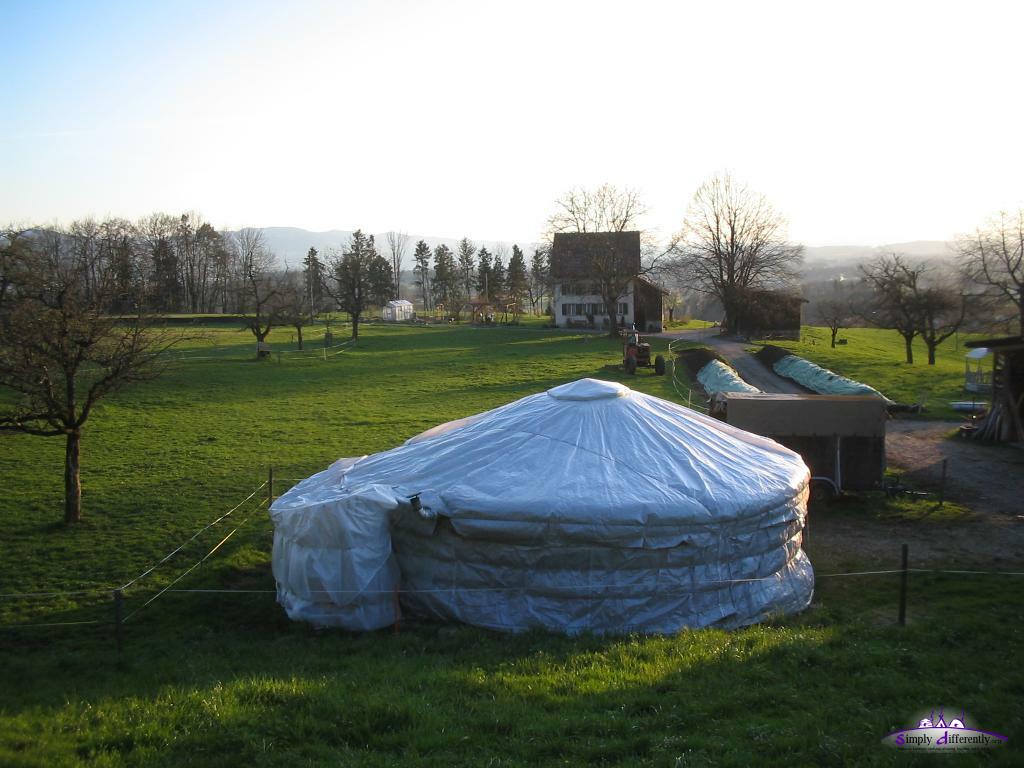
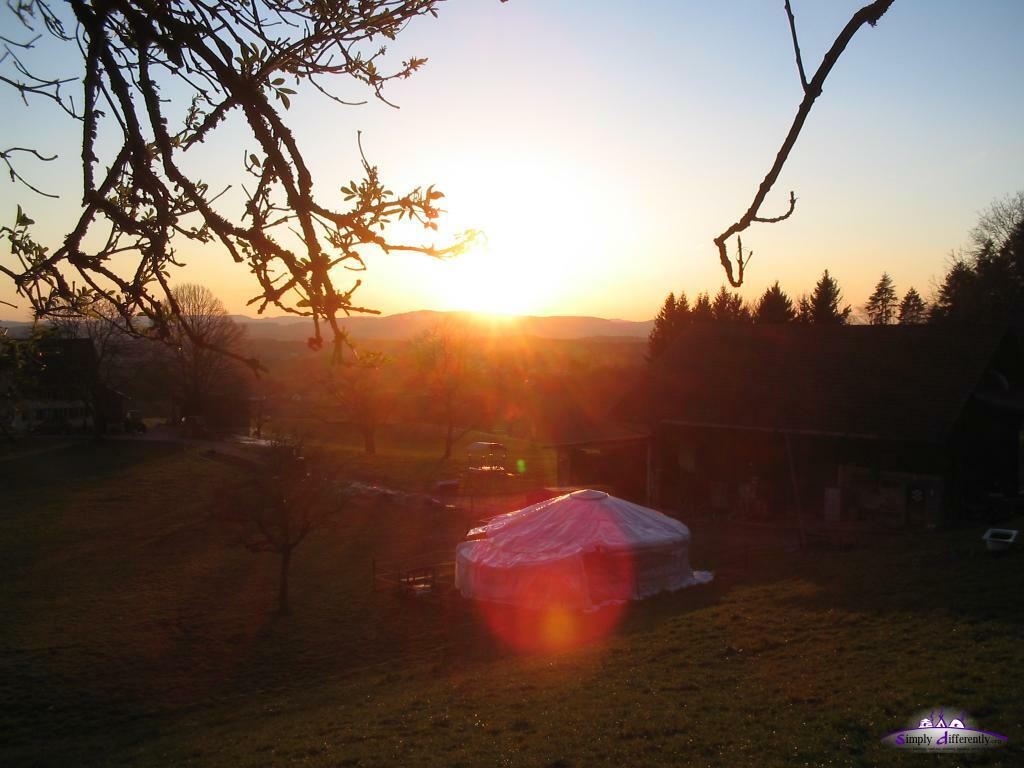
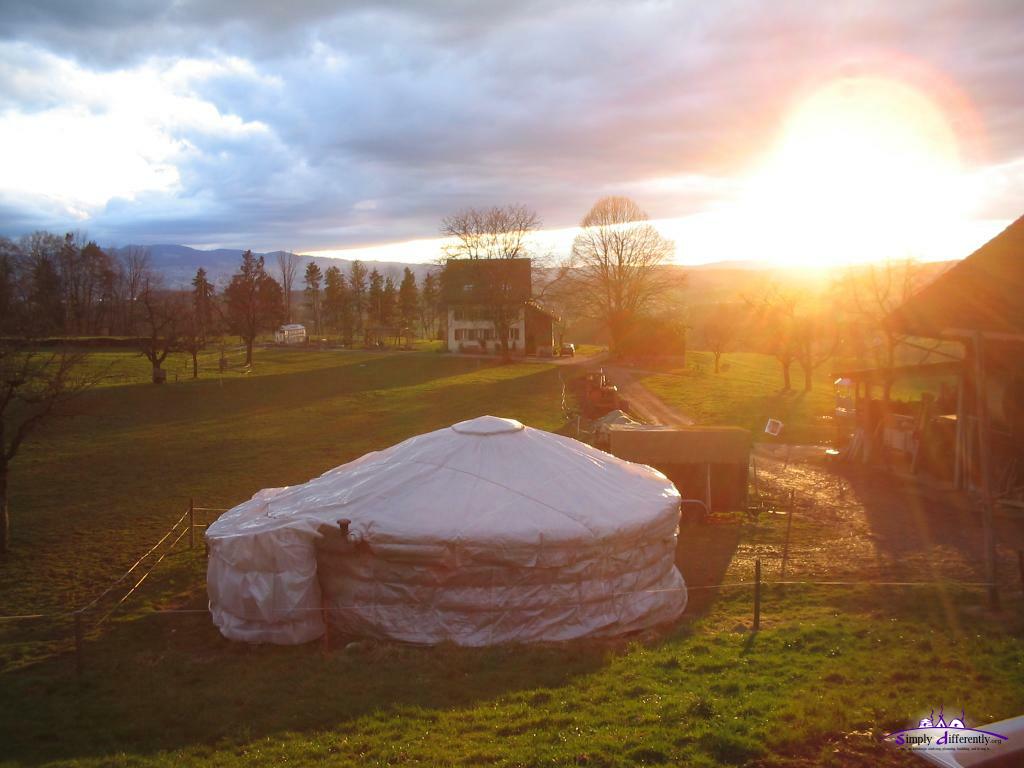
In May 2009 I attended the Yurt Builder Conference where I made contact with an eco-village project in southern France, and I traveled with my recumbent in France again and paid them a visit. After getting to know the group a bit and the eco-village project at its startup phase I decided to provisoral join it. In September 2009 I returned from my recumbent travelings to Switzerland, and roughly a month later, October 23 I moved with a truck and about 2000kg material to south of France about 1100km long trip. Surprise, there is a legal way to live in a yurt, and it's rather simple solution. What does it mean? In Germany, Switzerland and Austria yurts essentially aren't permitted to be lived in, either you ignore the law and get along with the local authorities, or make a touristic hotel like setup with yurts, it might work. In France you are allowed to pitch a tent, a caravan or a yurt or some sort of temporary building for at least 2 years after you have been given permission to build your own house. To get permission to build your own house is a multistep procedure - so, I was given permission to pitch the yurt before I even filed the details of a house building; but also that the parcel I'm on will be used for a future yurt camping facility - either way it seems a legal way to live in a yurt for a "limited time". With all the feedback of the recent years it seems the easiest way to live in a yurt is when a "legal" house is nearby. So, it took a while to get everything setup legally, as being part of an eco-village project I had to wait 2-3 weeks until the permission was granted. And then of course you can only work as fast and make head when the weather allows it, which slowed down preparing and putting the yurt up further.
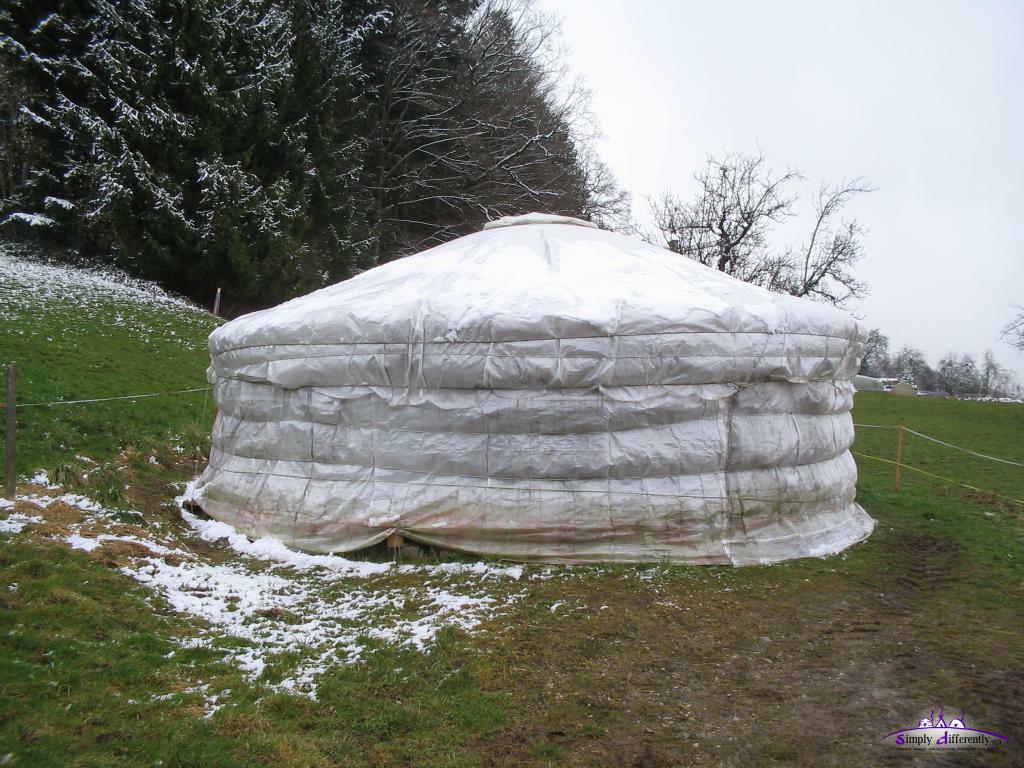
 2009/11/04 14:48 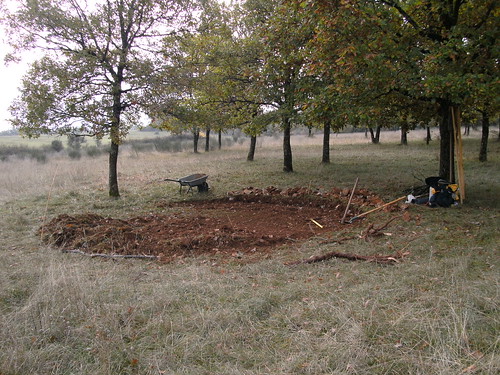 2009/11/11 10:28 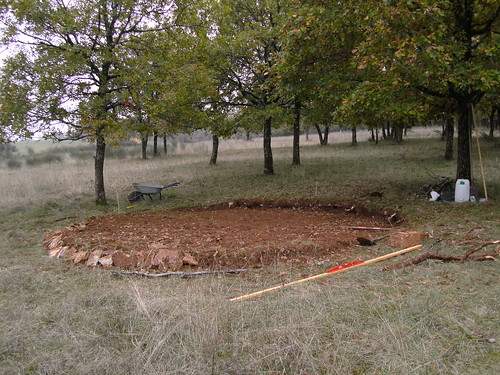 2009/11/11 13:39 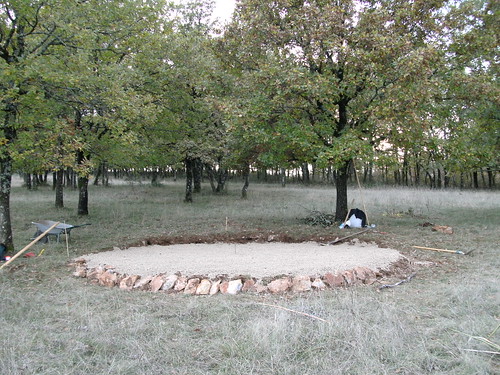 2009/11/12 16:34 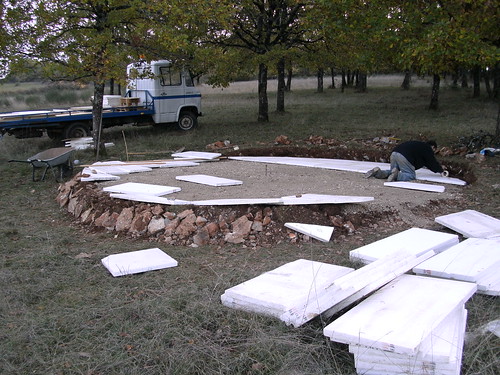 2009/11/13 16:24 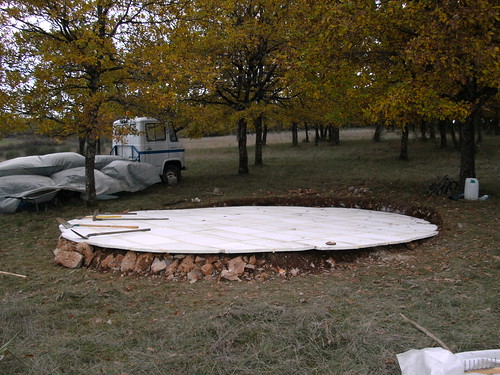 2009/11/15 15:39 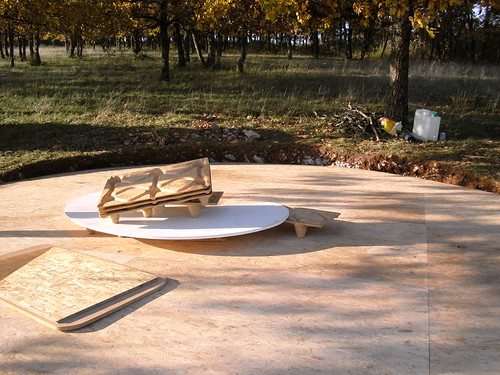 2009/11/16 09:46 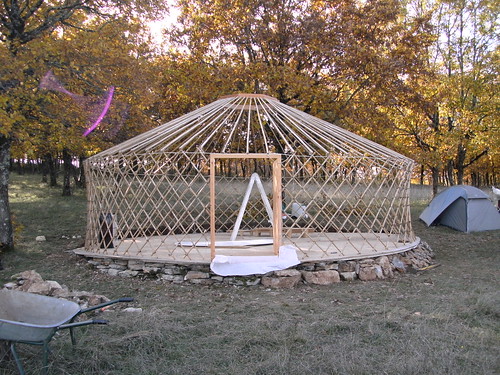 2009/11/16 14:38 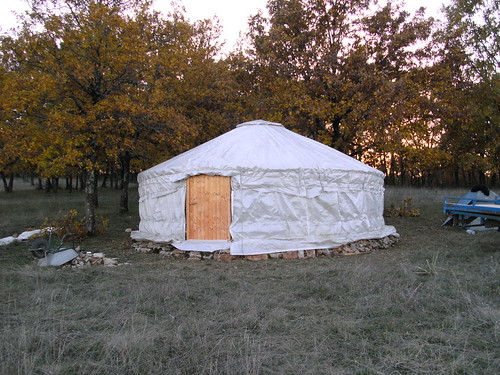 2009/11/16 16:58  2009/11/18 10:09 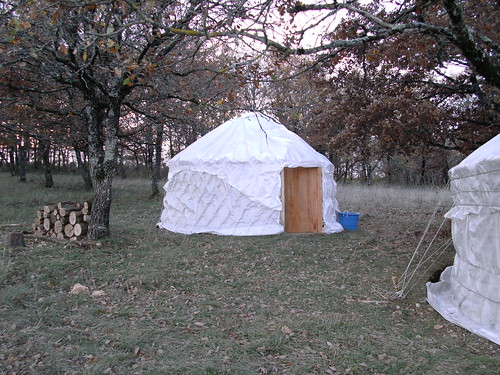 2009/11/21 16:59 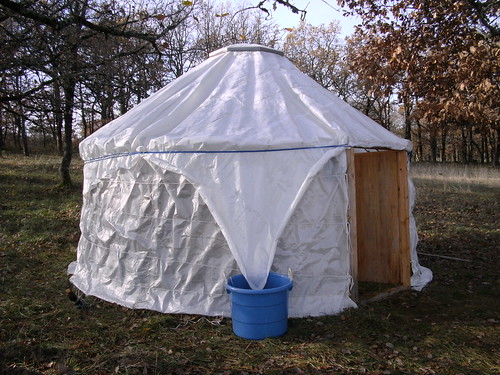 2009/12/10 12:58 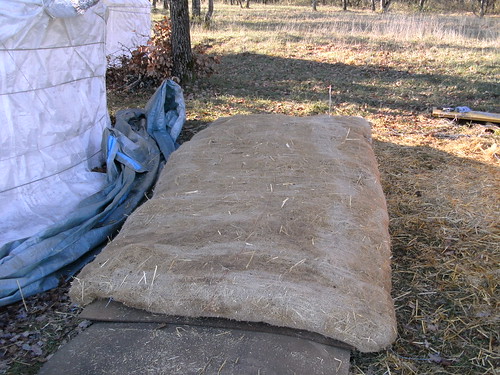 2009/12/11 10:57 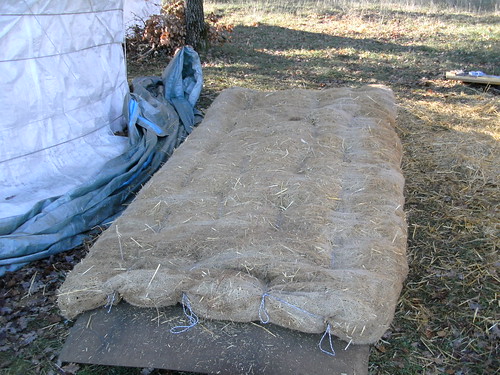 2009/12/11 11:17 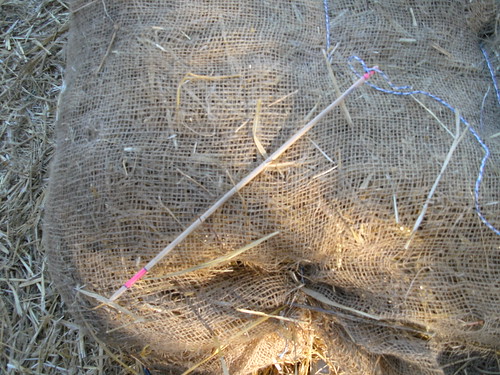 2009/12/11 13:54 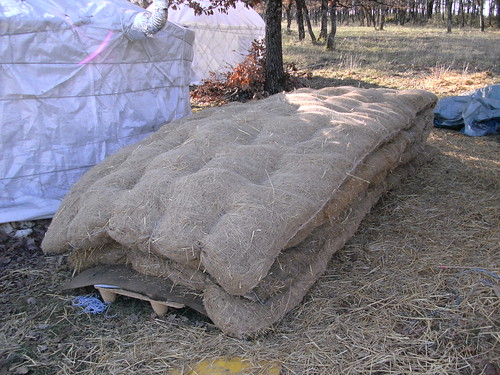 2009/12/12 11:50 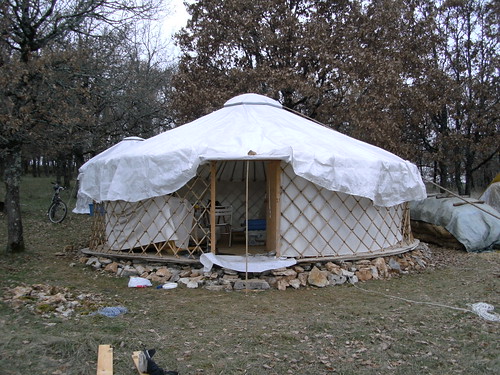 2009/12/13 10:56  2009/12/13 11:44 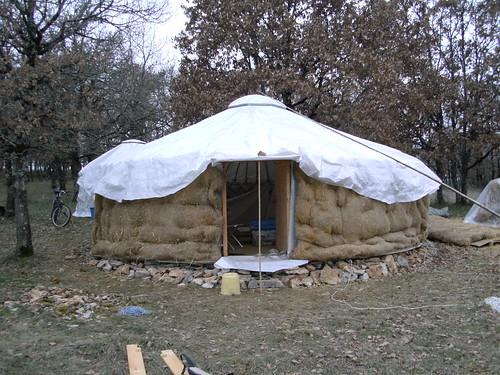 2009/12/13 12:35 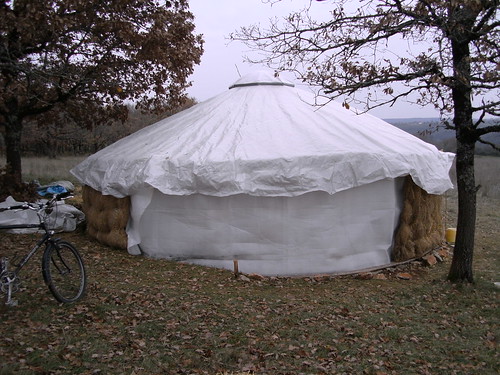 2009/12/13 13:22 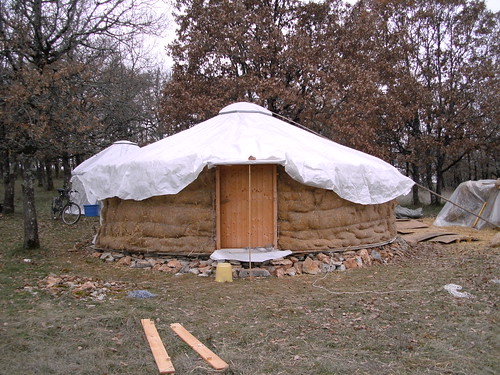 2009/12/13 13:55 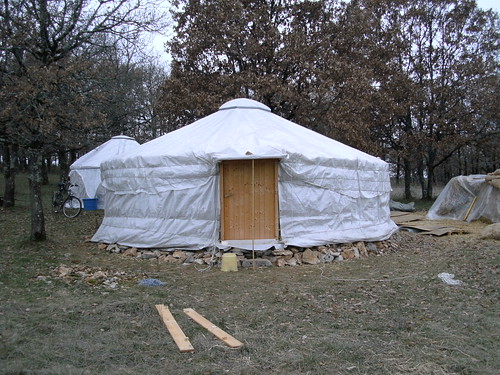 2009/12/13 15:22 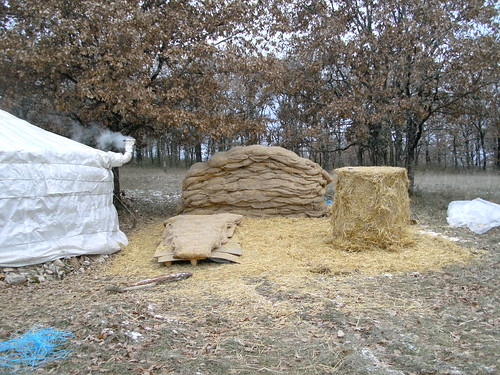 2009/12/16 14:31 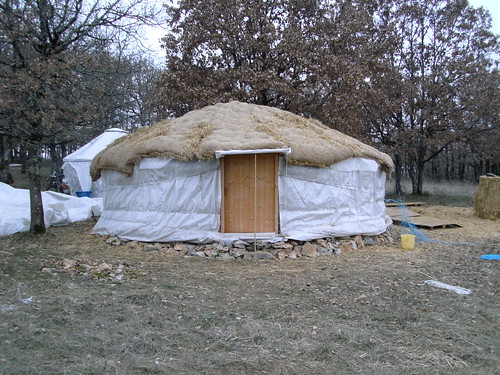 2009/12/16 16:36 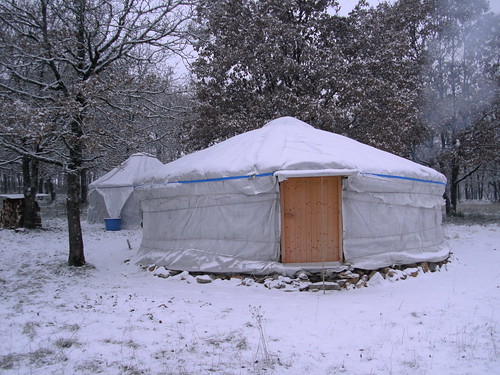 2009/12/18 10:06 What's different from Switzerland? First of all unusual winds: in western Europe most "weather" comes from the west, but in south of France the winds come from south where as the clouds come from the west. The south winds are warm and stormy, up to 70km/h where I am - which make working on the yurt impossible, only with calm or no wind you can put up or take down the roof covers properly. Also, in Switzerland it was very humid, lot of rain, and then cold in November and first snow. In southern France, Midi Pyrenees to be specific, it also rains, but the ground and earth is dry from the summer, the earth hardly gets damp even after days of rain. This ideal for a yurt setup, the humidity is rather low, but it also means not much water. So, back to my place, I arrived to a spot:
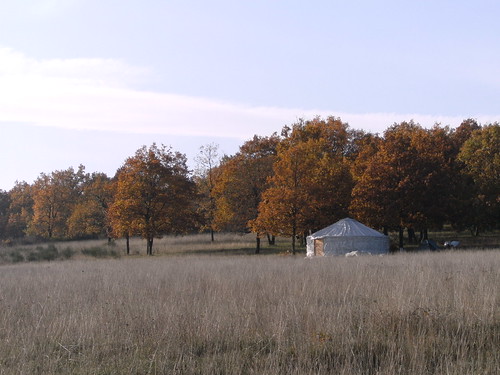
I have choosen a shady place a slope facing east, open area from North, East and South, and in the back (West) a small forest, supposed to slow down storms from the atlantic. In the summer I get shadow around 11:00 until rest of the day, this will lower the UV impact to the cover I have. Summers are rather hot, 35-38C, and very dry. No rain for weeks, and rain only briefly. The eco-village project owns about 55ha of land, about 140 acres - and some is located in a narrow valley, with at summers is nice to be, at winter only brief sunlight and rather cold. I have chosen a spot at the plateau, exposed more to the winds, and in summer time to the heat - that's why the shady spot. I positioned the yurt between two or three trees, at winter they loose the leafs and sunlight reaches me until 15:00 or a bit more, in summer, with all the leafs I have shadow, as mentioned, around 11:00. It's a slight slope, about 30cm or 1 feet to dig away at 6.50m diameter, the yurt has a diameter of 6.40 or 19'. We displaced the earth from one side to another and many stones we discovered just a bit under the the surface, and put them aside. Further, we used 2t of gravel to fine tune the surface. I dropped the palettes, as the ground is dry, and put the polystyrol direct on the gravel, not even ditched a drainage. Then direct on top the wooden floor - very simple setup. I would not recommend this setup unless you are located on an alike dry site. As next we pitched the yurt, and moved all my stuff from a nearby storage place into the yurt. It took me about a week to open and place all stuff, and clean up the items from the dust of one year storage and also the dusty place it was stored for 4 weeks here in France. I took with me the empty bags of my thermal insulation and refilled them with local straw, straw roles a 180kg each and € 15 each, harvested in spring of 2009.
What else to write? The eco-village project has attracted like-minded people,
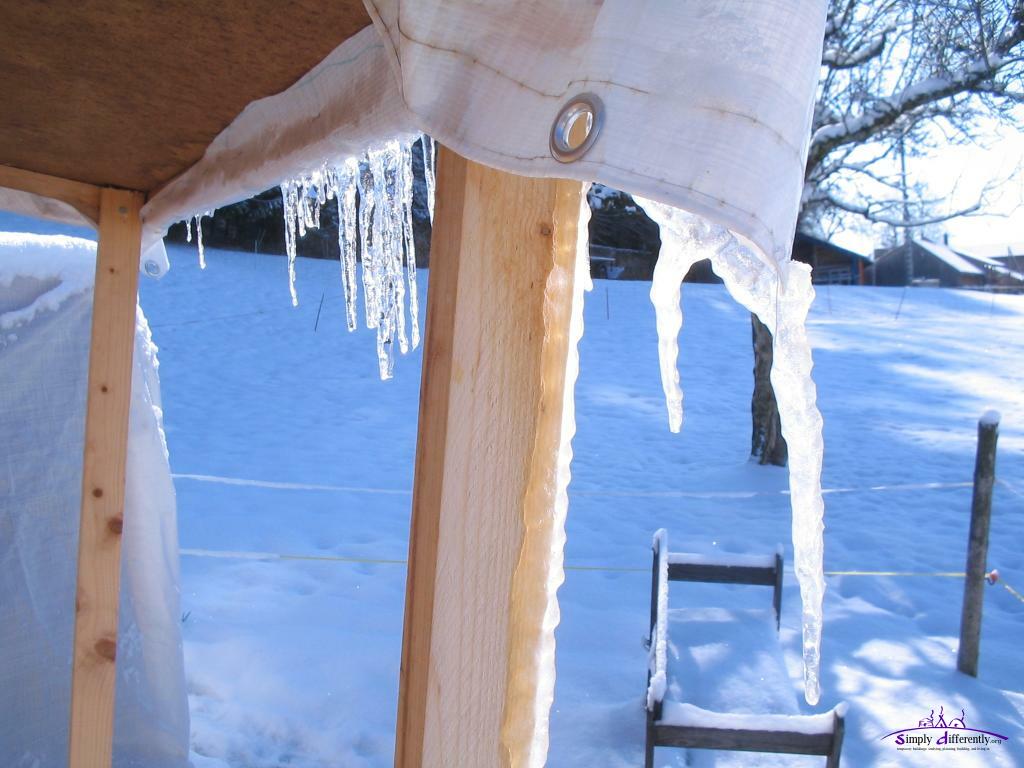
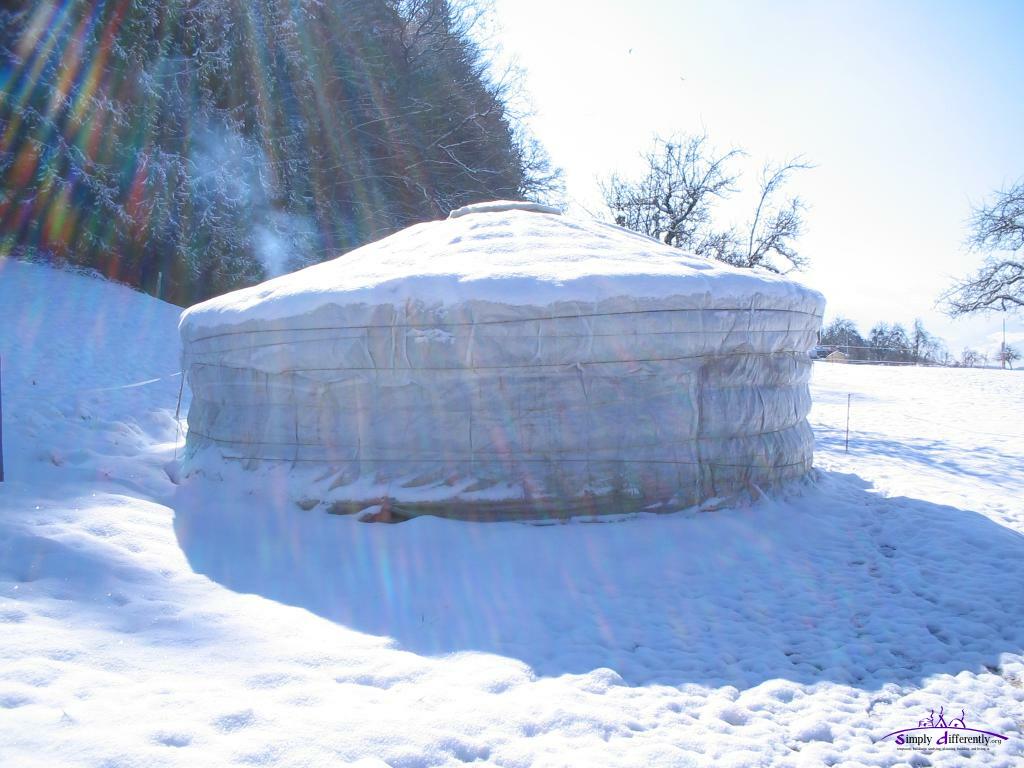
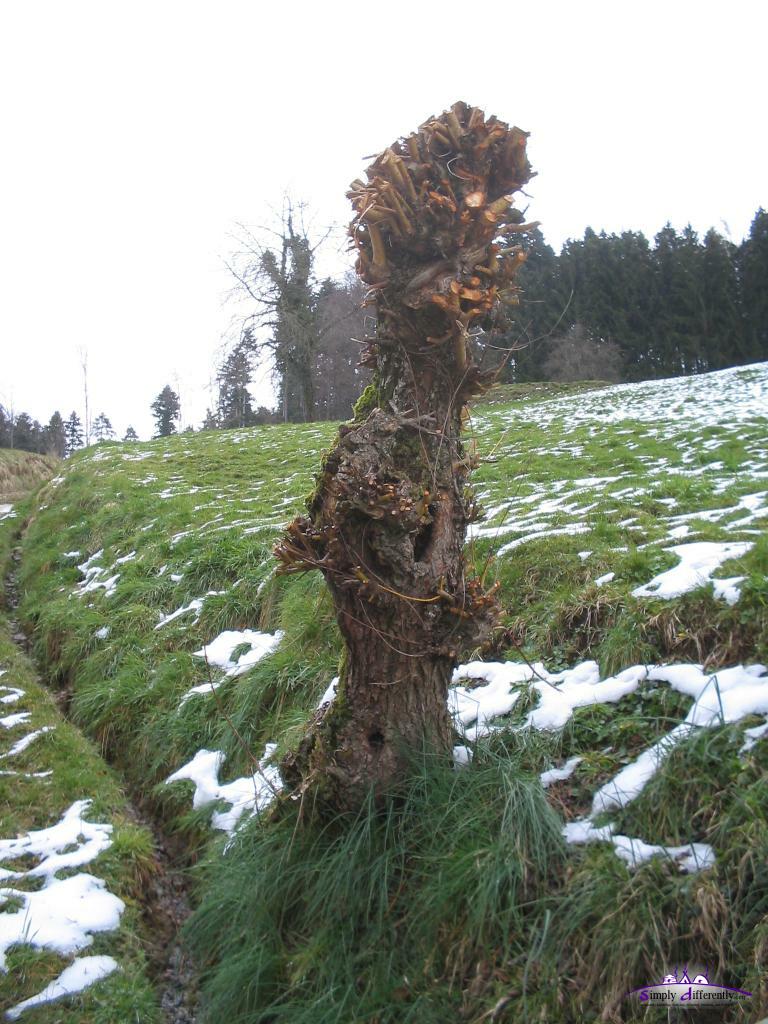
one of them is Nicolas Causse, who builds Helix Zomes This also made me add two pages on zomes: In a nutshell, I continue my endevour now in France . . . 26. 4. - 27. 4. 2008: Taking Down the YurtHere the photos of the take down; with these photos also my Yurt Diary ends.  2008/04/26 10:04 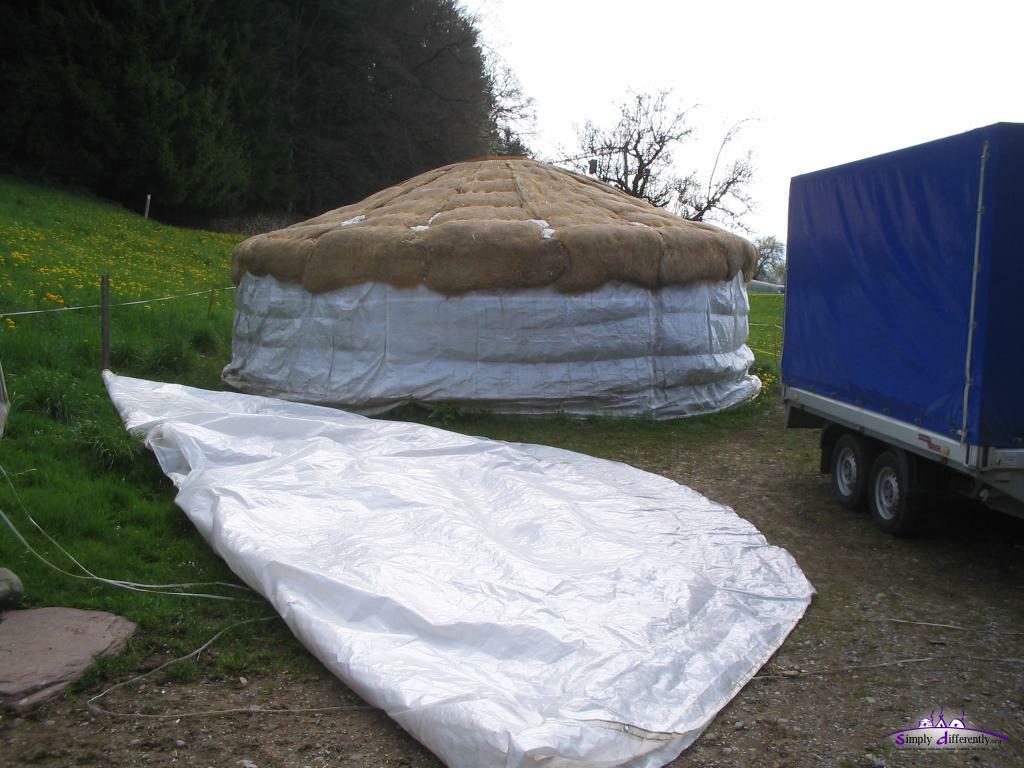 2008/04/26 10:32 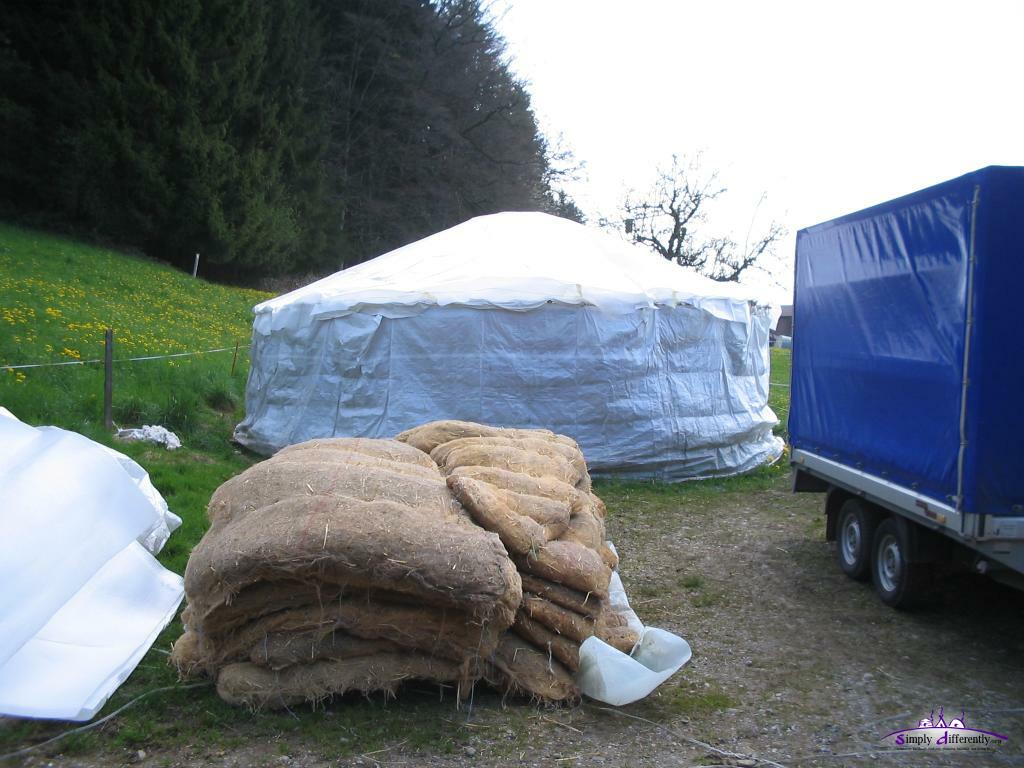 2008/04/26 11:02 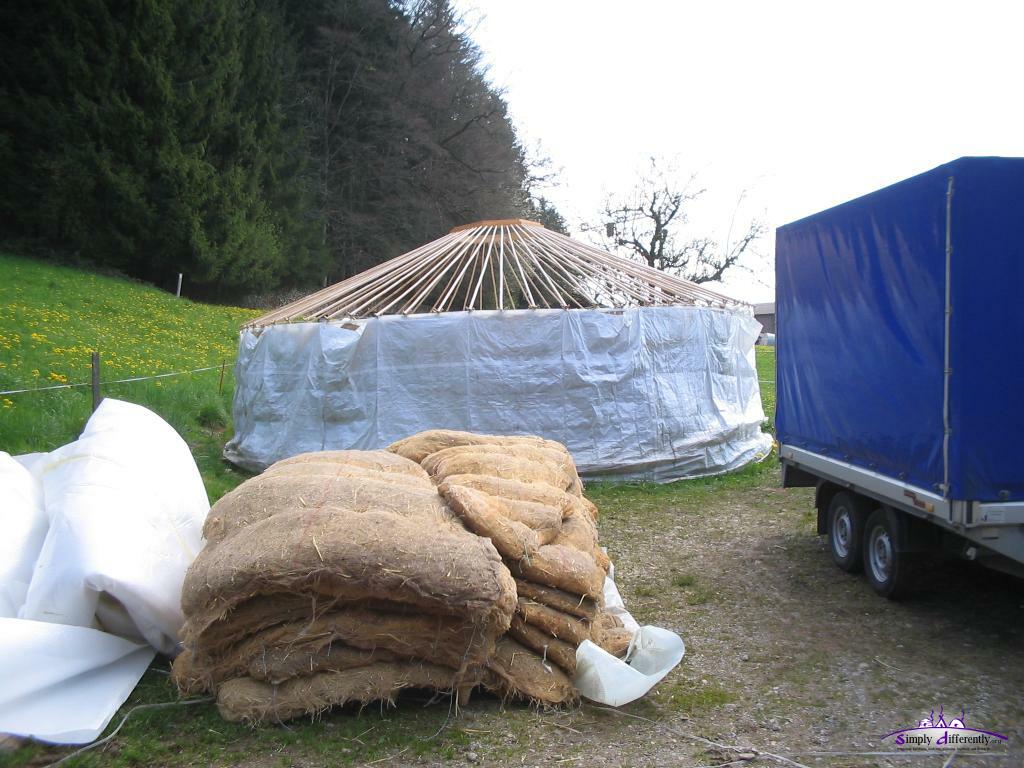 2008/04/26 11:13 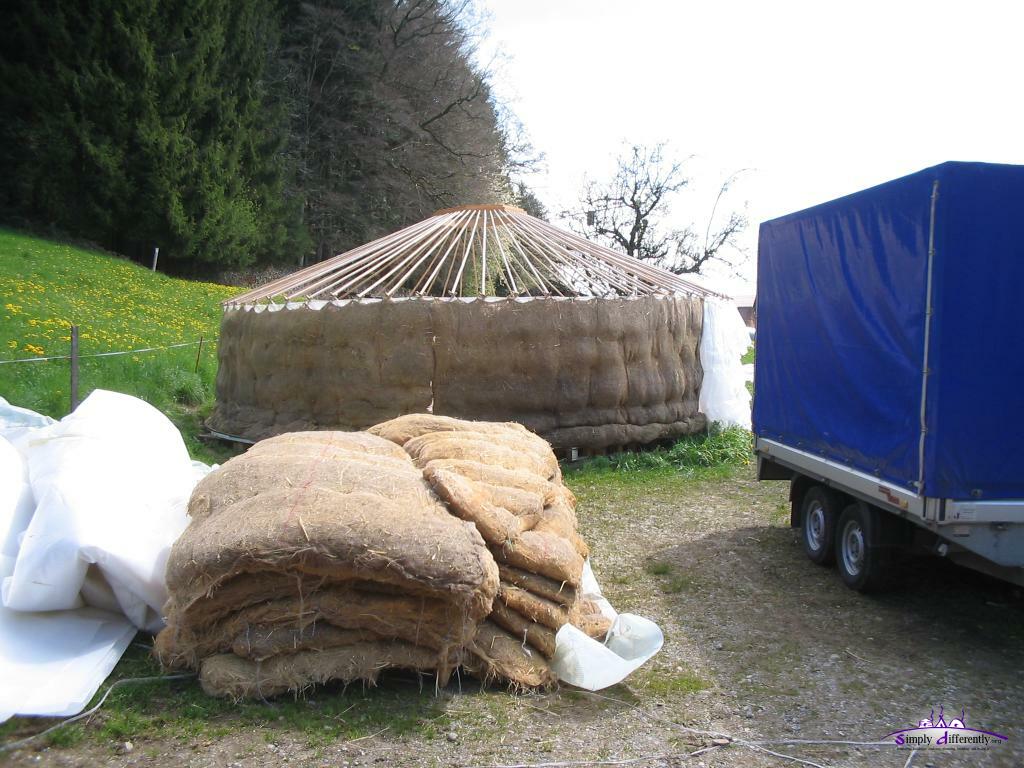 2008/04/26 11:50 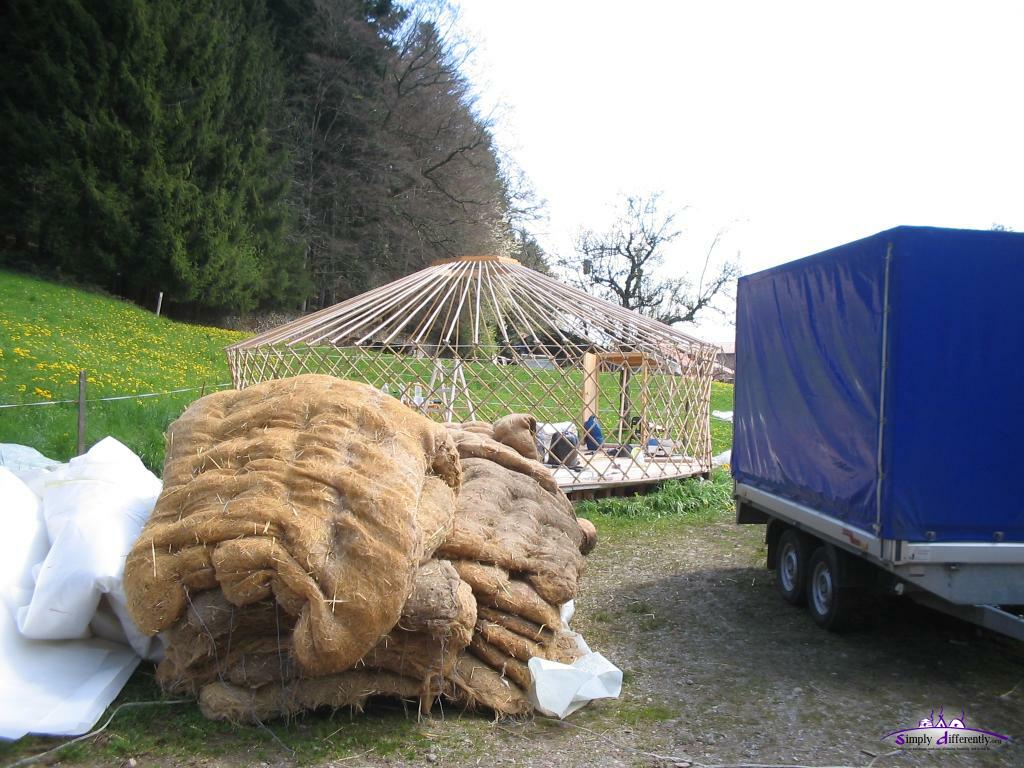 2008/04/26 12:08 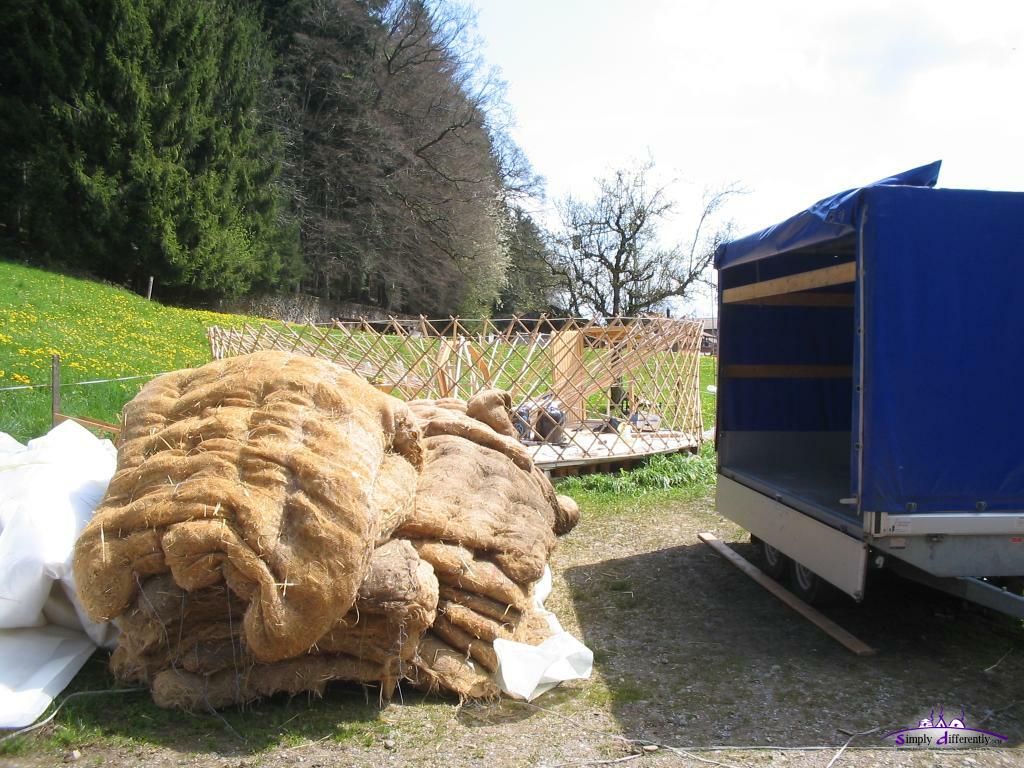 2008/04/26 12:14 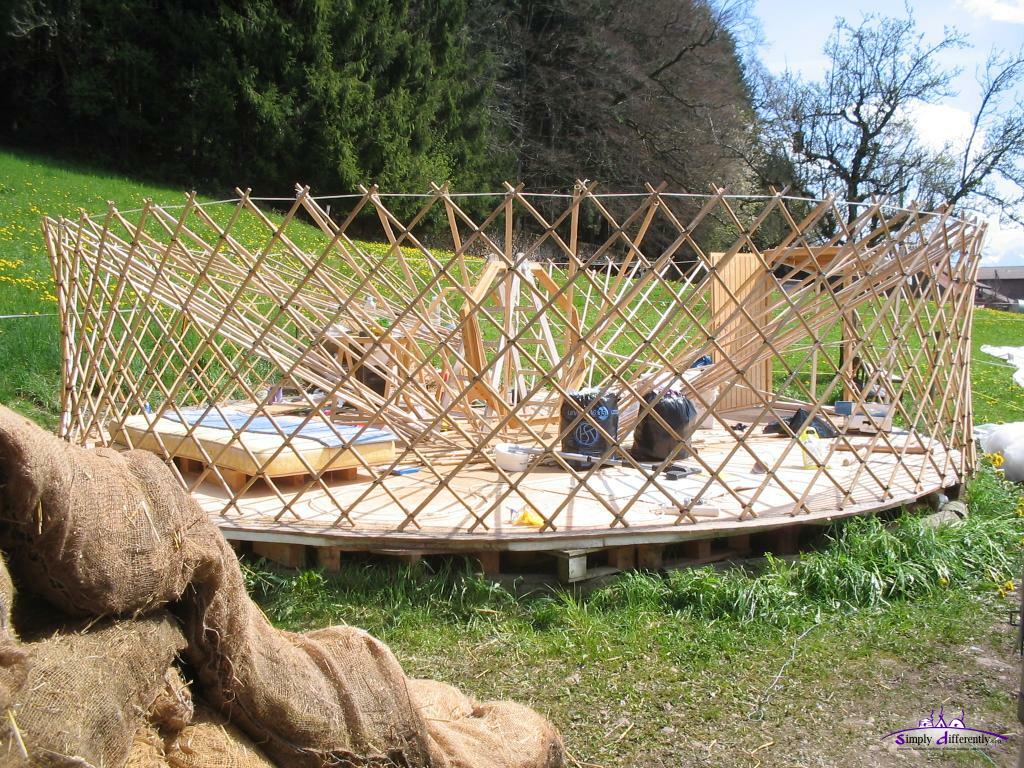 2008/04/26 12:14 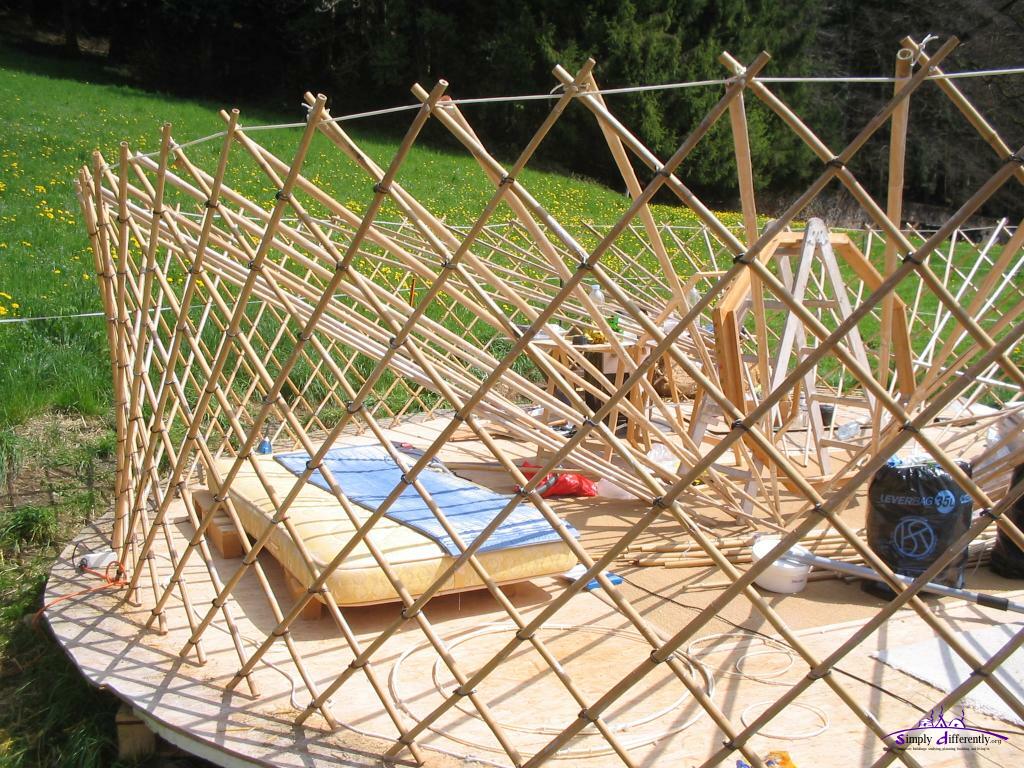 2008/04/26 12:14 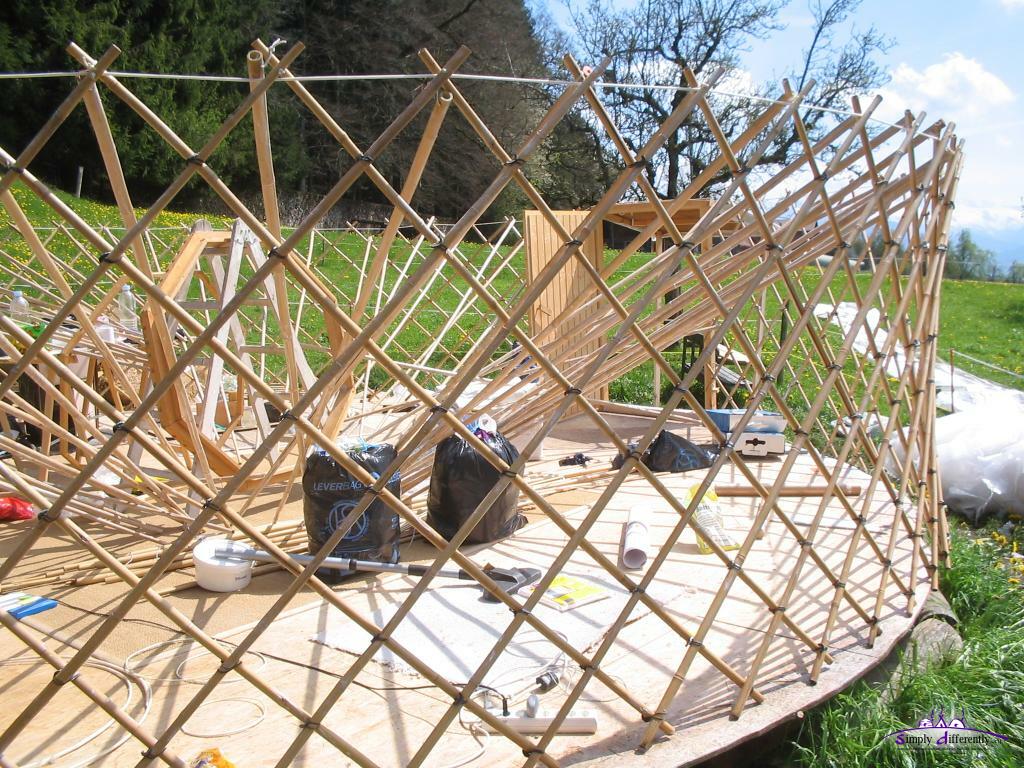 2008/04/26 12:14 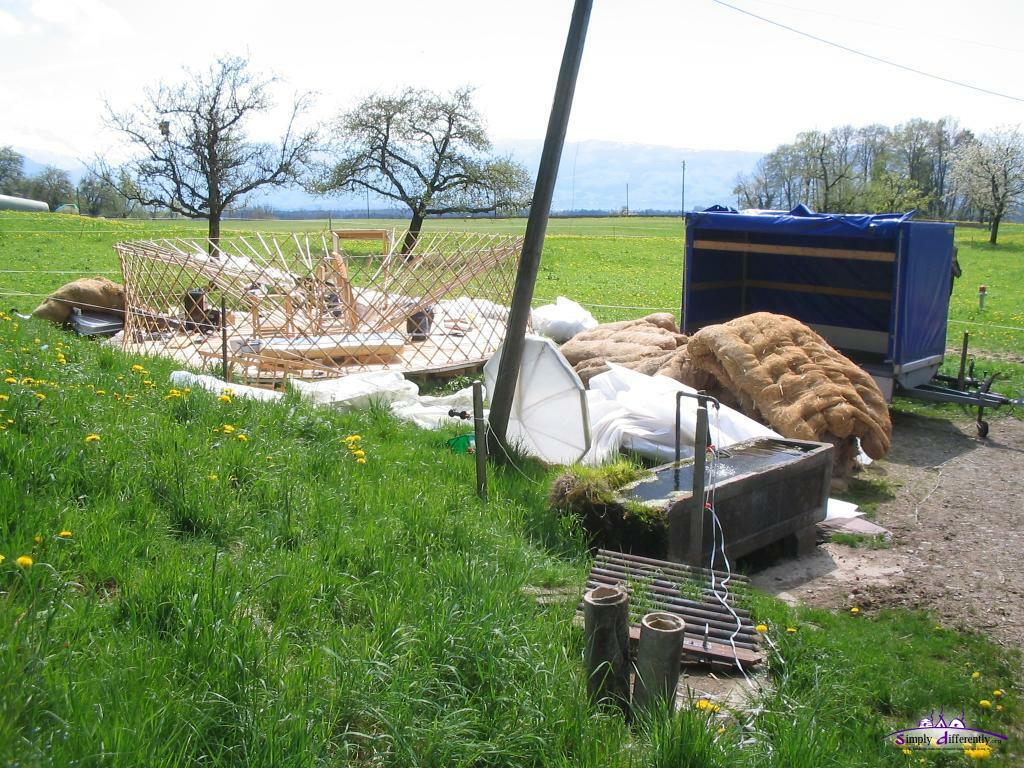 2008/04/26 12:14  2008/04/26 13:01  2008/04/26 13:52 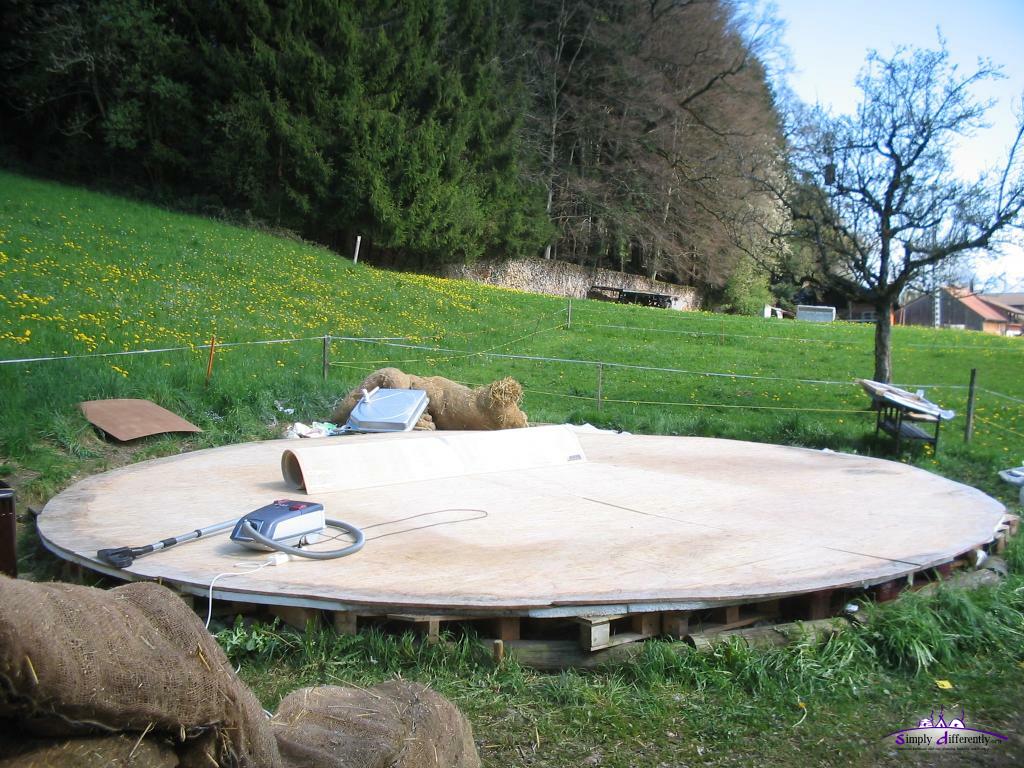 2008/04/26 13:53 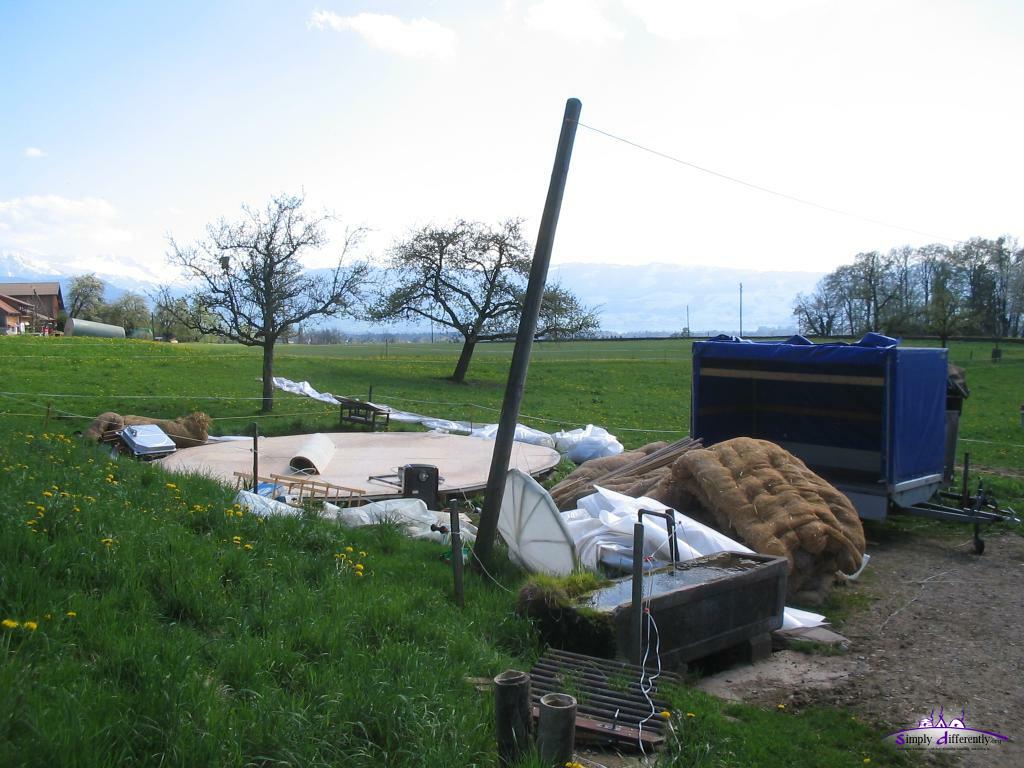 2008/04/26 13:53 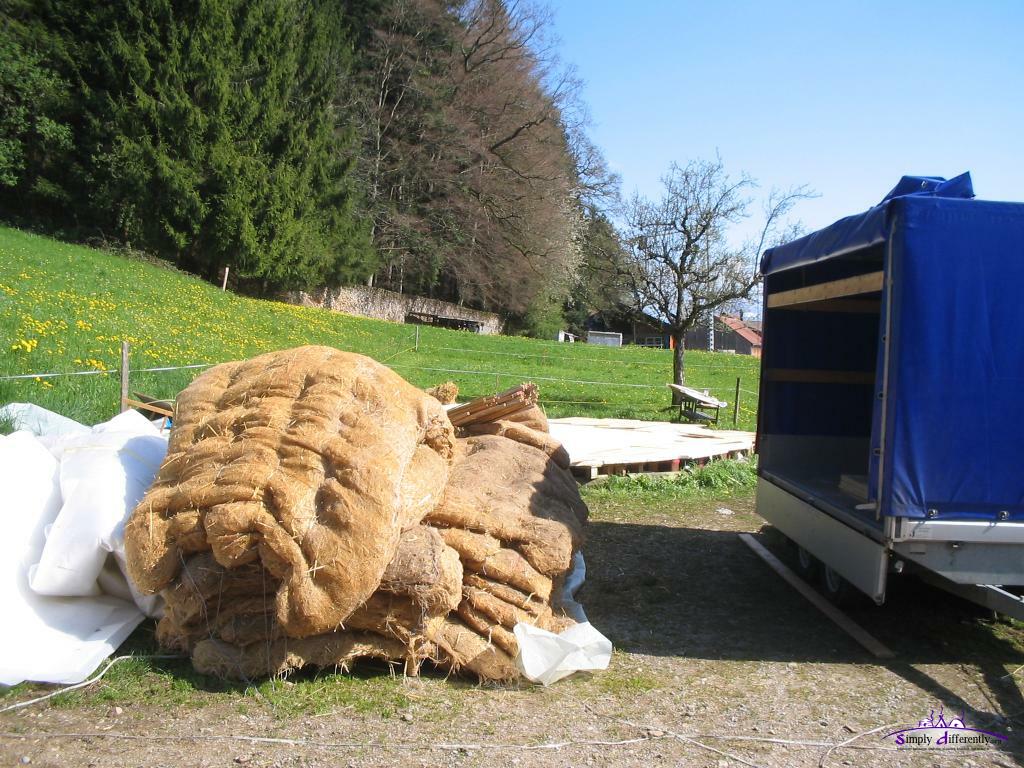 2008/04/26 14:22  2008/04/26 14:22 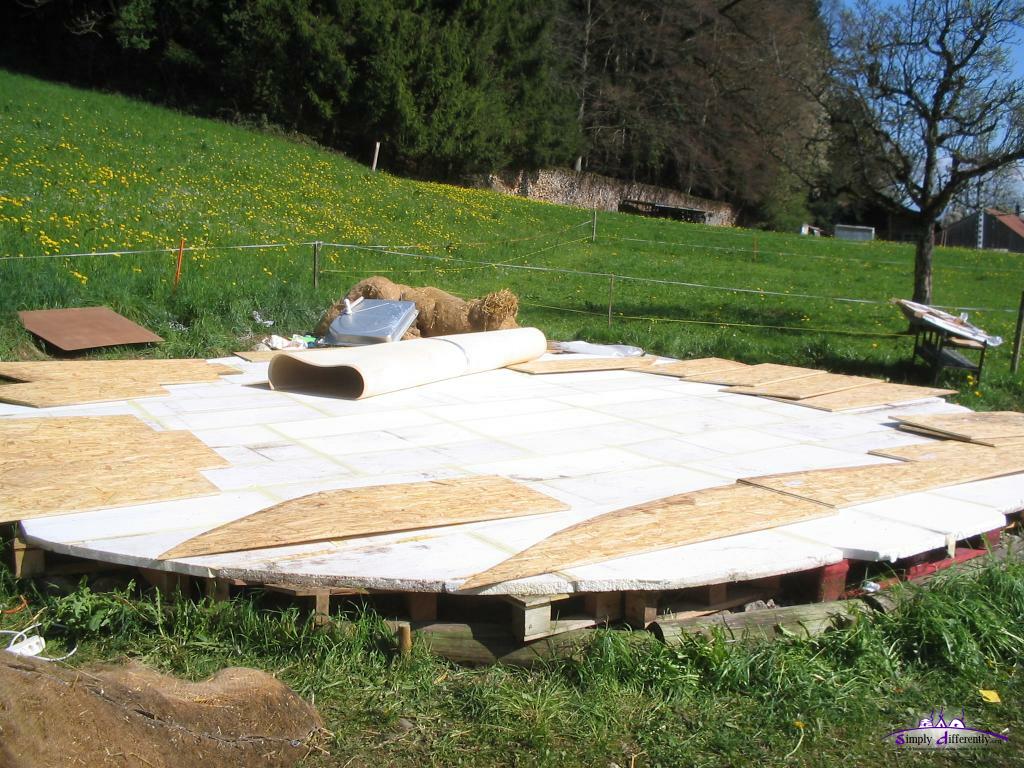 2008/04/26 14:22 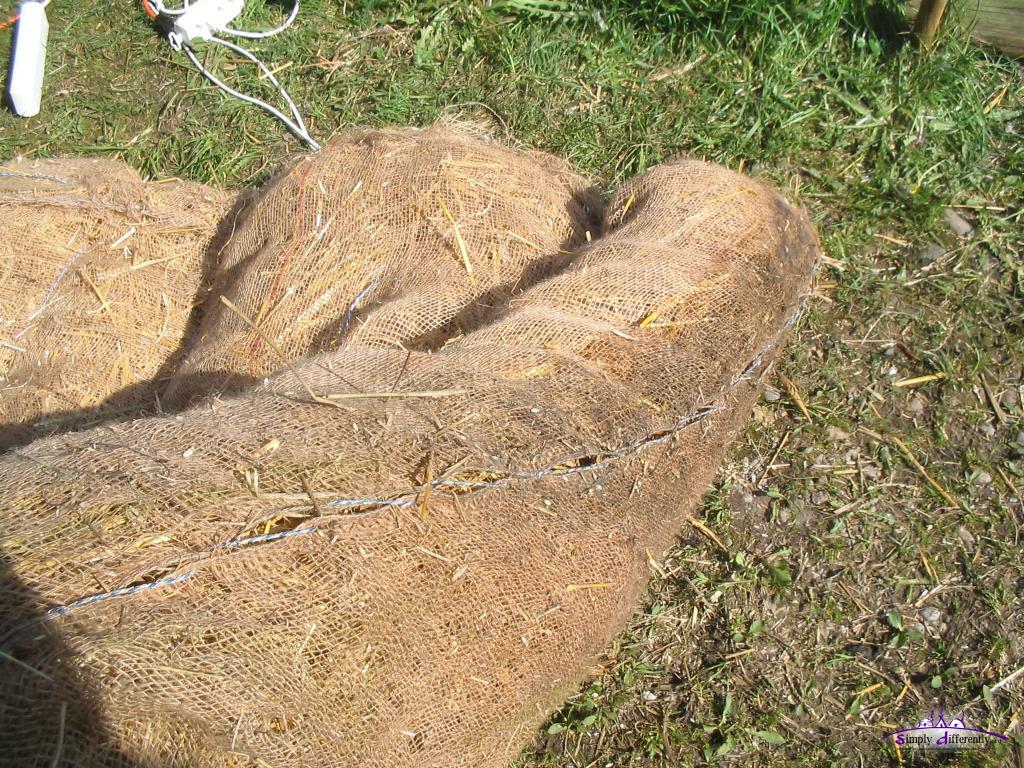 2008/04/26 14:23 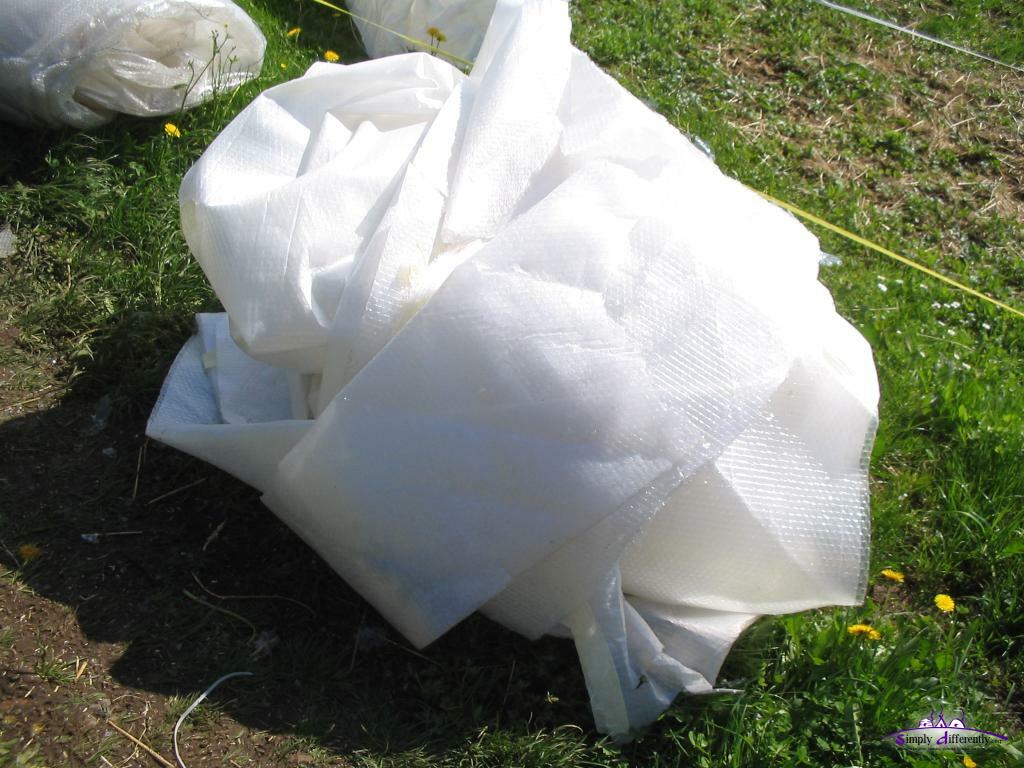 2008/04/26 14:23  2008/04/26 14:23 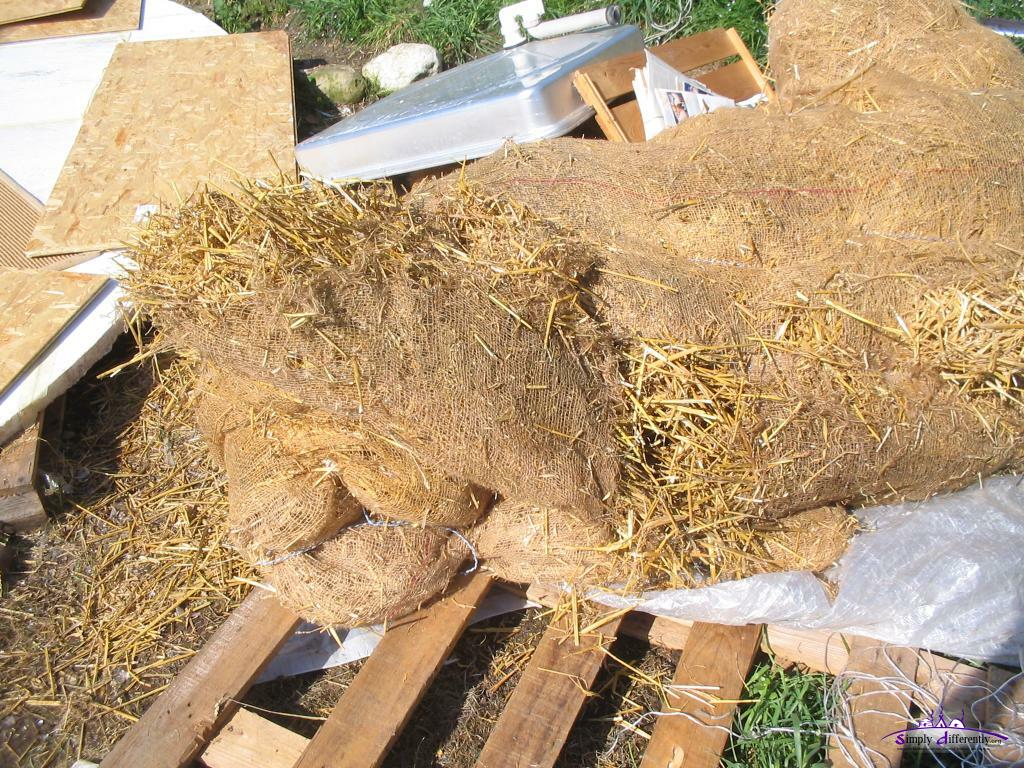 Mice nested within this segment of straw insulation, won't be reused 2008/04/26 14:23 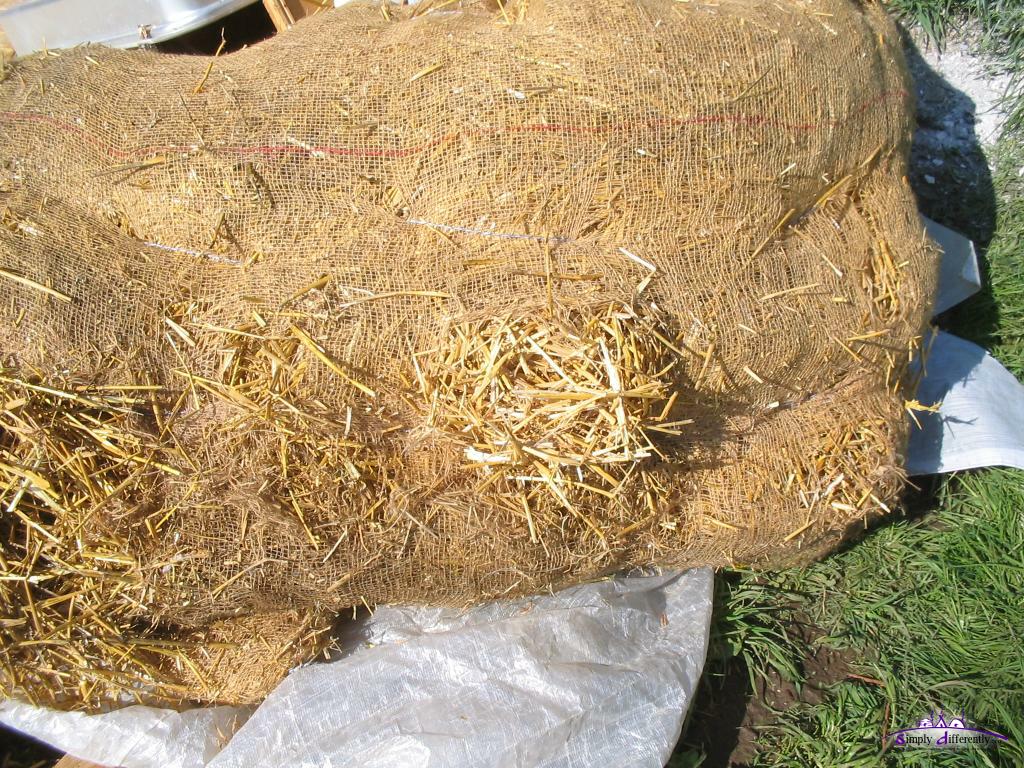 2008/04/26 14:23 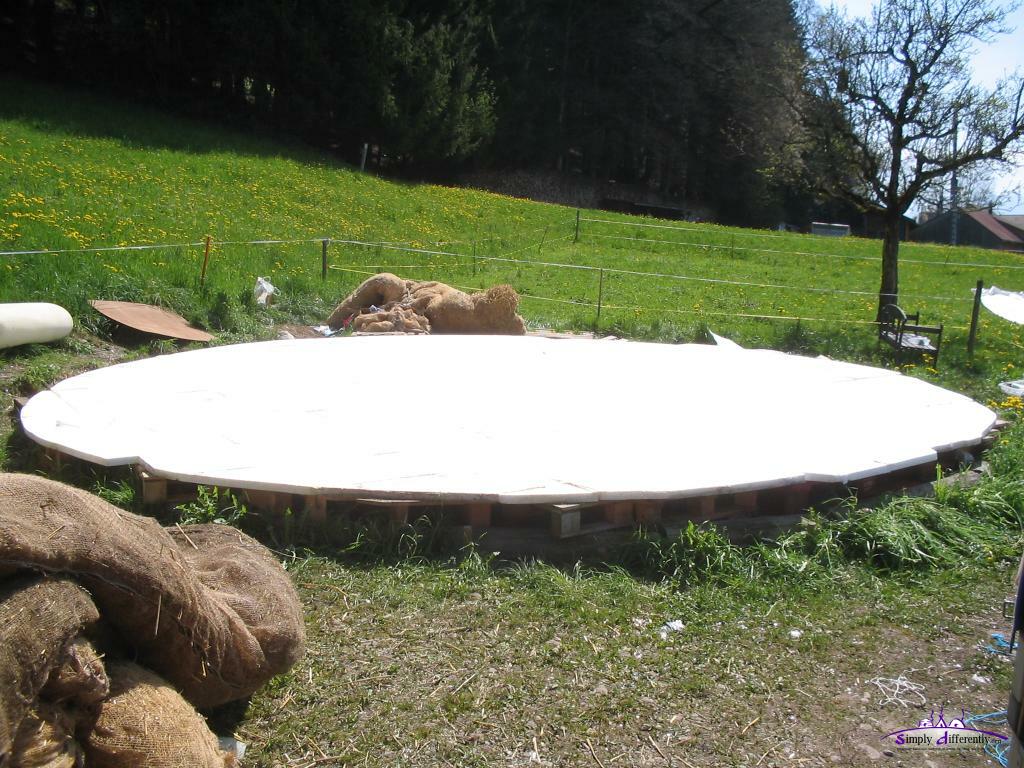 2008/04/27 10:12 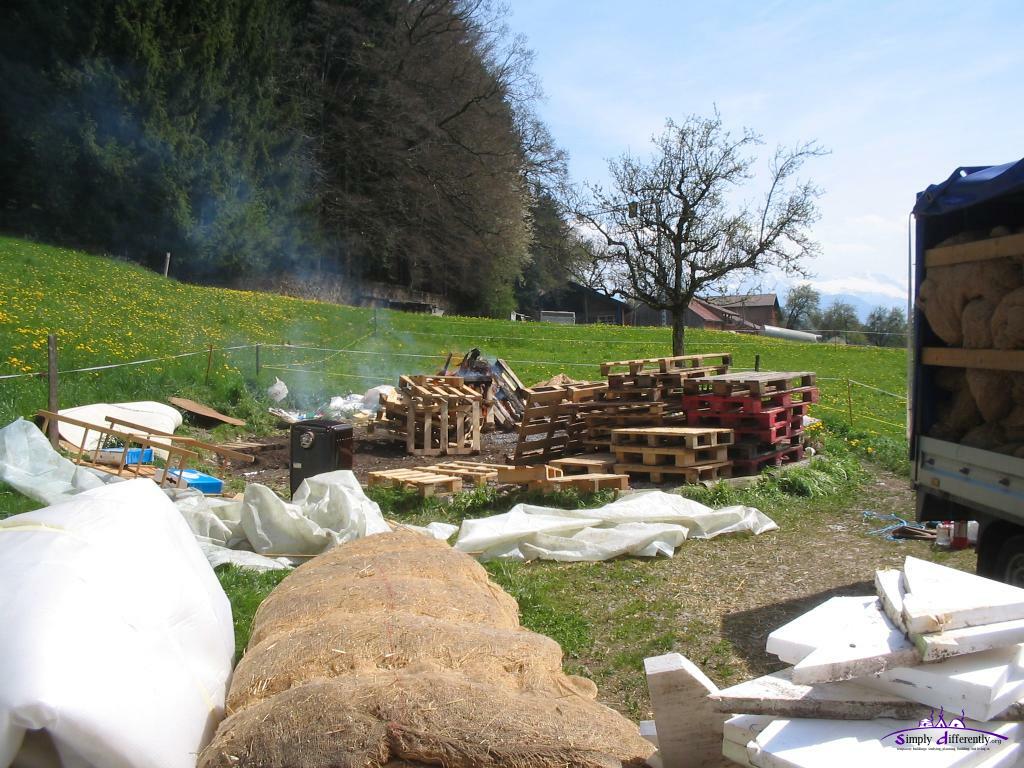 2008/04/27 12:25  2008/04/27 13:07  2008/04/27 13:07  2008/04/27 16:33  And starting my traveling with my recumbent . . . 2008/04/27 16:54 20. 4. 2008: Last Days, Total Wood Usage & Larger Skylights
Total Wood Usage It has been warmer and I didn't fire the stove anymore the last week - so I can conclude now the last winter season 2007/2008 total wood usage of 27 boxes = 1.58 ster or m3 loose wood, hard and soft wood mixed (50%/50% apprx). I fired the stove from November 2007 until 3rd week of April 2008, total 23 weeks. Skylights
Here a few photos of the skylights I made during the last few days:
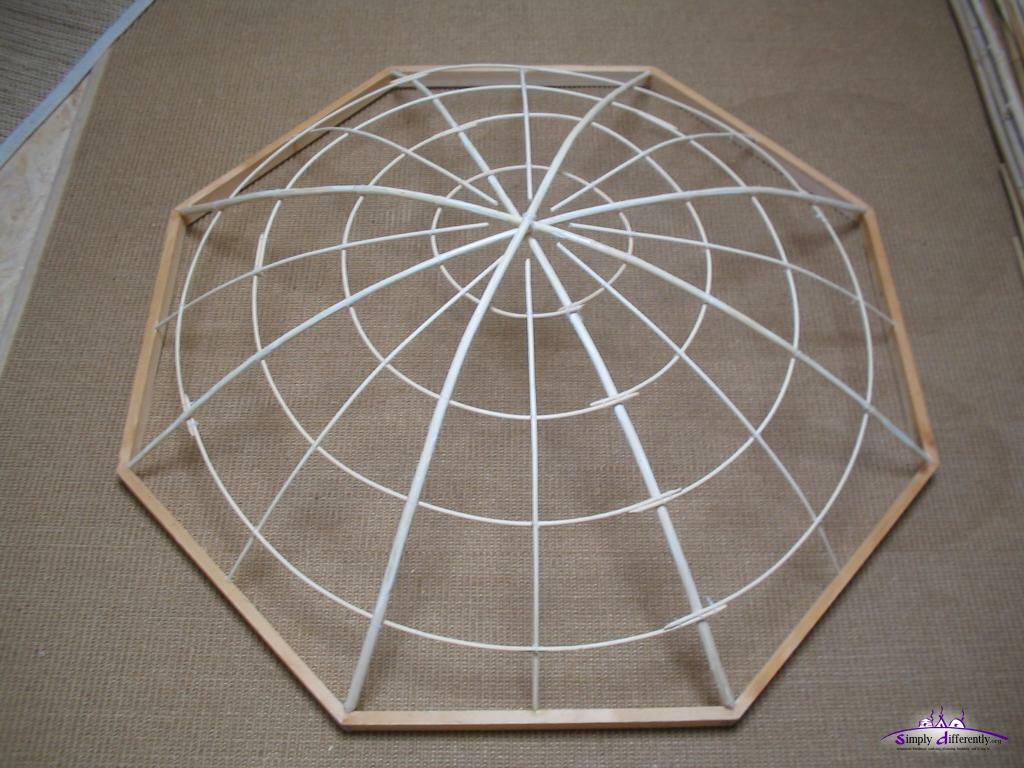
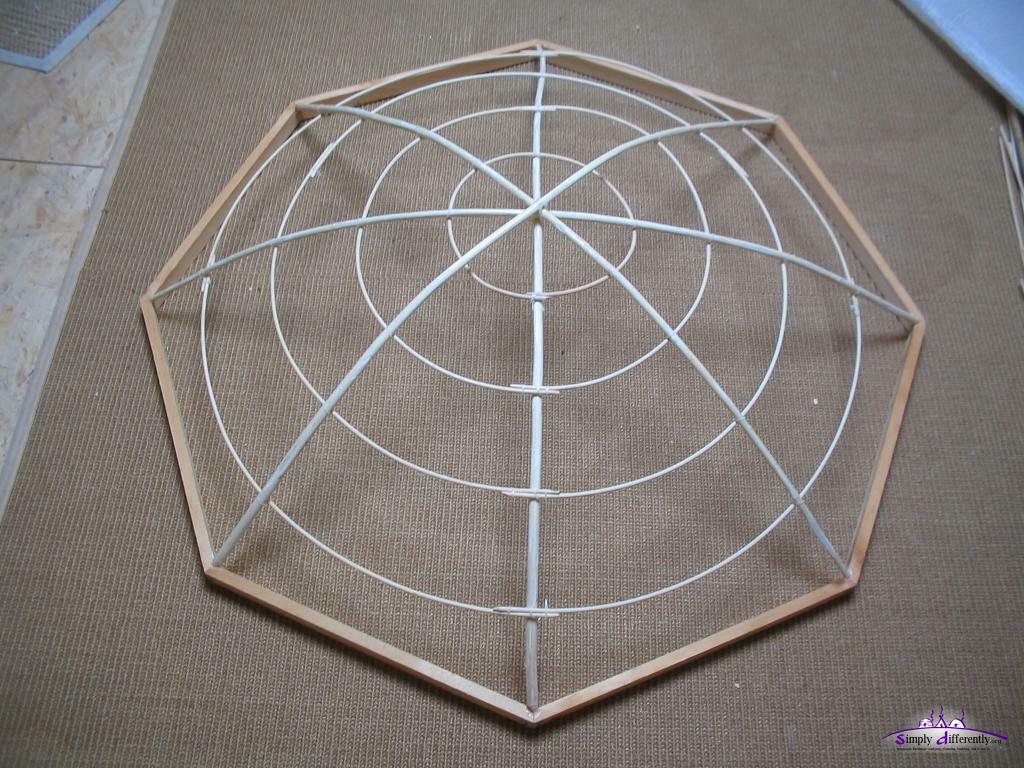
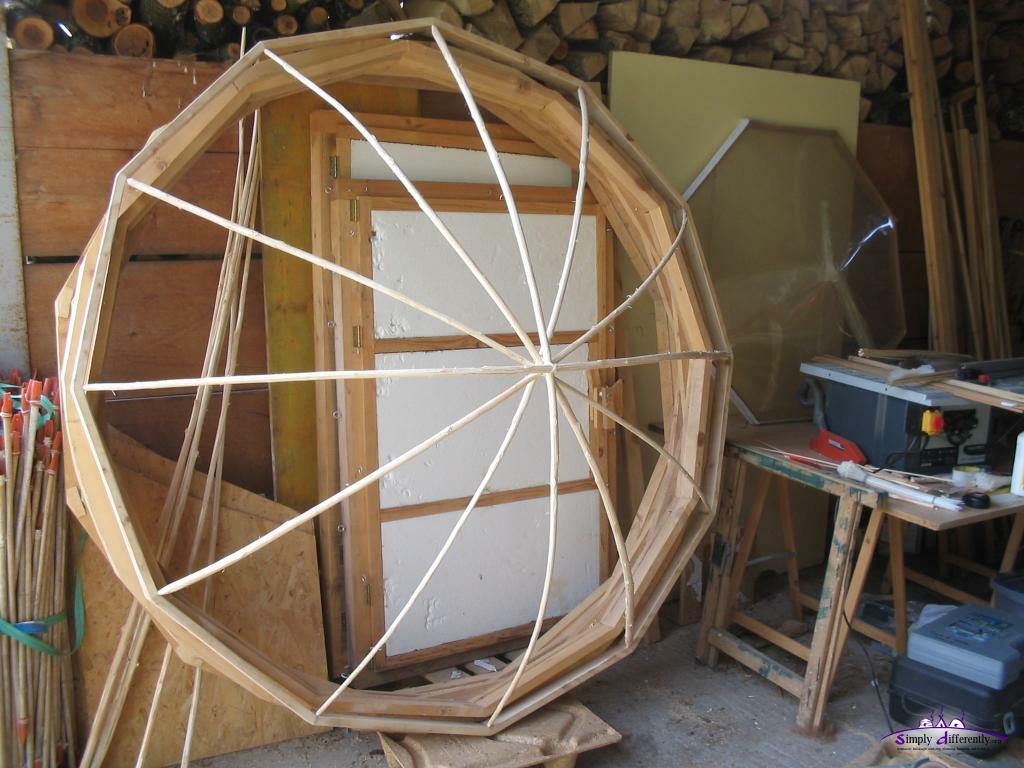 195cm crown-wheel/toono with skylight 12 willow bows 2008/04/20 13:41 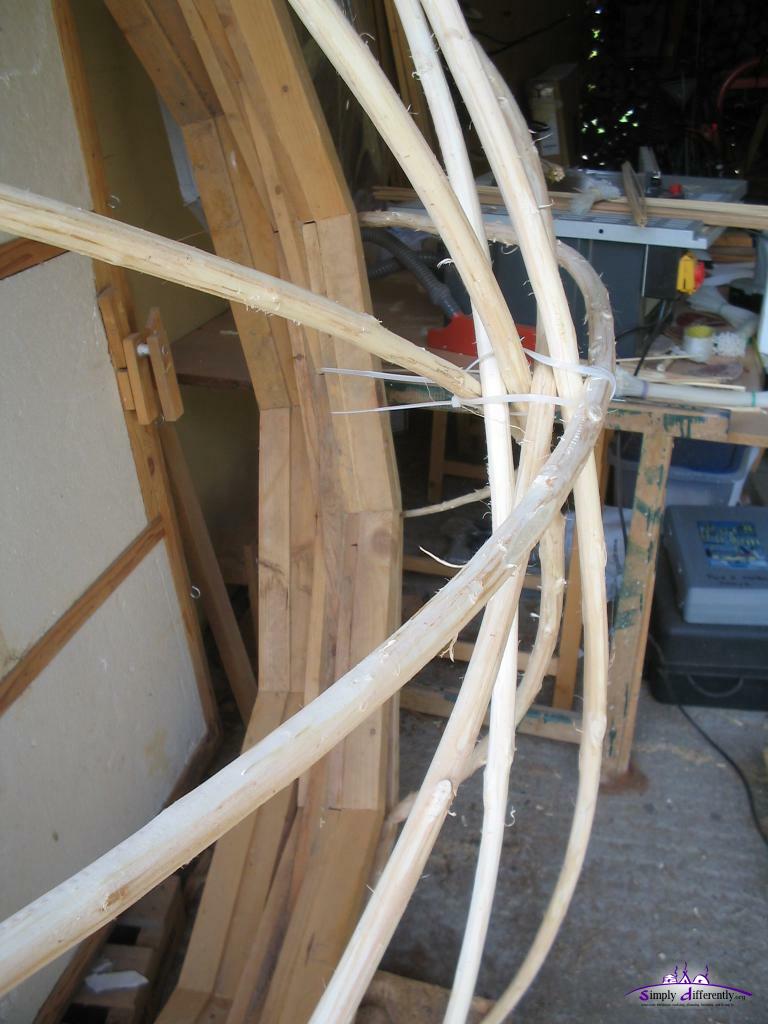 195cm crown-wheel/toono & skylight (closeup) 2008/04/20 13:41 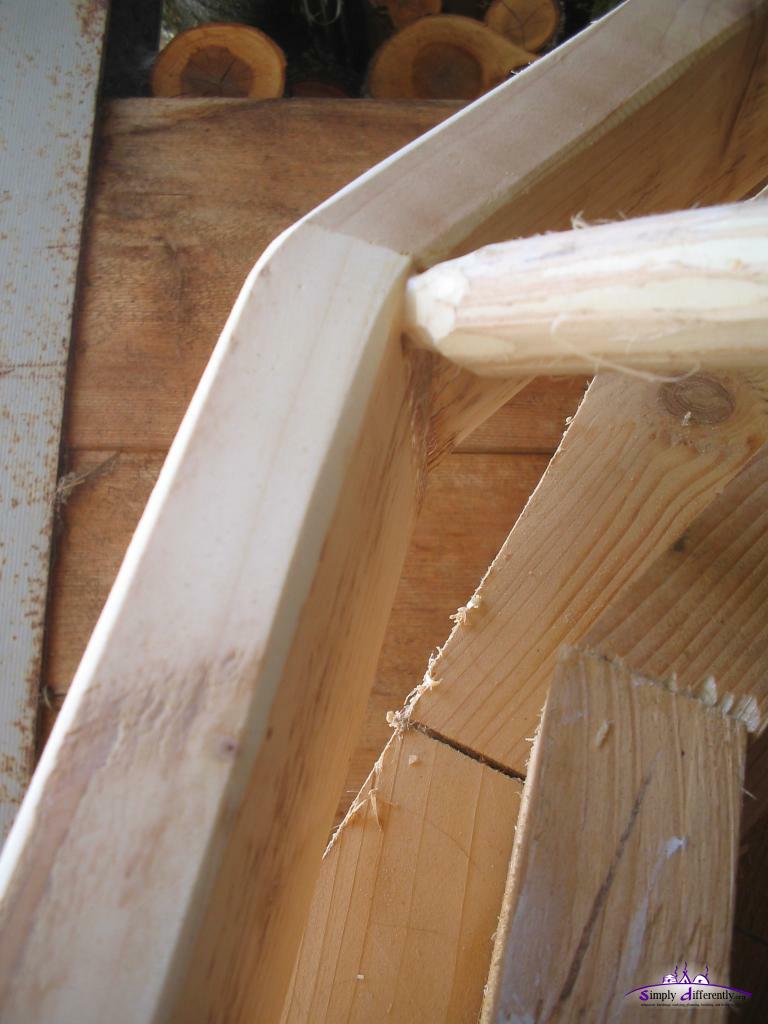 195cm crown-wheel/toono & skylight (closeup) 2008/04/20 13:41 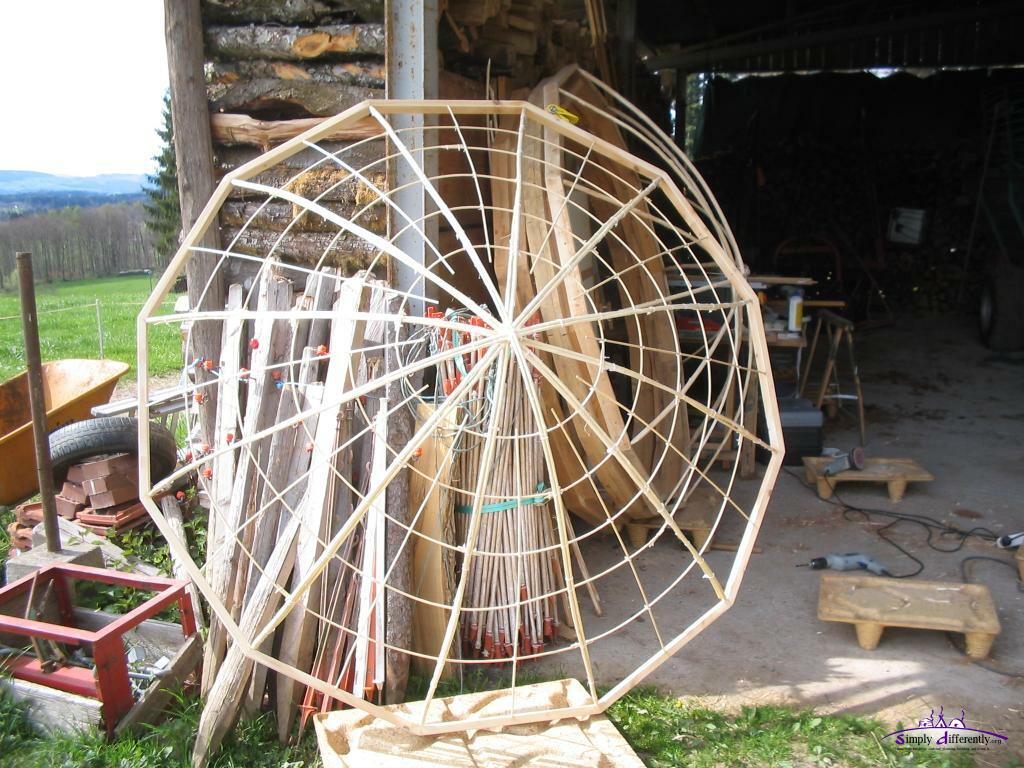 195cm skylight, 12 segments, 12 double willow bows, and fine grided with 5mm thick bamboo 2008/04/20 13:42 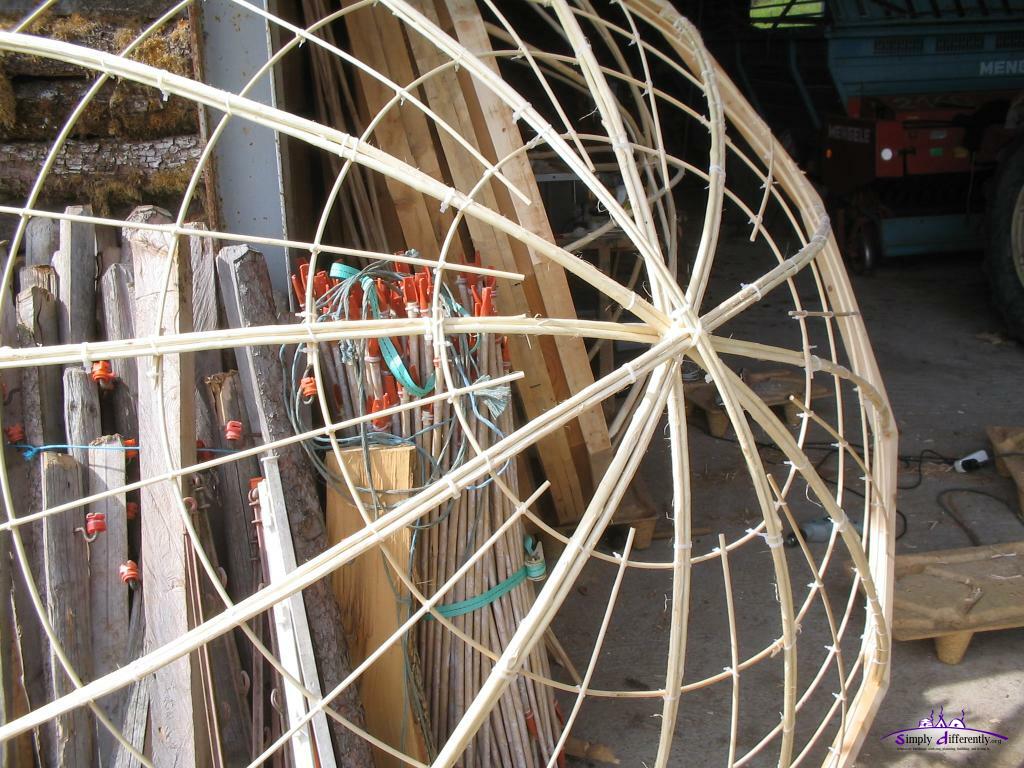 195cm skylight, 12 segments (closeup) 2008/04/20 13:42 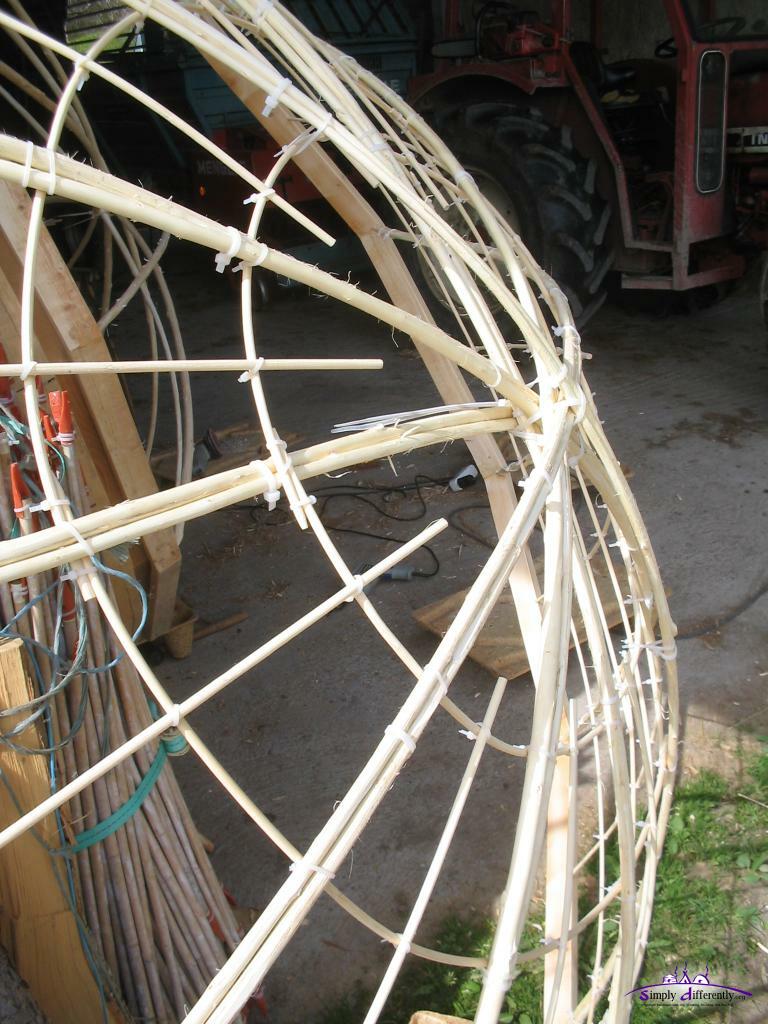 195cm skylight, 12 segments (closeup) 2008/04/20 13:42 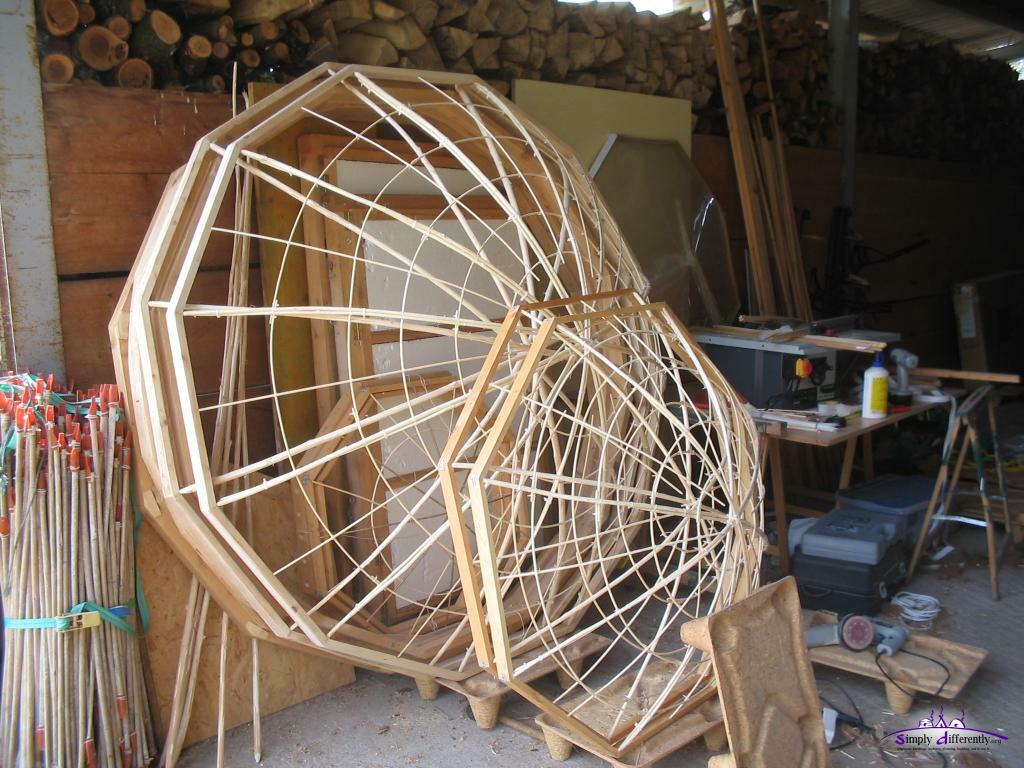 2x 195cm skylights, 2x 122cm skylights 2008/04/20 13:54  3 skylights: 195cm (12 segments), 122cm (8 segments), 90cm (8 segments) 2008/04/20 13:50 Details for the 190cm skylights:
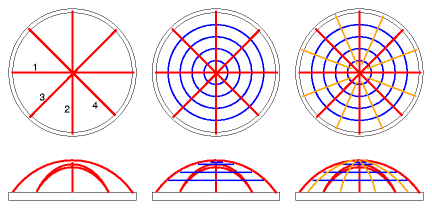
Crown-wheels/toono & skylights (for my own inventory):
so total 6 crown-wheels for 6 yurts (4m - 9.5m diameter), something like 1x 4m, 3x 6.4m, 1x 8m, 1x 9.5m.
15. 4. 2008: Rain, Sunshine, Snow
In about a week I plan to take down the yurt and put all my stuff in storage and start with a longer bicycle ride through Europe.
I still work on larger skylights (195cm in diameter) using the same technique I tested with the 122cm diameter skylights using willow rods - once I finished them, hopefully within this week (it's a bit too cold outside so the wood glue very slowly dries), I will show the results here.
7. 4. 2008. April Weather: No Snow, Snow, No Snow ...
 Freezing morning of 7th April 2008 2008/04/07 07:11 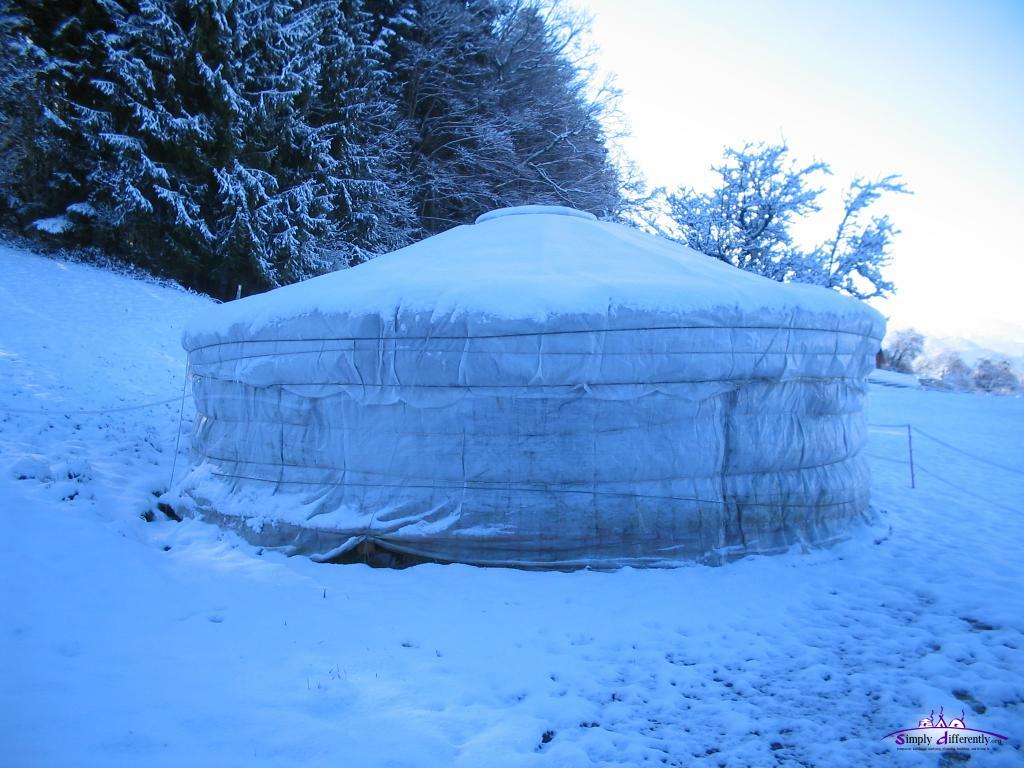 Morning of 7th April 2008 2008/04/07 07:11 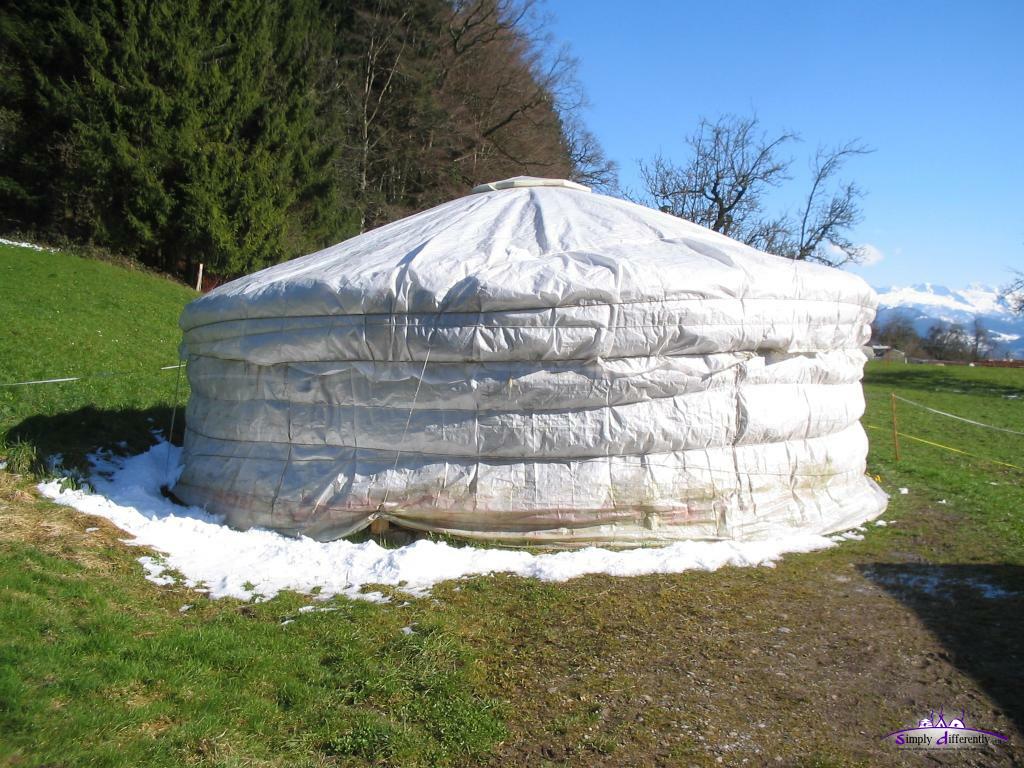 Afternoon of 7th April 2008 2008/04/07 15:04  Sunset of 7th April 2008 2008/04/07 17:27
I fired the stove in the morning 1-2 hours as it cooled significantly down due cold winds; in the afternoon the sun warmed up the yurt further almost to summer temperatures.
6. 4. 2008: April Weather: Snow, No Snow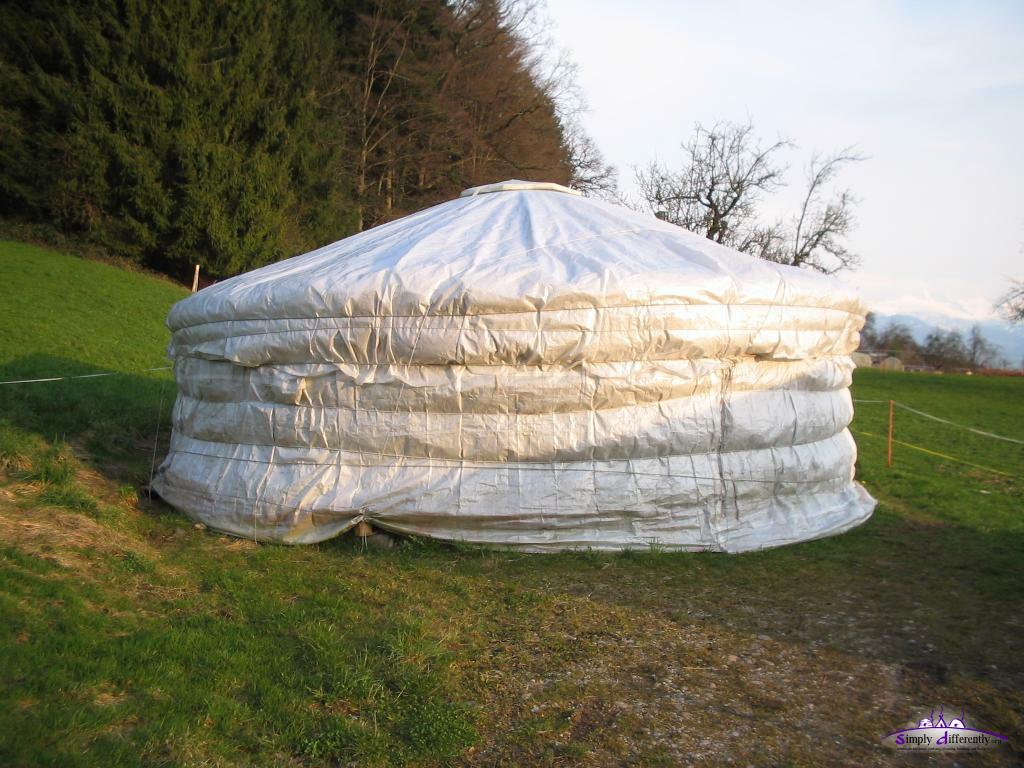 Yurt in sunset of 5th April 2008 2008/04/05 16:59 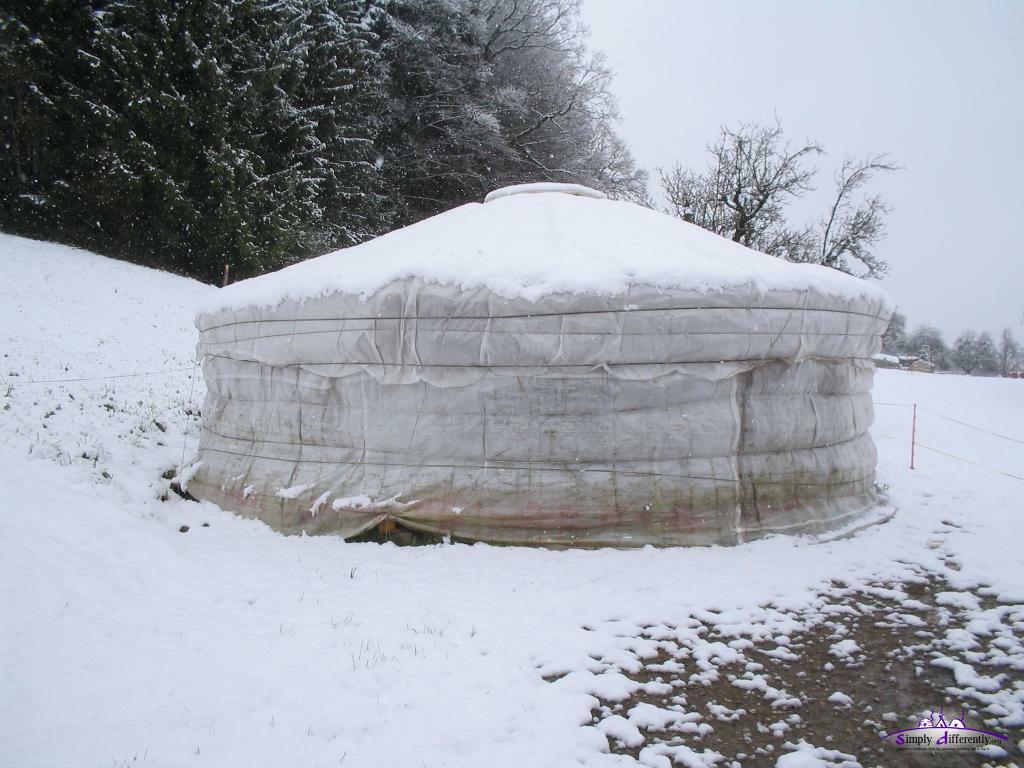 Snow in the morning 2008/04/06 08:55 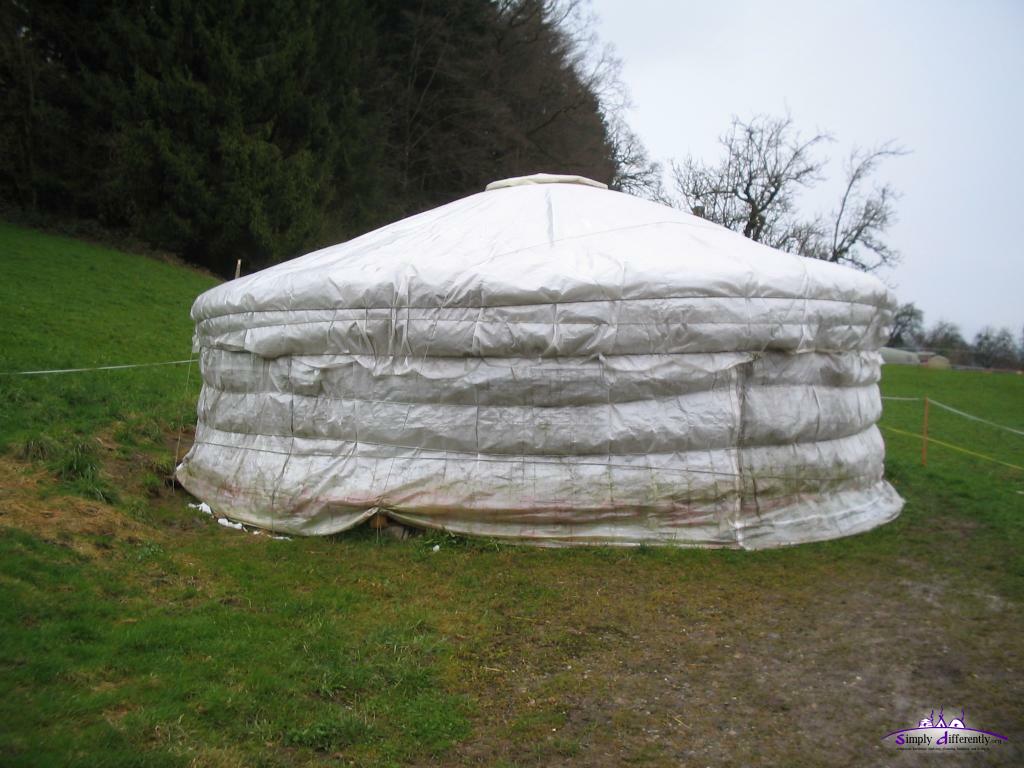 Snow gone in the evening 2008/04/06 16:01 I used this last winter season now 26 boxes of wood (17 boxes = 1 ster or 1m3 chopped wood) which gives 1.52 ster/m3 wood (apprx. 0.75m3 compact wood), maybe another 2 boxes until temperatures are high enough so the stove is no longer required to heat the yurt. 5. 4. 2008: Skylight RefinedI finished the grids of the skylights I started earlier. At first I tried two different methods:
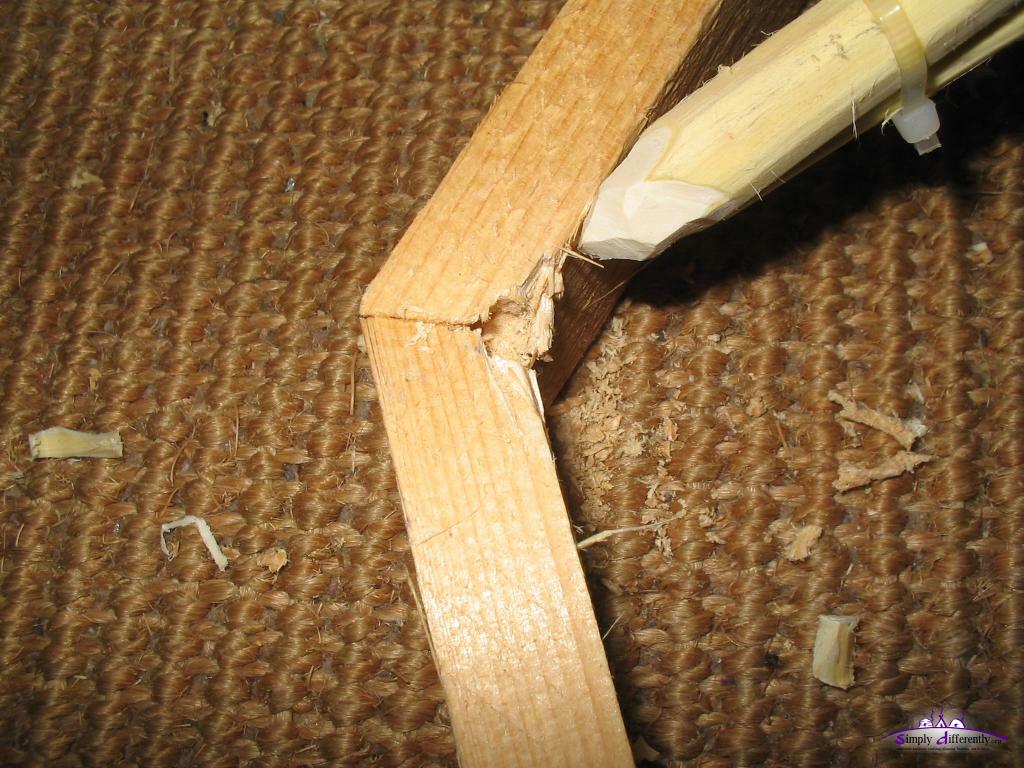
The bamboo rings I made out of 90cm long 4mm thick bamboo split; and the inner most was one bamboo stick soaked in water for 2-3 hours in order to bent it; the other 3 rings were made out of 2x, 3x and 4x 90cm bamboo sticks, and bent respectively assembled dry with cable ties.
The additional subspokes I then aligned below the outermost ring, and above the three smaller rings and again fixated with cable ties.
 Skylight grid: single willow rods with bamboo rings & shortened subspokes 2008/04/05 12:37 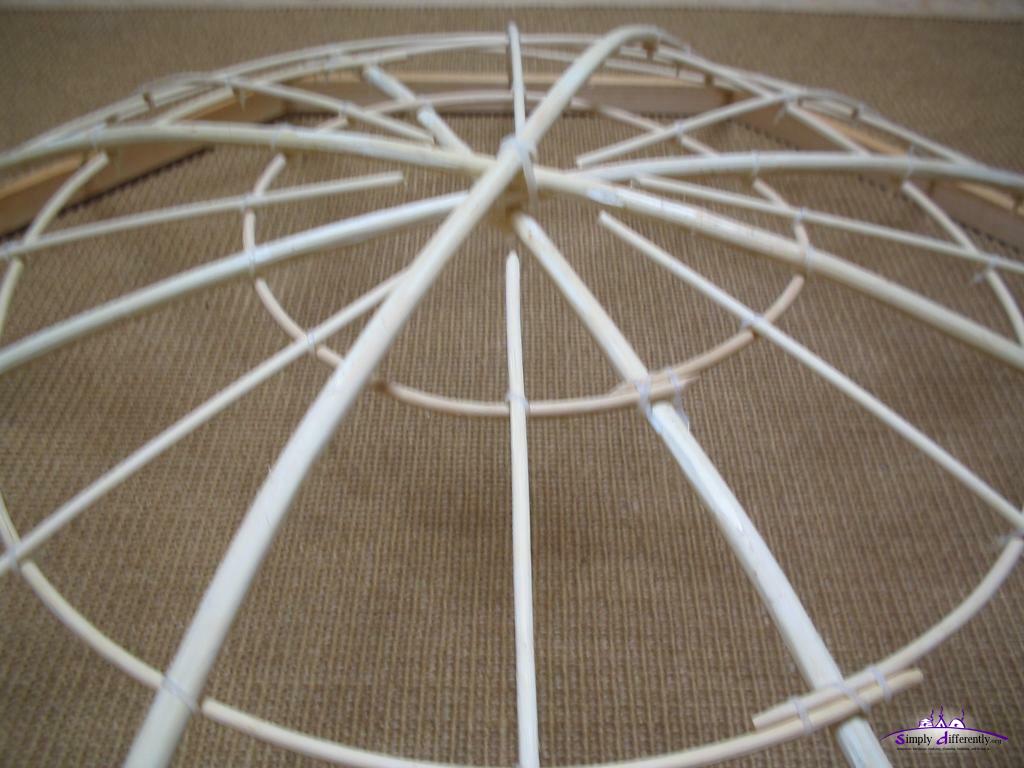 Skylight grid: single willow rods with bamboo rings & shortened subspokes (closeup) 2008/04/05 12:37 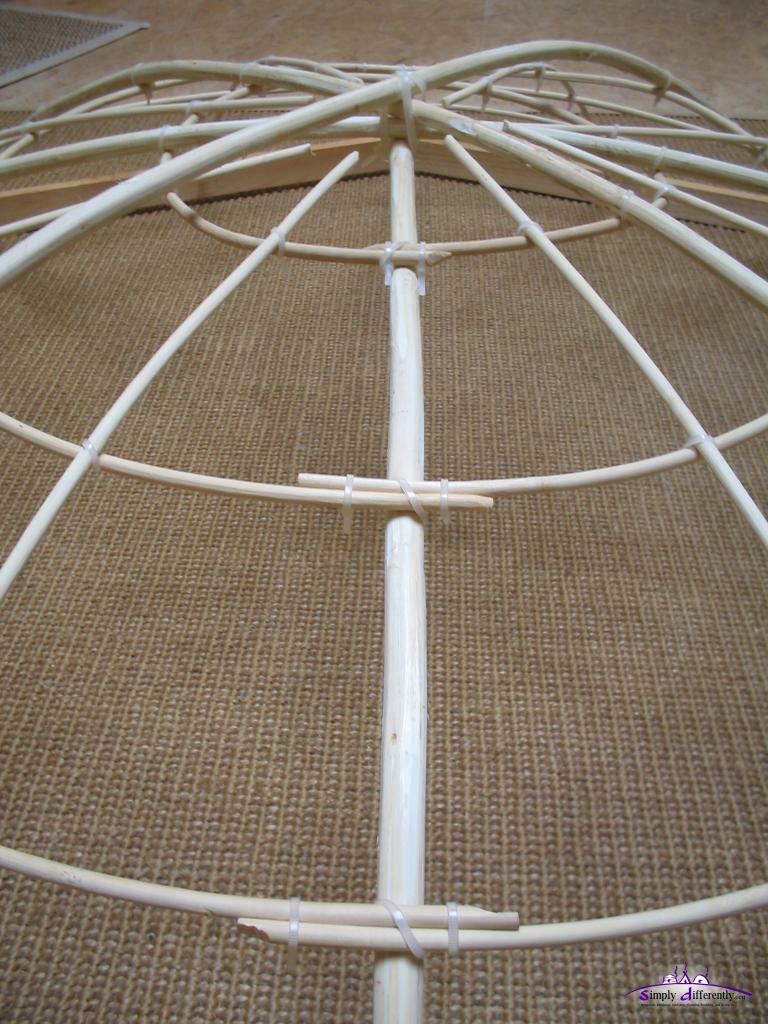 Skylight grid: single willow rods with bamboo rings & shortened subspokes (closeup) 2008/04/05 12:37 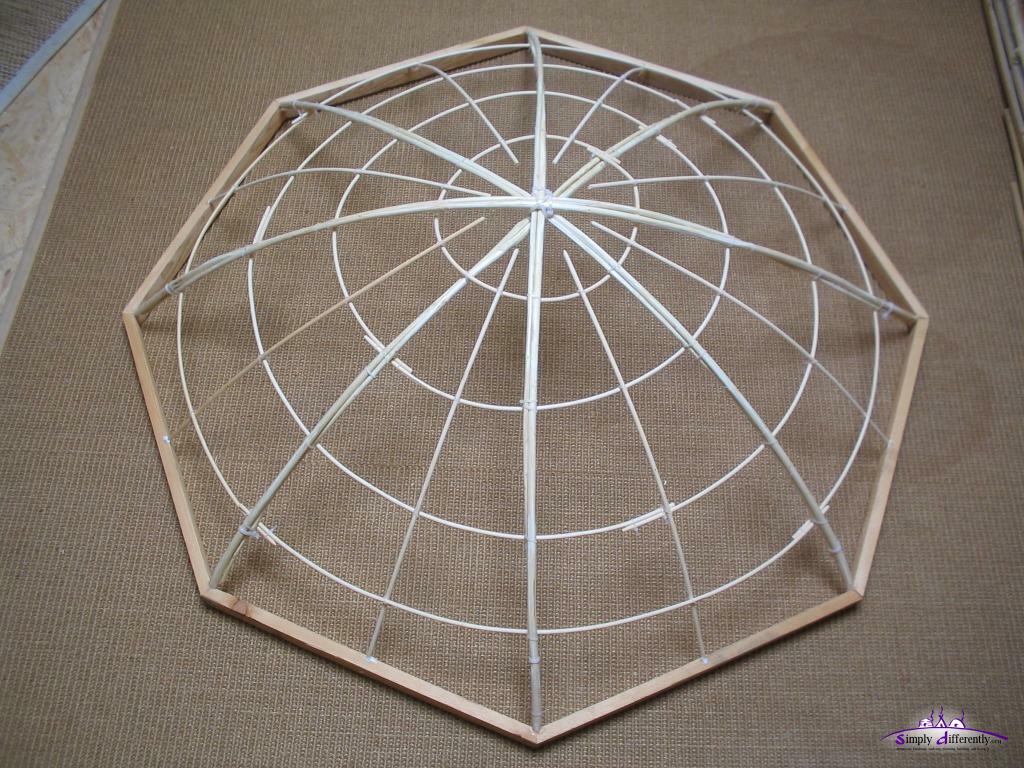 Skylight grid: dual willow rods with bamboo rings & shortened subspokes 2008/04/05 12:39 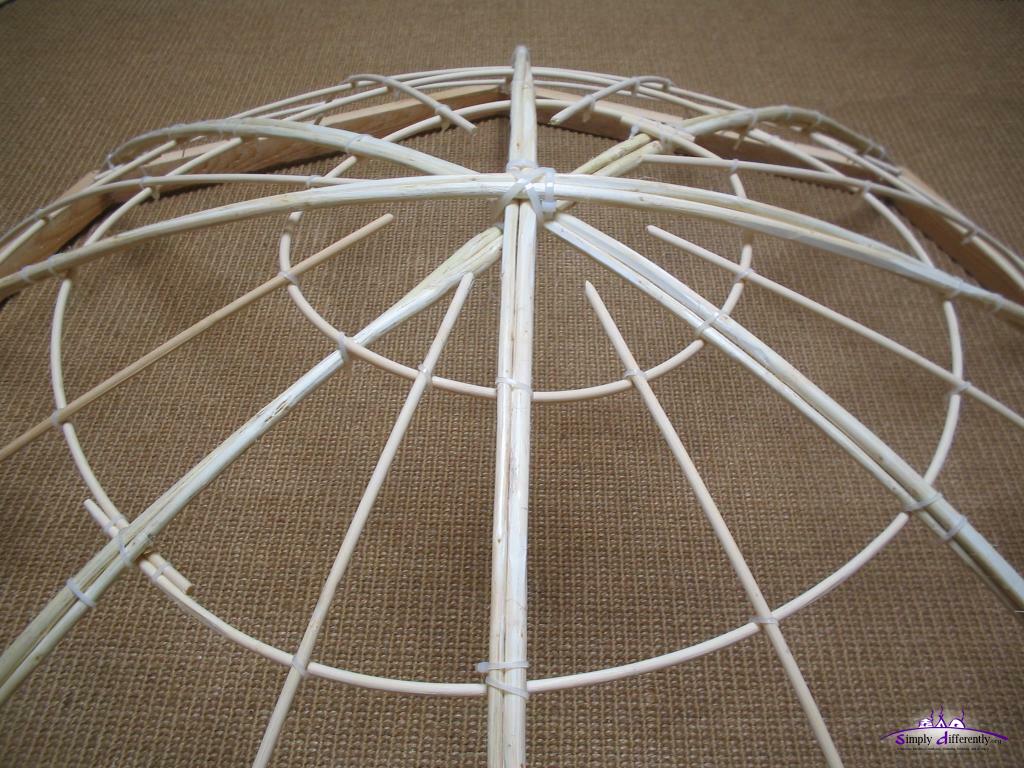 Skylight grid: dual willow rods with bamboo rings & shortened subspokes (closeup) 2008/04/05 12:39 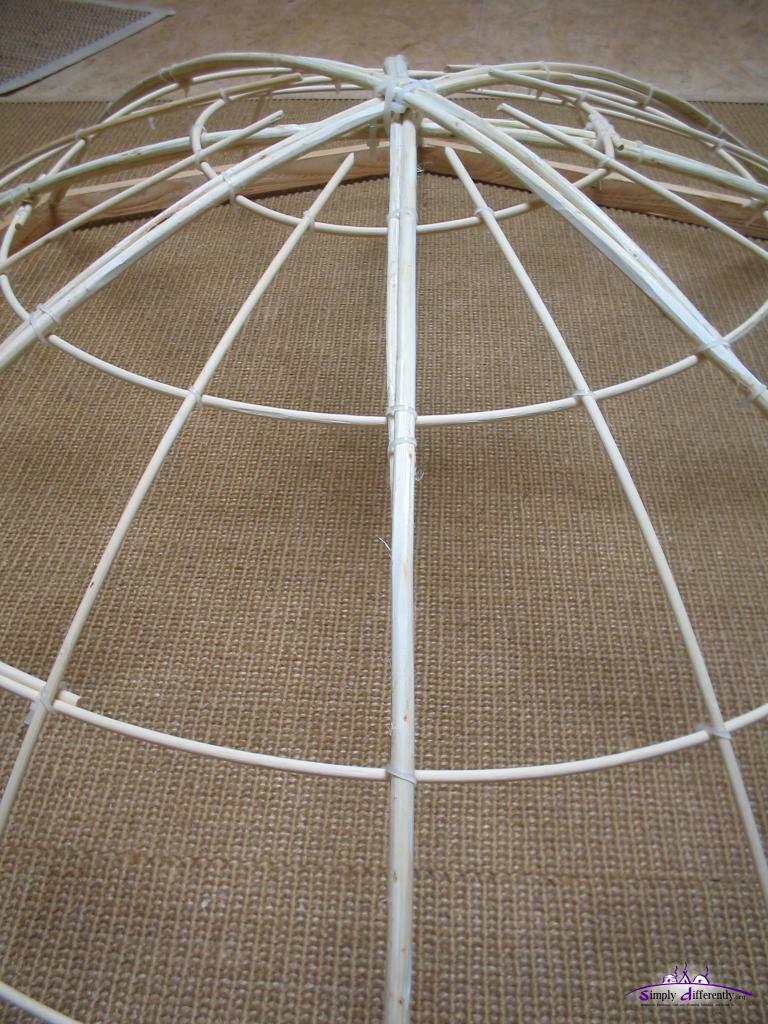 Skylight grid: dual willow rods with bamboo rings & shortened subspokes (closeup) 2008/04/05 12:39 The polygonal frame didn't really interfere with the bamboo rings or the willow bows at all.
30. 3. 2008: Warm DaysToday the temperature reached 20°C outside with foehn, it was a sunny day - inside the yurt the temperature reached 21°C - which maybe was the first day after winter where the straw didn't keep the heat but cooled, otherwise the temperature inside would have gone much higher. 24. 3. 2008: Sunny & Chilly
More snow, temperatures below 0°C in the night, and next morning a clear sky and temperature slowly rising to 3-4°C - and so the snow & ice slides from the roof by itself.
I'm using again more wood to heat the yurt, apprx. 2 boxes of wood per week.
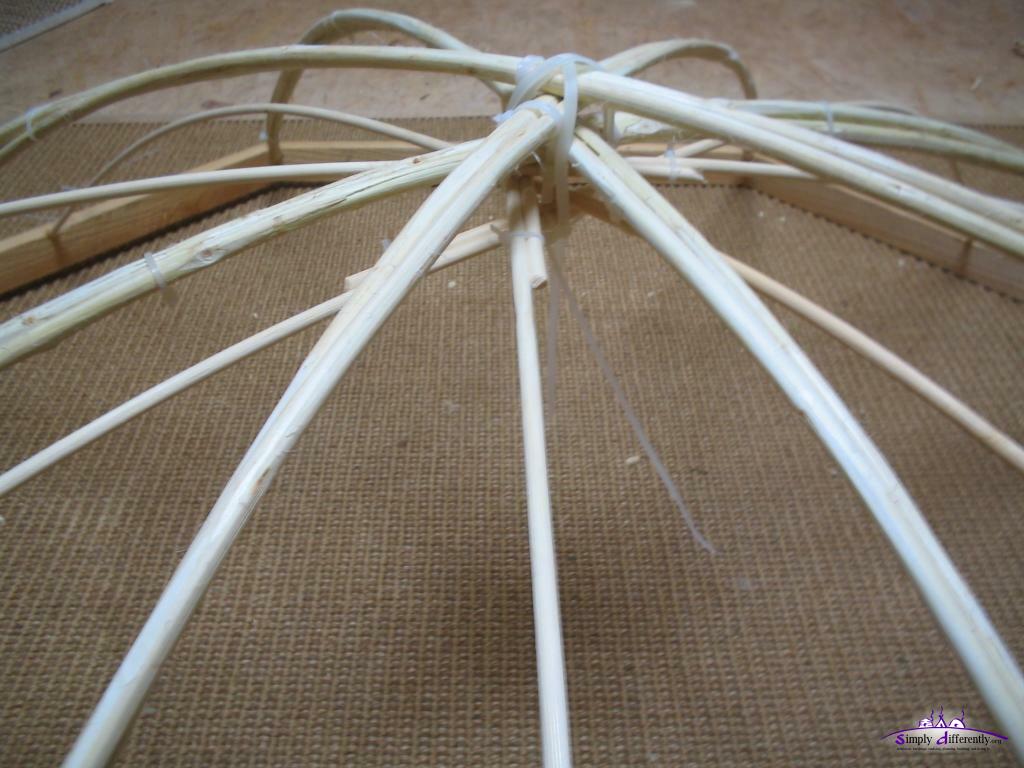
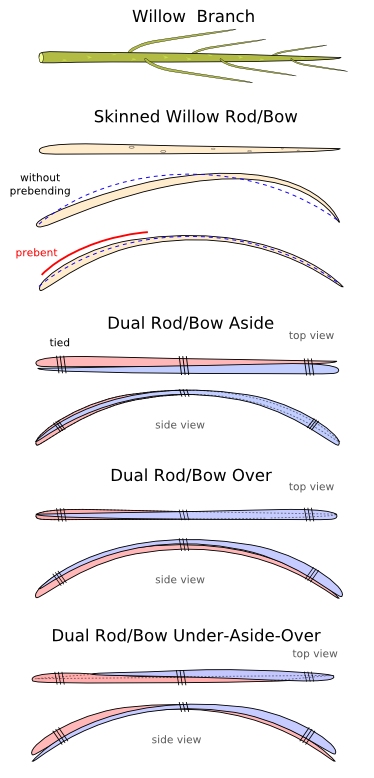
22. 3. 2008: Willow Rod/Bow Based Skylight Grids
Single Rod/Bow: the branch doesn't narrow too quickly, and is moderatly thick, at least 8mm at the narrow end. I noticed, the willow bow is easy to prebend in order to create a symmetric bow.
Double Rod/Bow Under-Aside-Over: two branches are arranged that one branch narrow end goes below the thicker end of the other, aside of each in the middle, and then again the thicker end over the narrow end.
The third example in the photo series below shows that I used bamboo stick connected in the mids of the segment of the octagon (8-sided frame), this was due the length of the bamboo stick as I would have prefered to attach the spoke in the junction frame segment like the other two skylights.
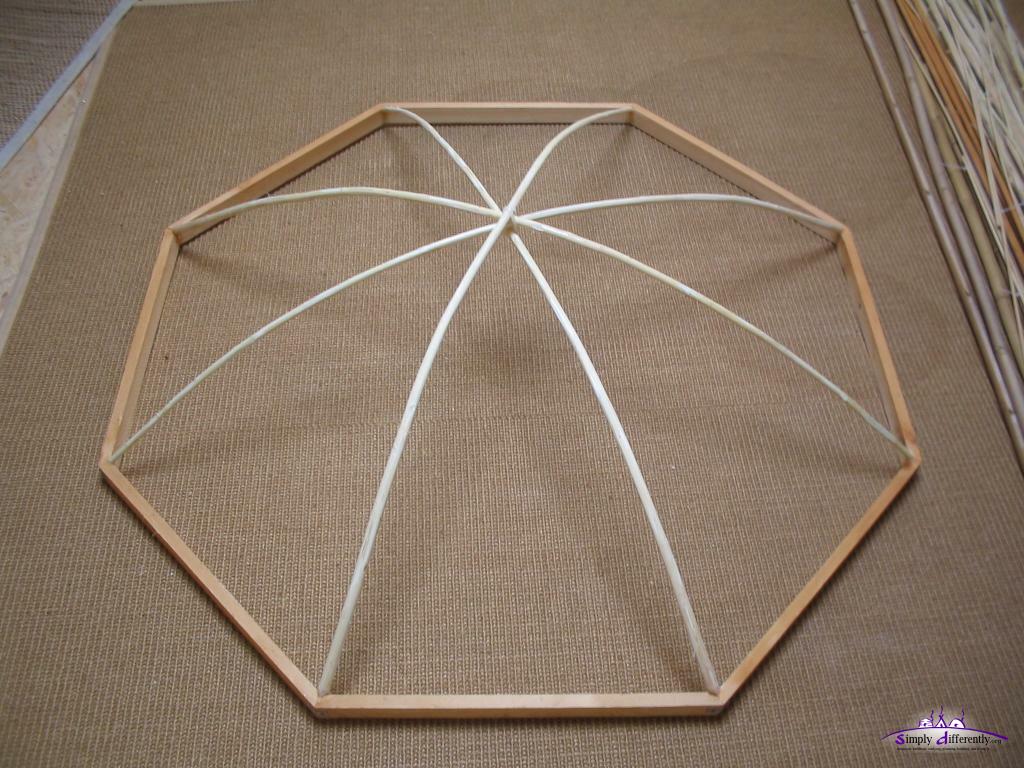 Skylight grid: single willow rod (diameter 122cm) 2008/03/22 12:48 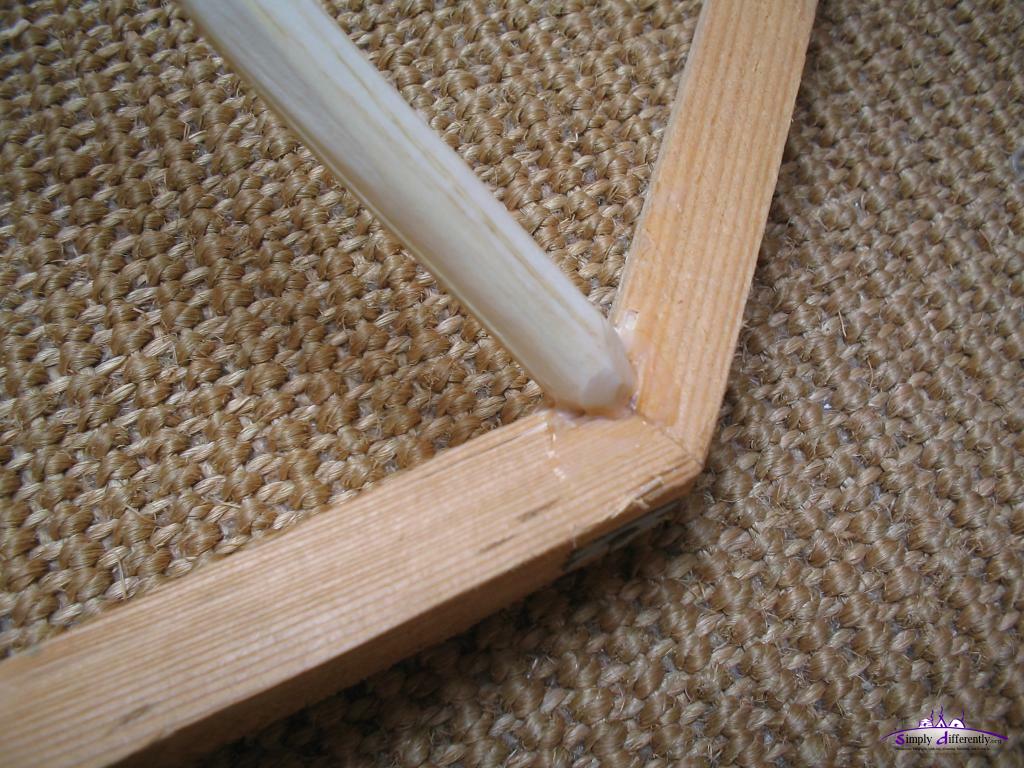 Skylight grid: single willow rod, close up connection to frame 2008/03/22 12:48 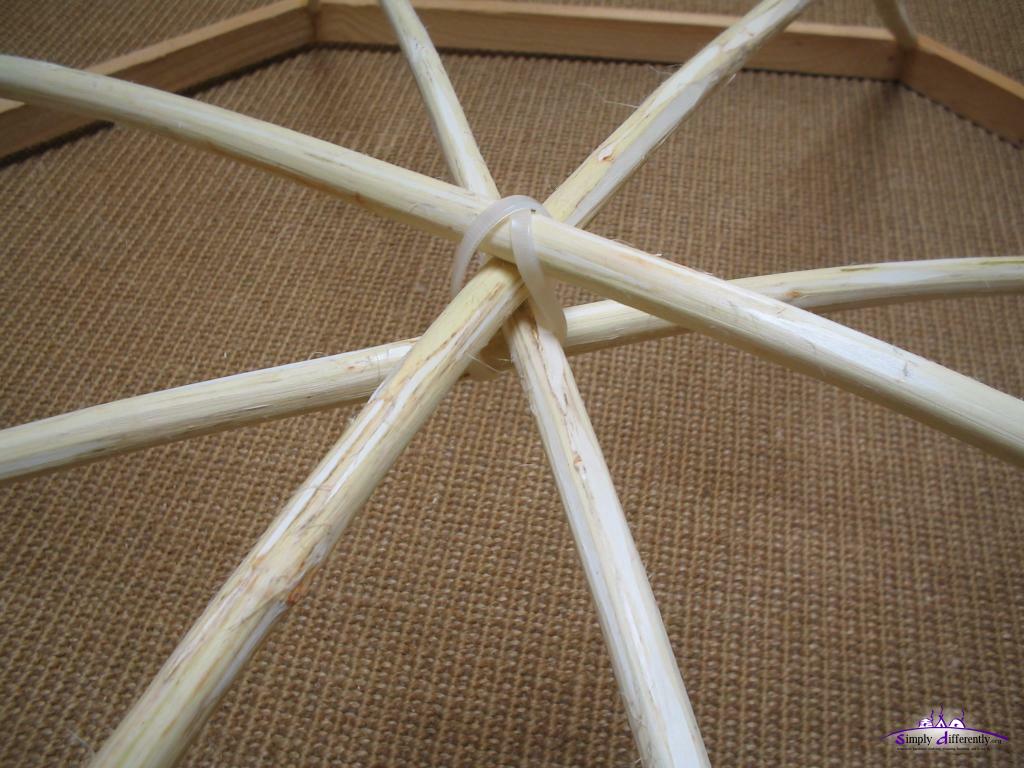 Skylight grid: single willow rod, close up center 2008/03/22 12:48 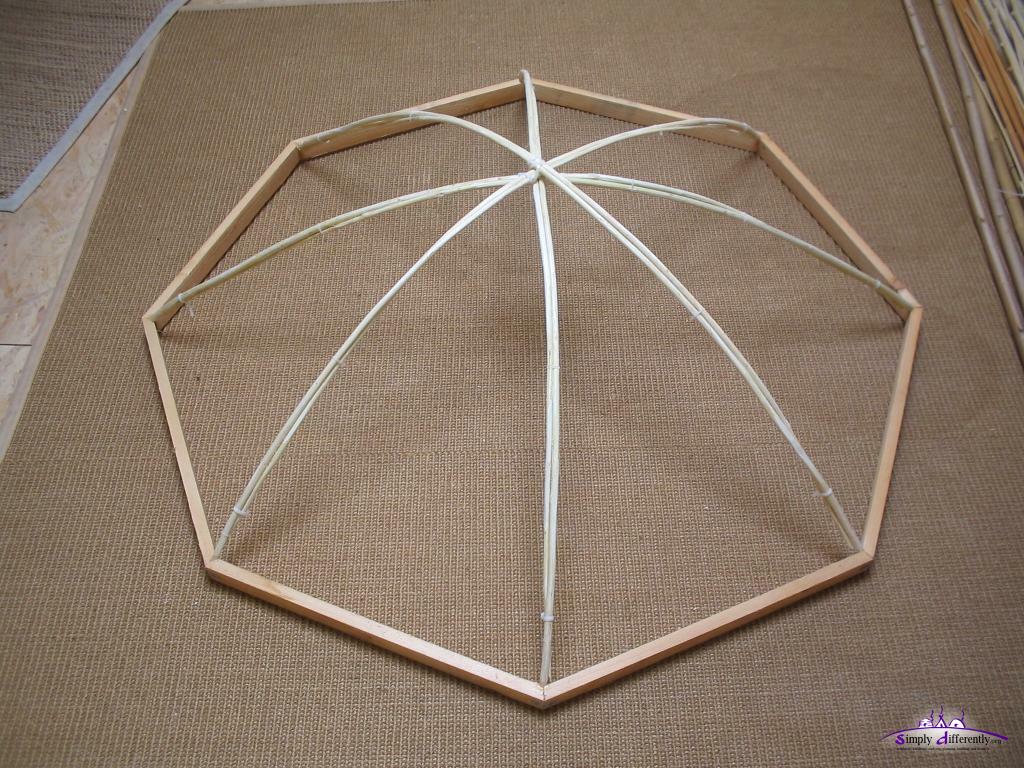 Skylight grid: double willow rods under-aside-over (diameter 122cm) 2008/03/22 12:47 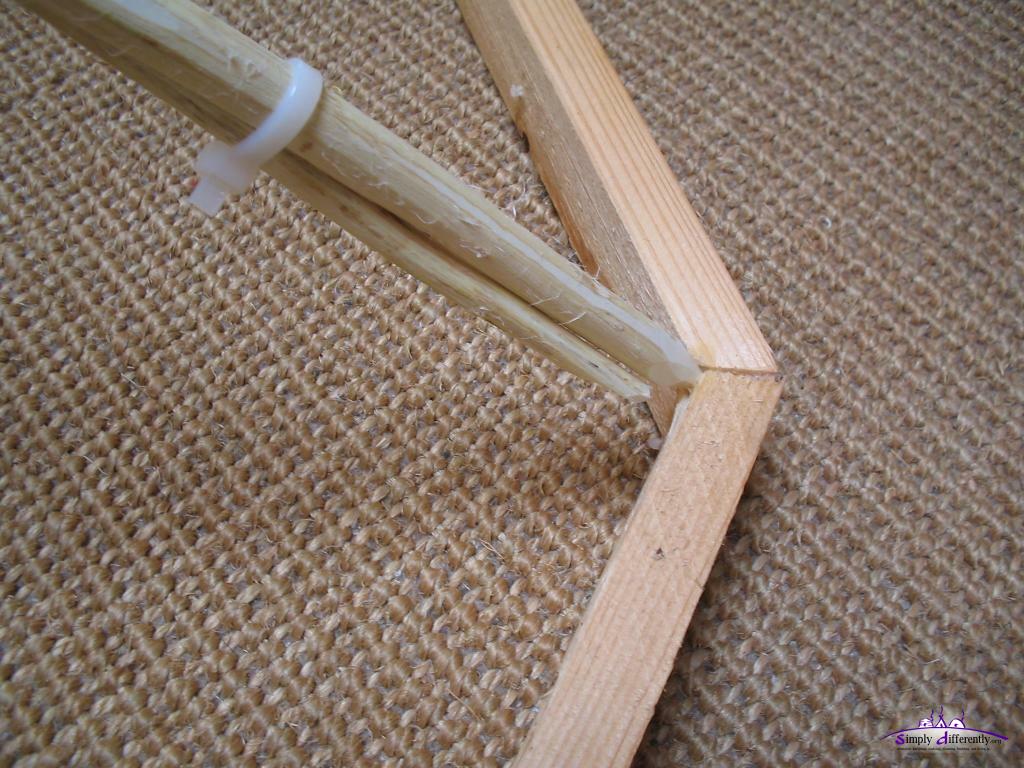 Skylight grid: double willow rods under-aside-over, close up connection to frame 2008/03/22 12:47 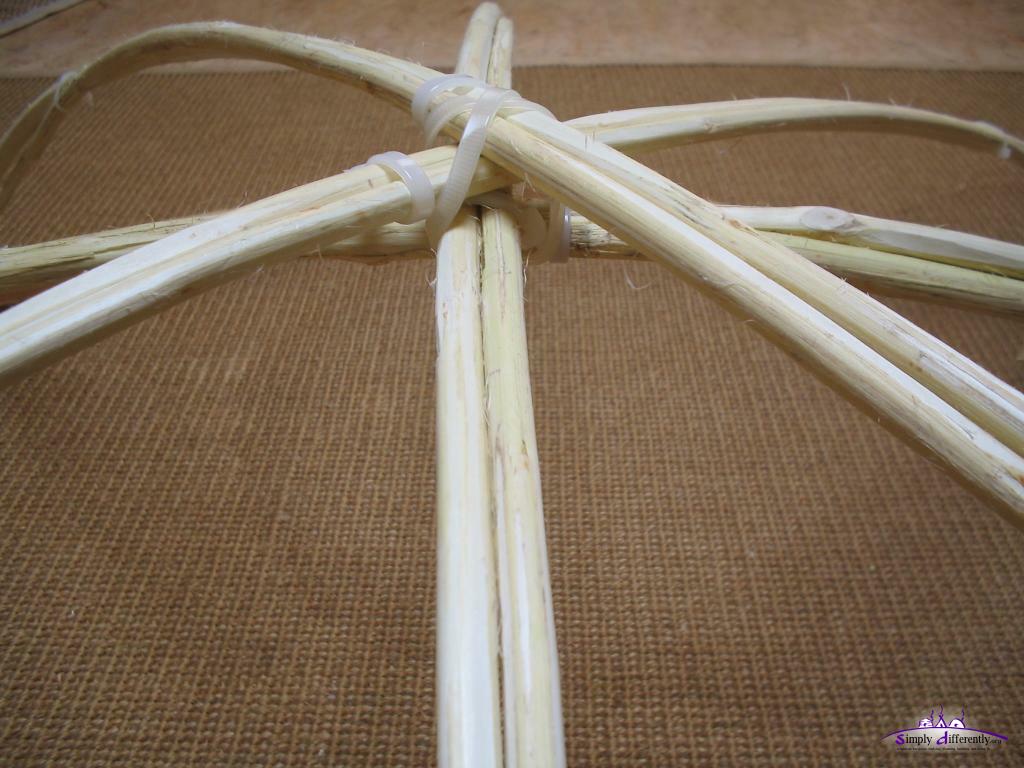 Skylight grid: double willow rods under-aside-over, close up center 2008/03/22 12:47 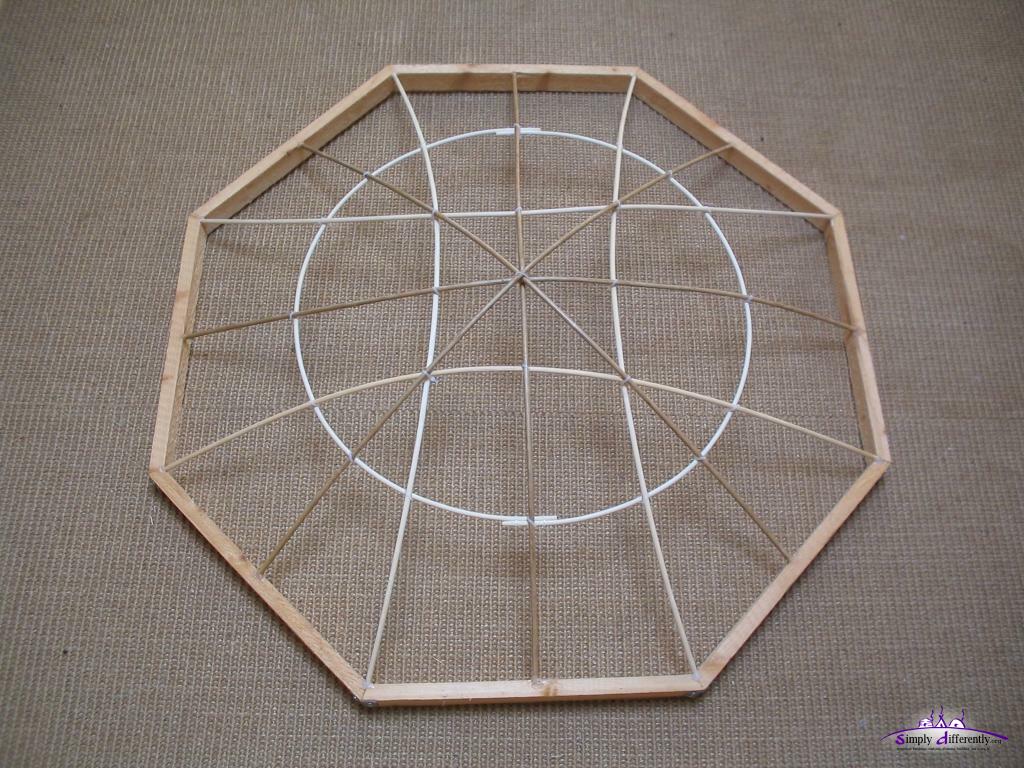 Skylight grid: bamboo sticks (4mm thick) (diameter 95cm) 2008/04/07 15:03 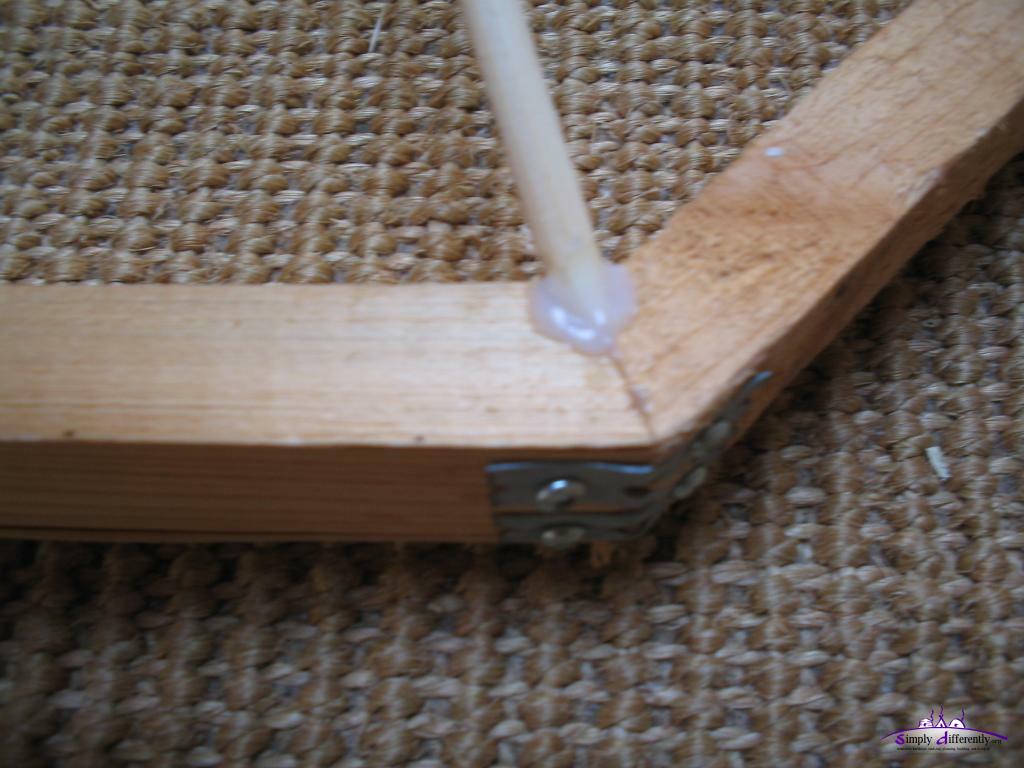 Skylight grid: bamboo sticks, close up connection to frame 2008/04/07 15:03 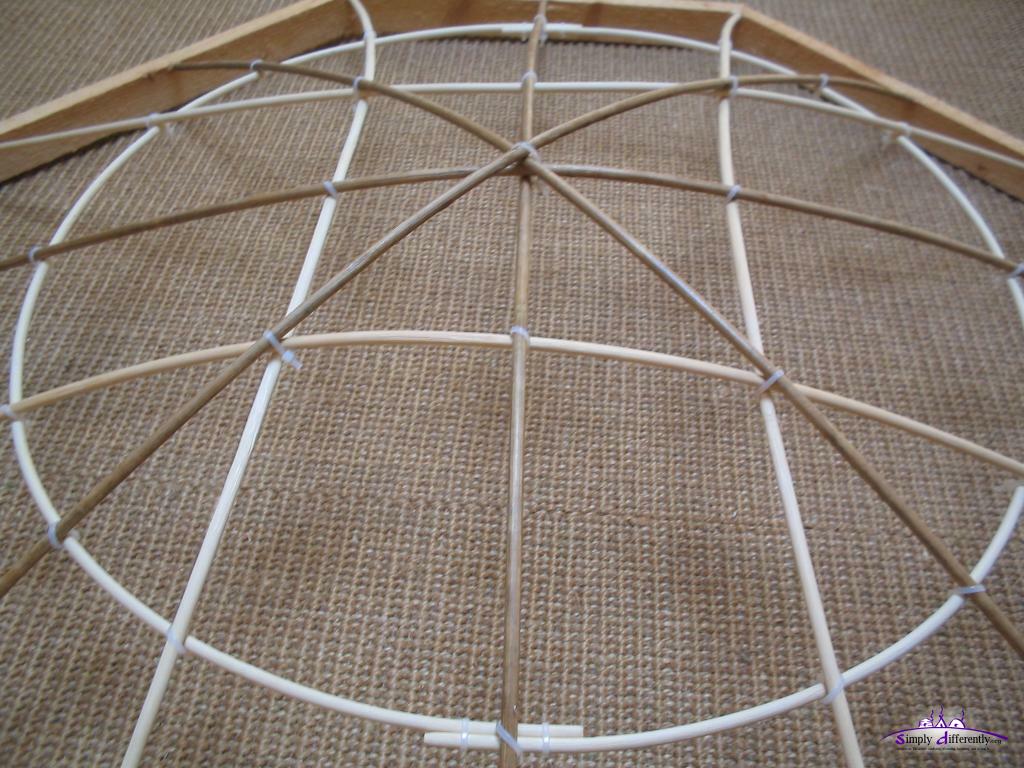 Skylight grid: bamboo sticks, close up center 2008/04/07 15:03 Detail Observation
I will refine the grid further, but I haven't decided of the procedure: either using concentric rings attached to all spokes, or use straight sticks and form an octagon again, both variants would then give support to further willow bow sub-division, but then using rather narrow branches. The final cover will be either some bubble-wrap or if I find a material which is a bit flexible then pull it over the skylight grid. The option I used previous with clear PVC formed cone as skylight worked well, except with heavy snow it happened a few times that it flipped inside - as remedy I used some unskinned willow branches to form a supporting grid. Btw, the frame segments are glued and with a short strip of eyed sheet metal screwed over the junction on the side to reinforce the corner - I will enventually add further reinforcement by adding a thin layer wood covering the top and bottom of the junction - once I did this I will add more photos. Skinned vs Unskinned Willow Unskinned willow remains flexible and has better bending and overall stability. Fresh skinned willow is very flexible, and one can bent it and undue bows and make it straight, or bent it to a certain radius and let it dry while remaining in this form; once dried out is stiff, but has somewhat limited strength compared to bamboo. Skinned willow is almost white, and looks aesthetically. Yesterday
20. 3. 2008: March Equinox
Today we have March Equinox ("Spring Equinox" would only apply to northern hemisphere). Last night it snowed 8cm apprx. but it's melting away during the morning. I have been using now 22 boxes of wood (17 boxes = 1 ster or 1m3 chopped wood) for this winter season. Several days in the last weeks I didn't have to fire the stove as the sun warmed up the yurt nicely, but the last few days with temperatures around 0°C fireing the stove was required.
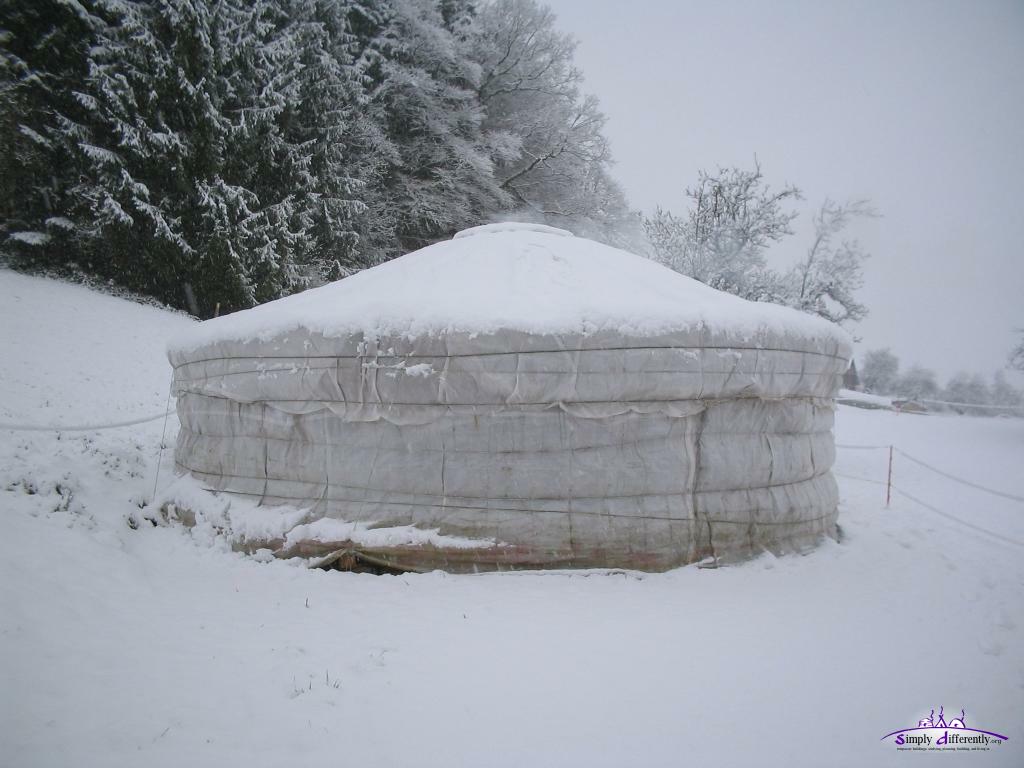
 Sunset of 15th March 2008 2008/03/15 16:53 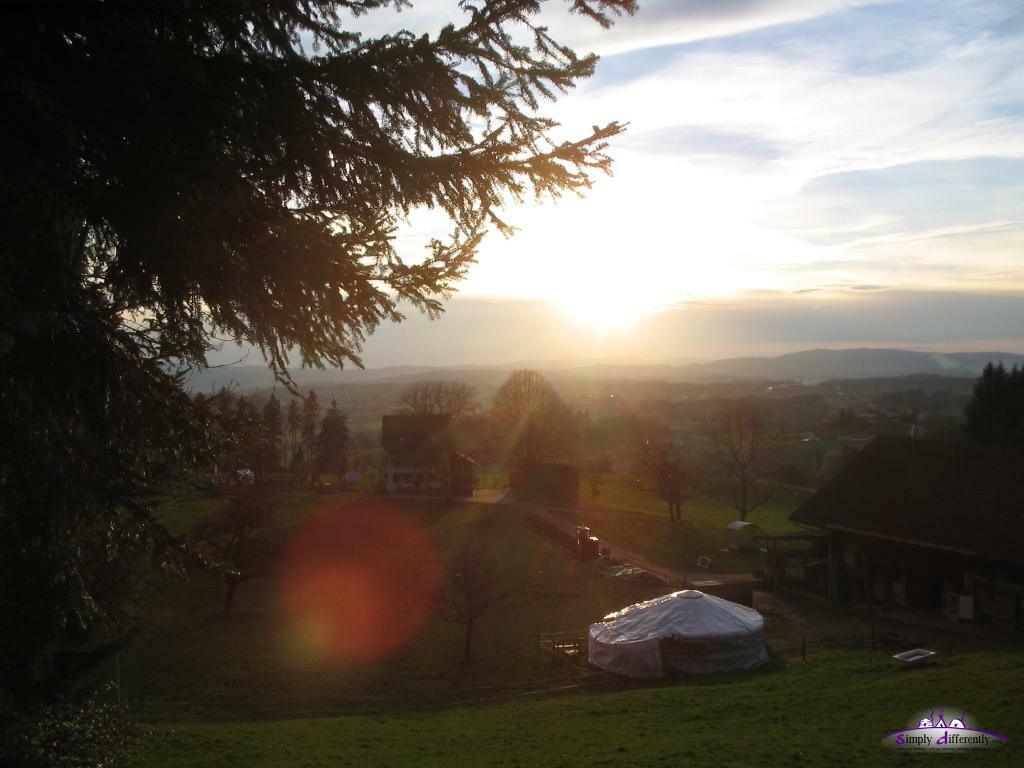 Sunset of 15th March 2008 2008/03/15 16:55 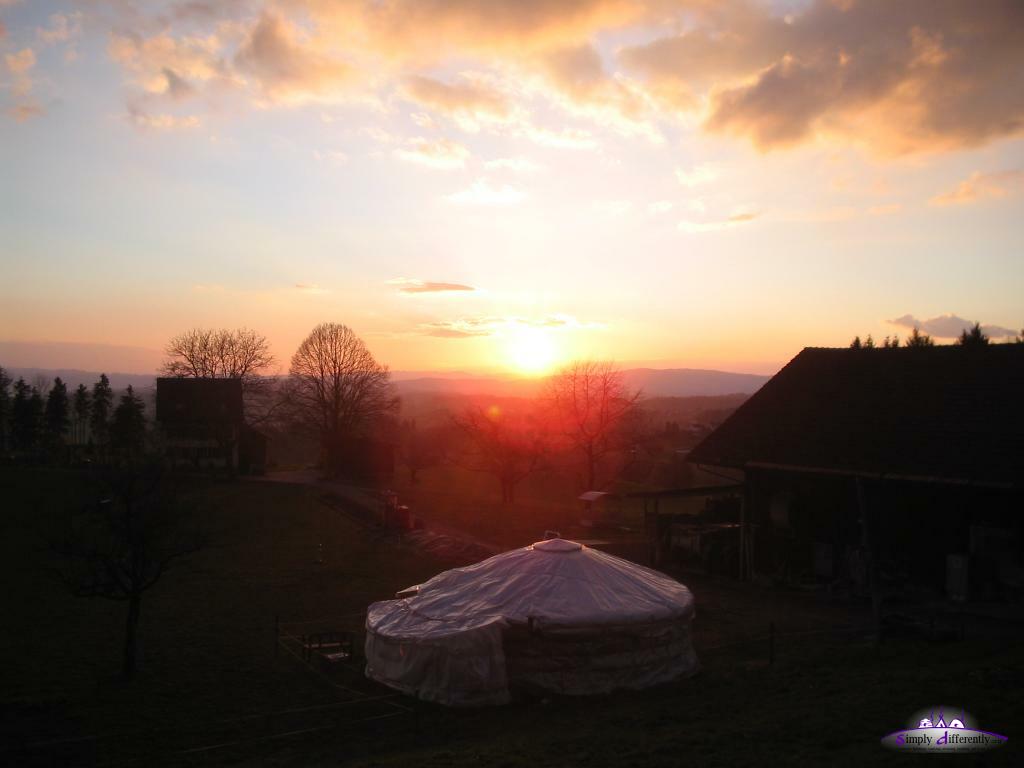 Sunset of 18th March 2008 2008/03/18 17:20 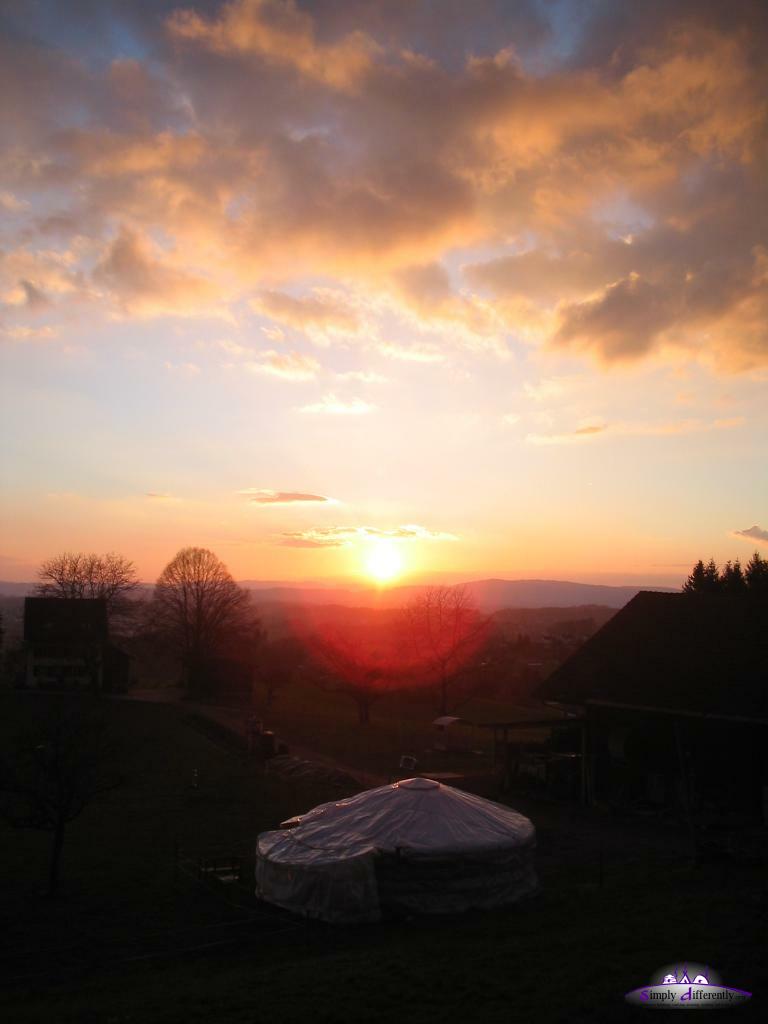 Sunset of 18th March 2008 2008/03/18 17:20 My time at the current site is slowly expiring, about end of April I will take down the yurt - whether I dislocate to a new place or put it into storage and go on an extended recumbent tour - let's see. That's kind of the advantage having a temporary shelter which you can either pack up, move, store and unpack on-demand. 12. 3. 2008: Another Storm
I rarely fire the stove at storms because of that - today I decided to fire the stove nevertheless. Once no smoke but just glowing wood was in the stove, the problem with pushing air backward is gone.
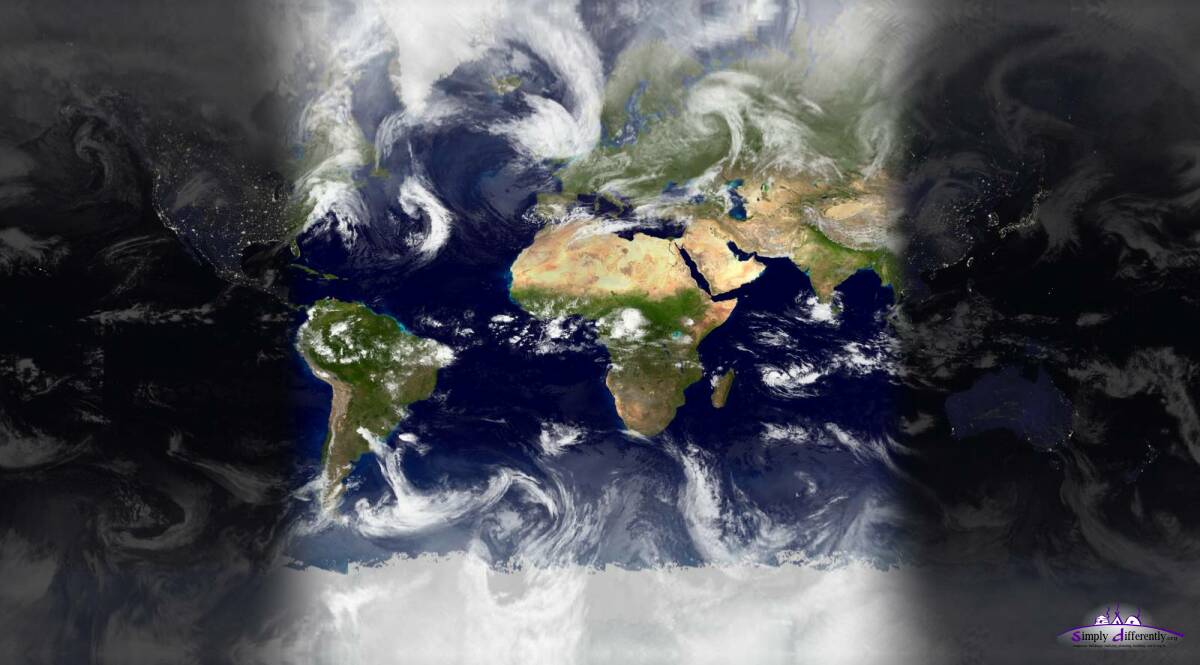
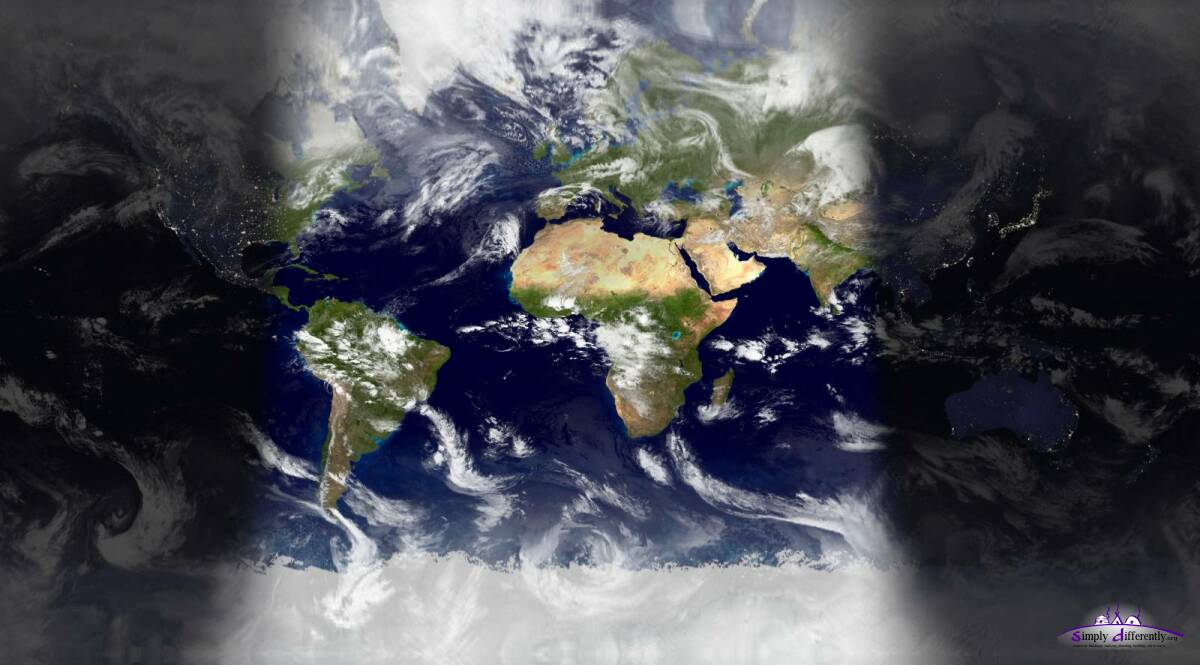
On the world sunlight map you also see nicely that we are approaching March Equinox, when day and night have the same length, when the shadow is equally cast over northern as well southern hemisphere.
Page << Prev | 1 | 2 | 3 | 4 | 5 | 6 | 7 | 8 | 9 | 10 | 11 | 12 | 13 | 14 | 15 | 16 | 17 | 18 | 19 | 20 | 21 | Next >> Content:
|


| Home | · | About | · |  Tipi | · |  Yurt | · |  Dome | · | Features | · | Gallery |


Creative Commons (CC) BY-SA-NC 2005-2017, developed, designed and written by René K. Müller
Graphics & illustrations made with Inkscape, Tgif, Gimp, PovRay, GD.pm
Web-Site powered by FreeBSD & Debian/Linux - 100% Open Source