written by Rene K. Mueller, Creative Commons CC BY NC 2014, last updated Sun, January 18, 2015
UpdatesFri, August 15, 2014: Calculator support for 3:3:2 and 4:4:3 as well aside of 3:x:2 and 4:x:3
.
Mon, June 30, 2014: Improving the calculator and adding more details on hooks and captures of the hanging up the cover
.
Mon, June 23, 2014: Included into the public web-site
.
Sat, June 21, 2014: Update with photos of full size 5.1m diameter 4:x:3 dome skeleton
.
Wed, June 18, 2014: First version of Low Cost Dome, documenting the building of a model
.
|

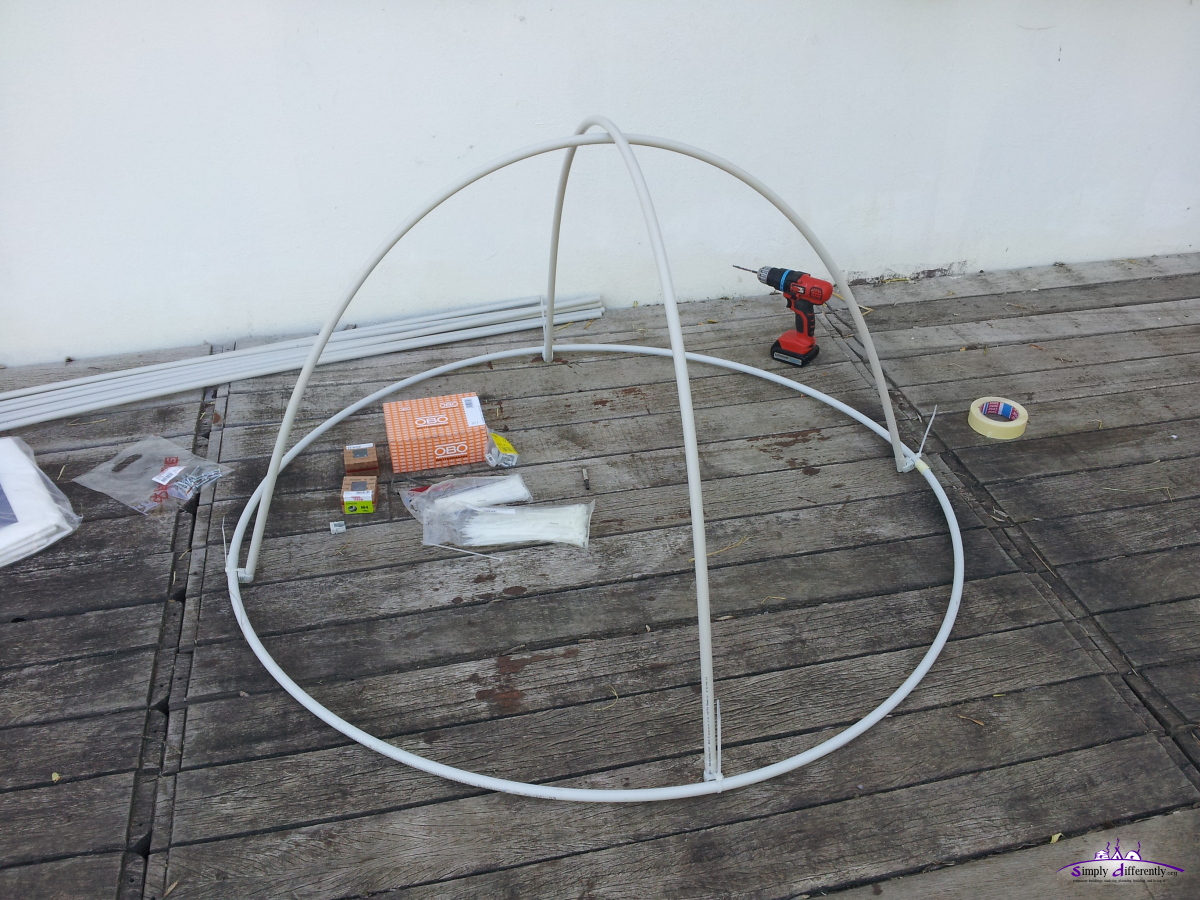
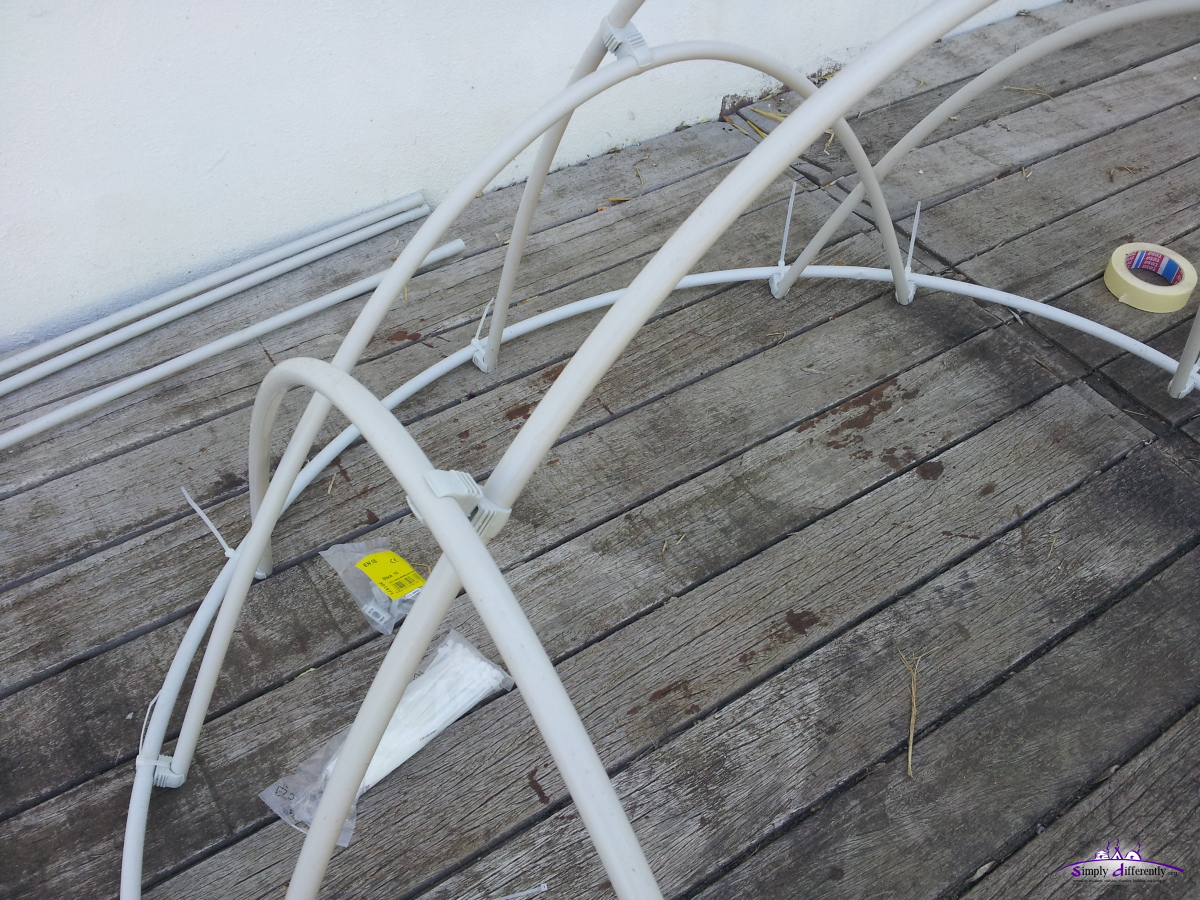
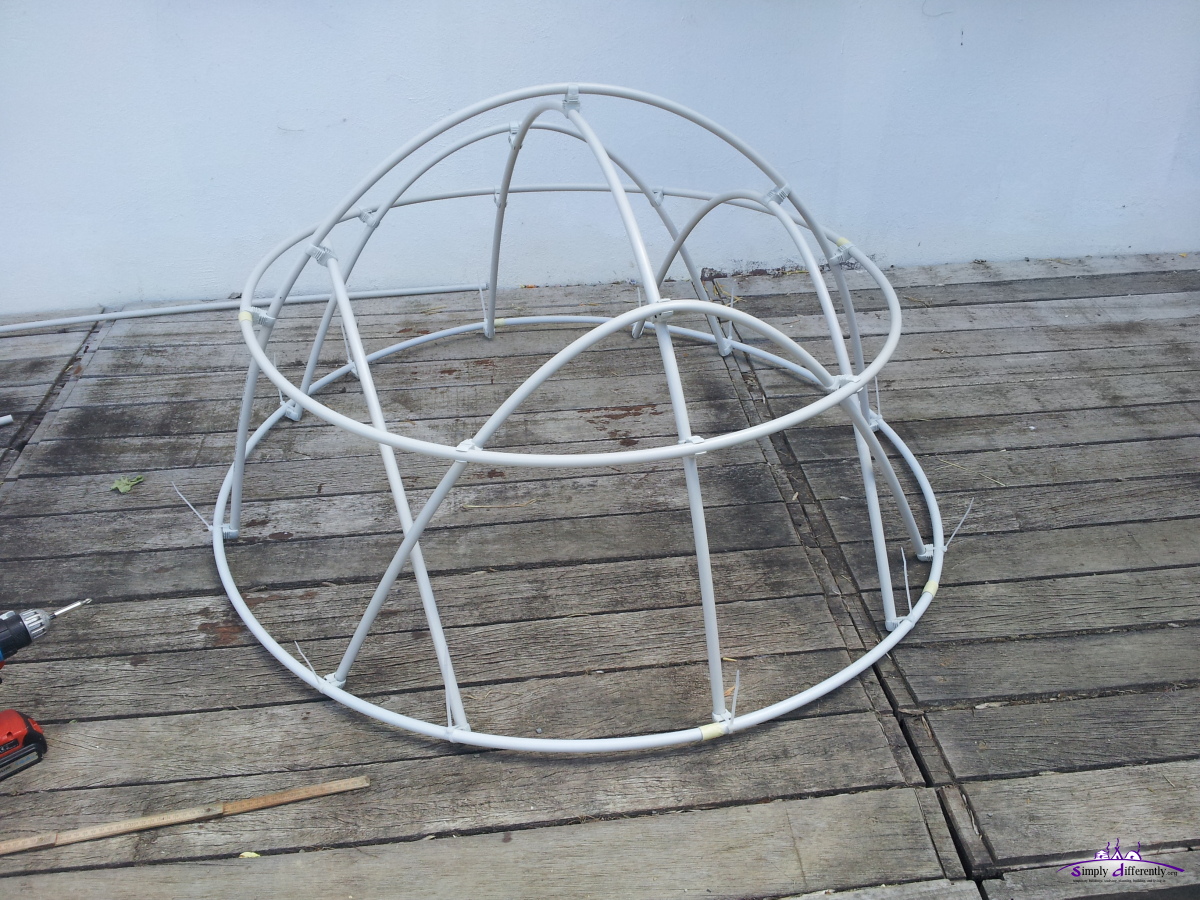
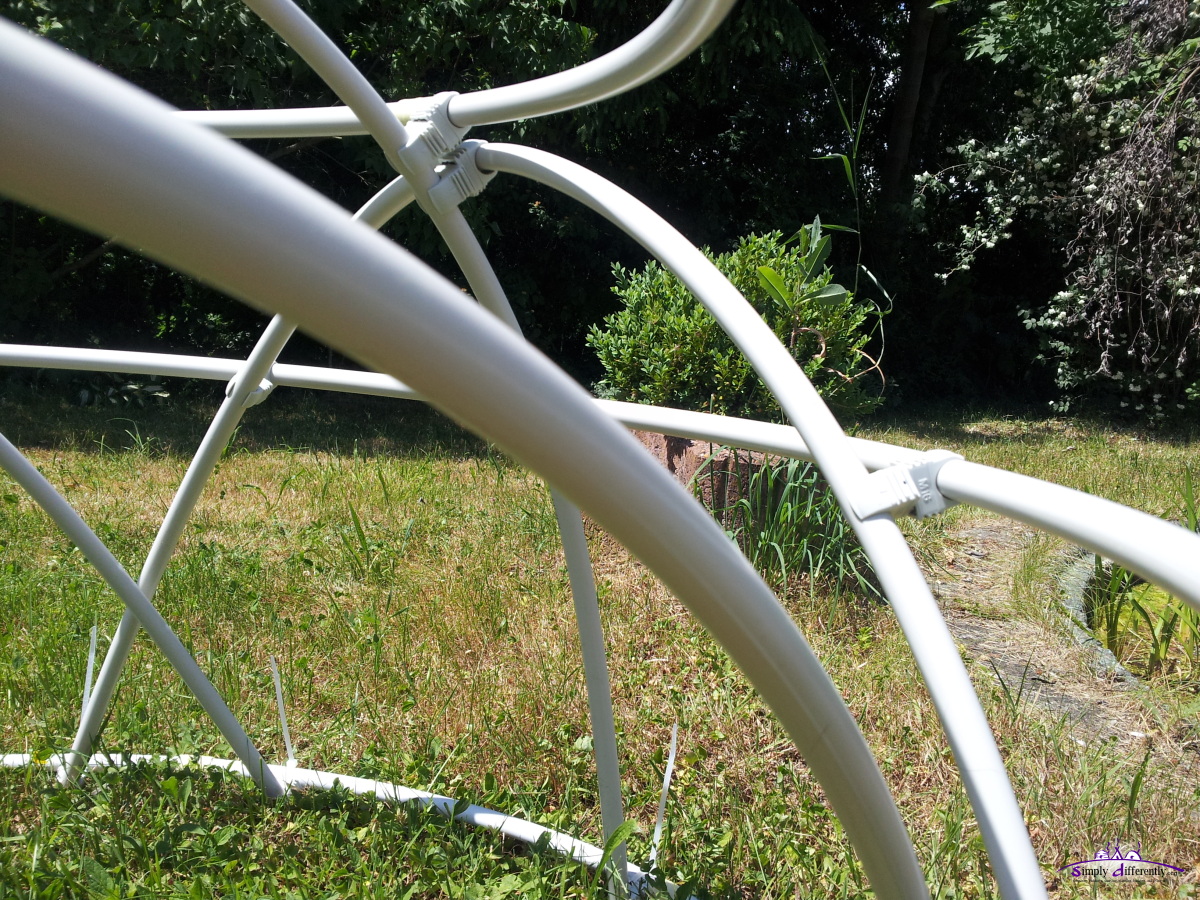
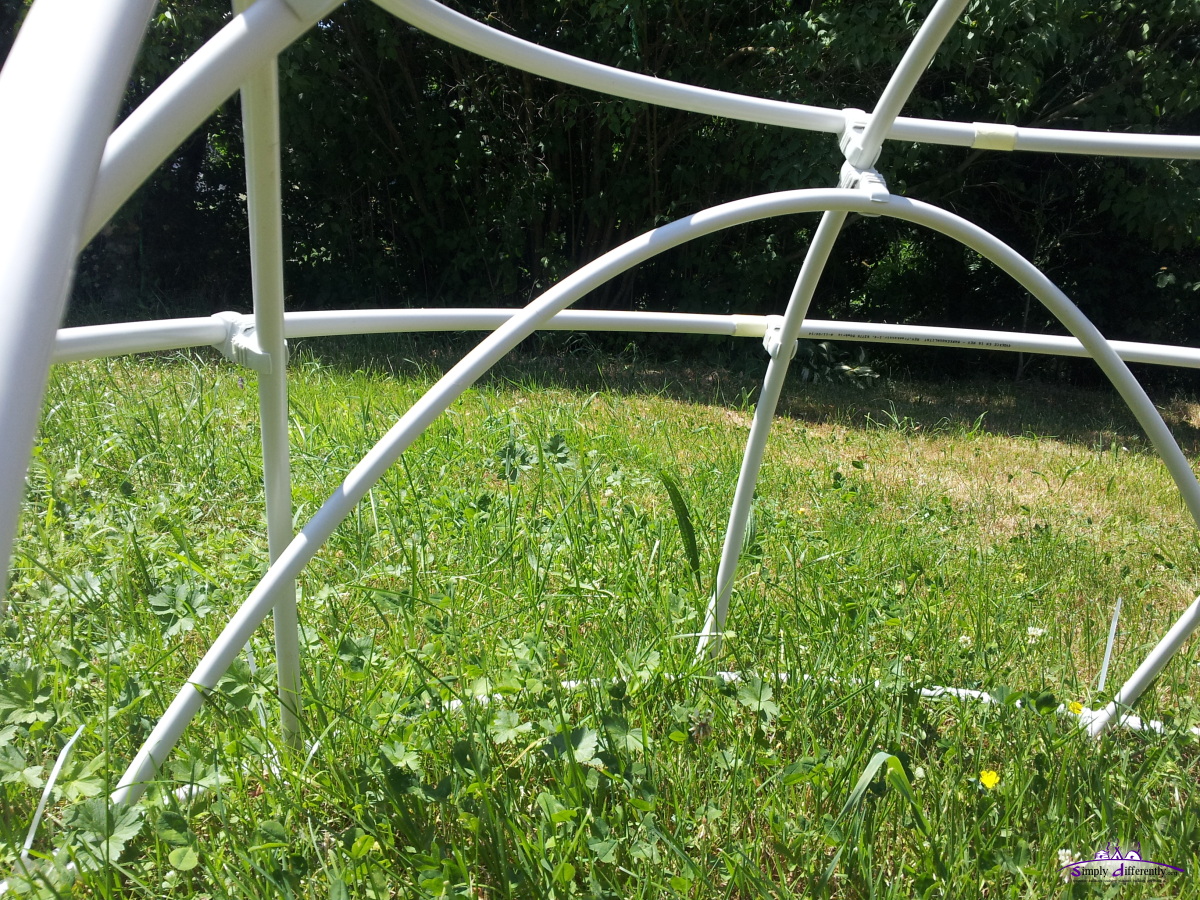
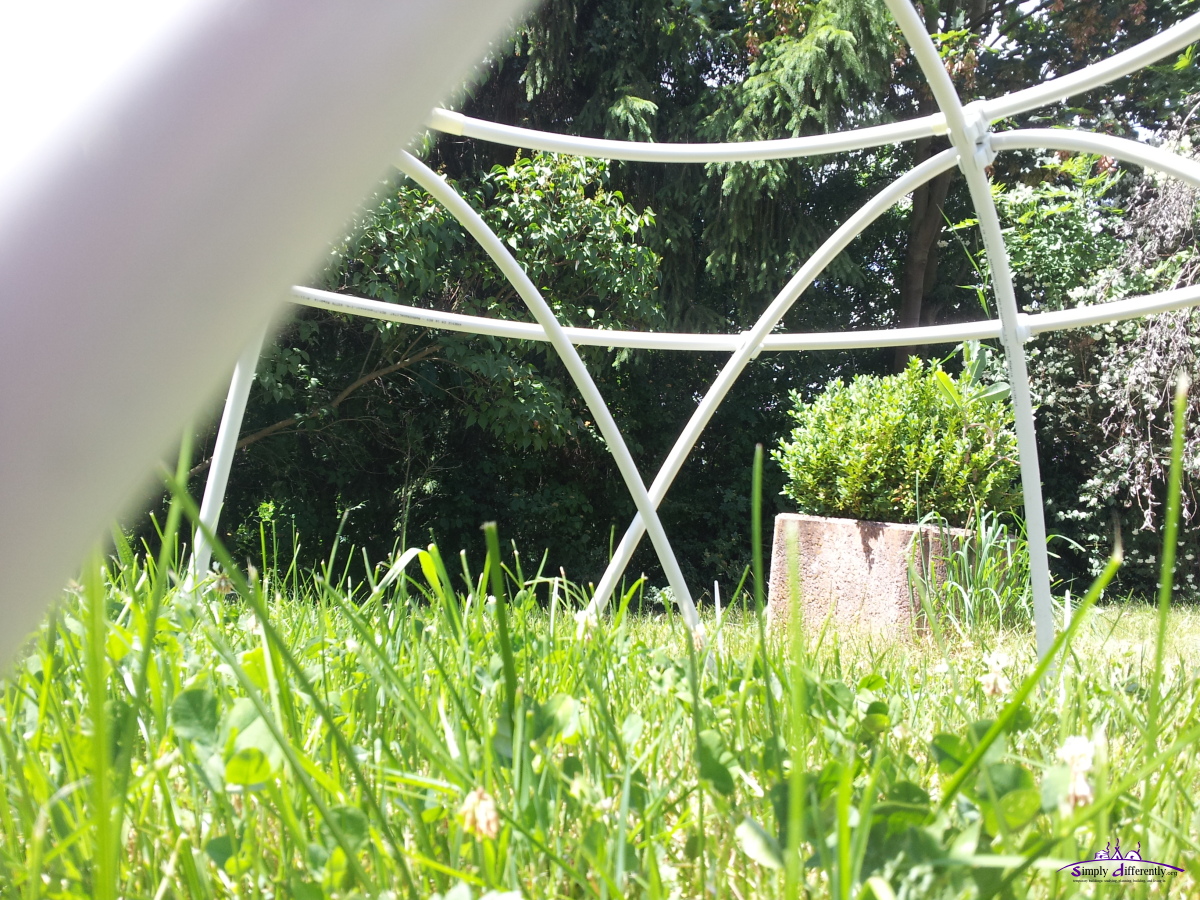
 LC Dome 3:3:2 (4m diameter) skeleton (without cover) |
For a while I pondered on low cost domes using PVC electrical conduits or tubes, and
Shelter Systems 
developed and sells some domes using PVC conduits, but I thought to even make it simpler and more cost effective by focusing on the existing parts, e.g. 2m and 3m long PVC tubes and making as little cuts and therefore left-overs as possible:
- use x amount of tubes to create a long bow, e.g. 3x or 4x put together
- use y amount of tubes to create a smaller bow, e.g. 2x or 3x put together
taking advantage of the fittings.
- LC = Low Cost
- a = length of a single tube, e.g 2m or 3m
- A = entire bow composed by multiple a
- X = entire bow composed by multiple a with little cut off at one a
- B = entire smaller bow composed by multiple a
- 3:x:2 = A: 3a tubes, X: 3ax tubes, B: 2a tubes
- 3:3:2 = A: 3a tubes, X = A, B: 2a tubes
- 4:x:3 = A: 4a tubes, X: 4ax tubes, B: 3a tubes
- 4:4:3 = A: 4a tubes, X = A, B: 3a tubes
whereas the x is about 3 or 4 x 0.92 to 0.95, in between A and B positioned, but almost as long as A (see illustrations below).
The 3:3:2 and 4:4:3 variant is using full bows, but tilt them a little (see below in the calculator).
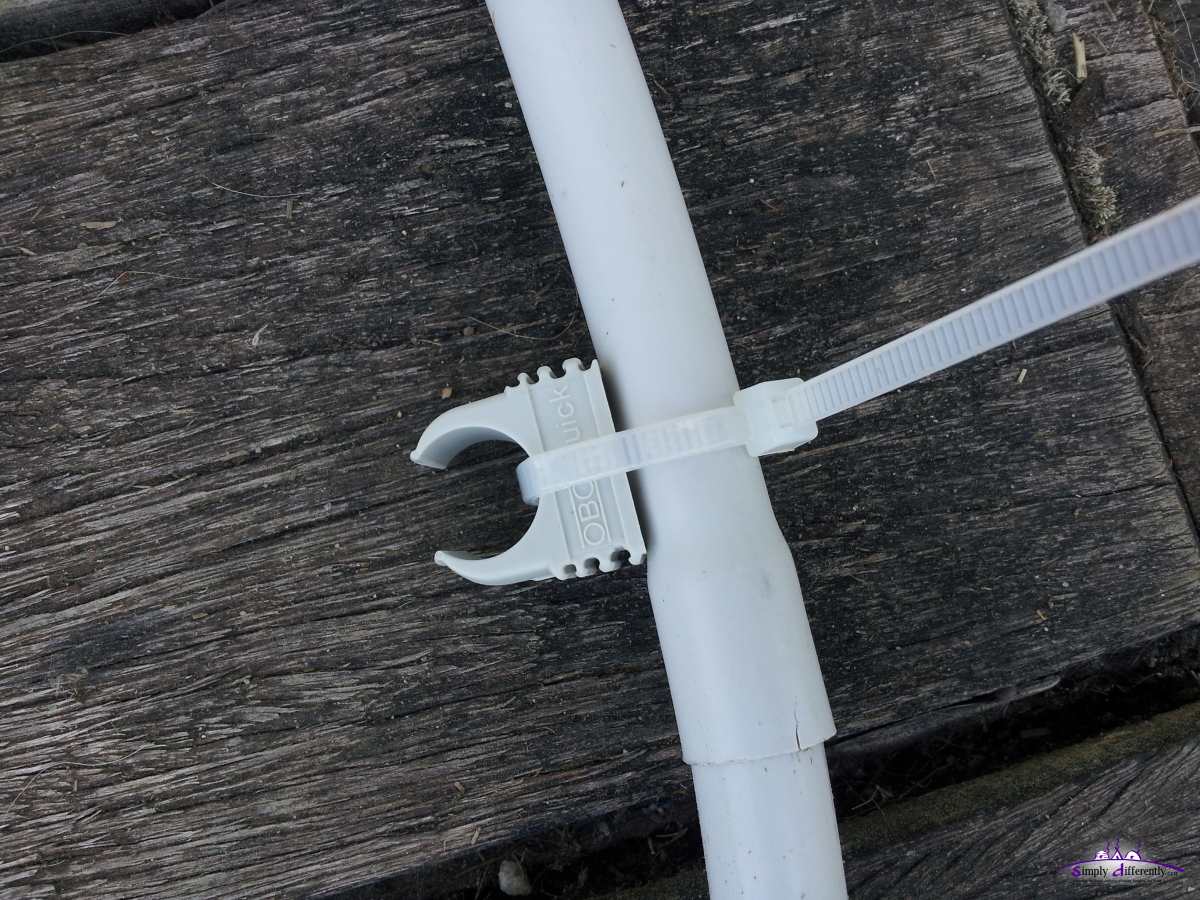
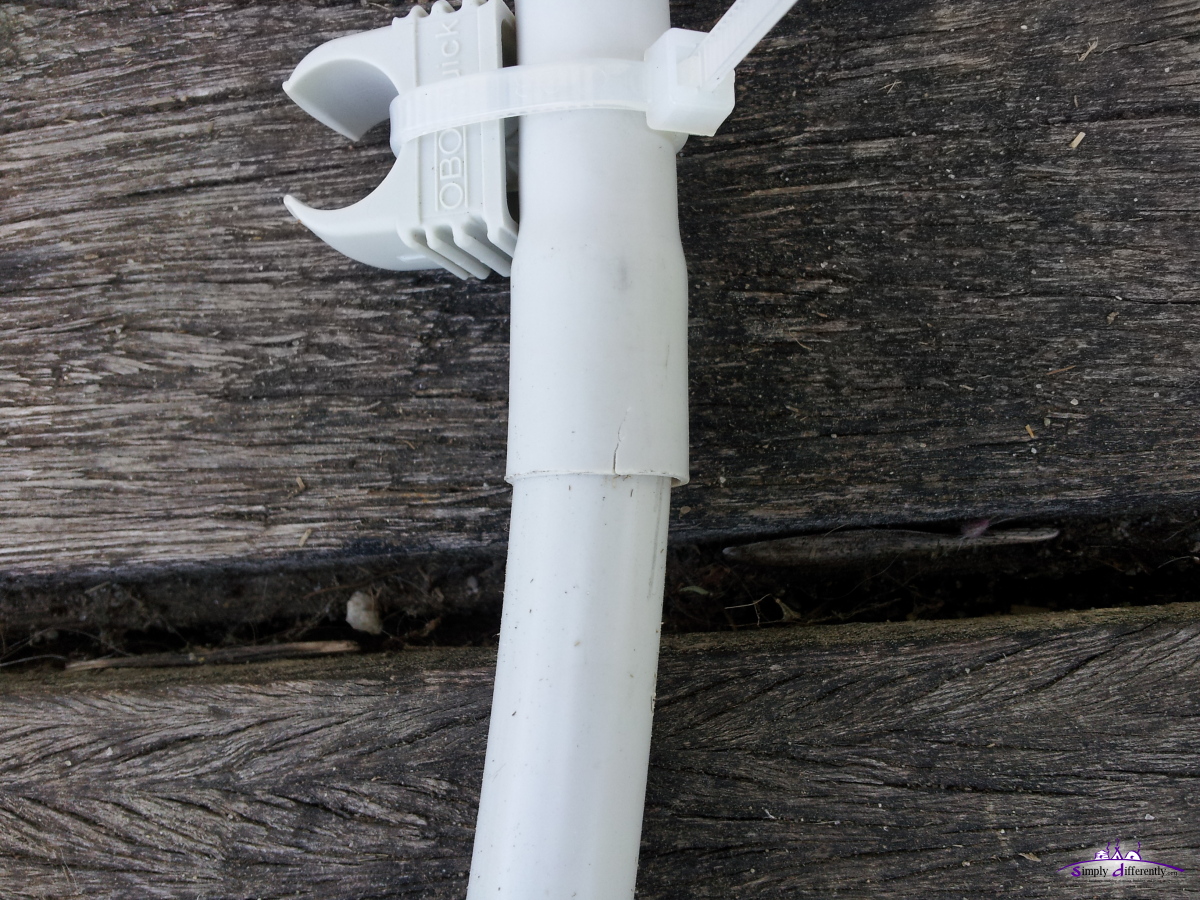
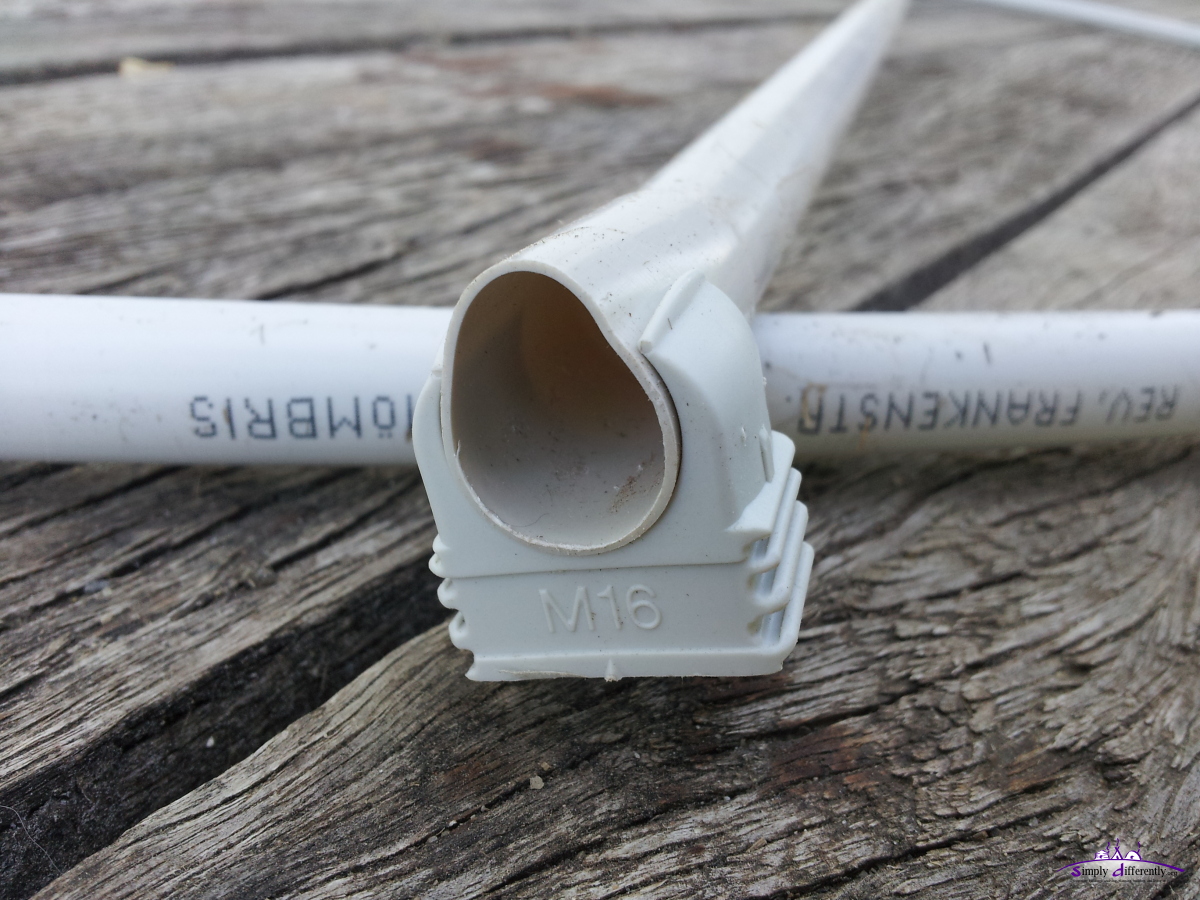
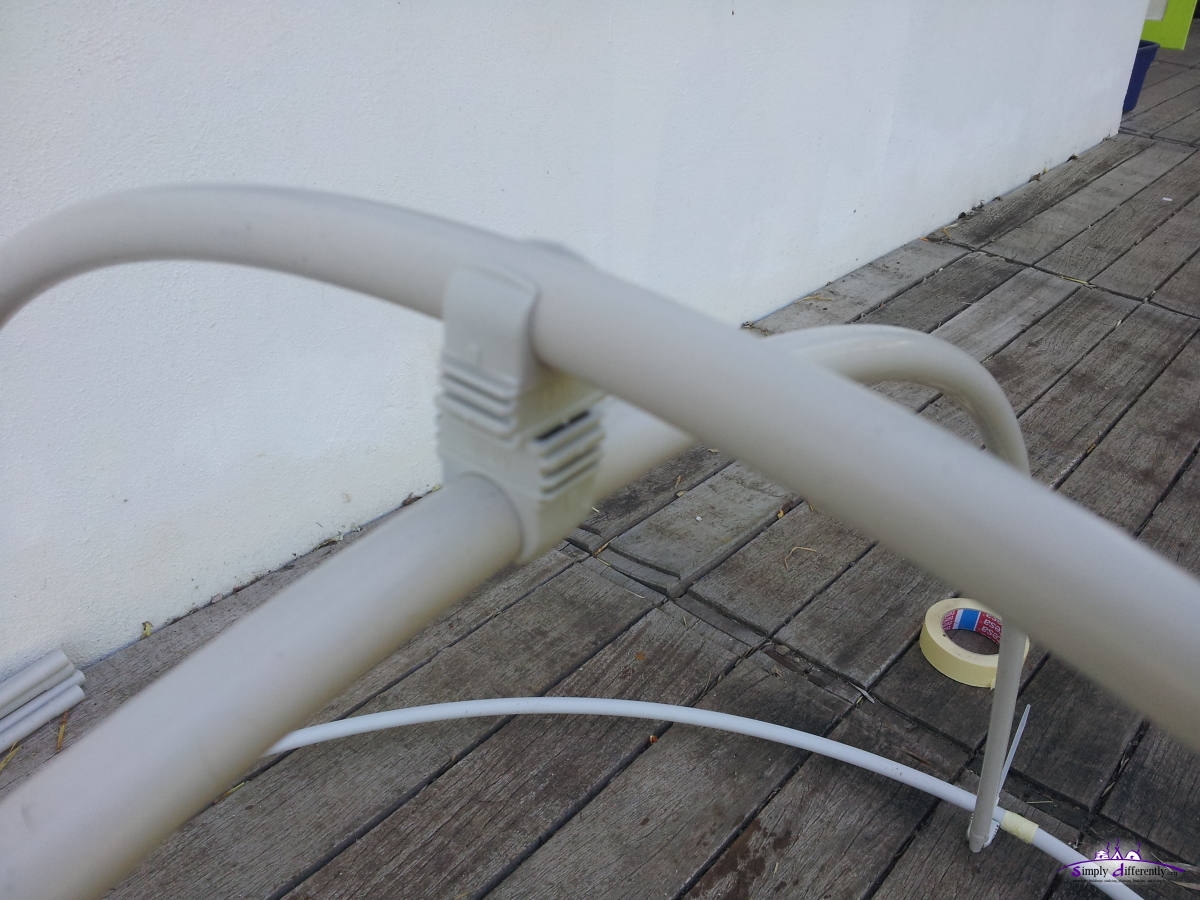
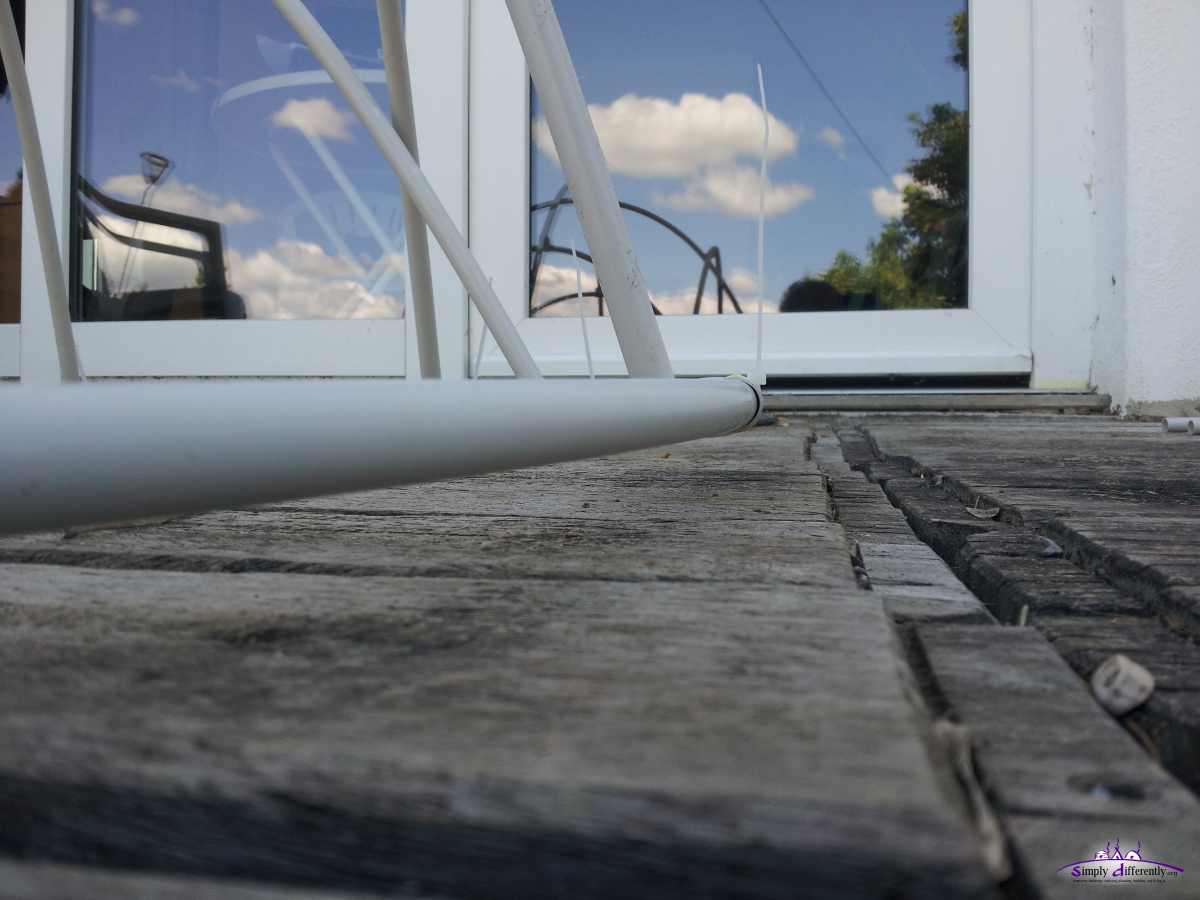
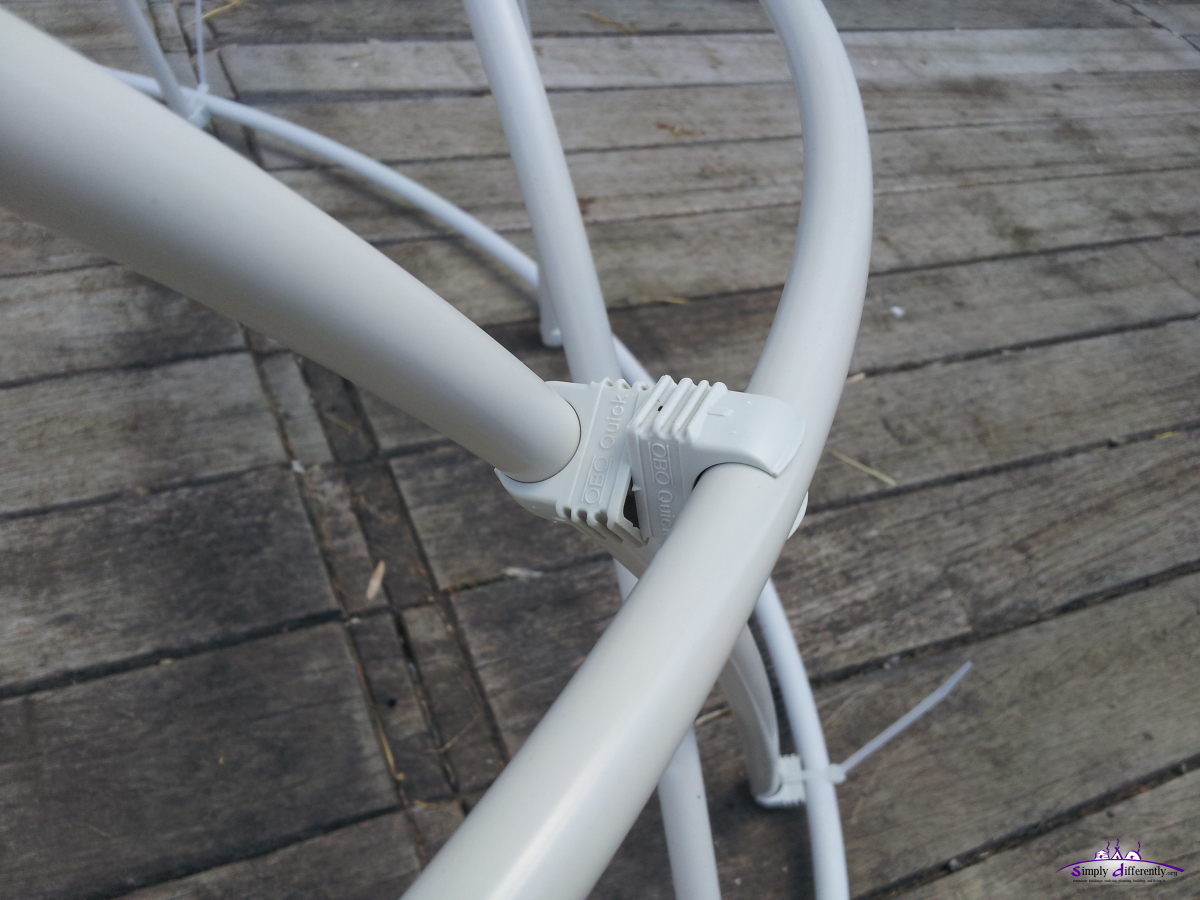
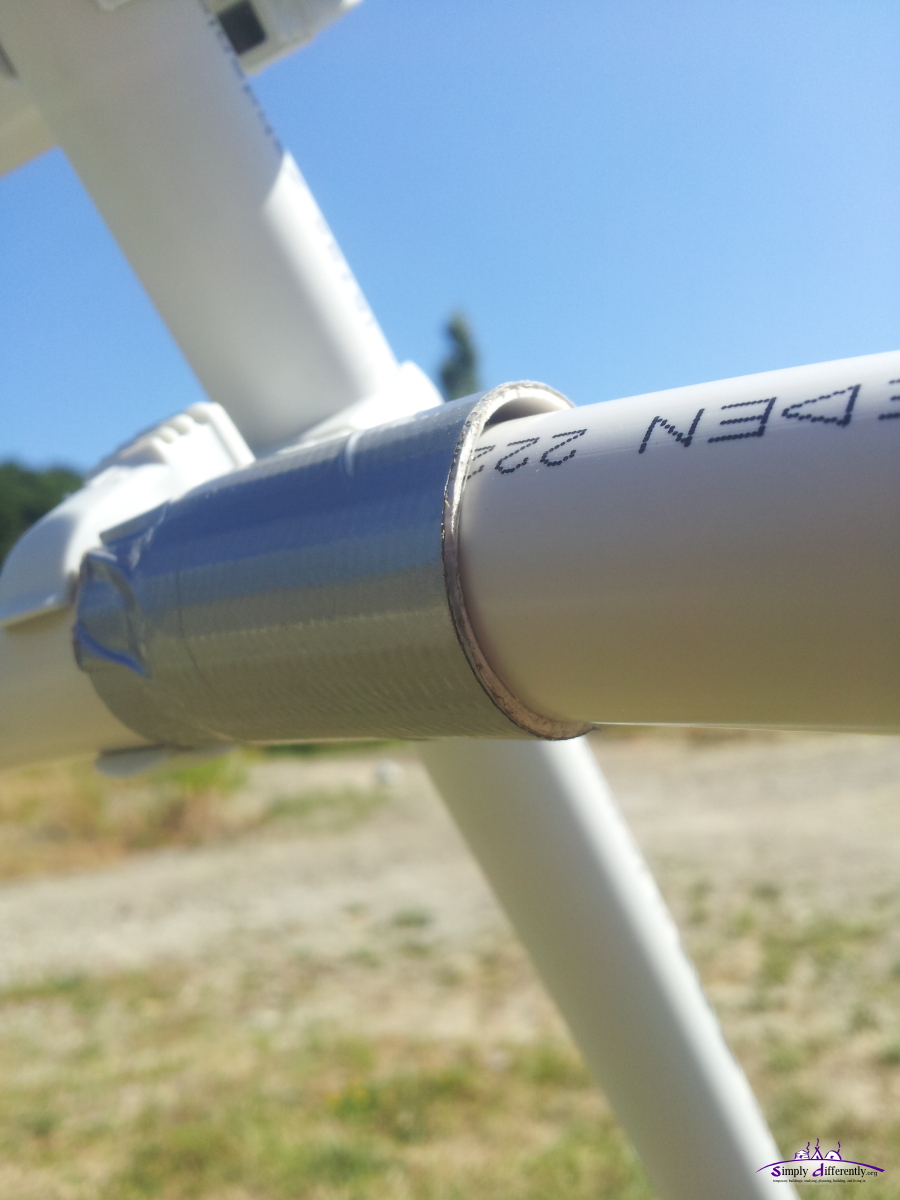
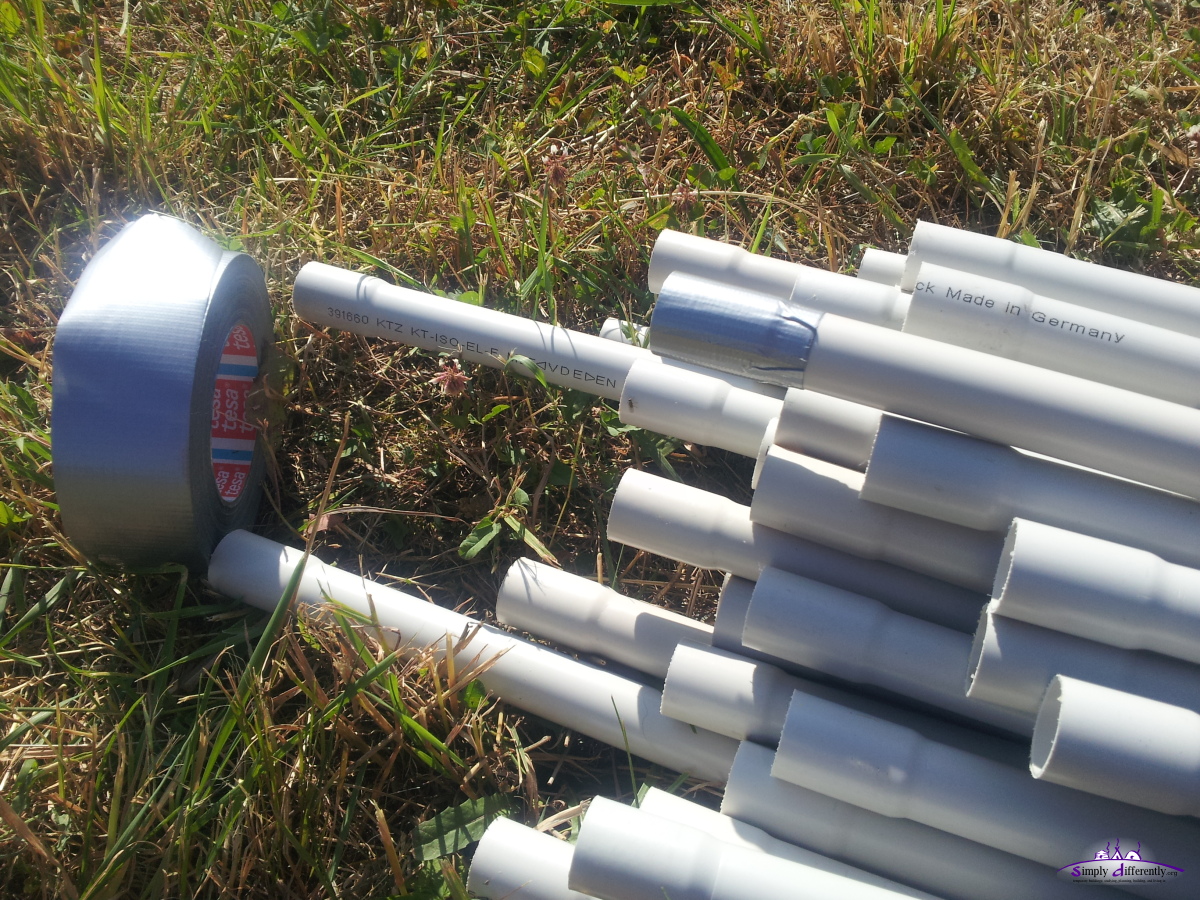
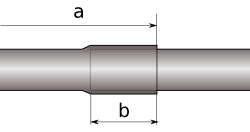
So far 25mm diameter PVC conduits worked, thicker ones would be preferable, but their fittings remain 30mm long regardless of the diameter.
With 25mm PVC conduits I was able to create
4m diameter dome, 3:x:2 or 3:3:2, and was sufficient stable for my use case.
The 5m diameter dome with 4x 2m long 25mm diameter PVC conduits was not very stable, some stronger wind and it collapsed; only suitable for "good" weather.
If you find 30mm diameter PVC conduits with long fitting, longer than 30mm, you are good to go for 5m diameter dome.
If you want to use PVC conduits to create a dome, I recommend Geodesic Dome instead, see Geodesic Dome Diary where I built an 2v icosahedron dome with PVC conduits.
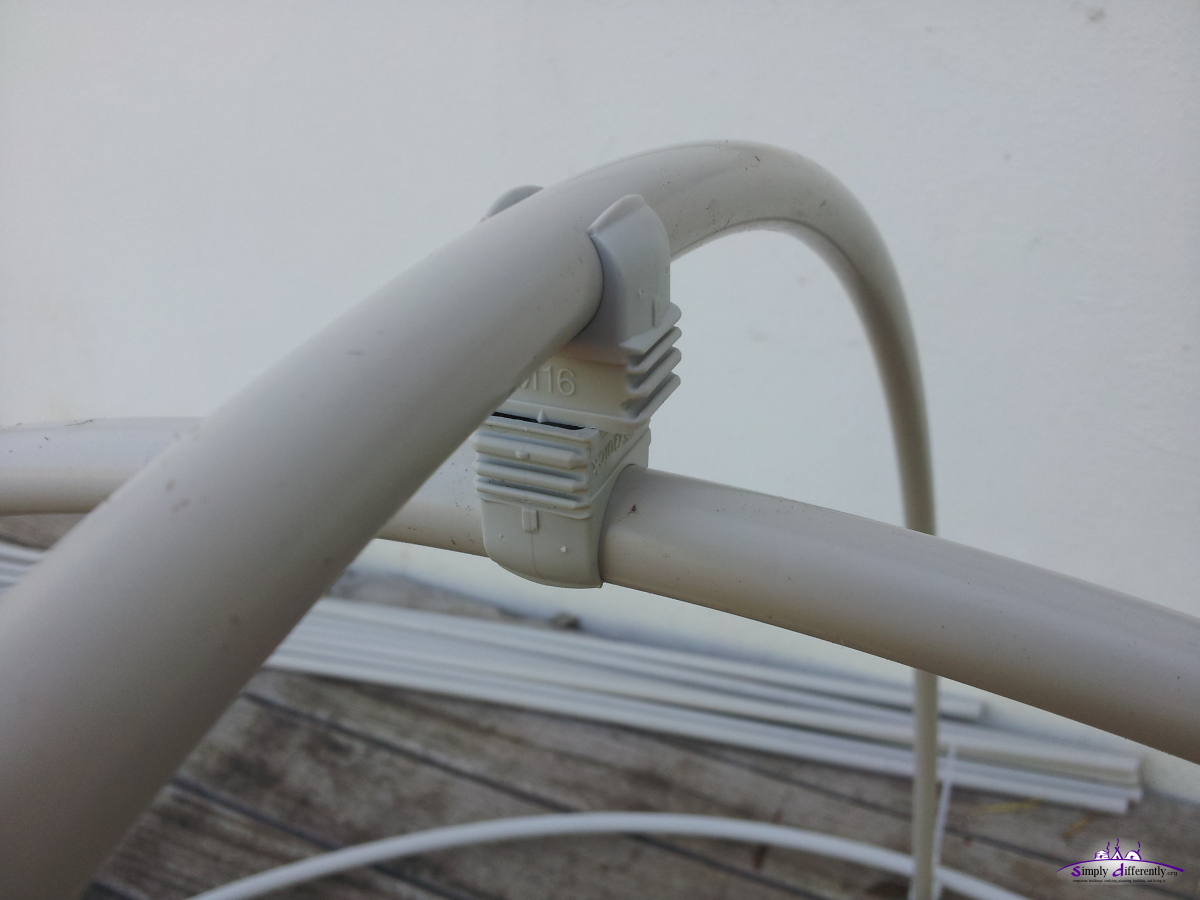
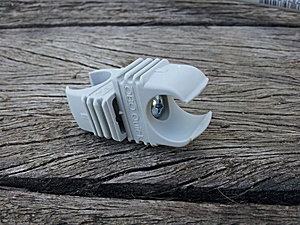
PVC Tube with fitting |
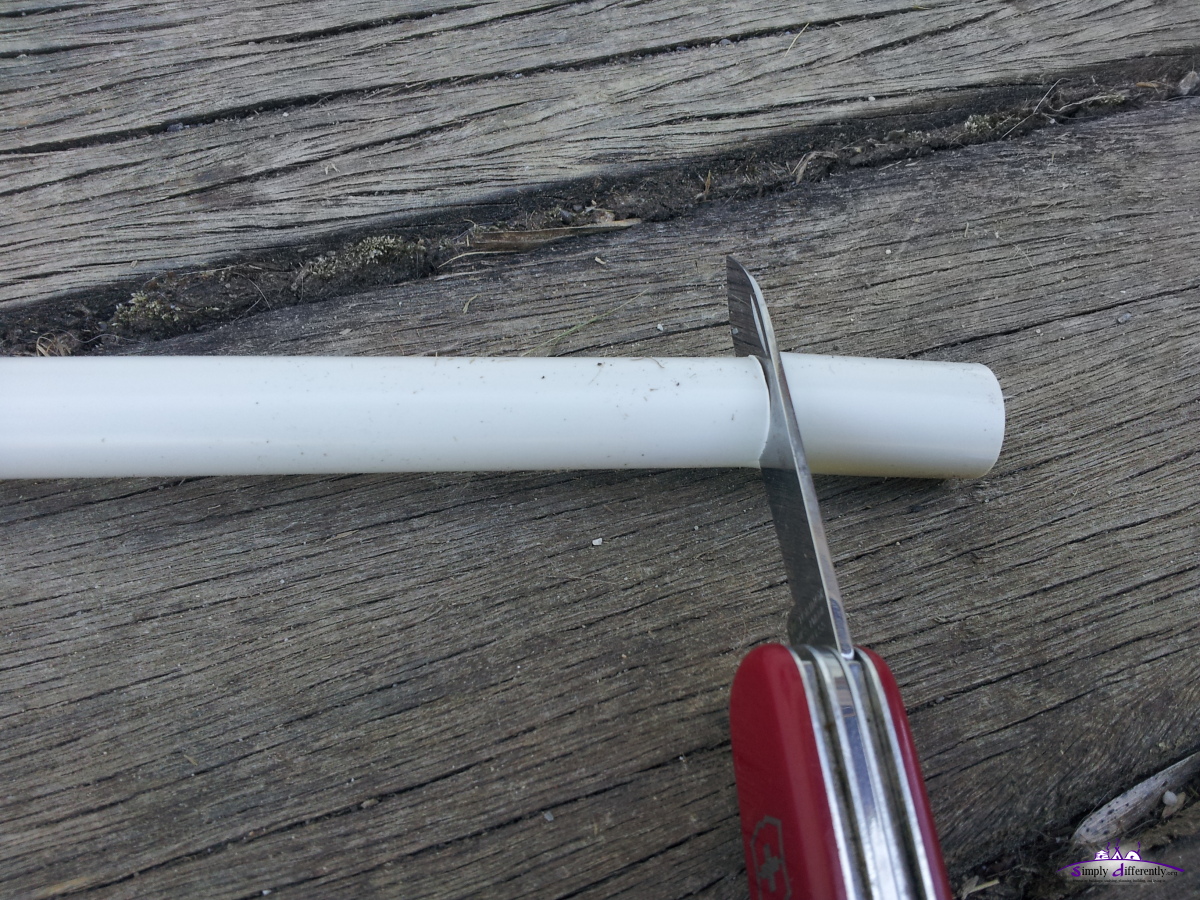
Some tests I made in the store where I obtained PVC conduits:
- EN16, 2m x 16mm (0.70 EUR / pc): 1x tube = 180° bow bending => suitable for model building
- EN20, 2m x 20mm (0.80 EUR / pc): 2x tubes = 180° bow bending => suitable for small dome
- EN25, 2m x 25mm (1.30 EUR / pc): 3x tubes = 180° bow bending => suitable for 3:x:2 and 4:x:3, 2x tubes works as well, but puts quite some tension on the fitting (update will follow)
Pricing from OBI.de (2014/06).
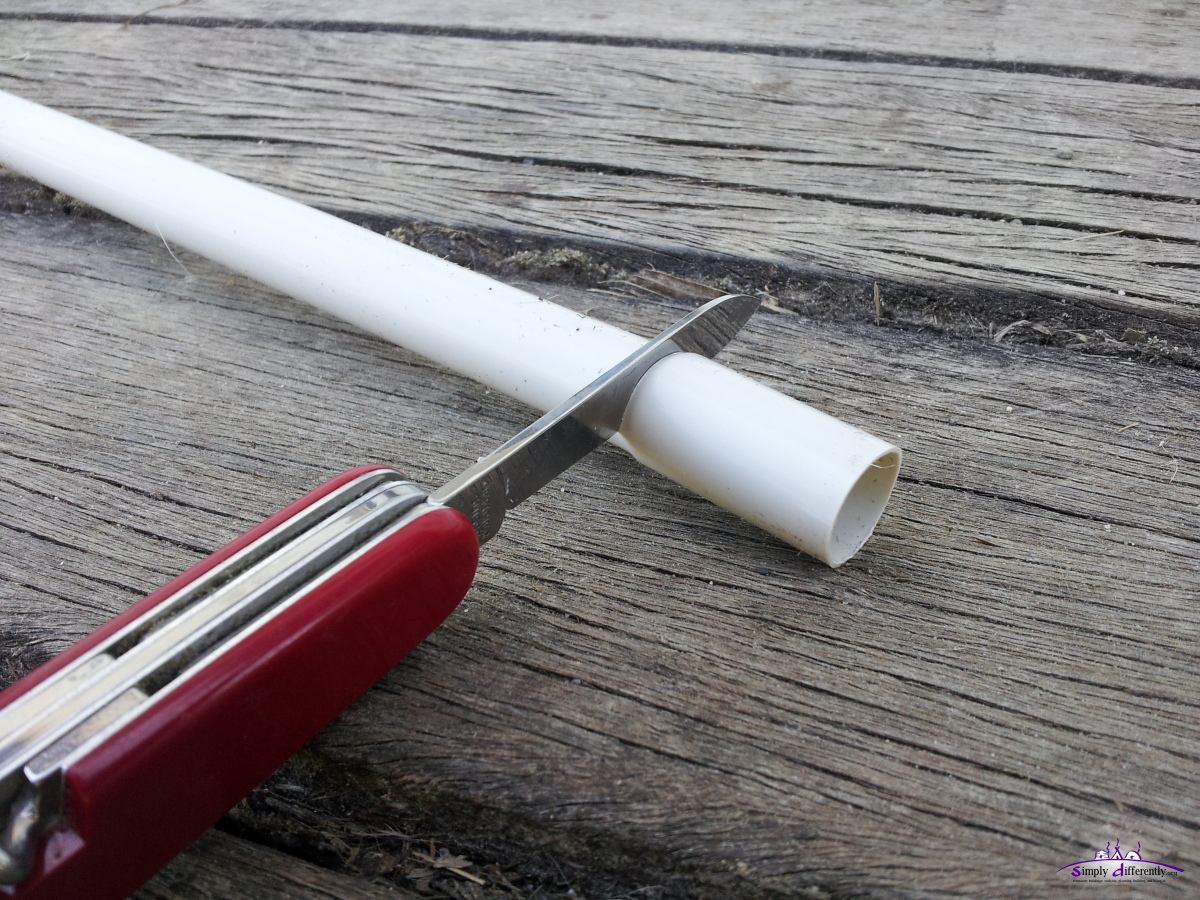
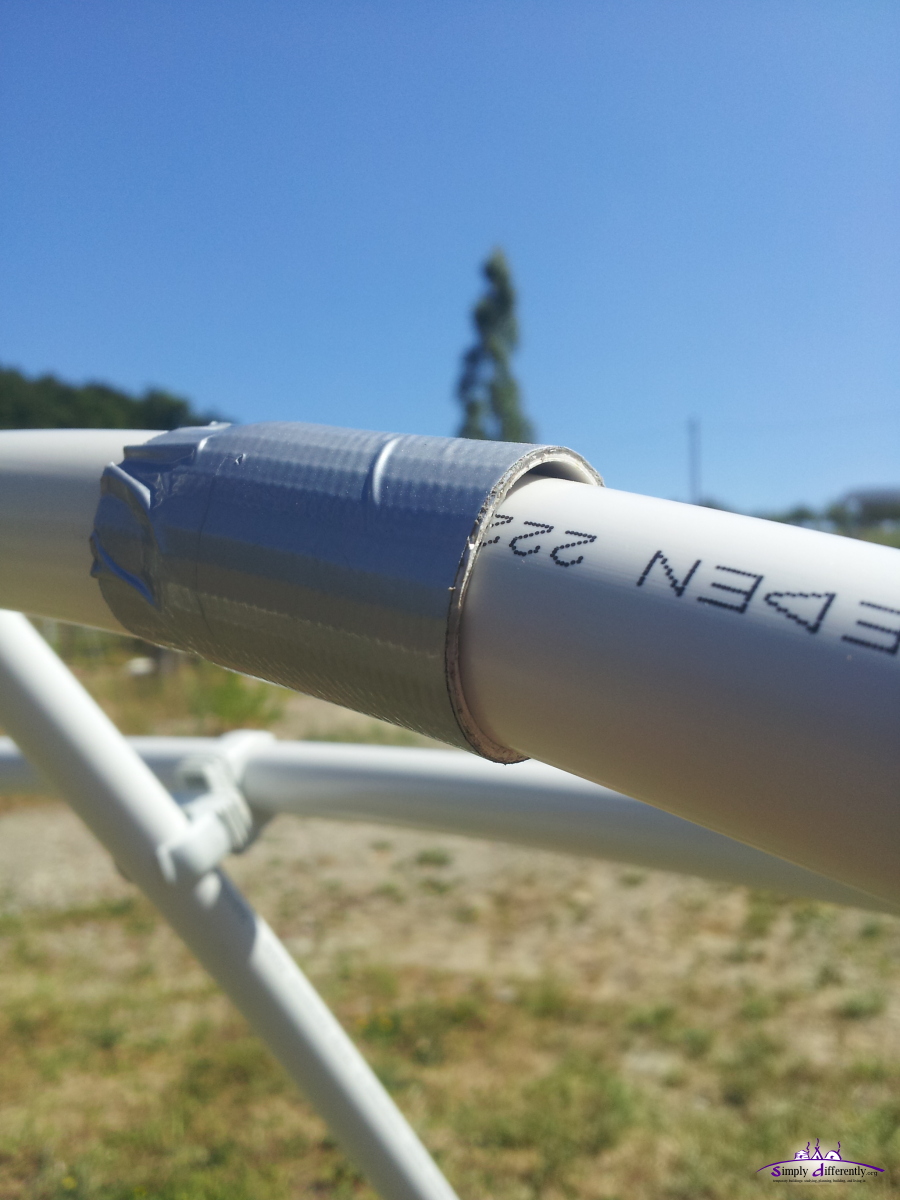
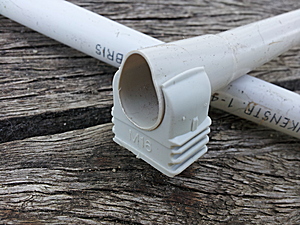
Tear of the fitting from (over-)bending |
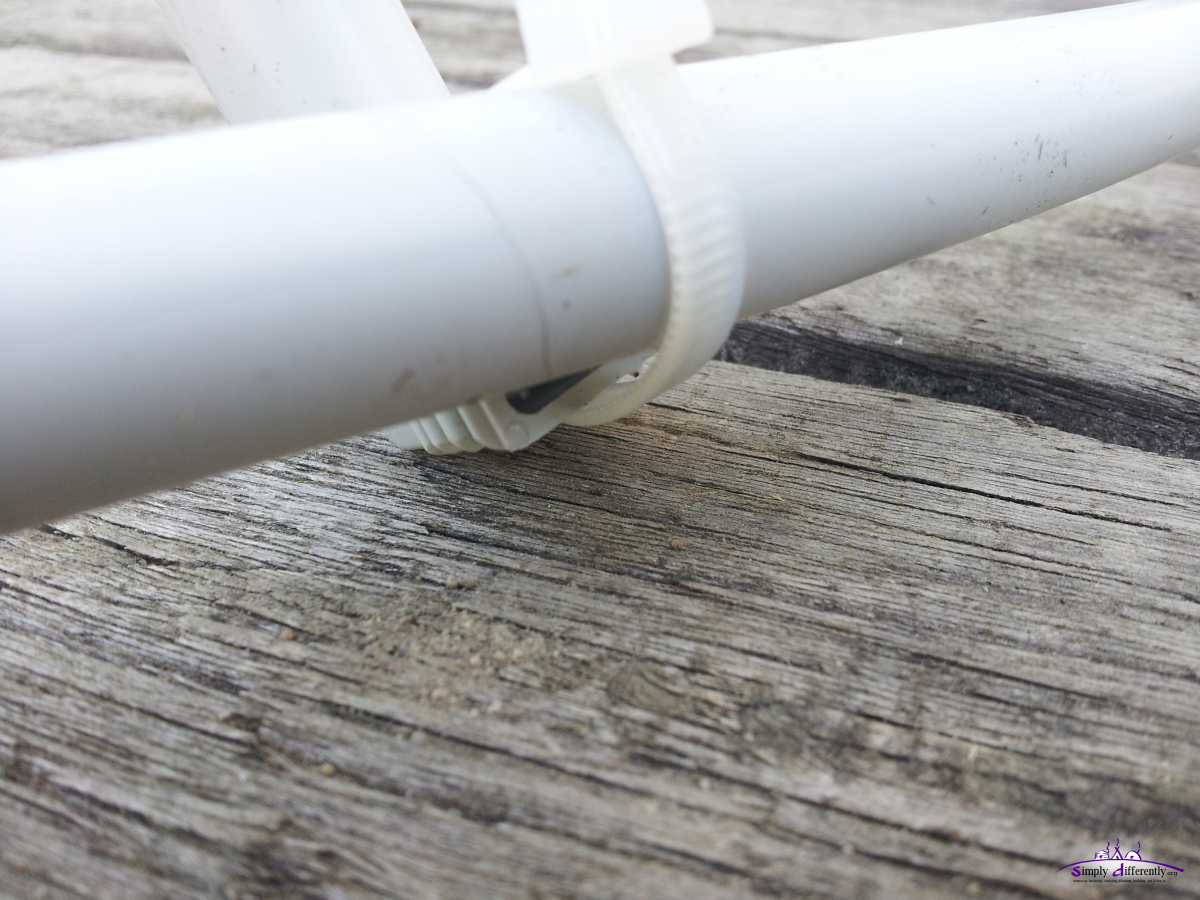
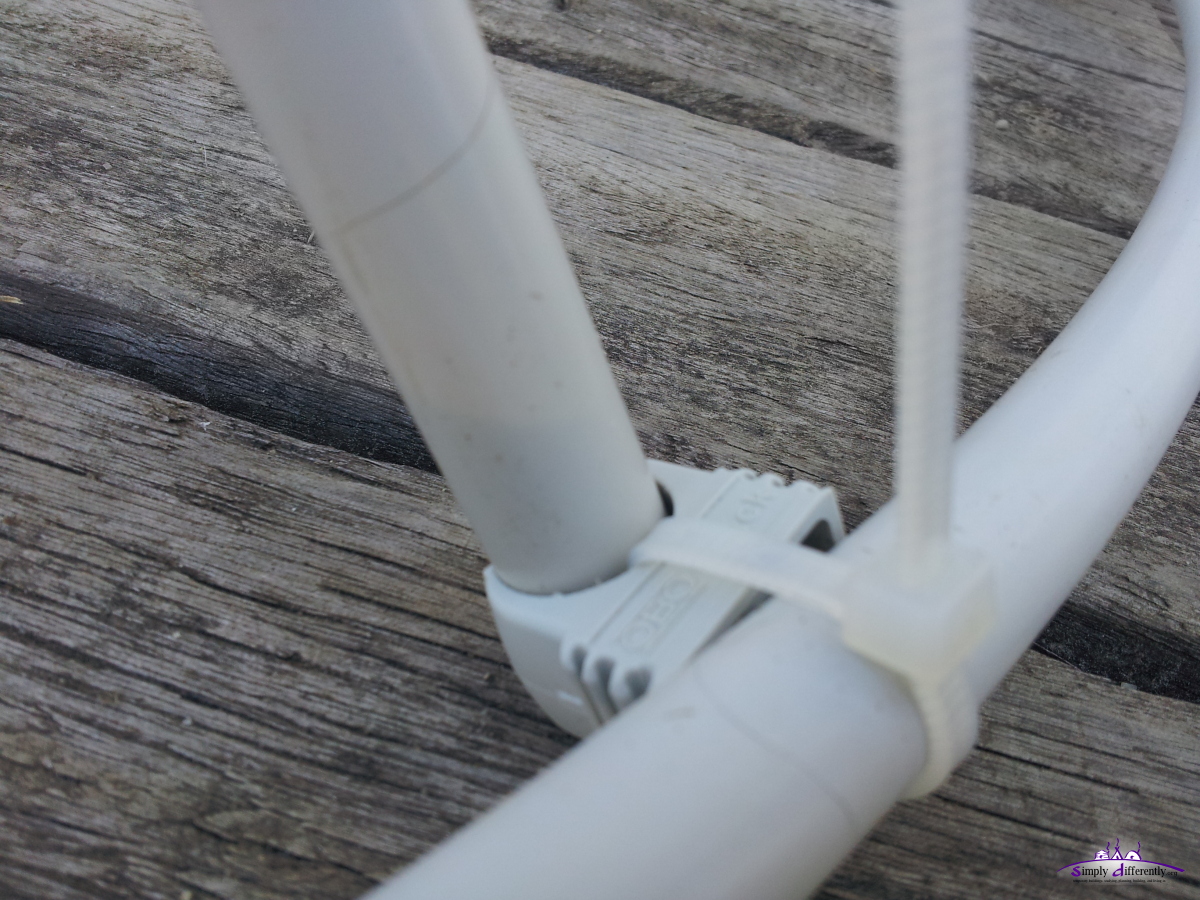
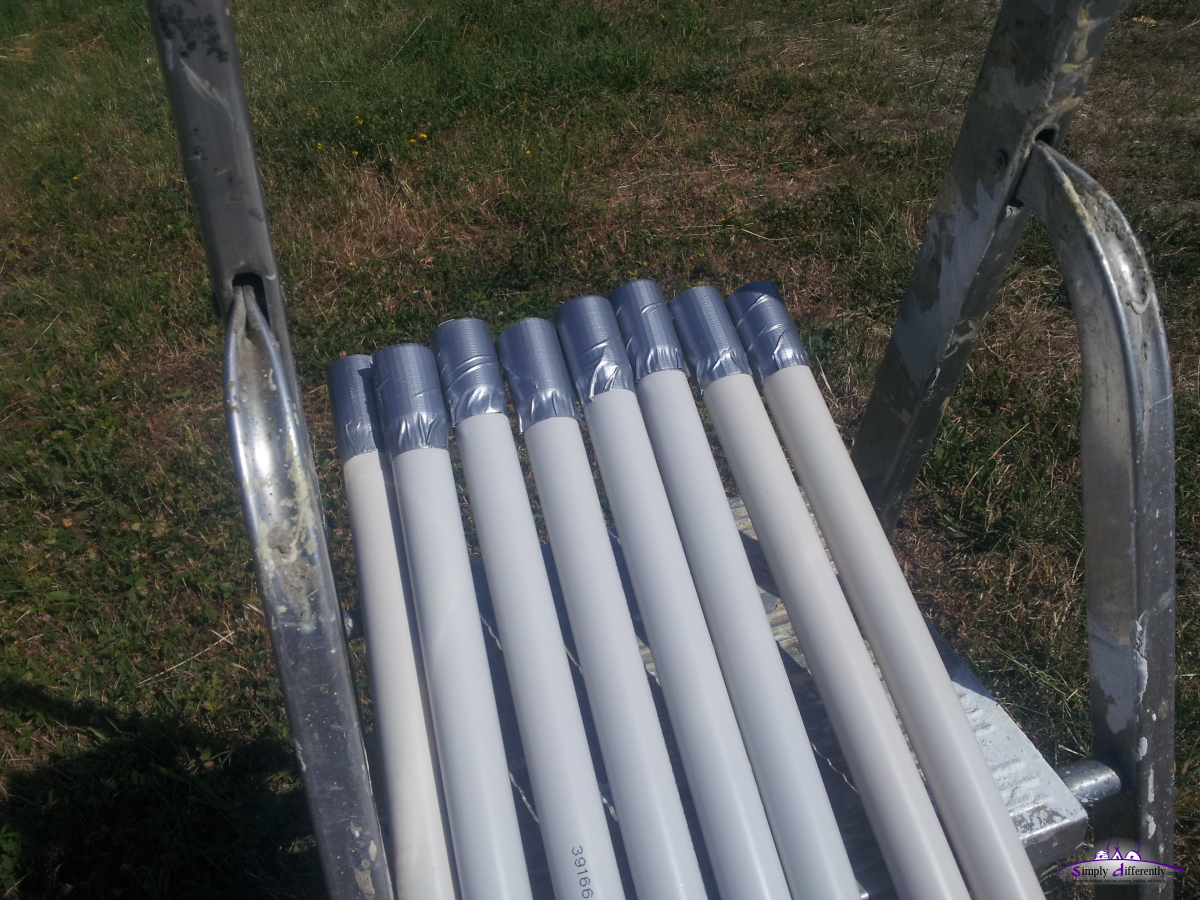
The fitting, b, is about 30mm long, and when bent it risks to tear - so using some tape to increase strength is recommendable (see photos of model building below).
- EN32, 3m x 32mm (3.25 EUR / pc)
- EN40, 3m x 40mm (3.65 EUR / pc)
Pricing from Bauhaus.info (2014/06)
|
3:x:2:
Examples:
- a = 2m, b = 0.03m; A = 5.94m, B = 1.97m
- a = 3m, b = 0.03m; A = 8.94m, B = 5.97m
| |
4:x:3:
Examples:
- a = 2m, b = 0.03m; A = 7.91m, B = 5.94m
- a = 3m, b = 0.03m; A = 11.91m, B = 8.94m
|
which means the 0.5% to 0.1% is neglectable.
An important aspect of using PVC conduits is the temperature range, which is -5 to +60 C°, in cold winters the temperature easily can go below -5C°, but rarely above 60C° in summer, so the main concern is about cold winters.
Formulas:
- A = 3a
- B = 2a
- h = A / π
- d = 2h
- π ~ 22/7
- total tubes: 4 x 3a + 4 x 3ax + 4 x 2a = 32a
Examples:
- a = 2m, A = 3a = 6m, h = 1.91m, d = 3.82m
- a = 3m, A = 3a = 9m, h = 2.86m, d = 5.72m
- 3:x:2 / 3:3:2 1r = adding 1 ring, + 2a = 34a total
- 3:x:2 / 3:3:2 2r = adding 2 rings, + 3ax + 2a = 37a total
| |
Formulas:
- A = 4a
- B = 3a
- h = A / π
- d = 2h
- π ~ 22/7
- total tubes: 4 x 4a + 4 x 4ax + 4 x 3a = 44a
Examples:
- a = 2m, A = 4a = 8m, h = 2.55m, d = 5.10m
- a = 3m, A = 4a = 12m, h = 3.82m, d = 7.64m
- 4:x:3 / 4:4:3 1r = adding 1 ring, + 3a = 47a total
- 4:x:3 / 4:4:3 2r = adding 2 rings, + 4ax + 3a = 51a total
|
An overview of variants, sorted by diameter:
- 1.27m => LC Dome 4:x:3 or 4:4:3 / 4 with 2m tubes: small model
- 1.91m => LC Dome 4:x:3 or 4:4:3 / 4 with 3m tubes: model, kids playground
- 3.82m => LC Dome 3:x:2 or 3:3:2 with 2m tubes: small storage, kids playground
- 5.10m => LC Dome 4:x:3 or 4:4:3 with 2m tubes: living space for 1 person, apprx. space for 10 people to sleep
- 5.72m => LC Dome 3:x:2 or 3:3:2 with 3m tubes: living space for 1-2 people, apprx. space for 15 people to sleep
- 7.64m => LC Dome 4:x:3 or 4:4:3 with 3m tubes: living space for 2-3 people, apprx. space for 20 people to sleep
I did
- 1.27m LC Dome 4:x:3 / 4 with 2m x 16mm tubes
- 3.82m LC Dome 3:x:2 with 2m x 25mm tubes
- 3.82m LC Dome 3:3:2 with 2m x 25mm tubes
- 5.10m LC Dome 4:x:3 with 2m x 25mm tubes
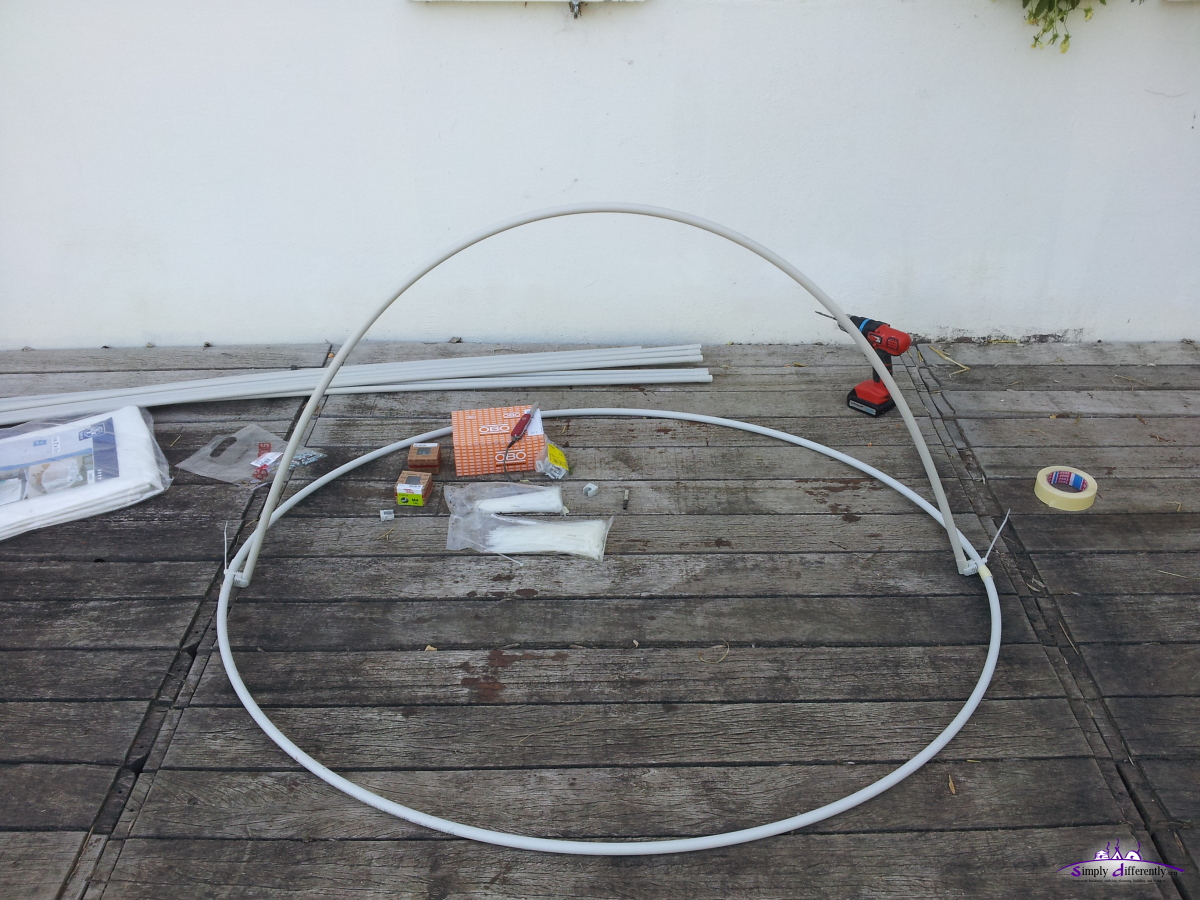
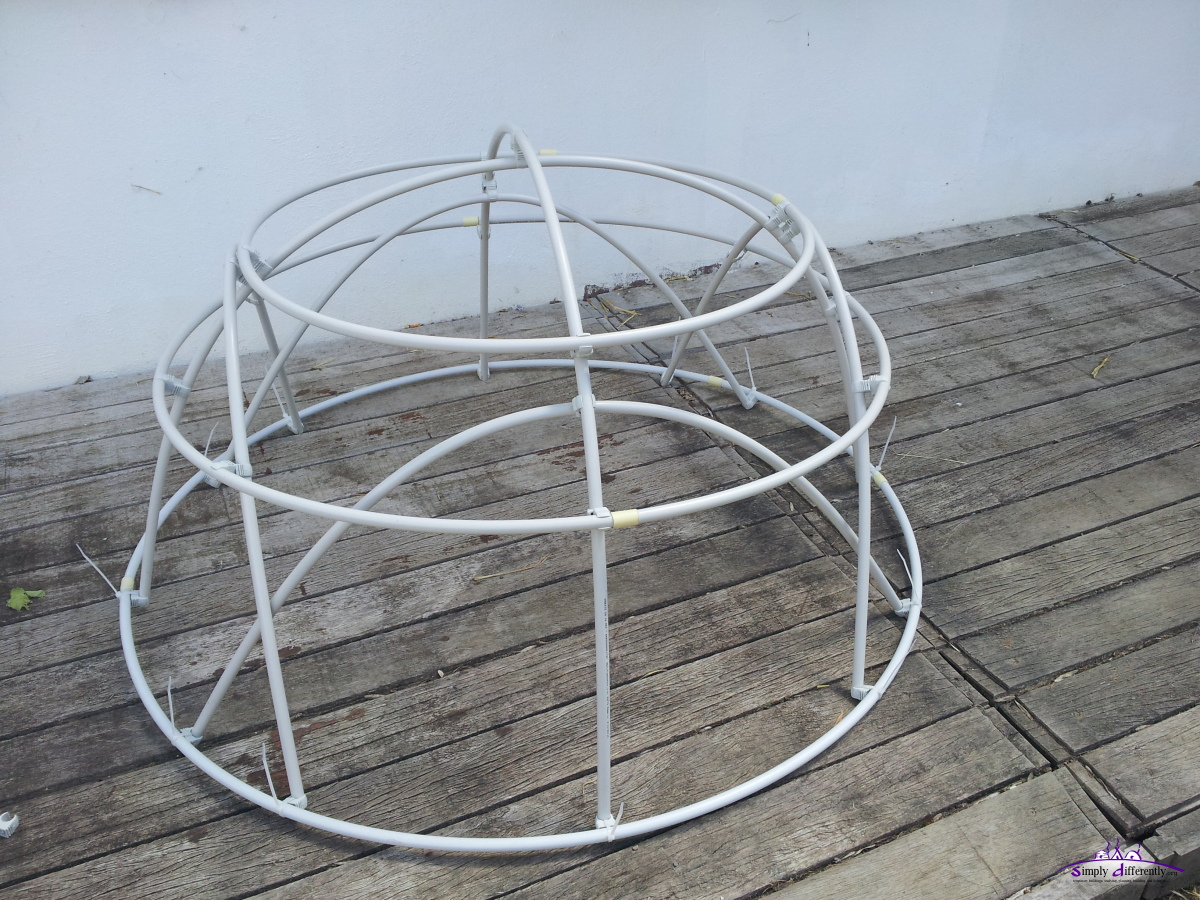
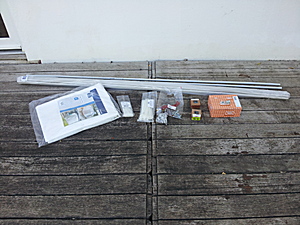
In order to get some experience with the planned setup, I did a small model, scale 4:1 of the LC Dome 4:x:3 2r with 2m tubes:
Numbers
- a = 0.5m (2m / 4) x 16mm
- A = 4a = 2m
- h = 0.64m (25")
- d = 1.27m (50")
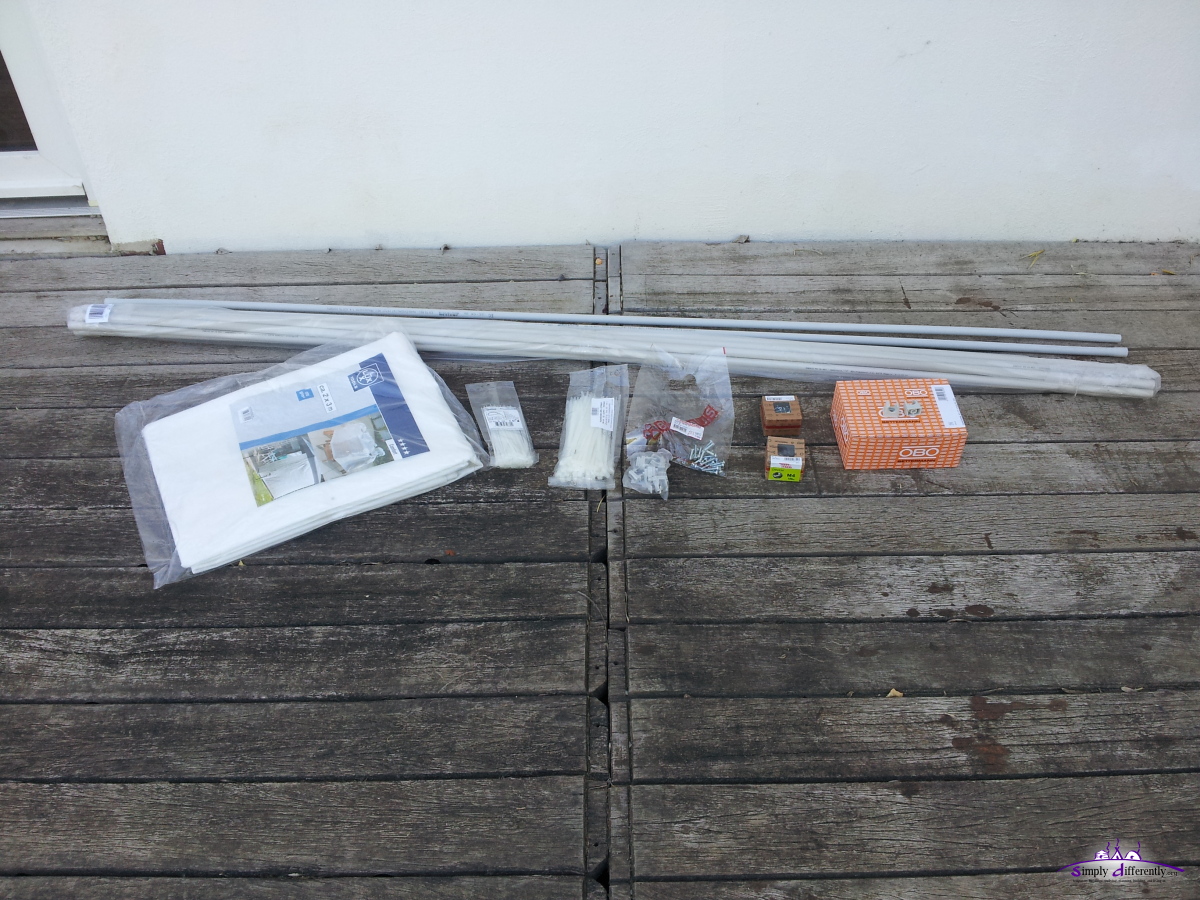
Material
- 12 x 2m x 16mm PVC conduits (cost ~10 EUR)
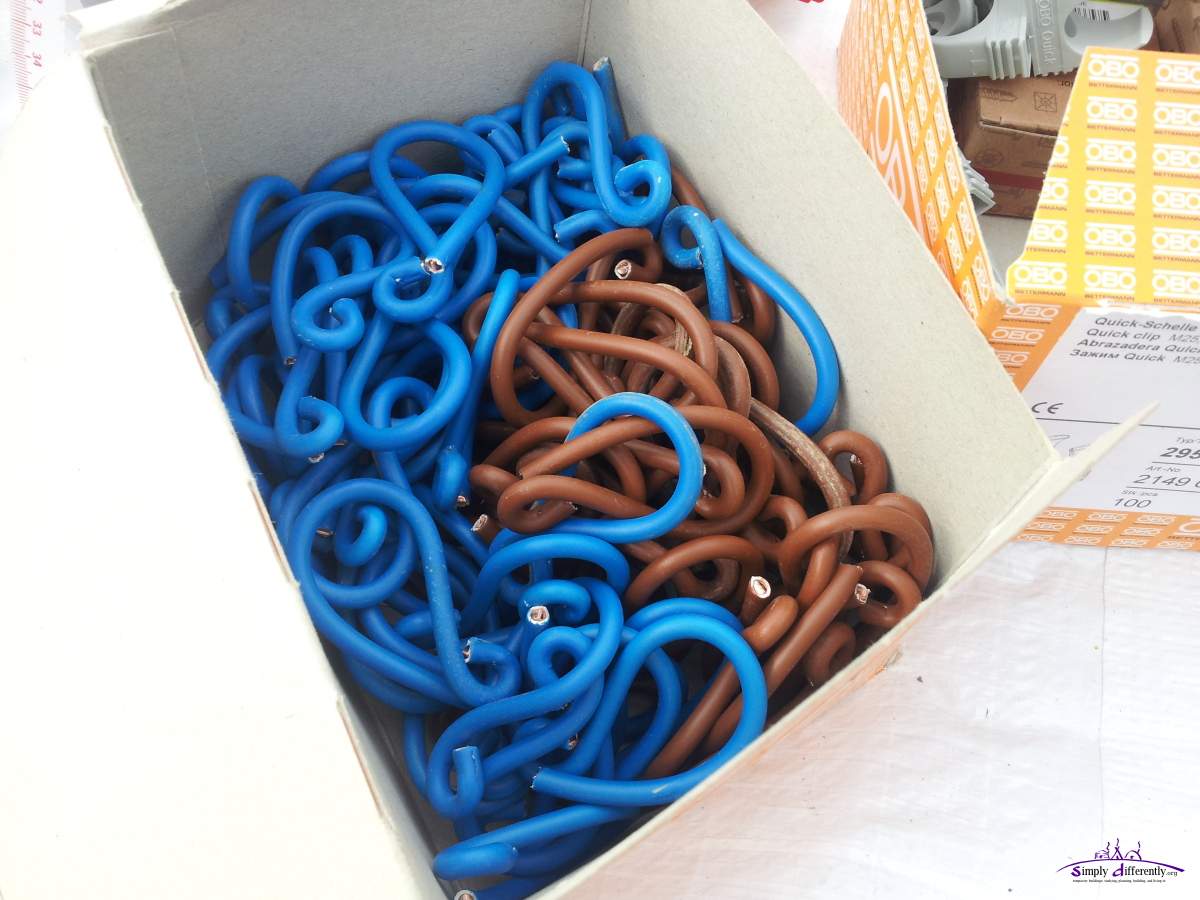
- 100 x "OBO Quick" 16mm clip-in connectors, (cost ~10 EUR)
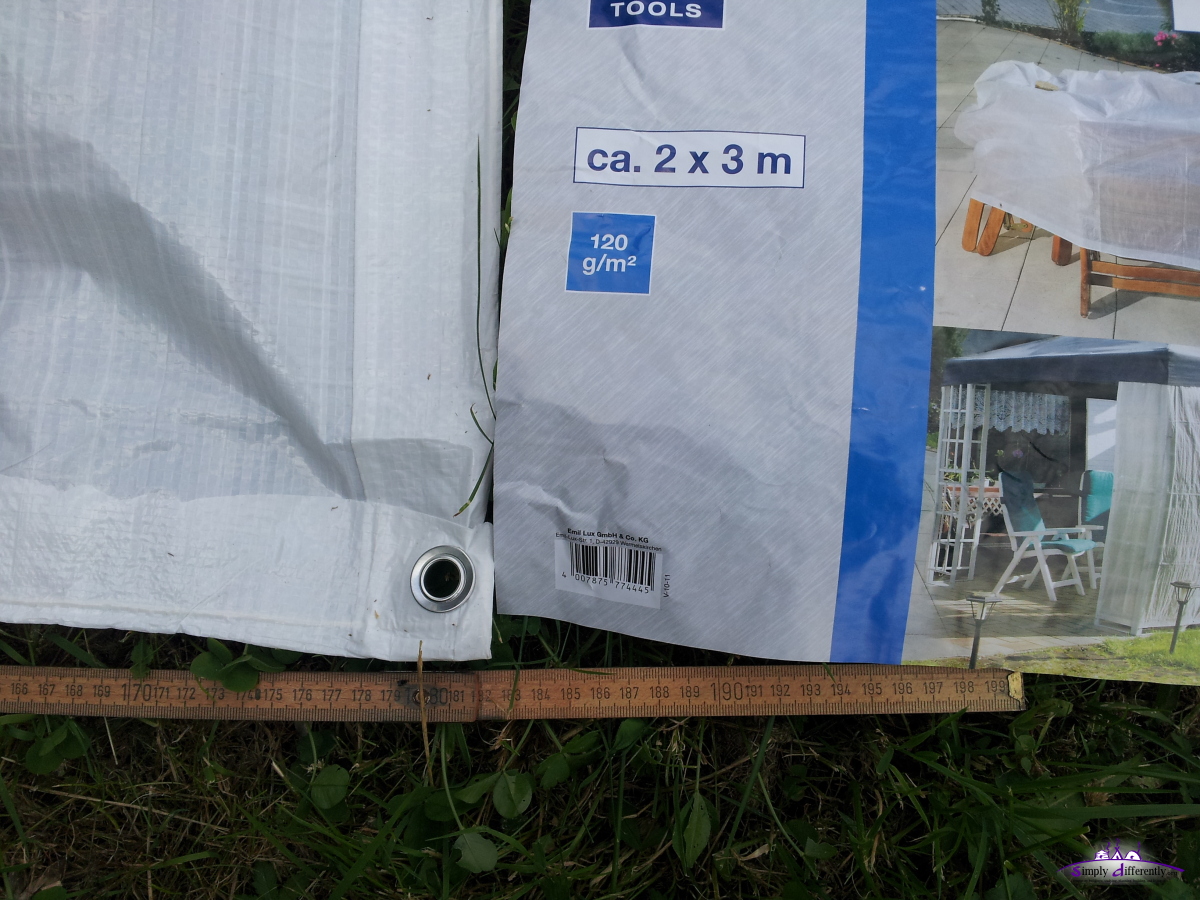
- ca. 2m x 2m PE white cover (actual size is 1.83m x 2m), (cost 7 EUR)
total cost apprx. 30 EUR
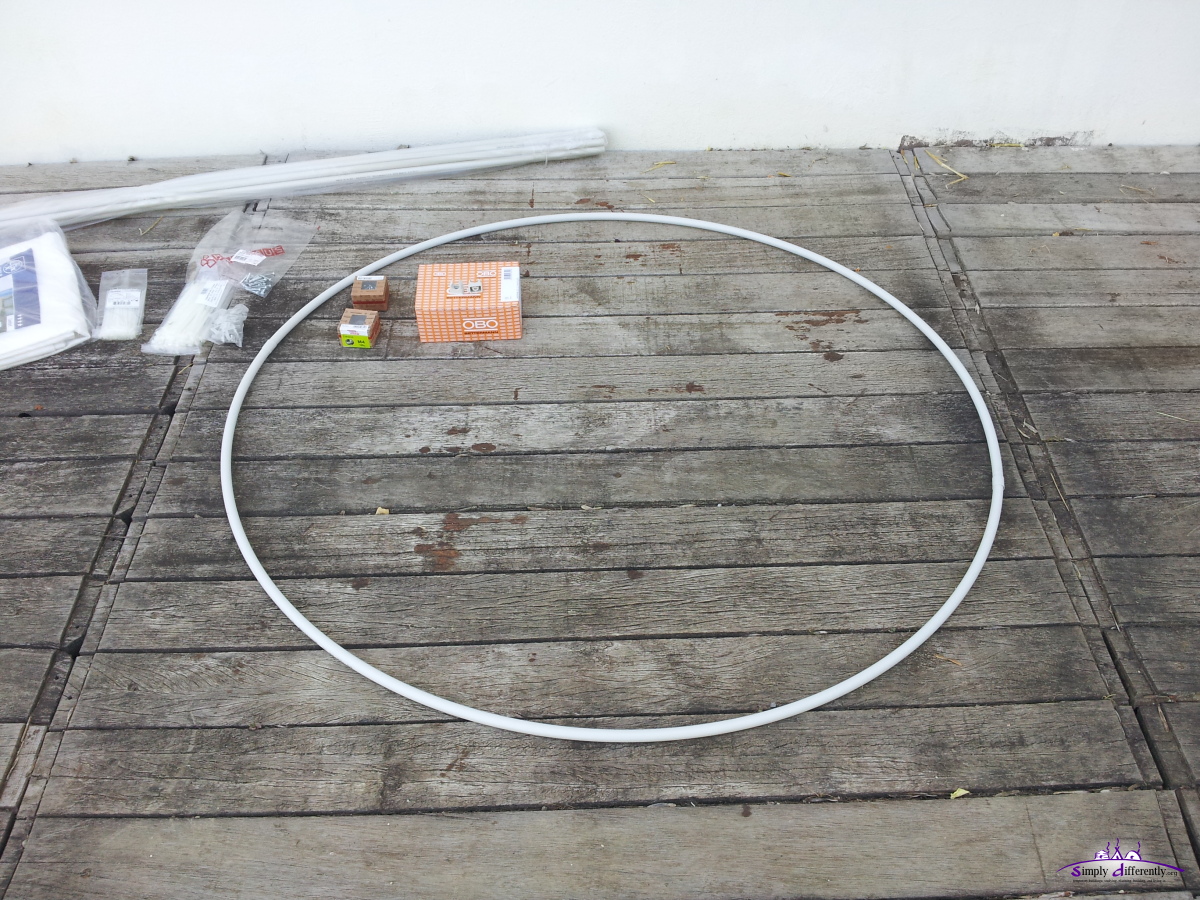
Starting point
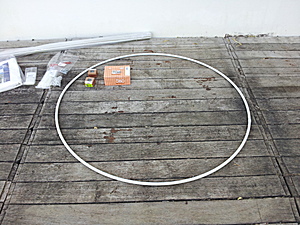
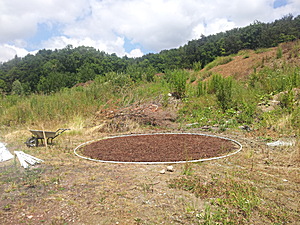
Base circle
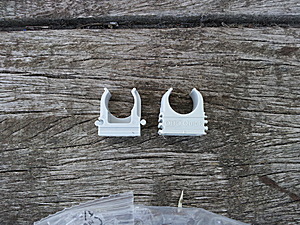
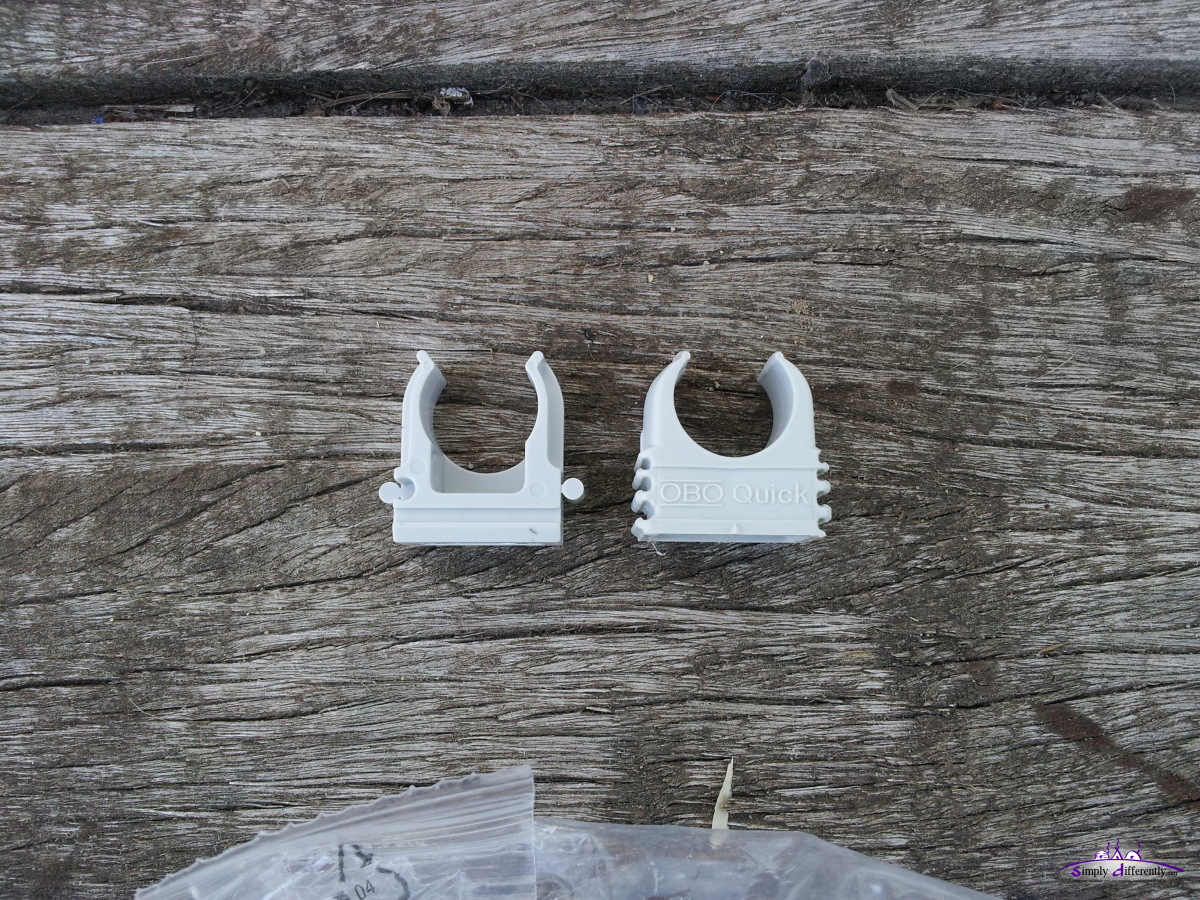
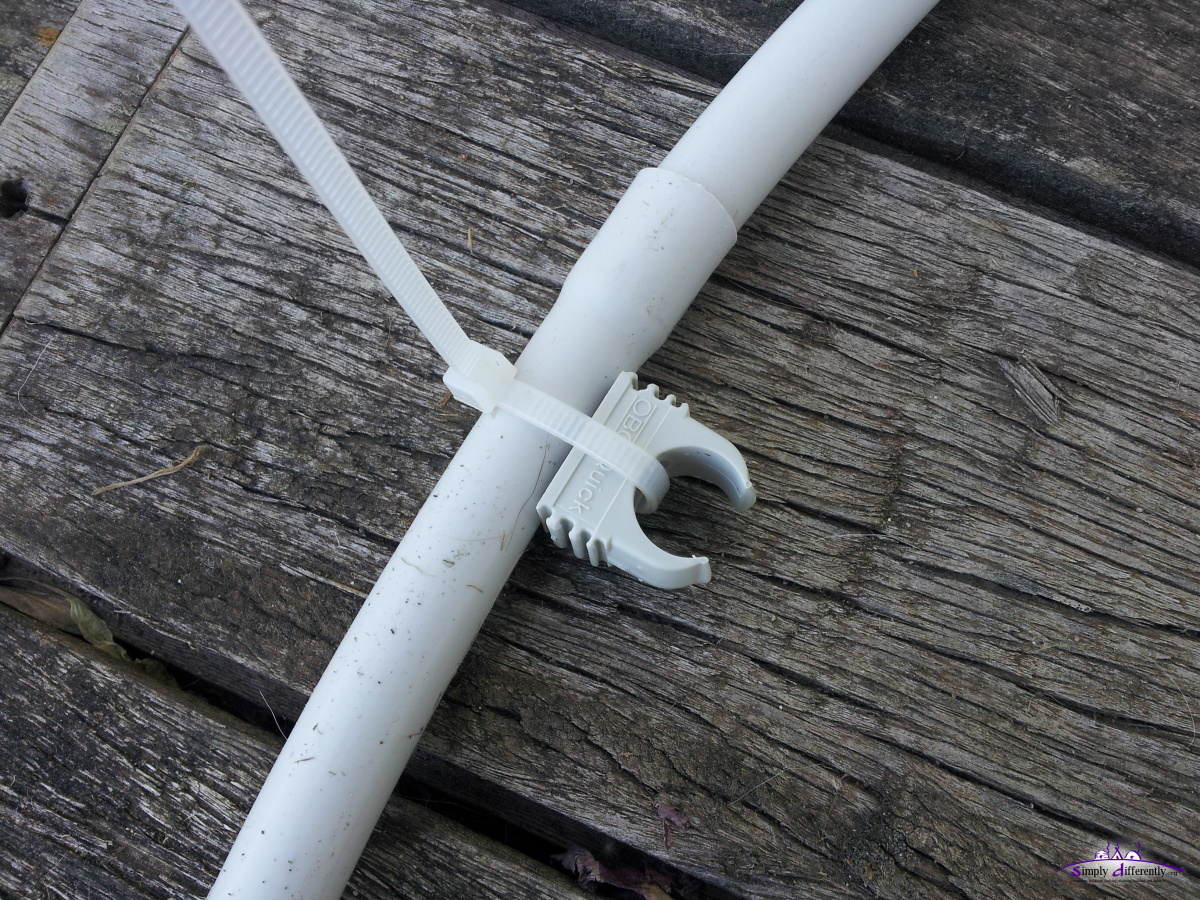
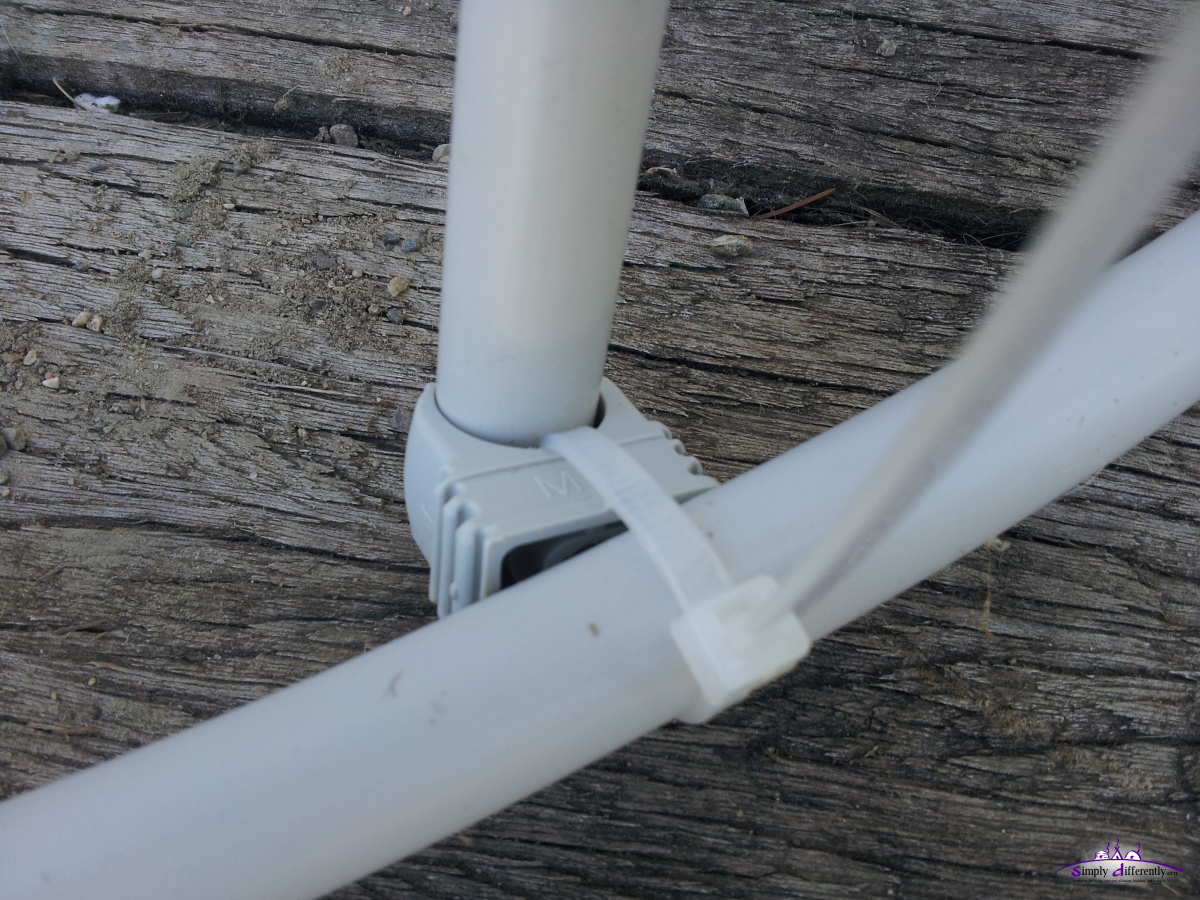
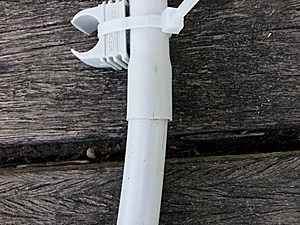
Clip connectors

Preliminary connector for the ground
Tear of the fitting from (over-)bending
Fitting too fat for the clip
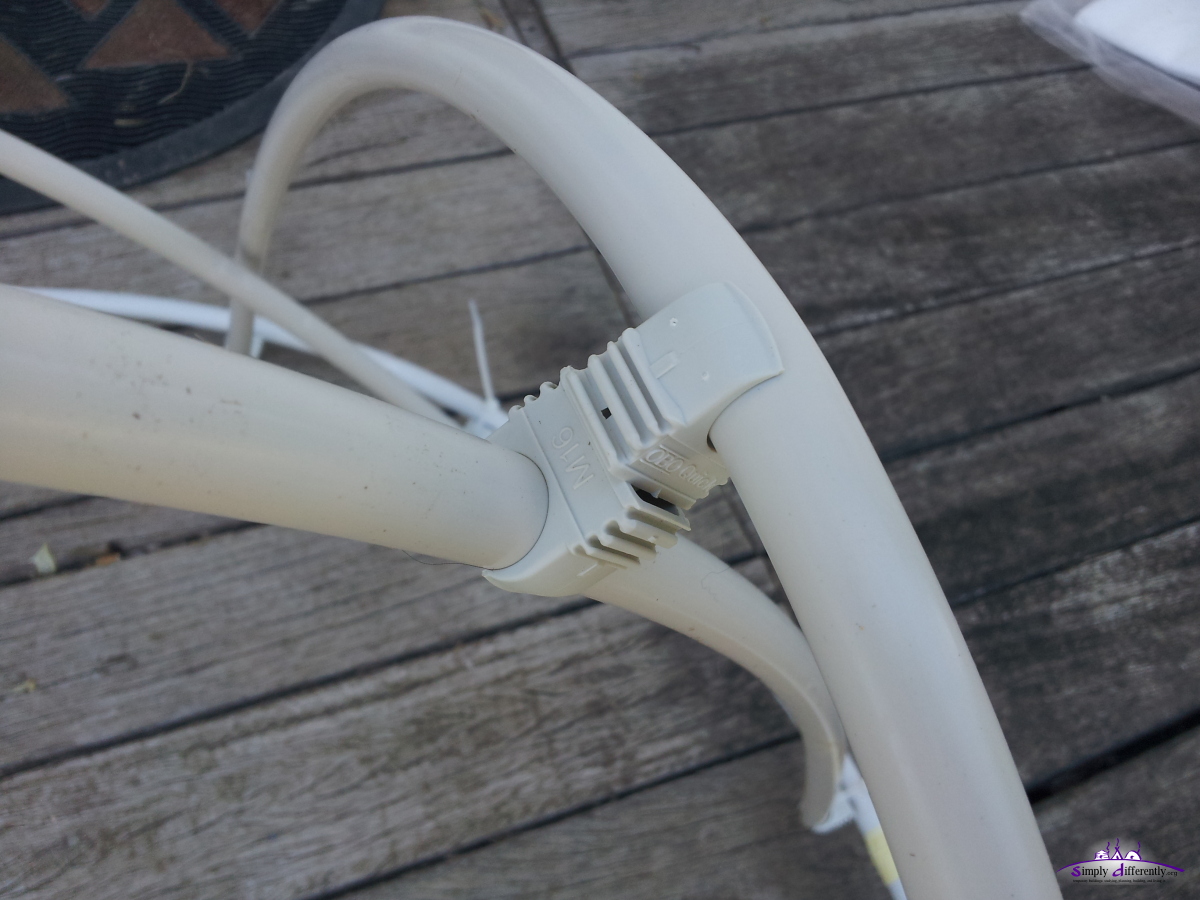
Combining two clip connectors with M4x16
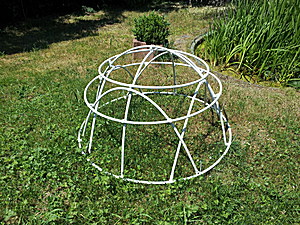
Finished skeleton
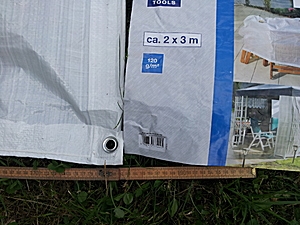
2m x 3m PE isn't really 2m, but 1.83m
Single "Ghostly" connector (1 of 3)
Single "Ghostly" connector (2 of 3)
Single "Ghostly" connector (3 of 3)
Starting with the top
Inside view of the "ghostly" connectors
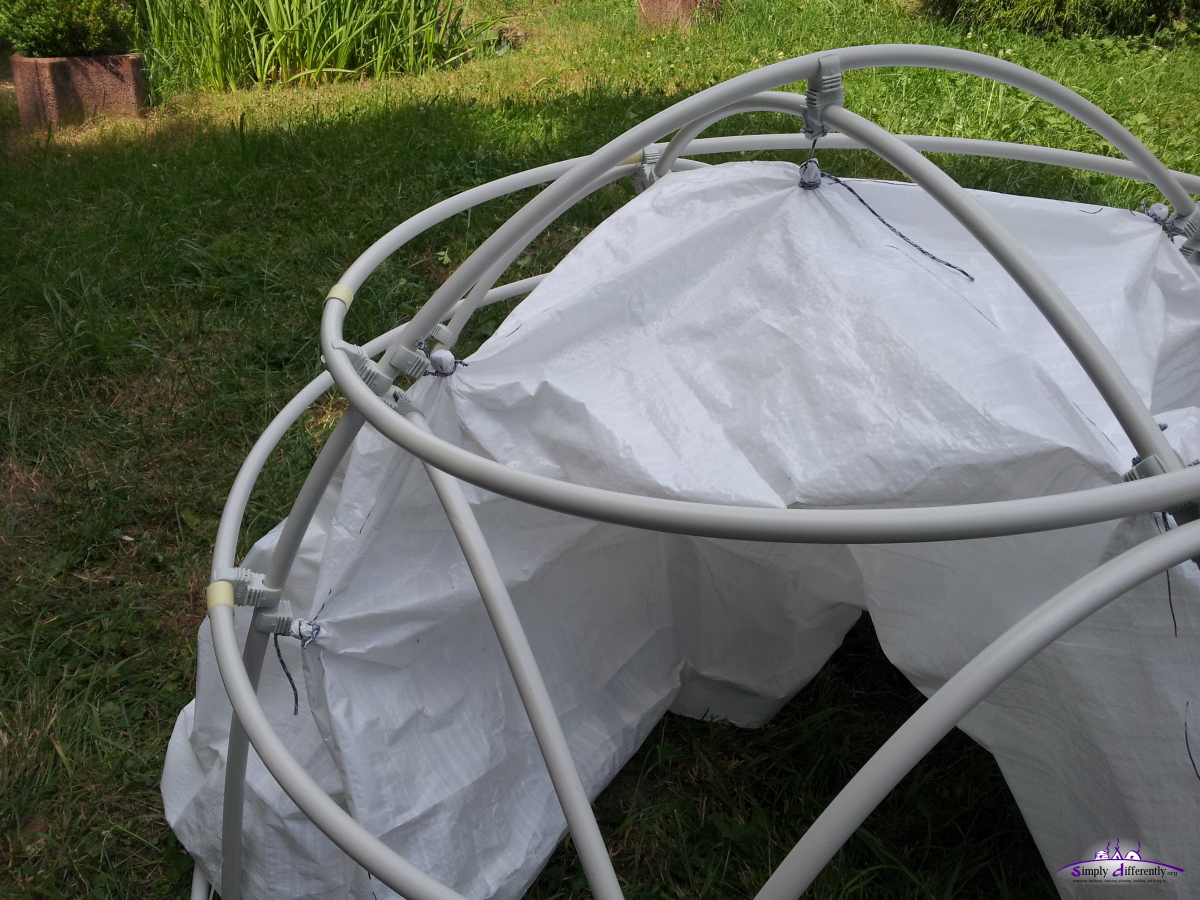
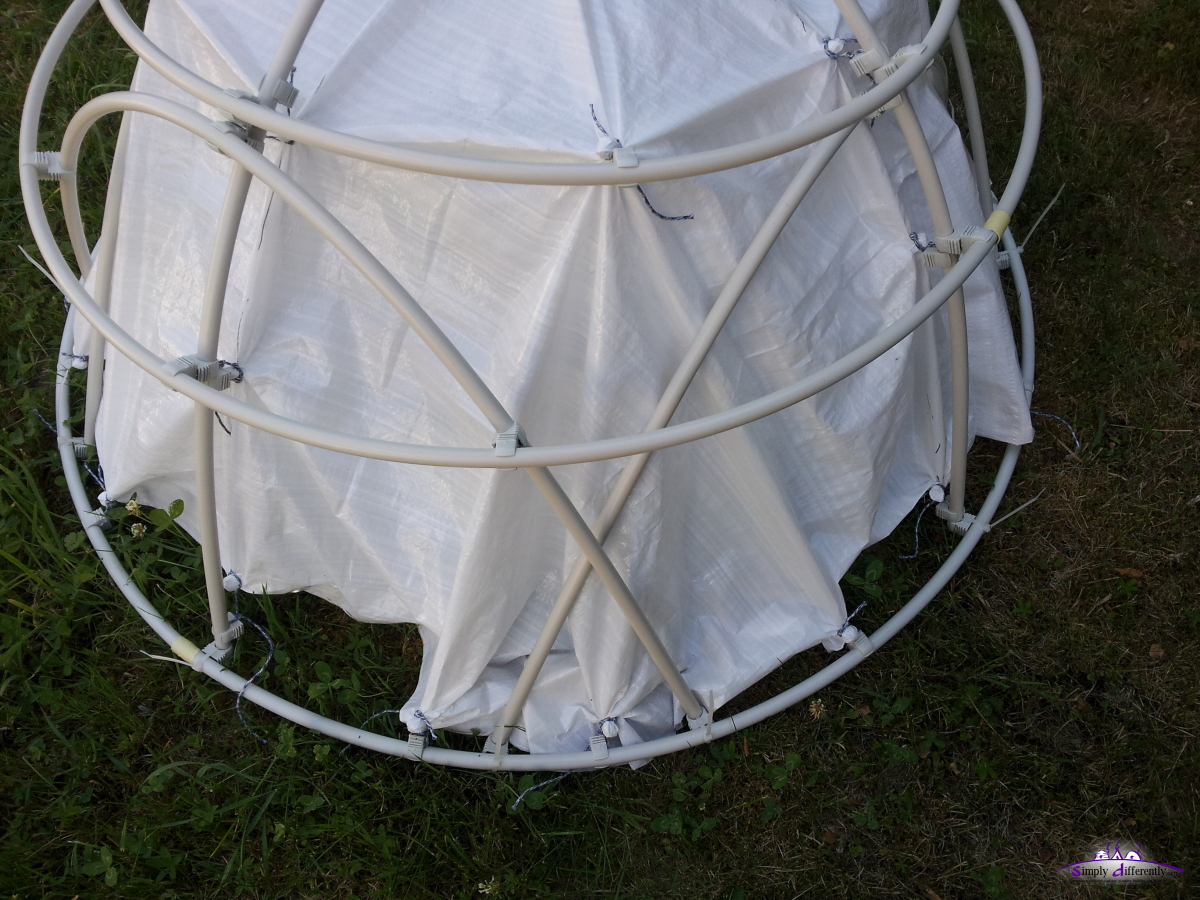
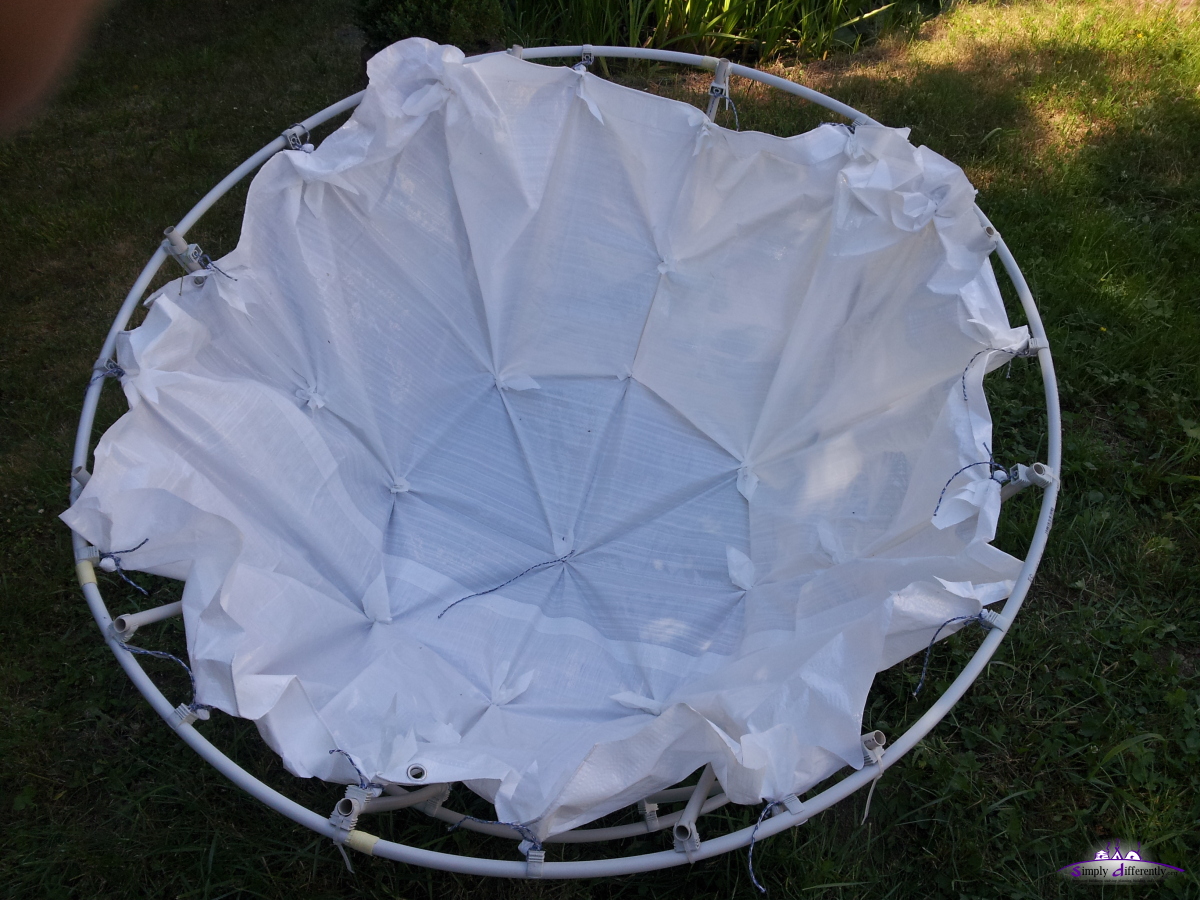
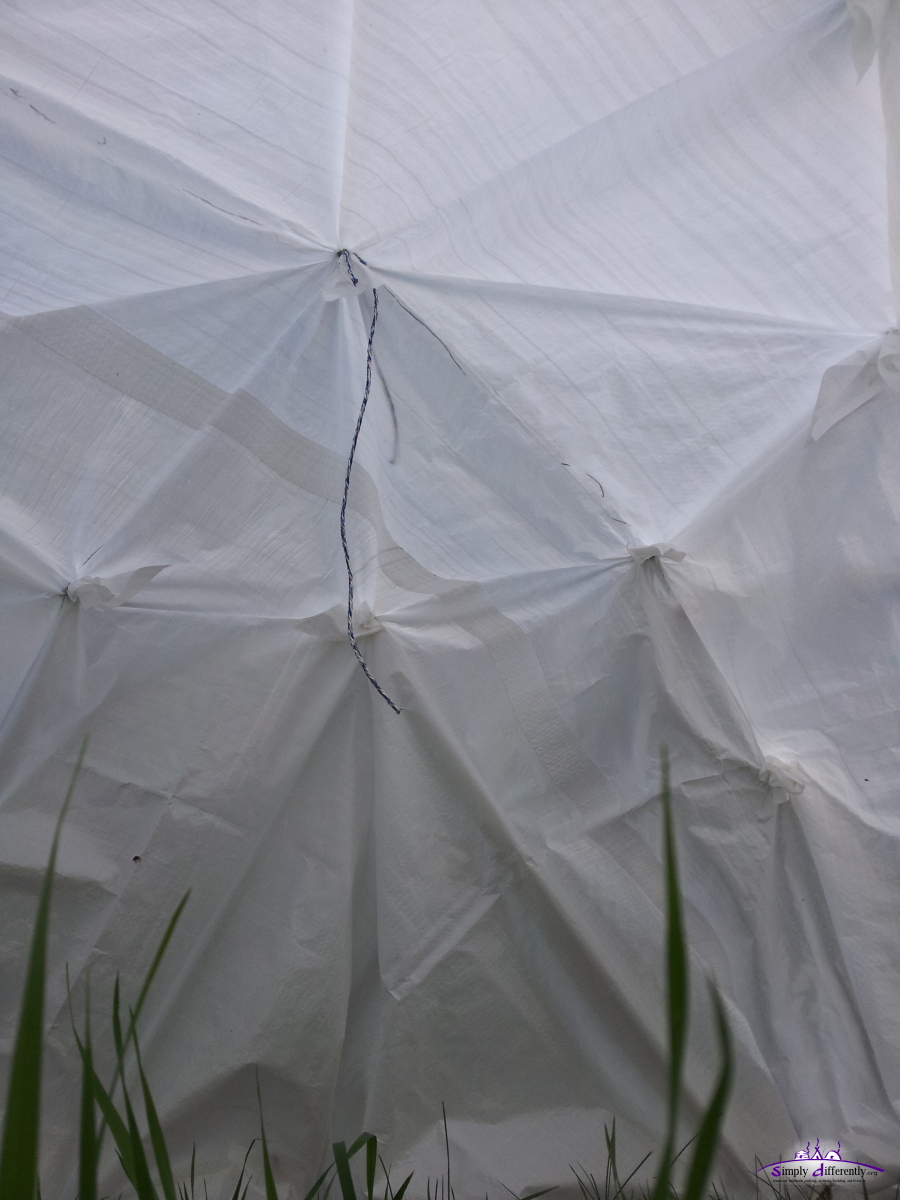
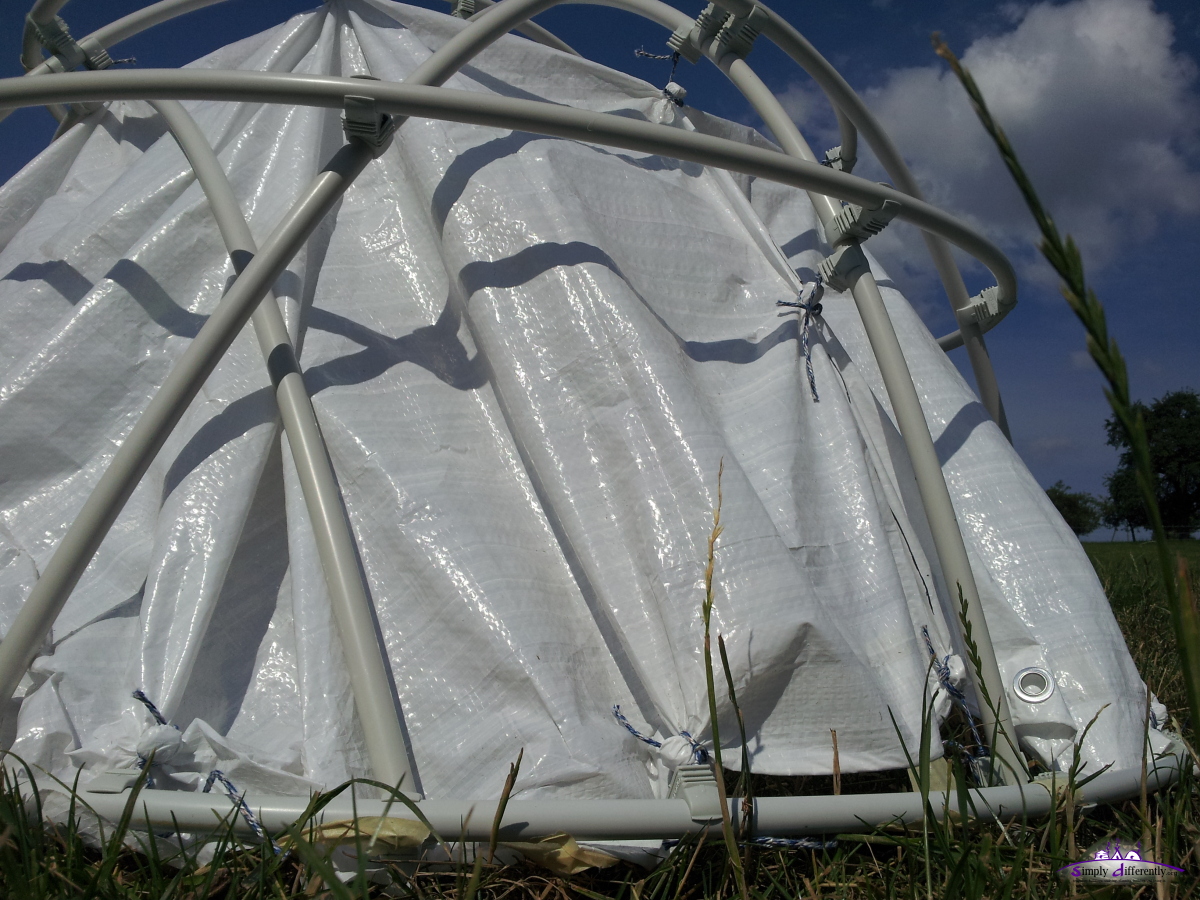
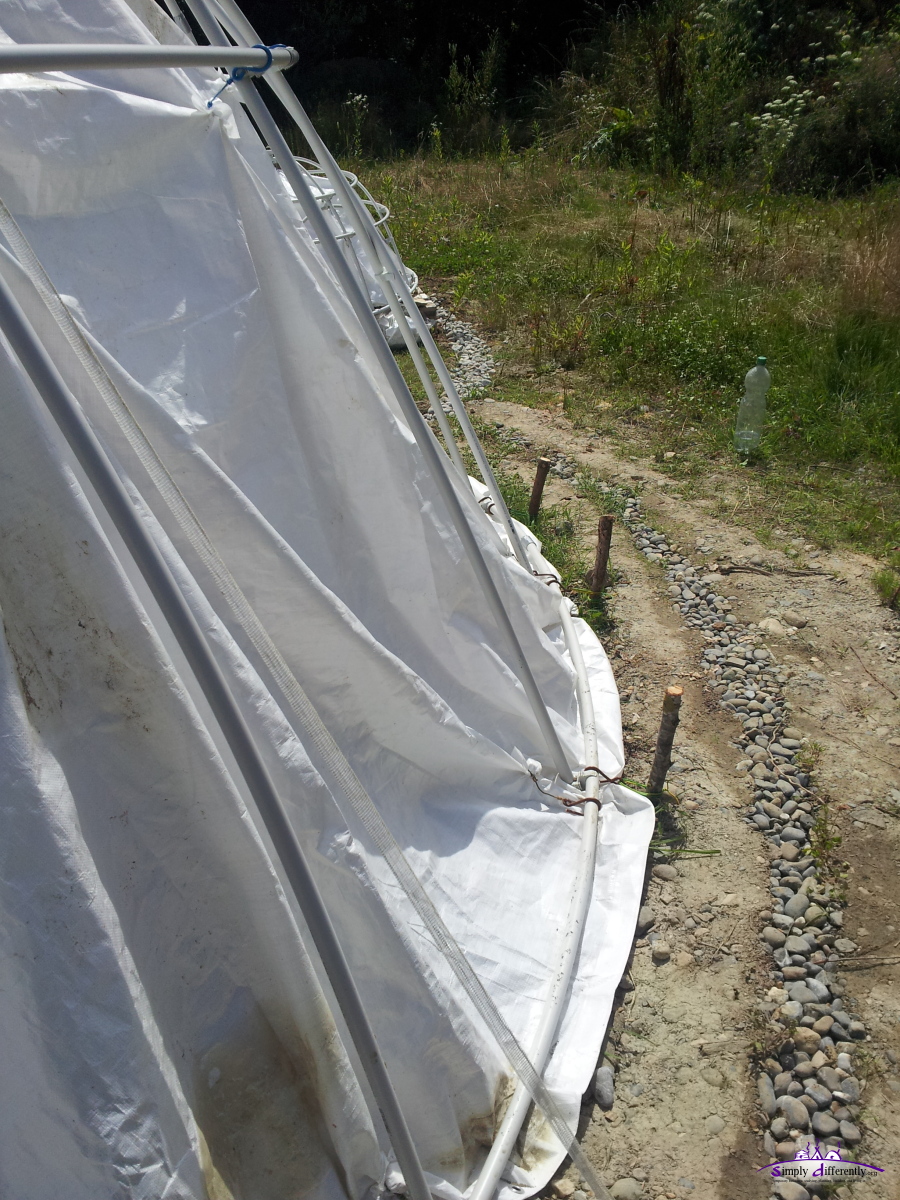
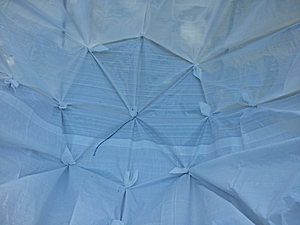
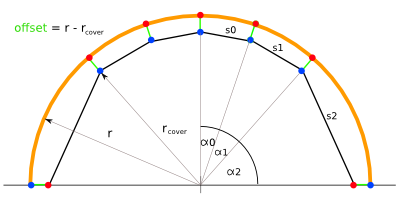
For sake of simplicity I hang the rain cover within, with the option and preparation to hang an interior inside as well:
Size of rain cover, one piece:
Example:
- 4:x:3 with 2m tubes, 8m x 8m rain cover
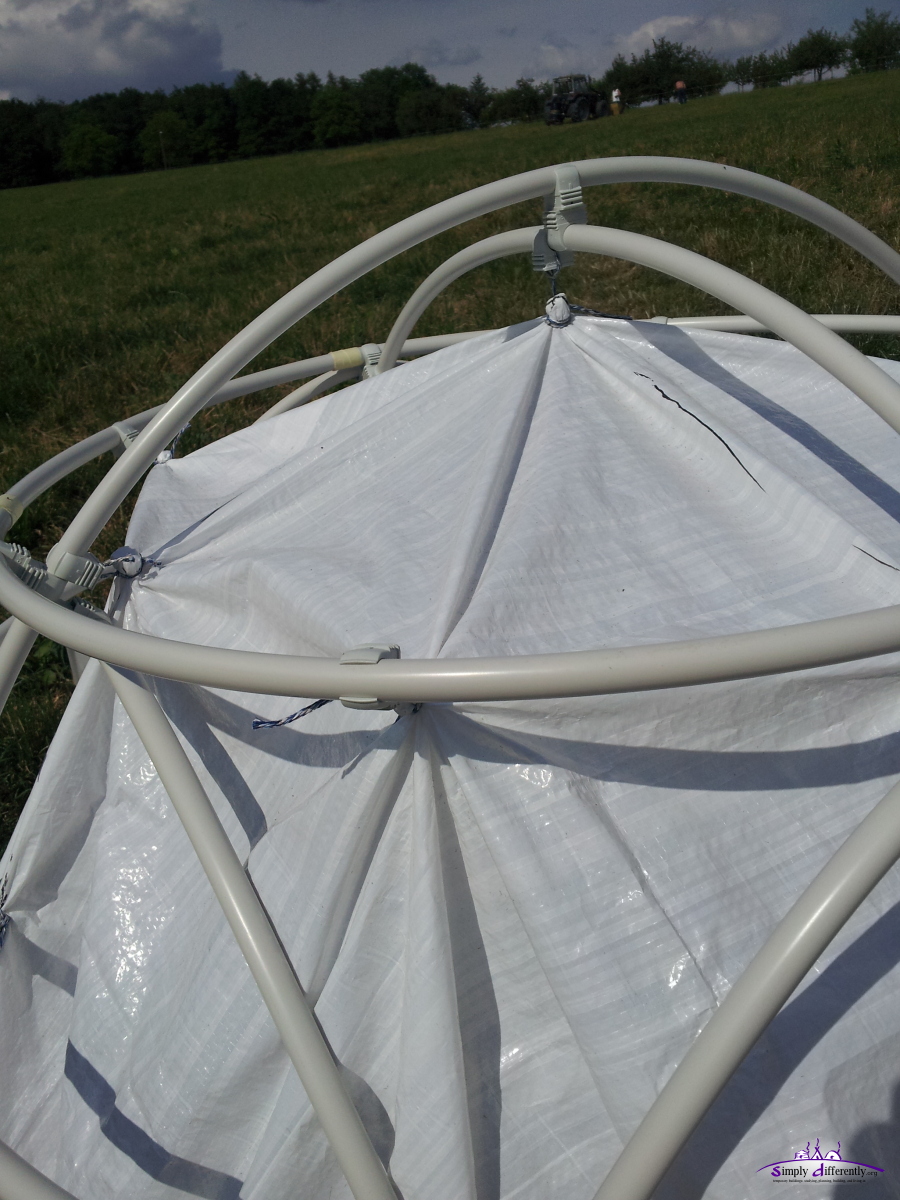
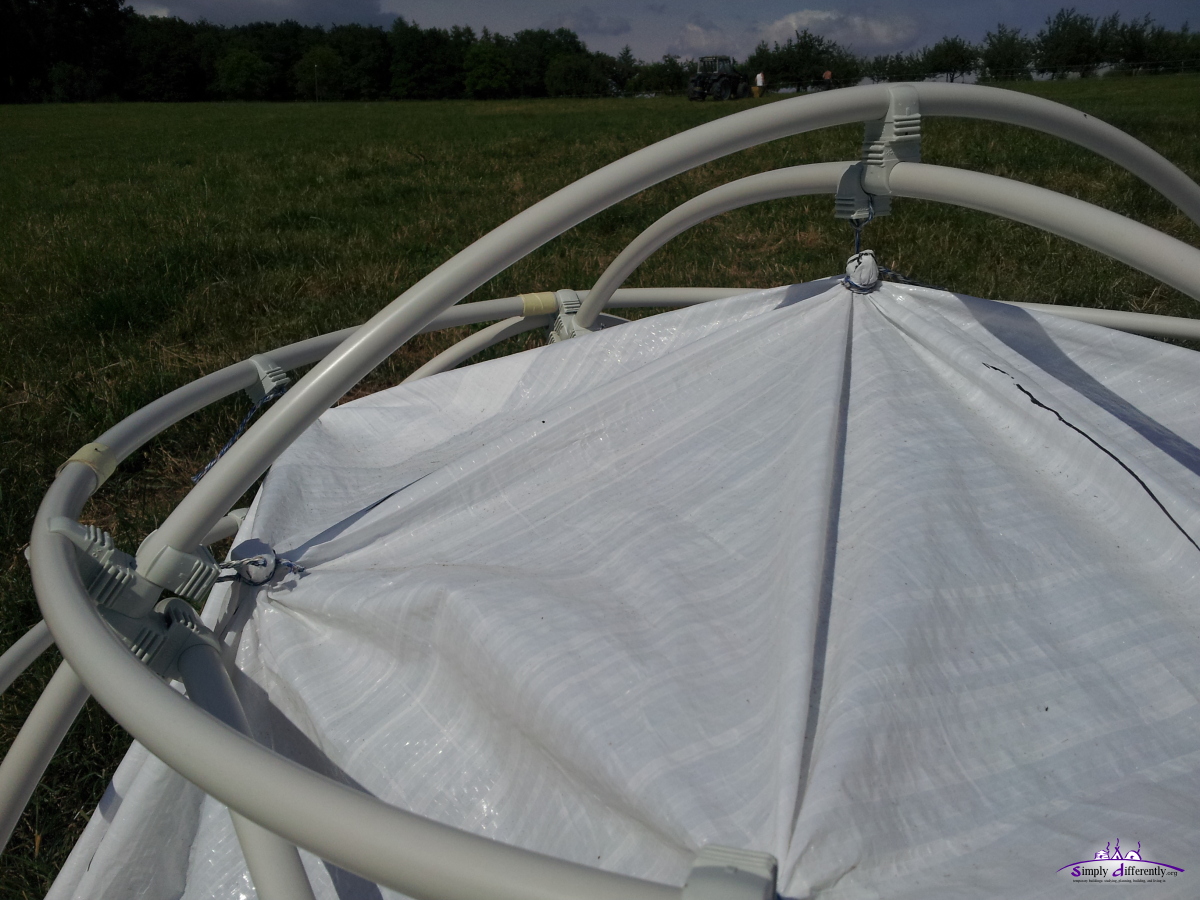
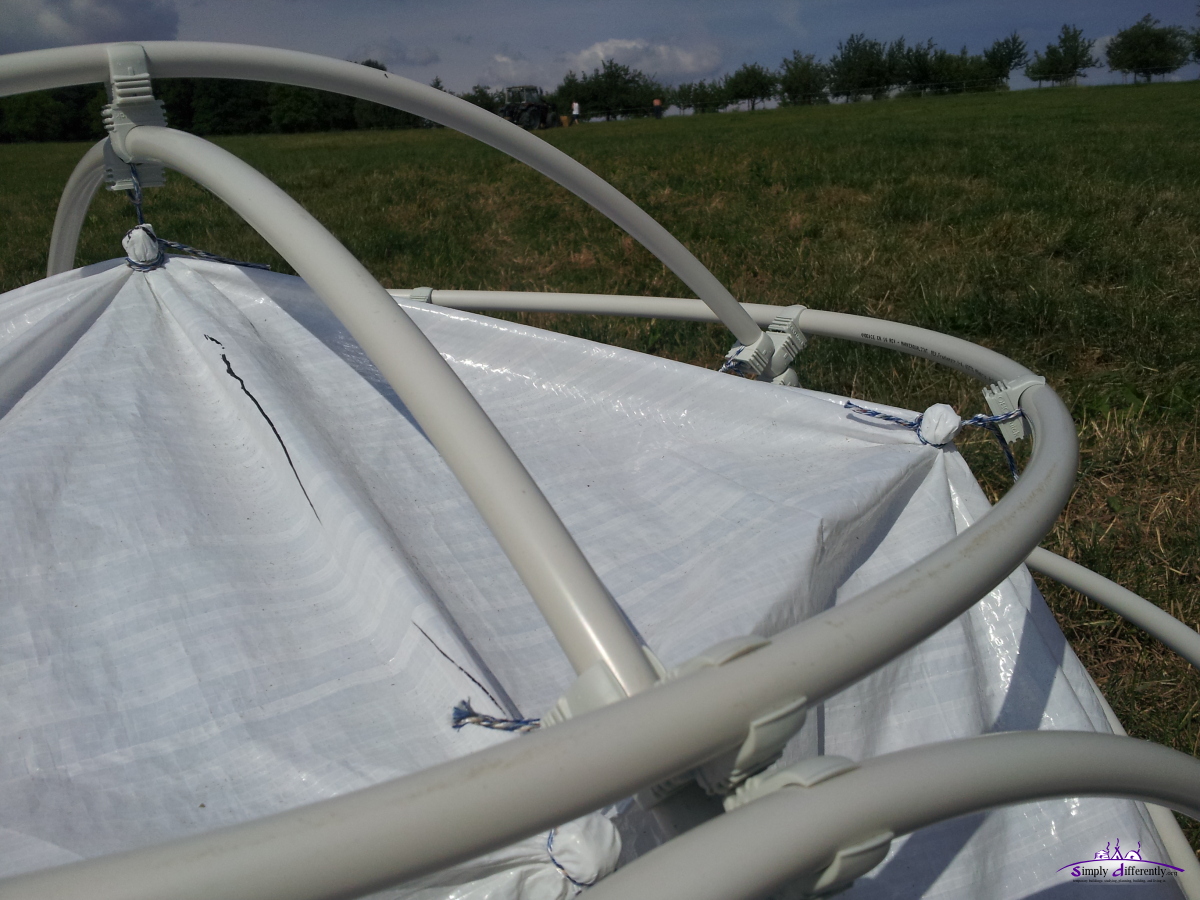
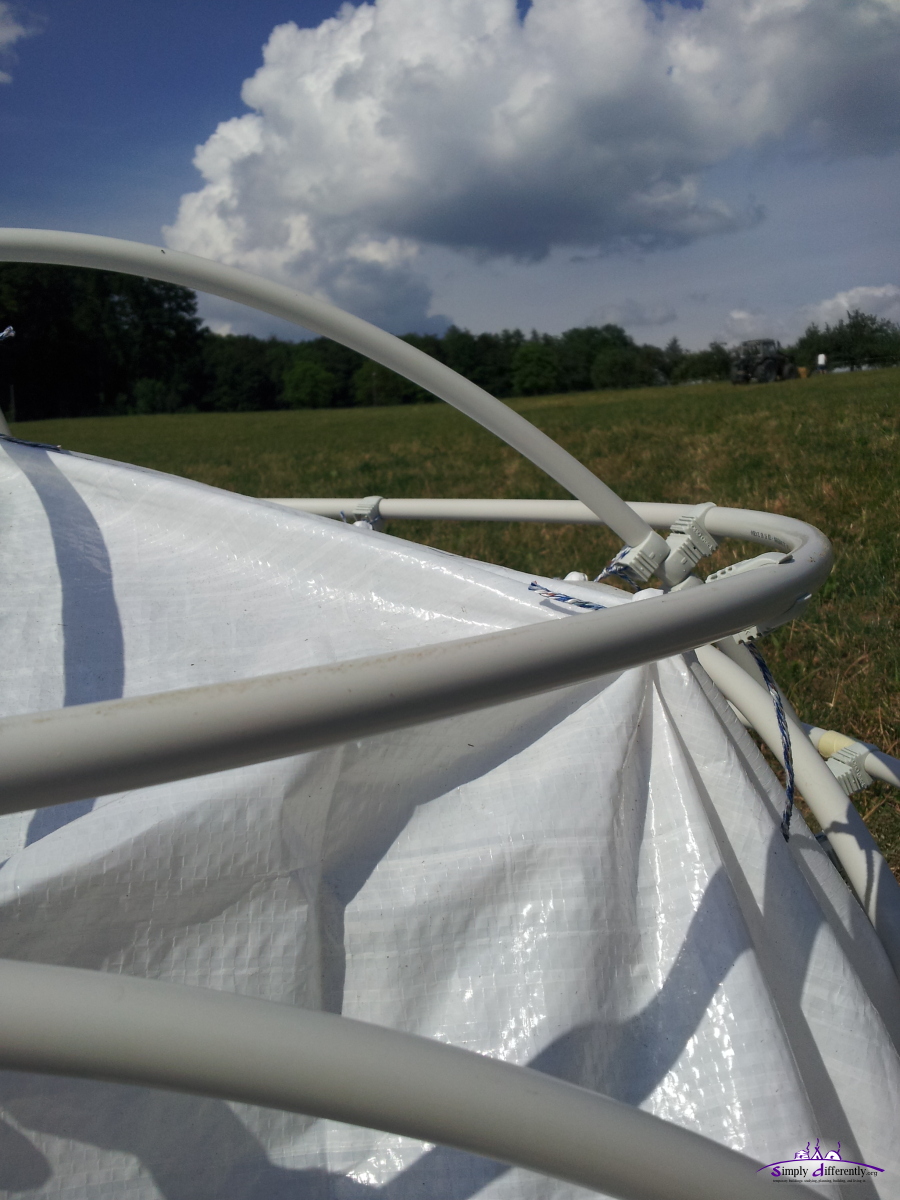
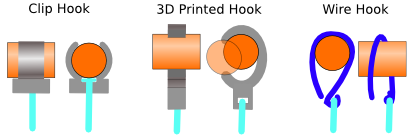
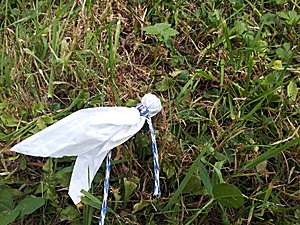
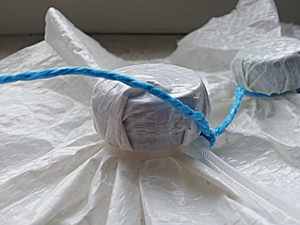
Cover Attachments |
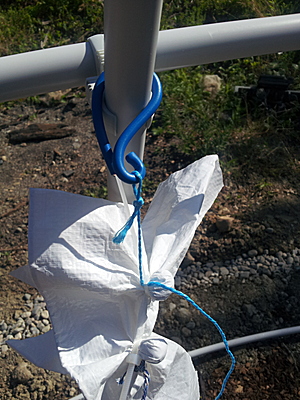
Wire Hook experimentation |
I pondered on the hook for a while, even considered a 3D printing design to match the requirements in a great detail.
Yet, on-site I found 8m long strong electric cable (apprx. 5x 3mm diameter wires, separately insulated), and dismantled it and formed a hook (left-hand side photo); actually ended up with 60+ hooks.
The main idea is that it's a deliberate point of failure or breaking in case of heavy storm; I do want that hook to fail in case of heavy application of force, and leave the skeleton intact, and leave the rain cover intact and not tear.
It also means, in case of a storm, the rain cover will detach but still cover the interior given it's properly anchored on the ground.
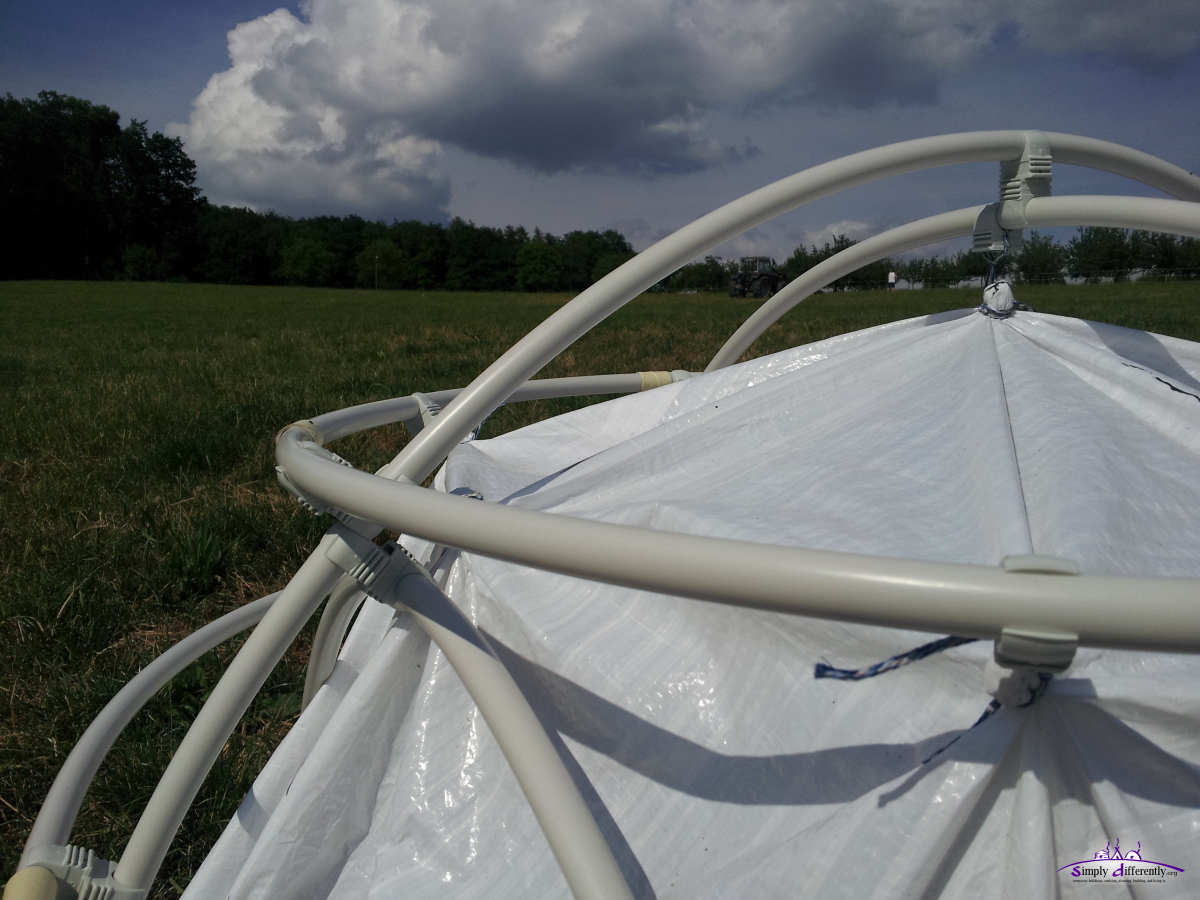
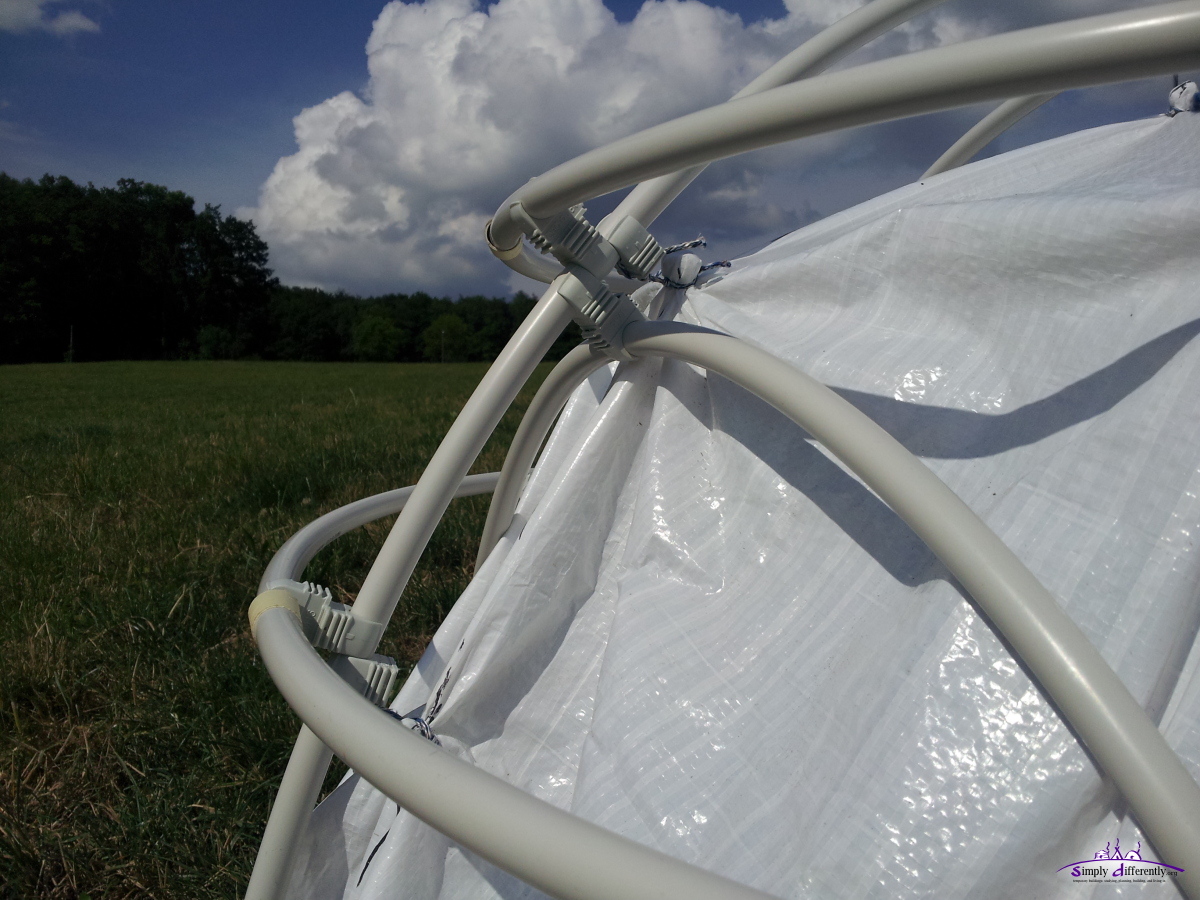
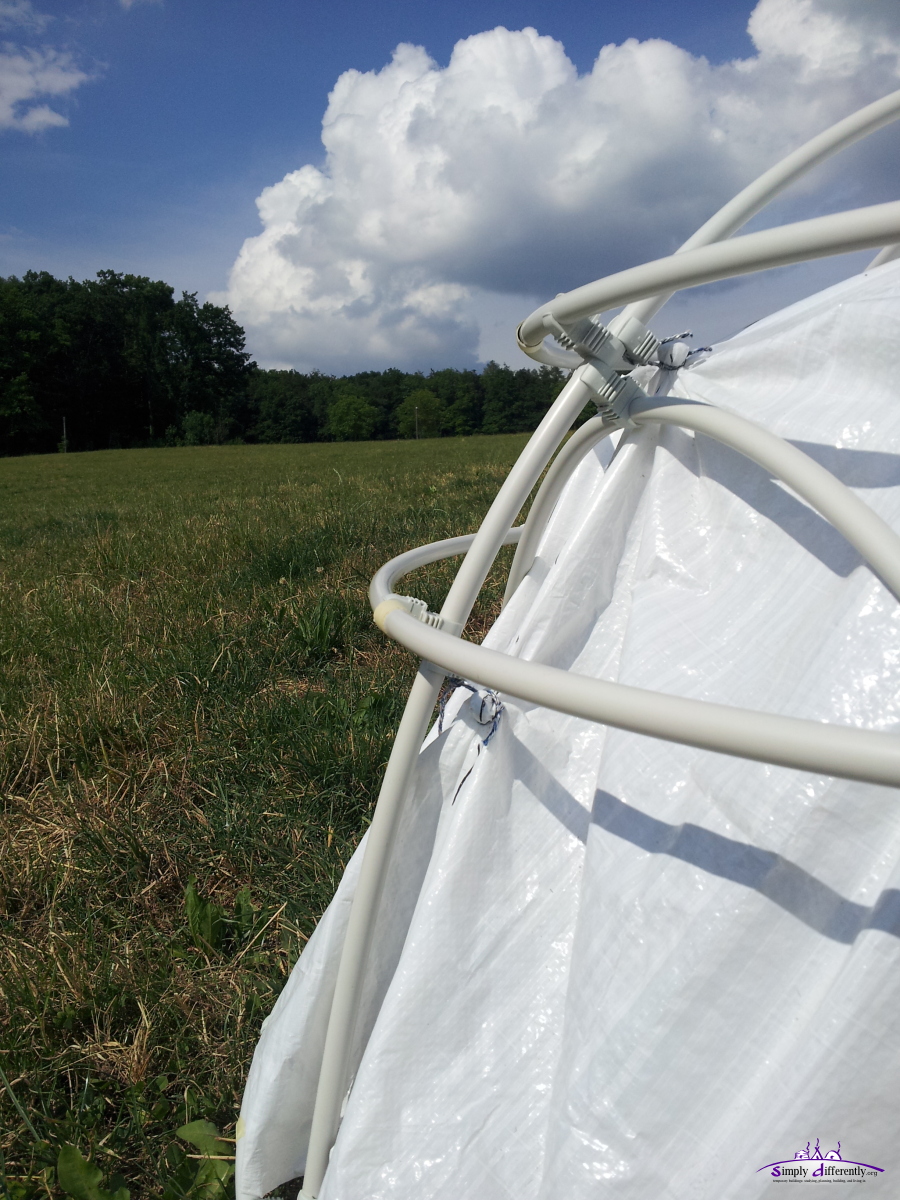
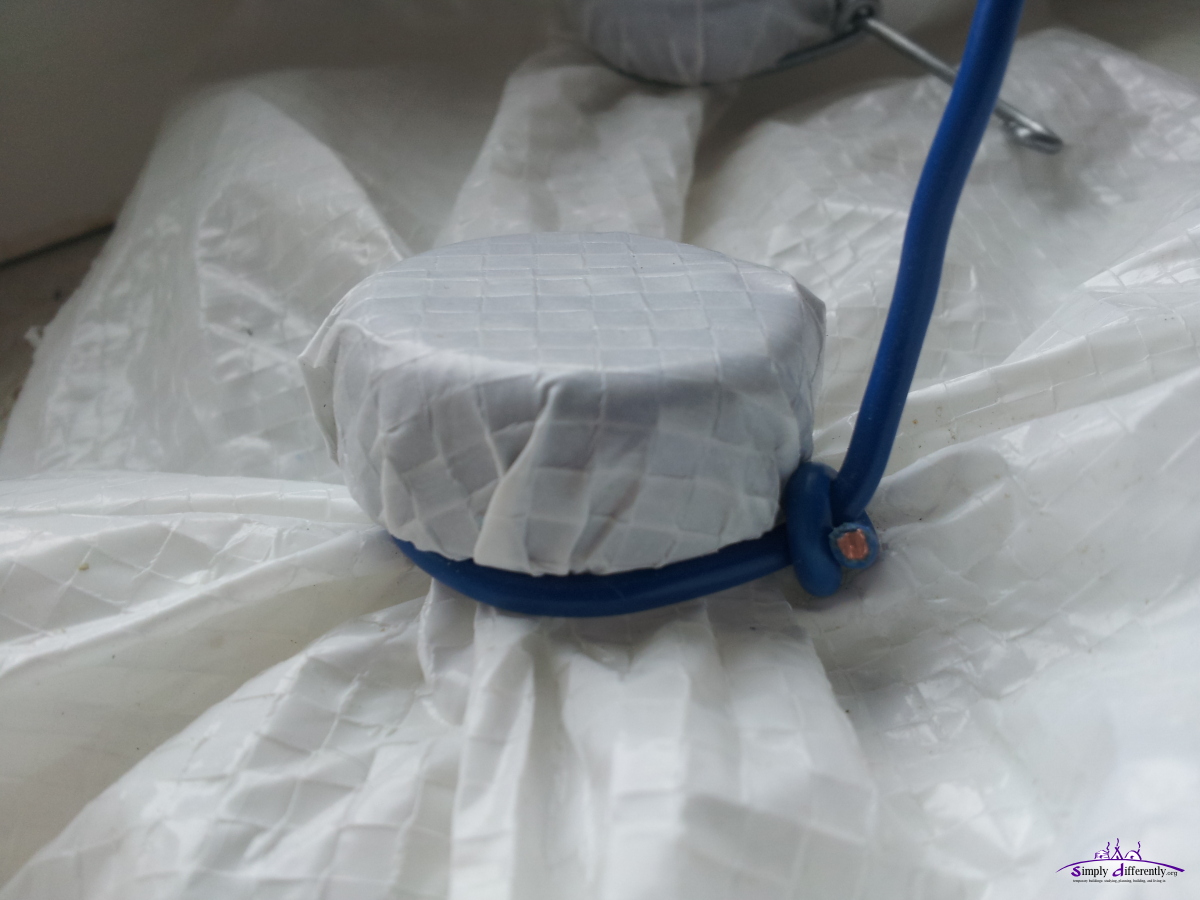
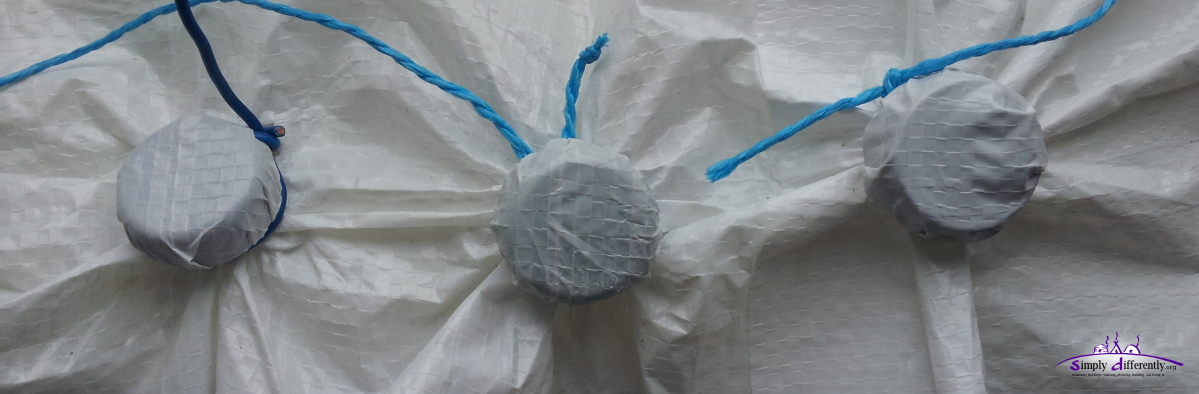
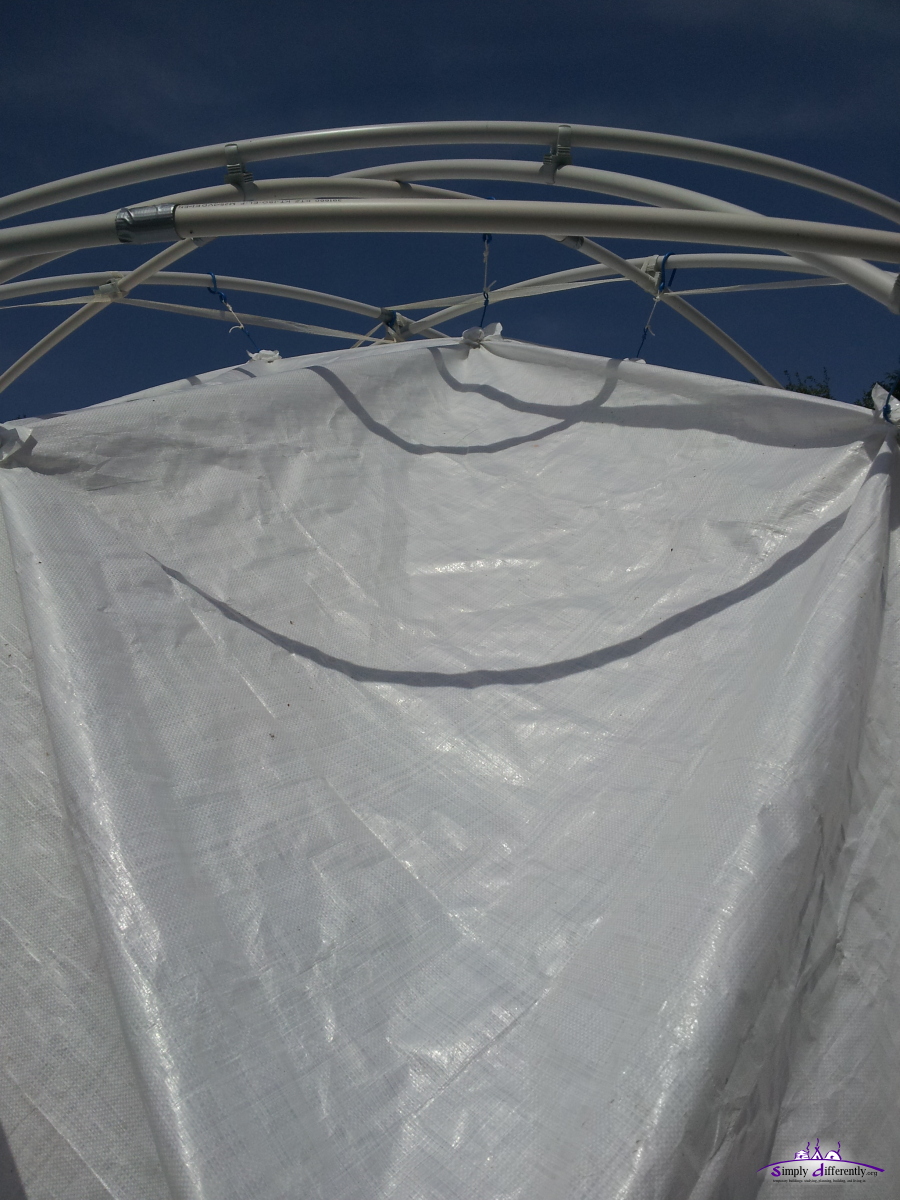
In order to attach a cover (from outside) and interior cover (from inside) some "ghostly" connector I came up with:
Single "Ghostly" connector (1 of 3)
Single "Ghostly" connector (2 of 3)
Single "Ghostly" connector (3 of 3)
Double sided "Ghostly" connector (1 of 3)
Double sided "Ghostly" connector (2 of 3)
Double sided "Ghostly" connector (3 of 3)
Features:
- Single "Ghostly": adjustable distance to next layer via cord
- Double "Ghostly": non-adjustable distance due the size of the wrap
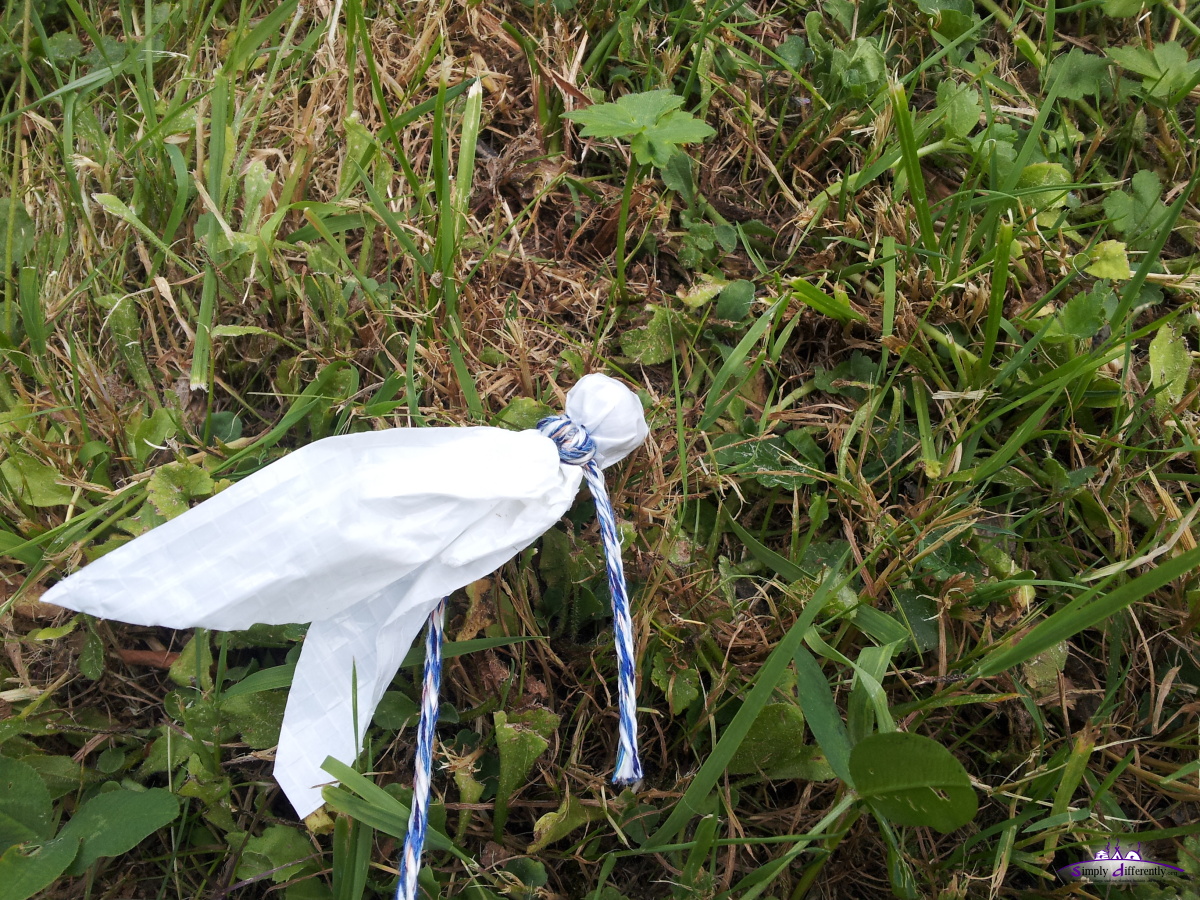
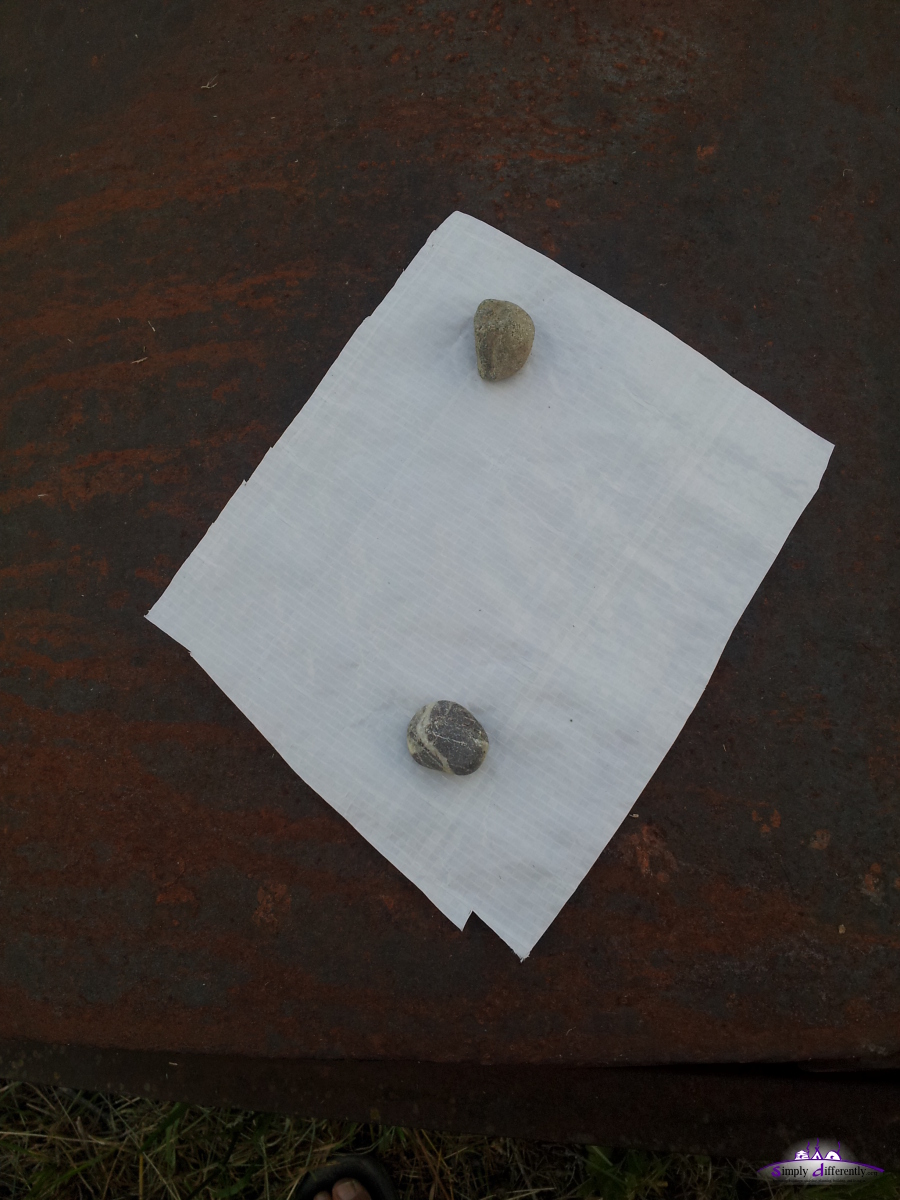
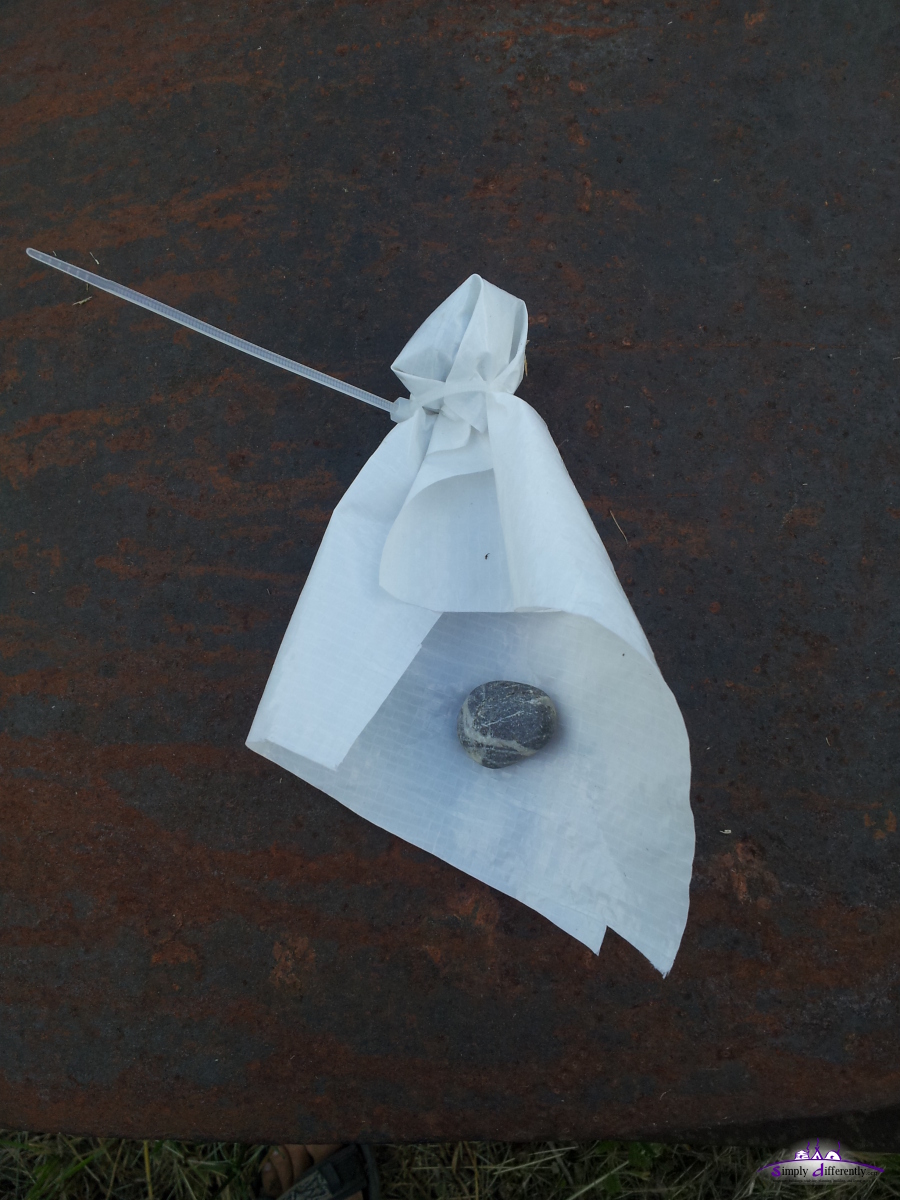
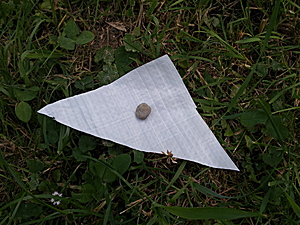
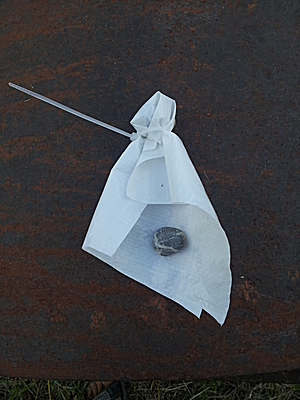
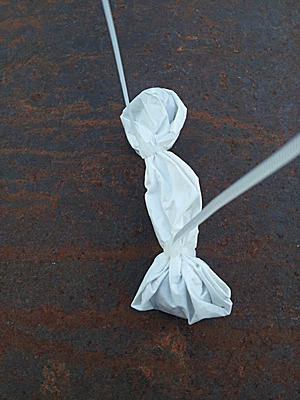
Some considerations how to attach the rain cover, using a "capture" to hold on it:
- Wire Capture: a wire circumvents the capture, and ability to open and close manually; ideal for experimentation to open and close often
- Cord Capture: most simple, the pull fastens the capture further; ideal for lasting installation
- Zip-Tie Capture: zip-tie must have no sharp edges (cheap zip-ties do, avoid them); ideal for quick setup and lasting installation (opening zip-ties is difficult, to cut them apart be careful not to tear the cover)
Capture Options:
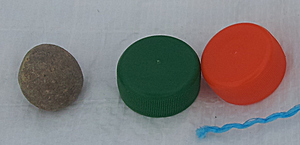
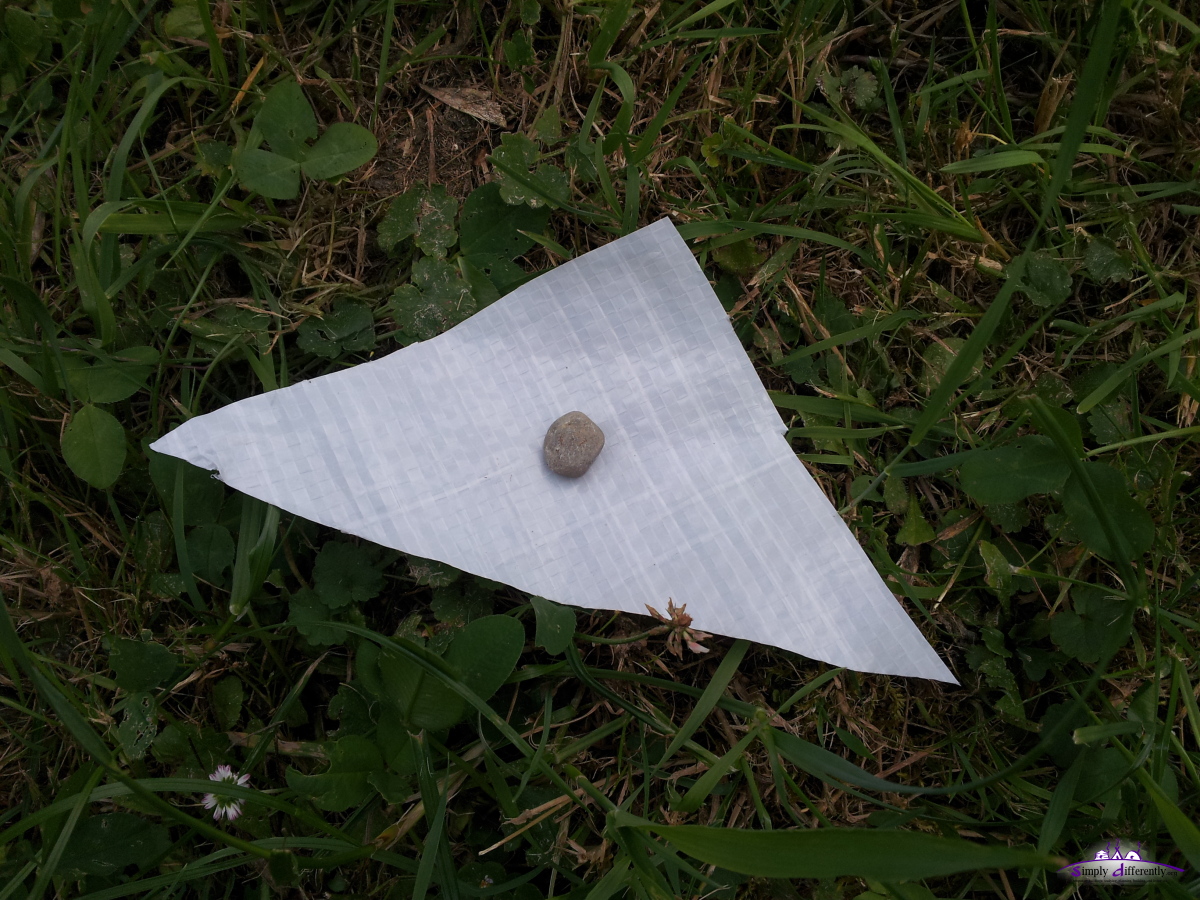
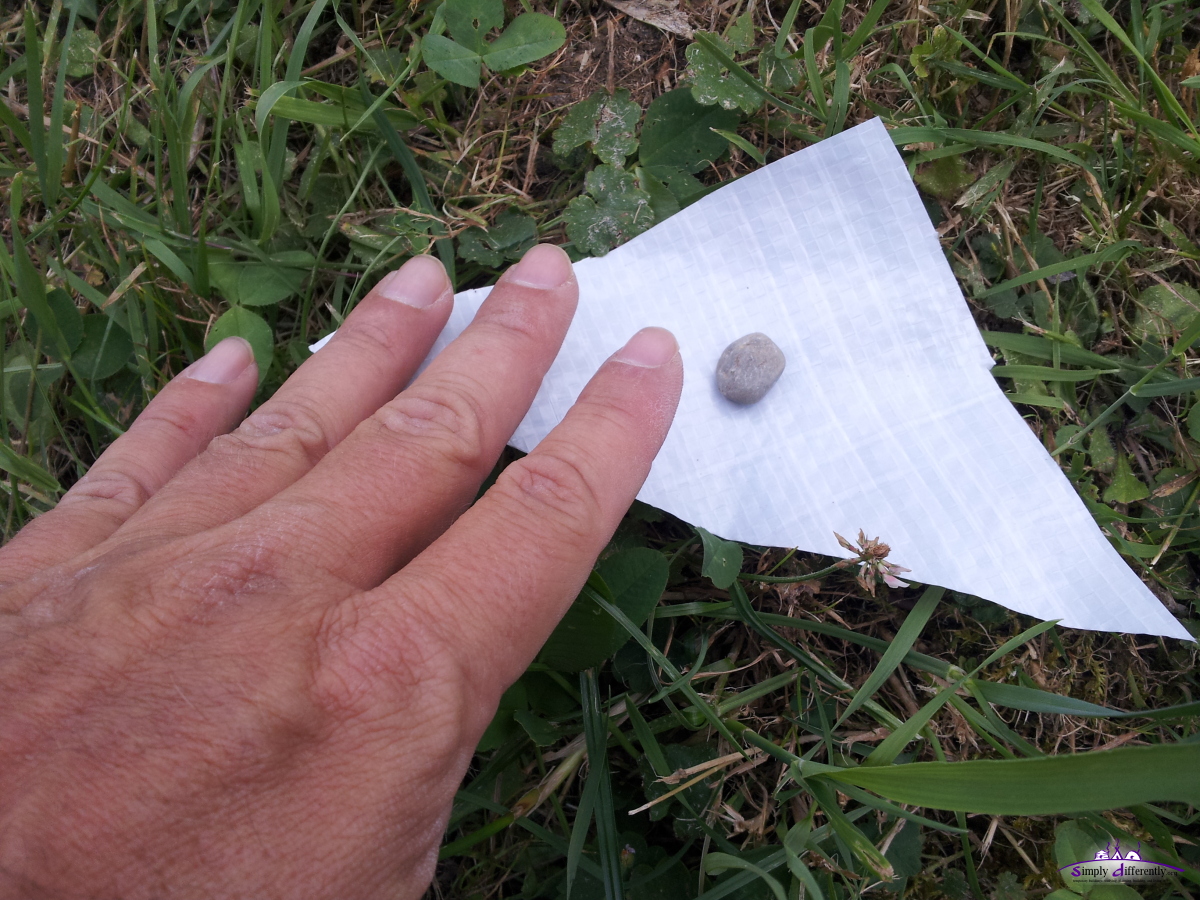
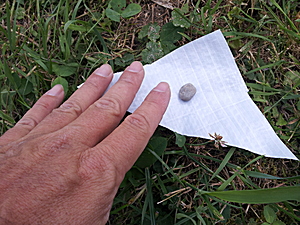
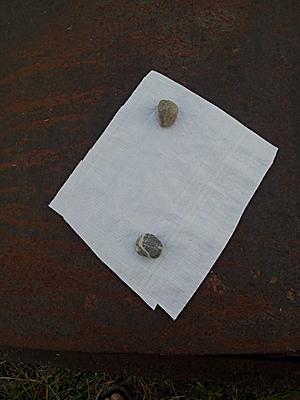
Captures: Gravel, Bottle Cap |
- Gravel: + easy to find, natural, lasting; - unpredictable size
- Bottle Cap: + easy to find, predictable size, flexible; - might disintegrate with time
- Marble: + easy to obtain, lasting, predictable size
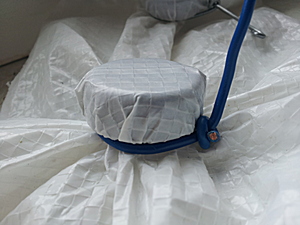
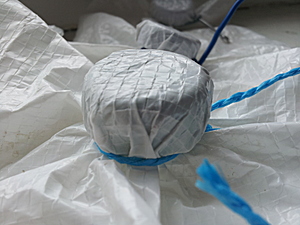
Here the real-life tests with bottle caps:
Close-ups:
2014/07/02 14:42
2014/07/02 14:42
2014/07/02 14:42
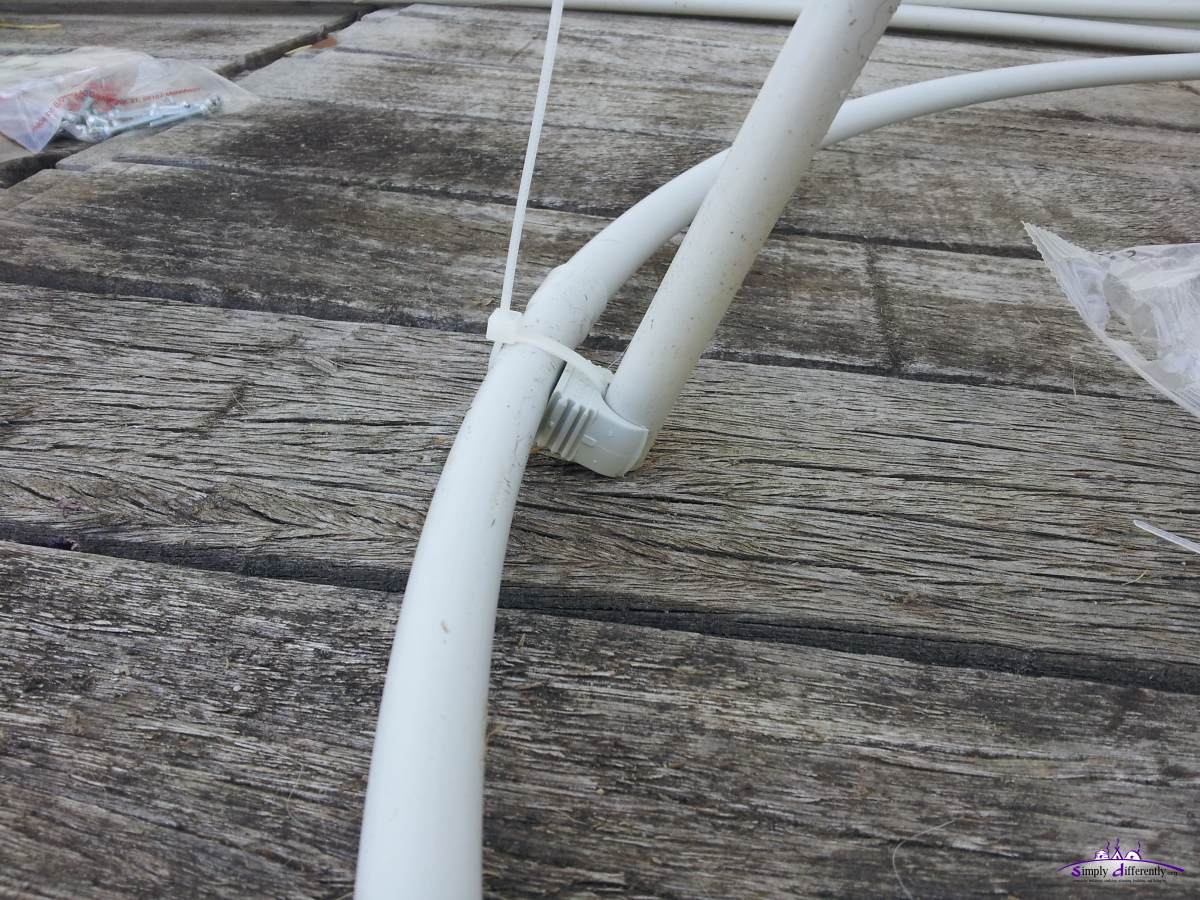
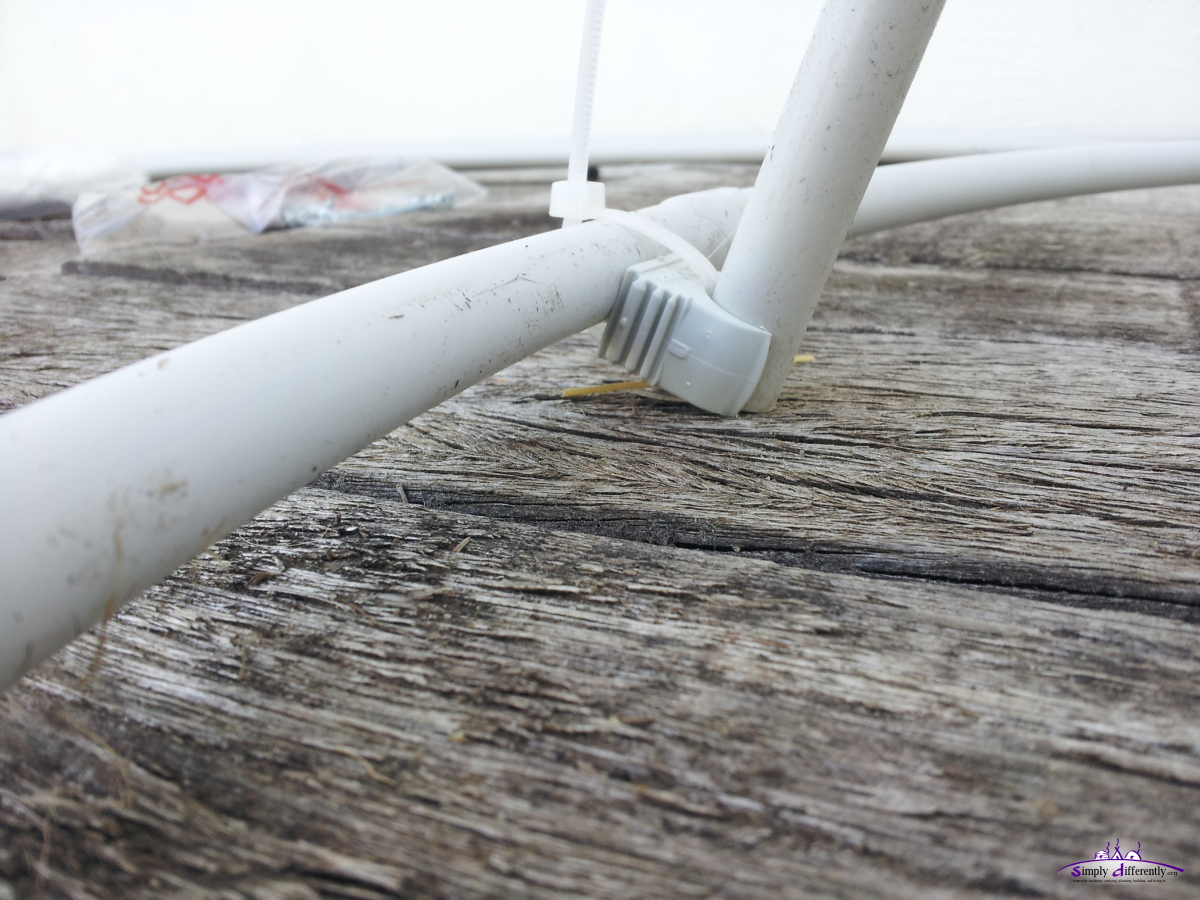
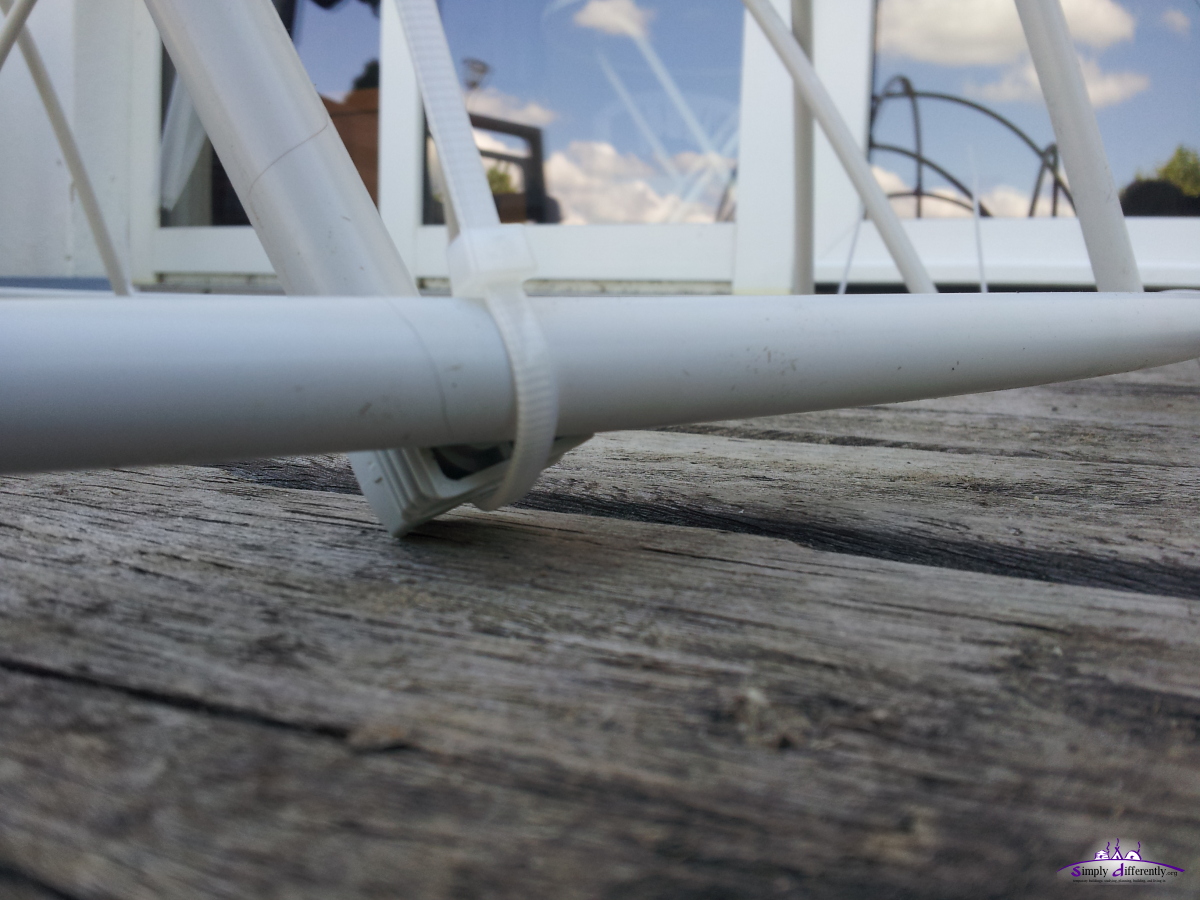
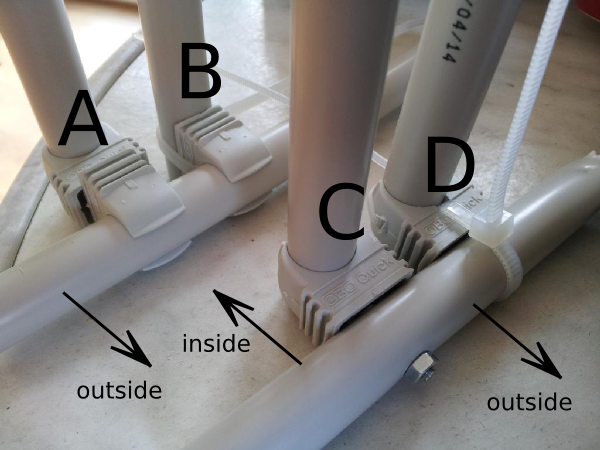
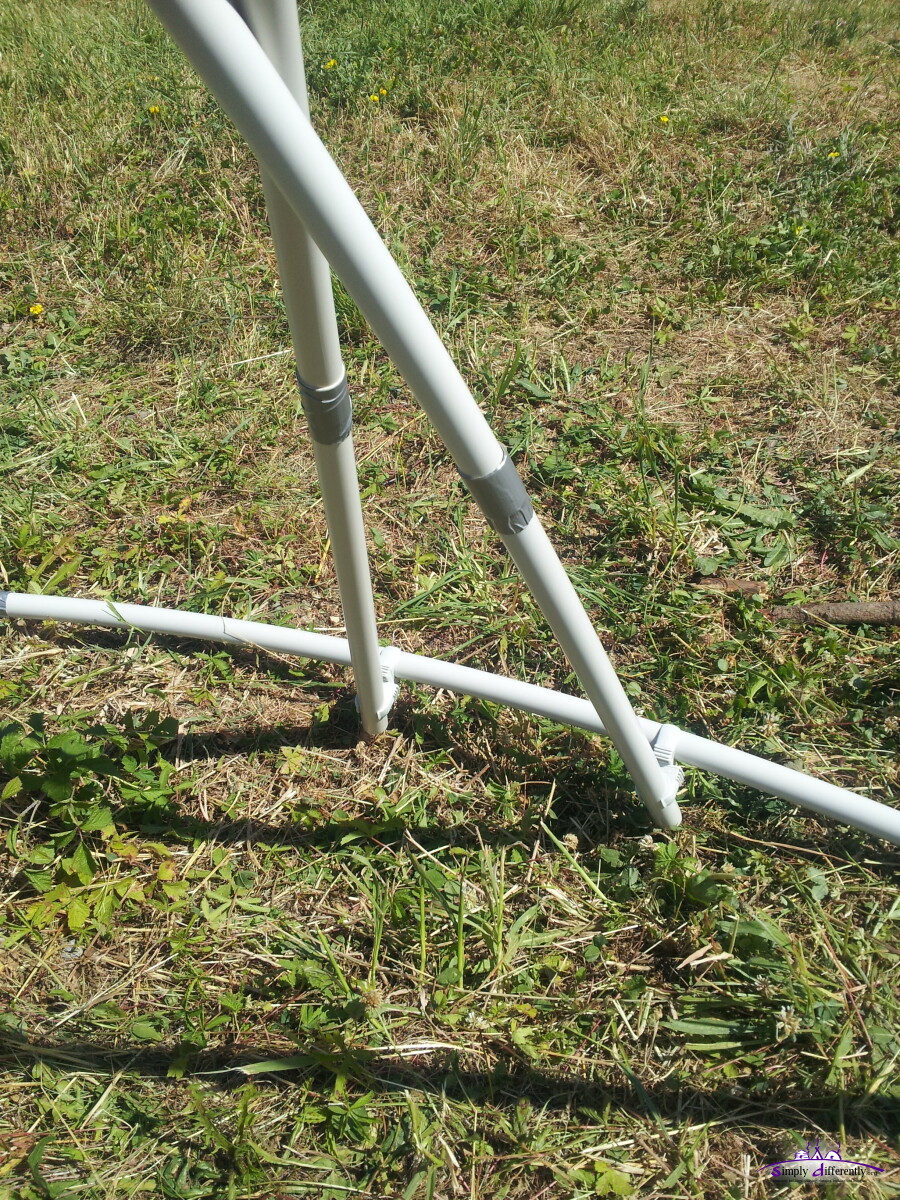
A few ground or bottom connectors options I experimented with:
A: double clips (like for crossing): + easy to do, not fixed, - vertical not fixed
B: bow fixed with zip tie: + strong, - doesn't truly fix bow pull/push
C: clip fixed with screw: + strong, - weakens base tube (tear)
D: clip fixed with zip tie & bow fixed with zip tie: + strong, - doesn't fix bow pull/push
I gonna use option A, "double clips" with "bow fixed with zip tie" to fixate pull/push.
|
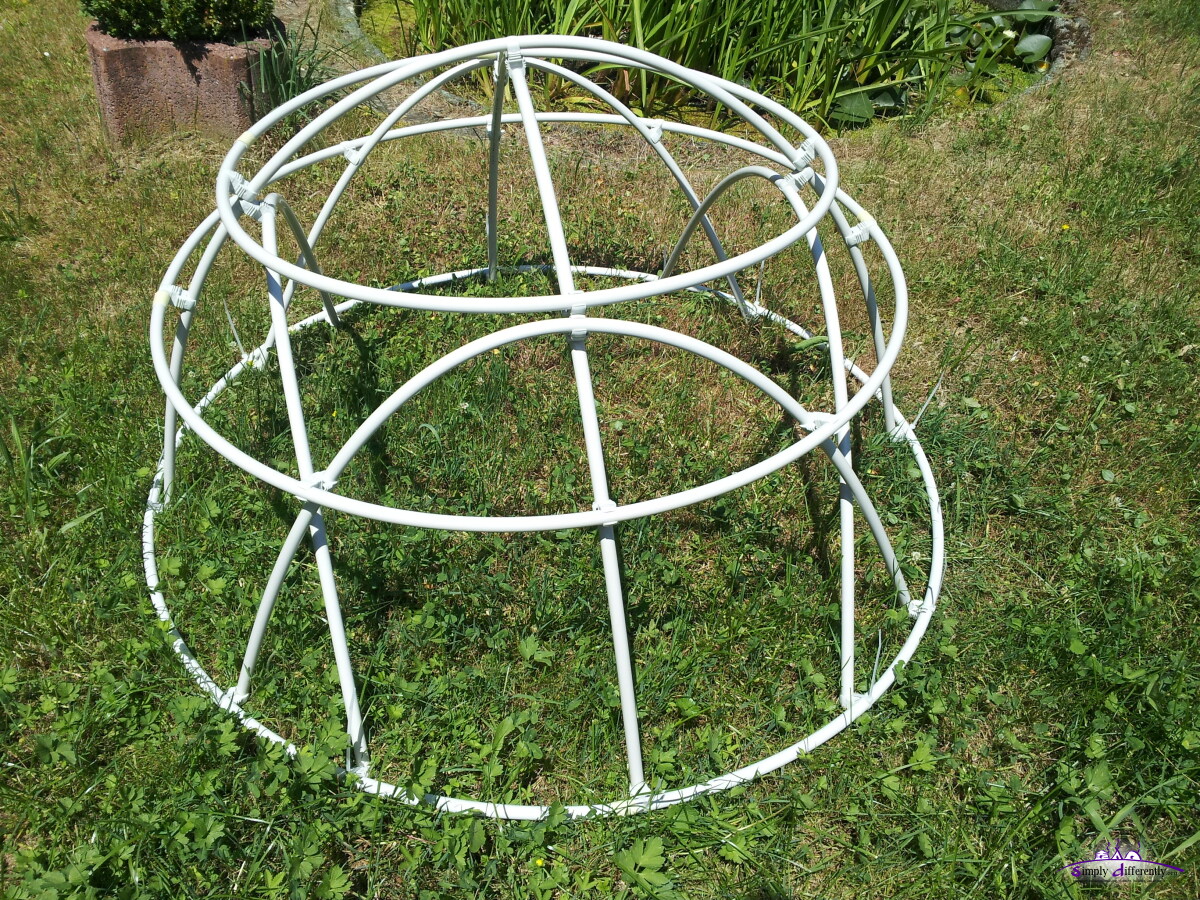
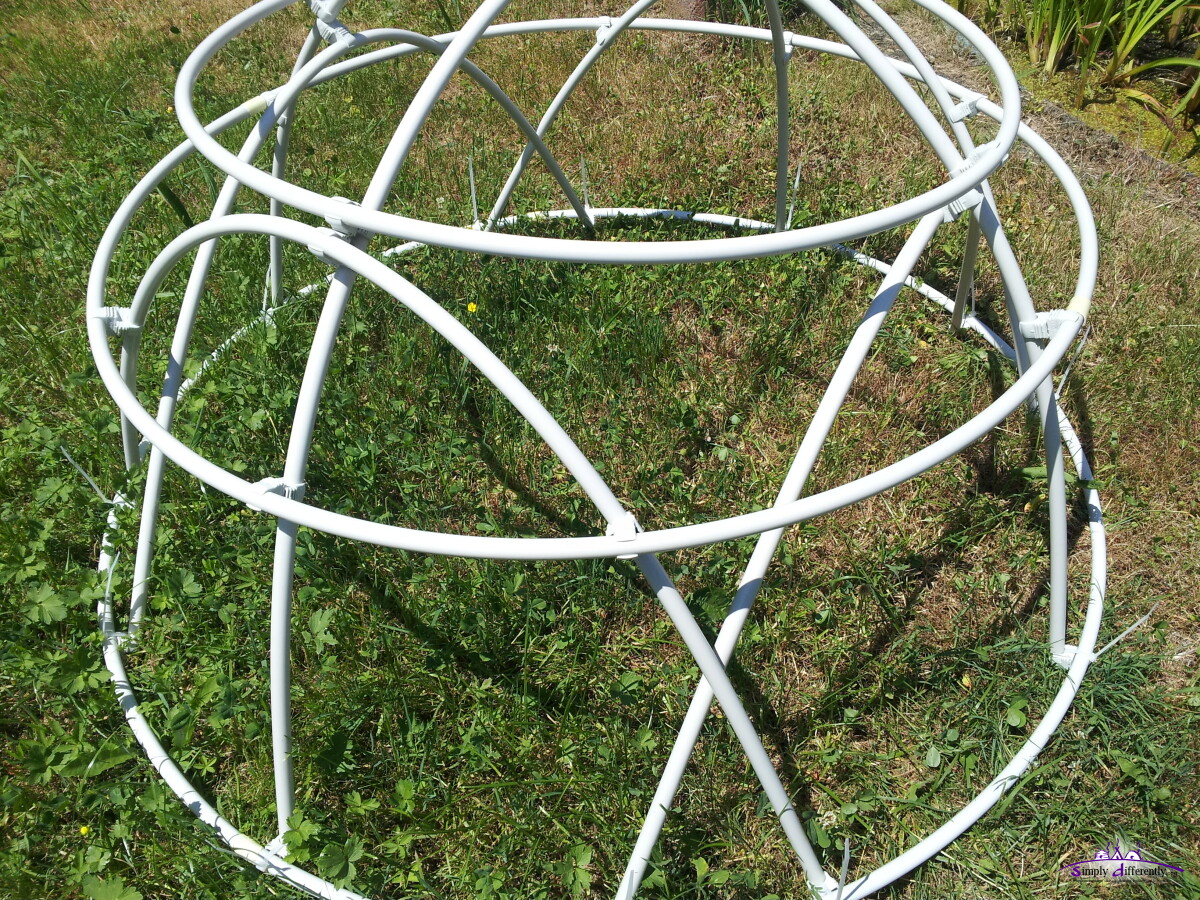
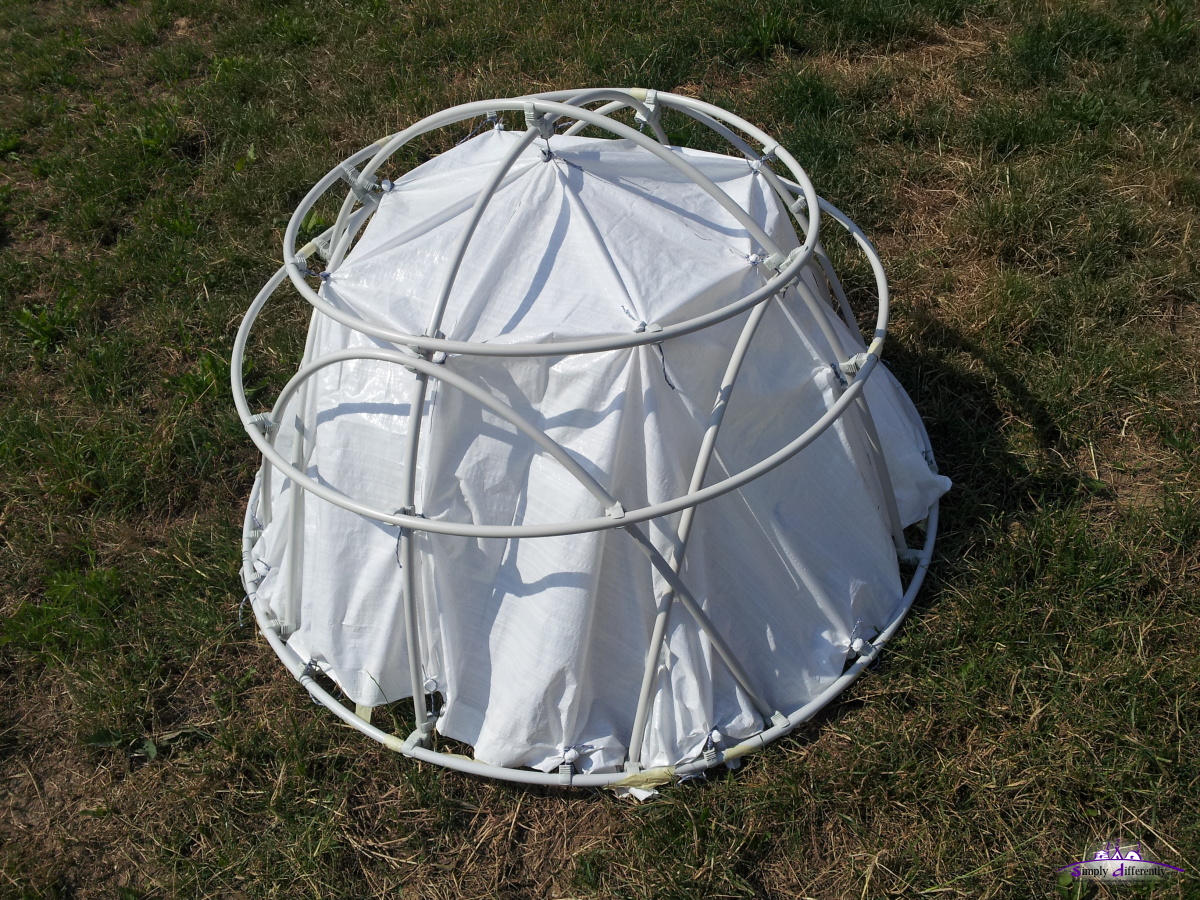
After the 4:x:3 version I used the same 2m x 25mm tubes to build a 3:x:2:
LC Dome 3:x:2 3.8m Diameter |
- a = 2m x 25mm
- A = 3a = 6m
- h = 1.91m
- d = 3.82m
- 32 tubes + 4 tubes for 1 ring = 36 tubes, 2m x 25mm PVC tube
- 6m x 6m PE rain cover
- 100x M4 nuts & screws (M4x16mm)
- 100 x "OBO Quick" tube clips M25 (source Bauhaus.info , 2014/06)
 2014/06/22 09:55  2014/06/22 10:02 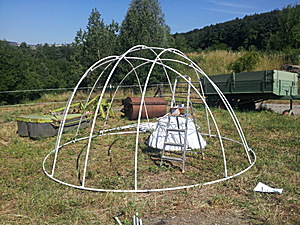 2014/06/22 10:25 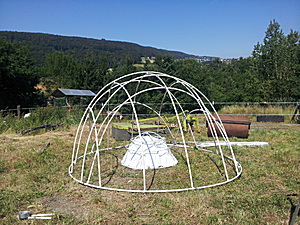 2014/06/22 10:56 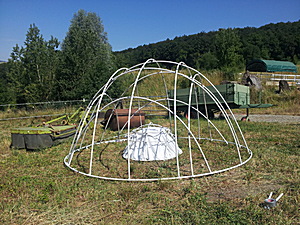 2014/06/22 10:57 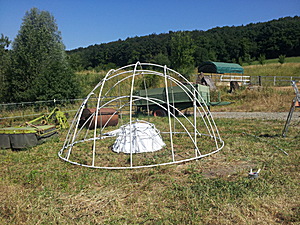 2014/06/22 11:01 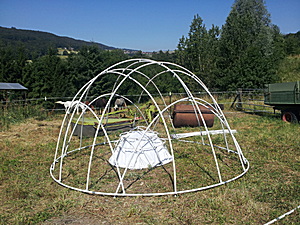 2014/06/22 11:02 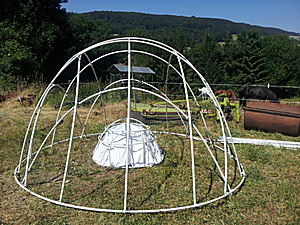 2014/06/22 11:03  2014/06/22 11:19 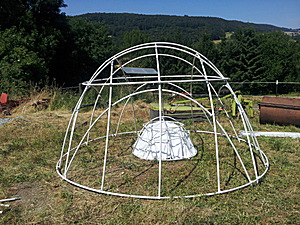 2014/06/22 11:20  2014/06/22 11:20 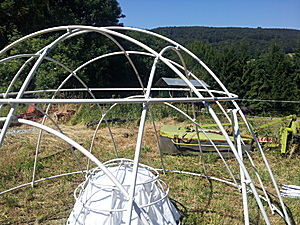 2014/06/22 11:20 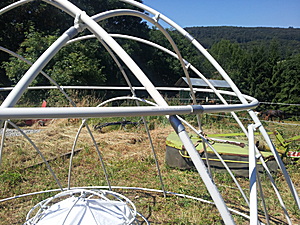 2014/06/22 11:20 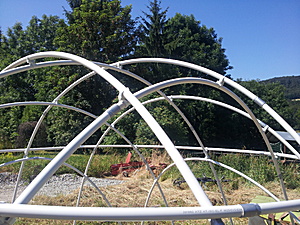 2014/06/22 11:20 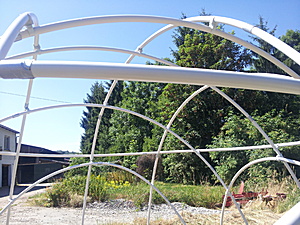 2014/06/22 11:20  2014/06/22 11:20  2014/06/22 11:20  2014/06/22 11:21 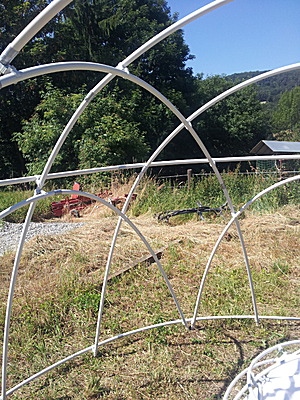 2014/06/22 11:21 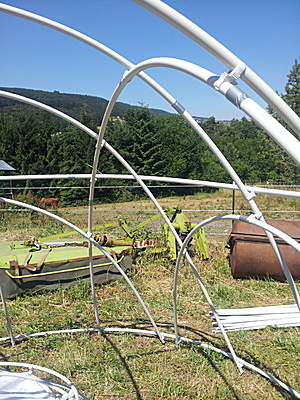 2014/06/22 11:21 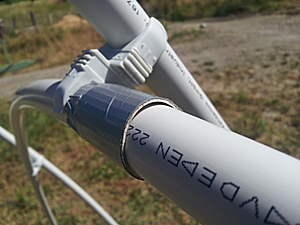 2014/06/22 11:26 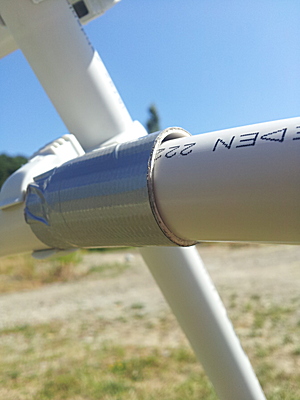 2014/06/22 11:26 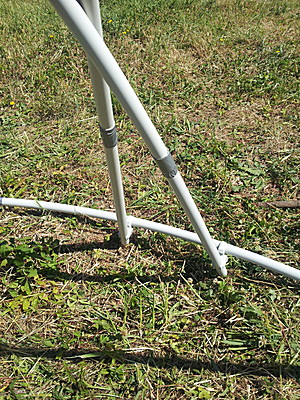 2014/06/22 11:38  2014/06/22 11:38  2014/06/22 11:39
Conclusions:
- 3:x:2 with 2m x 25mm gives a more solid dome, actually working
- 2a B bow has some tension, the tape at the fitting is a must
- many tubes were slightly bent from yesterday's 4:x:3 dome setup, they might eventually get straight when left alone
| |
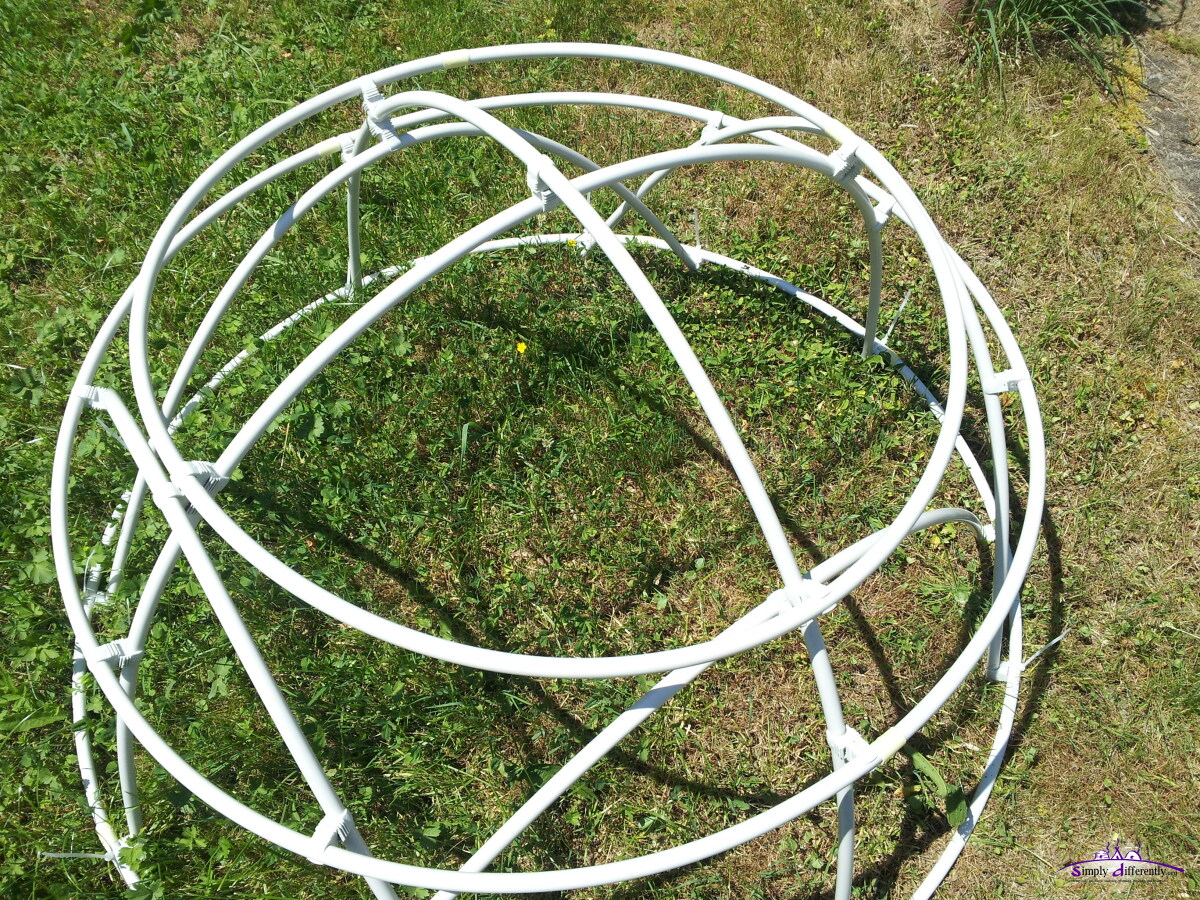
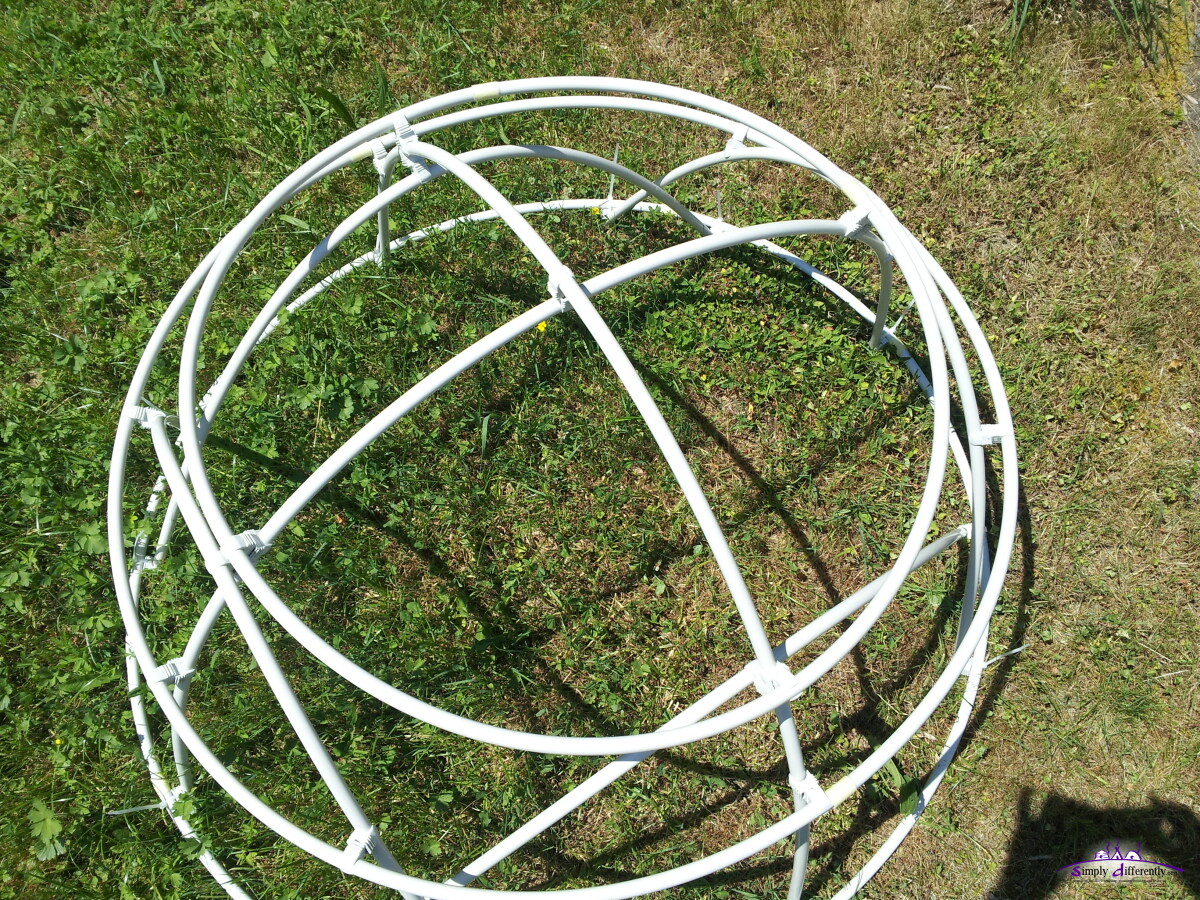
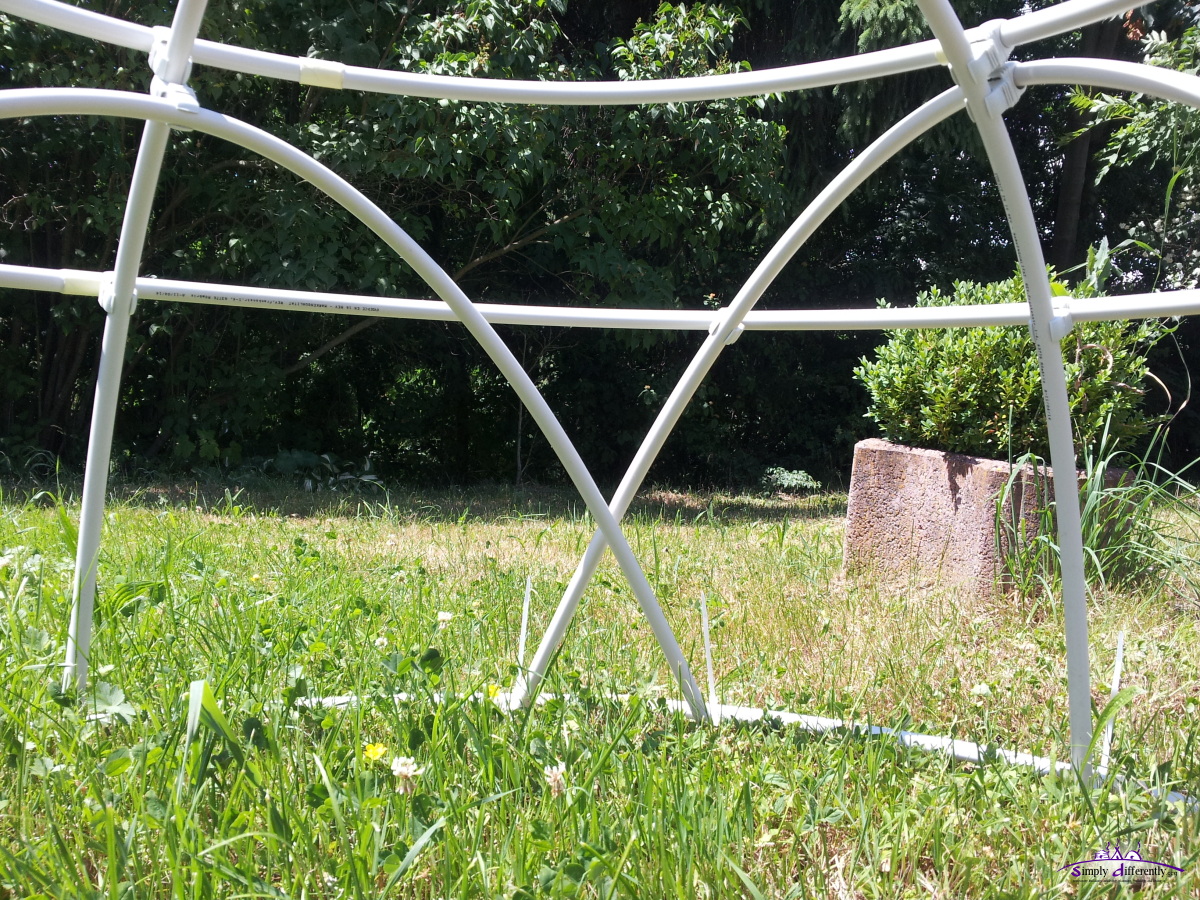
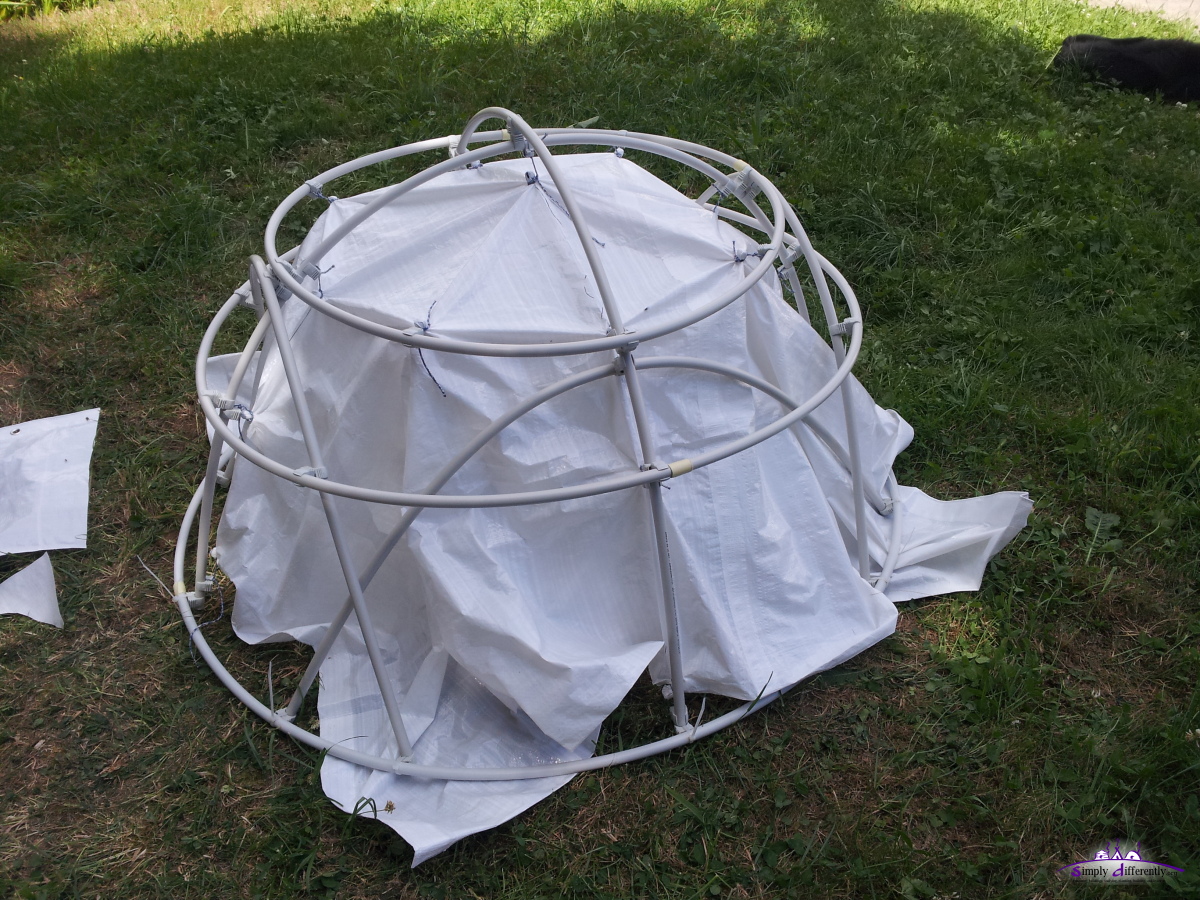
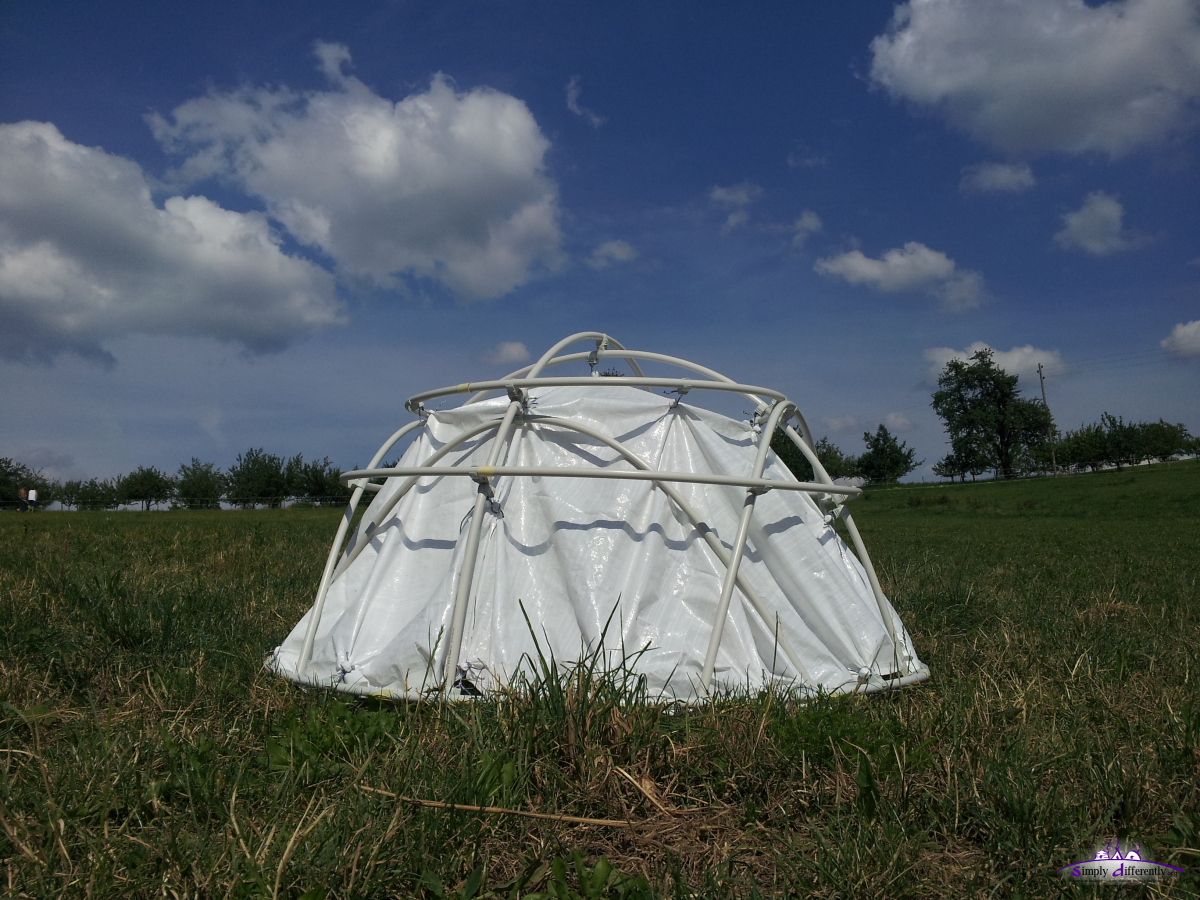
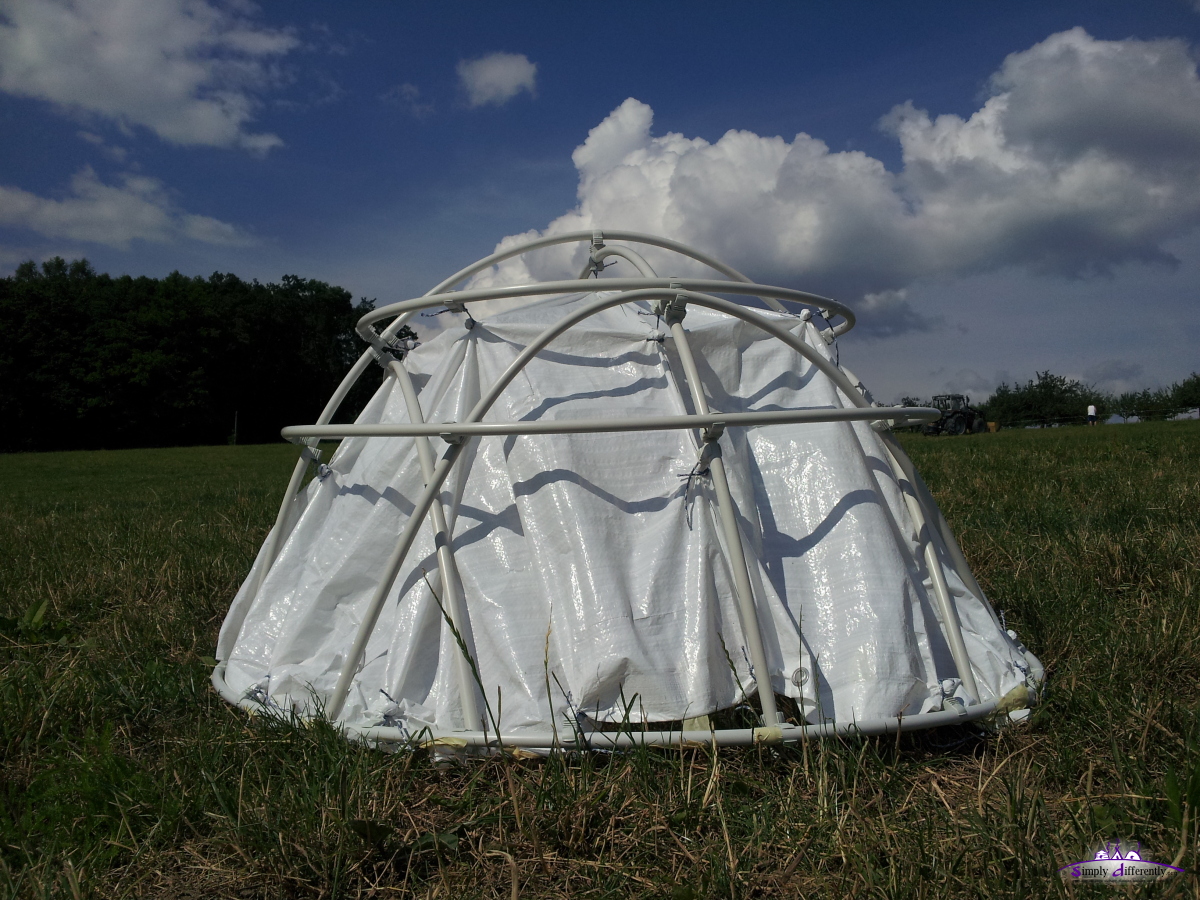
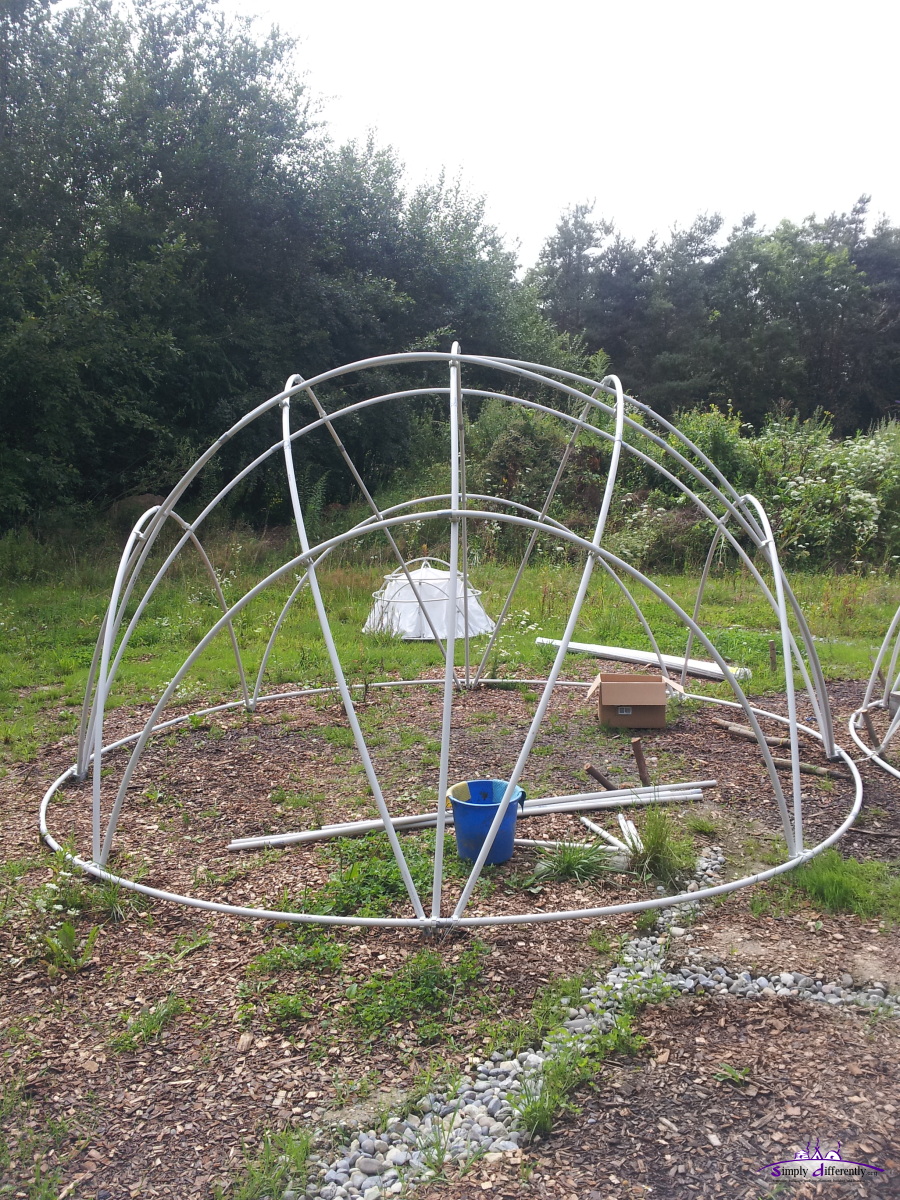
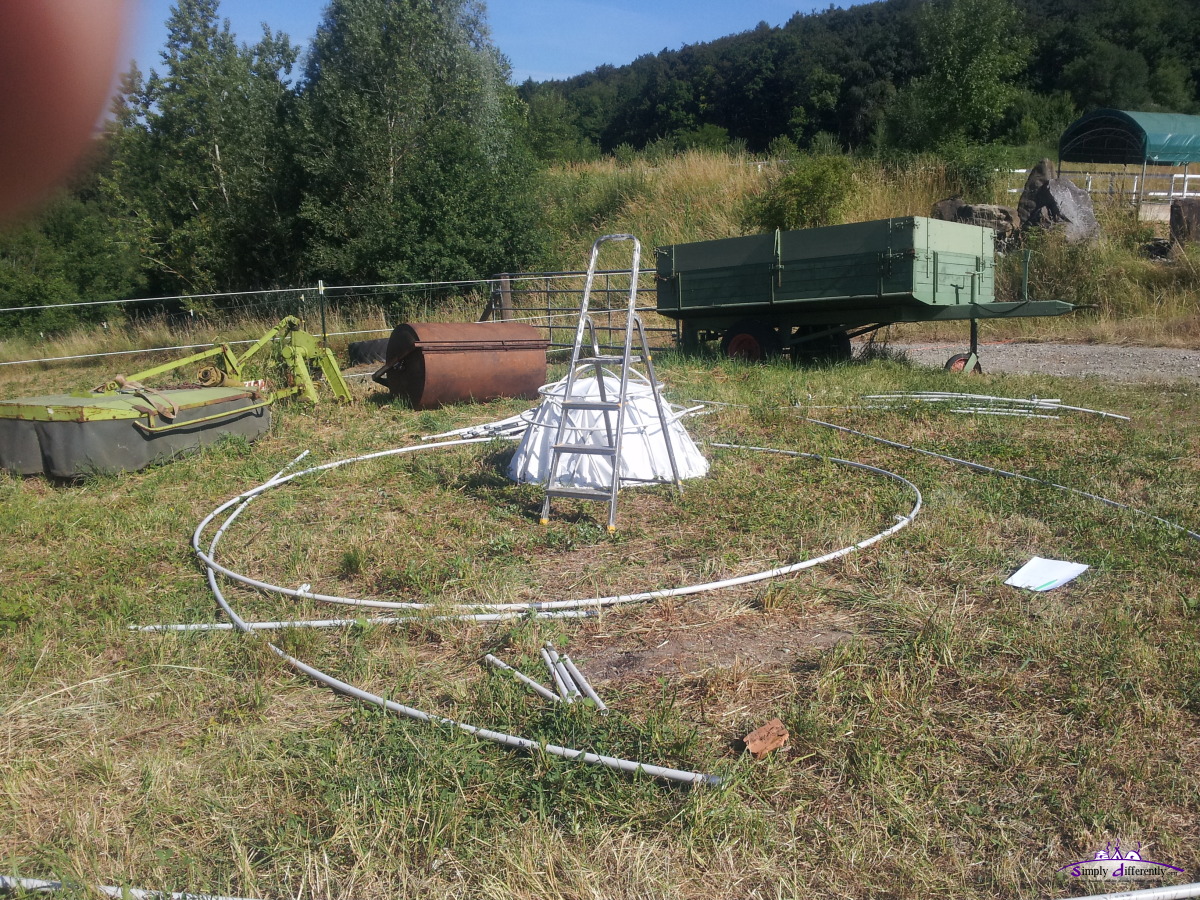
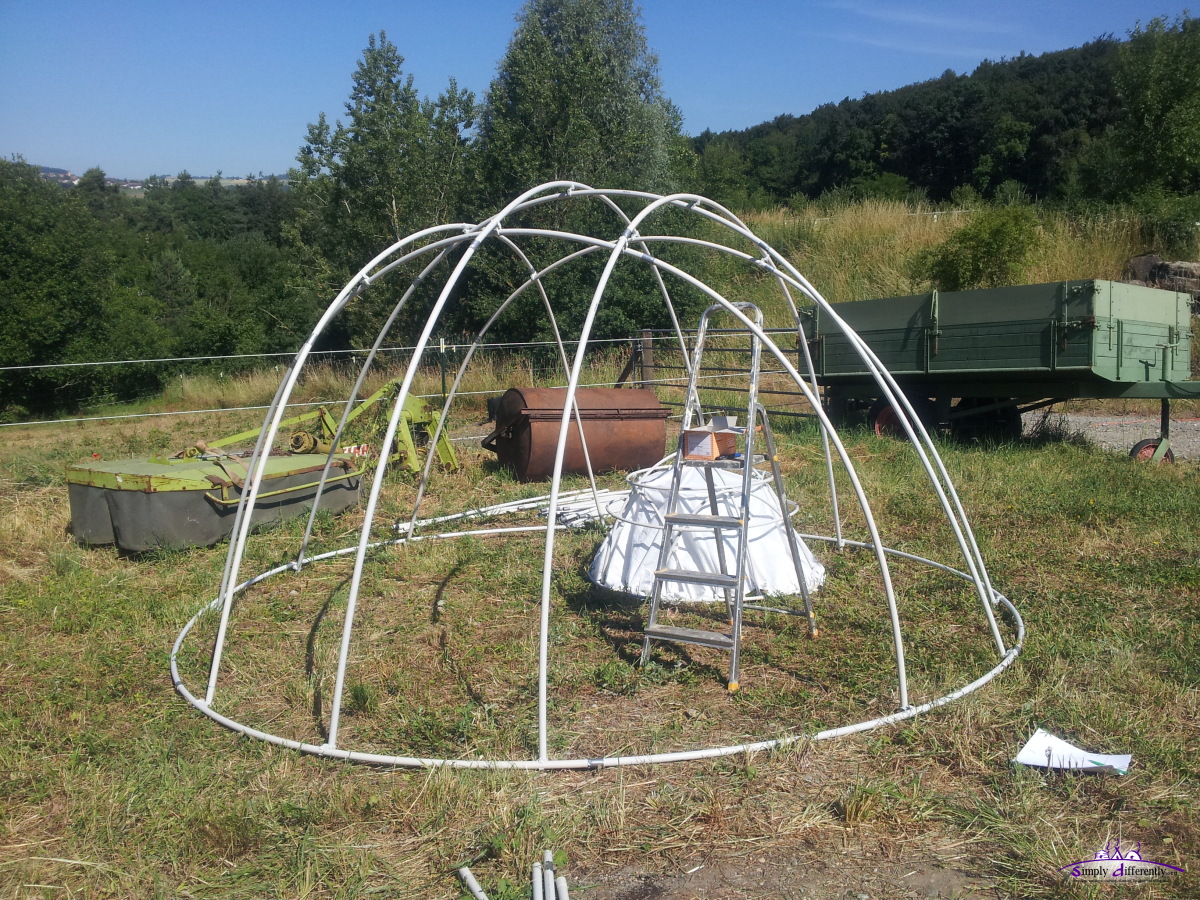
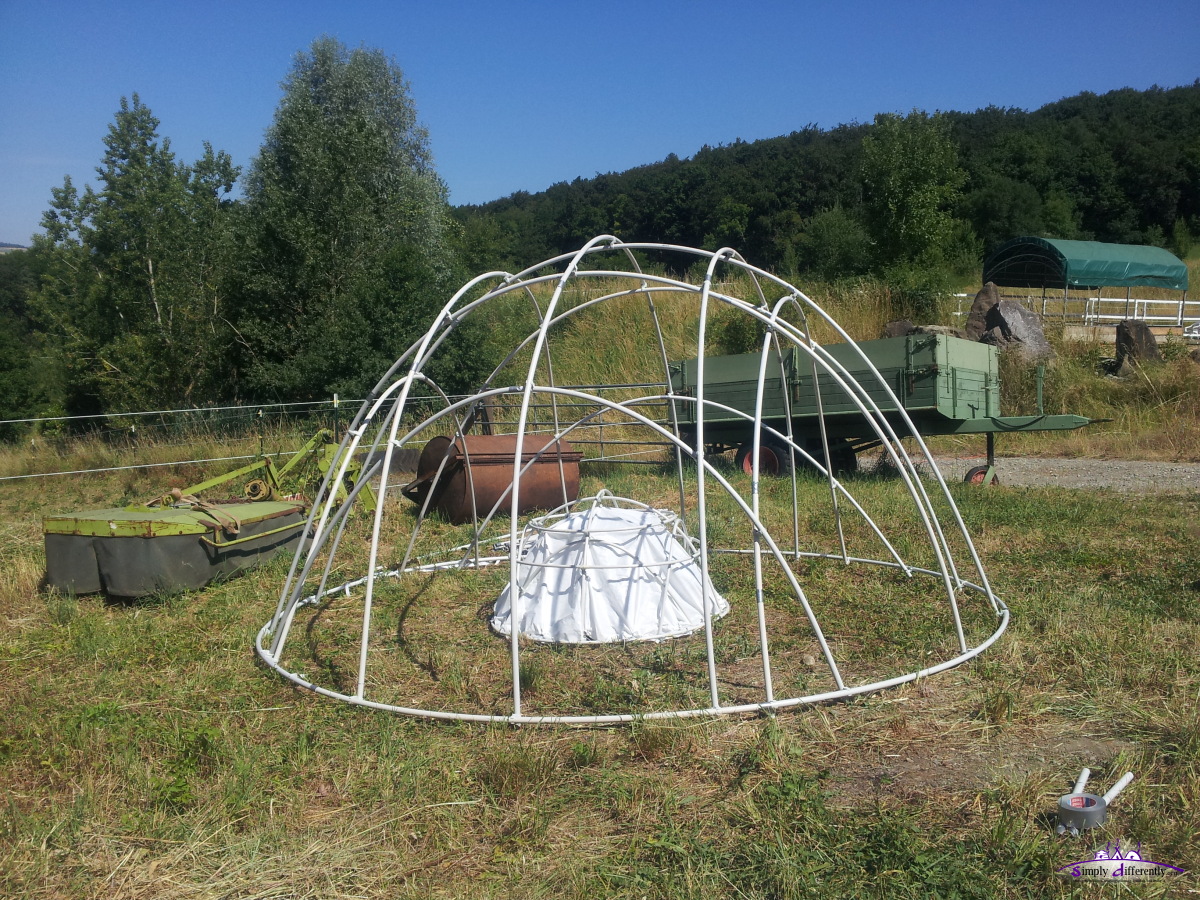
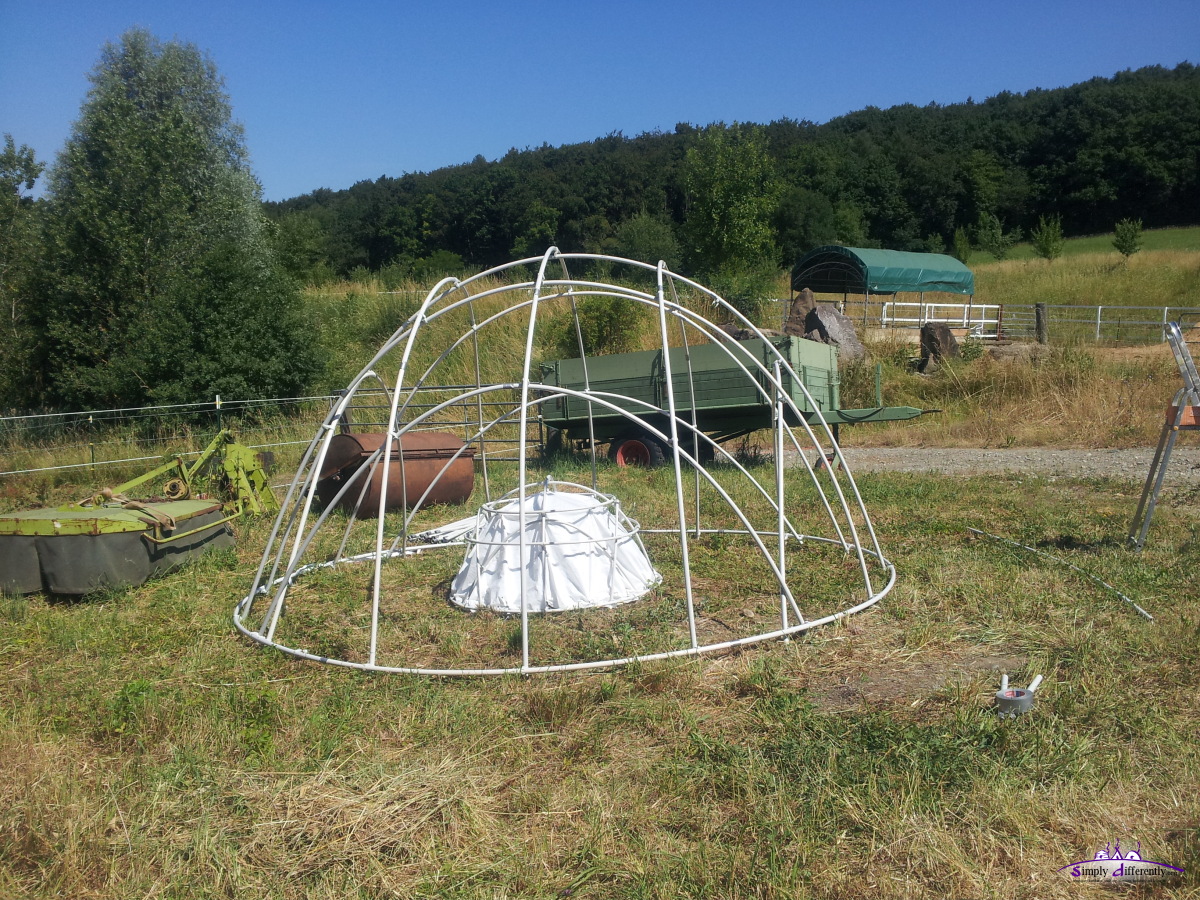
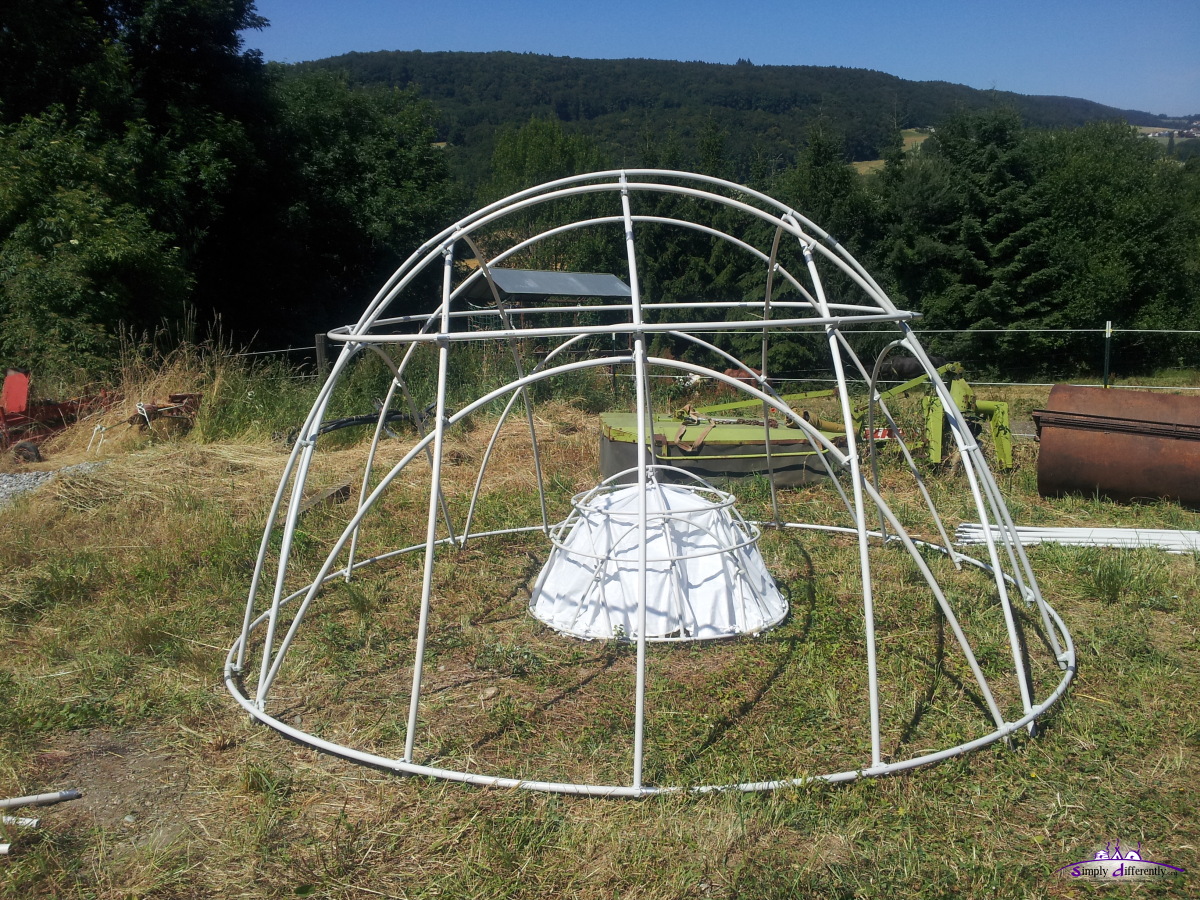
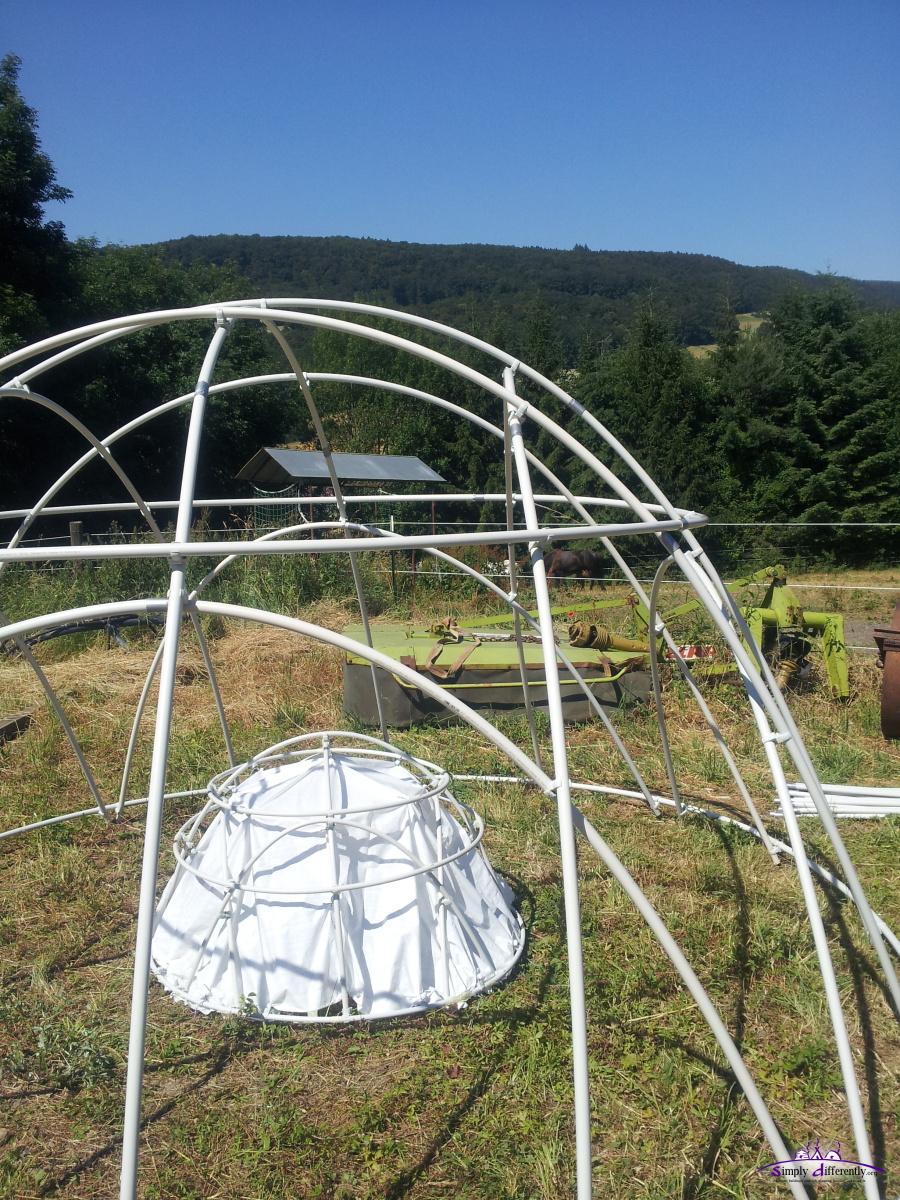
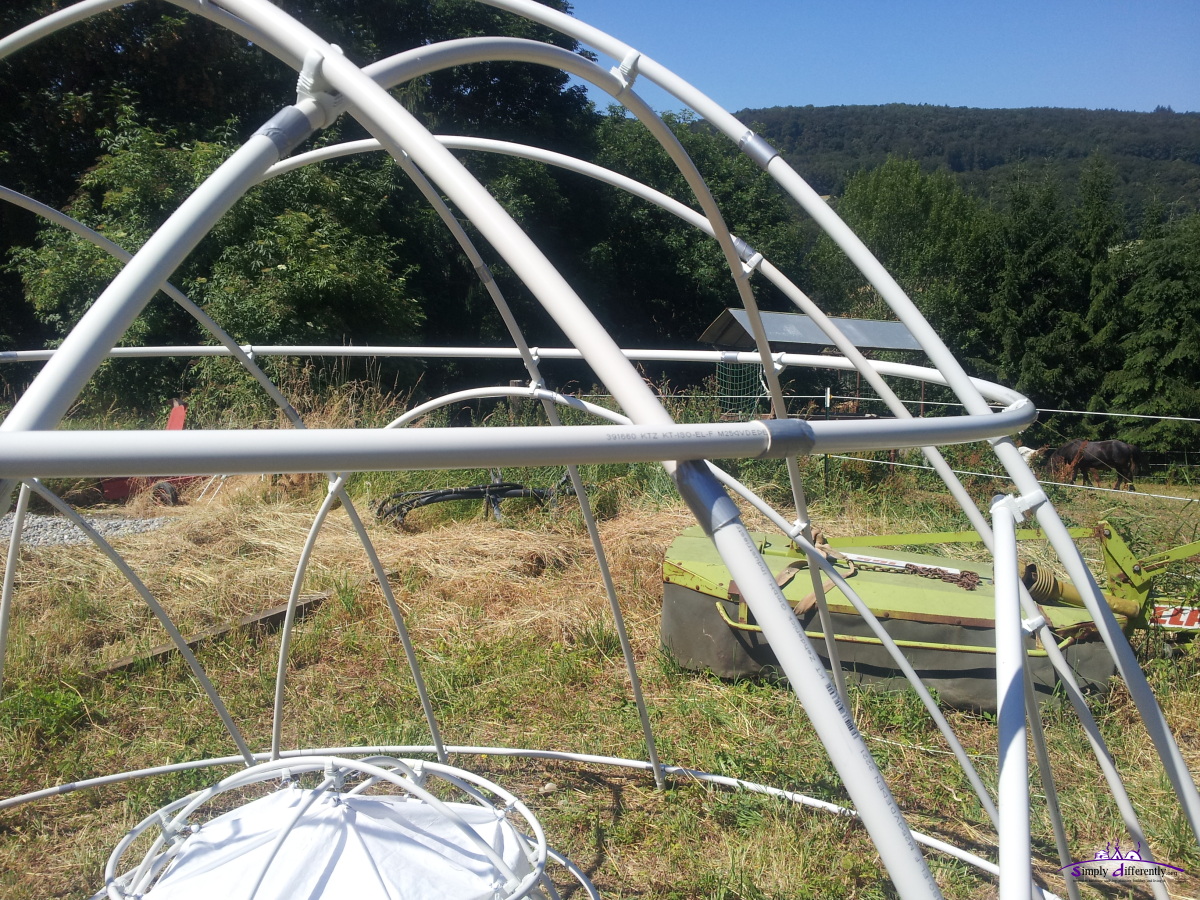
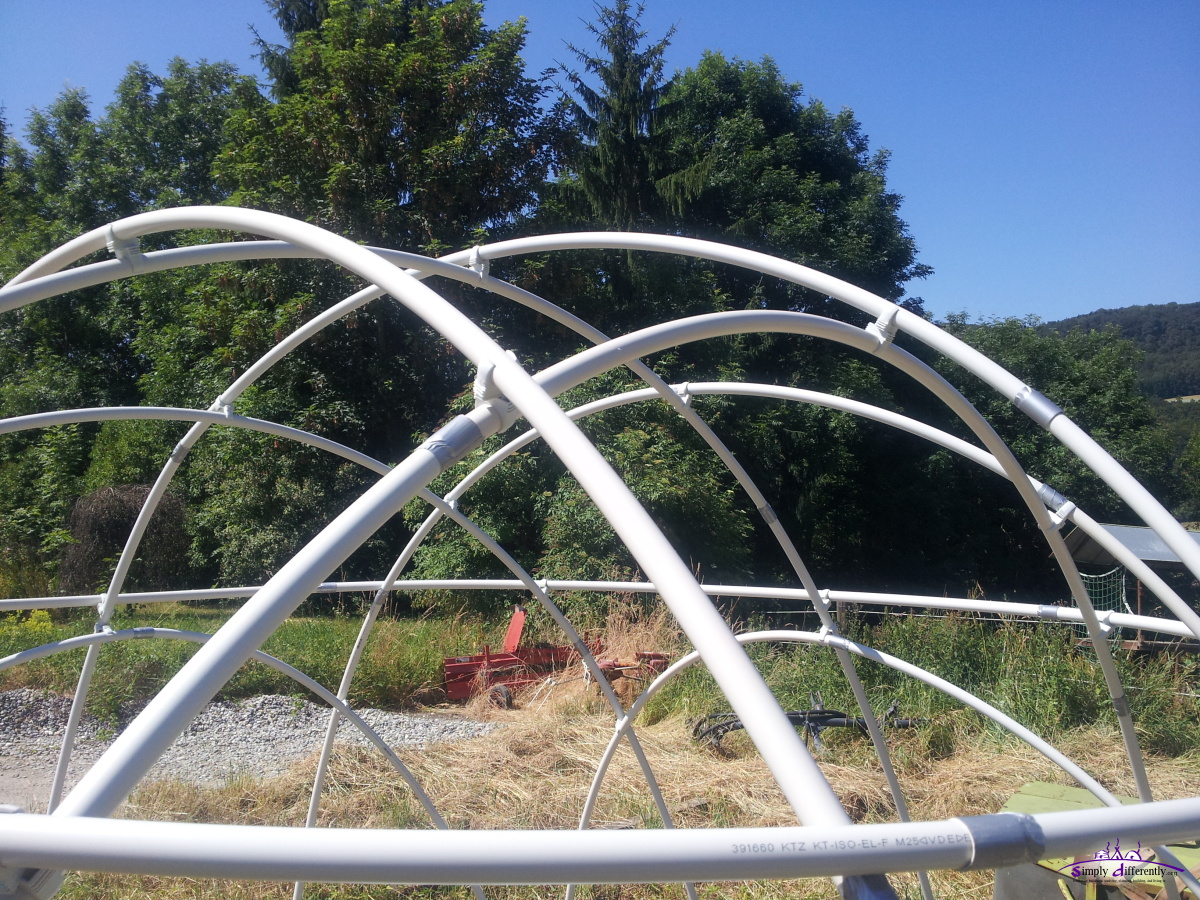
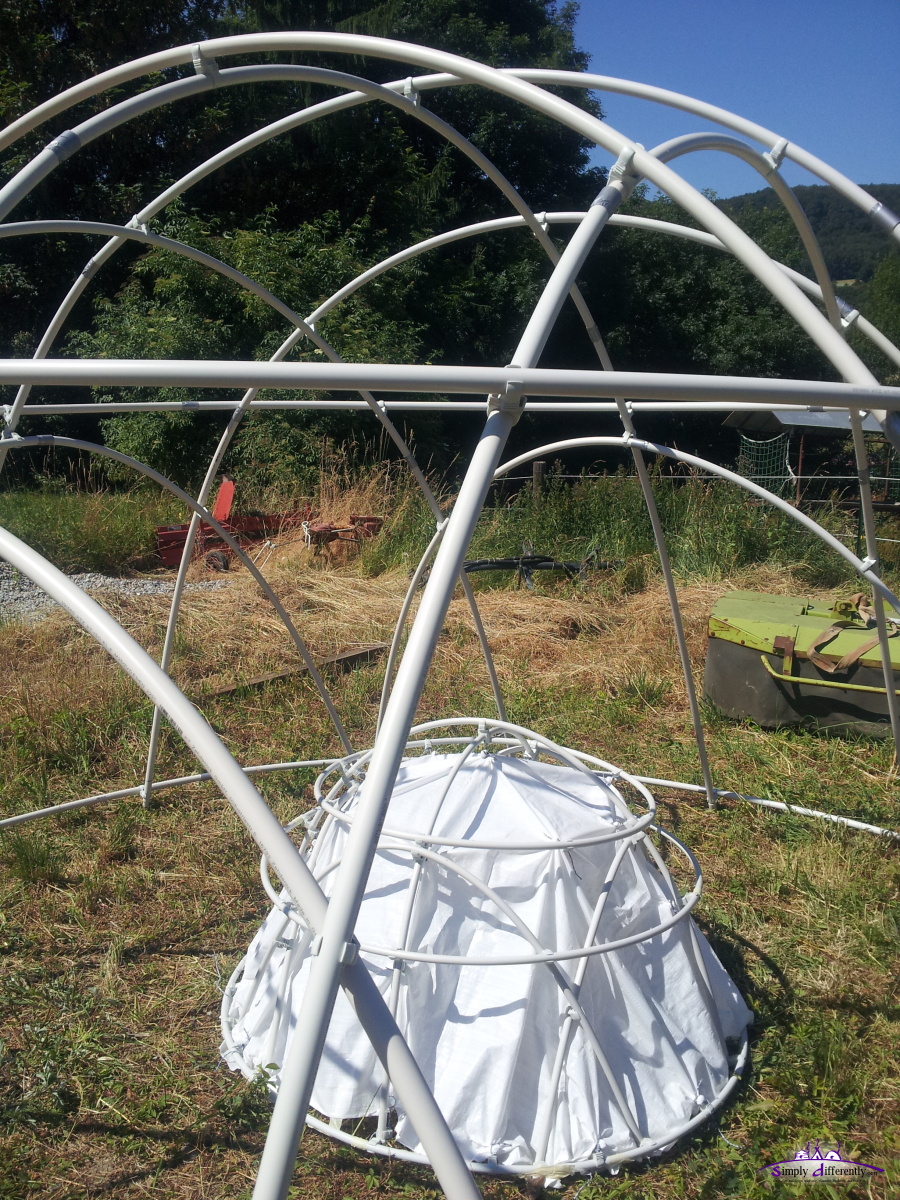
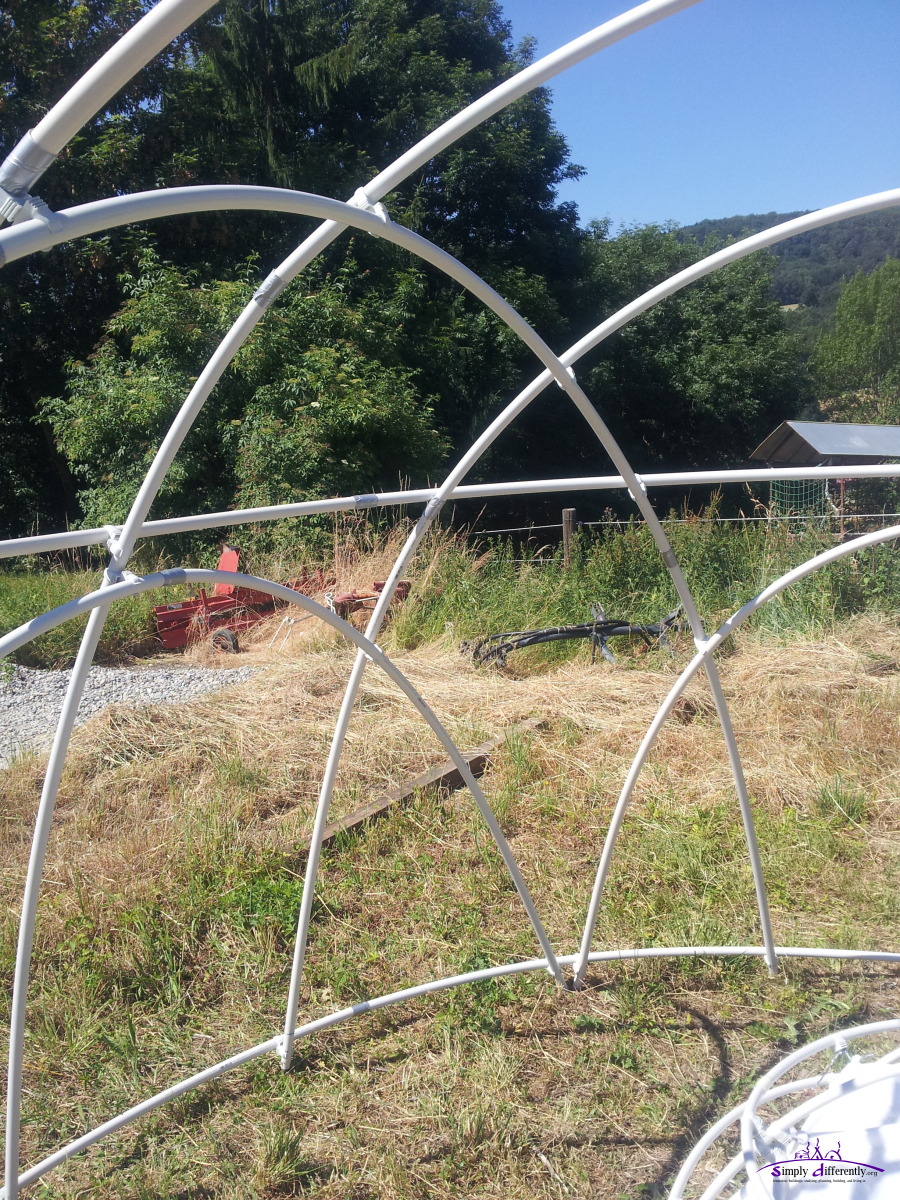
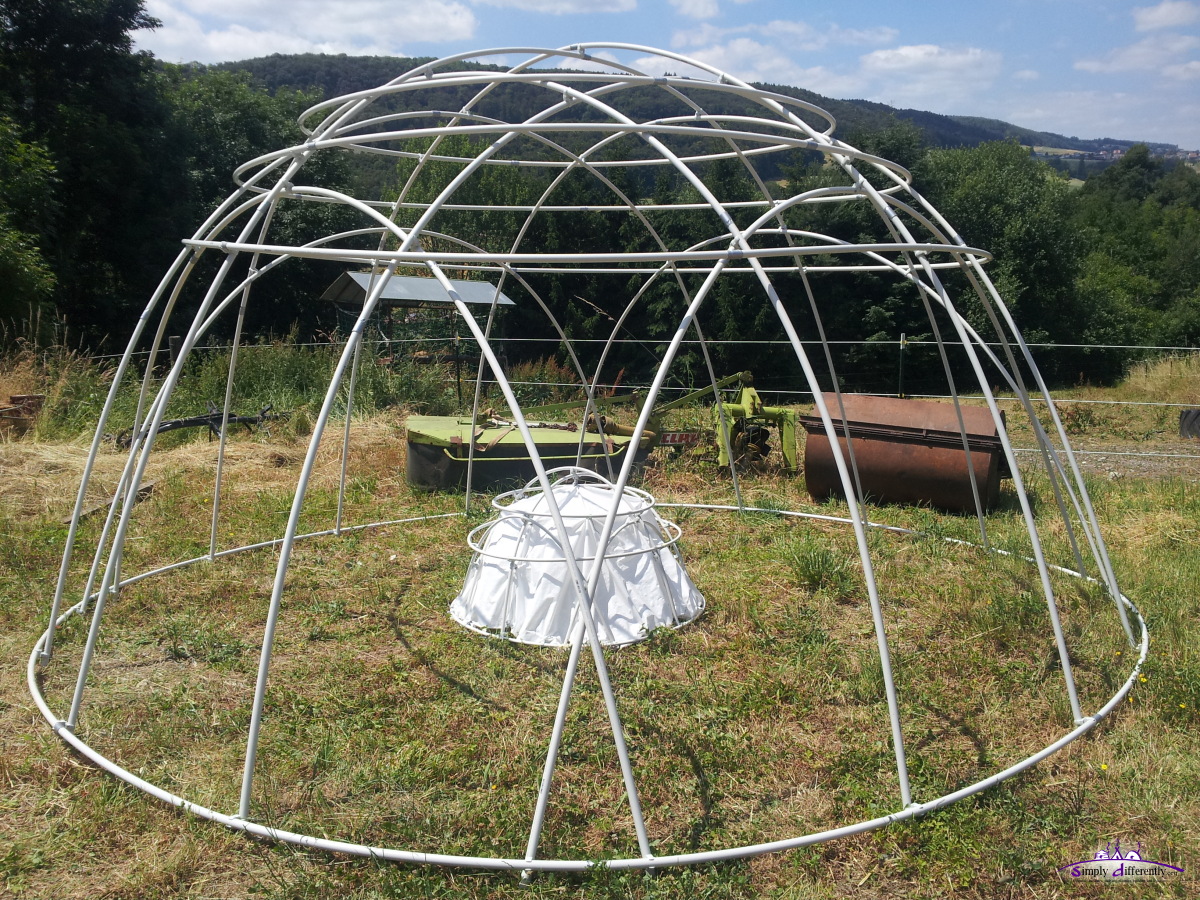
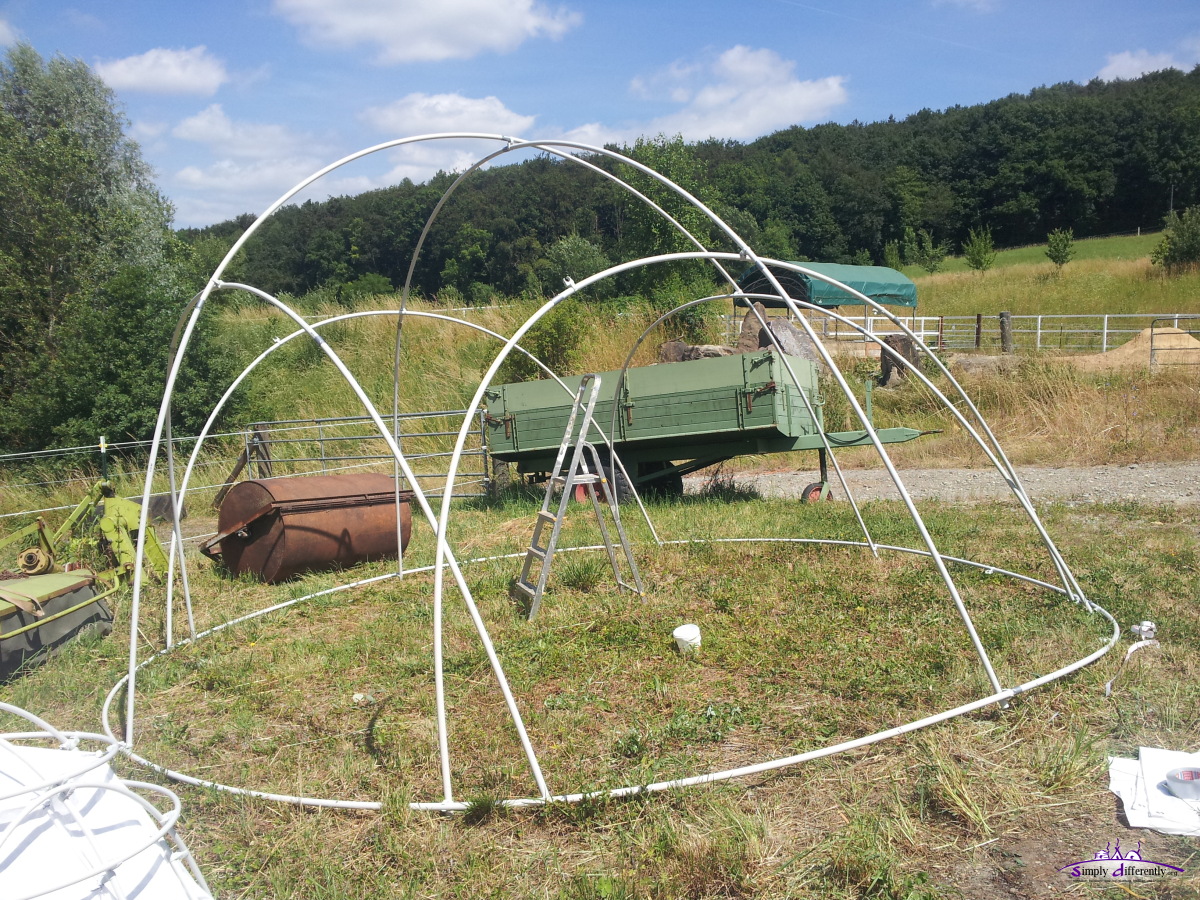
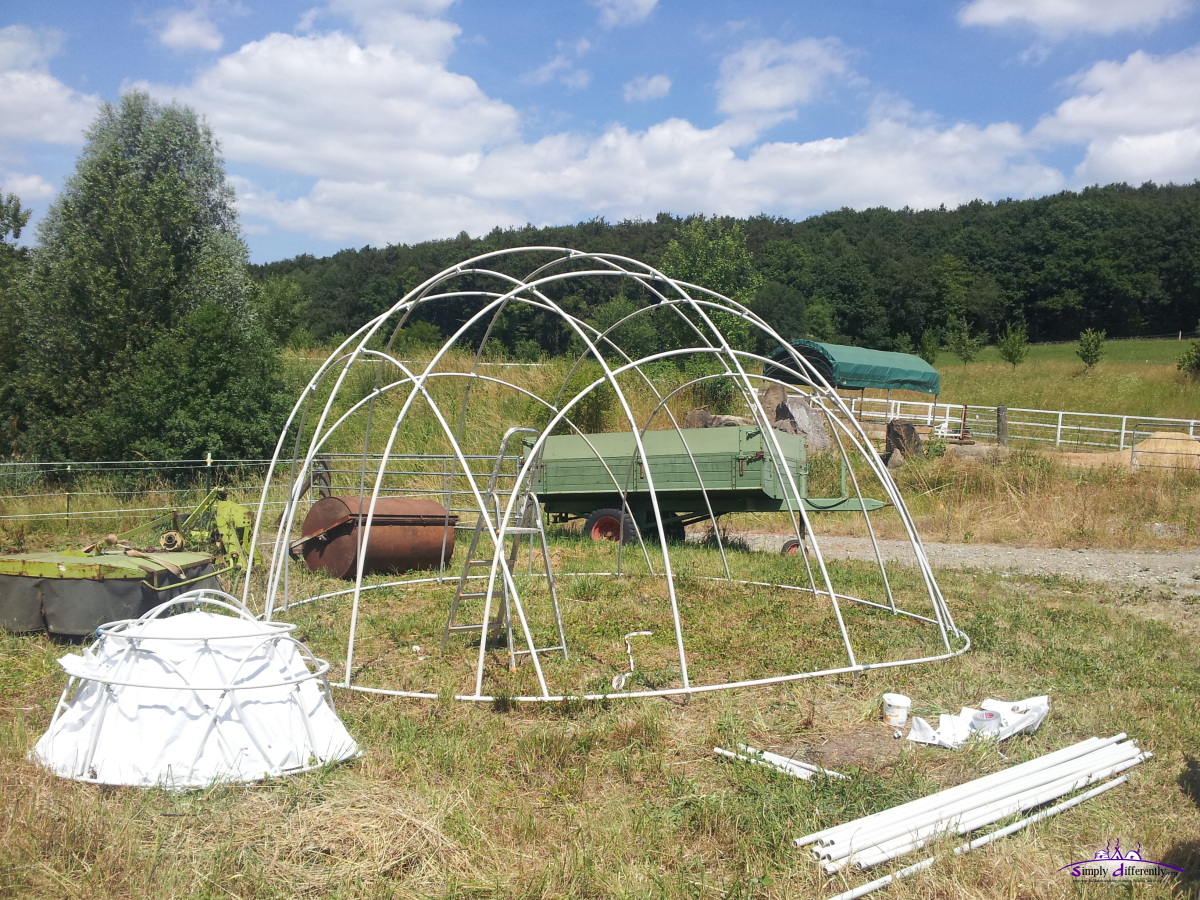
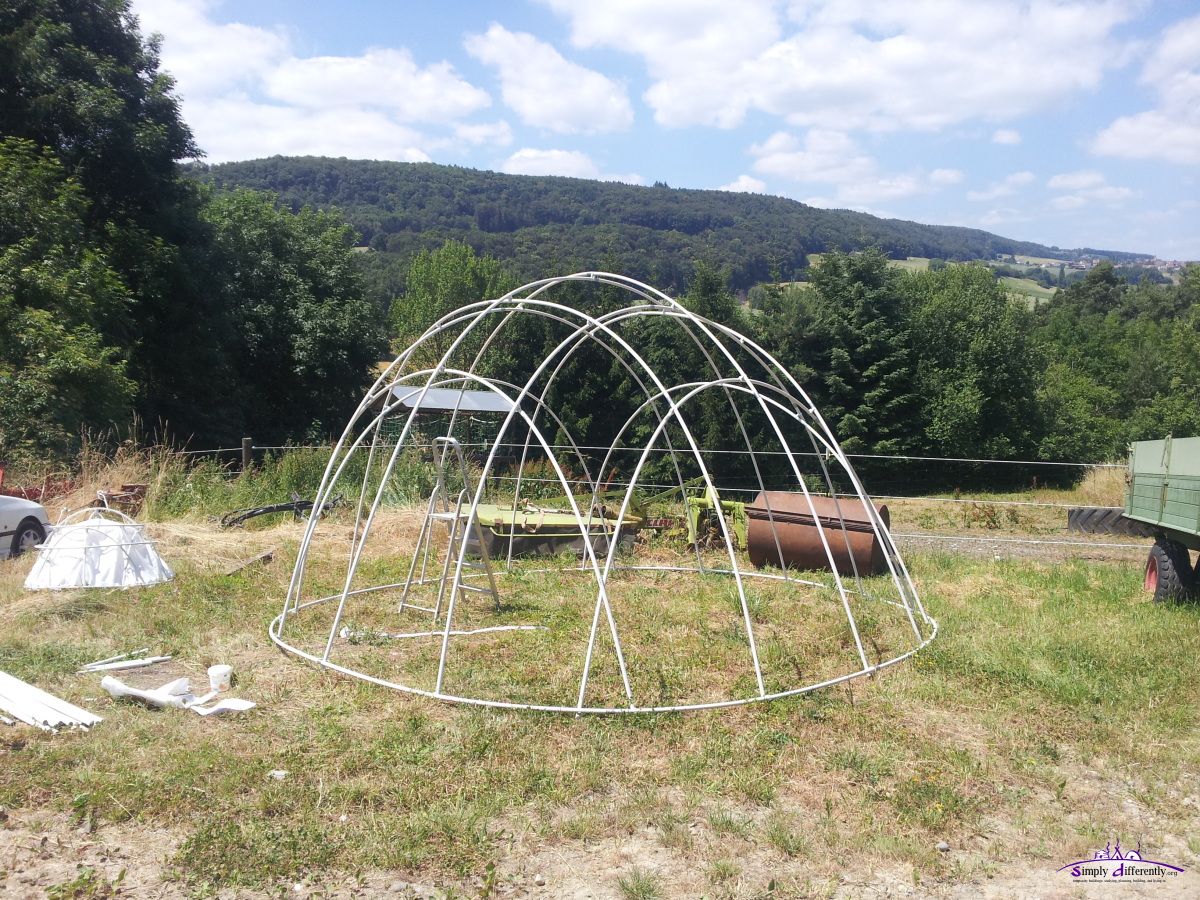
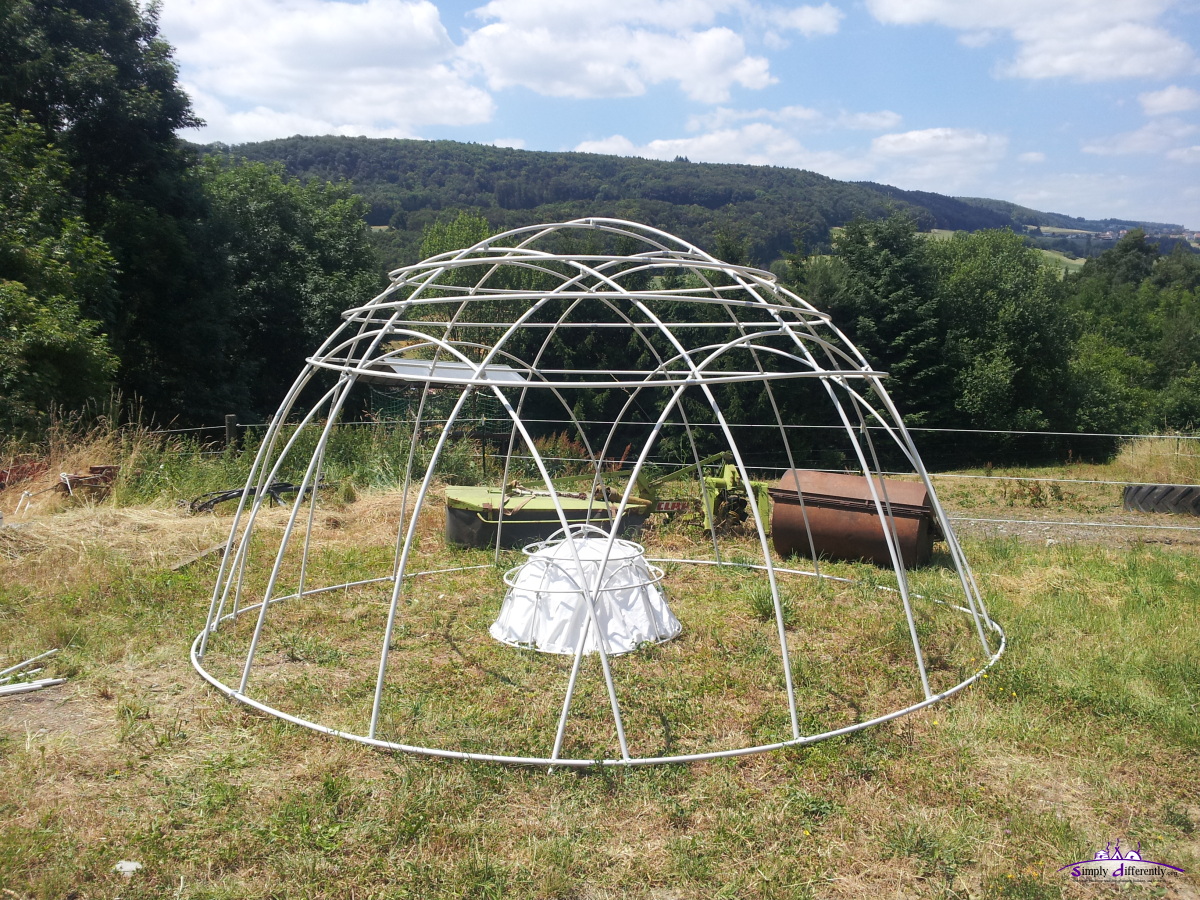
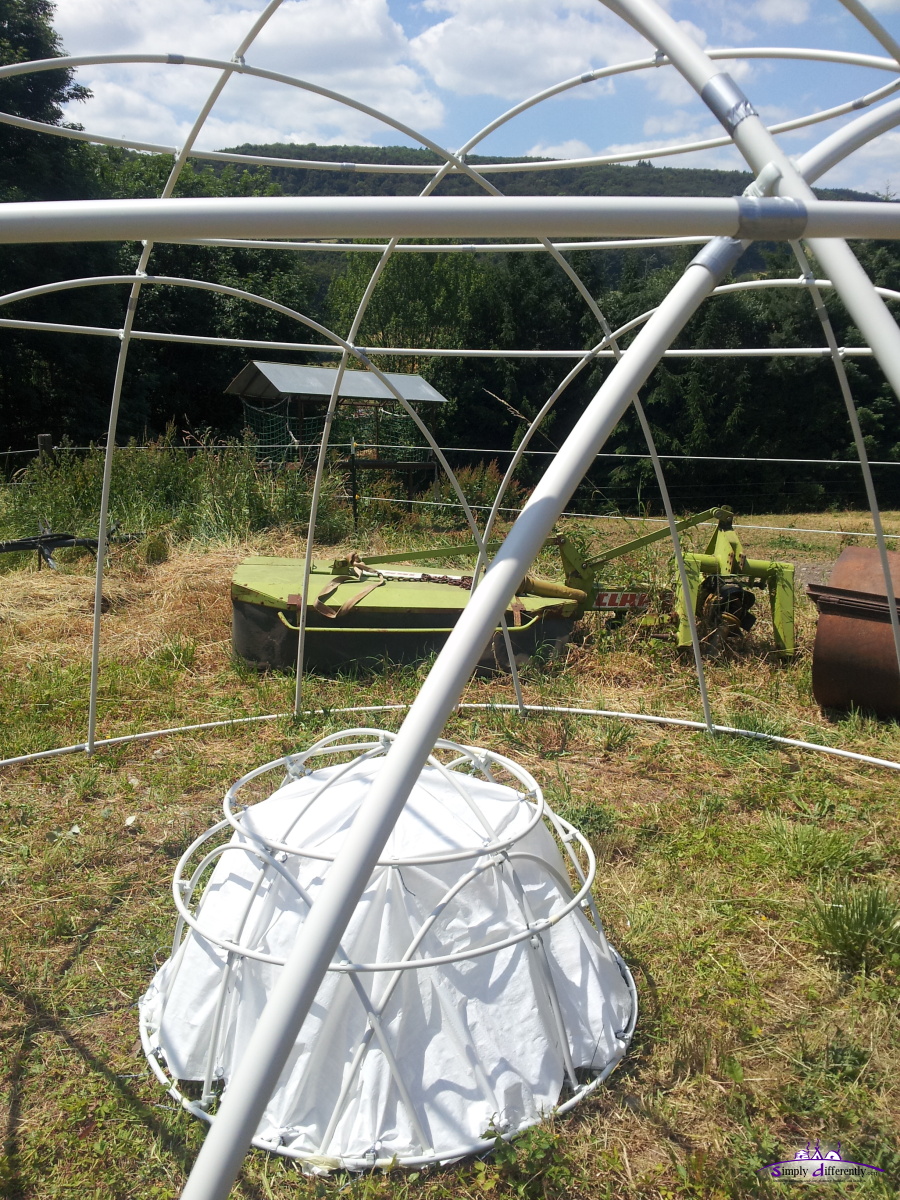
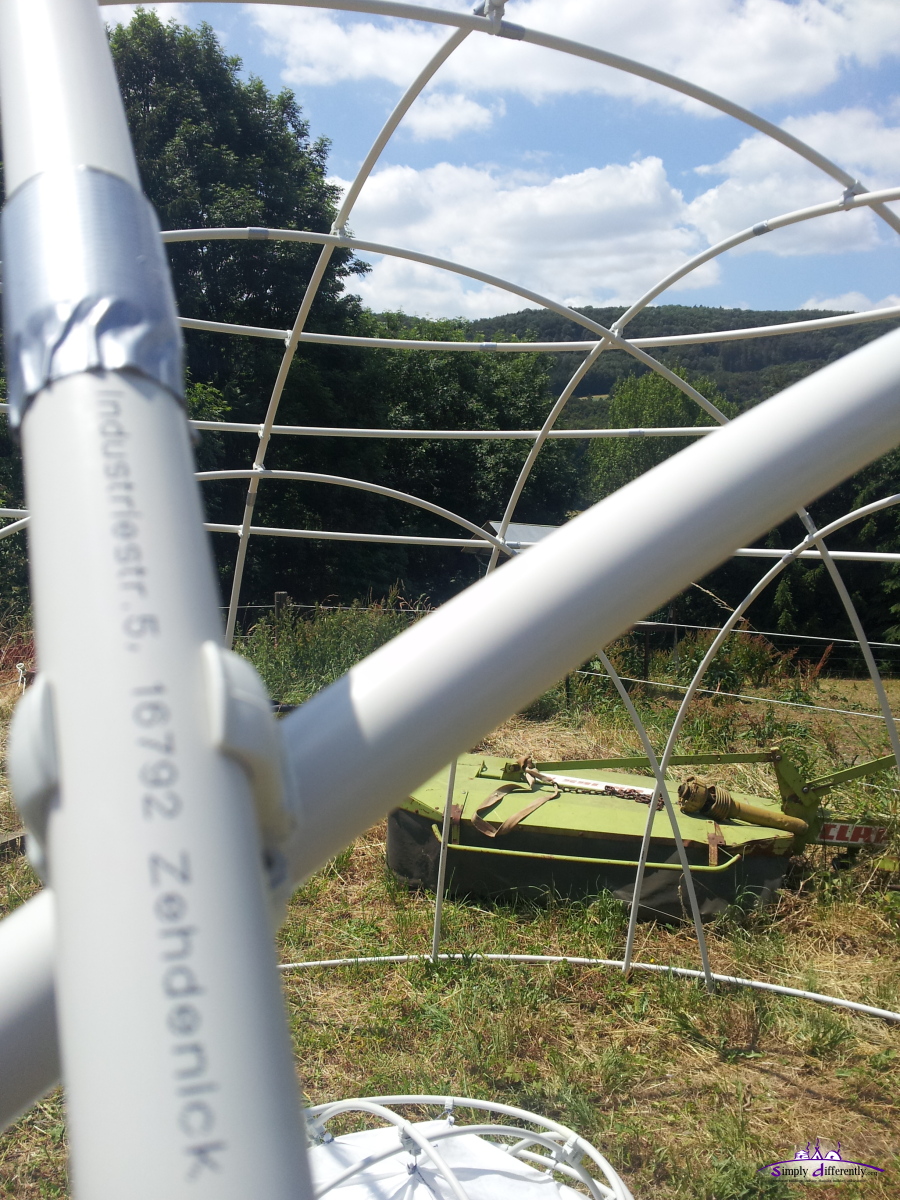
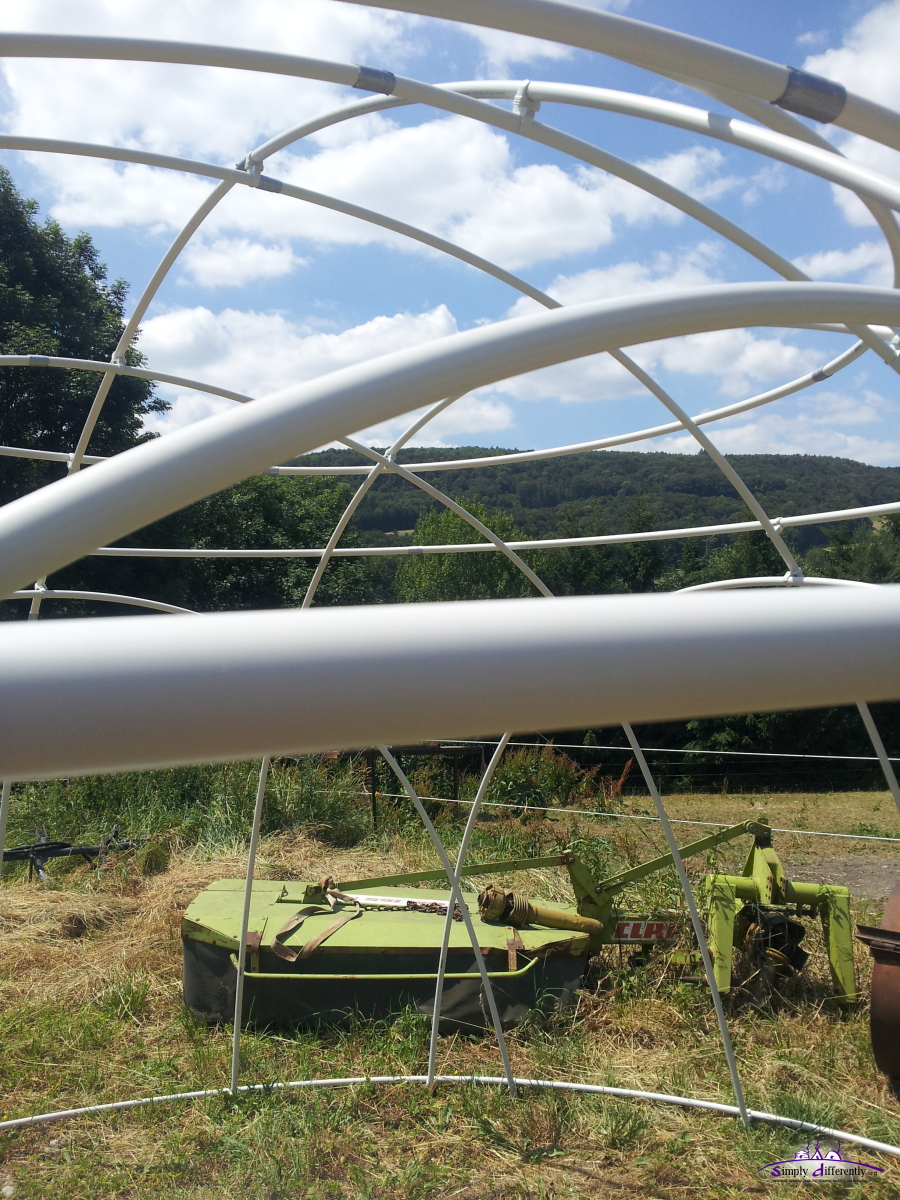
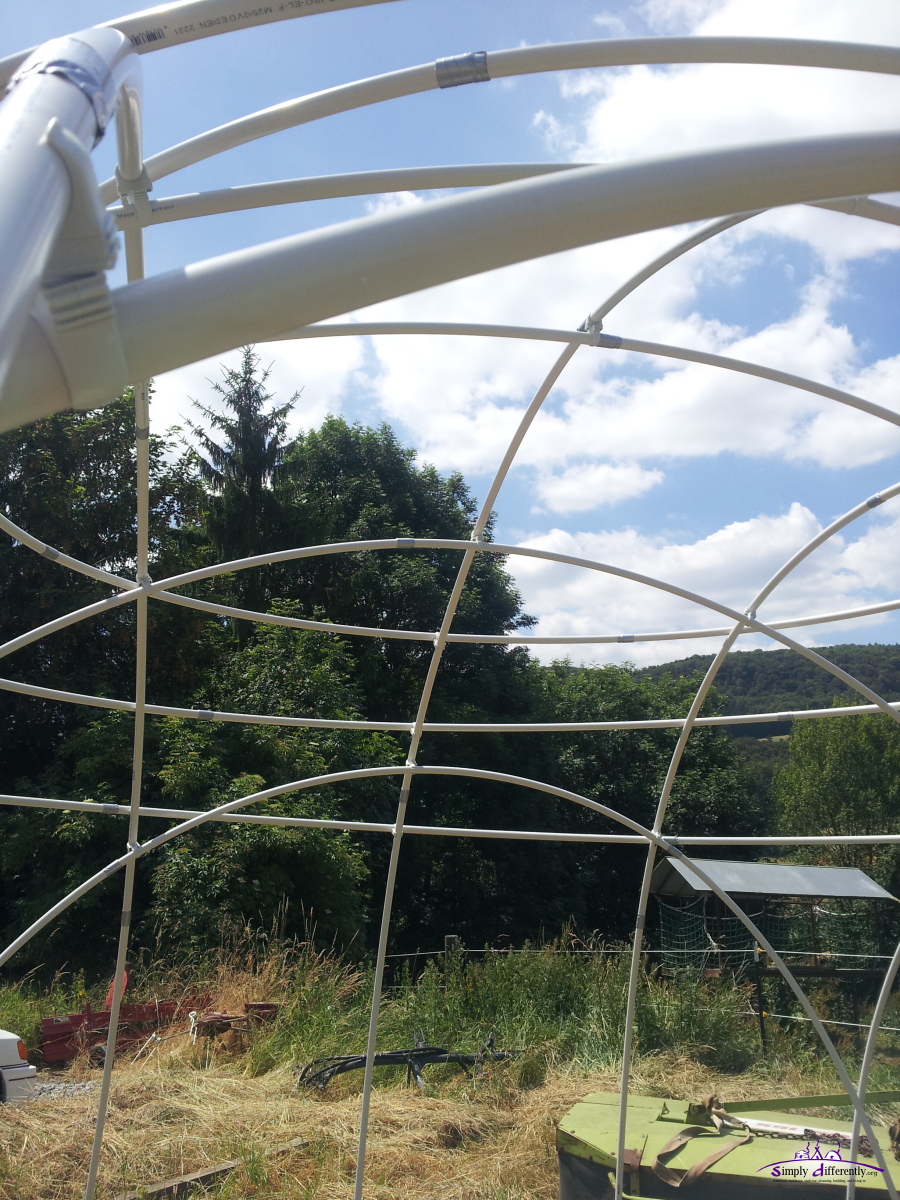
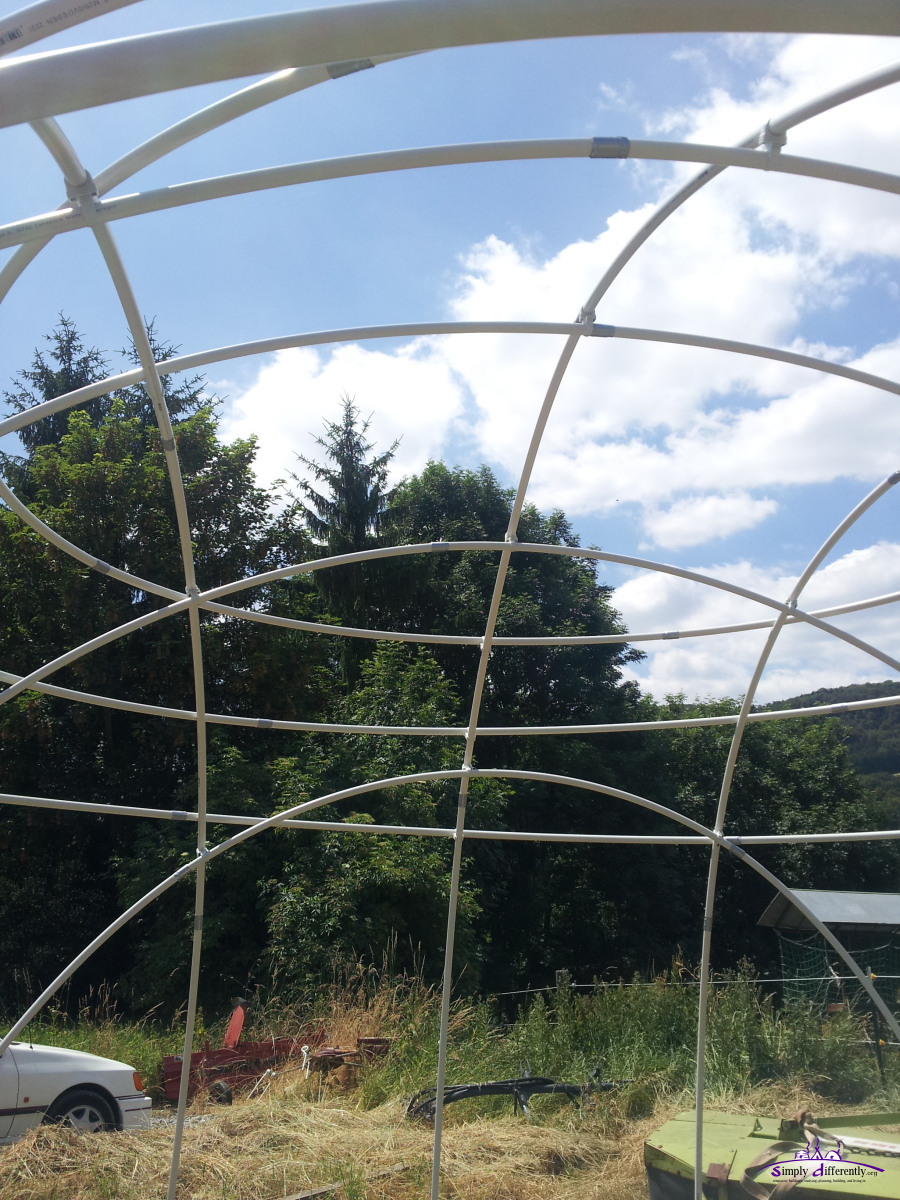
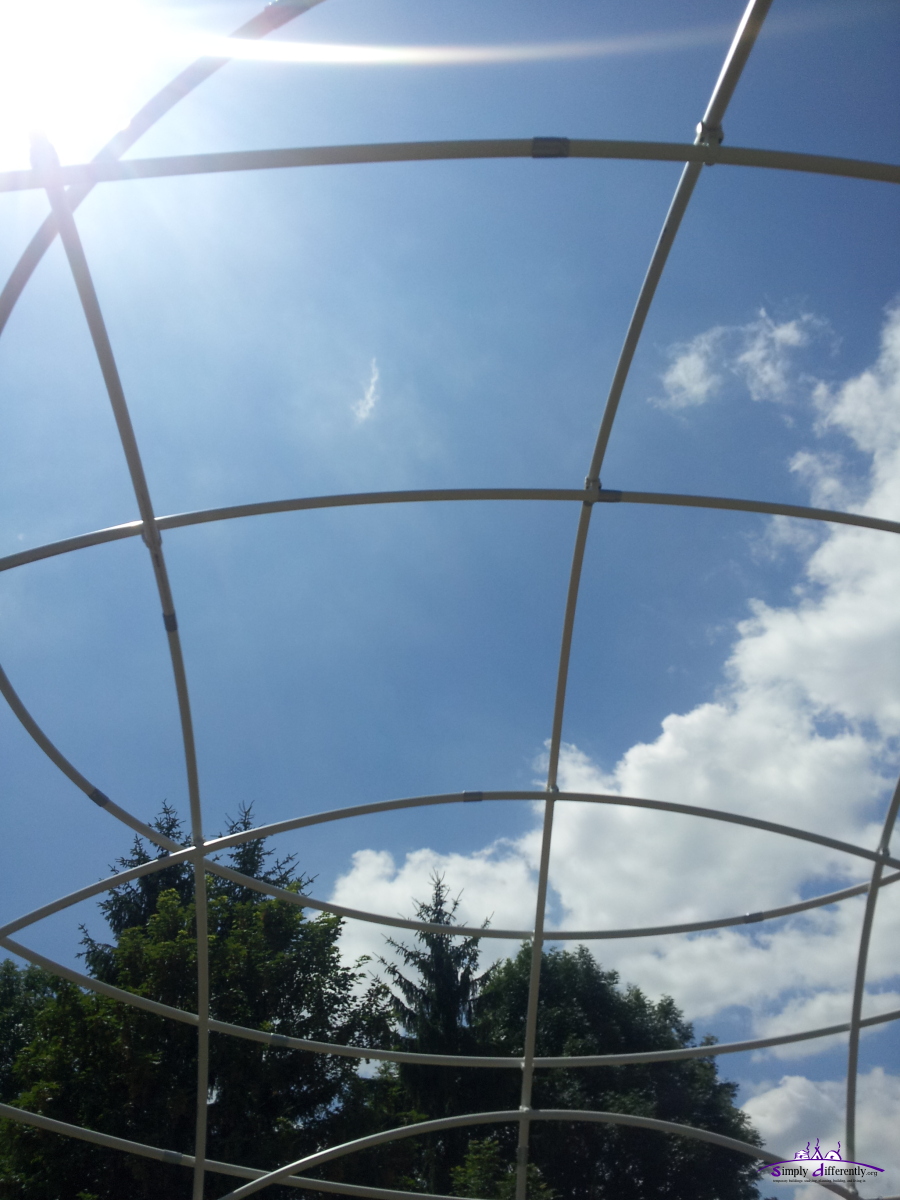
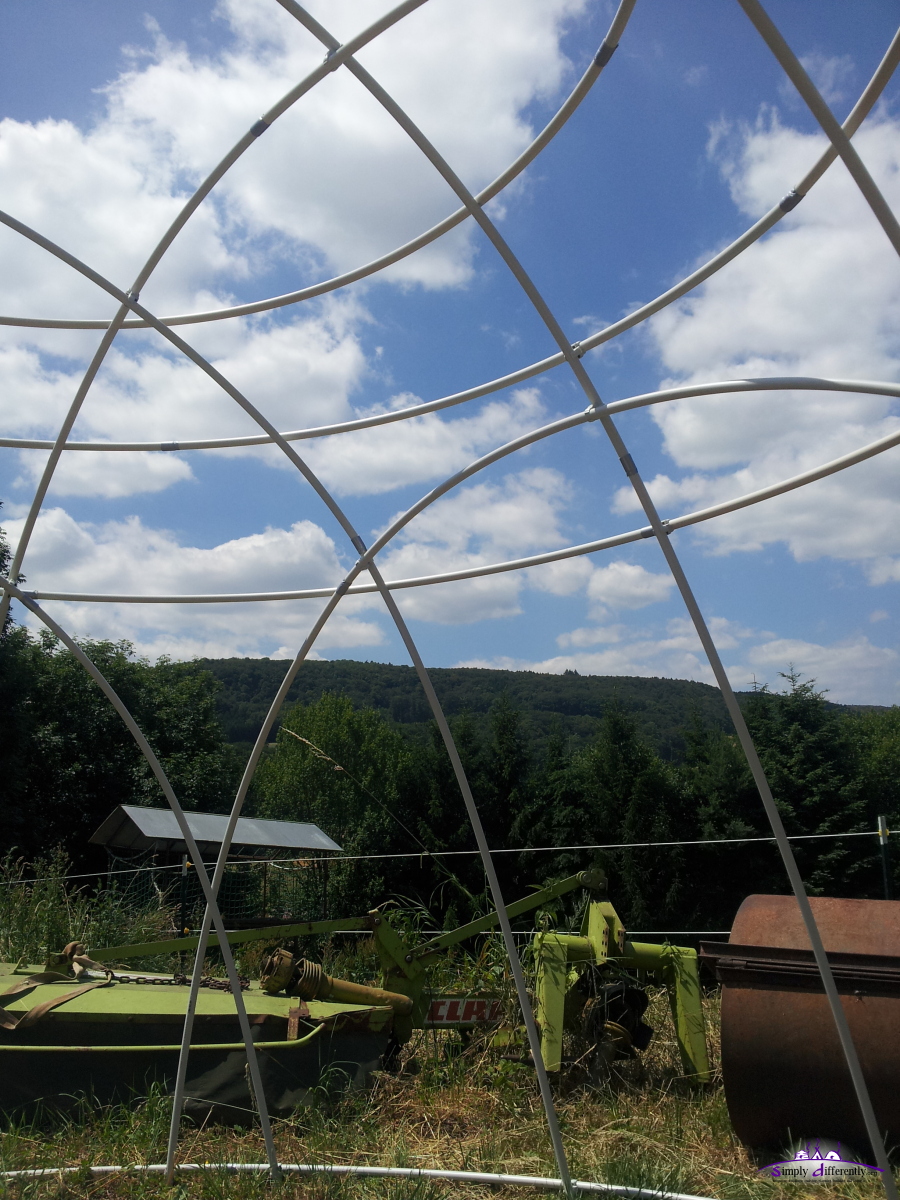
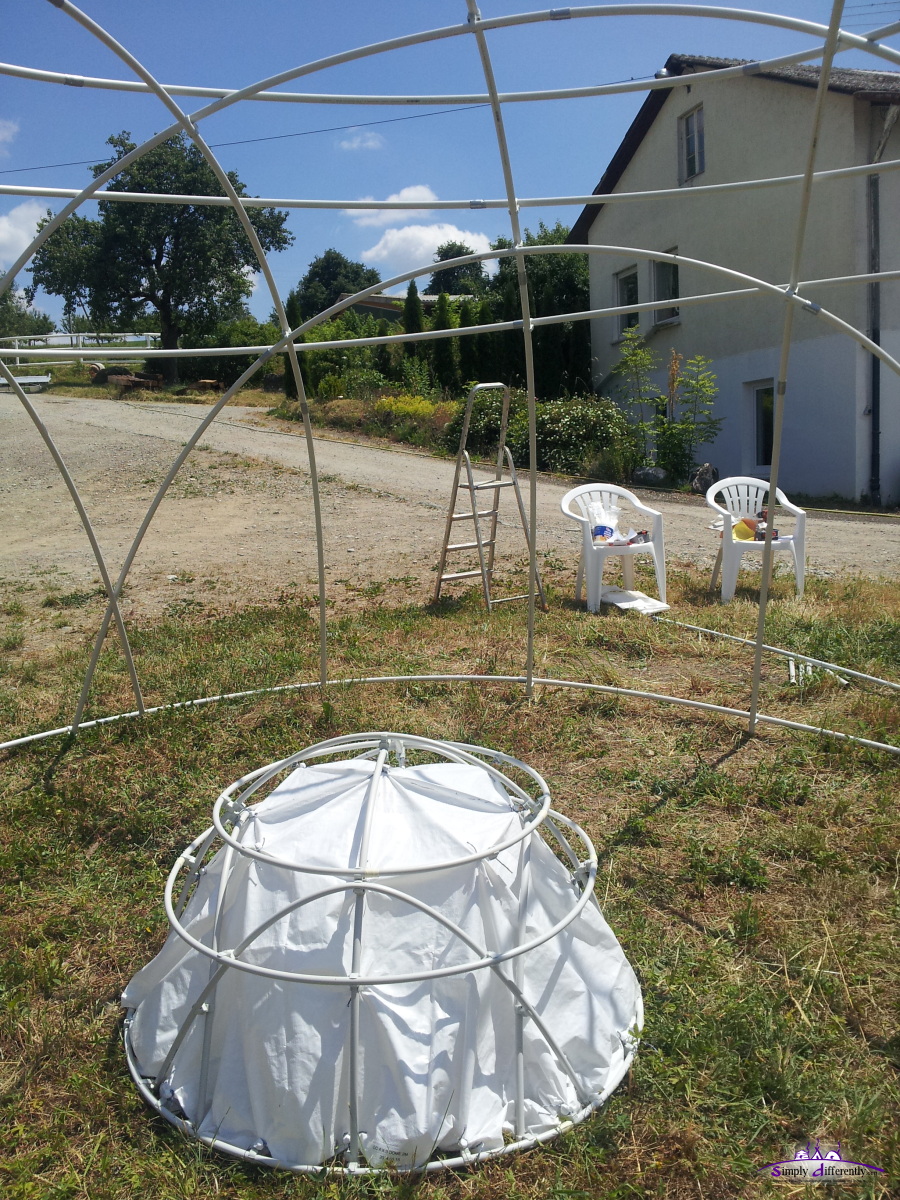
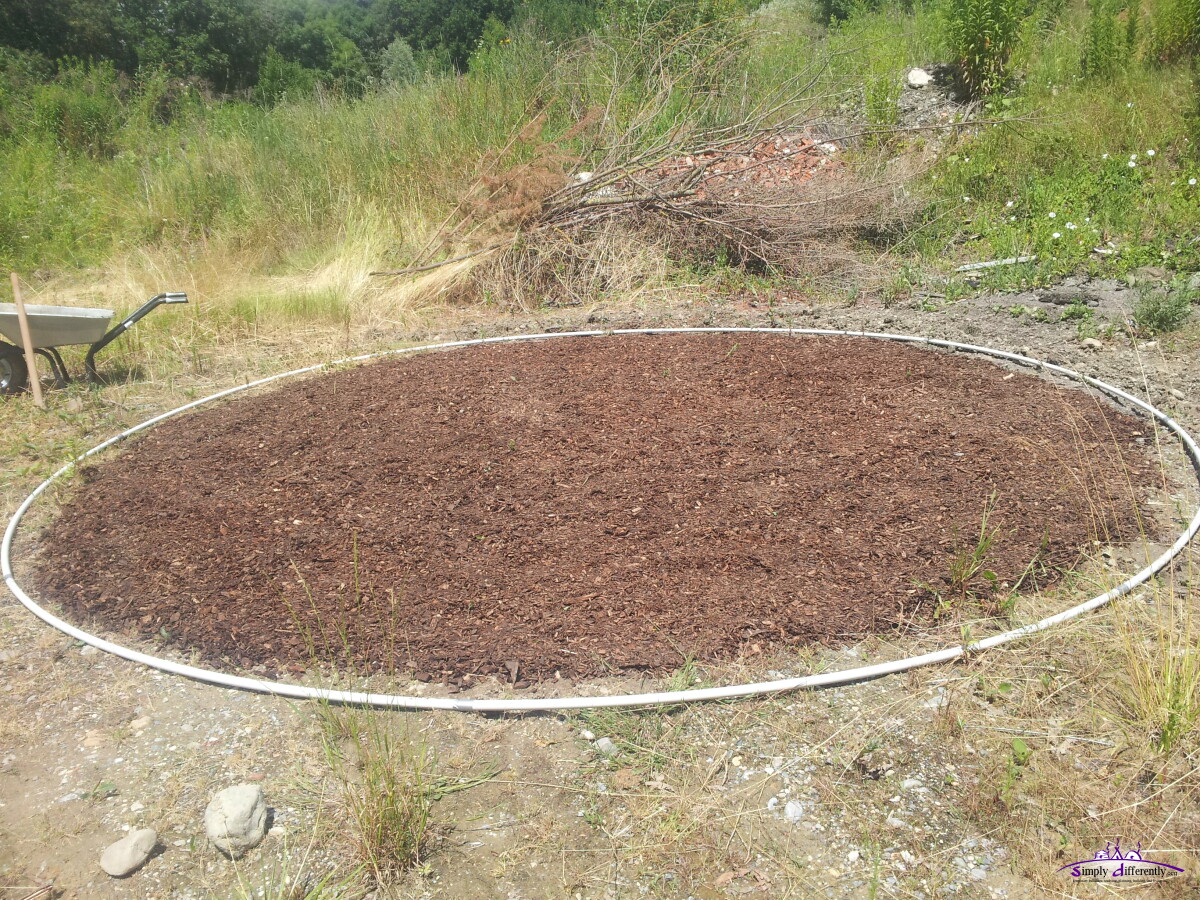
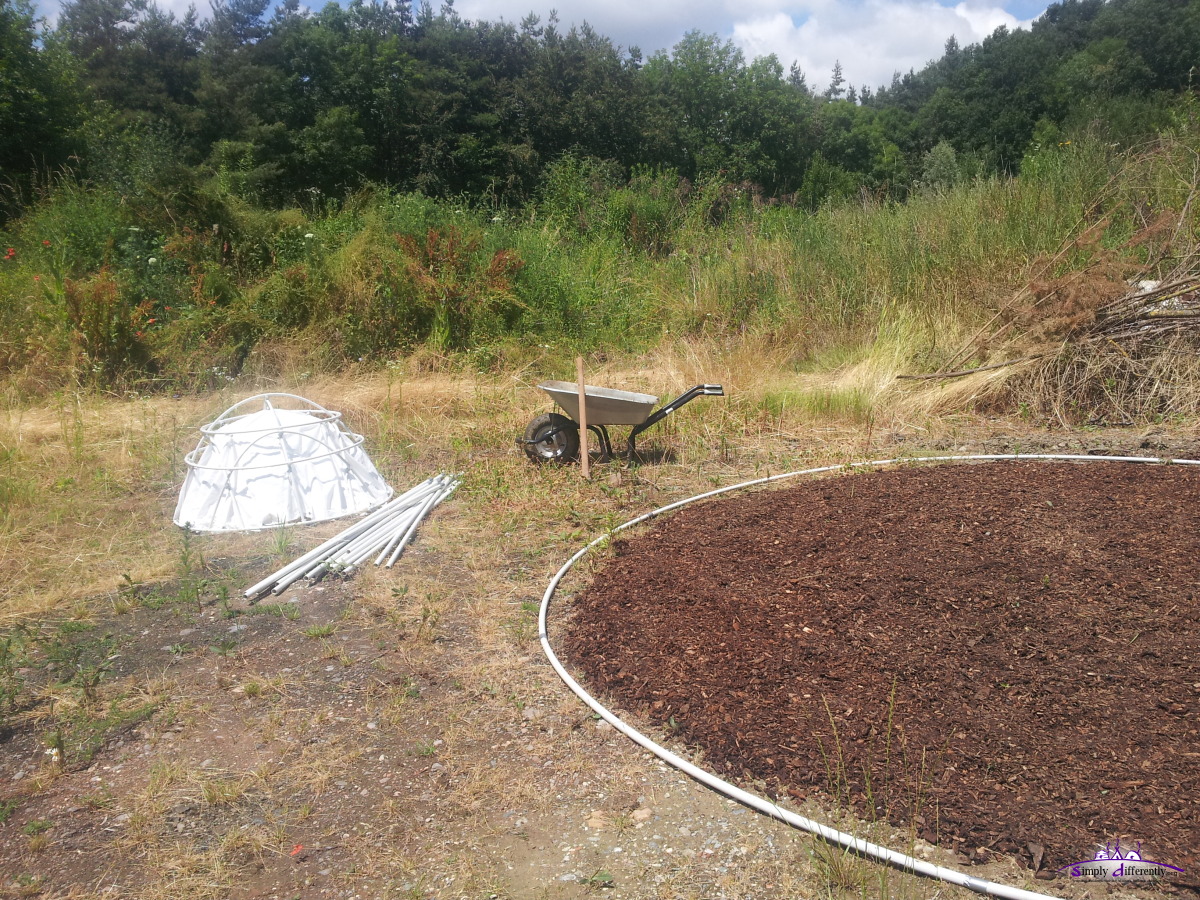
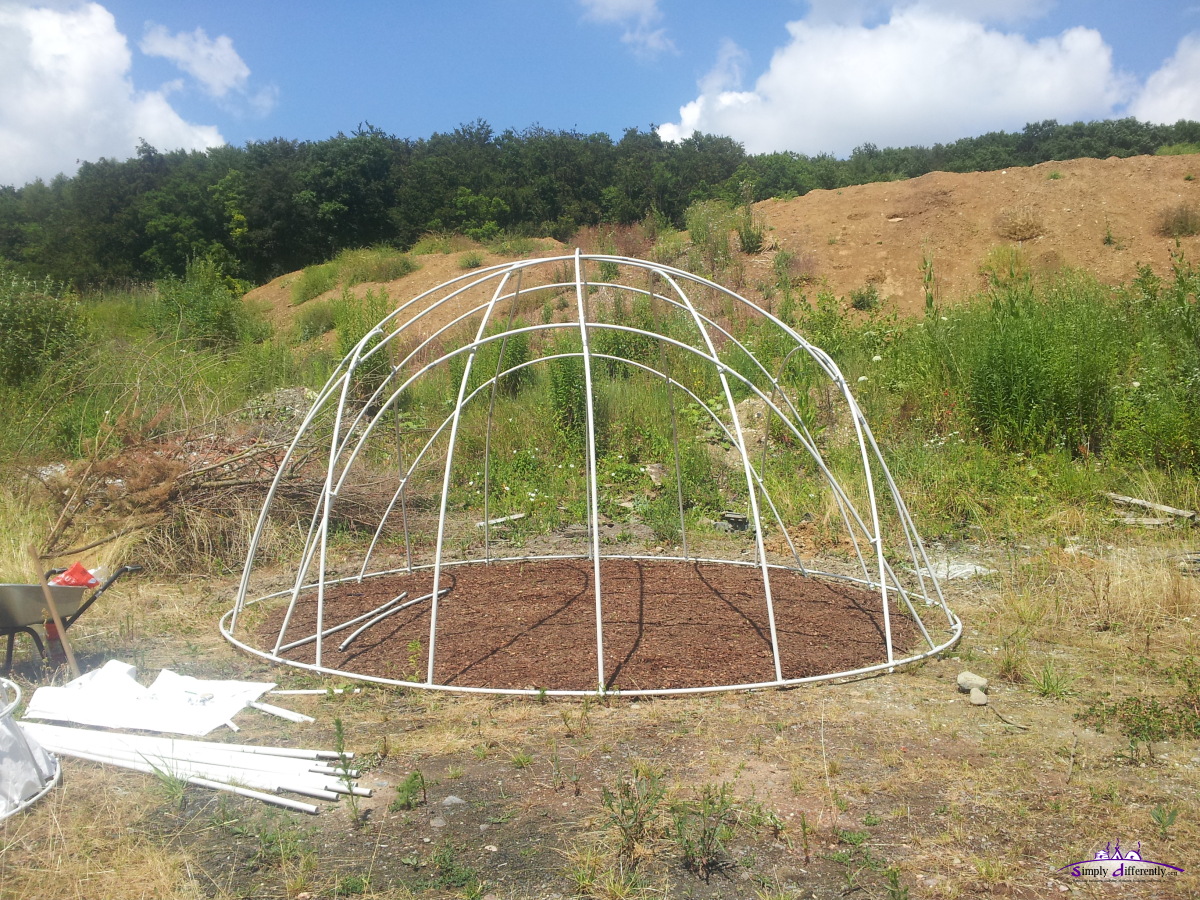
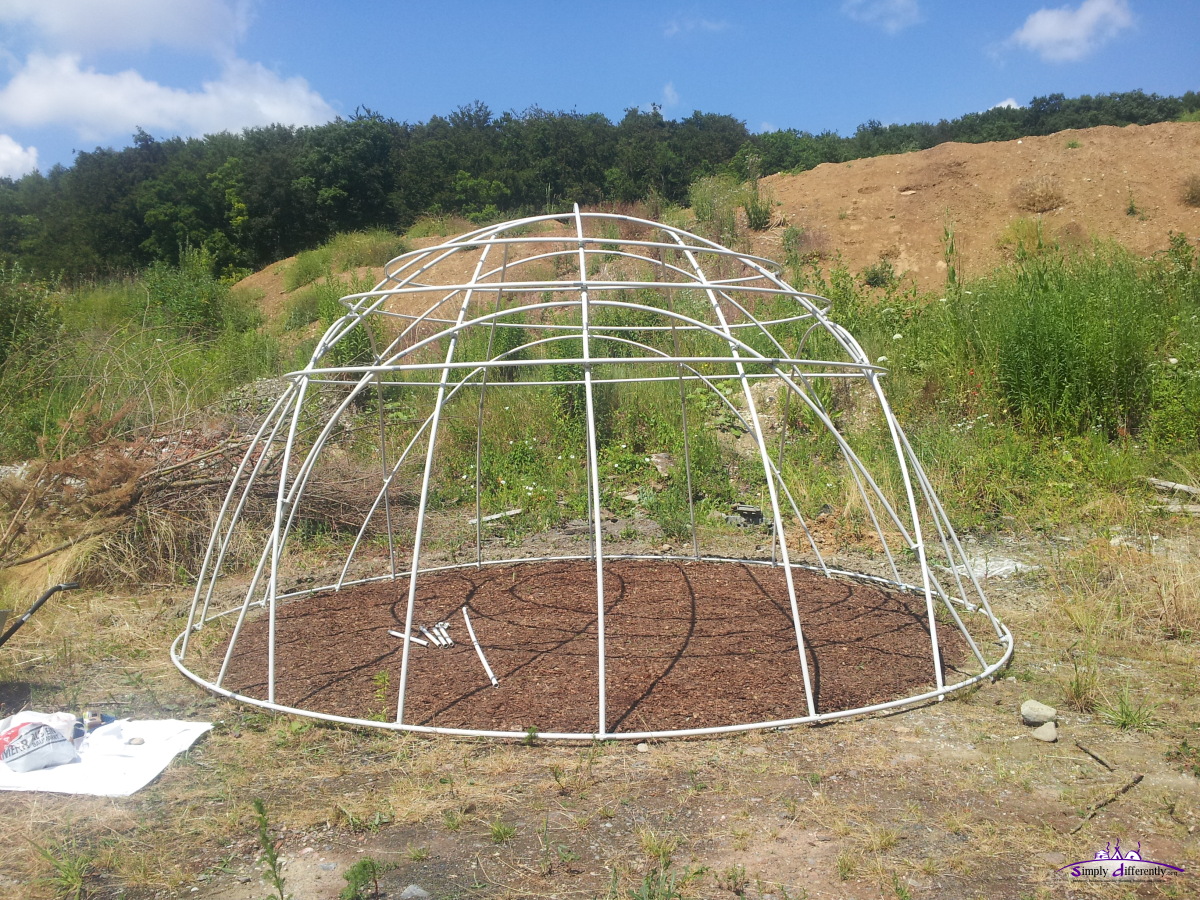
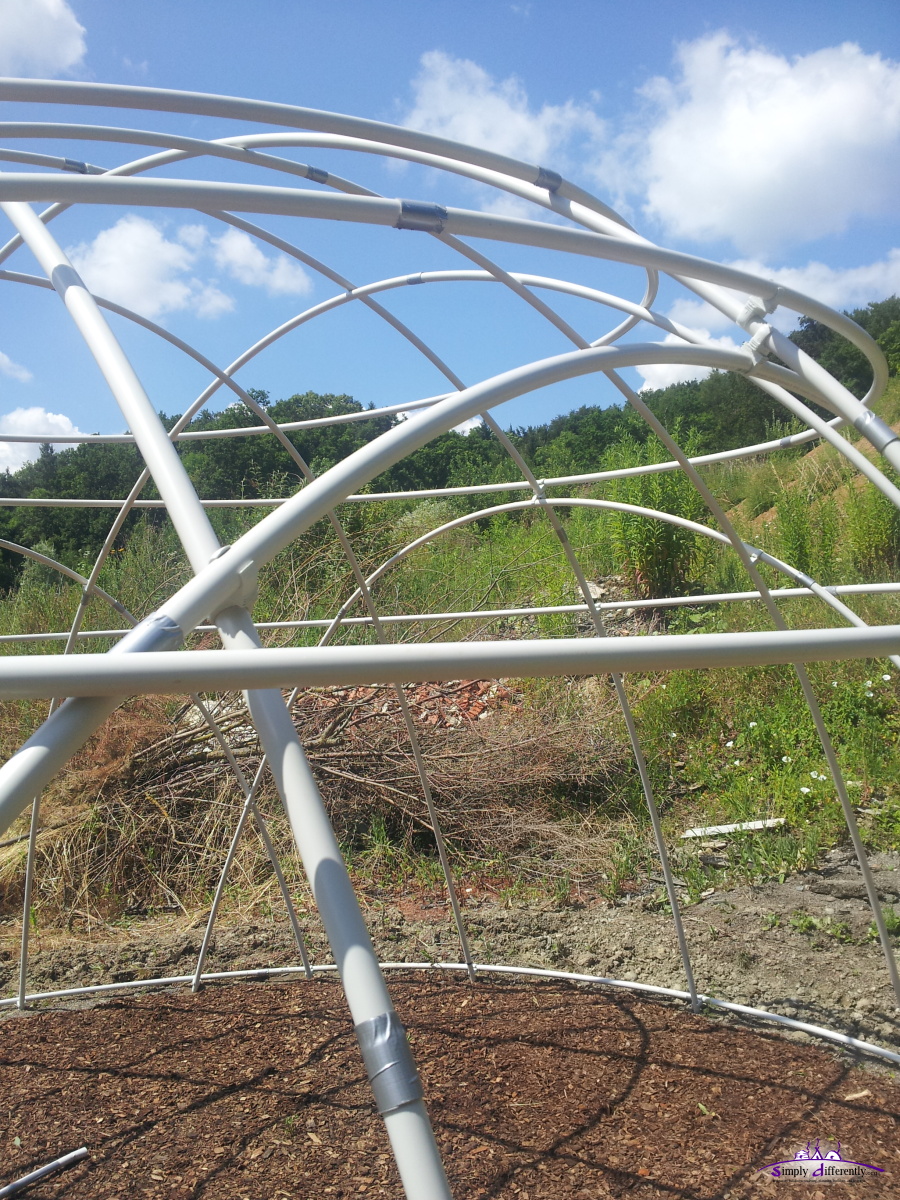
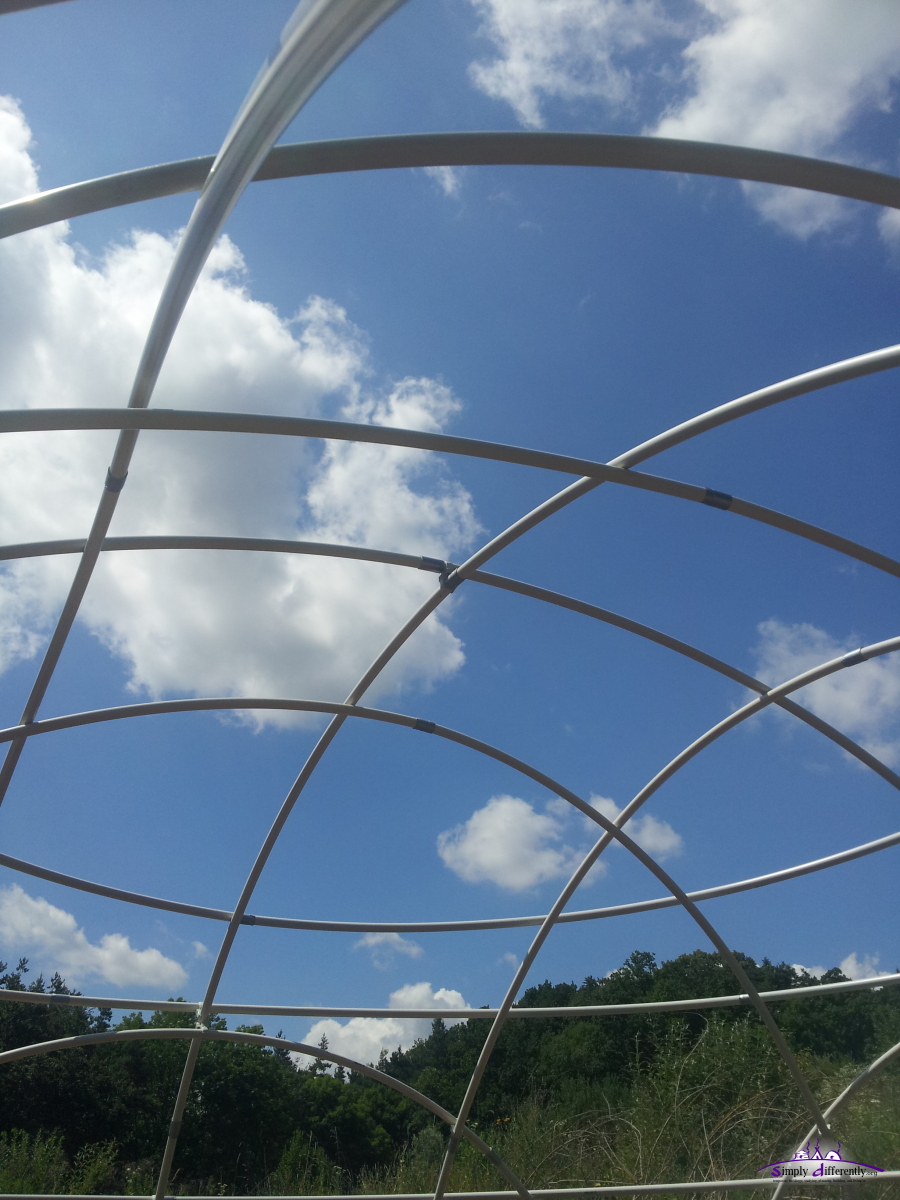
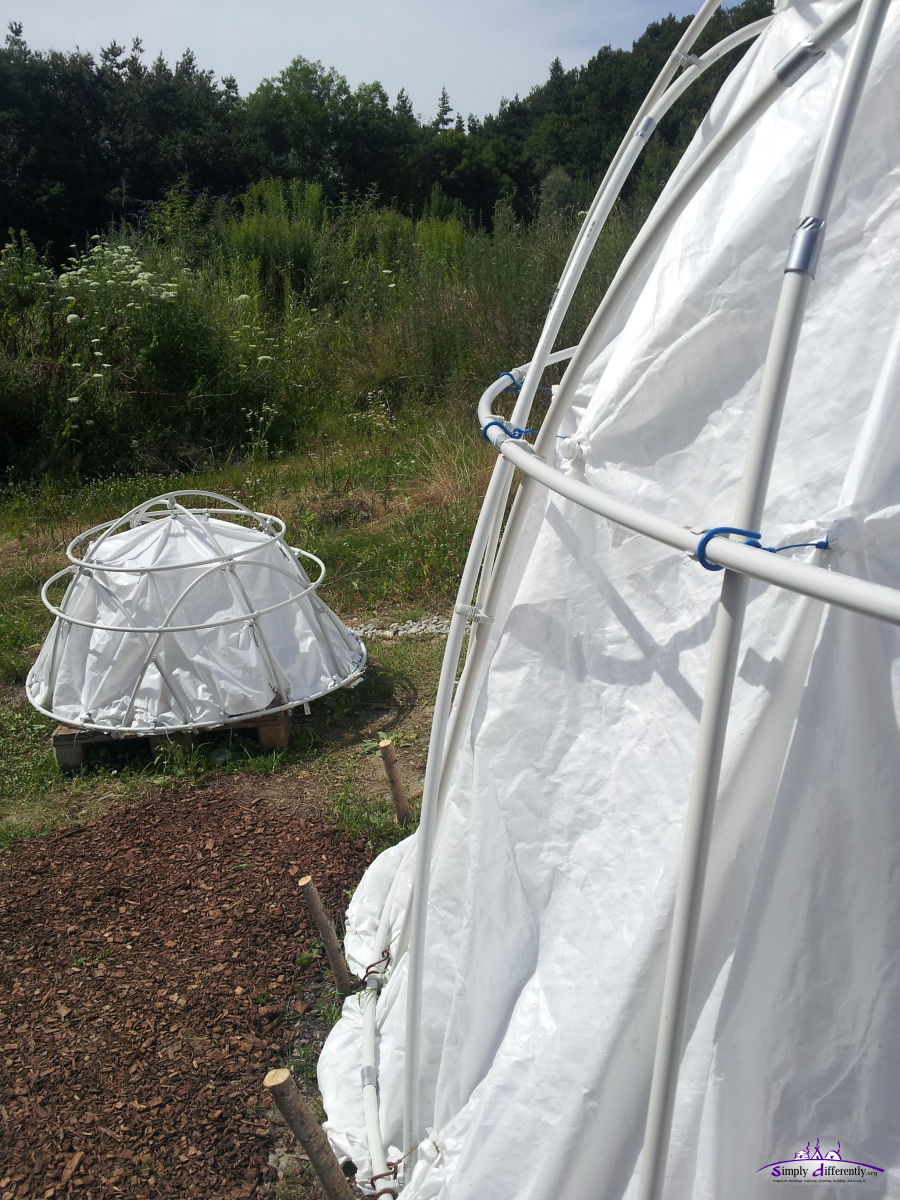
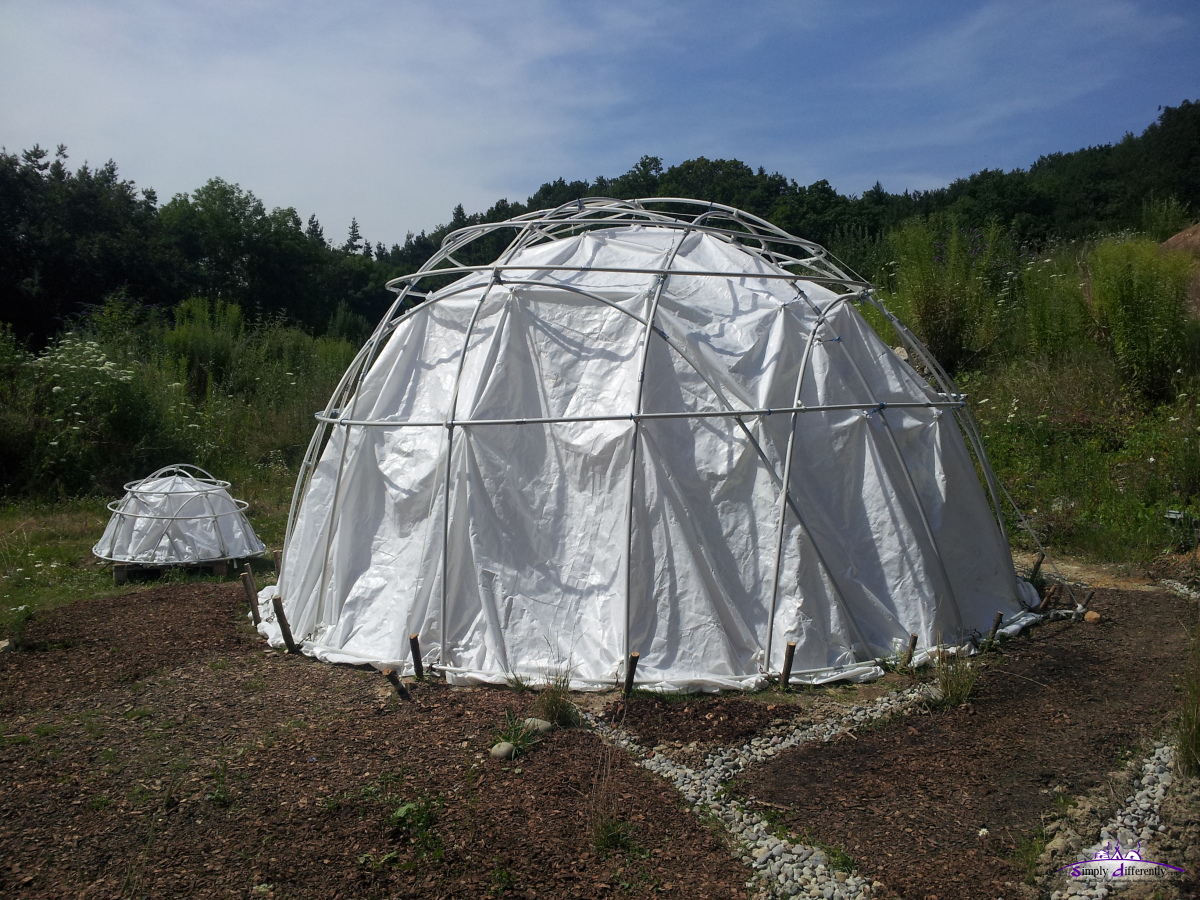
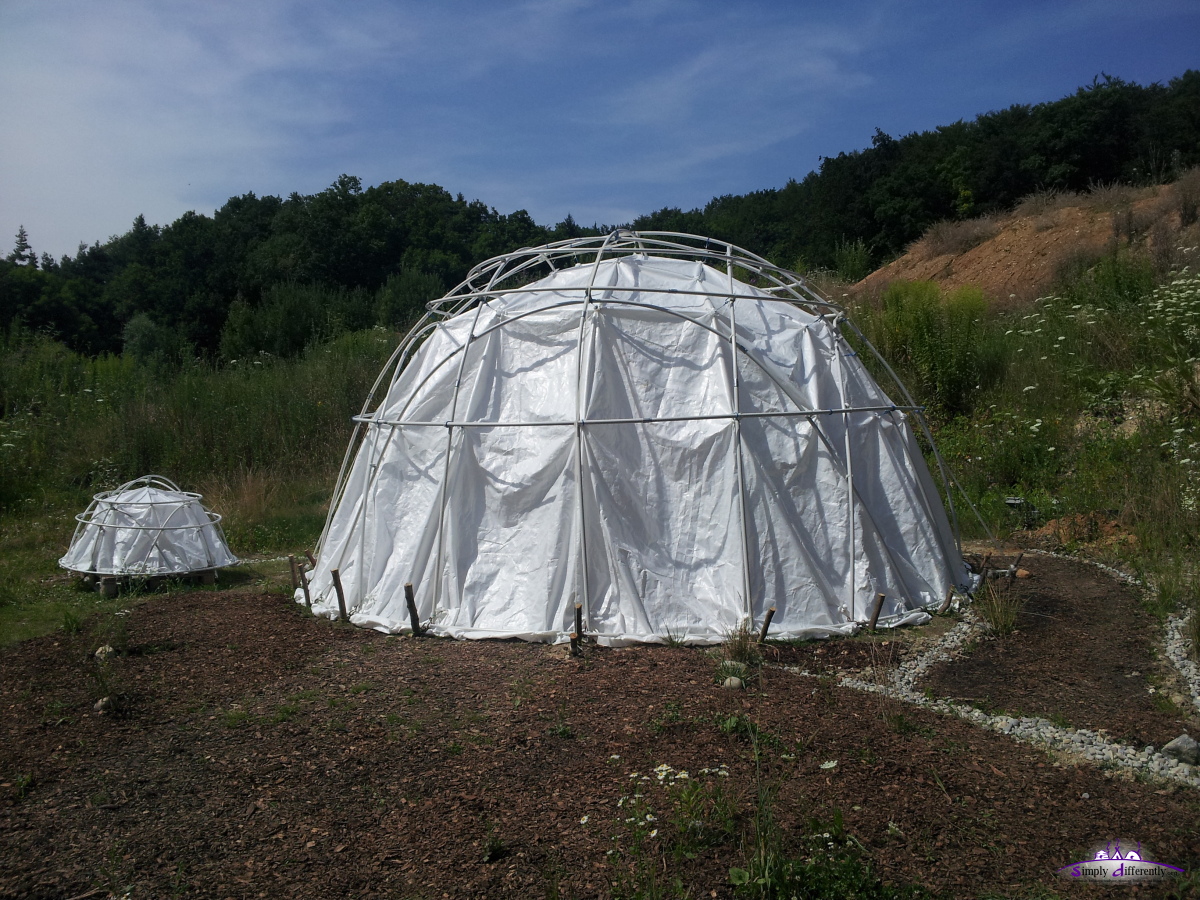
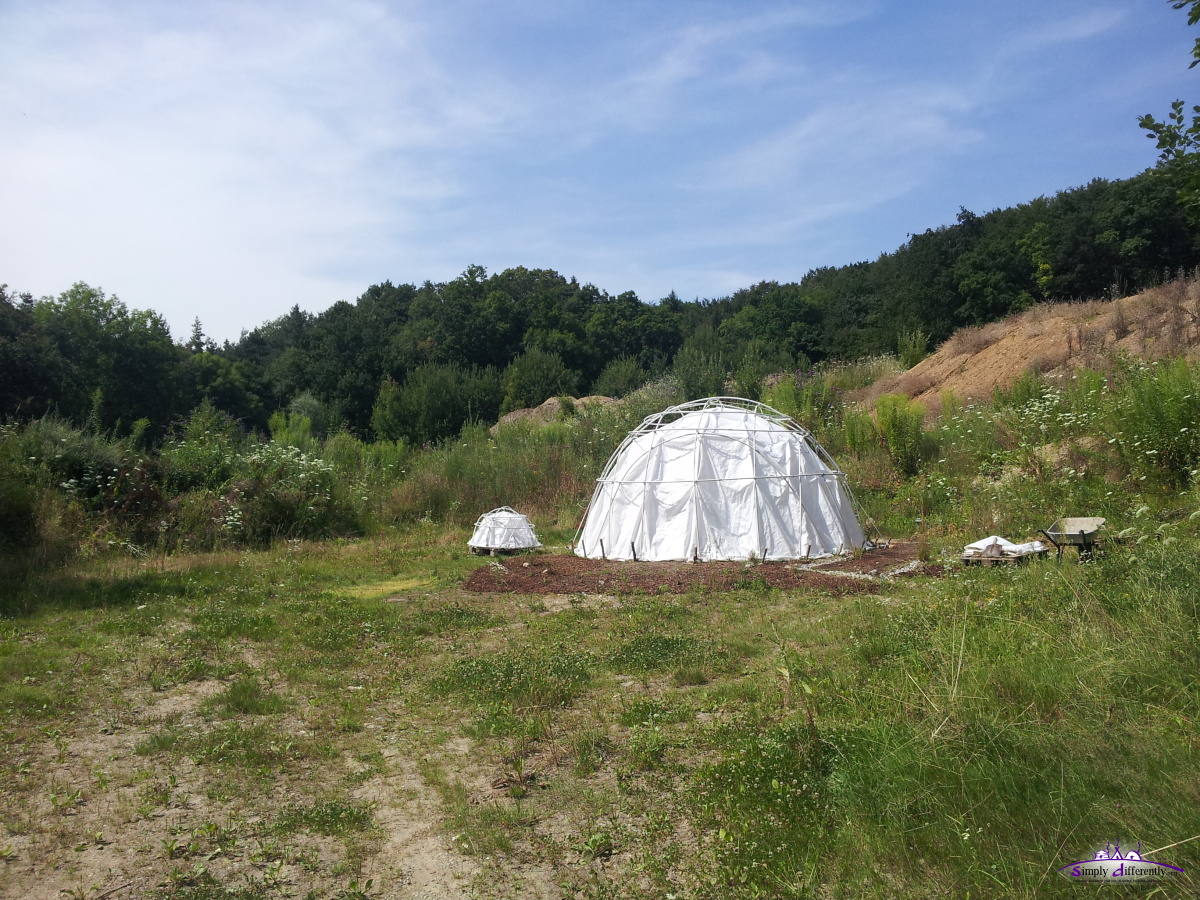
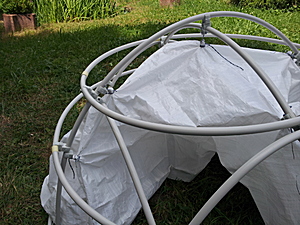
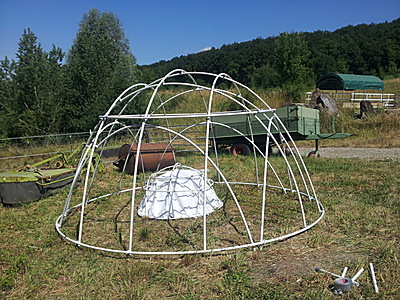
After the small model, I went ahead and started the full size 5.1m diameter 4:x:3 dome:
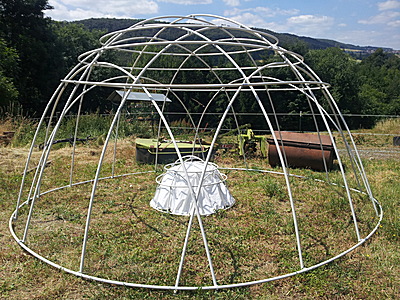
LC Dome 4:x:3 5.1m Diameter |
- a = 2m x 25mm
- A = 4a = 8m
- h = 2.55m
- d = 5.10m
- 44 tubes + 8 + 6 tubes for 2 rings = 58 tubes, 2m x 25mm PVC tube
- 8m x 8m PE rain cover (not yet used)
- 100x M4 nuts & screws (M4x16mm)
- 100 x "OBO Quick" tube clips M25 (source Bauhaus.info , 2014/06)
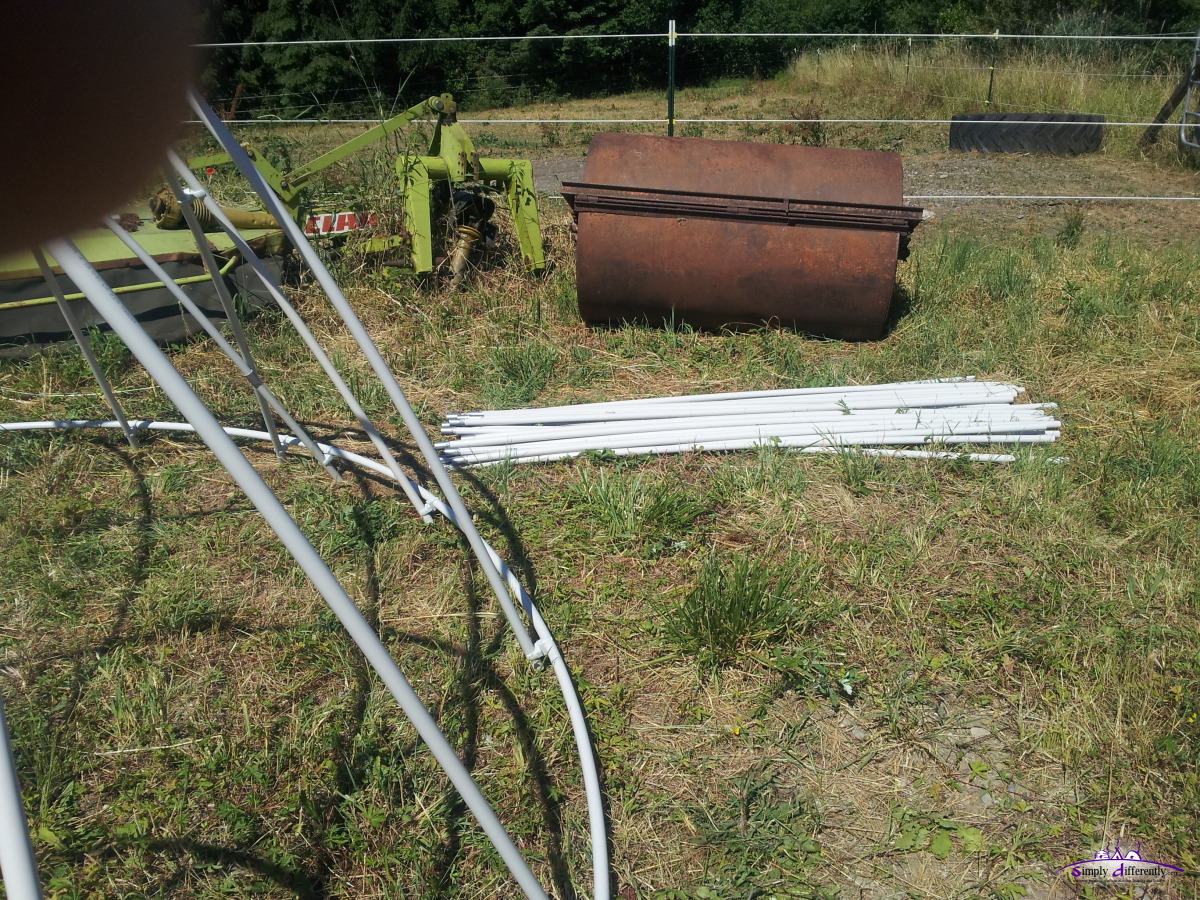
 60 x 2m x 25mm PVC tubes
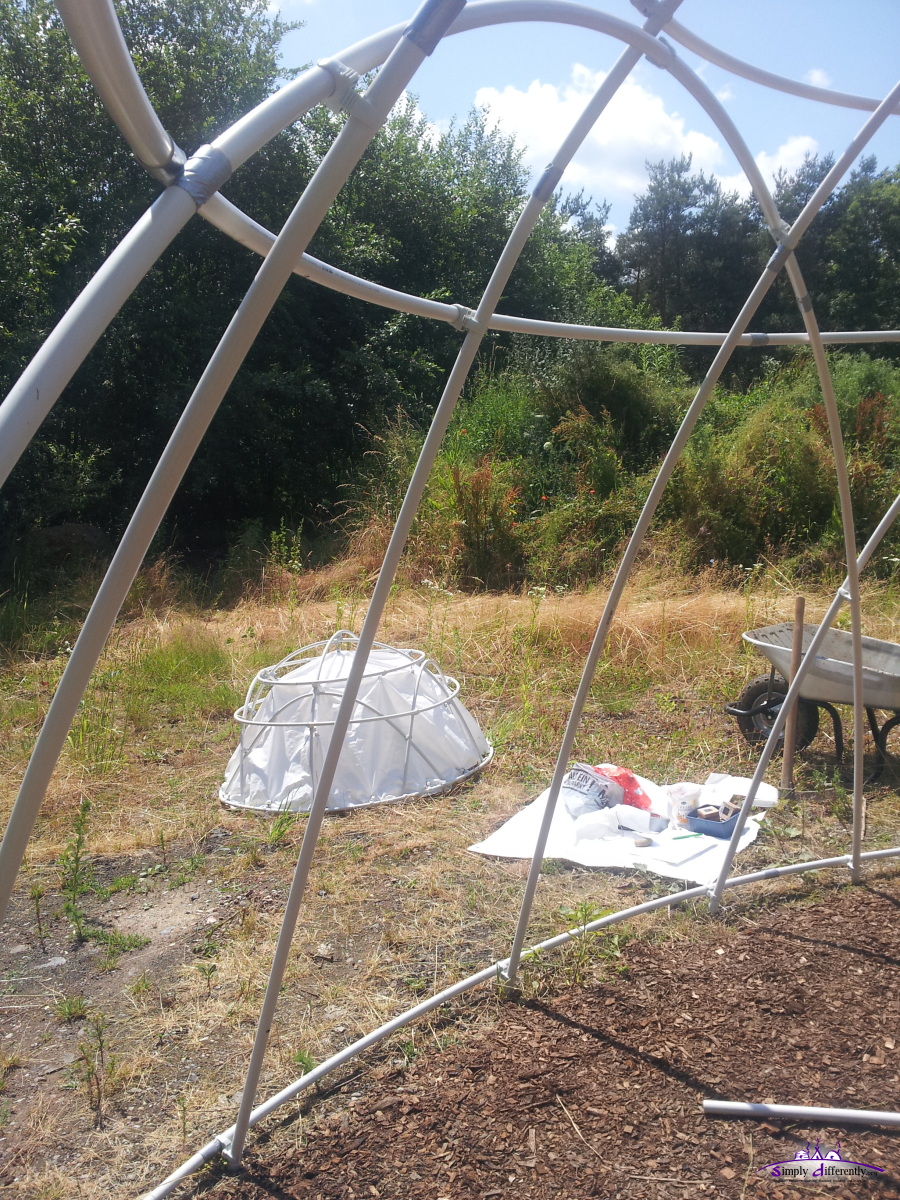
2014/06/21 09:28 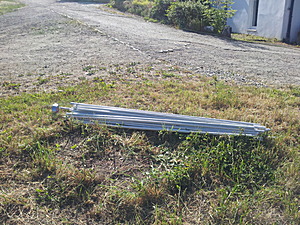 2014/06/21 09:28 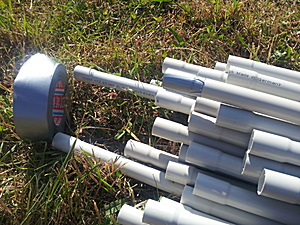 Taping the fittings to prevent tears
2014/06/21 09:28  2014/06/21 10:27 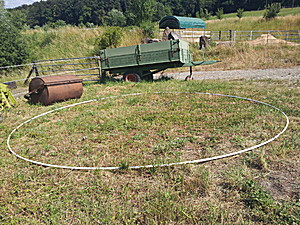 Ground circle layed out
2014/06/21 10:56 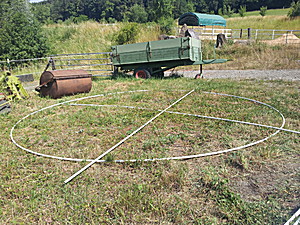 2014/06/21 11:06 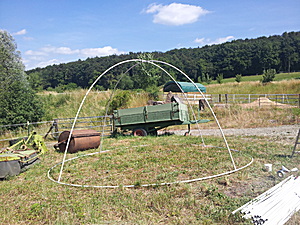 Main intersection put up (one person sufficient)
2014/06/21 11:10 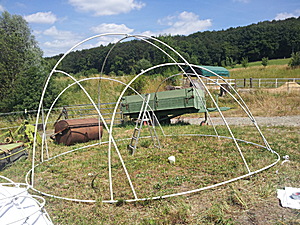 2014/06/21 11:43 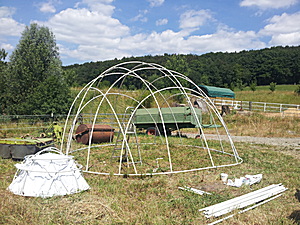 2014/06/21 12:44 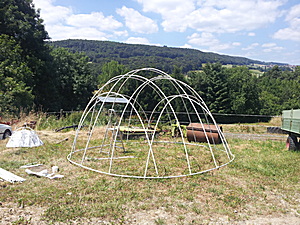 2014/06/21 12:56 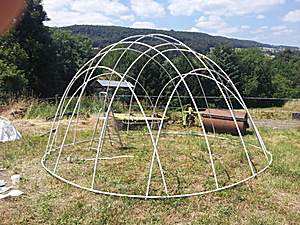 2014/06/21 12:56 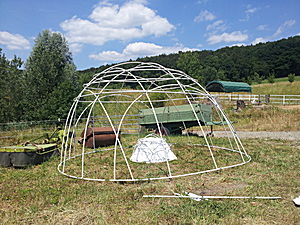 2014/06/21 13:29 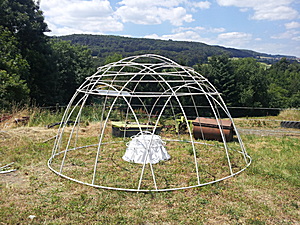 2014/06/21 13:29 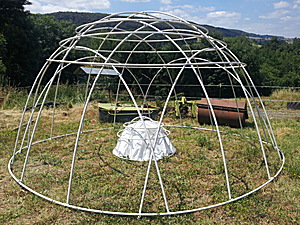 2014/06/21 13:29 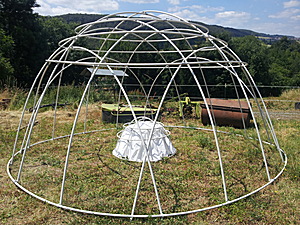 2014/06/21 13:29 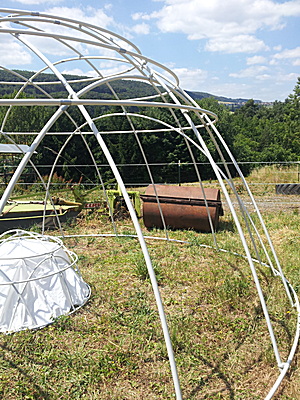 2014/06/21 13:29 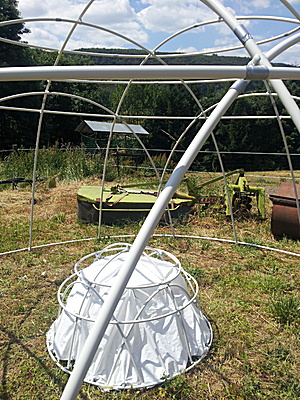 2014/06/21 13:30 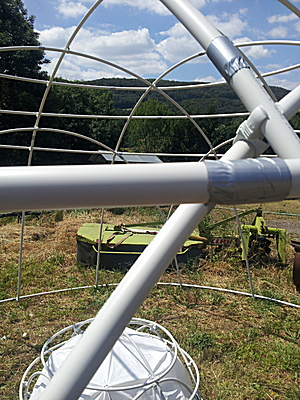 2014/06/21 13:30  2014/06/21 13:30 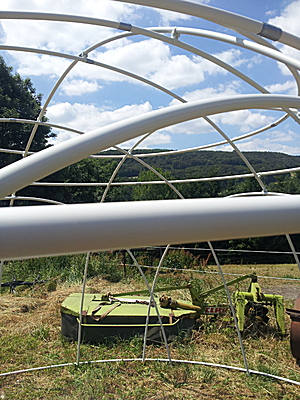 2014/06/21 13:30 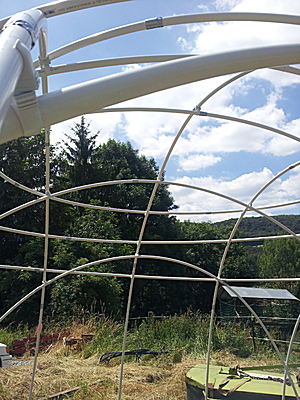 2014/06/21 13:30 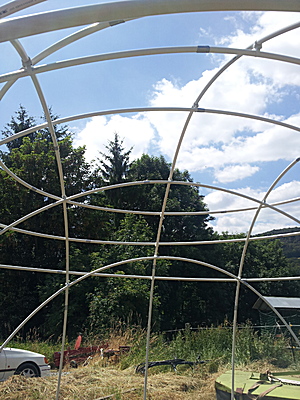 2014/06/21 13:30 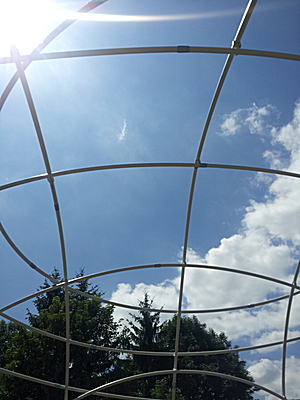 2014/06/21 13:30 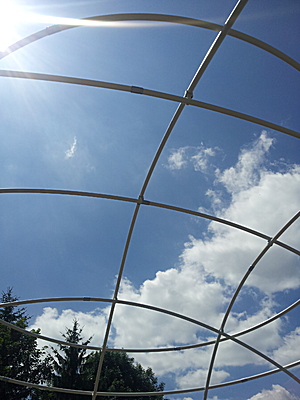 2014/06/21 13:31 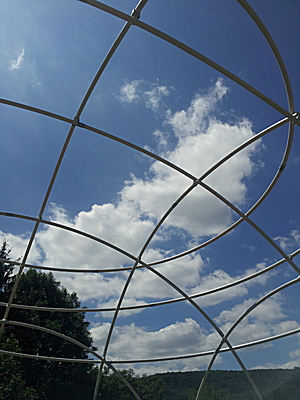 2014/06/21 13:31 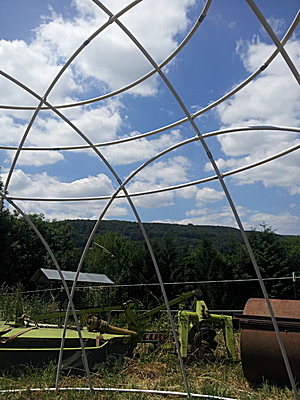 2014/06/21 13:31 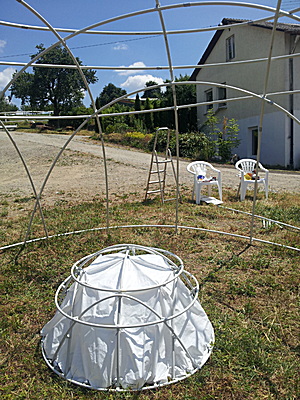 2014/06/21 13:31 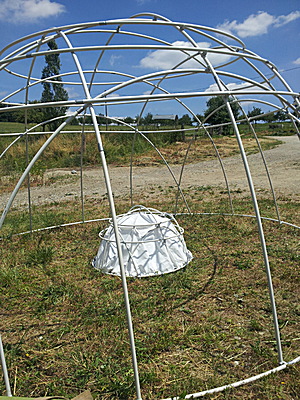 2014/06/21 13:32
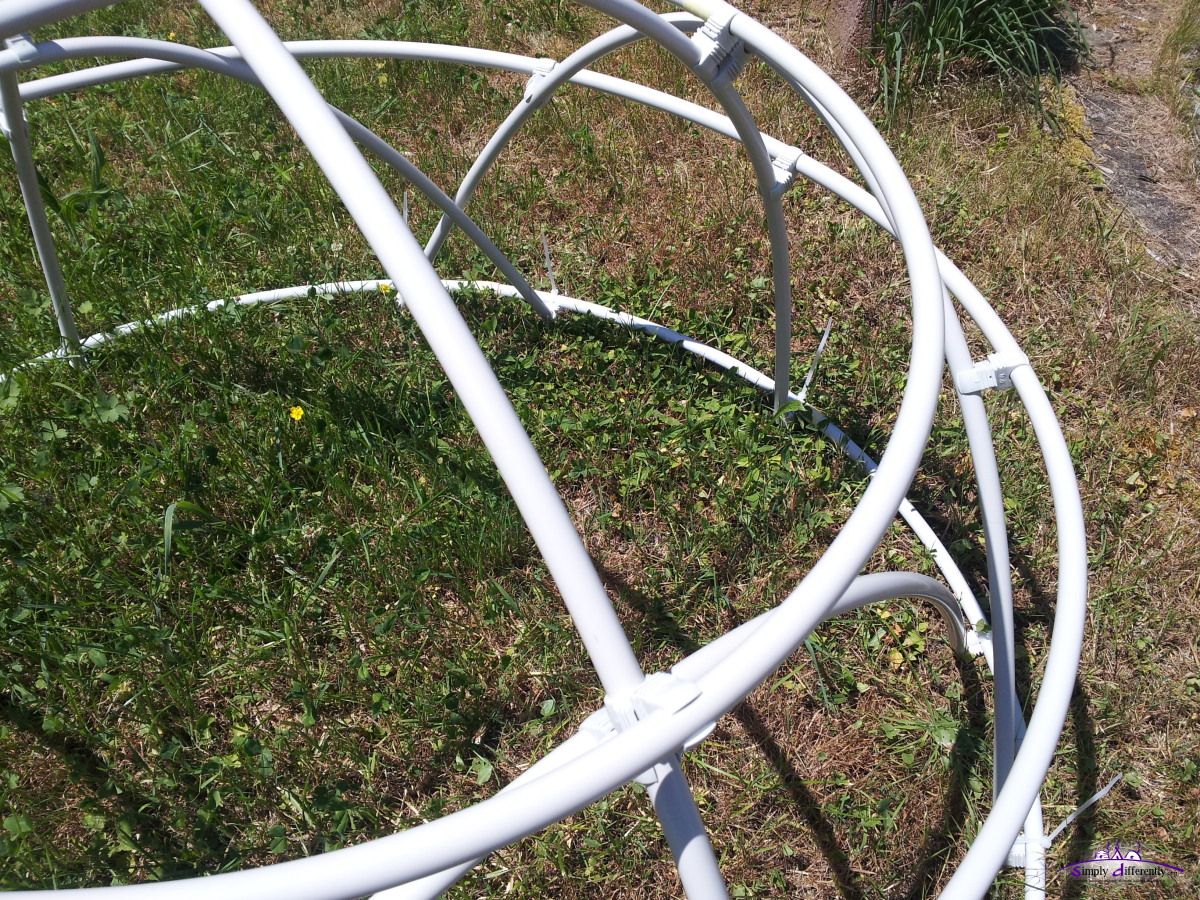
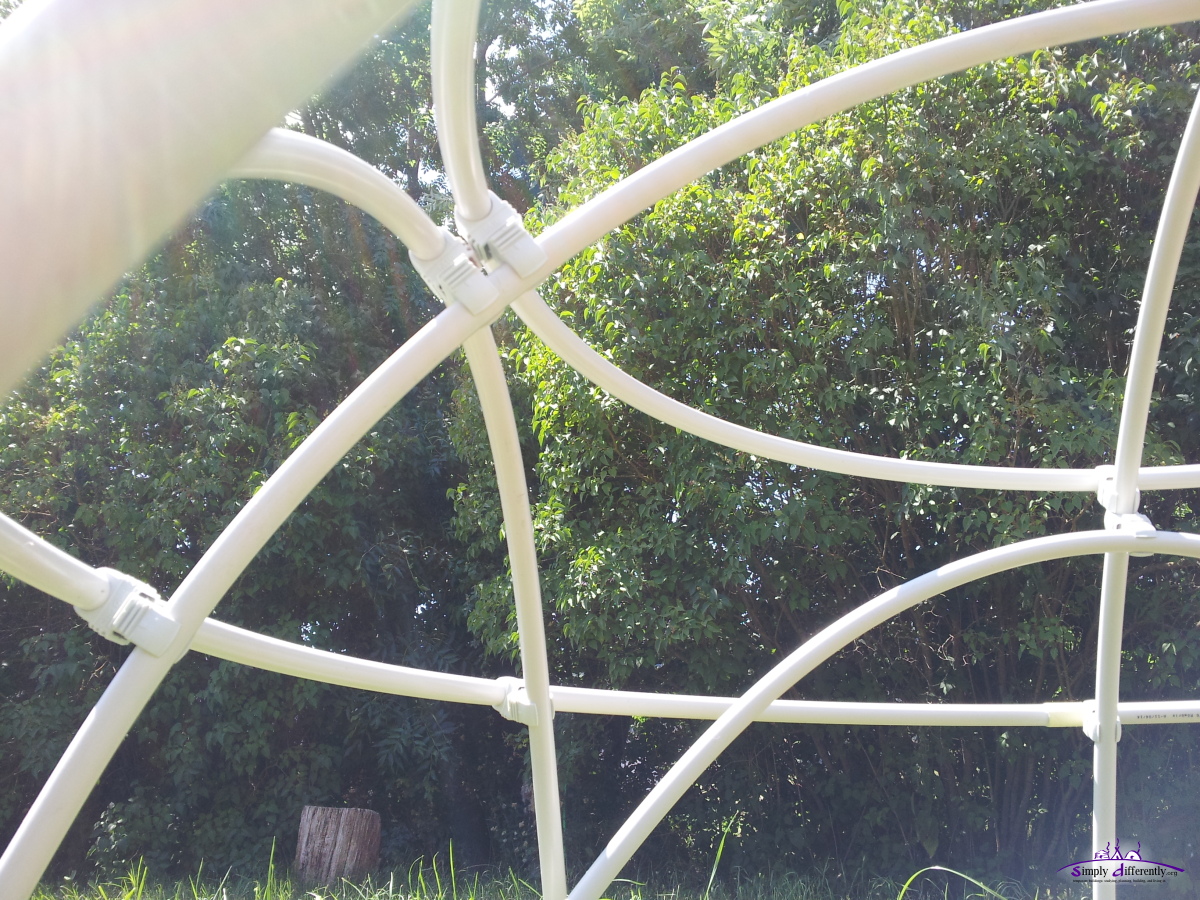
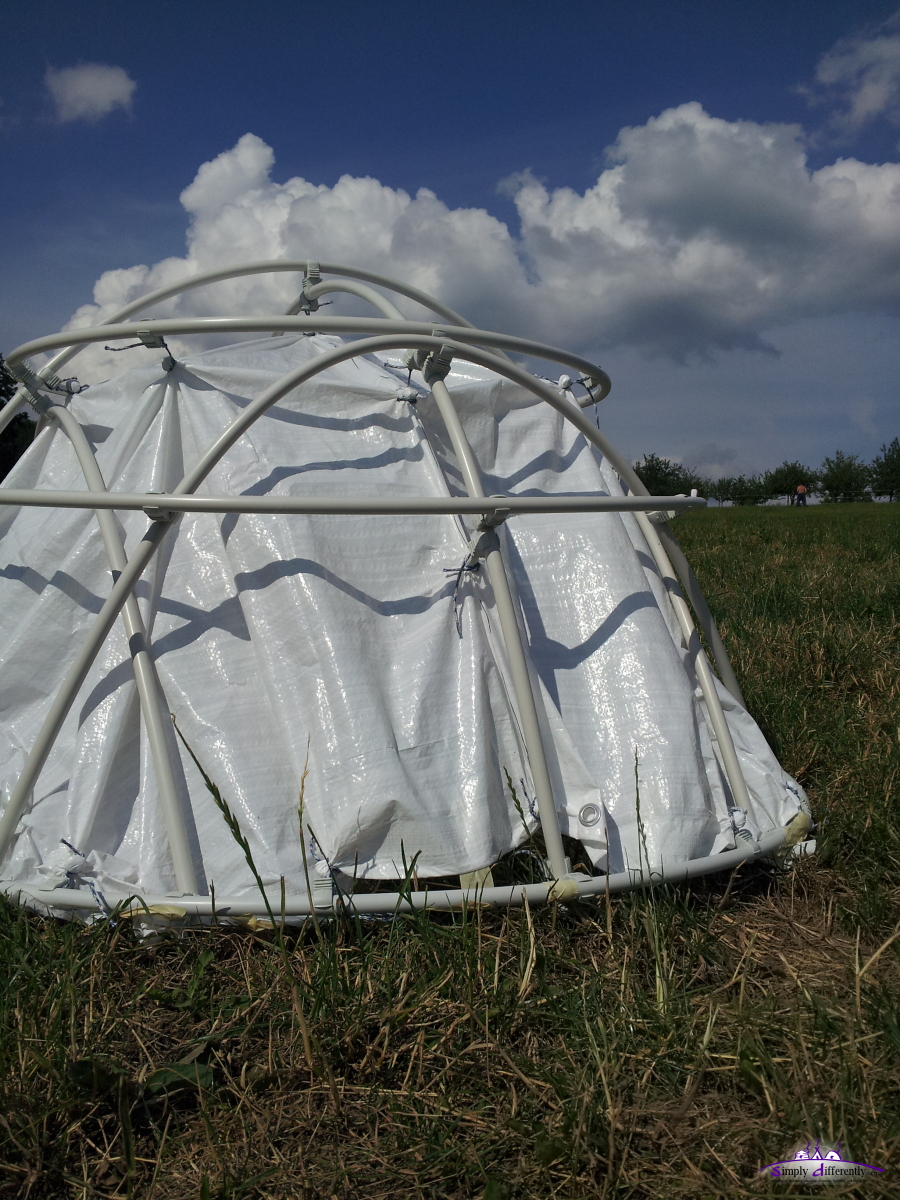
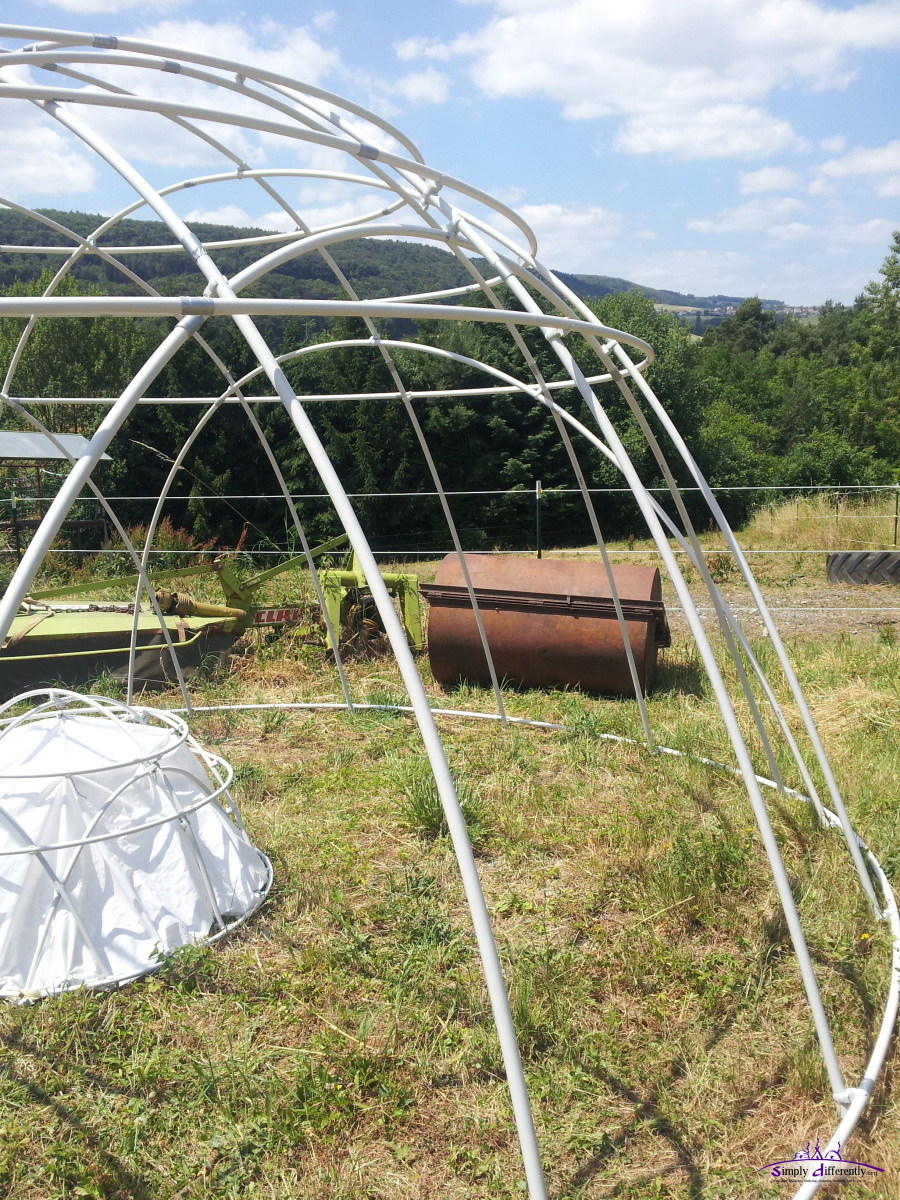
Conclusions:
- did not cut off the fittings at the one ends of bows, as those 0.03m do not matter at 8m entire bow
- 2m x 25mm diameter PVC tubes for 5.1m dome is wobbly,
considering for the full A bows (4 x 2m) using 32mm or 40mm diameter PVC tubes, which require then also other "OBO Quick" clips, 32mm or 40mm still has only 30mm fitting, which is not sufficient to connect multiple tubes together for a bow
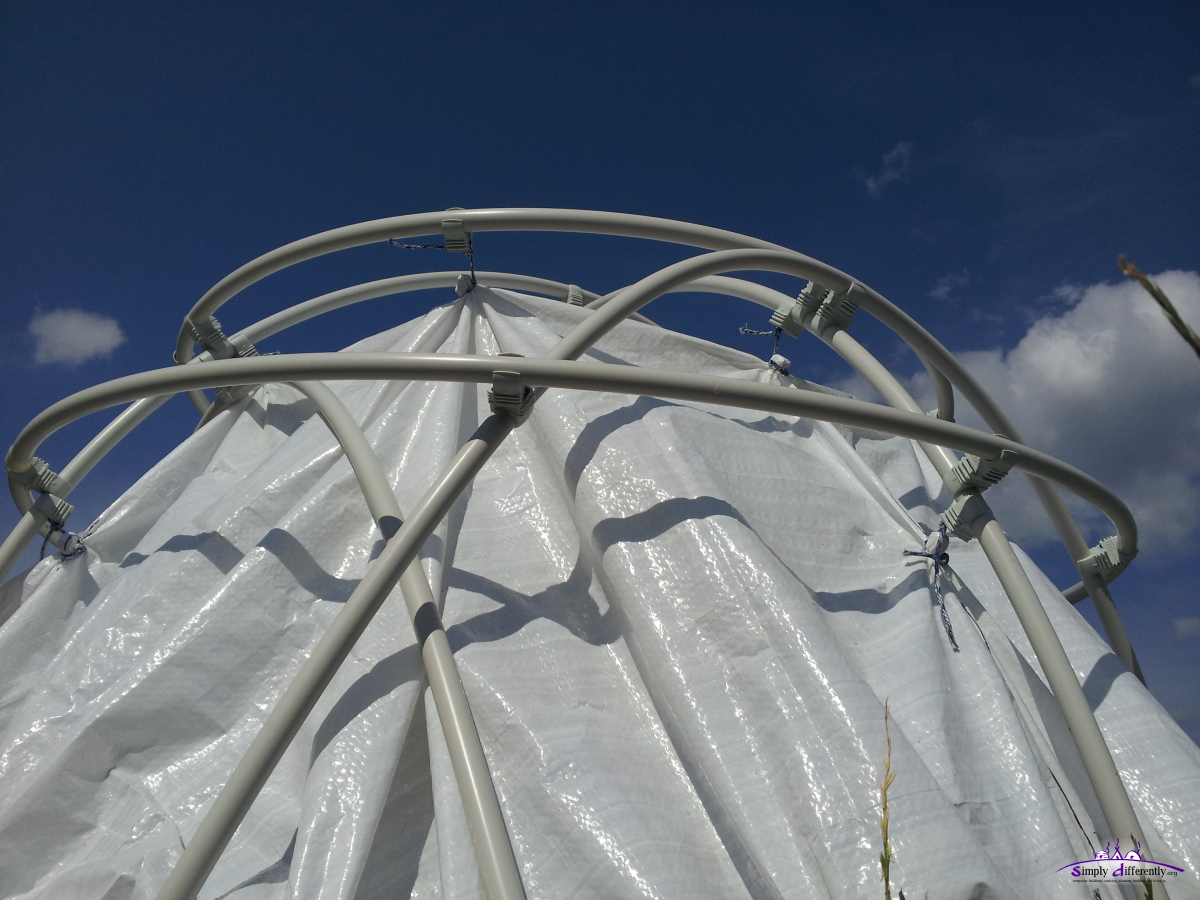
- the ground has slope, entire dome leans on one side
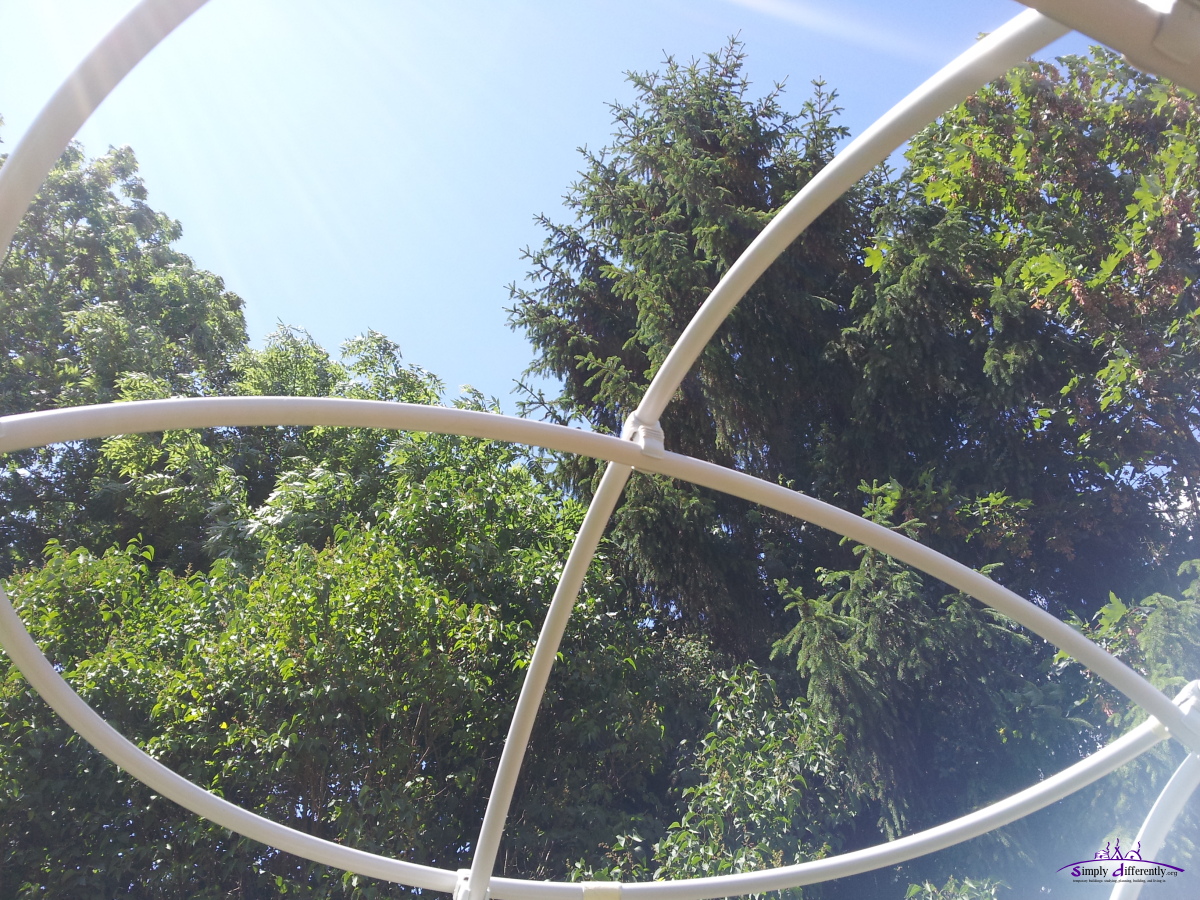
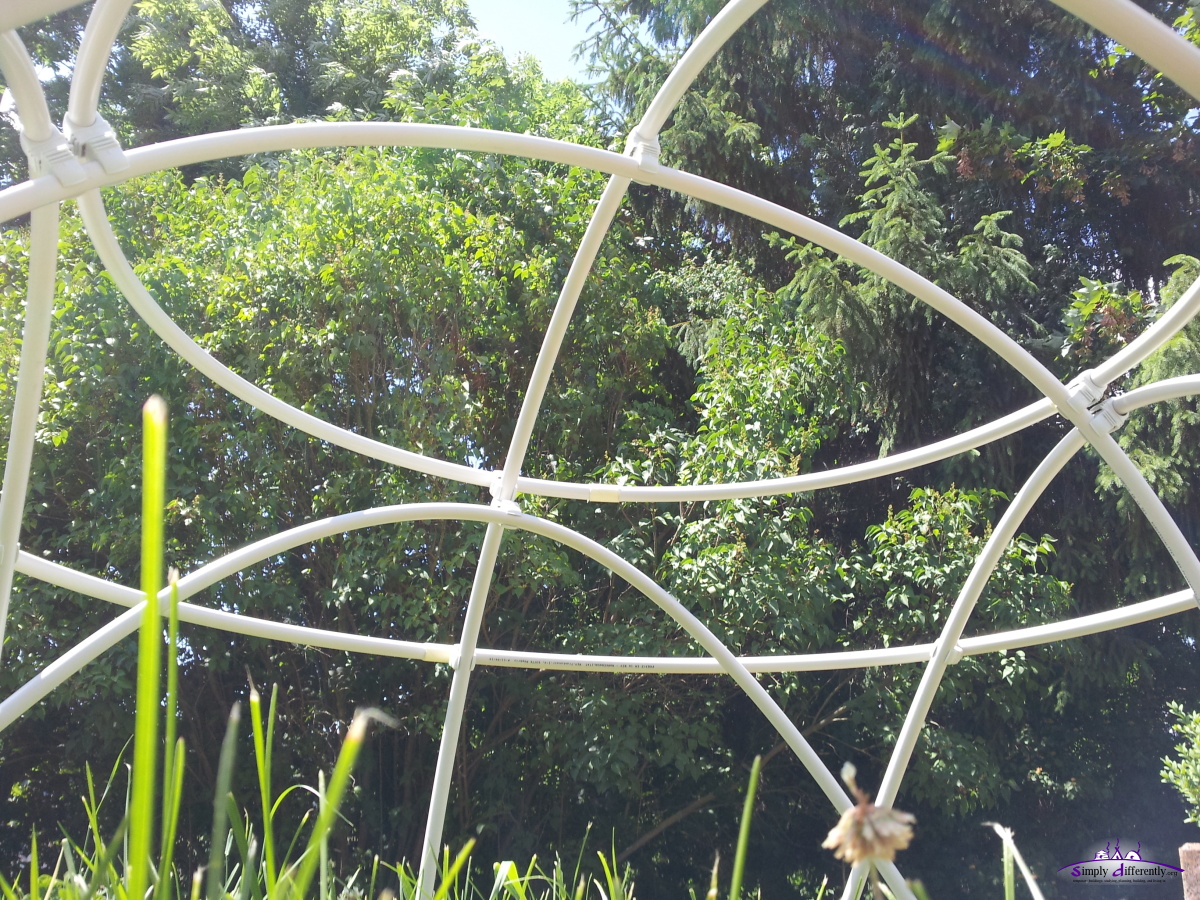
- top rings are 6a, 5a, and 4a look nice
- 100x M25 clips were not sufficient to attach the additional rings
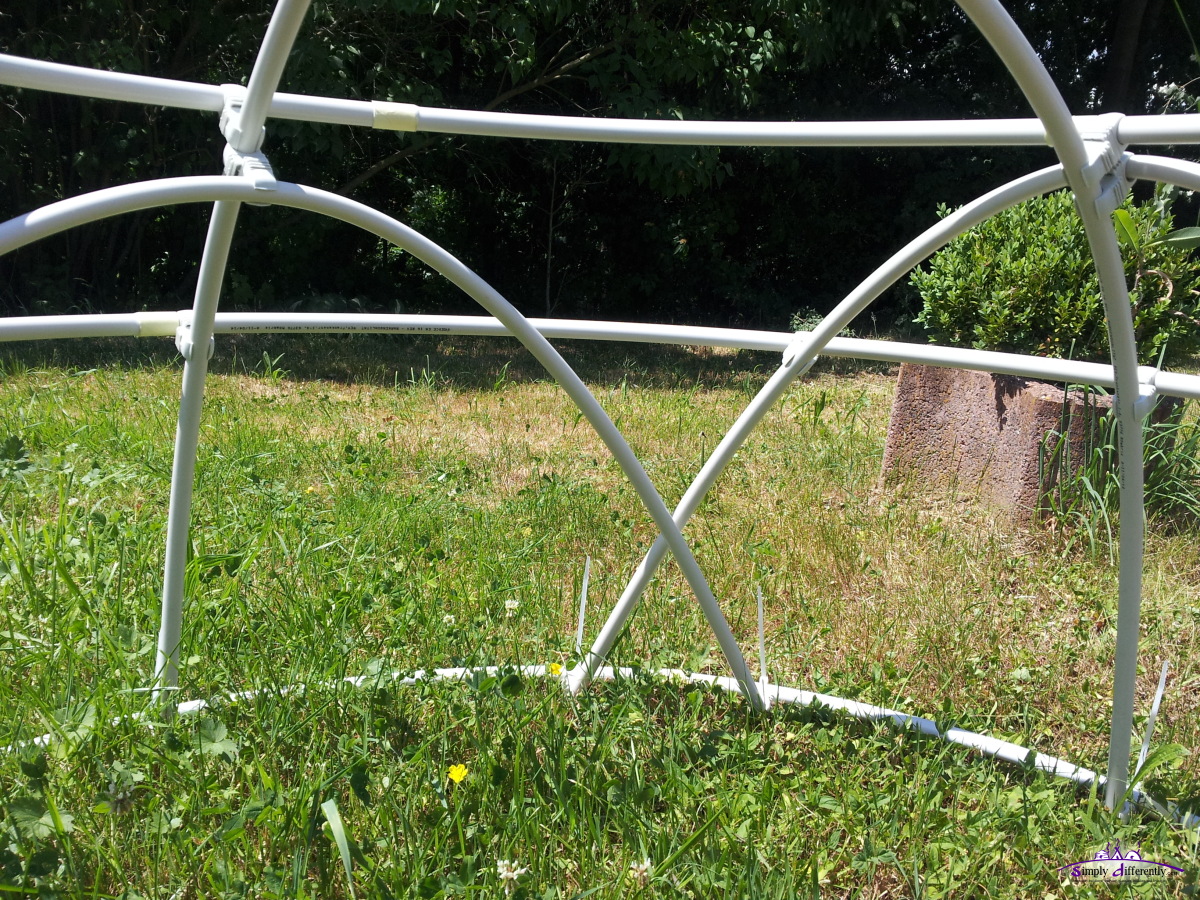
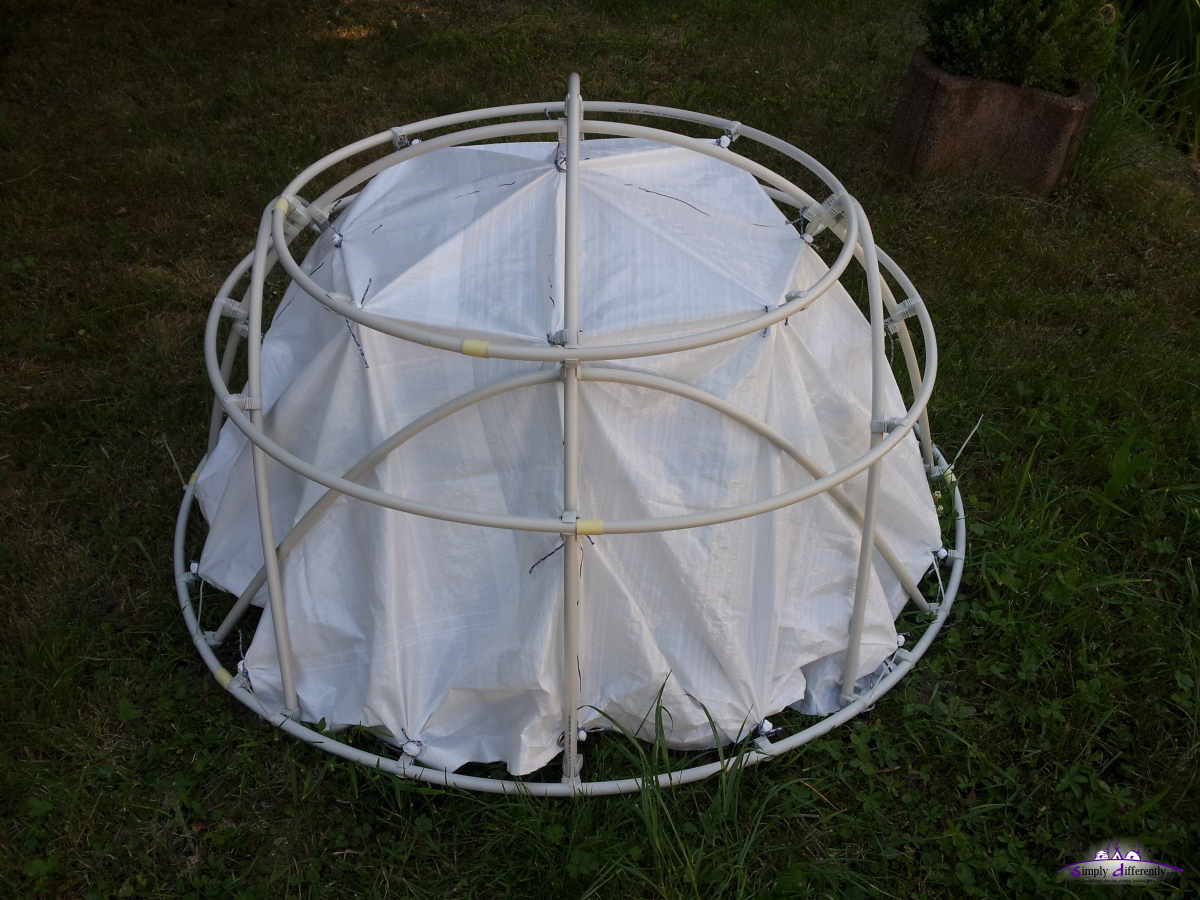
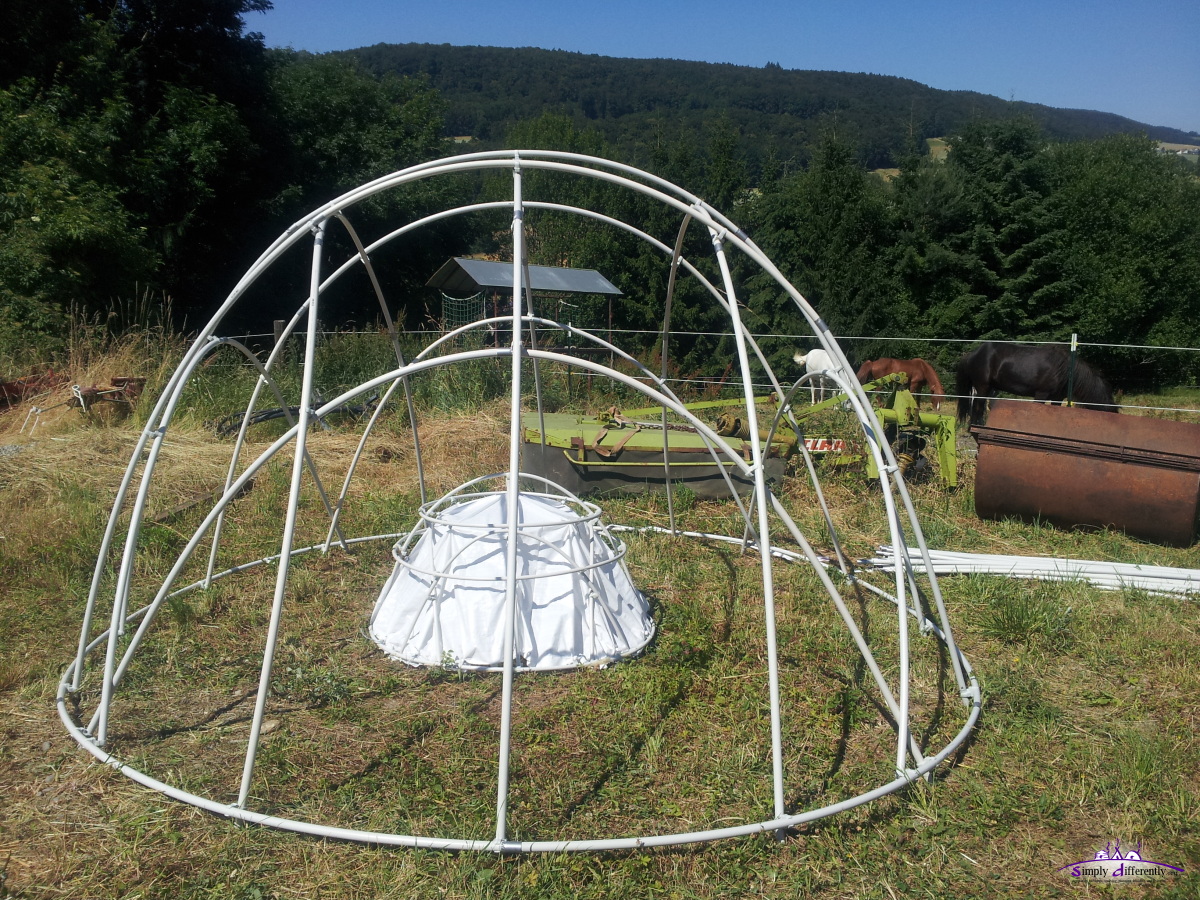
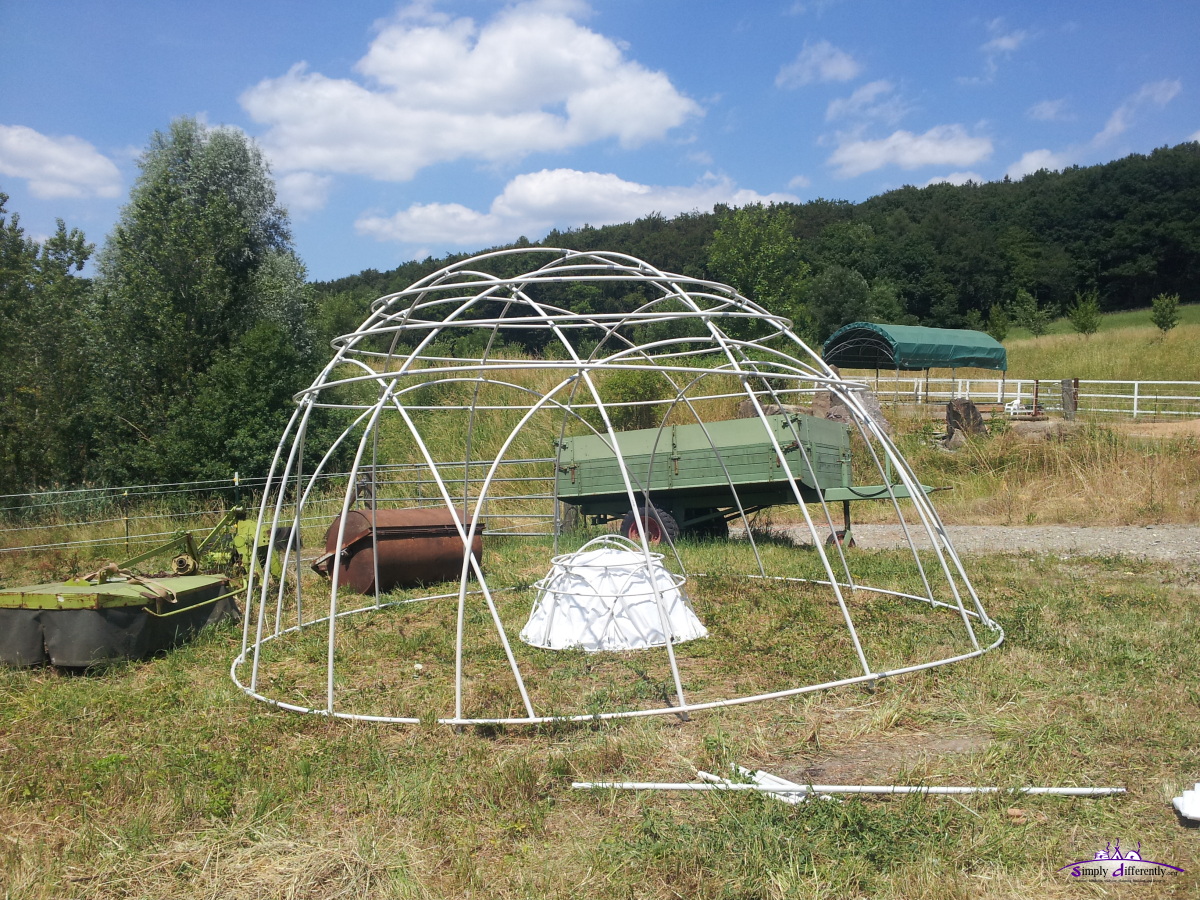
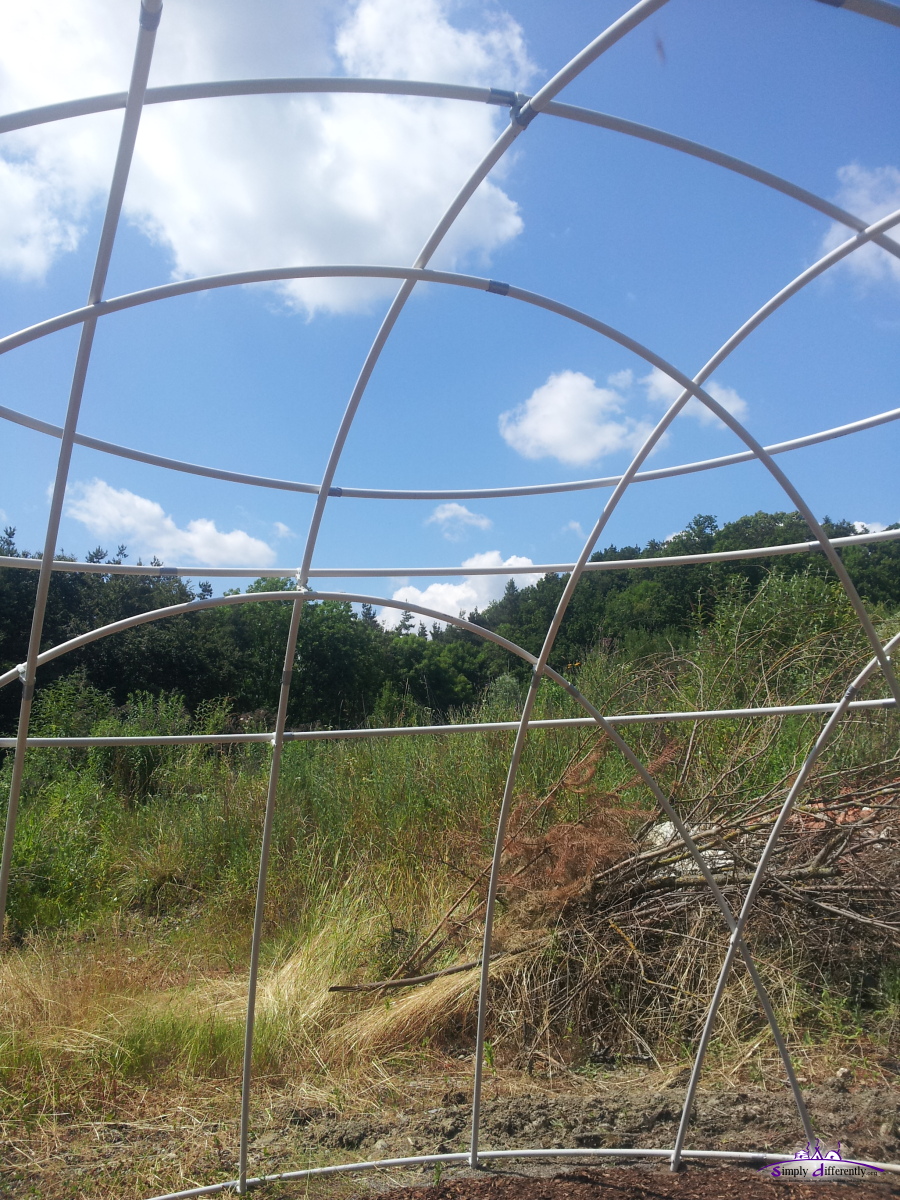
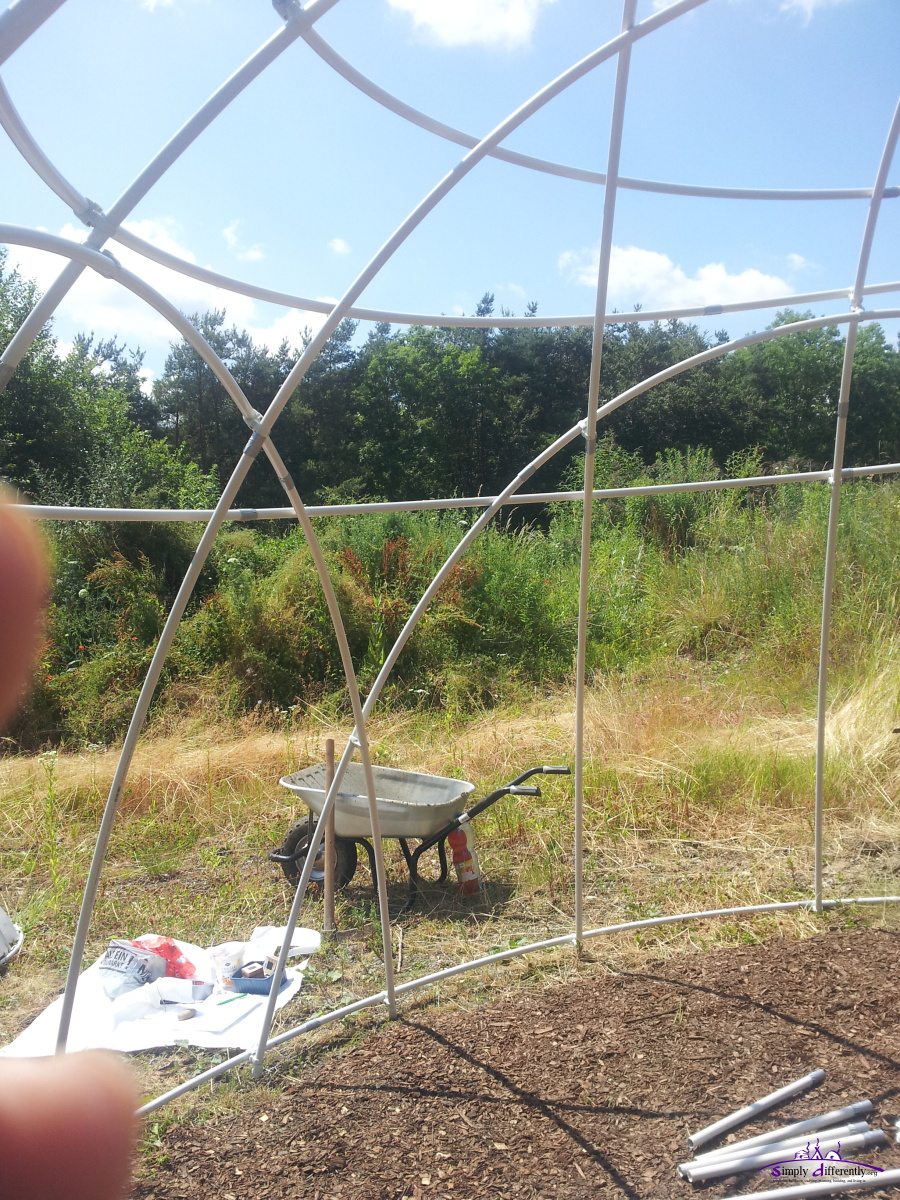
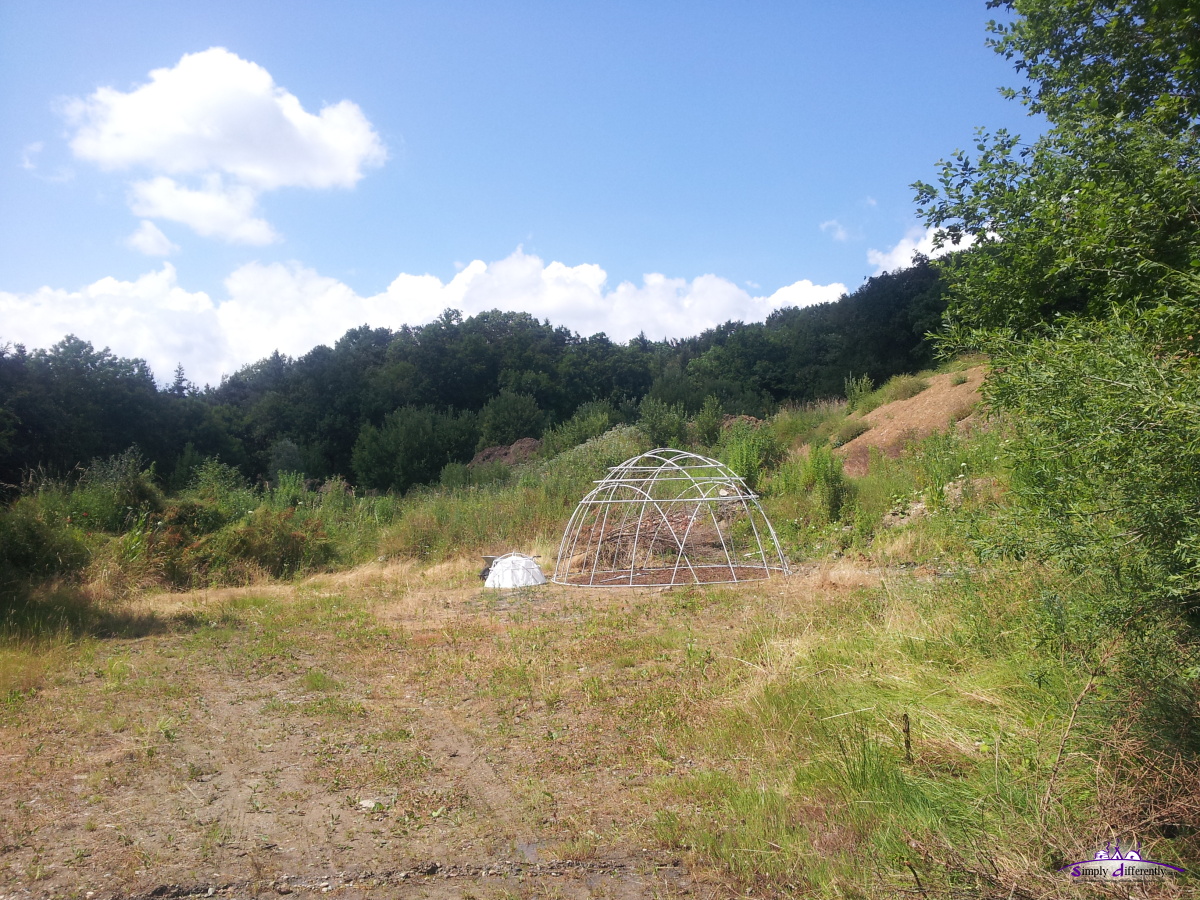
The second pitching went better:
 2014/06/24 12:43 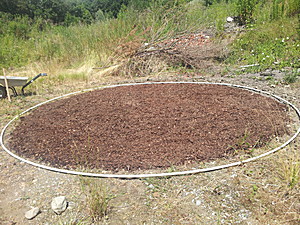 2014/06/24 12:43 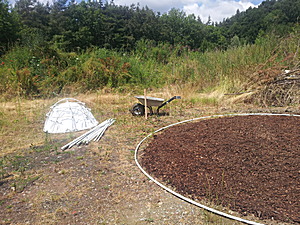 2014/06/24 12:43 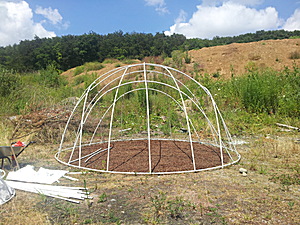 2014/06/24 14:39 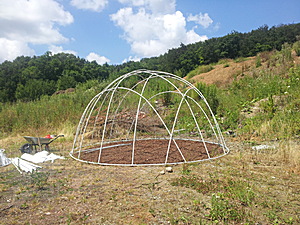 2014/06/24 14:39  2014/06/24 15:02 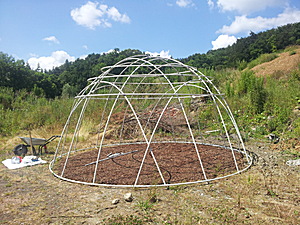 2014/06/24 15:02 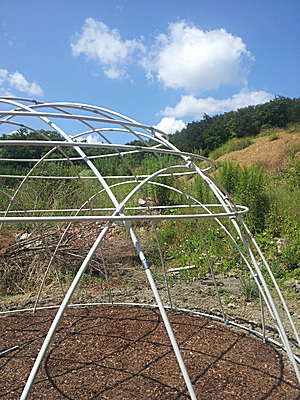 2014/06/24 15:02 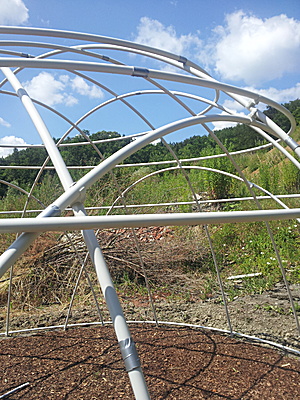 2014/06/24 15:02 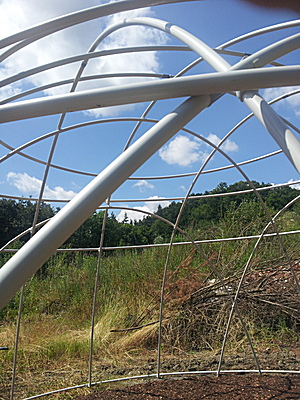 2014/06/24 15:02  2014/06/24 15:02 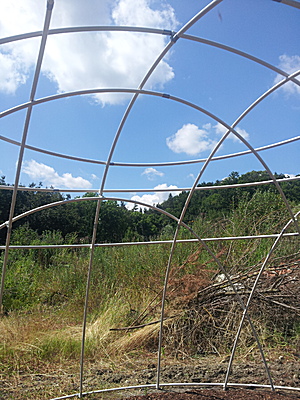 2014/06/24 15:02 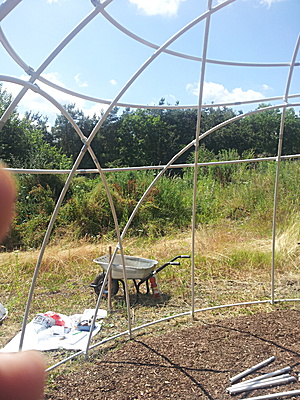 2014/06/24 15:02  2014/06/24 15:03 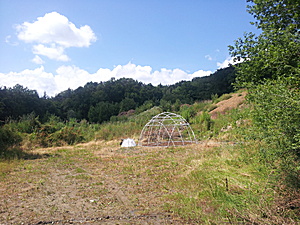 2014/06/24 15:19
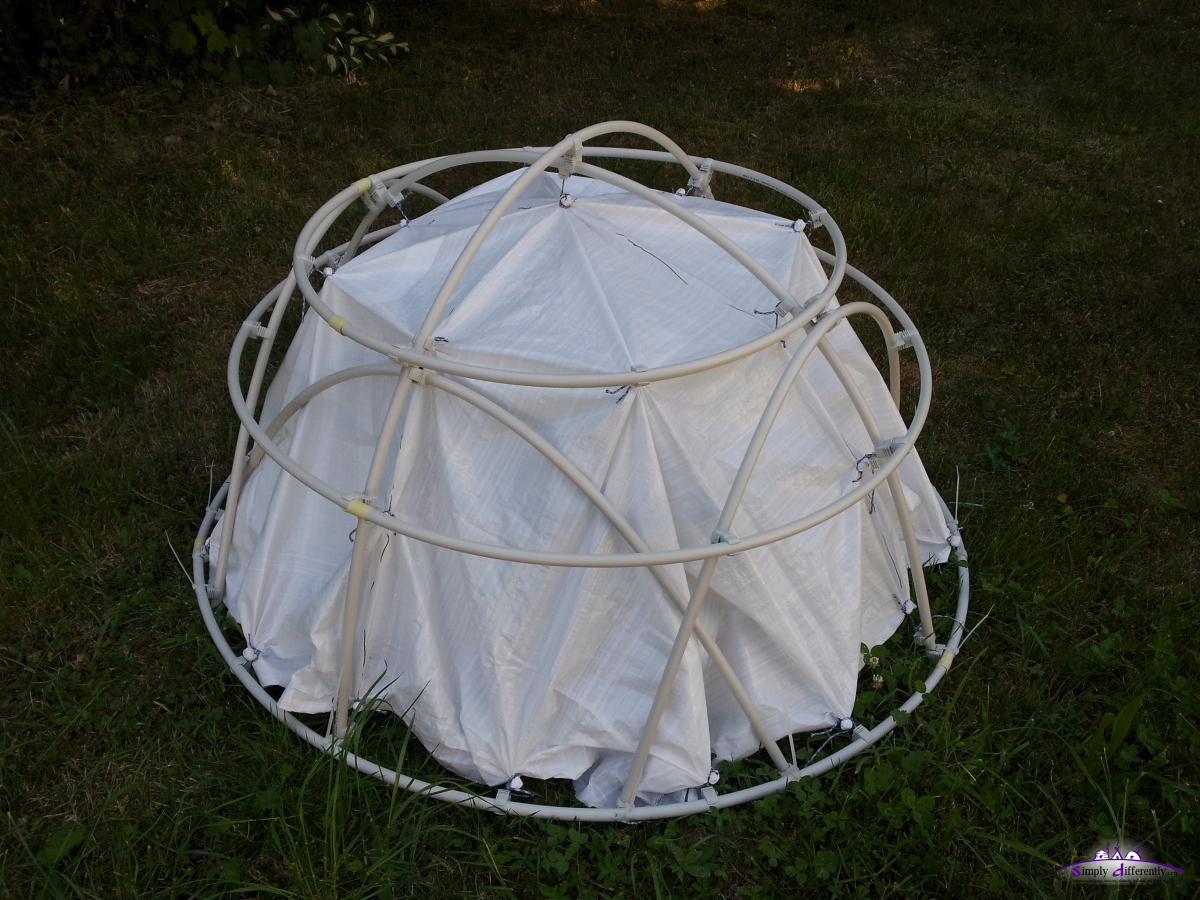
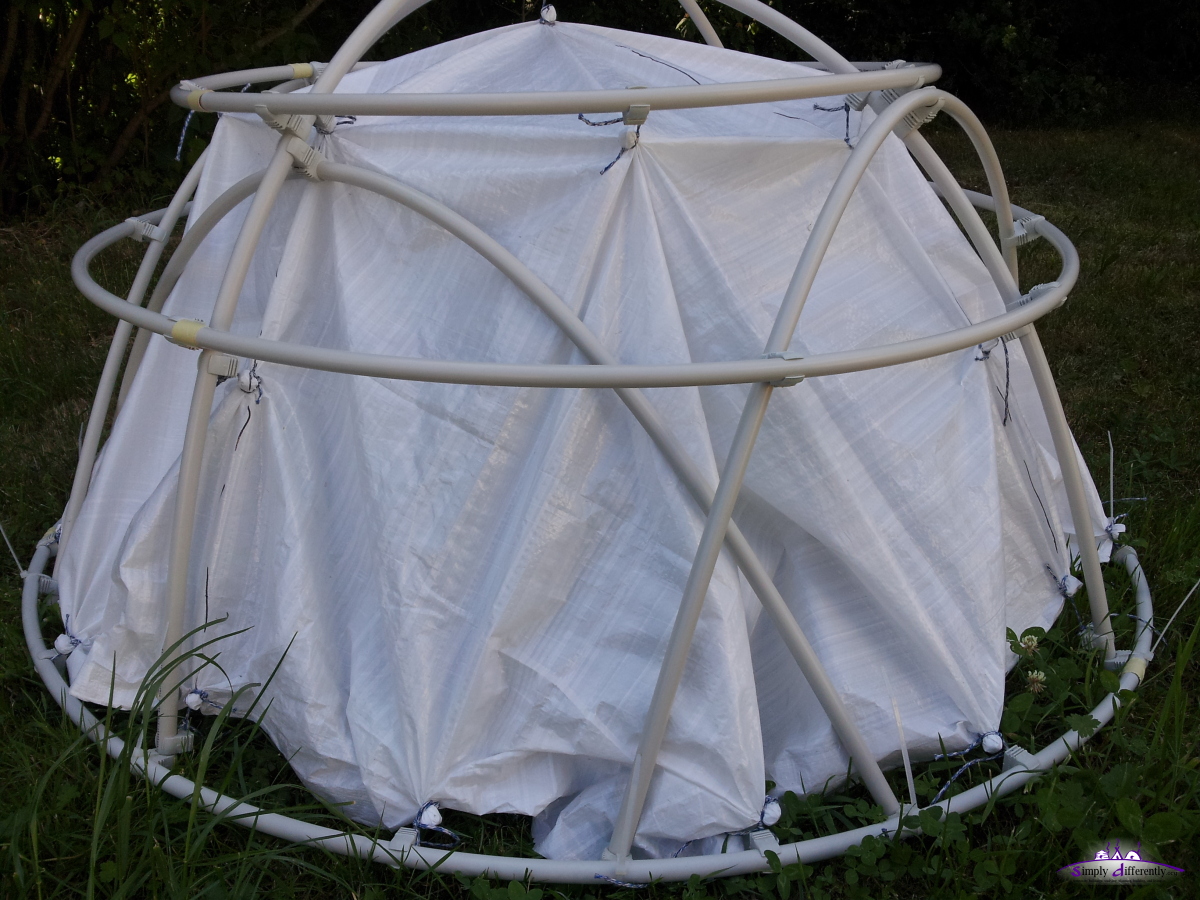
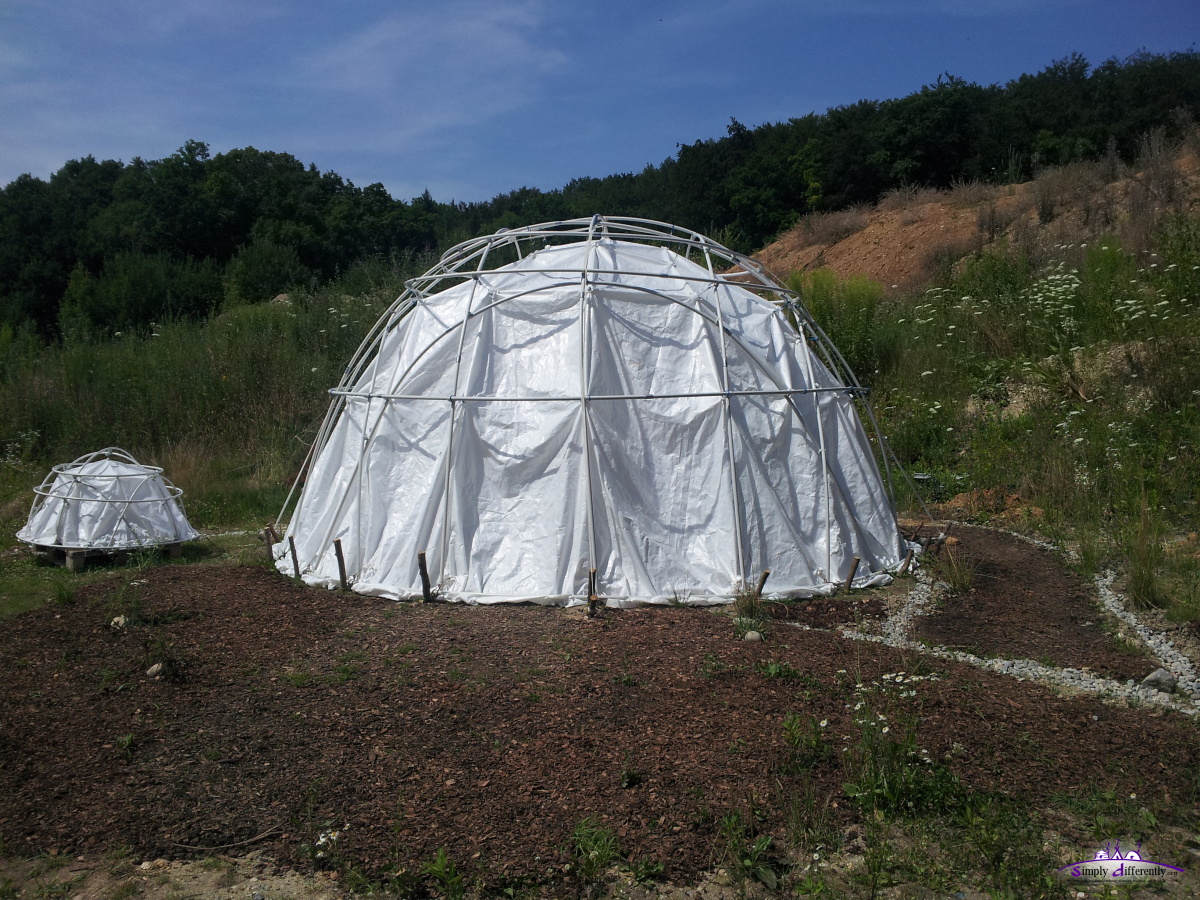
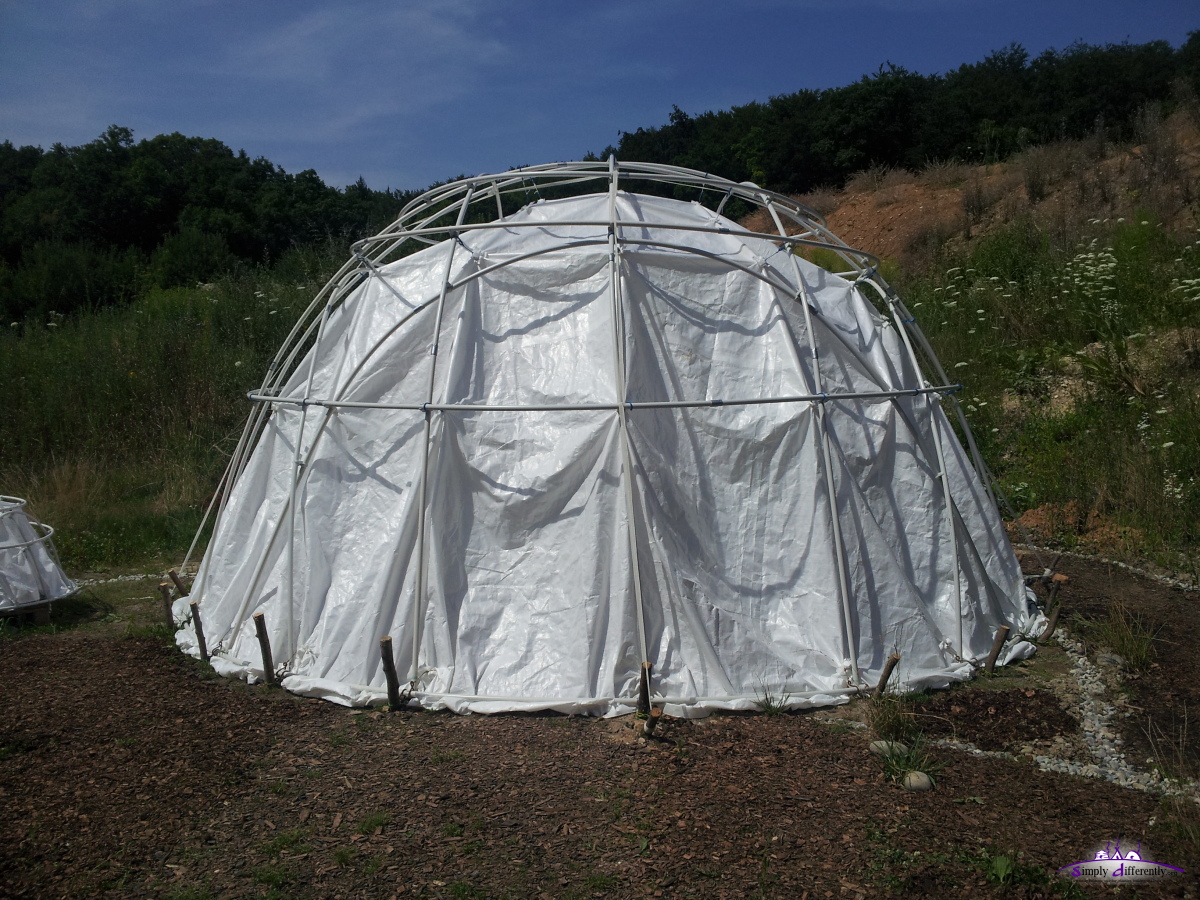
With PE rain cover:
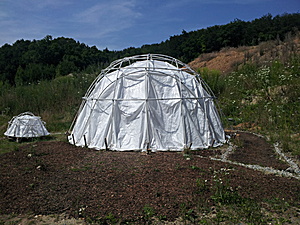 2014/07/19 15:15 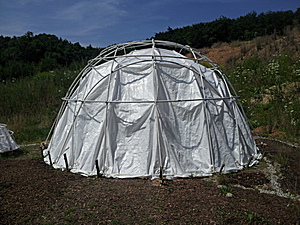 2014/07/19 15:15 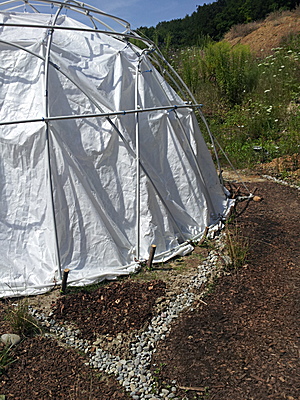 2014/07/19 15:15 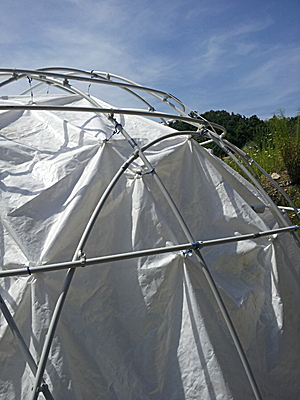 2014/07/19 15:16 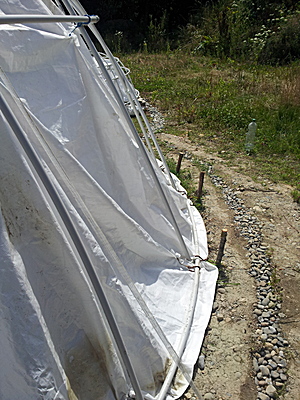 2014/07/19 15:16 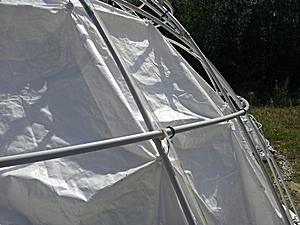 2014/07/19 15:16  2014/07/19 15:17 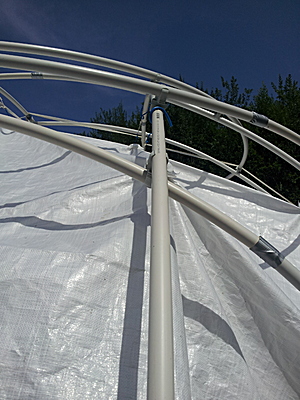 2014/07/19 15:17 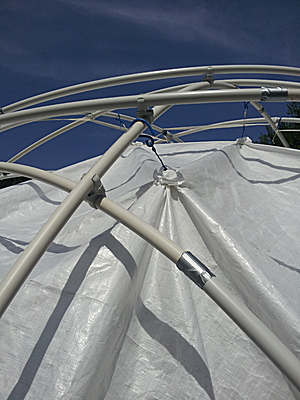 2014/07/19 15:17 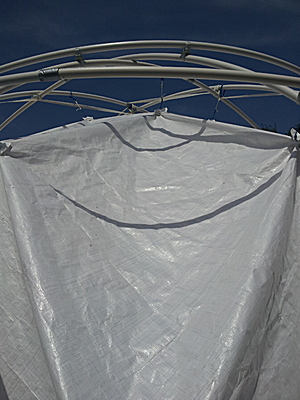 2014/07/19 15:17 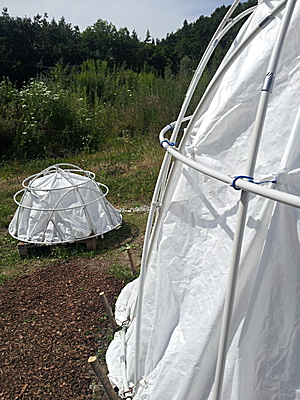 2014/07/19 15:18 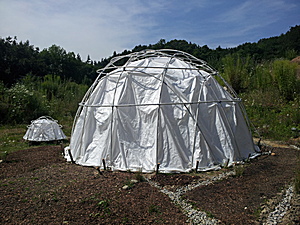 2014/07/19 15:19 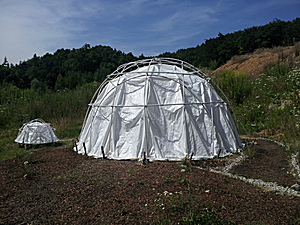 2014/07/19 15:21 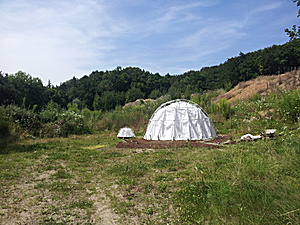 2014/07/19 15:21
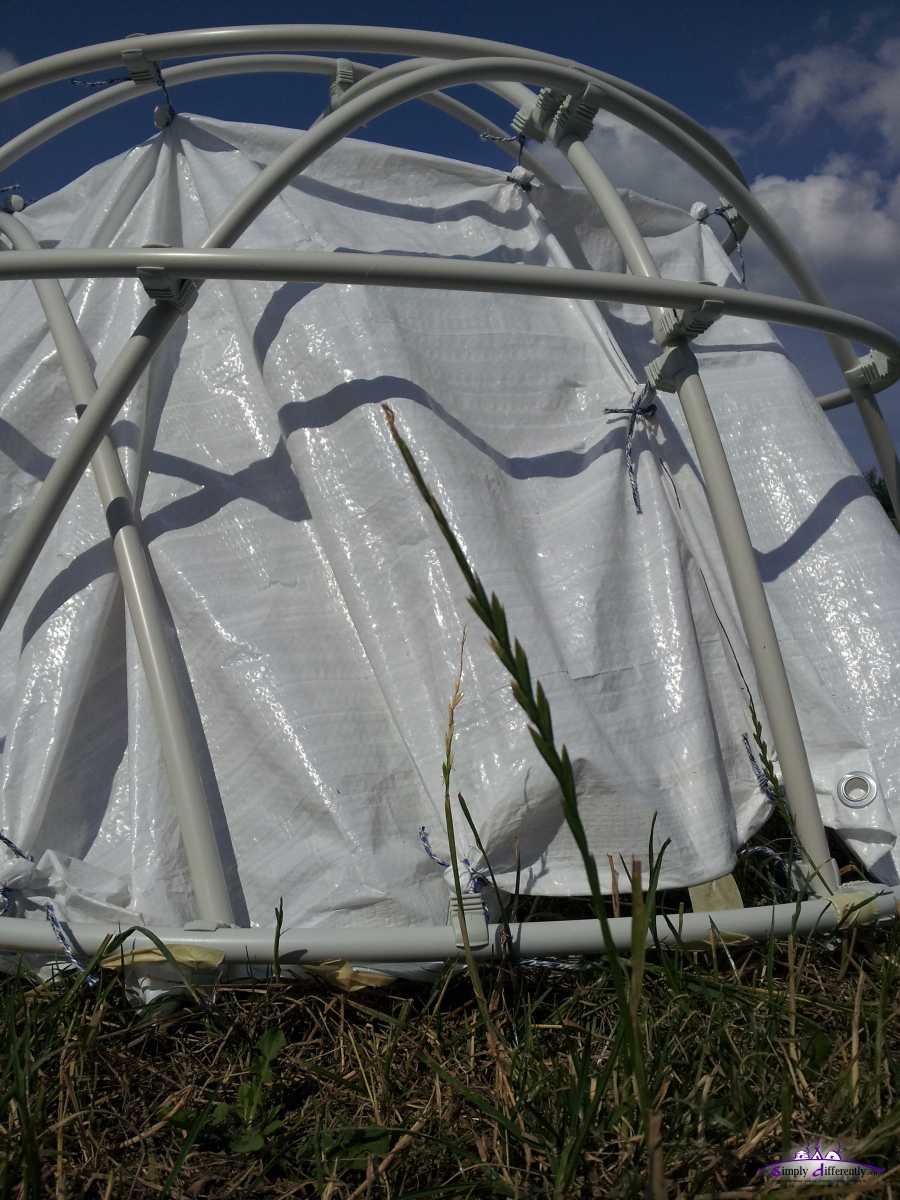
Conclusions:
- less slope or tilt allowed me to pitch the dome better
- considering to add a 4th ring, a partial one, 7a at the 50cm height from the ground, and leave one 2m open for the door or entry
- requires 2nd 100x M25 "OBO Quick" clips for the 3 or 4 rings, will improve the stability, in total 44a + 7a + 6a + 5a + 4a = 66a tubes.
- 3.8m 3:x:2 is ok for camping but not longer or actually living inside, 5.8m is a good size (requires a ladder to add clips to bind the crossing bows)
- 2m x 25mm diameter PVC tubes aren't stable for 5.1m diameter (using 4x 2m to reach 8m bows)
|
The following page(s) contain a chronological diary sorted by date.
Next Page >>
Content:
- Page 1: Notions, Reflection, PVC Conduits, 2m PVC Tube, 3m PVC Tube, Considering Fitting, Temperature Range ...
- Page 2: Diary, 2015/01/18: A Bit Snow Again, 2015/01/06: Pitched Again, 2015/01/03: Snow Gone, 2014/12/29: Collapsed Due Snow ...
- Page 3: 2014/07/04: Rain Cover & Storm, 2014/07/03: Preparing Rain Cover, 2014/07/02: Cover Setup ...