
|
Geodesic Dome Diarywritten by Rene K. Mueller, Copyright (c) 2007, 2014, last updated Tue, January 20, 2015 The DiaryAs I proceed I will update the diary. Most up-to-date entry at top, first and oldest entry at the bottom respectively last page. 20. 01. 2015: Little Snow
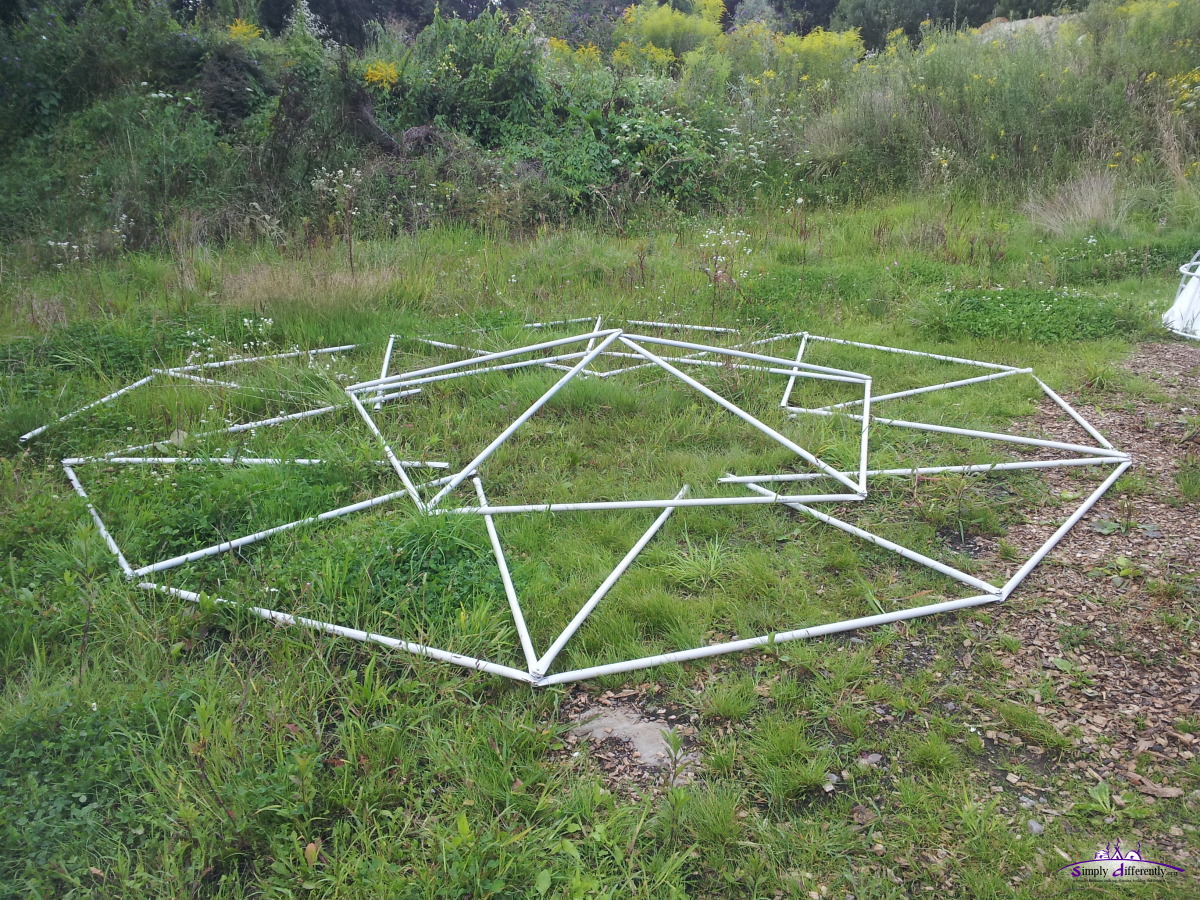
So, I detached the canvas from the skeleton and folded the skeleton outward again, and fix the broken struts again later and wait until spring before I re-attach the canvas again.
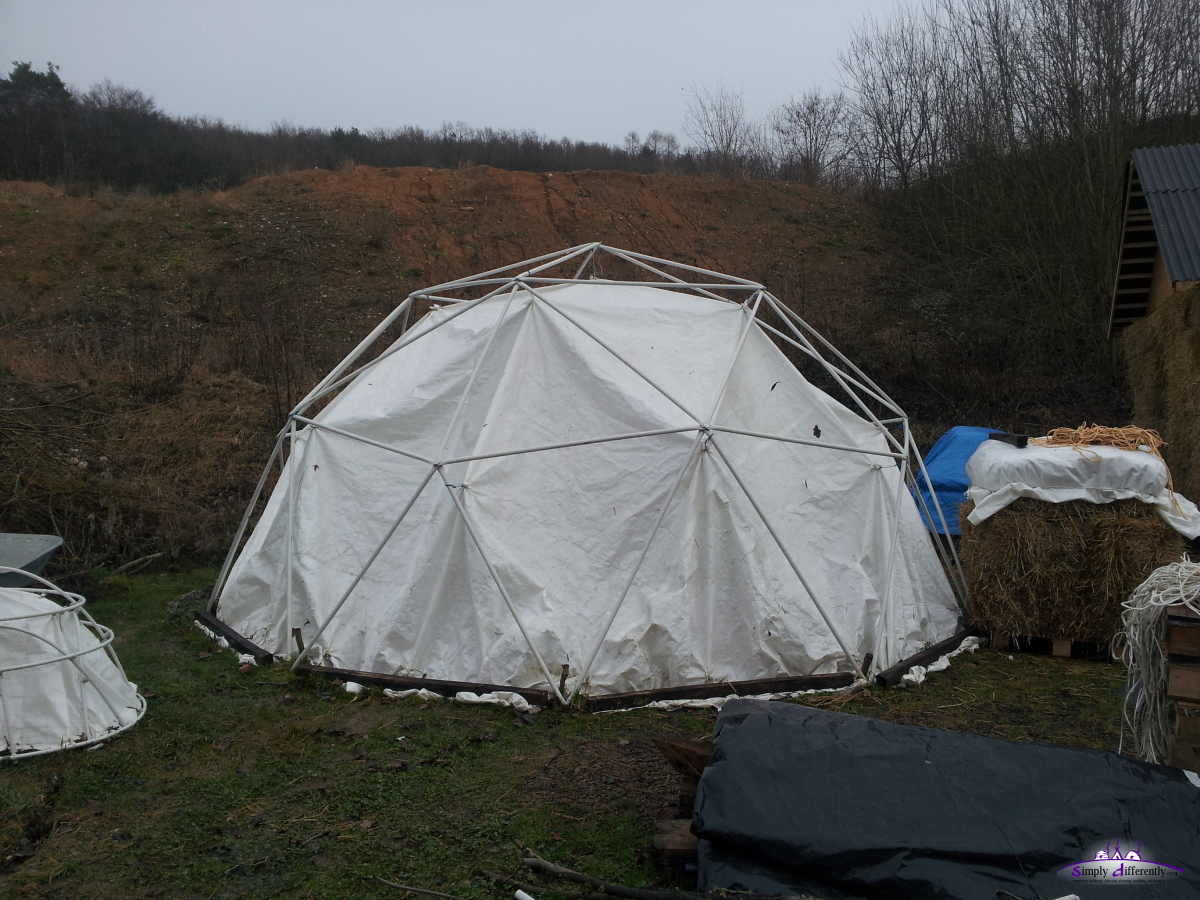
As a side note, the LC Dome did withstand the snow fall.
18. 01. 2015: A Bit Snow AgainYesterday it snowed again, quite humid and wet snow and I observed the snowfall carefully so it would not collapse again. A geodesic dome is quite stable, given good struts are used, and using PVC pipes as struts aren't that stable as earlier entries of the diary show. Anyway, I pushed down the snow once yesterday and some snow froze during the night on the canvas.Using PVC pipes for geodesic domes with any canvas is not suitable for winter time with snowfall, and if you decide to still use it with snow, constant supervision is a must. 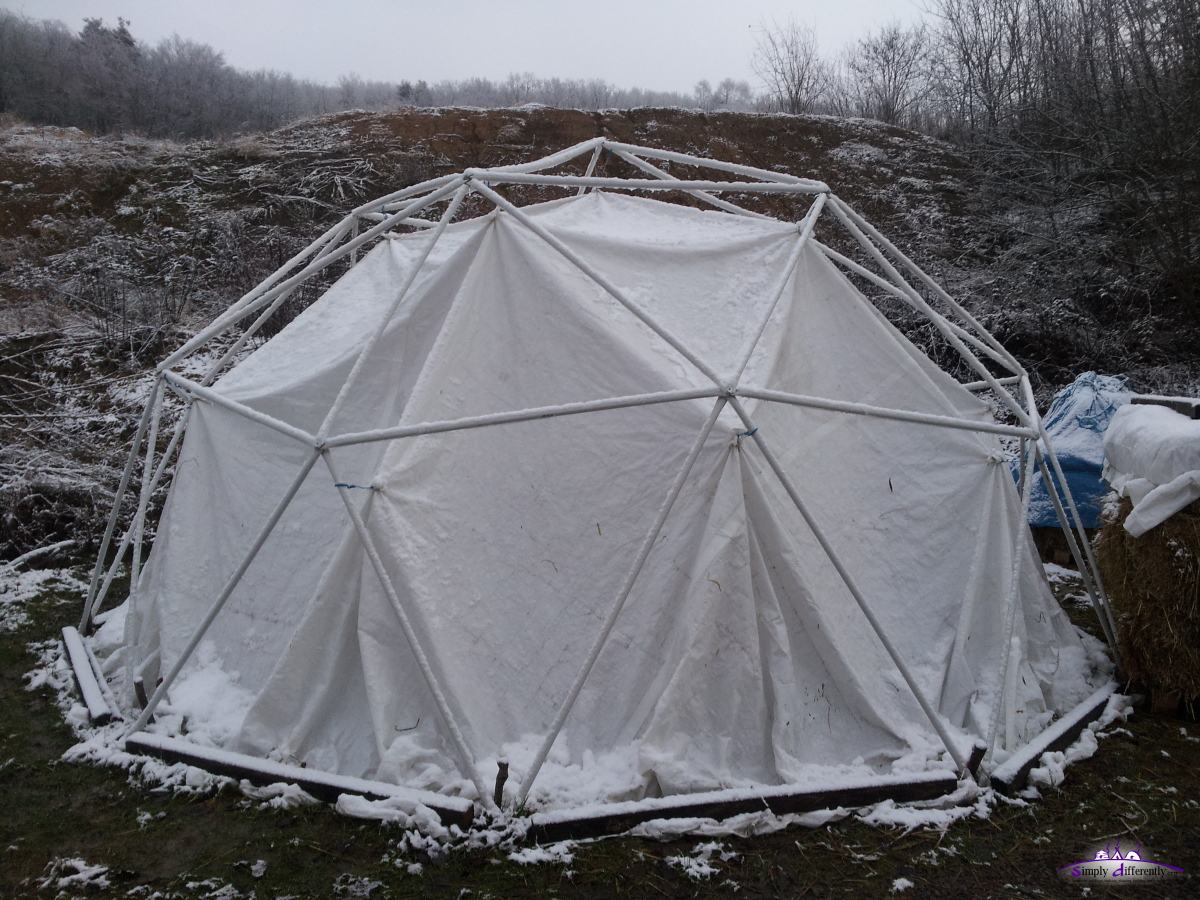 2015/01/18 08:05 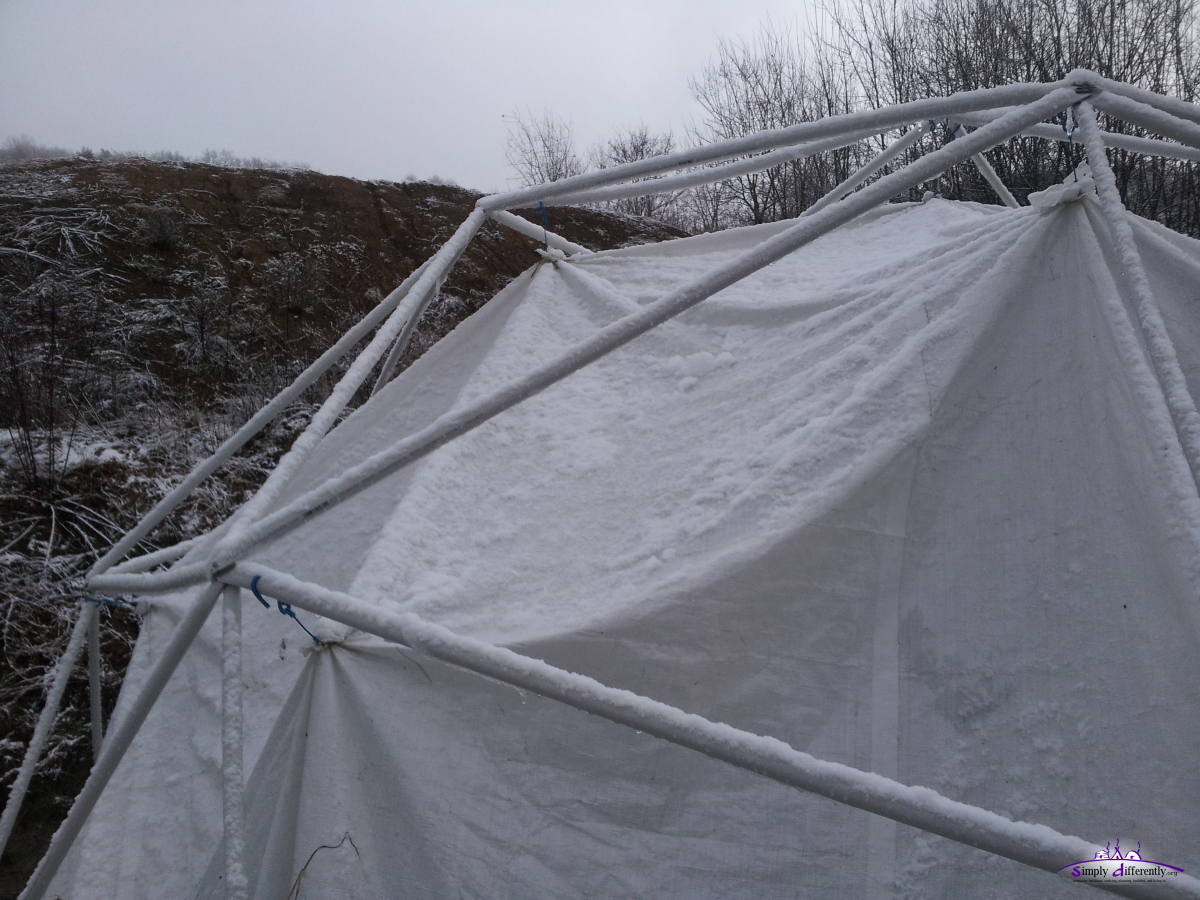 2015/01/18 08:05 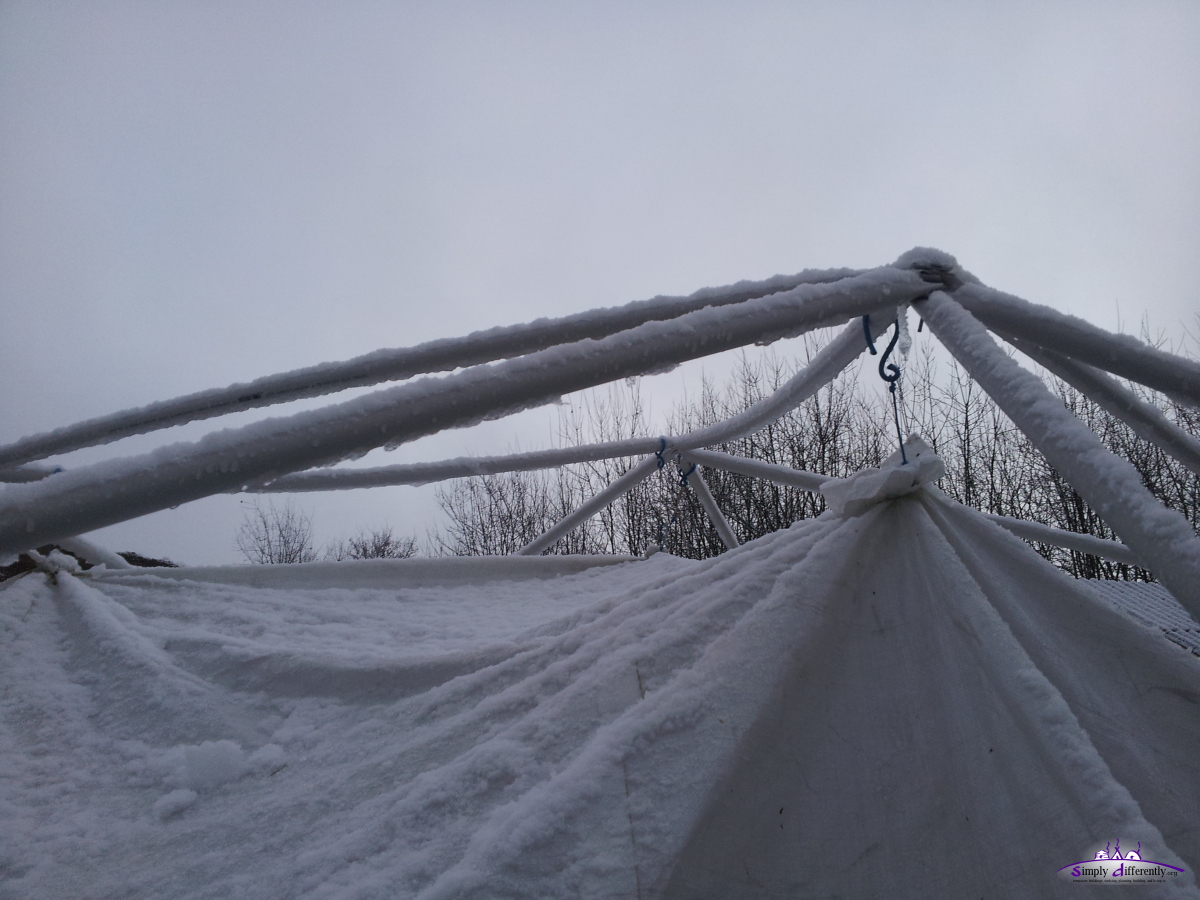 2015/01/18 08:05 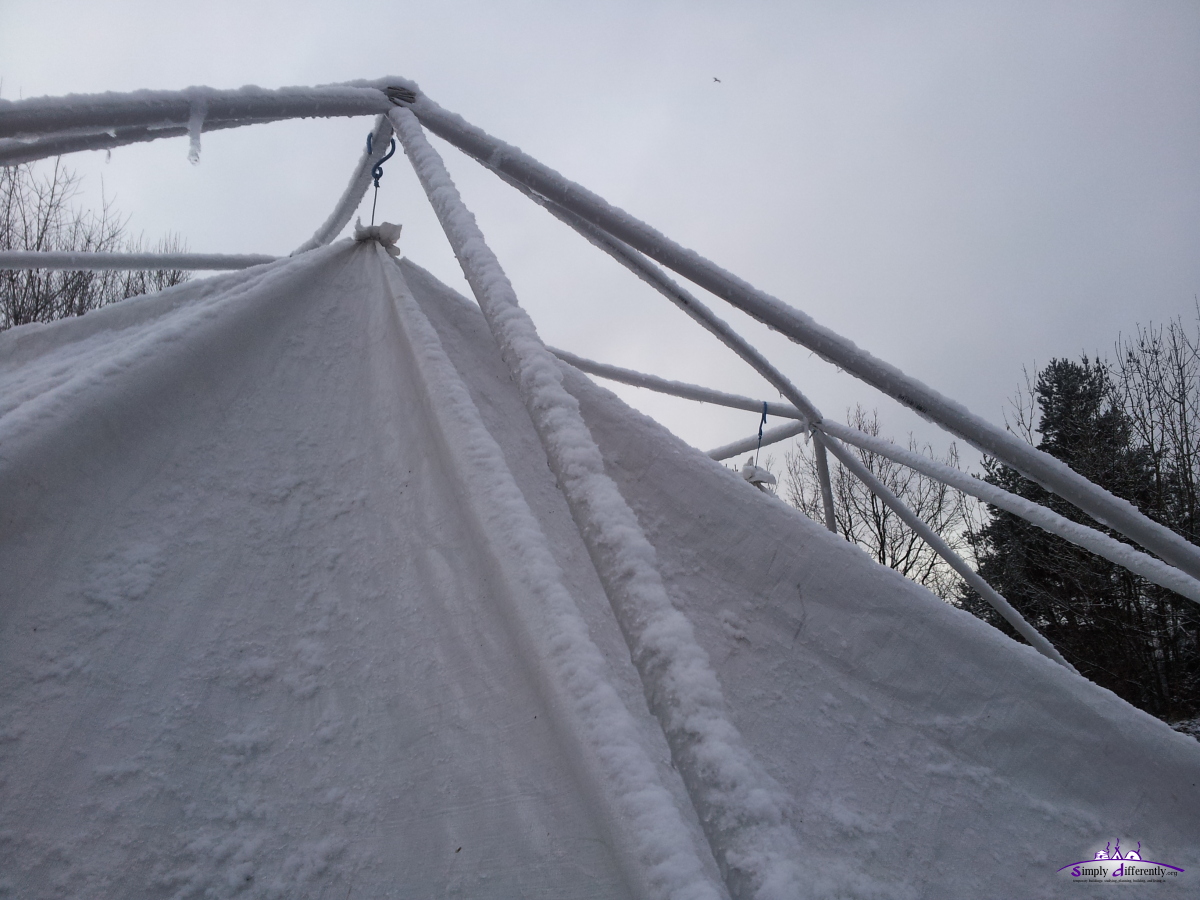 2015/01/18 08:06 15. 01. 2015: Struts Replaced & Canvas Put Up Again
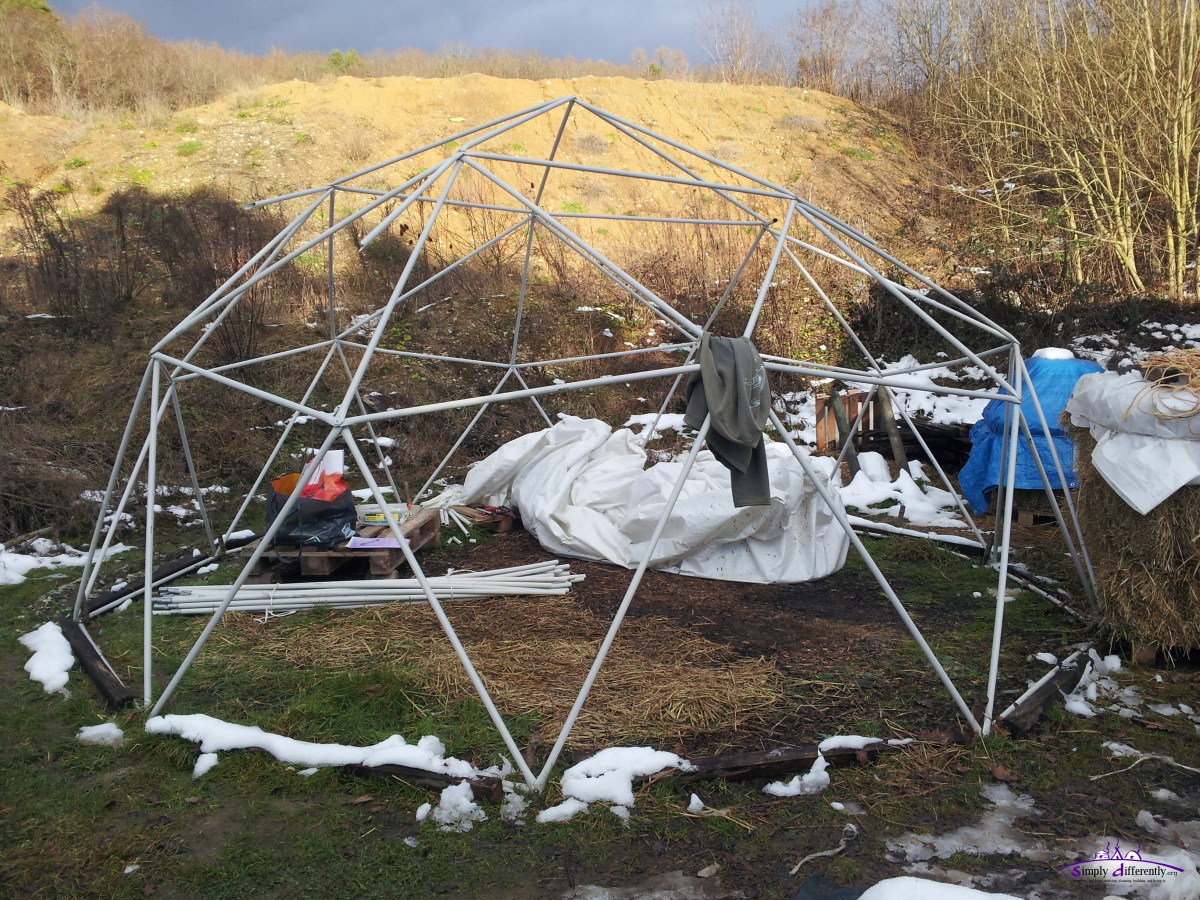
The next days some snow is expected, and I gonna observe how snow might remain on the PE canvas, which previously caused the collapse.
03. 01. 2015: Snow Gone
so totally 7 struts need to be replaced. Also some long screws which connect the ends and operate as hubless connections got bent but did not break.
Needless to say, the PVC conduits geodesic dome is a very low cost approach, but also moderately stress resistant.
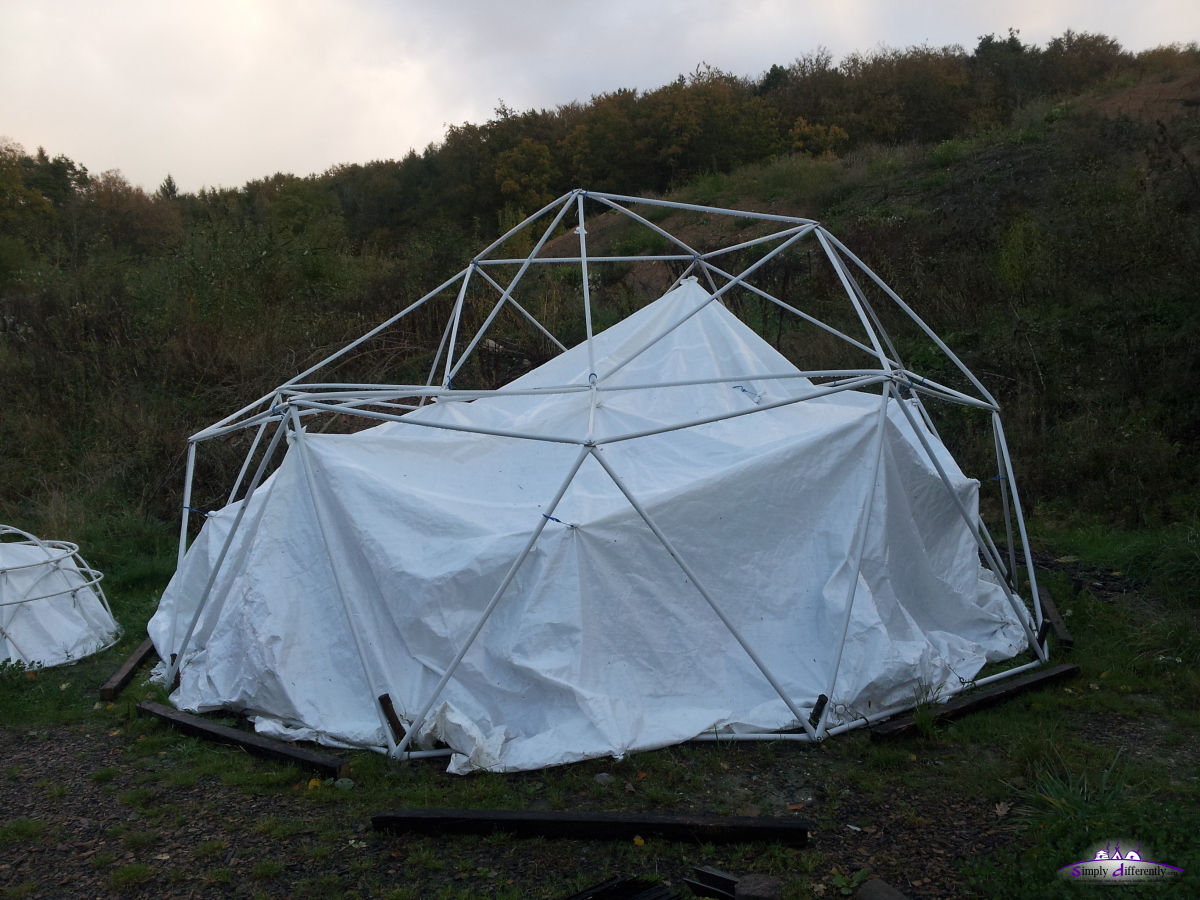
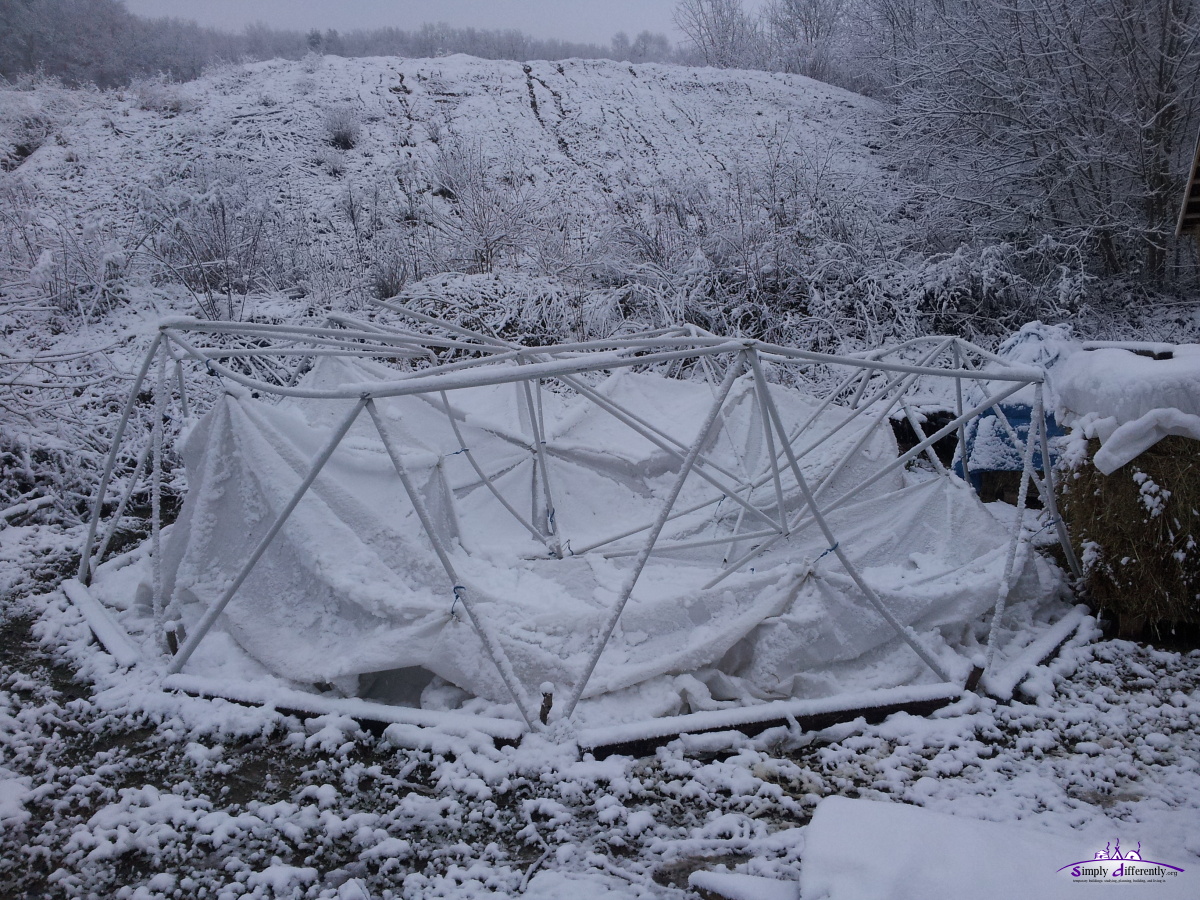
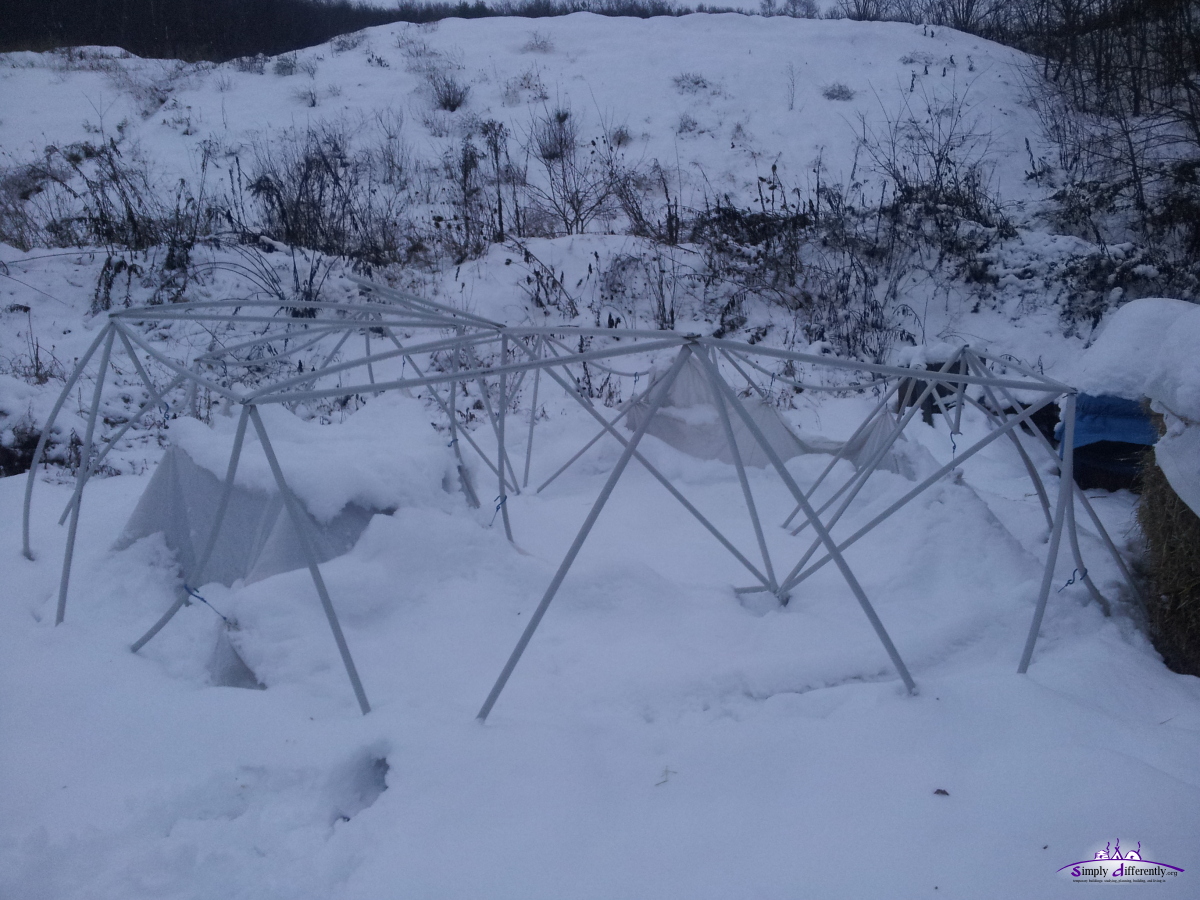
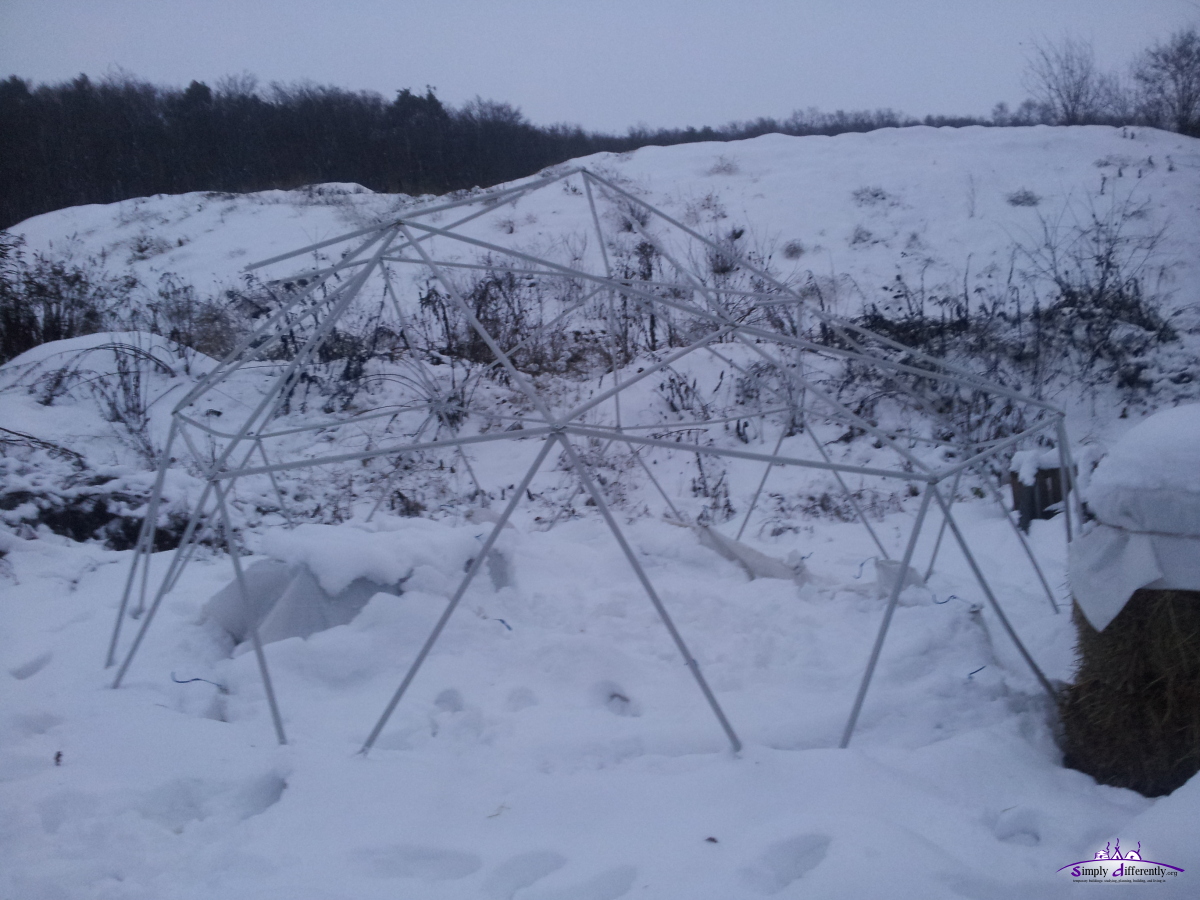
27. 12. 2014: Collapsed Due SnowI was away a few days, and came back just after it began to snow for 9 hours, heavy humid snow, apprx. 10-15cm thick, with a bit wind. Usually with PE snow slides away, but with a dome there are some area which is rather flat, on the top, so that's the result of unattended temporary buildings as 2v geodesic dome with 25mm diameter PVC (temperature range of -5C to 60C): collaps.
Given apprx. 30% of surface might have been covered with 10cm heavy snow, apprx. 20-25kg rested on the dome so my estimation, too much for the 25mm diamater PVC struts. Theoretically the hooks should have opened, and the dome skeleton remain intact; in other words the hooks were designed too strong and should have been weaker. So, part of the top pentagon, surrounding B's, two of them, broke - alike at the snow storm where one B broke. Additional at least one strut end got brittle, and requires to be replaced as well - so at least 3x B need to be replaced. As soon the snow and ice is decreased, I gonna replace the broken struts and put up the PE canvas again. 22. 10. 2014: After the Storm
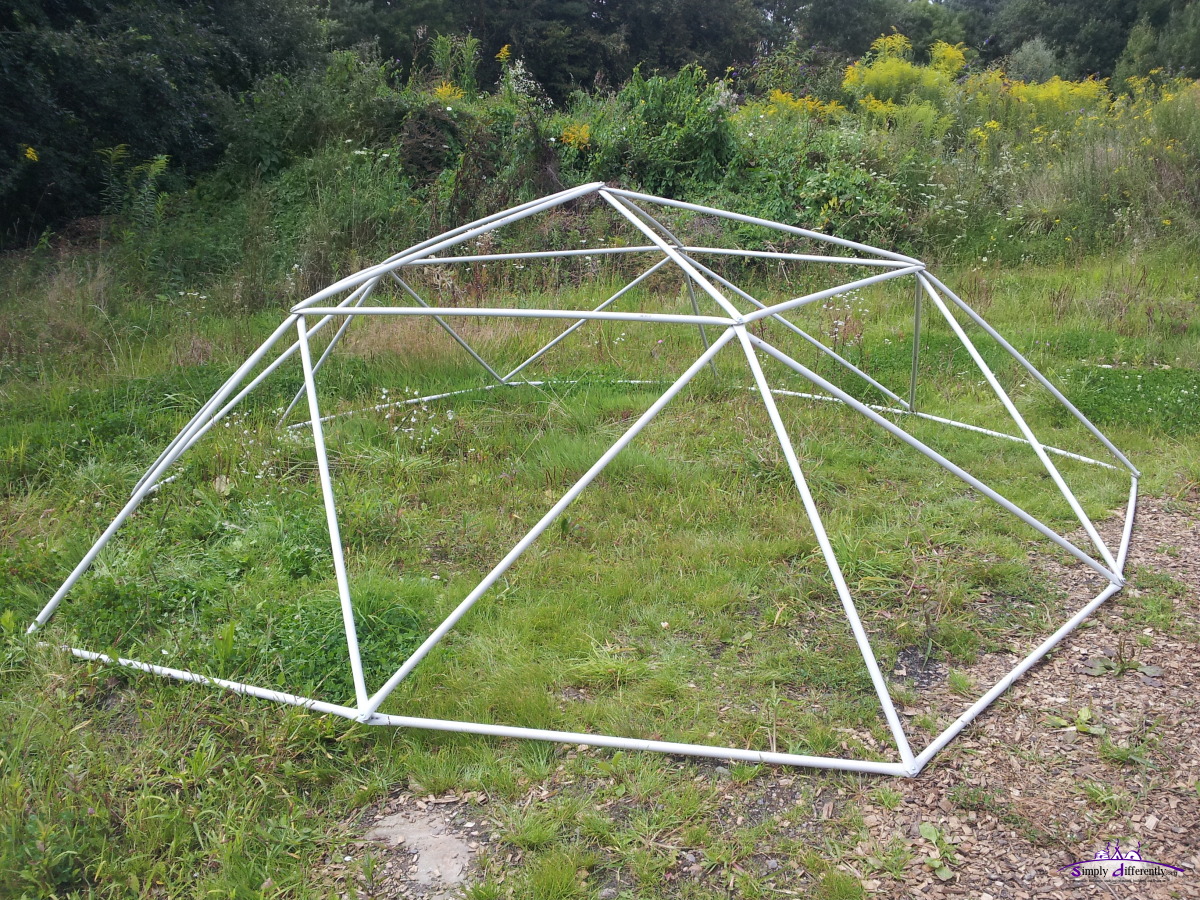
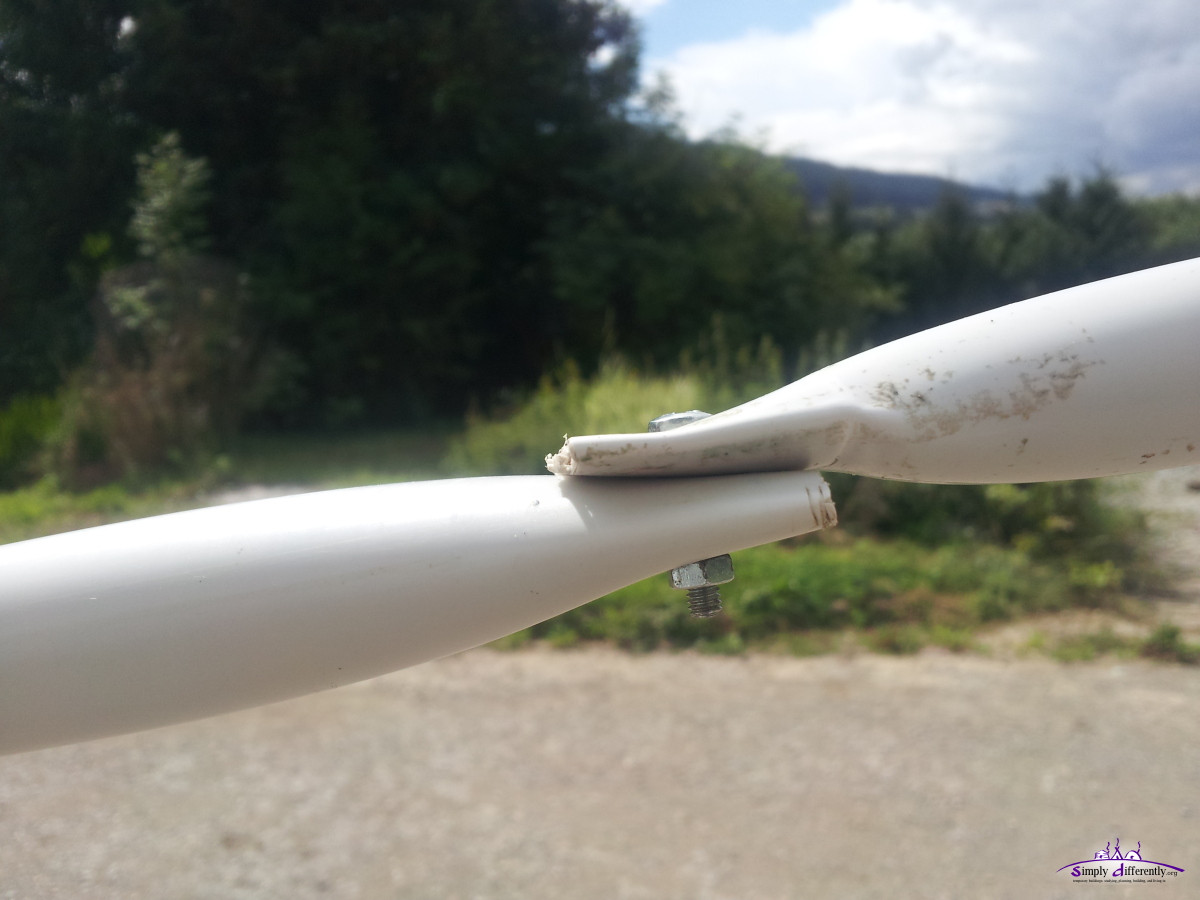
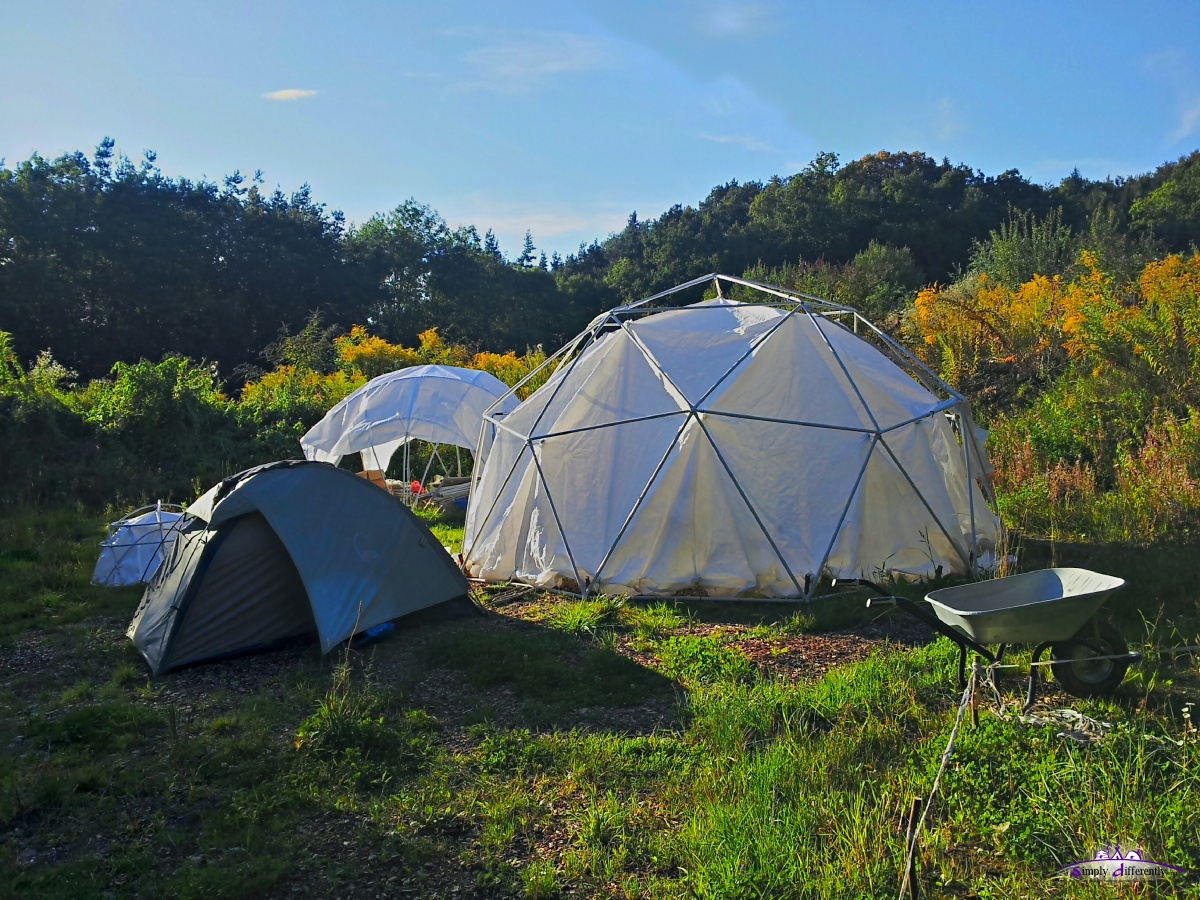
 One strut broken after the storm, two edges folded inside 2014/10/22 08:16 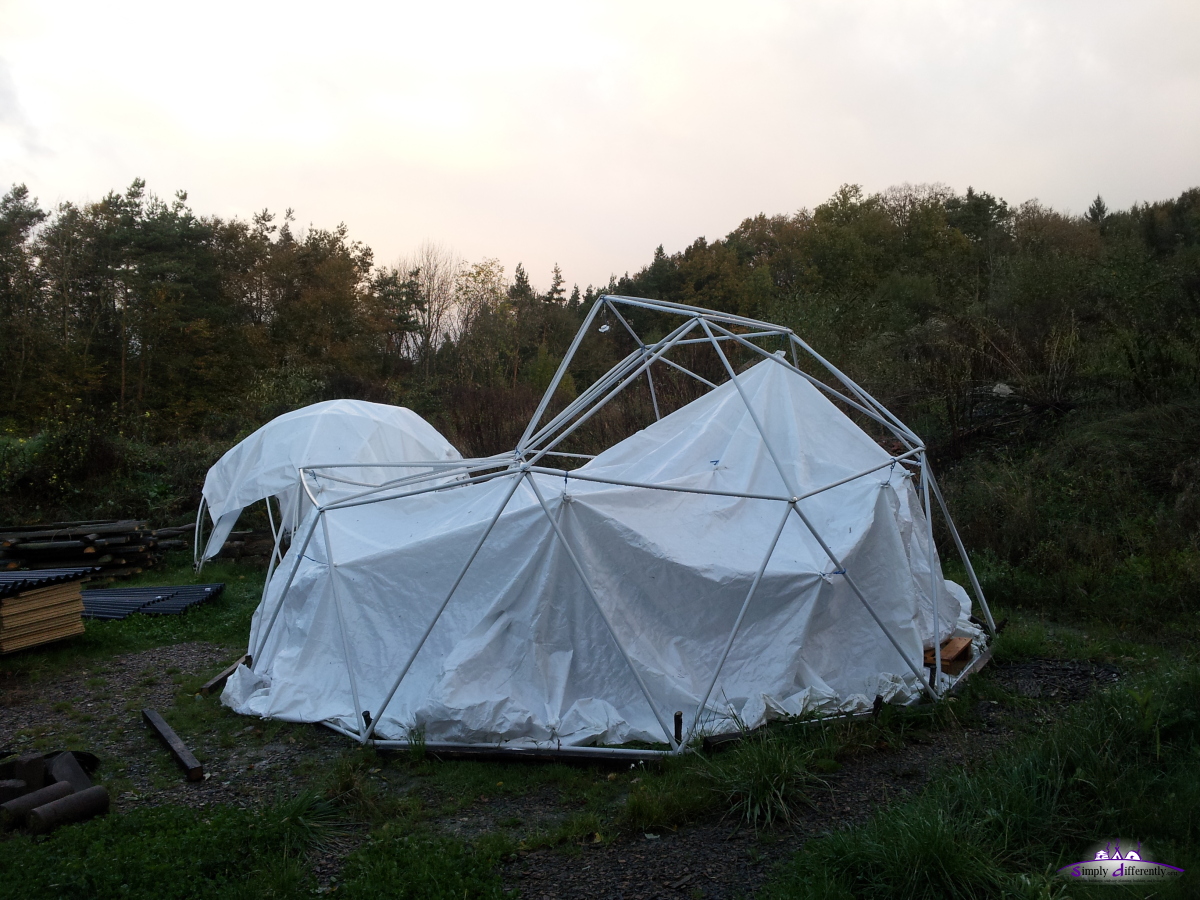 2014/10/22 08:17  Broken "B" strut 2014/10/22 08:17  Repairing, open edges 2014/10/22 13:23 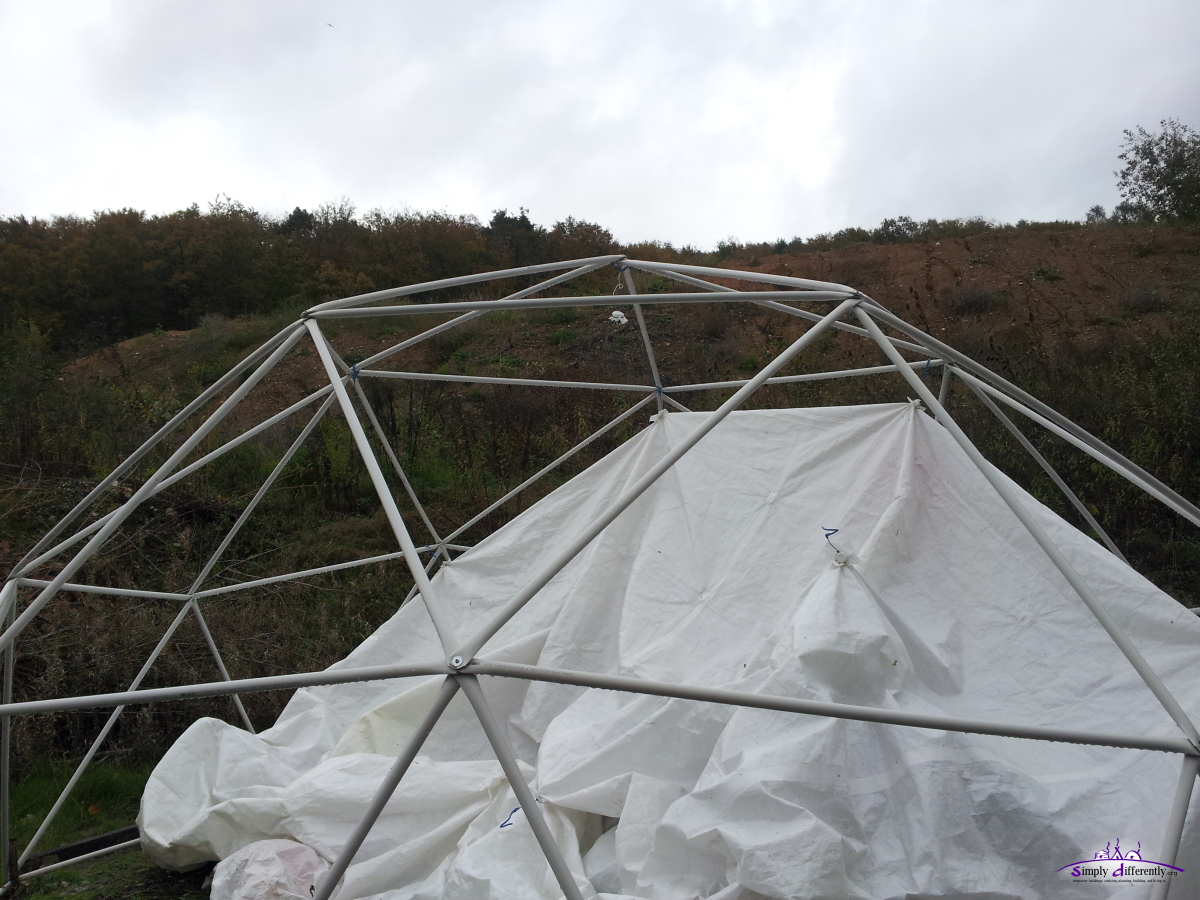 Repairing, strut replaced 2014/10/22 13:30 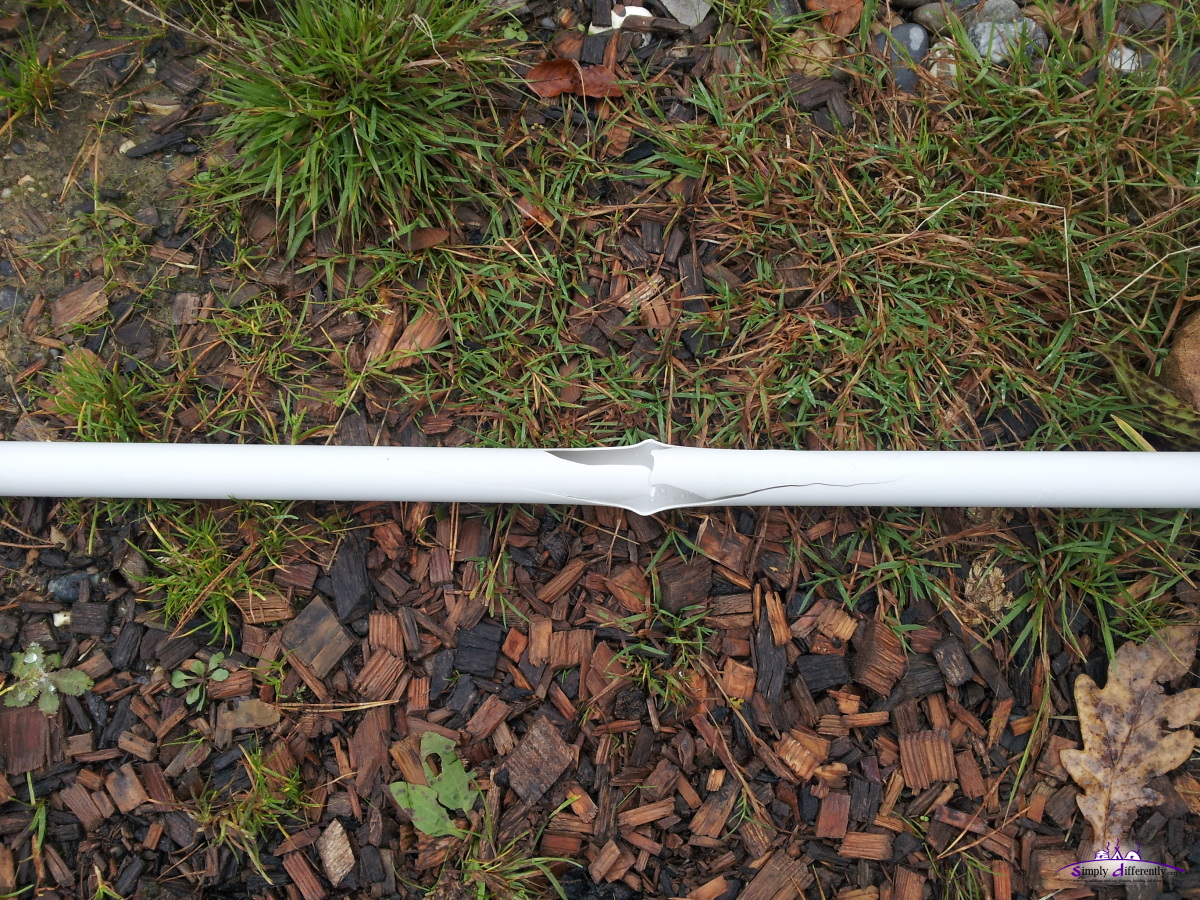 Broken B strut (actually broke, not just overbent) 2014/10/22 13:30 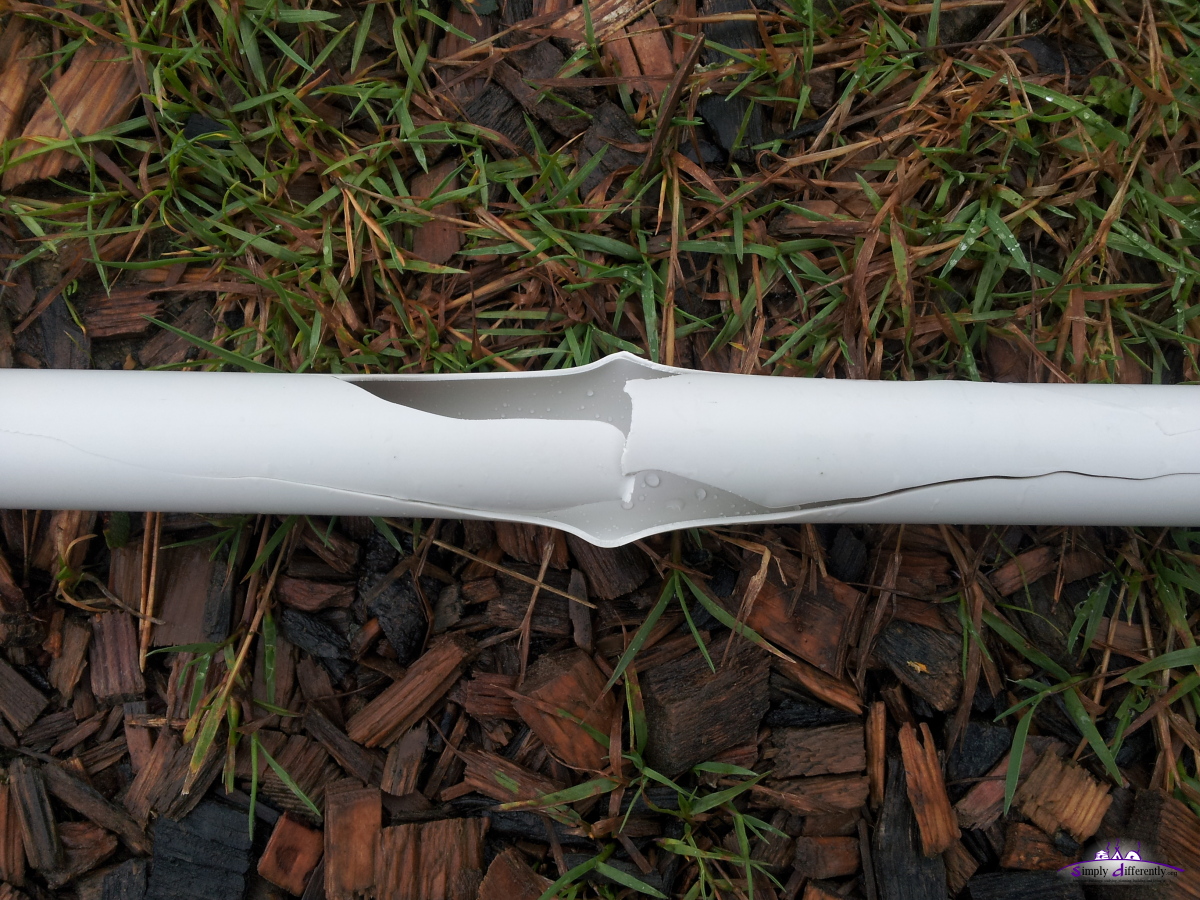 Broken B strut closeup 2014/10/22 13:30 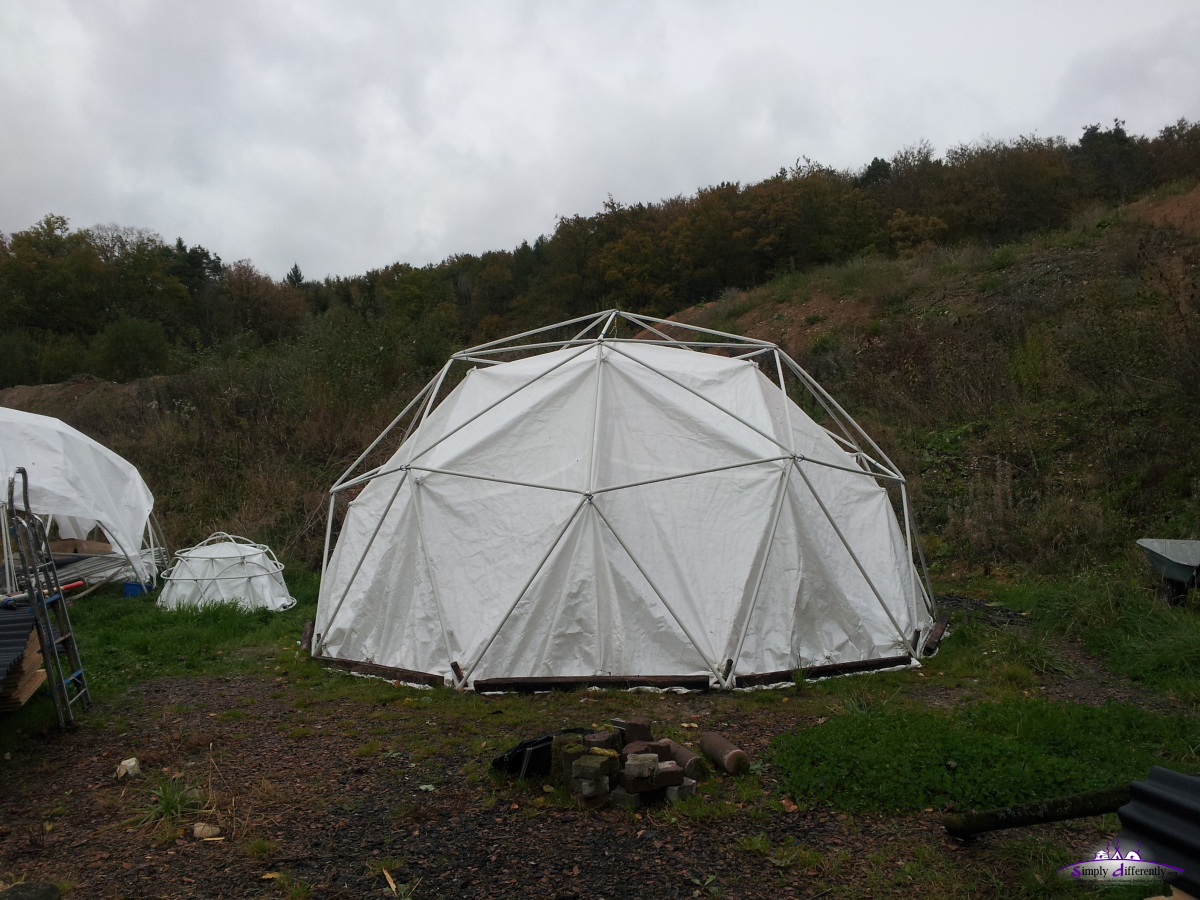 Dome repaired 2014/10/22 14:08 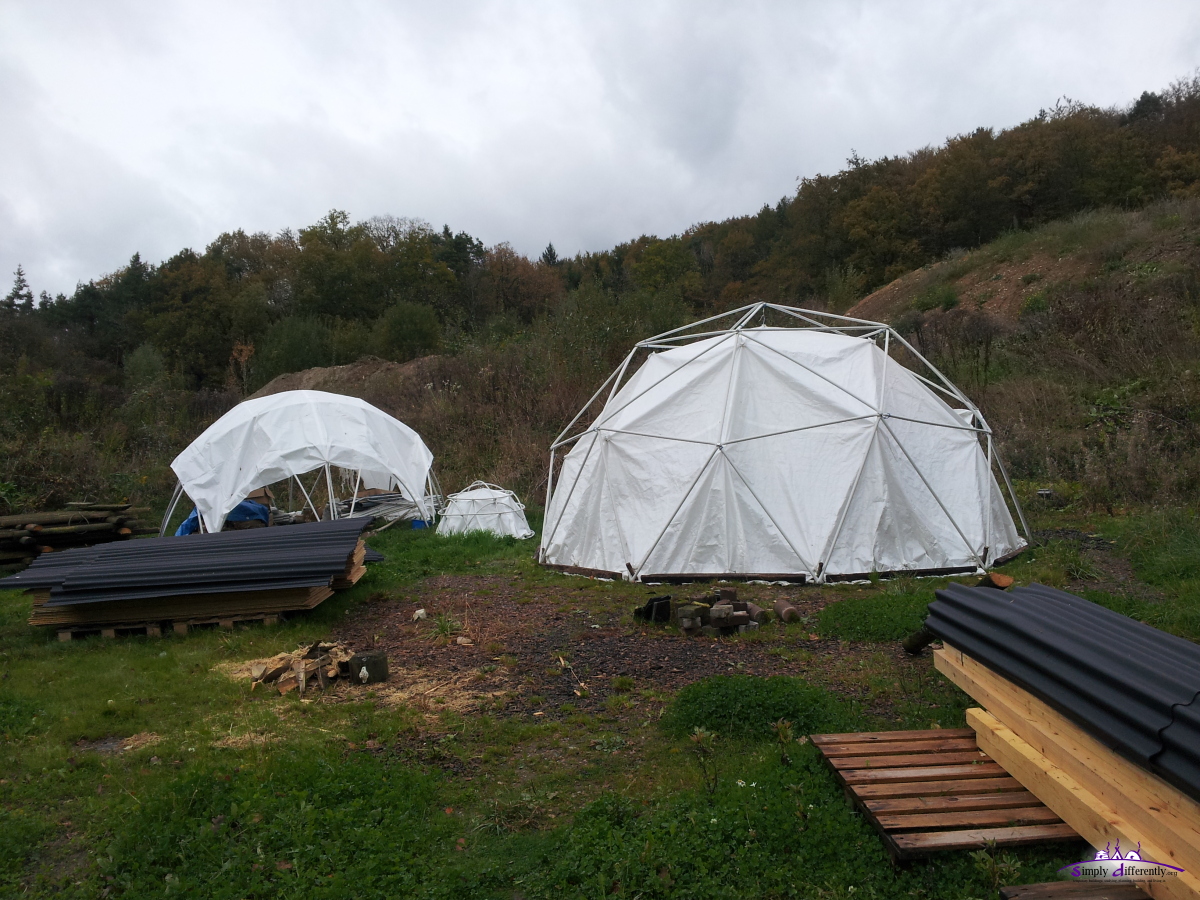 2014/10/22 14:10 So, one B strut with 1.565m length needs to be replaced, otherwise no other parts got broken, the wire hooks can be re-attached easily again. So far the dome did well, given the only 25mm diameter PVC struts, and the rather strong storm which occured over the period of 2-3 hours. Surely a metal-based struts the dome would have not given in at all. The closeup of the broken strut shows it actually broke and not just overbent, this likely due the lower temperature during the storm, apprx. 10C - likely with lower temperature and strong winds or storm more struts might actually break and not just overbend. The 4m diameter LC Dome in the background withstand without problem (the 5m diameter LC Dome wasn't stable and folded with a much weaker storm) - the difference of 4m vs 5m diameter dome is significantly. 30. 8. 2014: 3rd Stage and PE Rain CoverAfter more than 10 days trying to straighten the bent PVC pipes I gave up as they still remained bent - too much for my taste. So I've got new straight ones and finished the 3rd stage: 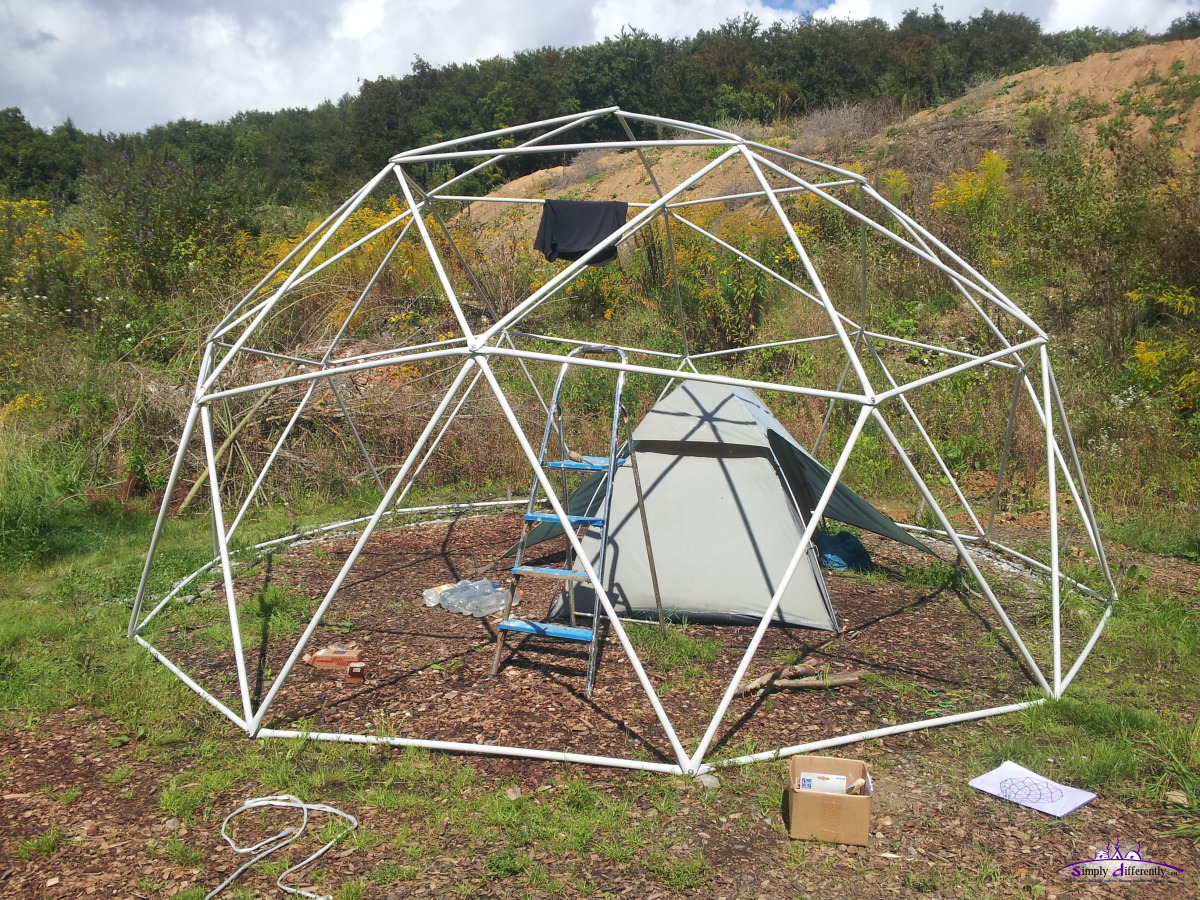 2014/08/30 13:25 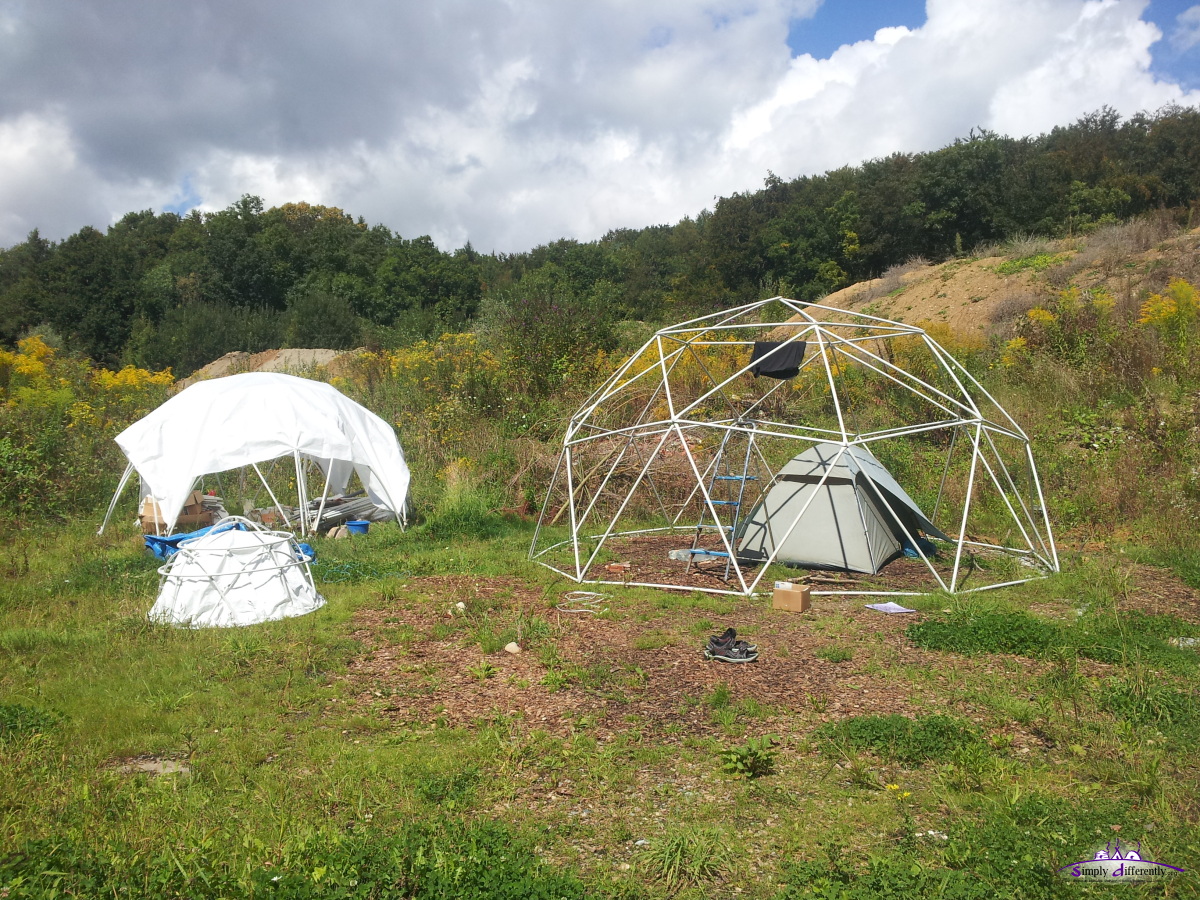 2014/08/30 13:25 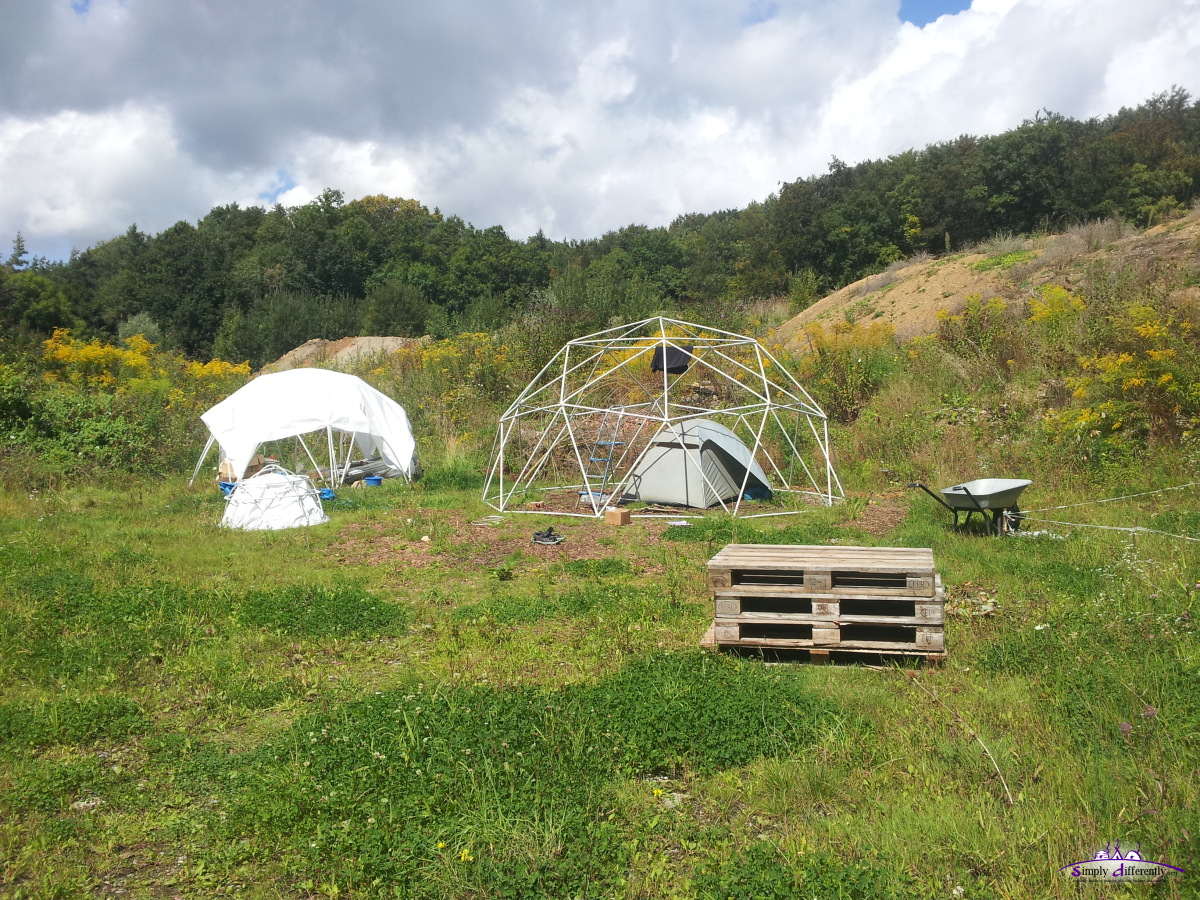 2014/08/30 13:25 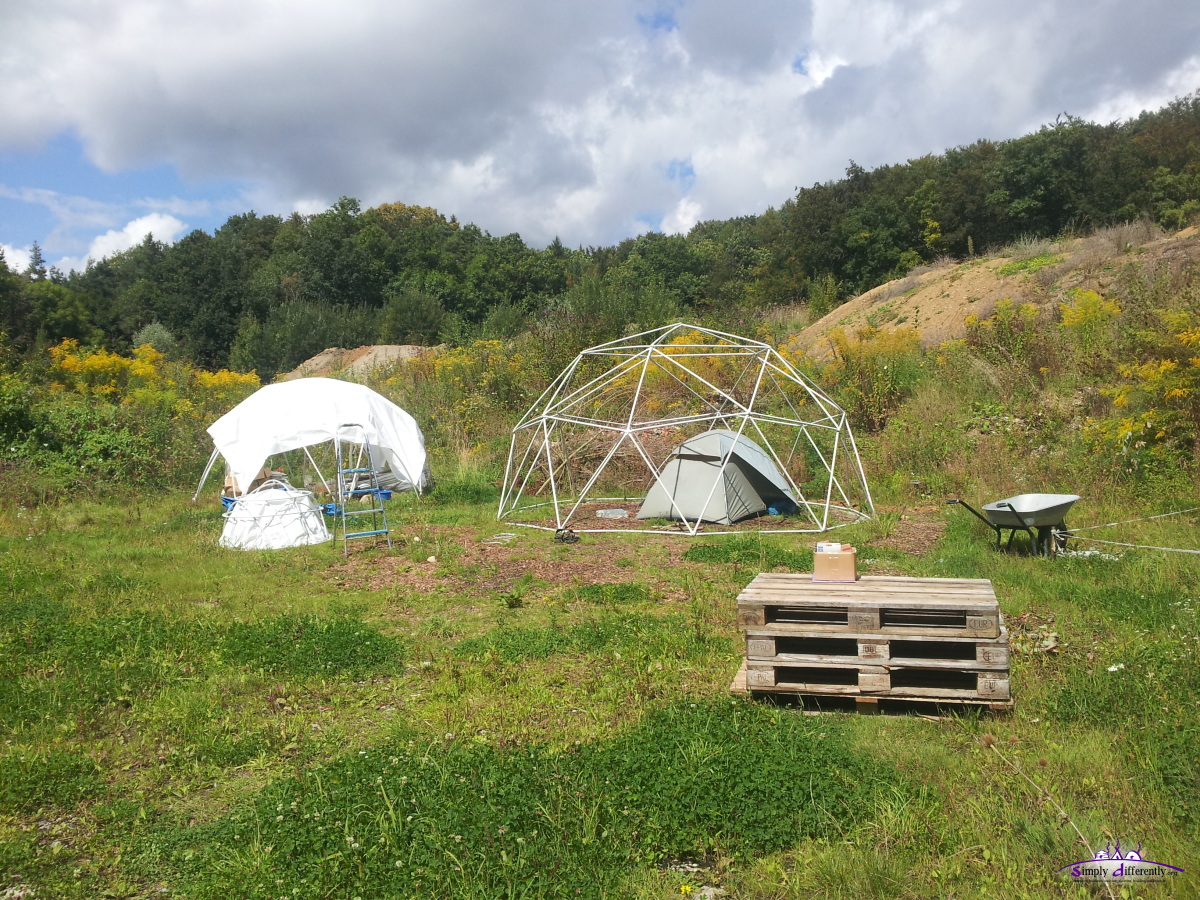 2014/08/30 13:40 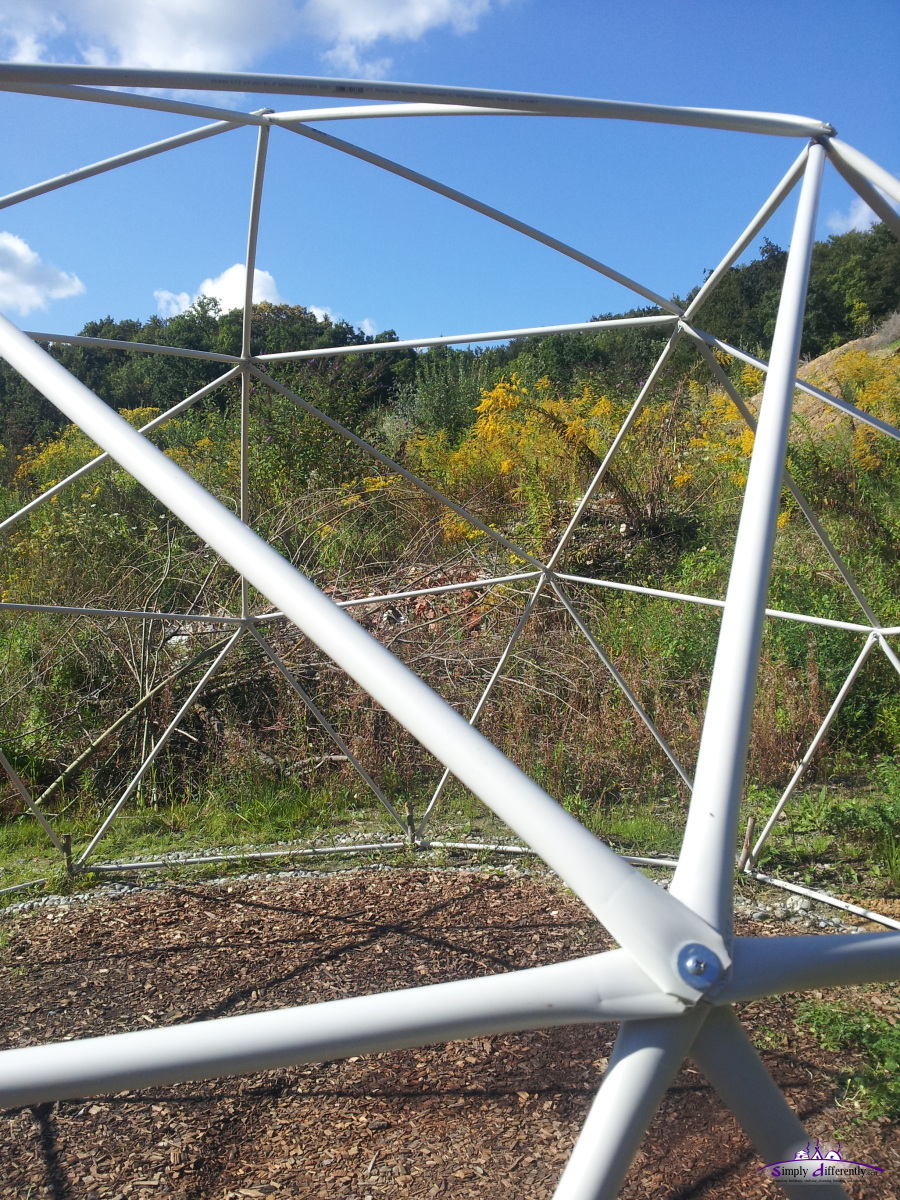 2014/08/30 16:31 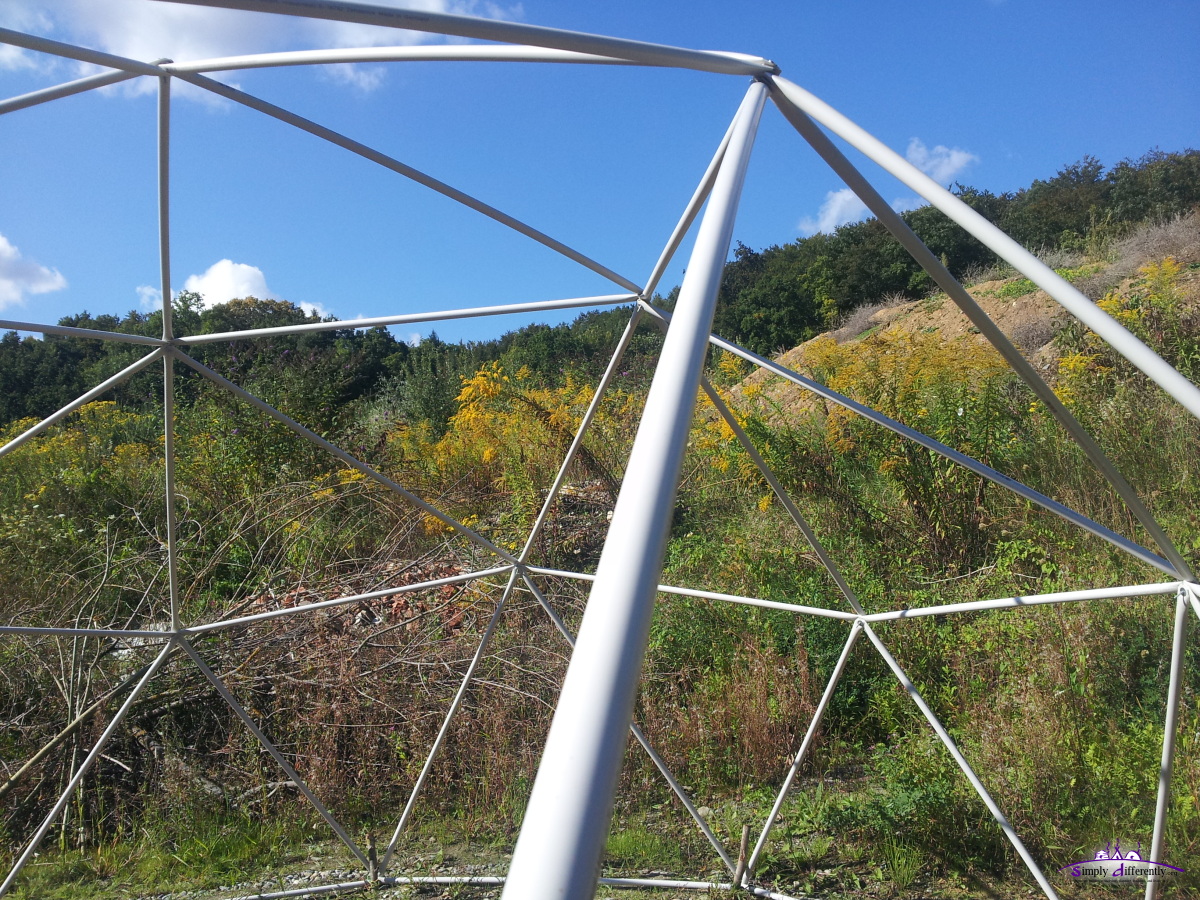 2014/08/30 16:31 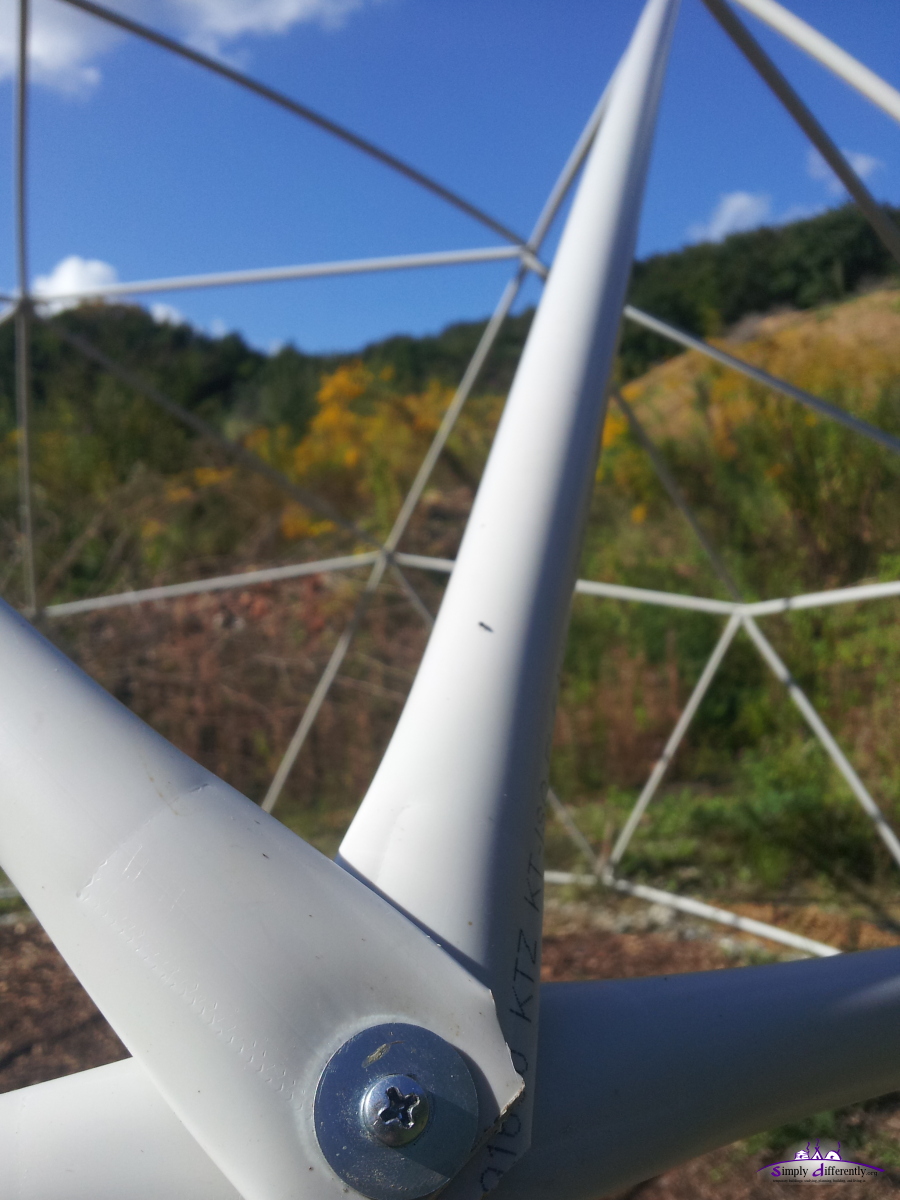 2014/08/30 16:31 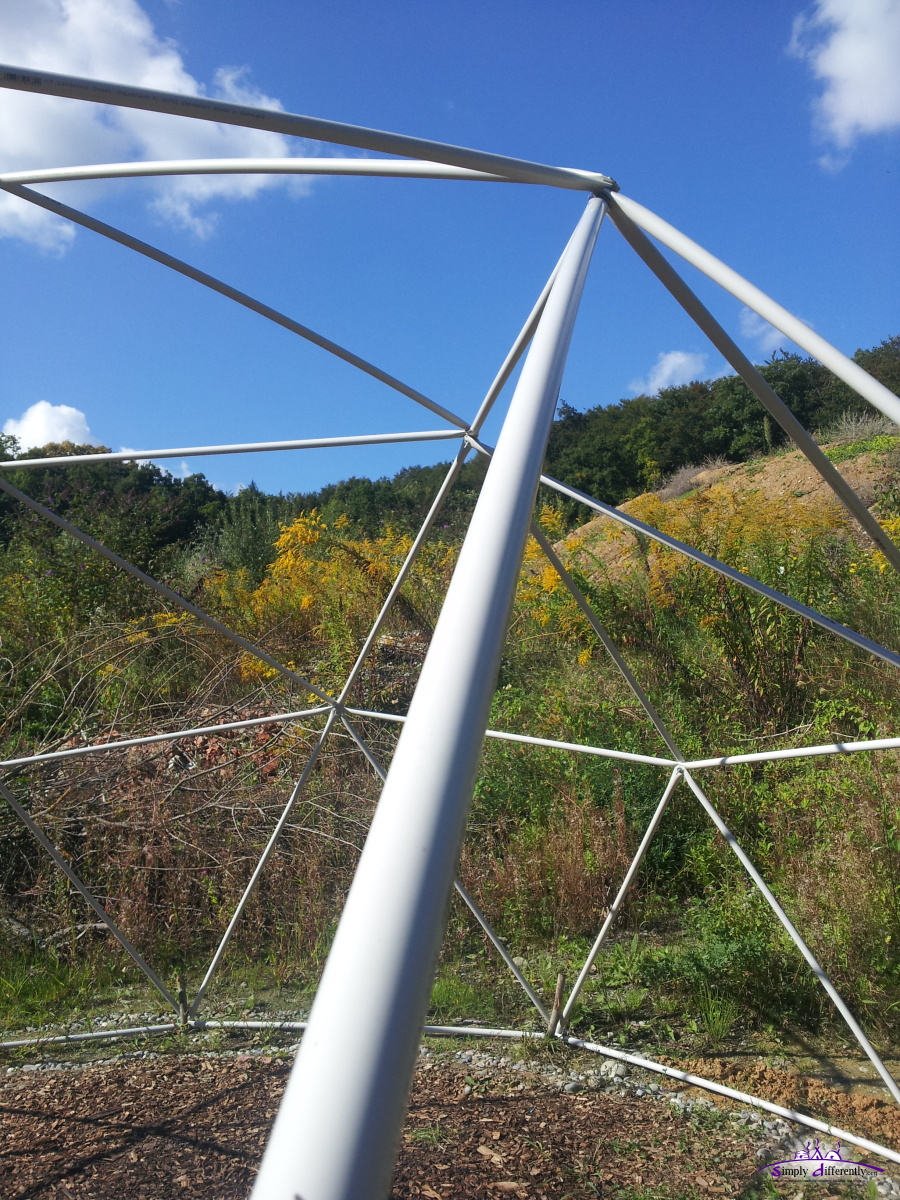 2014/08/30 16:31 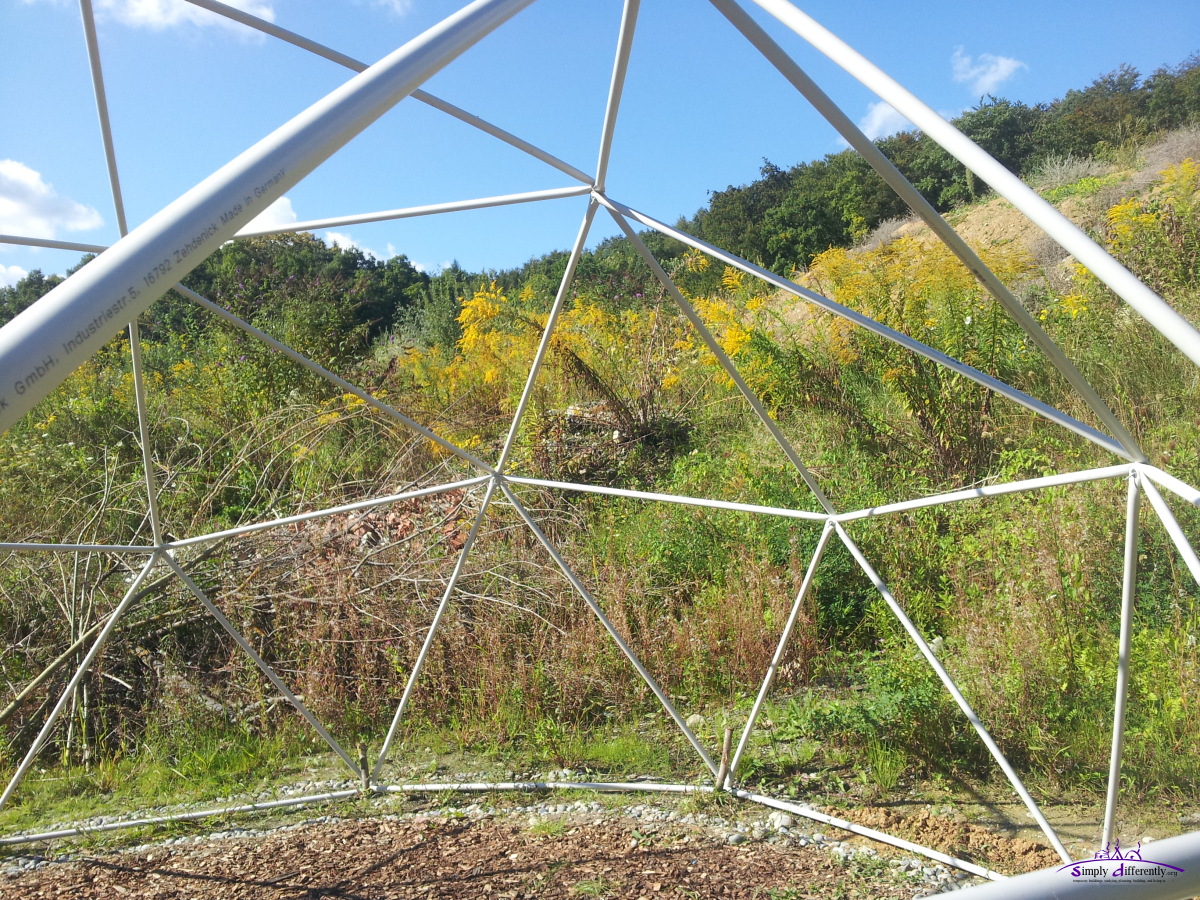 2014/08/30 16:31 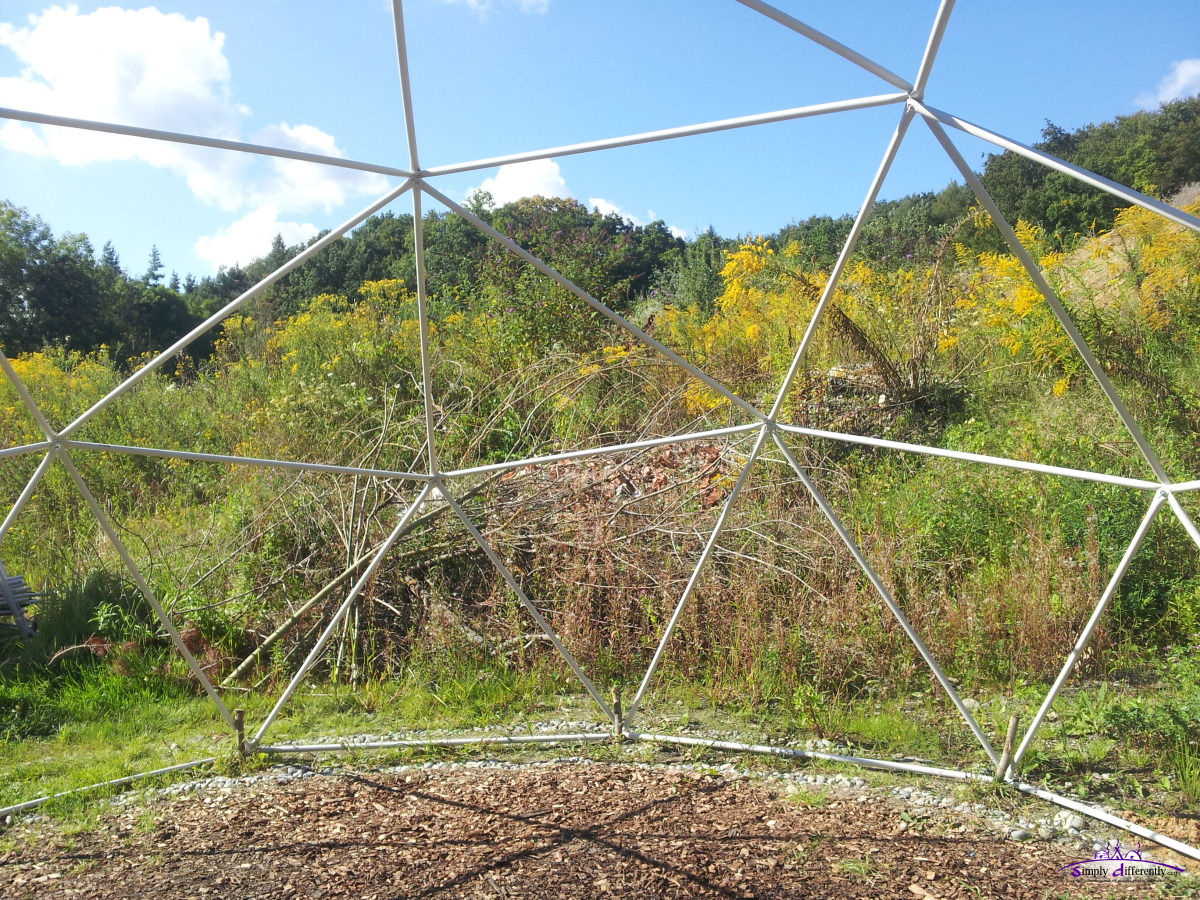 2014/08/30 16:31 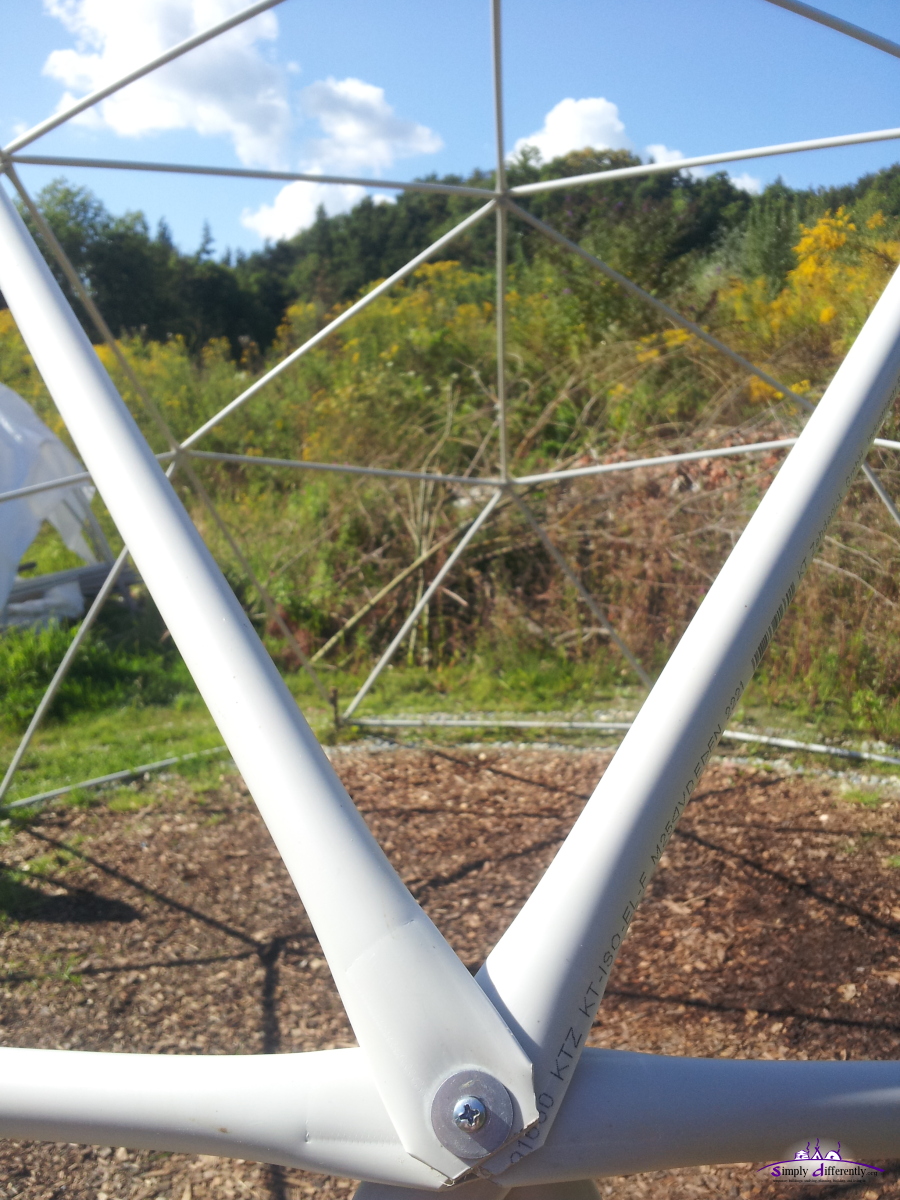 2014/08/30 16:31 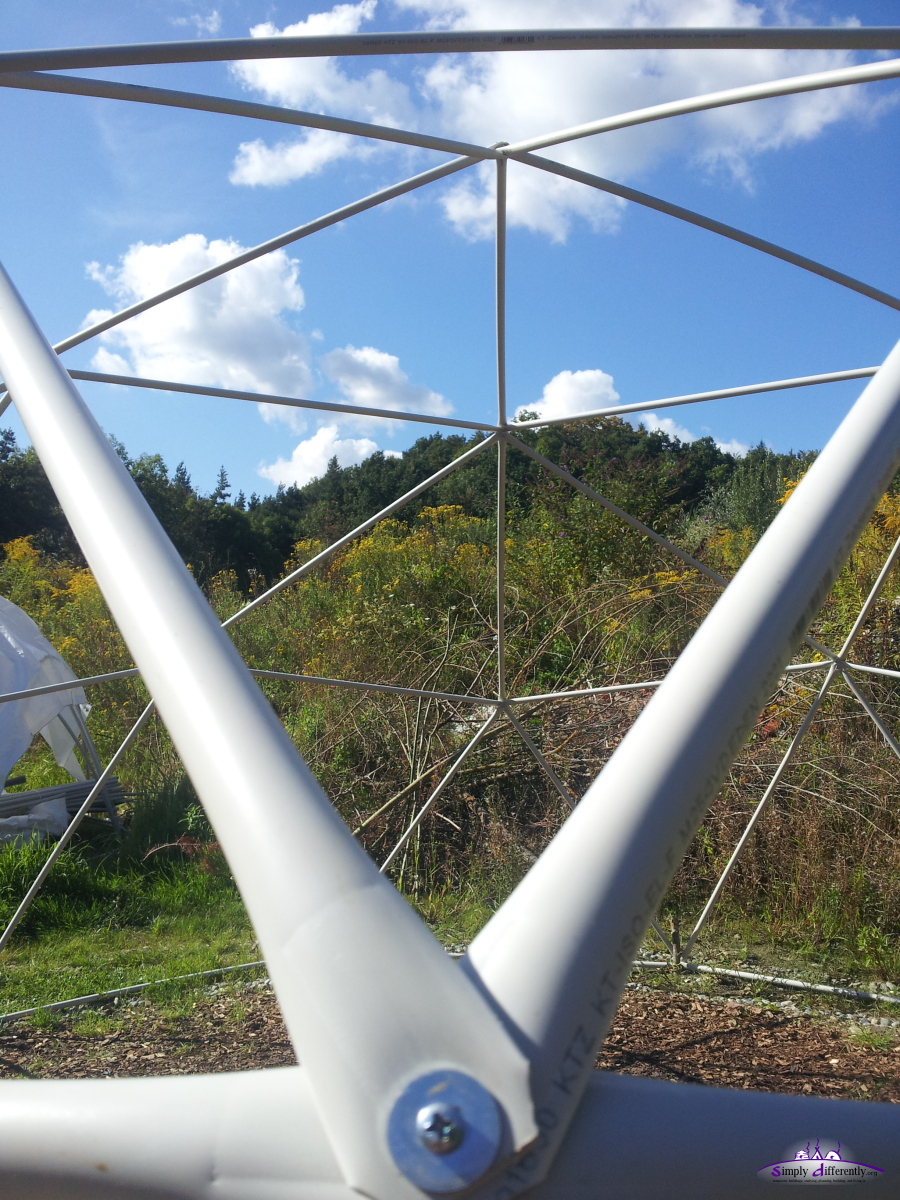 2014/08/30 16:32 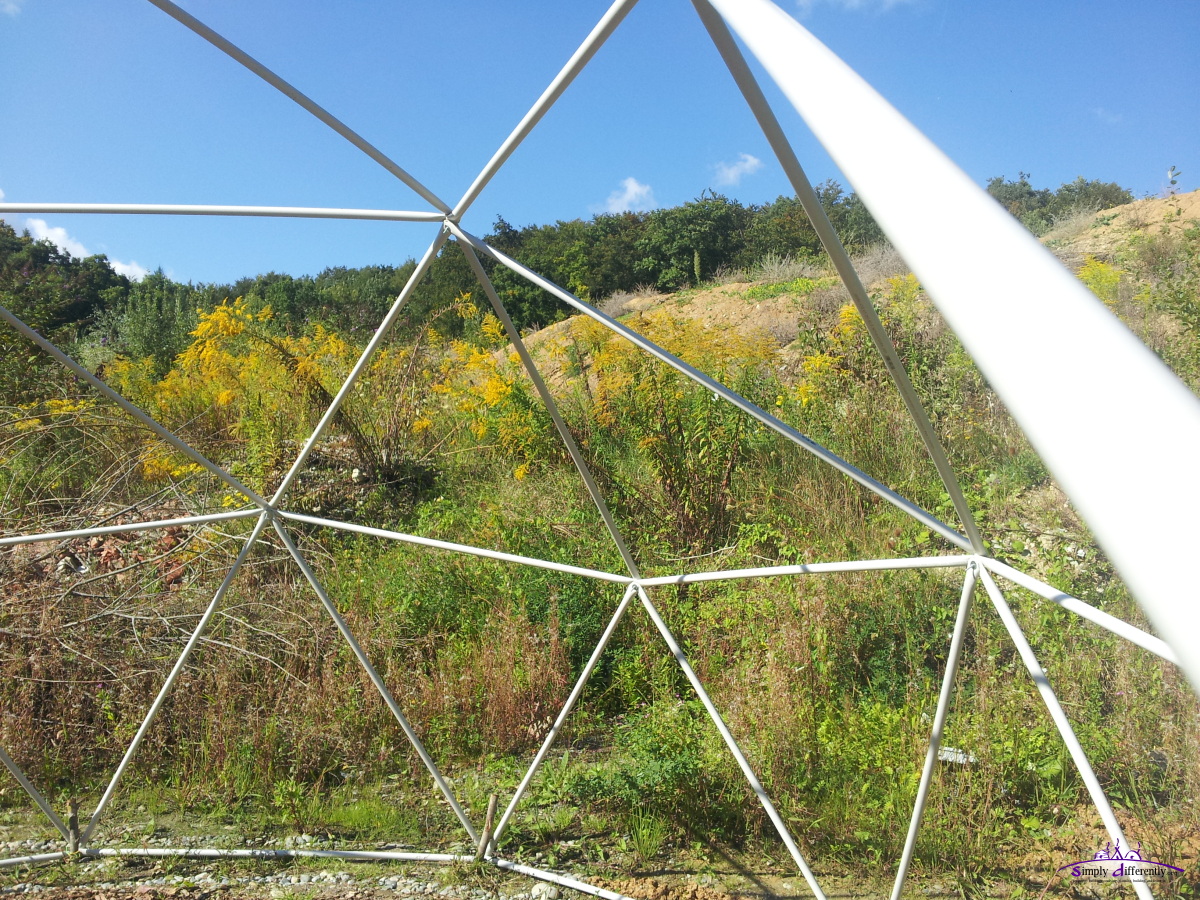 2014/08/30 16:32 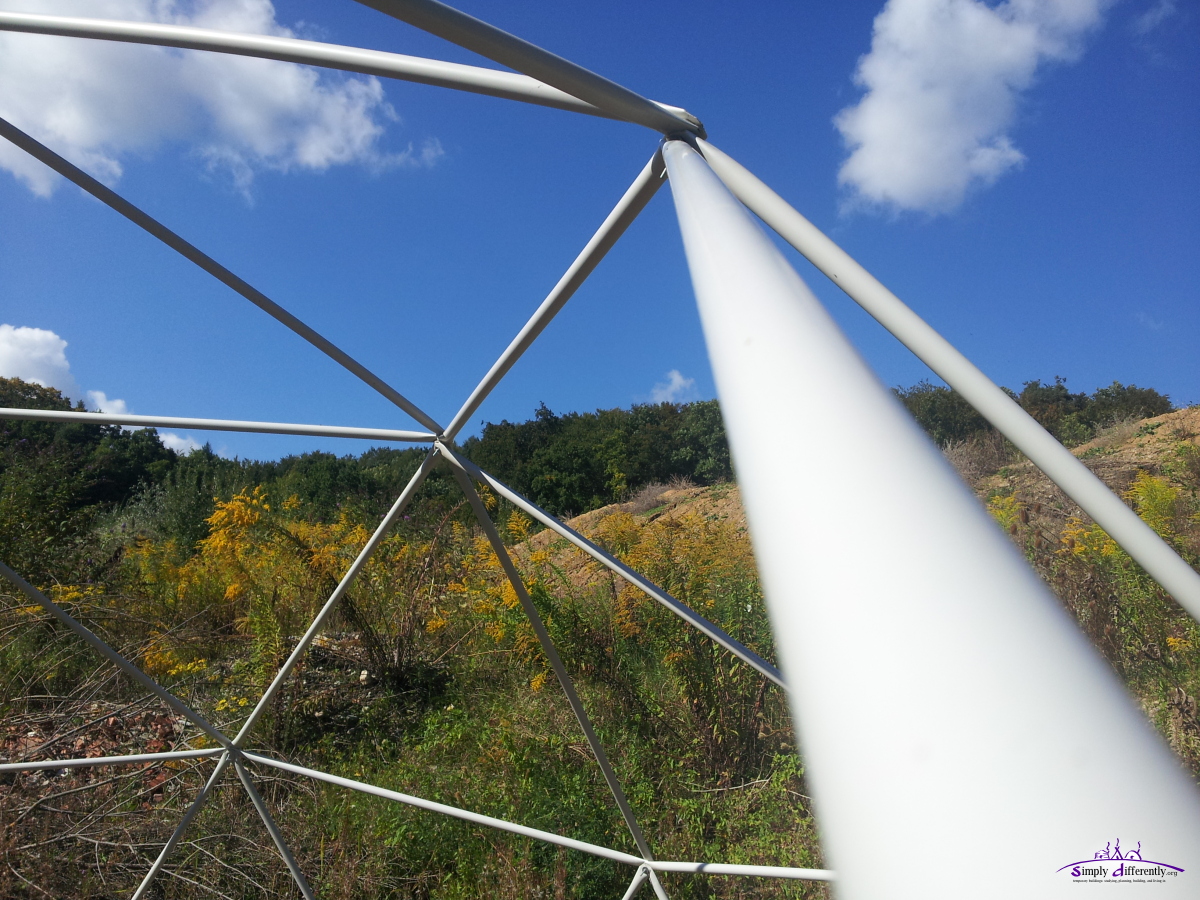 2014/08/30 16:32 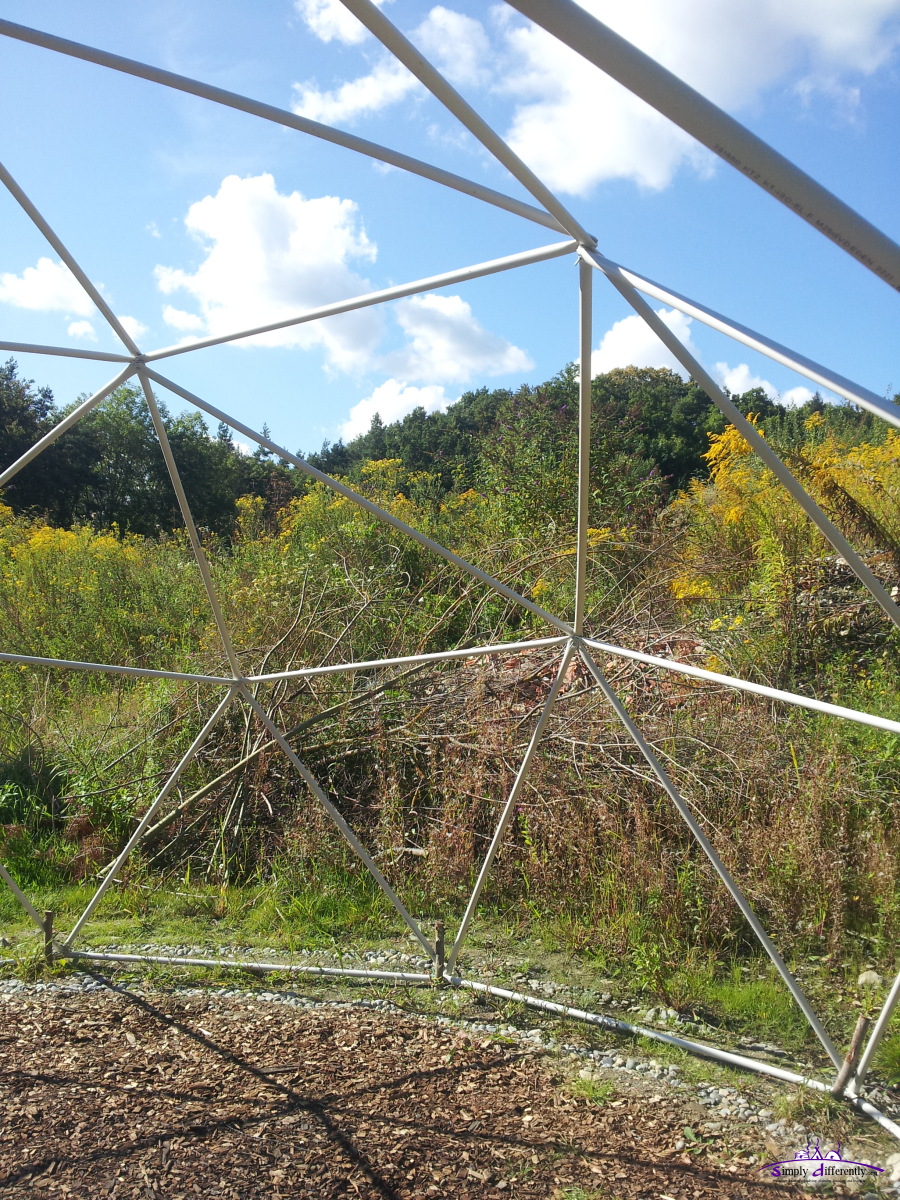 2014/08/30 16:32 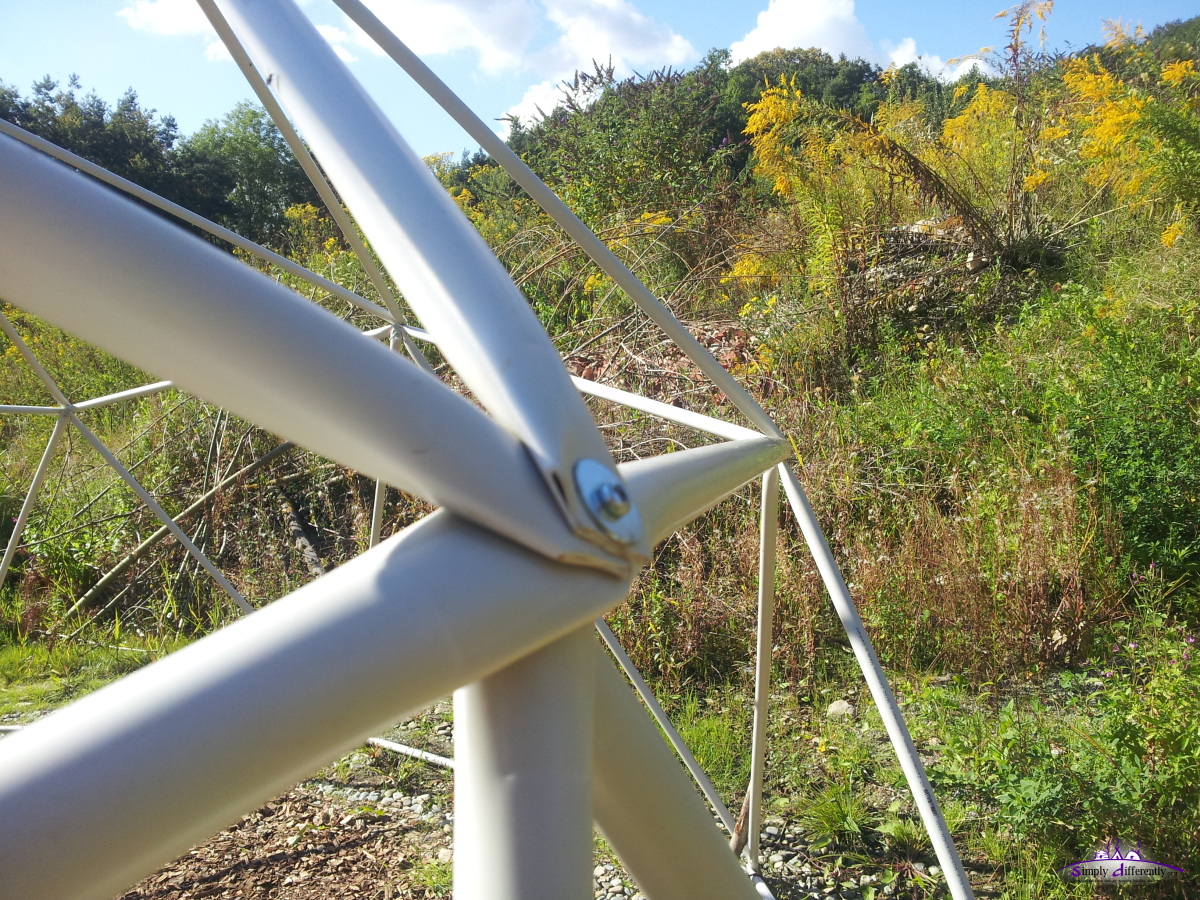 2014/08/30 16:33 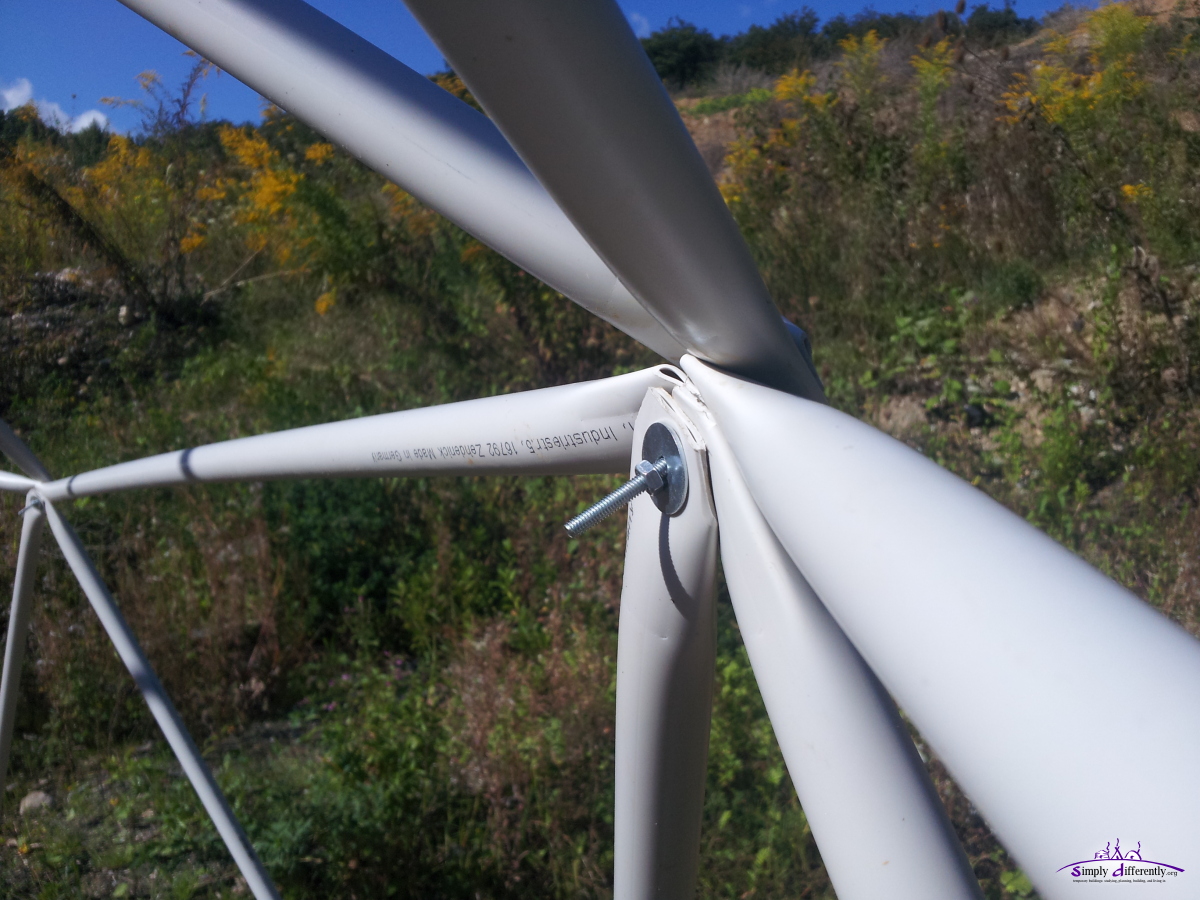 2014/08/30 16:33 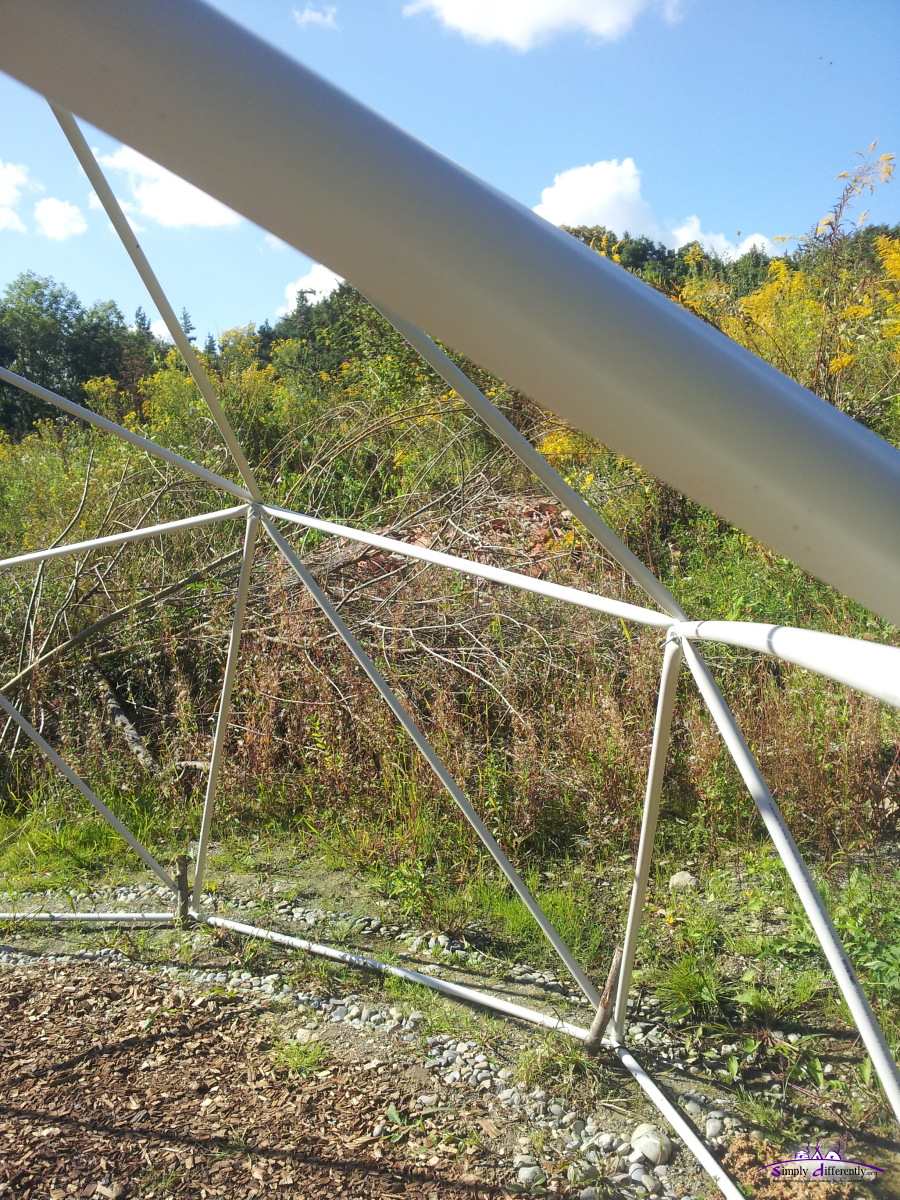 2014/08/30 16:33 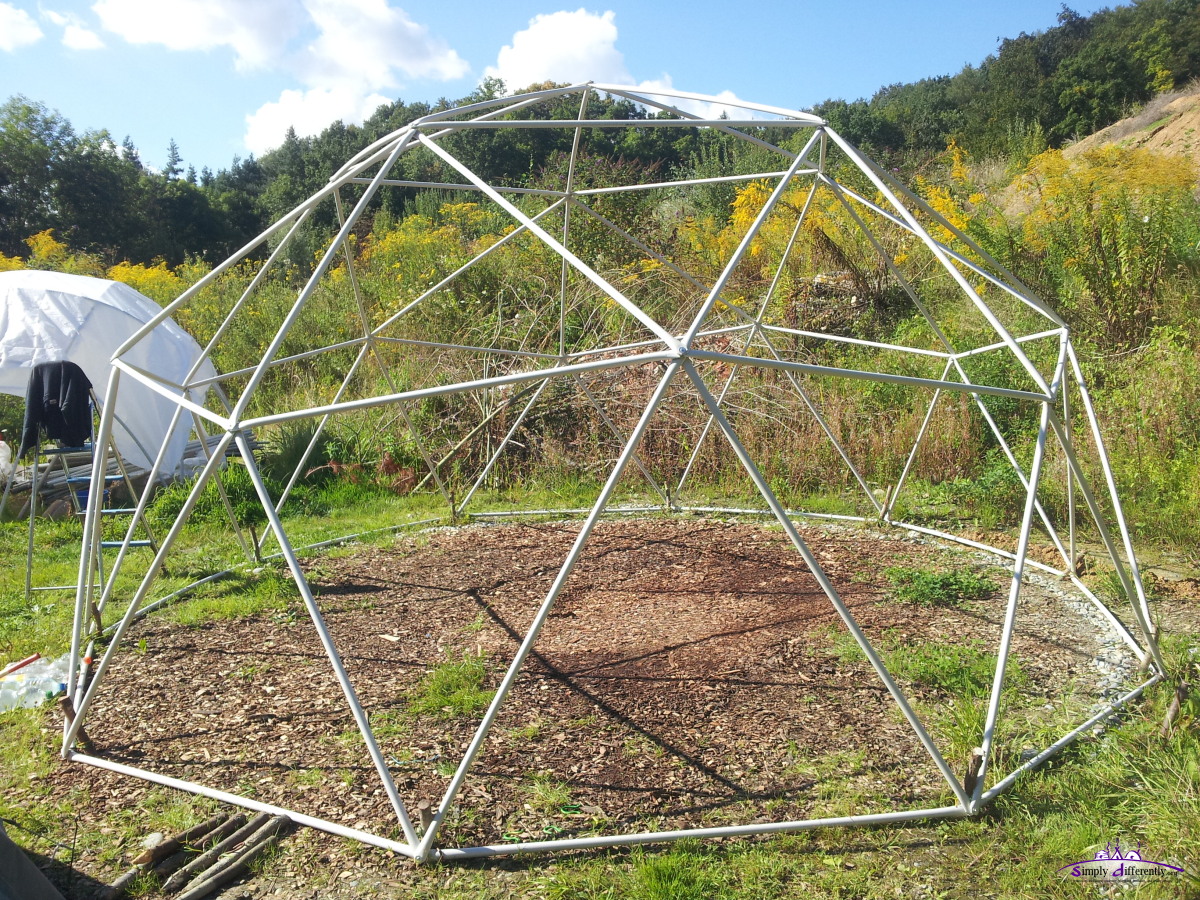 2014/08/30 16:33 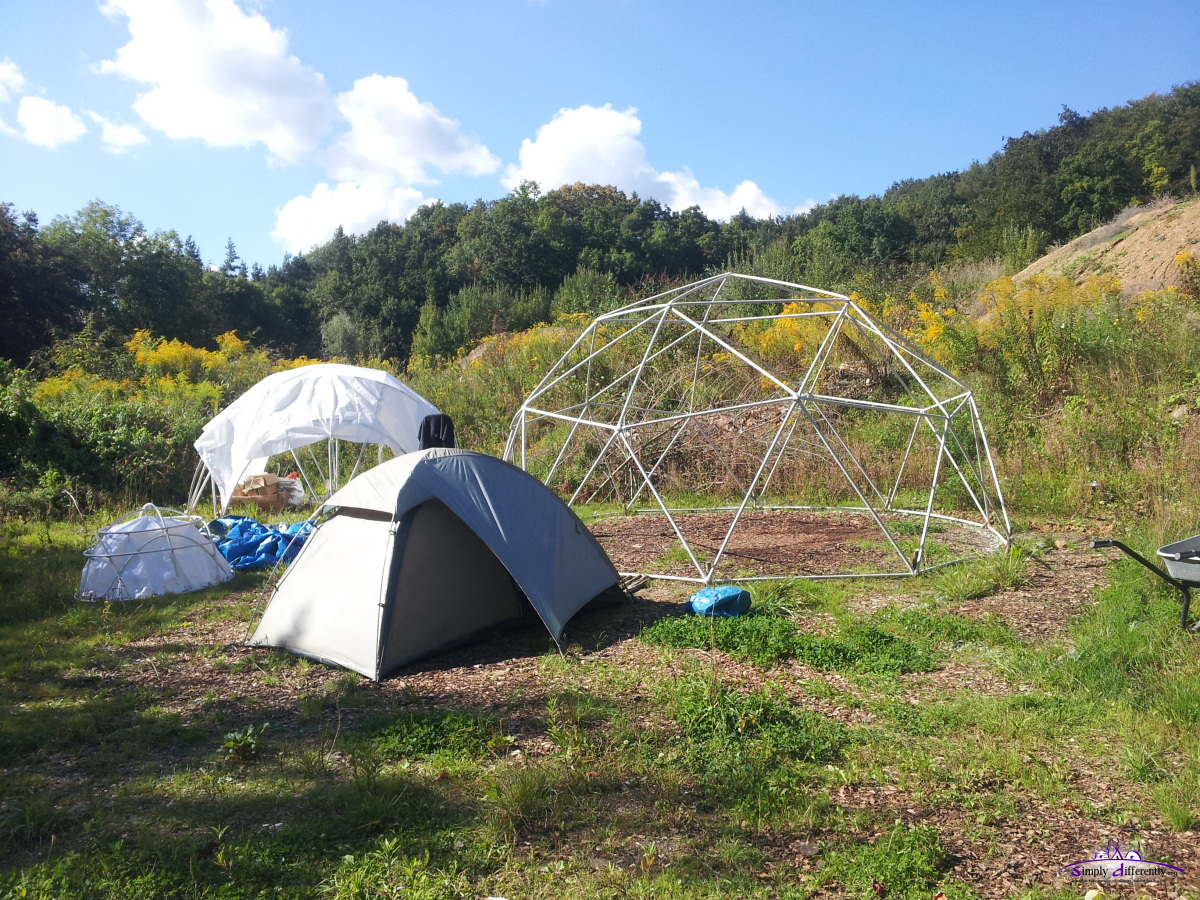 2014/08/30 16:33 and put up the rain cover, attached at the corners, and at the base double: 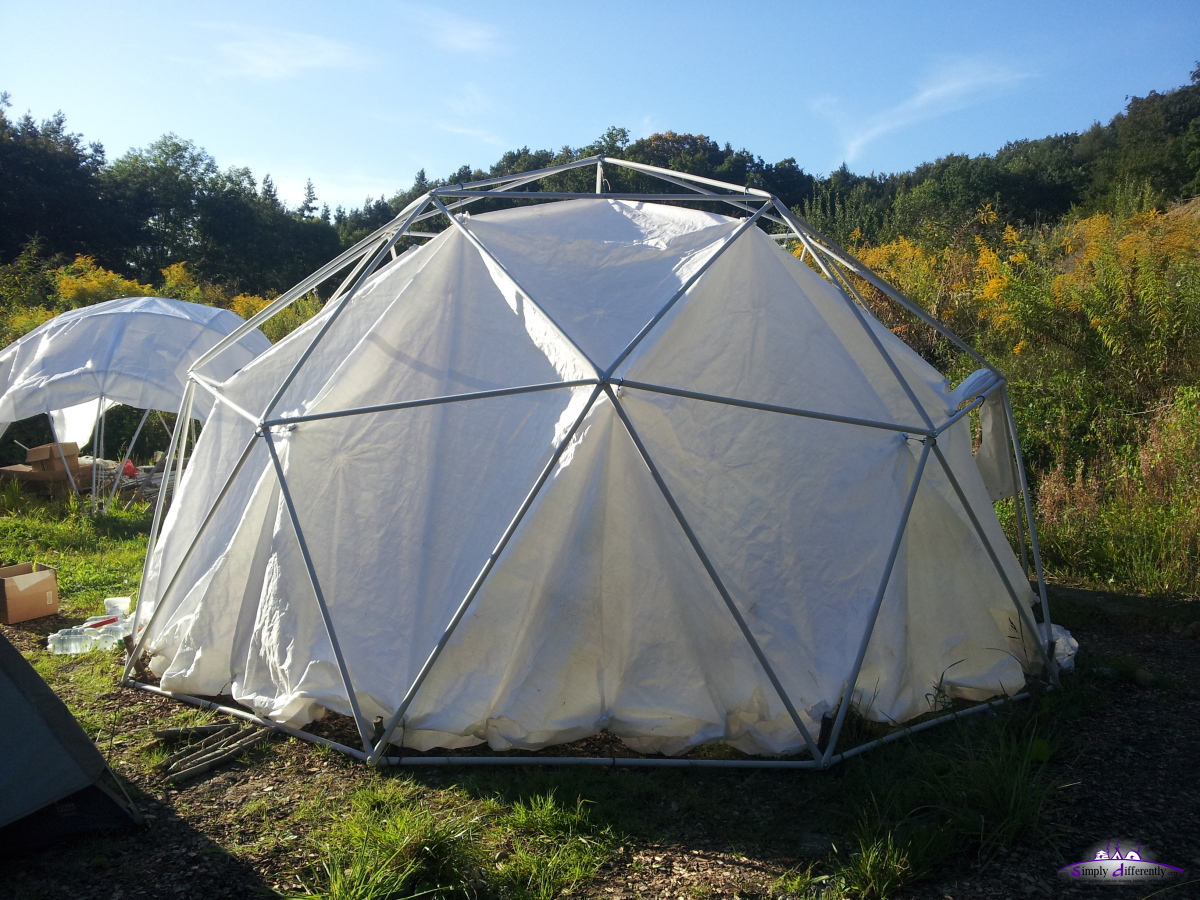 2014/08/30 18:14 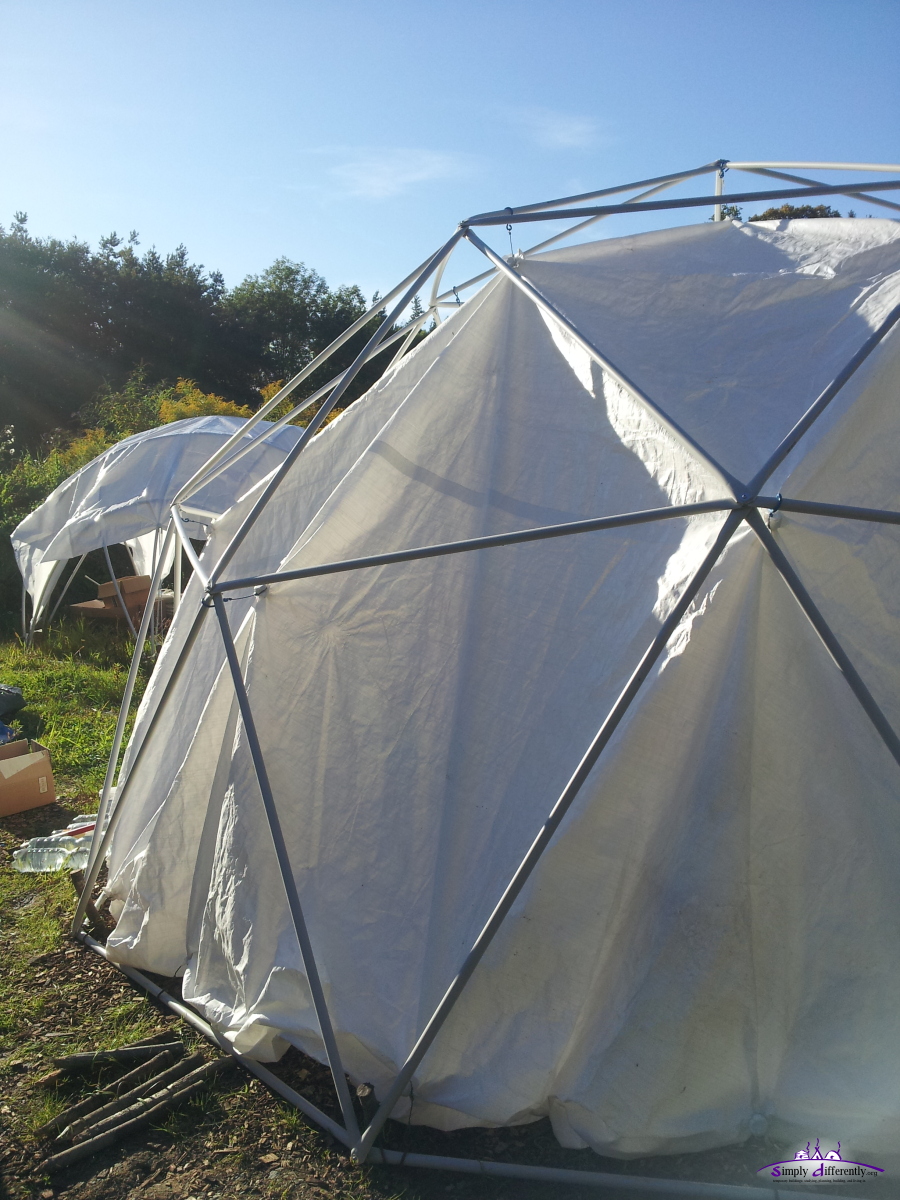 2014/08/30 18:15 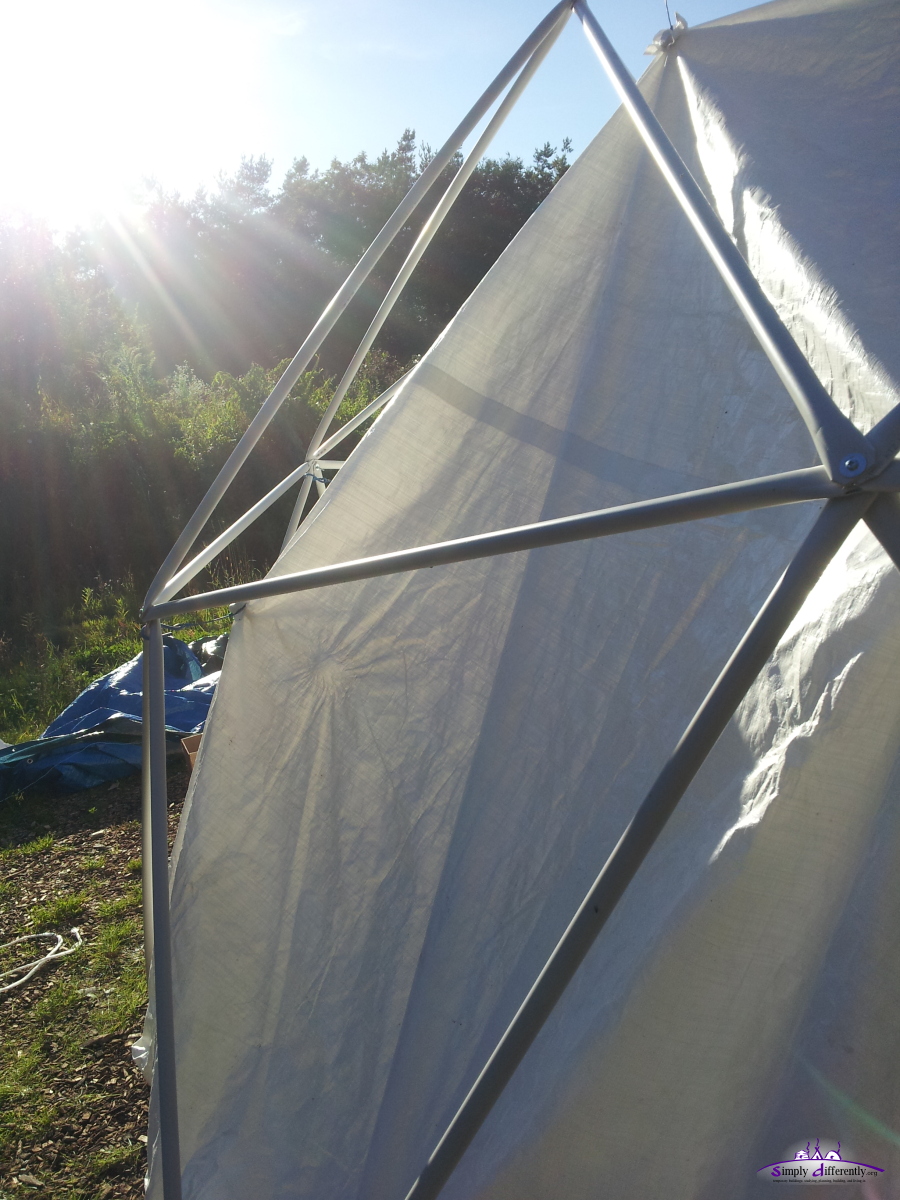 2014/08/30 18:15 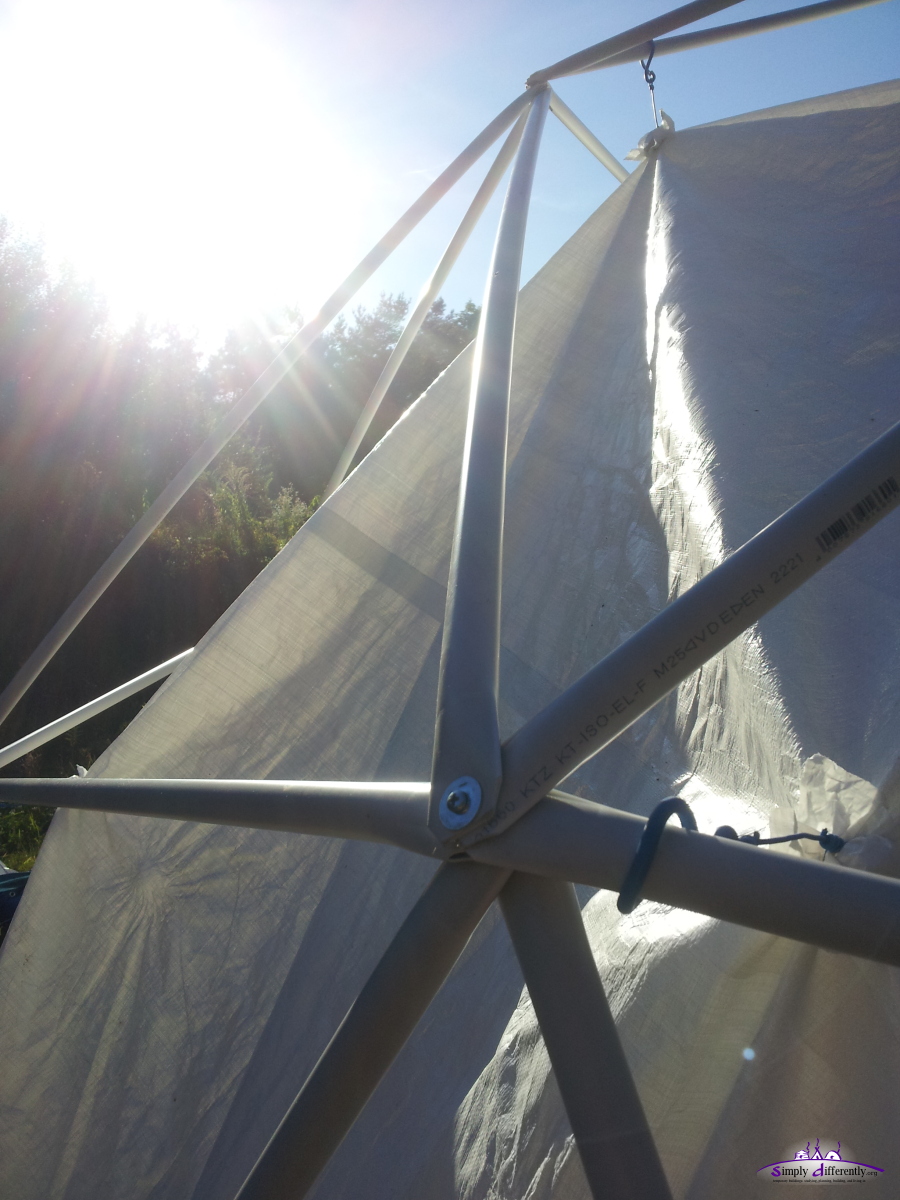 2014/08/30 18:15 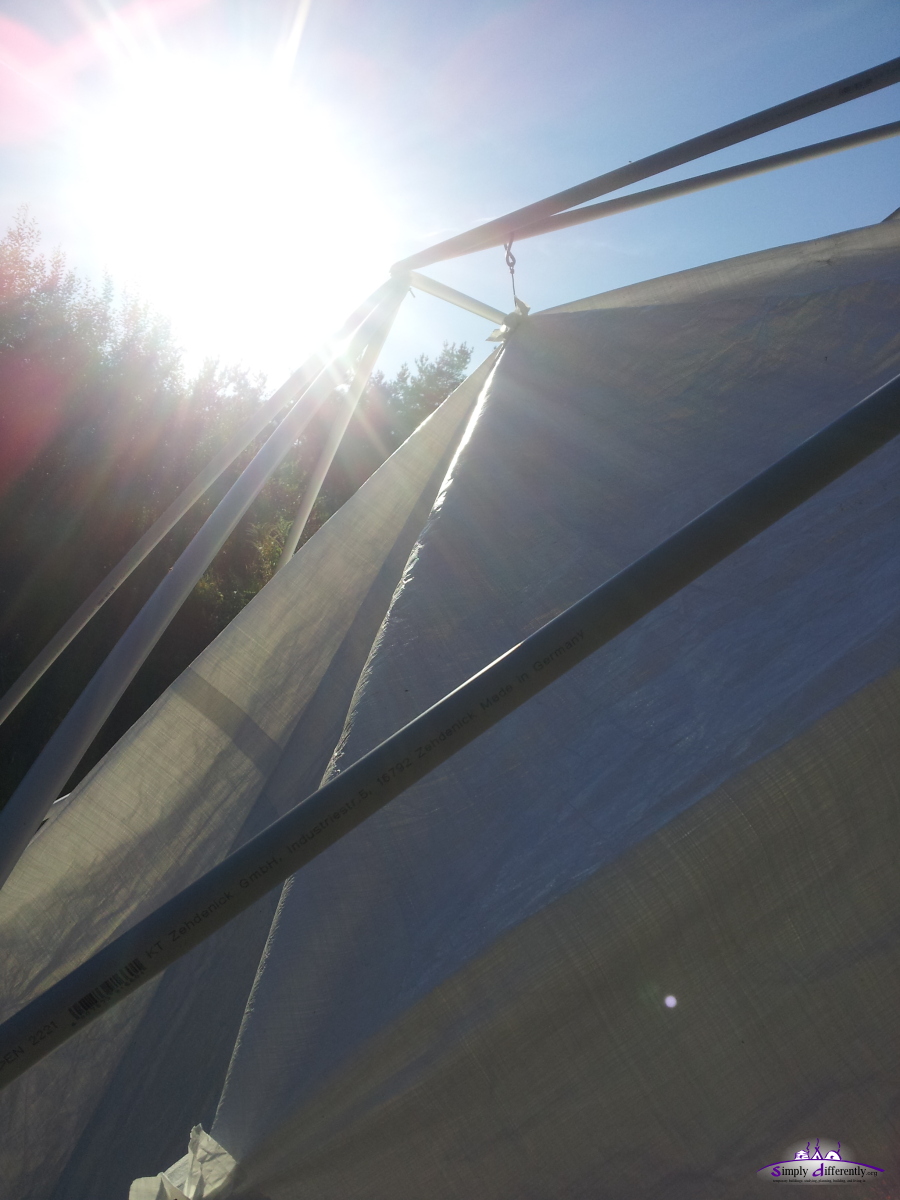 2014/08/30 18:15 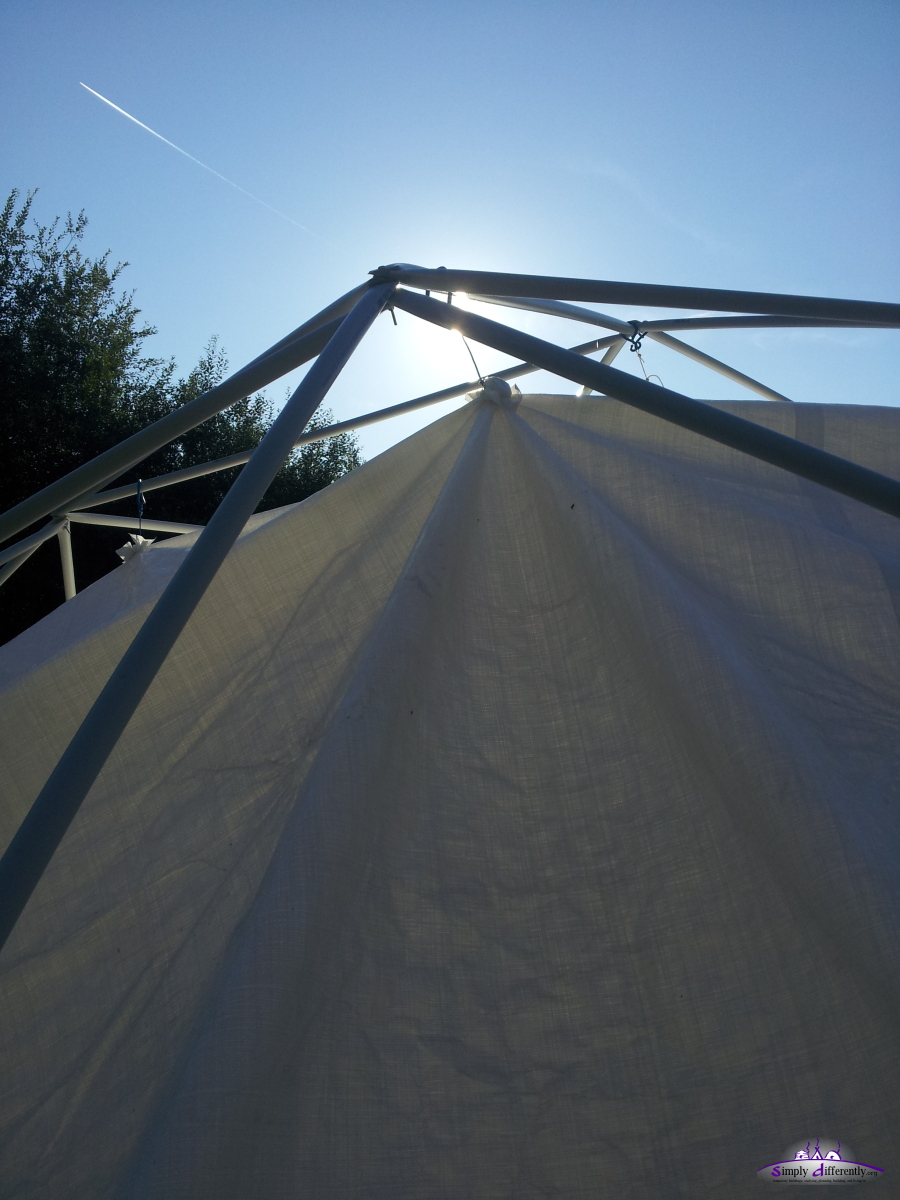 2014/08/30 18:15 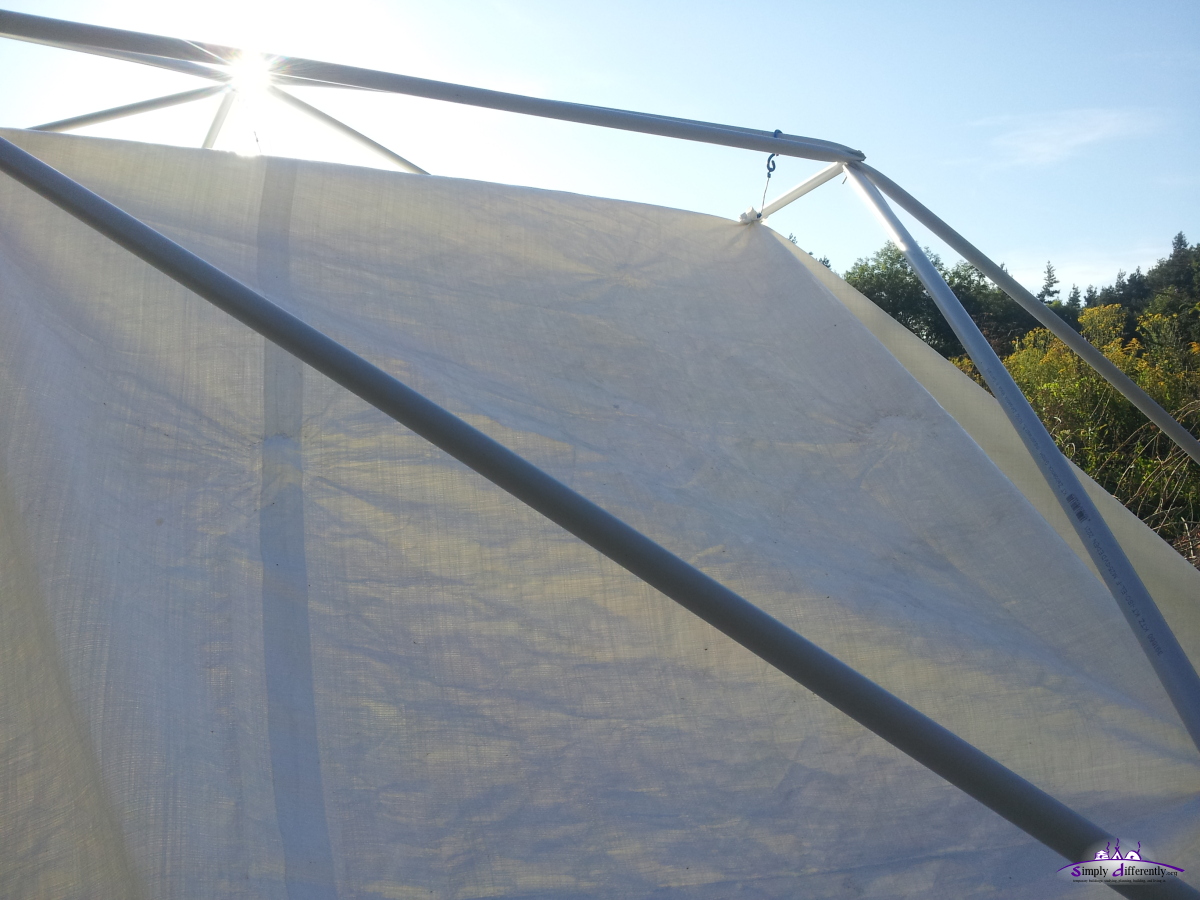 2014/08/30 18:15  2014/08/30 18:15 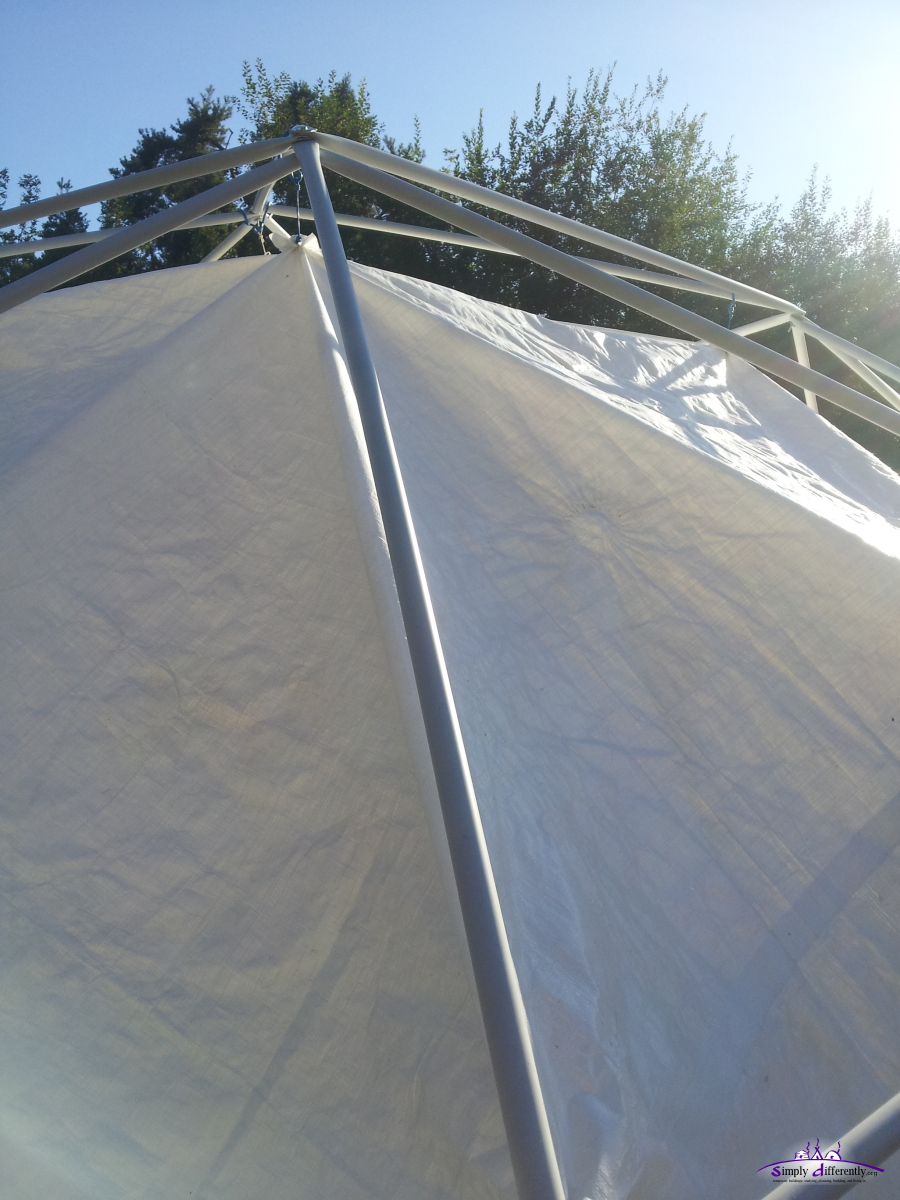 2014/08/30 18:15 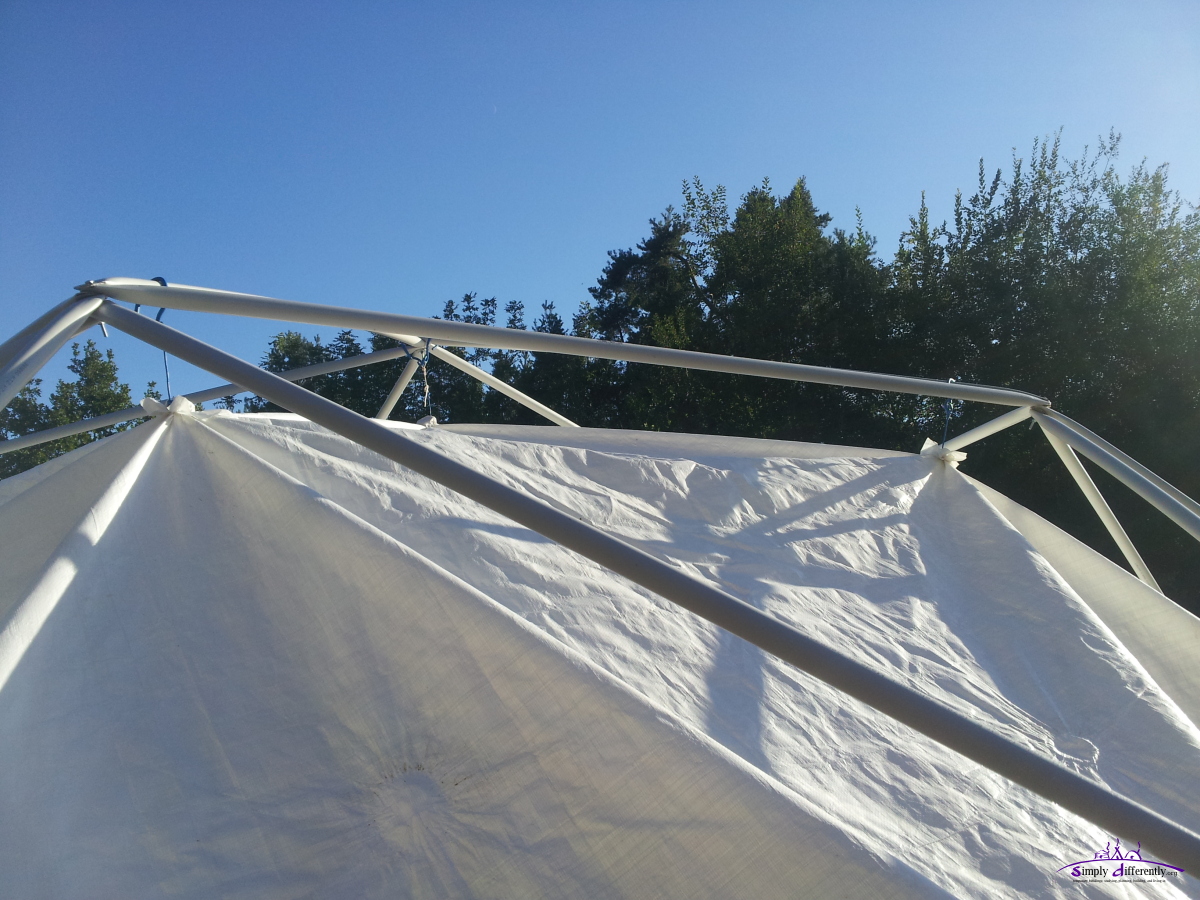 2014/08/30 18:16 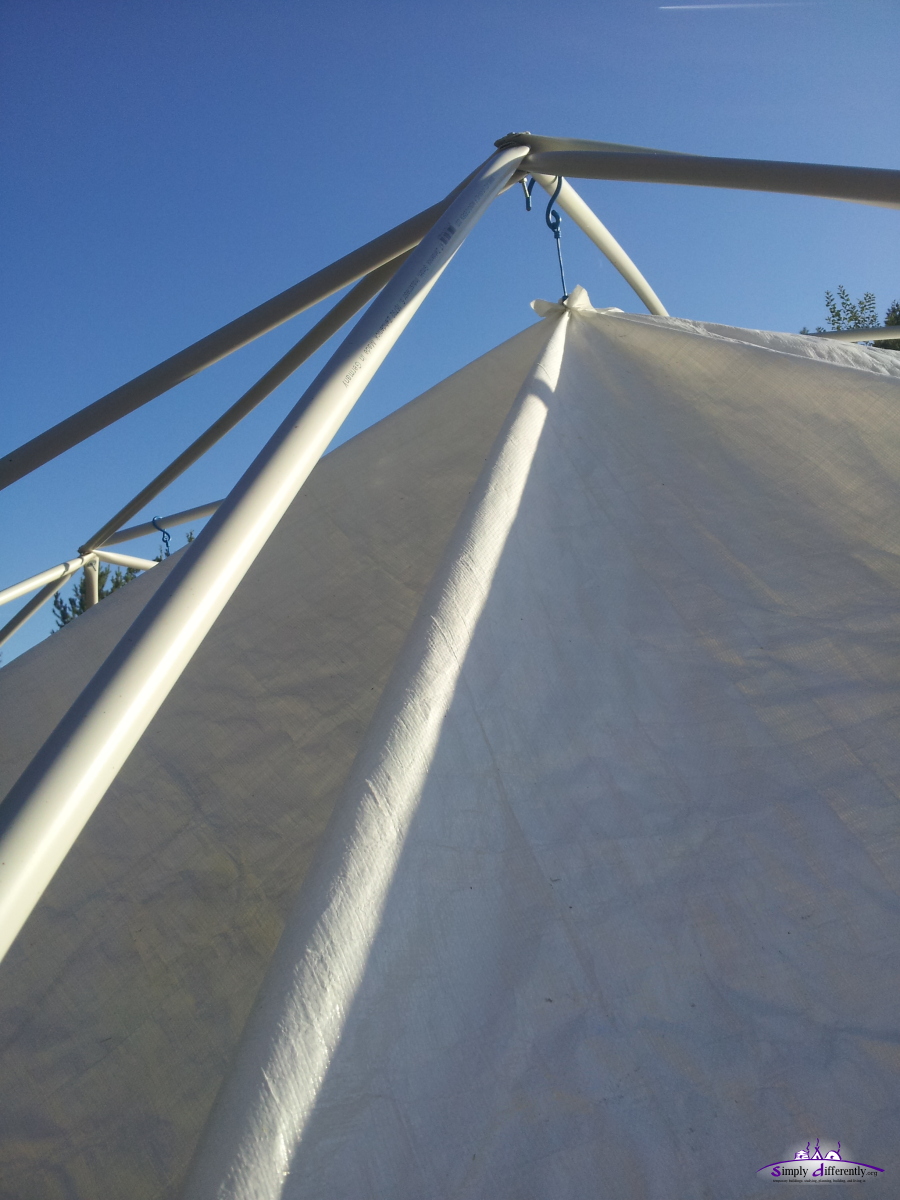 2014/08/30 18:16 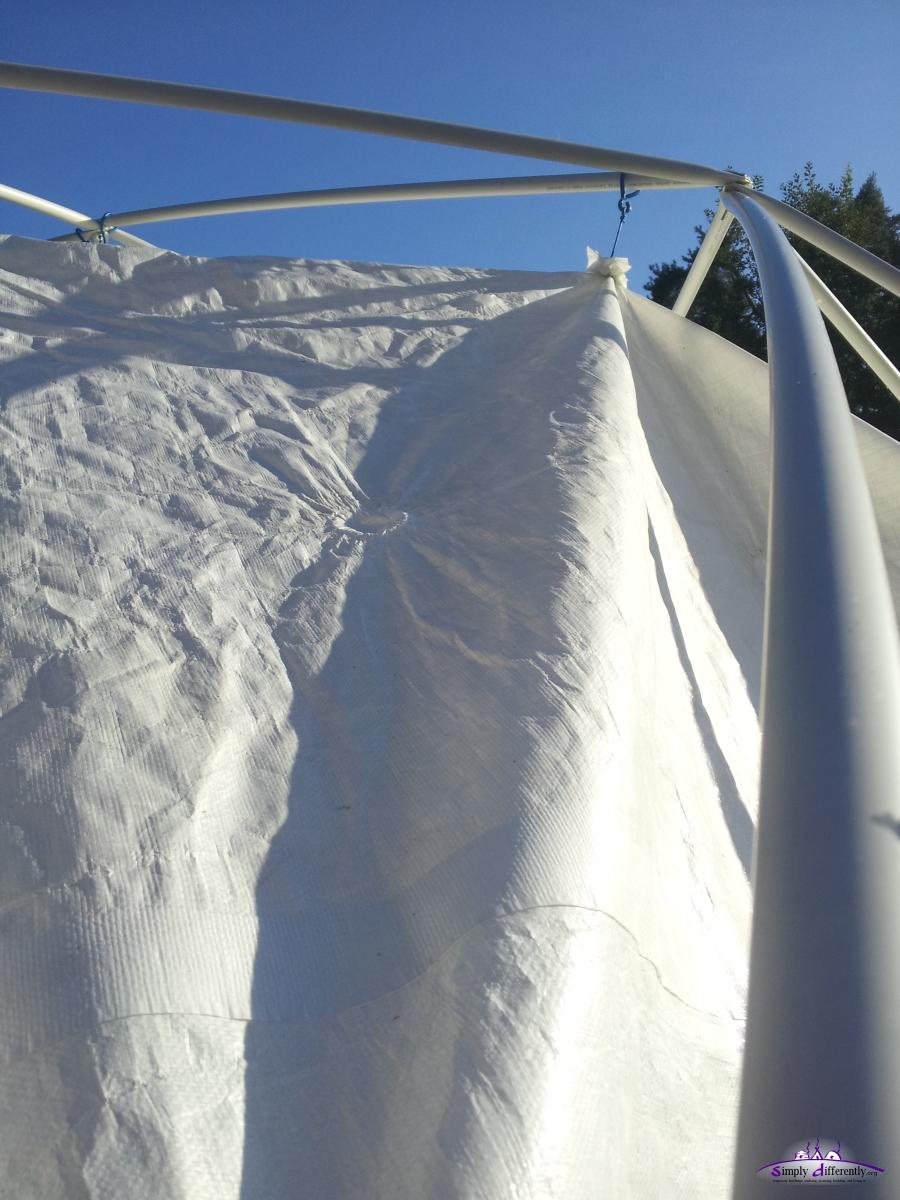 2014/08/30 18:16 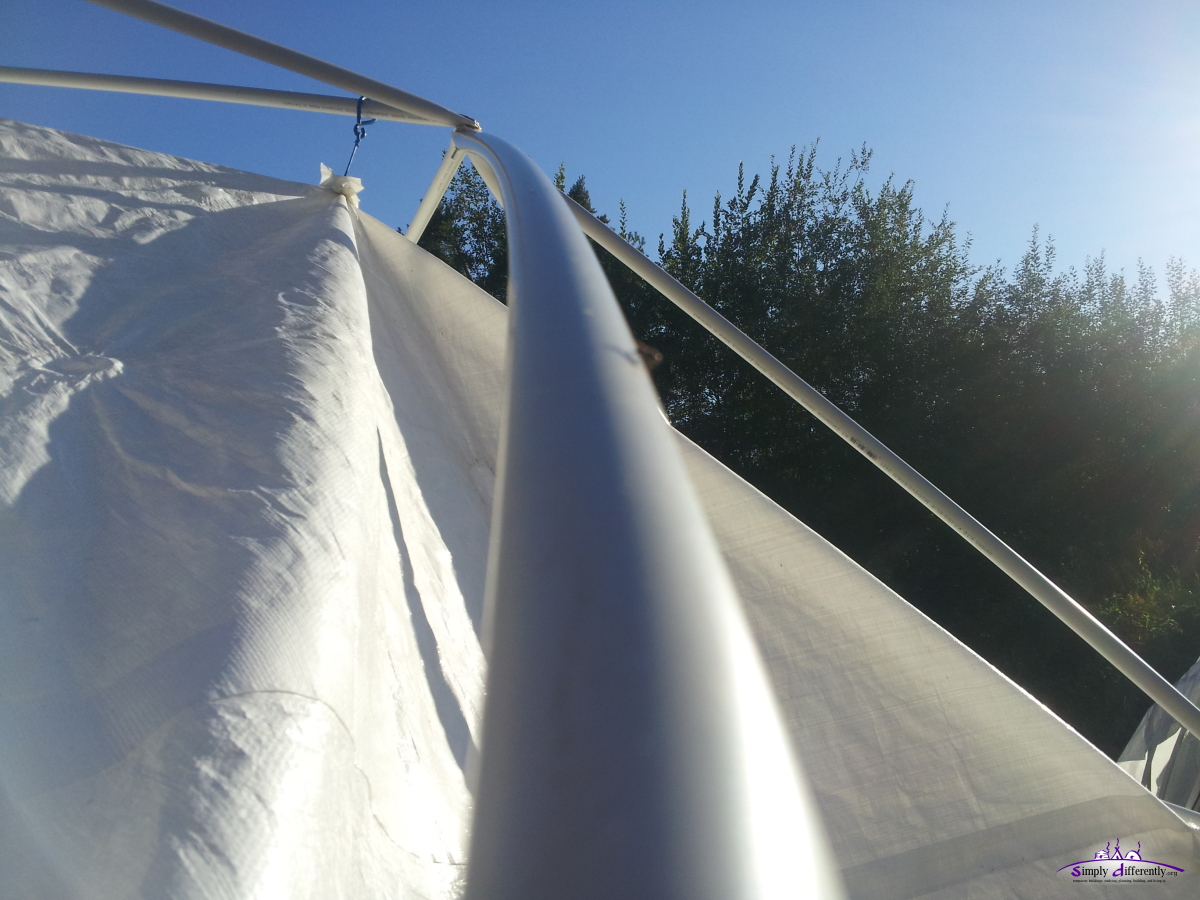 2014/08/30 18:16 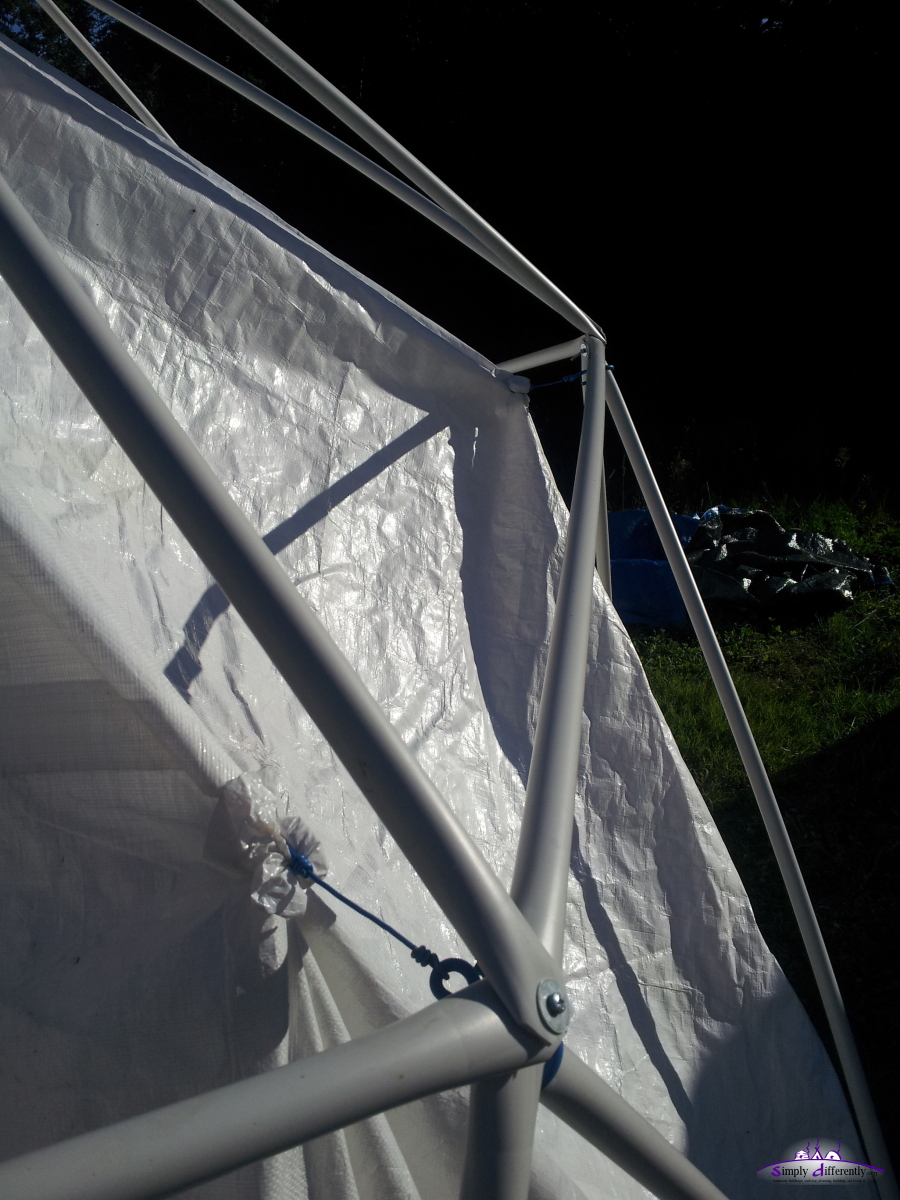 2014/08/30 18:16 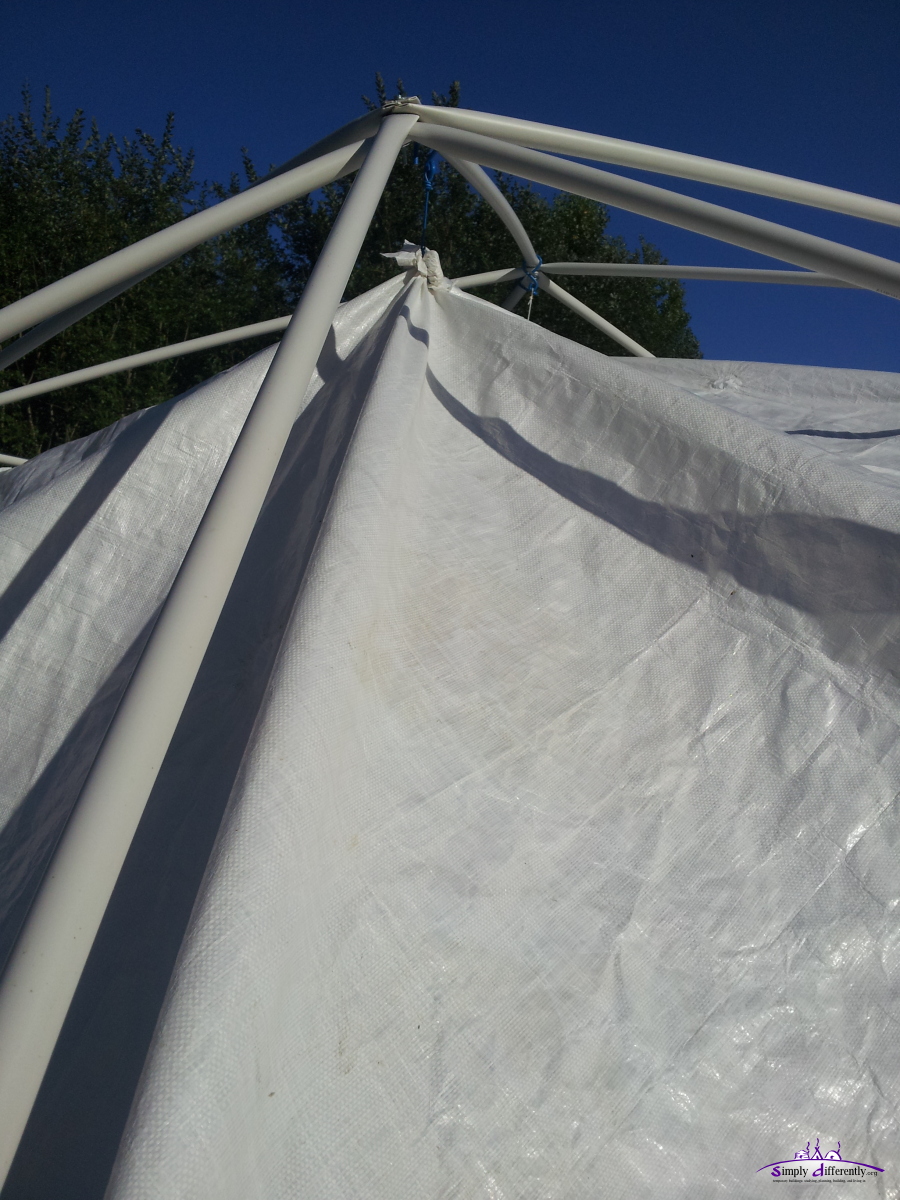 2014/08/30 18:16 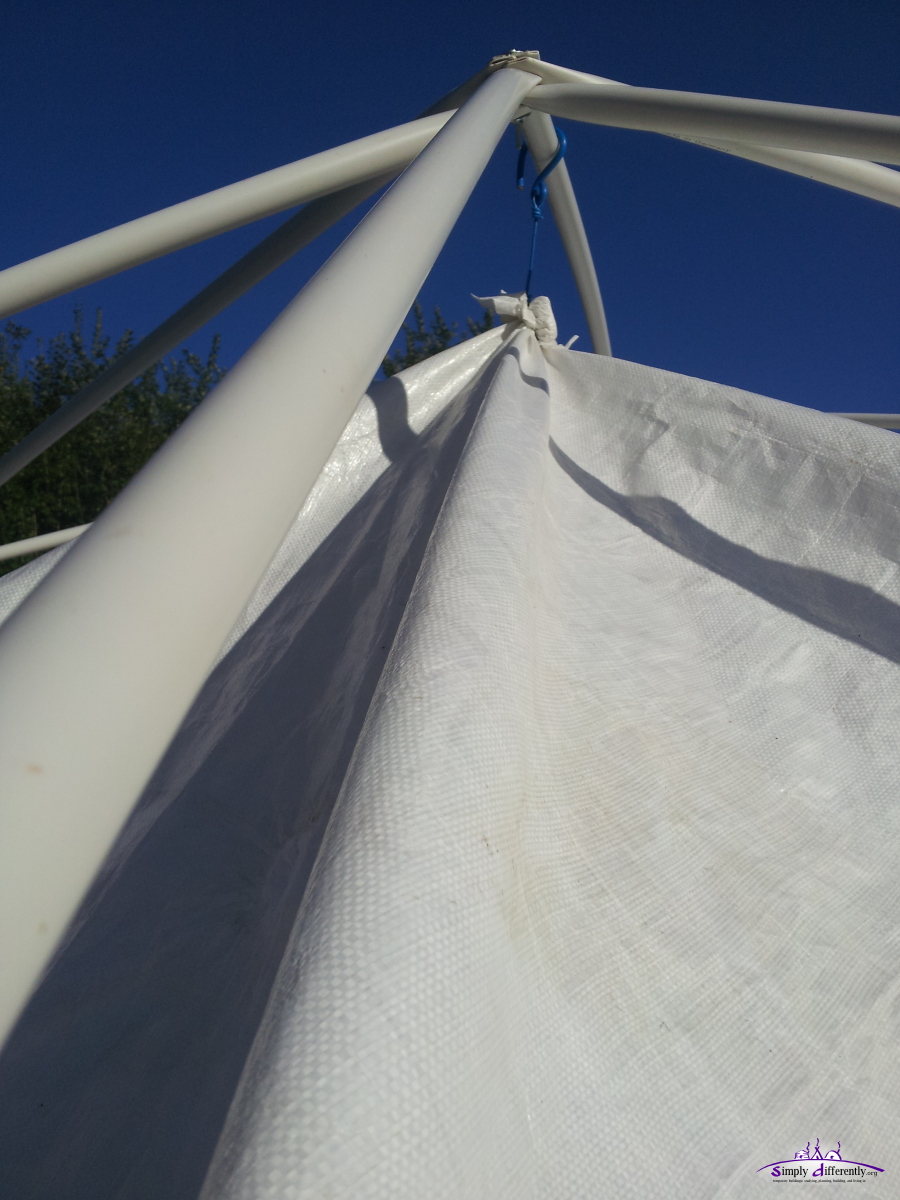 2014/08/30 18:17 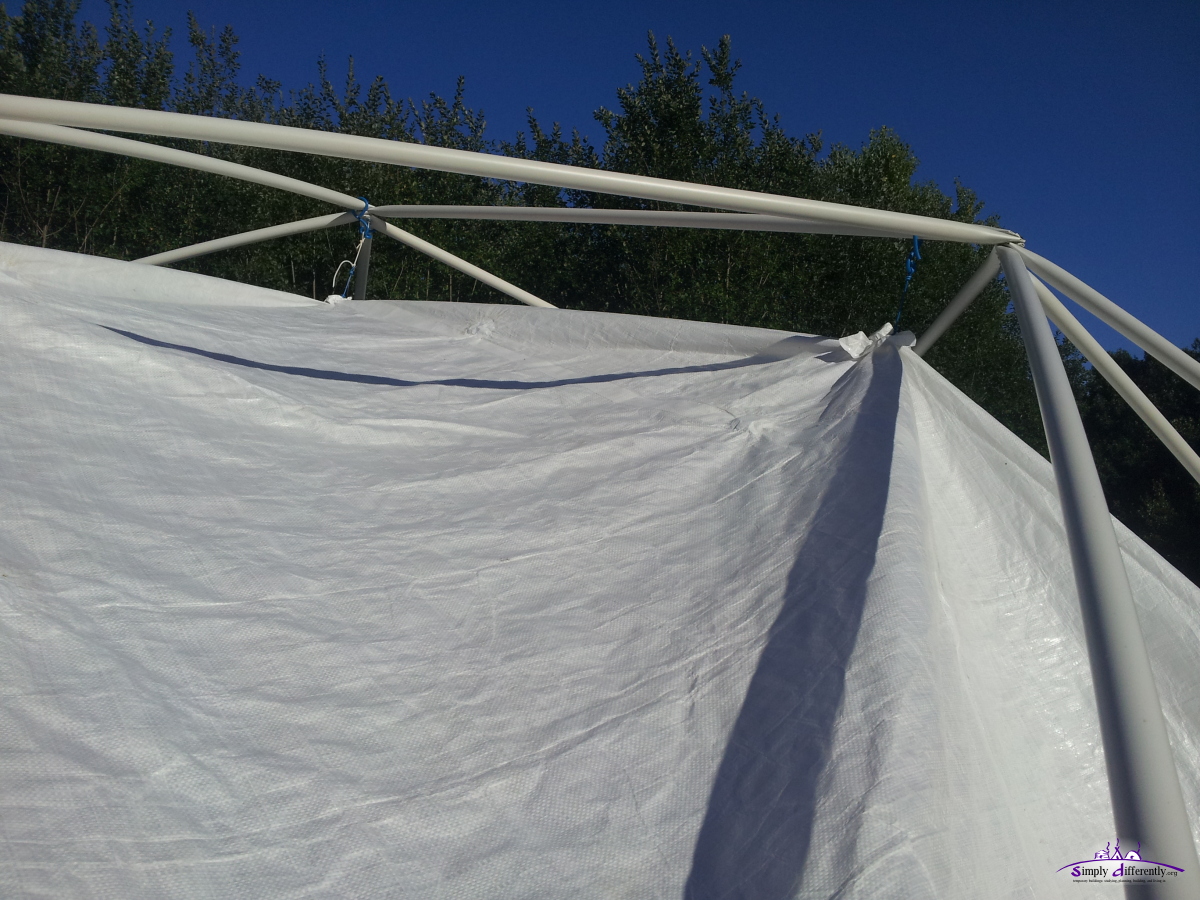 2014/08/30 18:17 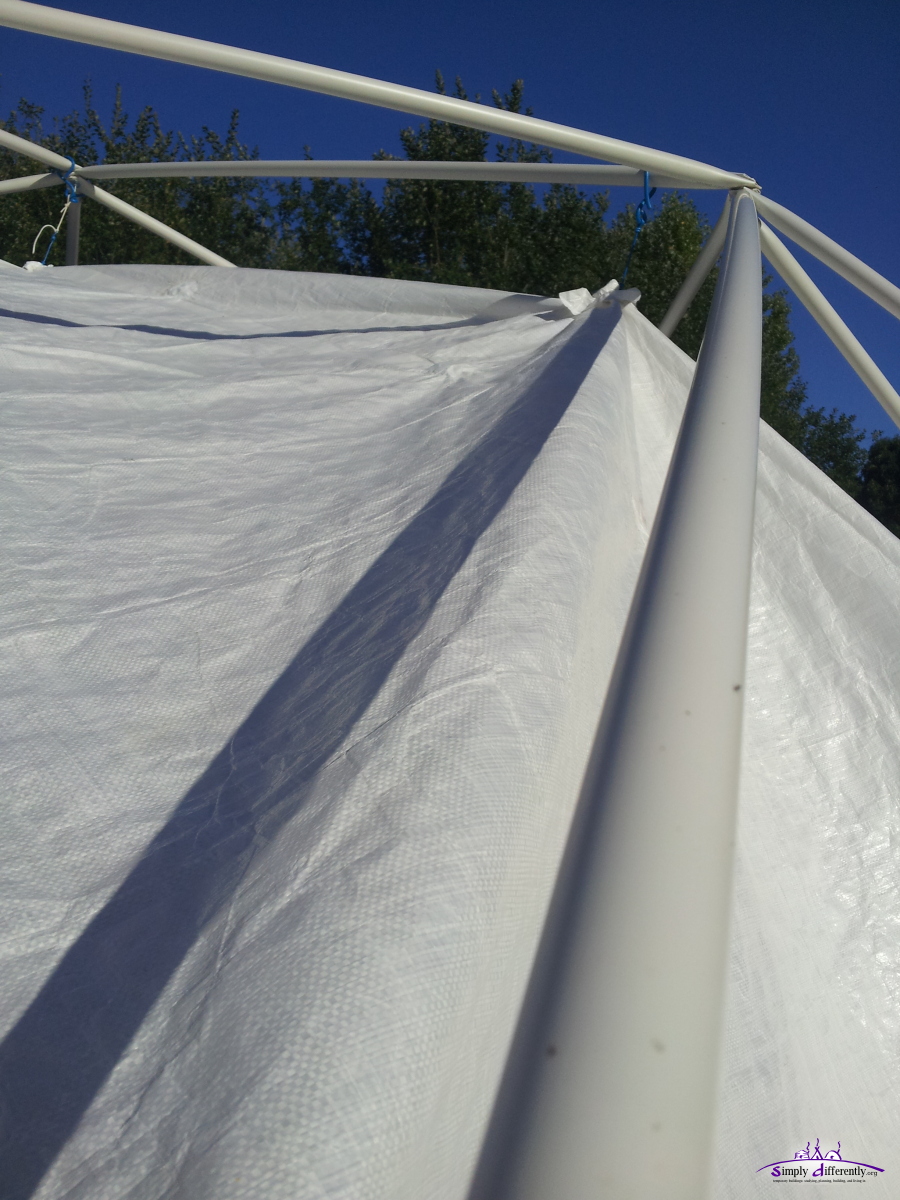 2014/08/30 18:17 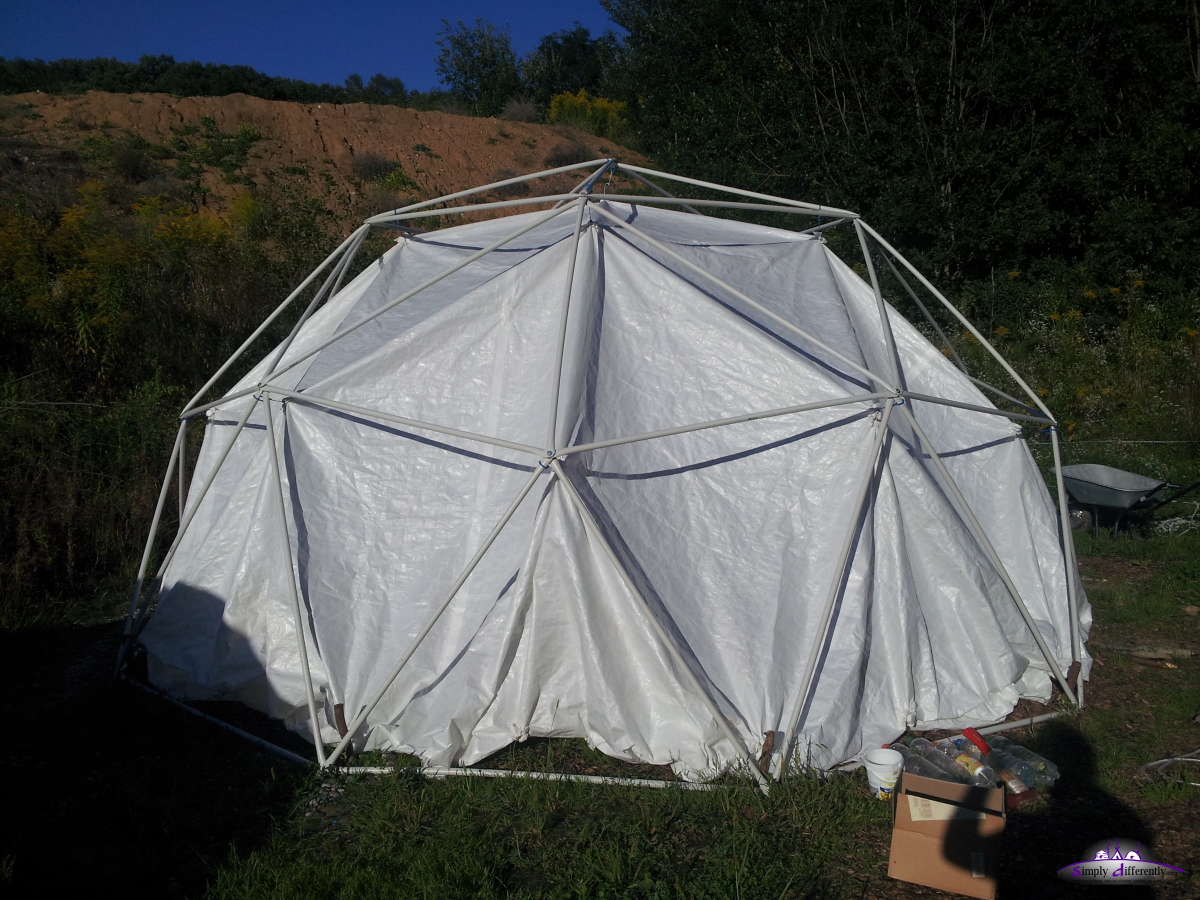 2014/08/30 18:17  2014/08/30 18:17 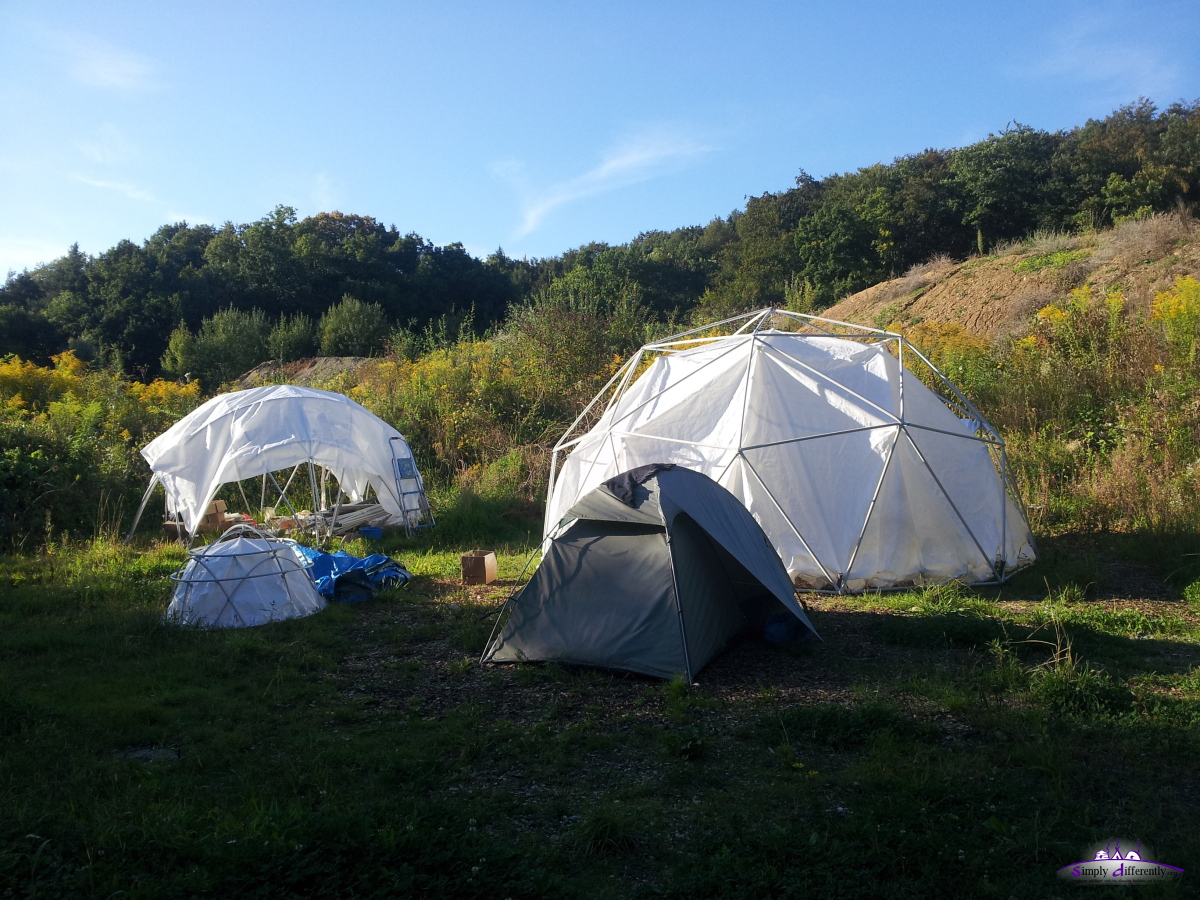 2014/08/30 18:17  2014/08/30 18:18
29. 8. 2014: Moving LC DomeMoving the LC 3:3:2 4m "storage" dome to make place for 5m 2v icosa geodesic dome last 3rd stage: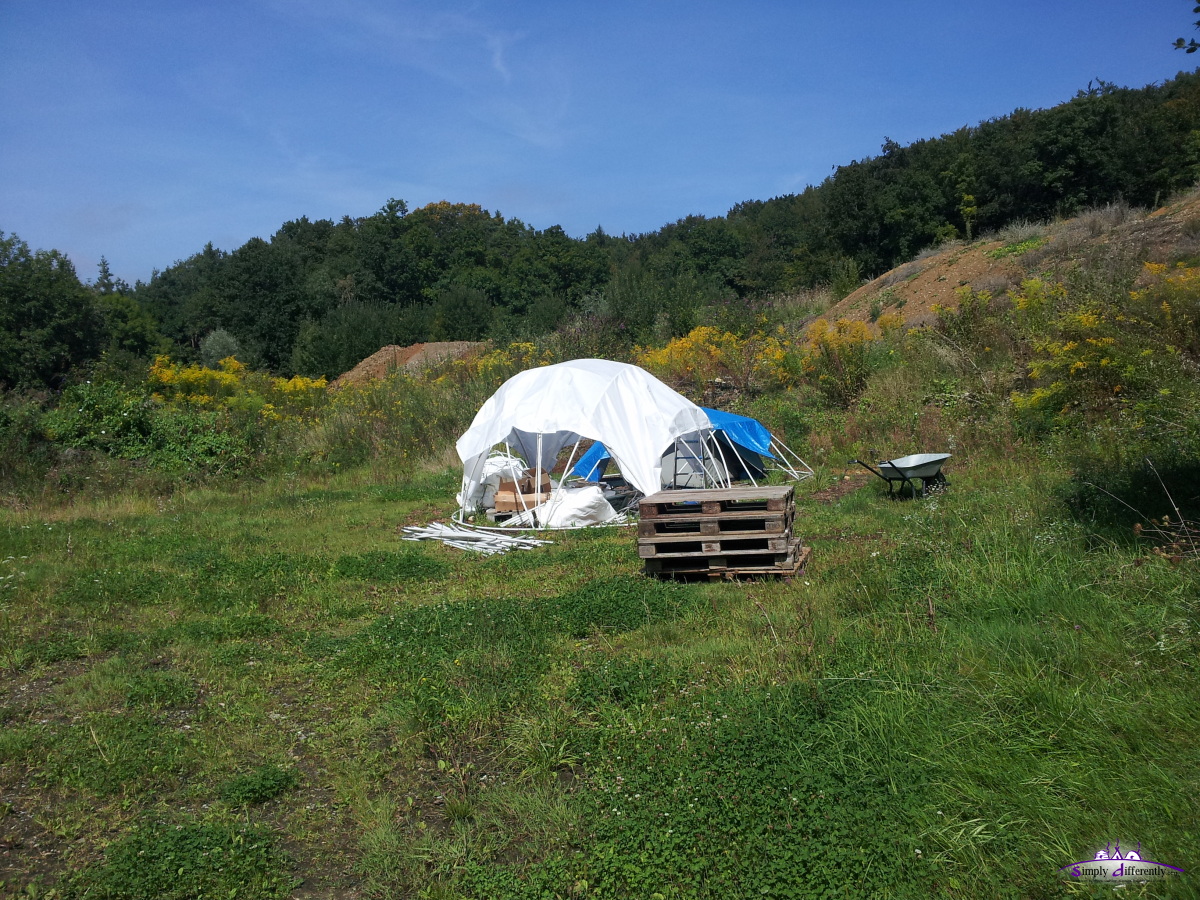 2014/08/28 12:32 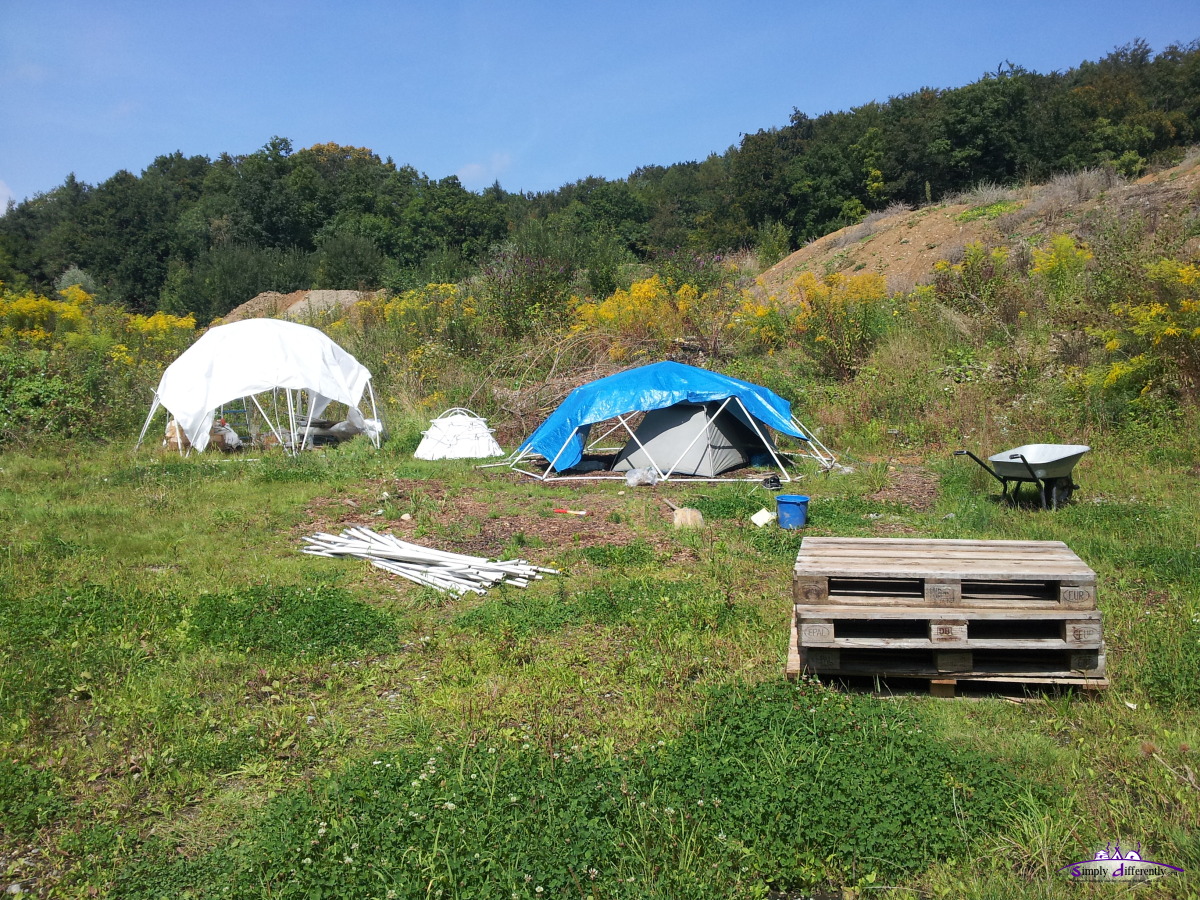 2014/08/28 13:18 19. 8. 2014: 2nd Stage of 5m 2v Icosa PVC DomeFor the 6x way edges I used M4 x 60mm screws, the longest I've got - it was challenging at first, but realized to screw already without nut and squeeze the first 4-5 pipes, before putting the last underneath.
 2014/08/19 14:23 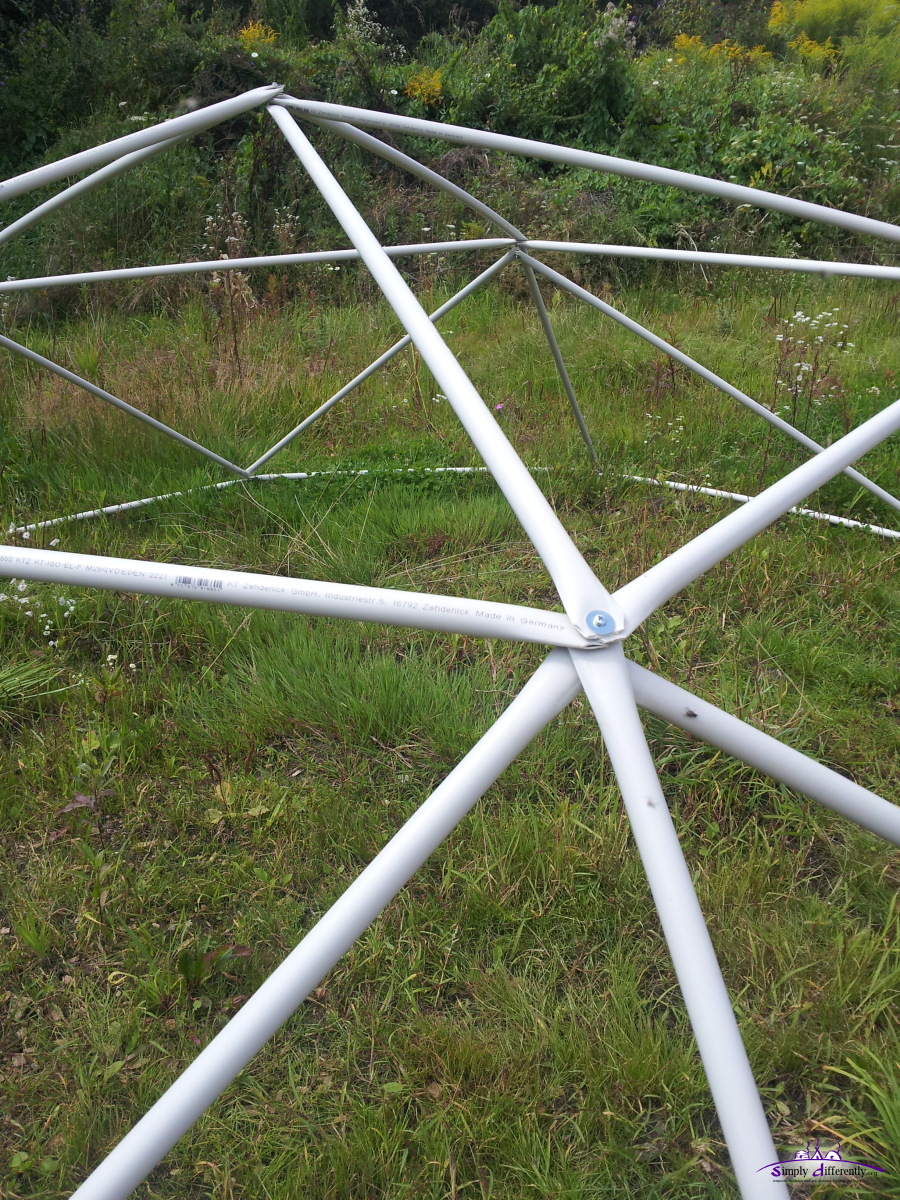 2014/08/19 14:23 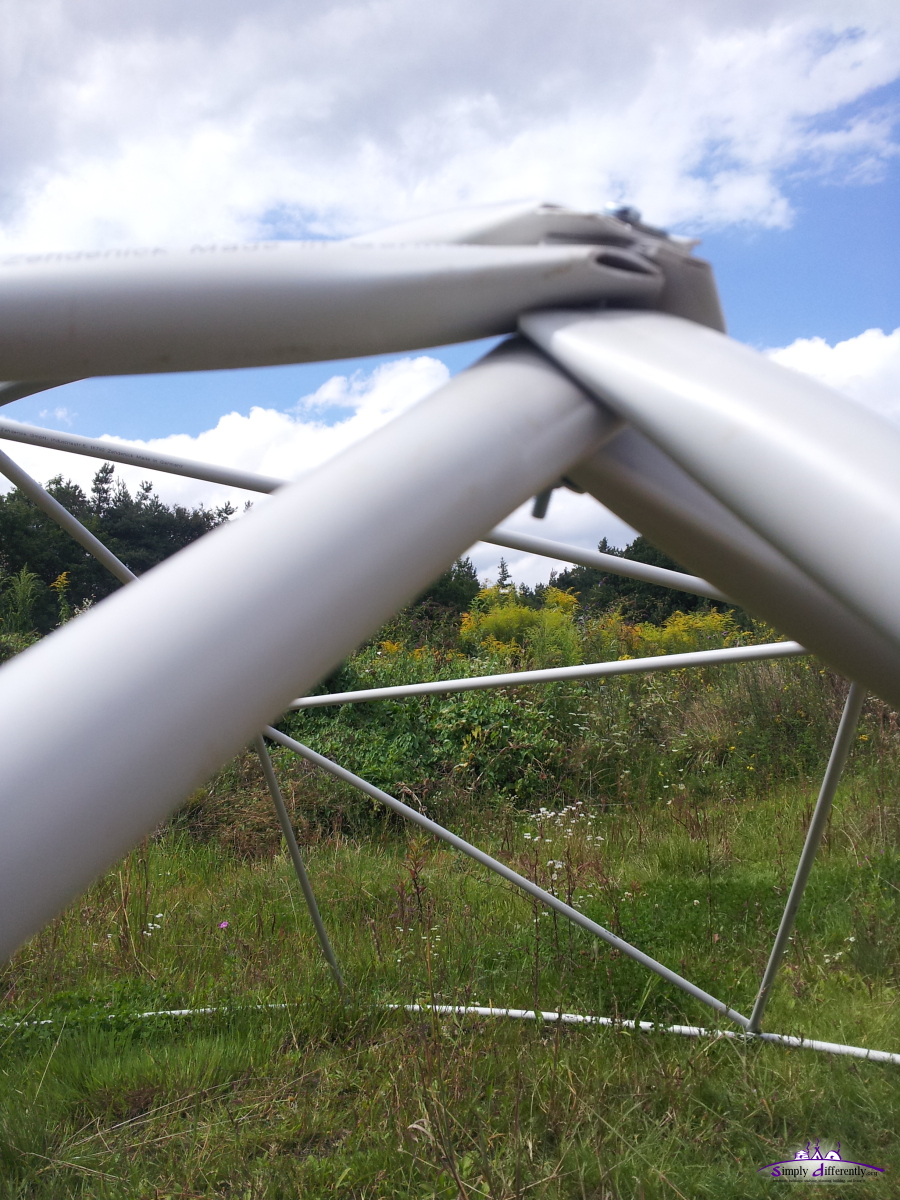 2014/08/19 14:23 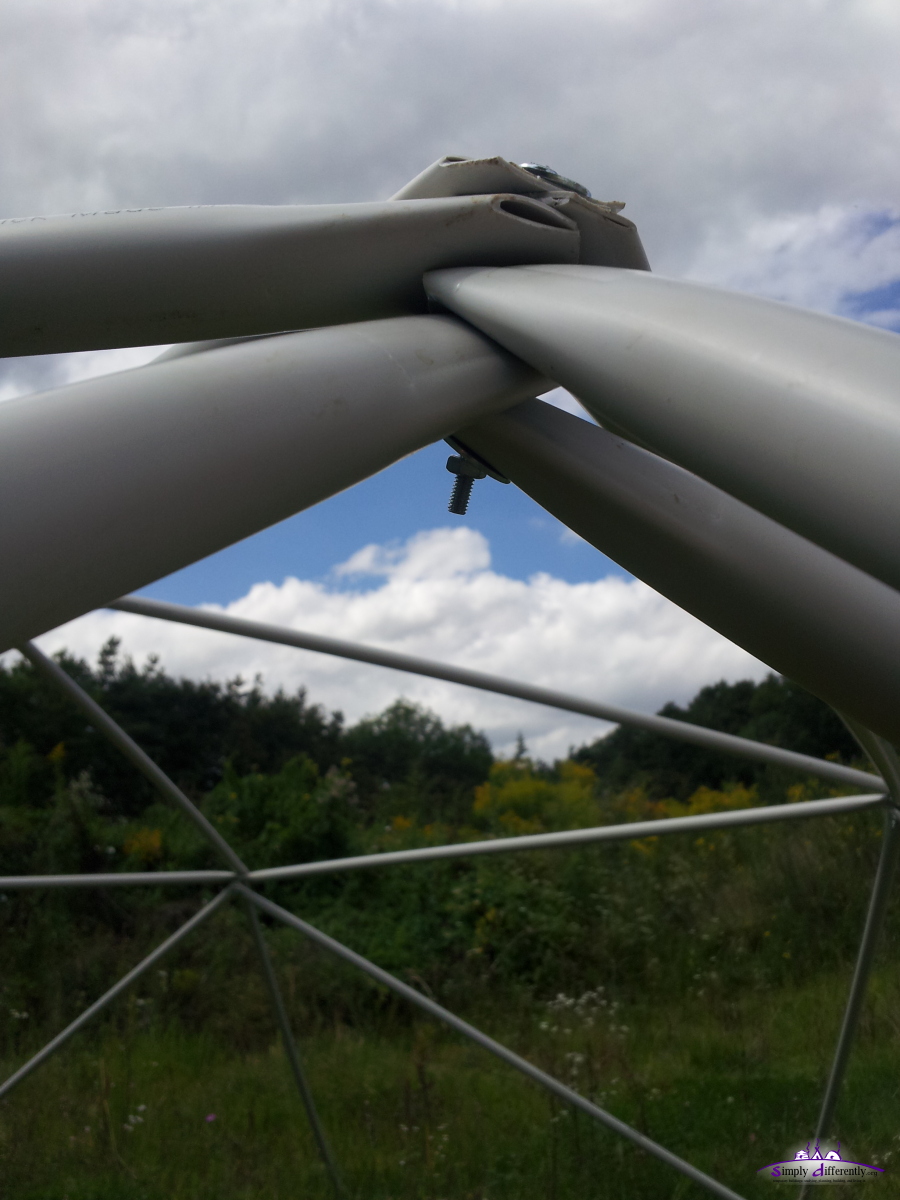 2014/08/19 14:24 Still need to wait for the other pipes to straighten out, then the last 3rd stage the bottom ring I attach. For lightweight geodesic domes it's fine to start at the top, and attach the pipes or struts as you go - heavier and larger geodesic dome might be more suitable to build from the bottom up, eventually portable ladder or even a crane is required. 16. 8. 2014: Next Steps of 5m 2v Icosa PVC Dome
The M4 x 50mm screws are too short for 6x edges, for 5x they are sufficiently but only with a lot of effort. So, it's M4 x 60mm or M4 x 70mm required, even though after fastening it might use only 50mm length.
The final stage I use PVC pipes which were used for a LC Dome, and all of them were bent and remained bent after dismantle the LC dome - and now straighten them so I can use them again.
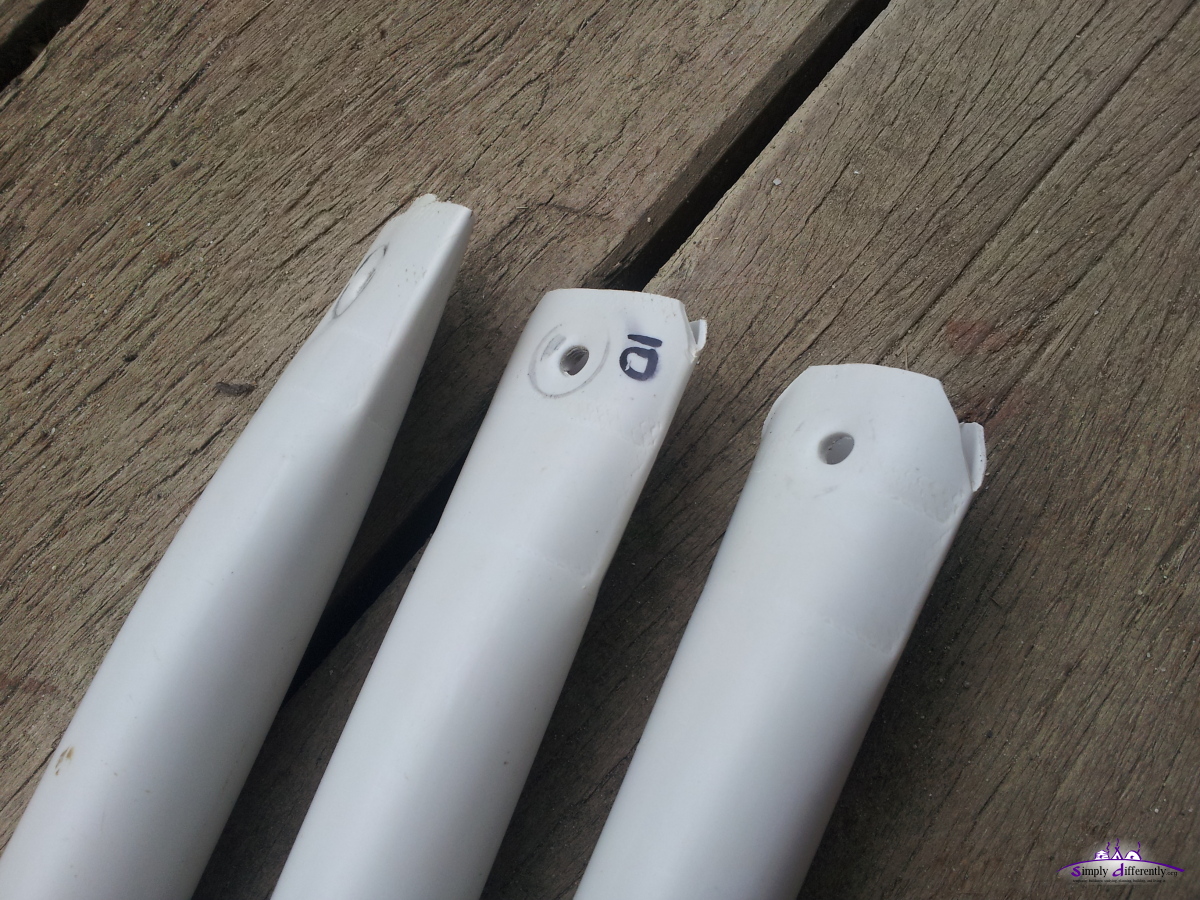
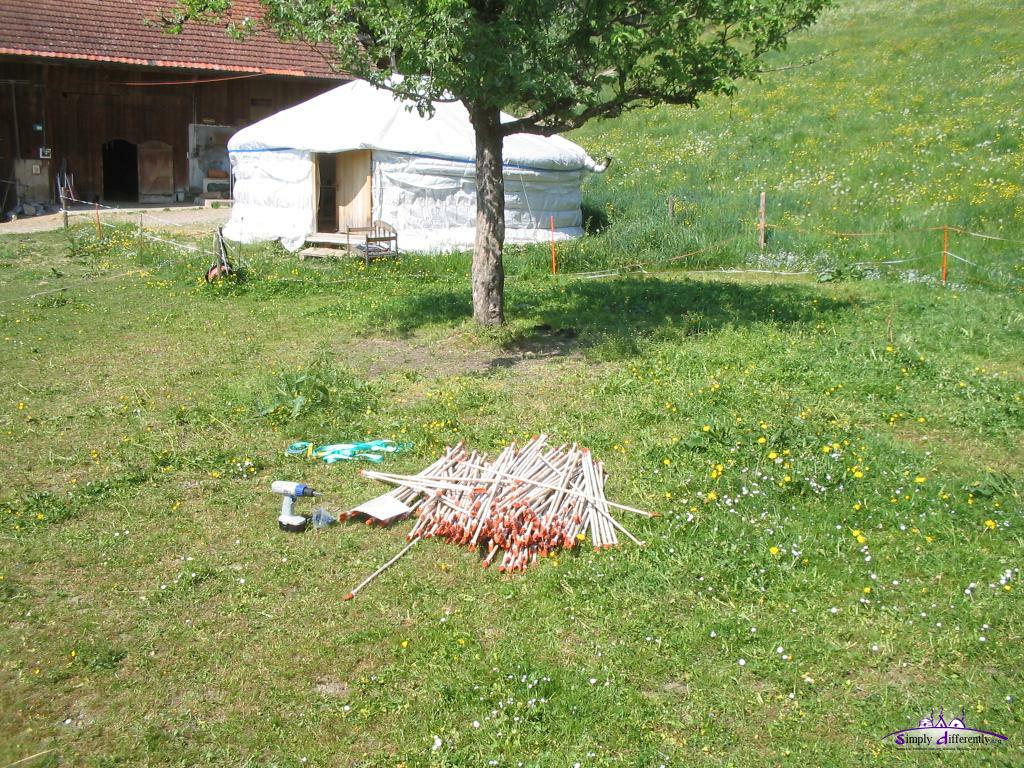
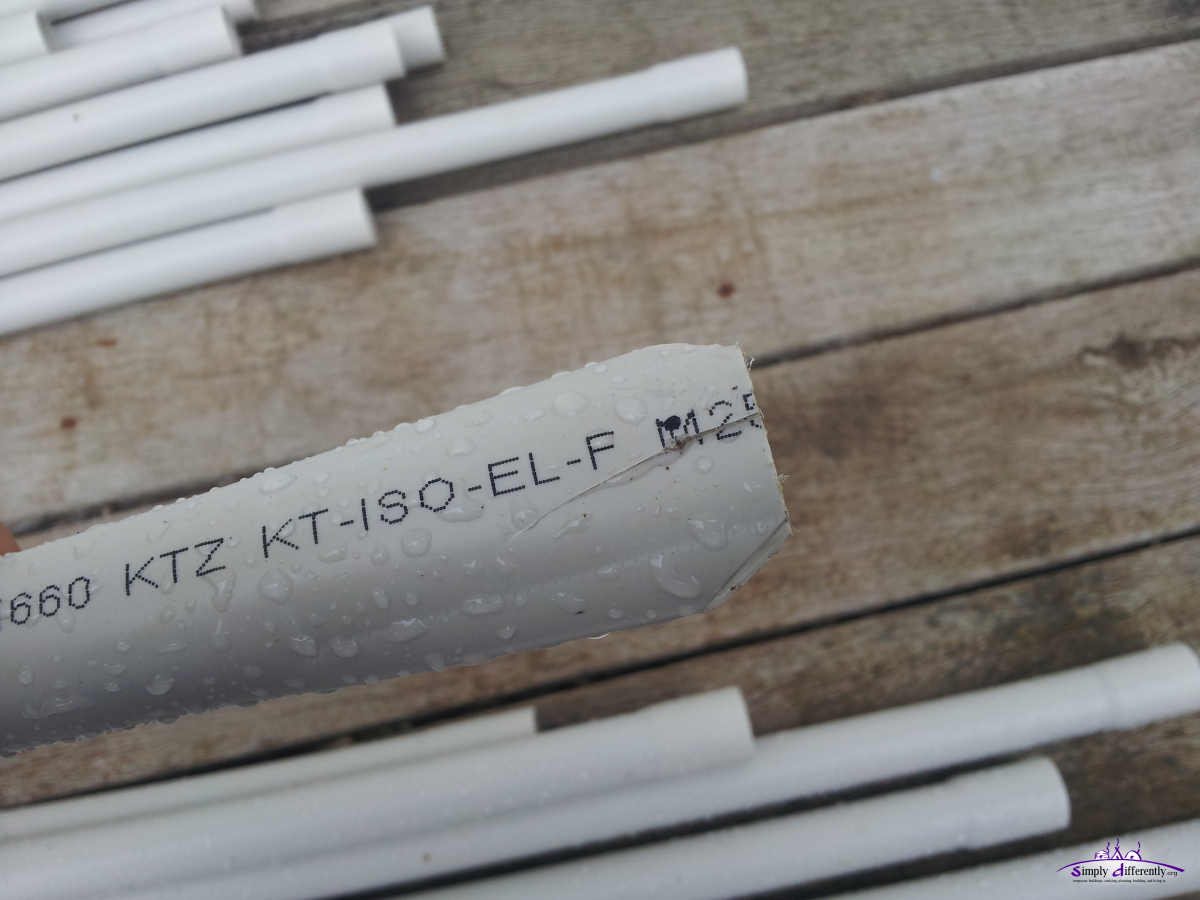
14. 8. 2014: First Steps of 5m 2v Icosa PVC DomeI started with cutting 5x A (1.386m) and 5x B (1.565m) from 2m PVC electric conduits - with the holes 1cm offset at the ends: 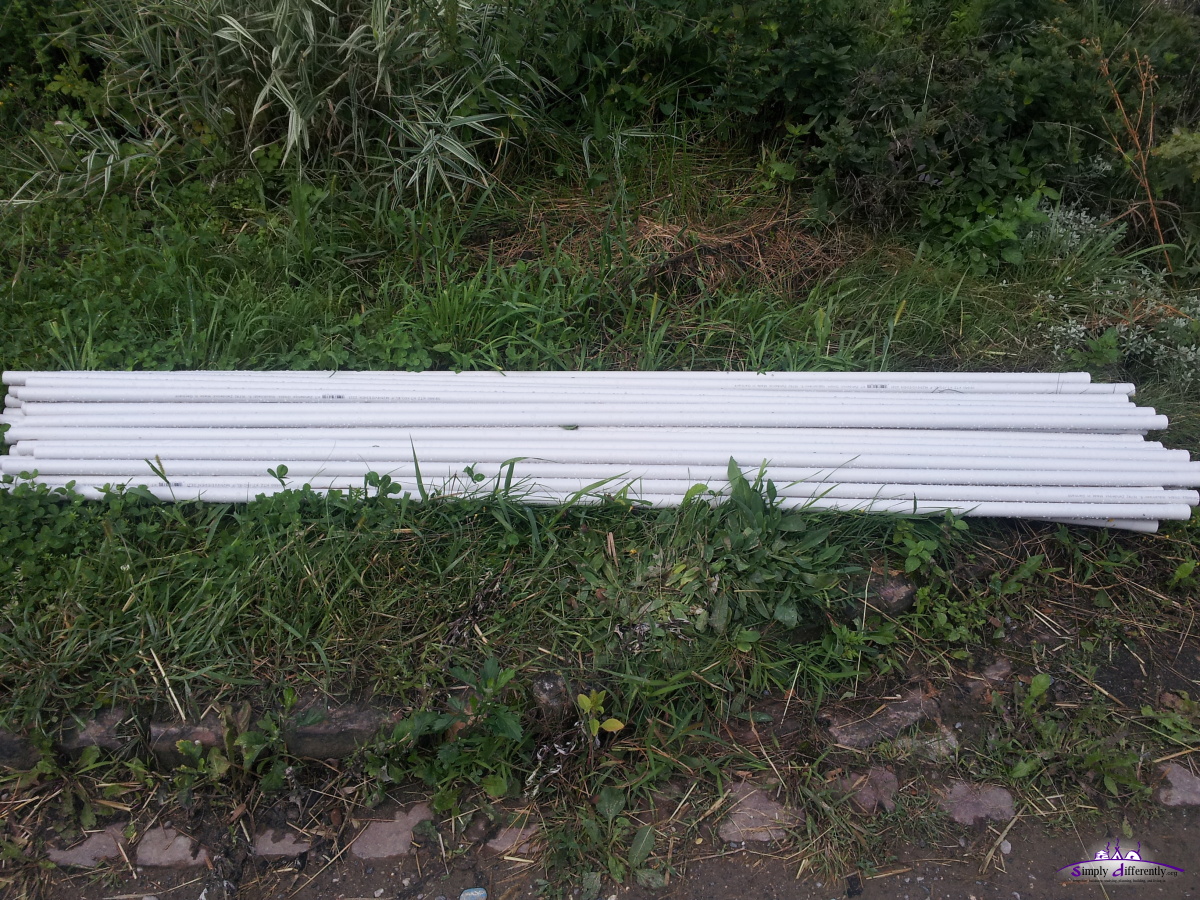 5x 2m PVC electric conduits 2014/08/14 11:26 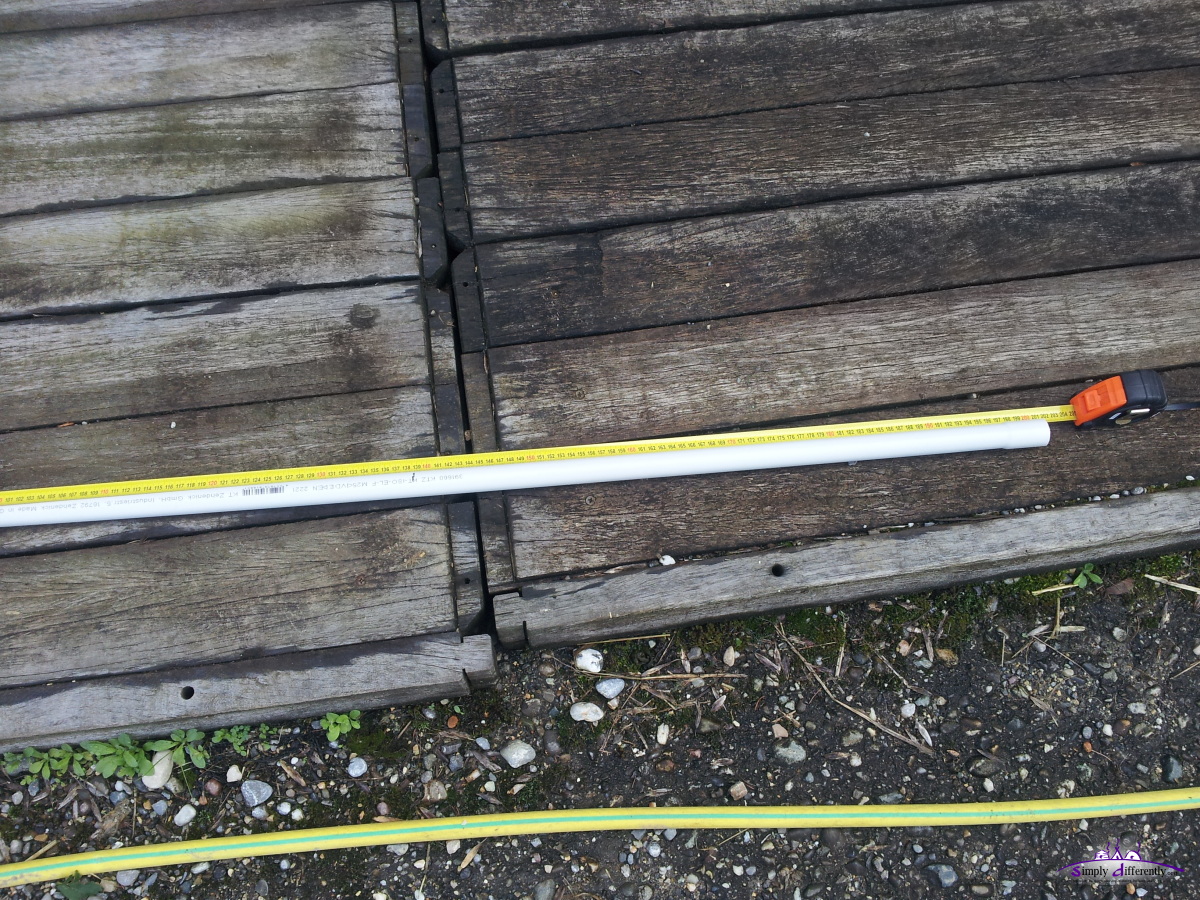 Measure length, 1.386m (A) 2014/08/14 11:26 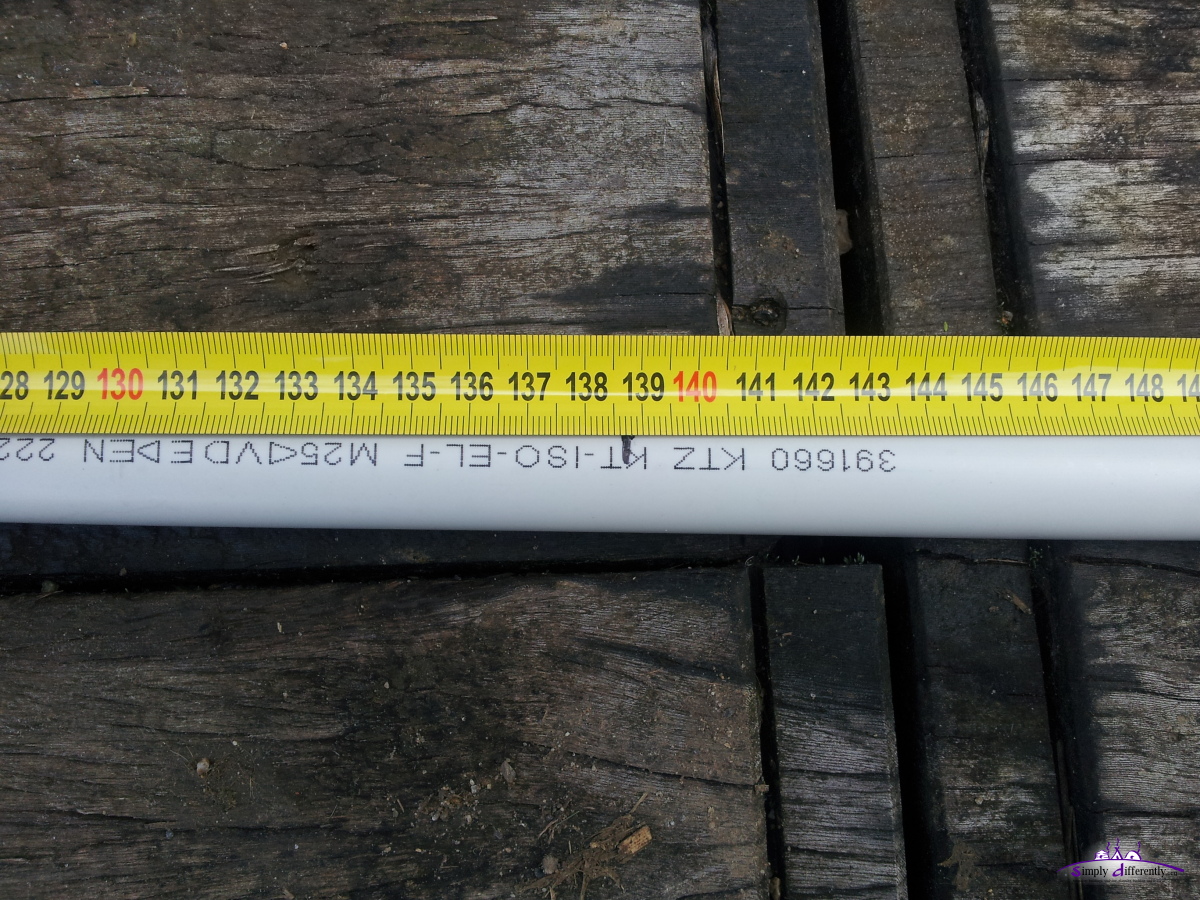 Measure length, 1.386m (A) 2014/08/14 11:26 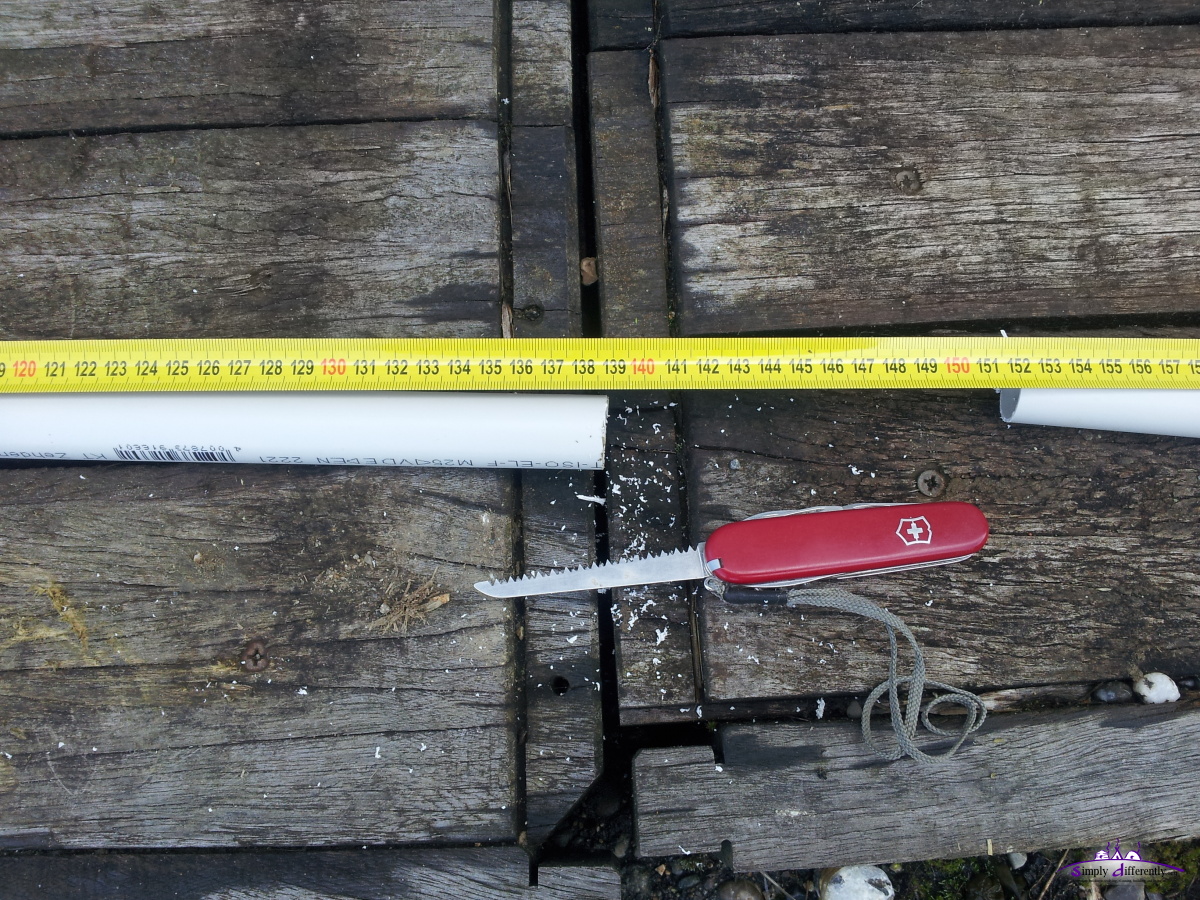 Cutting millimeter exact 2014/08/14 11:31 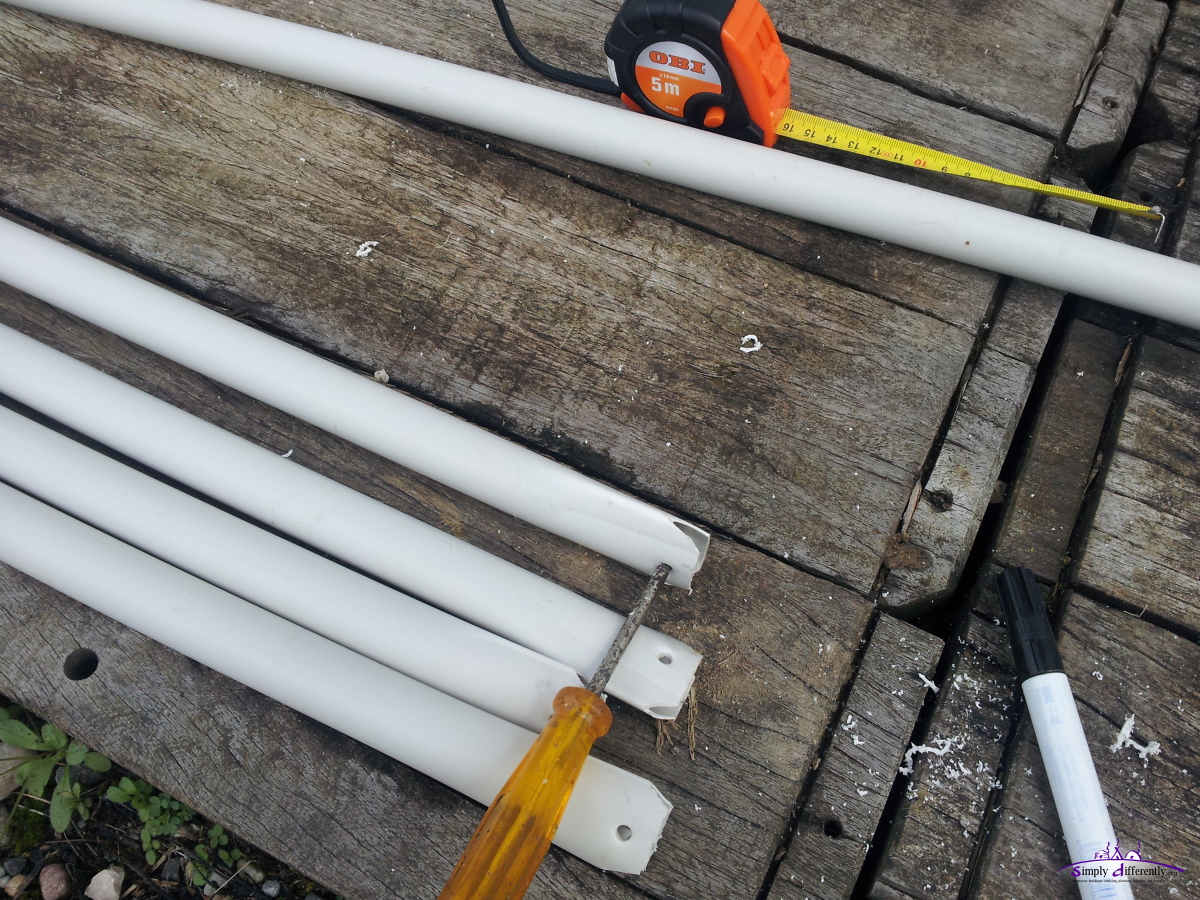 Mangle holes at the ends, 1cm offset 2014/08/14 13:29 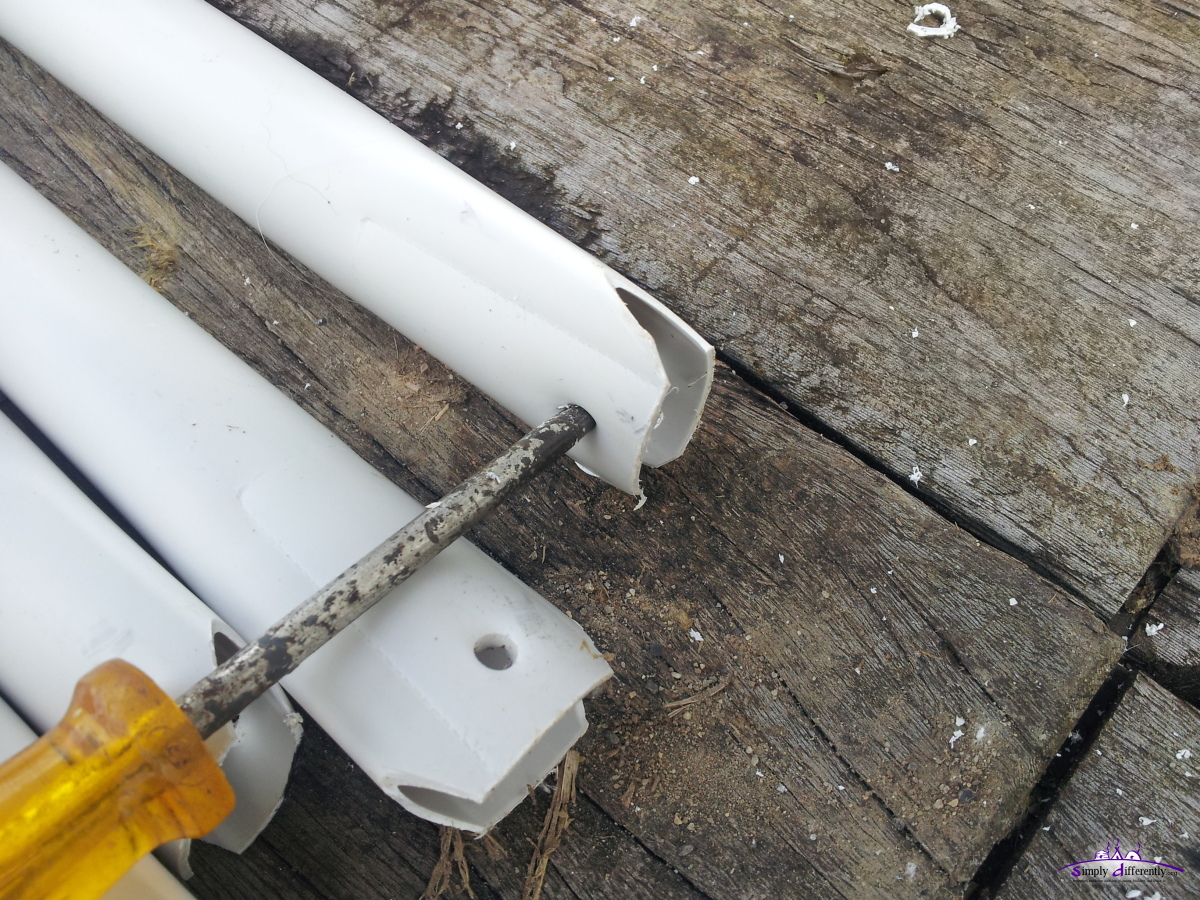 Mangle holes at the ends, 1cm offset (from both sides inside) 2014/08/14 13:29 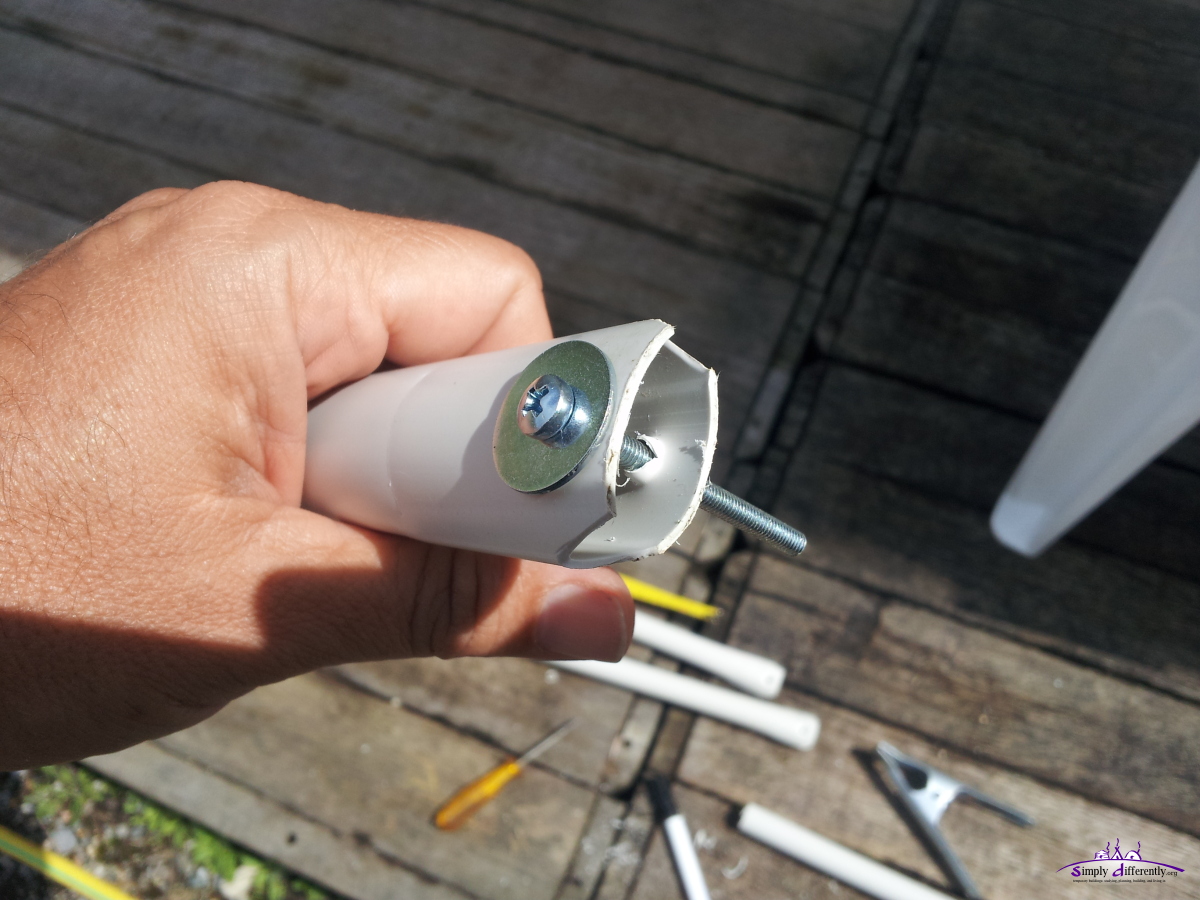 M5 support ring, 5.3 x 20mm, with a M4 x 50mm 2014/08/14 13:31 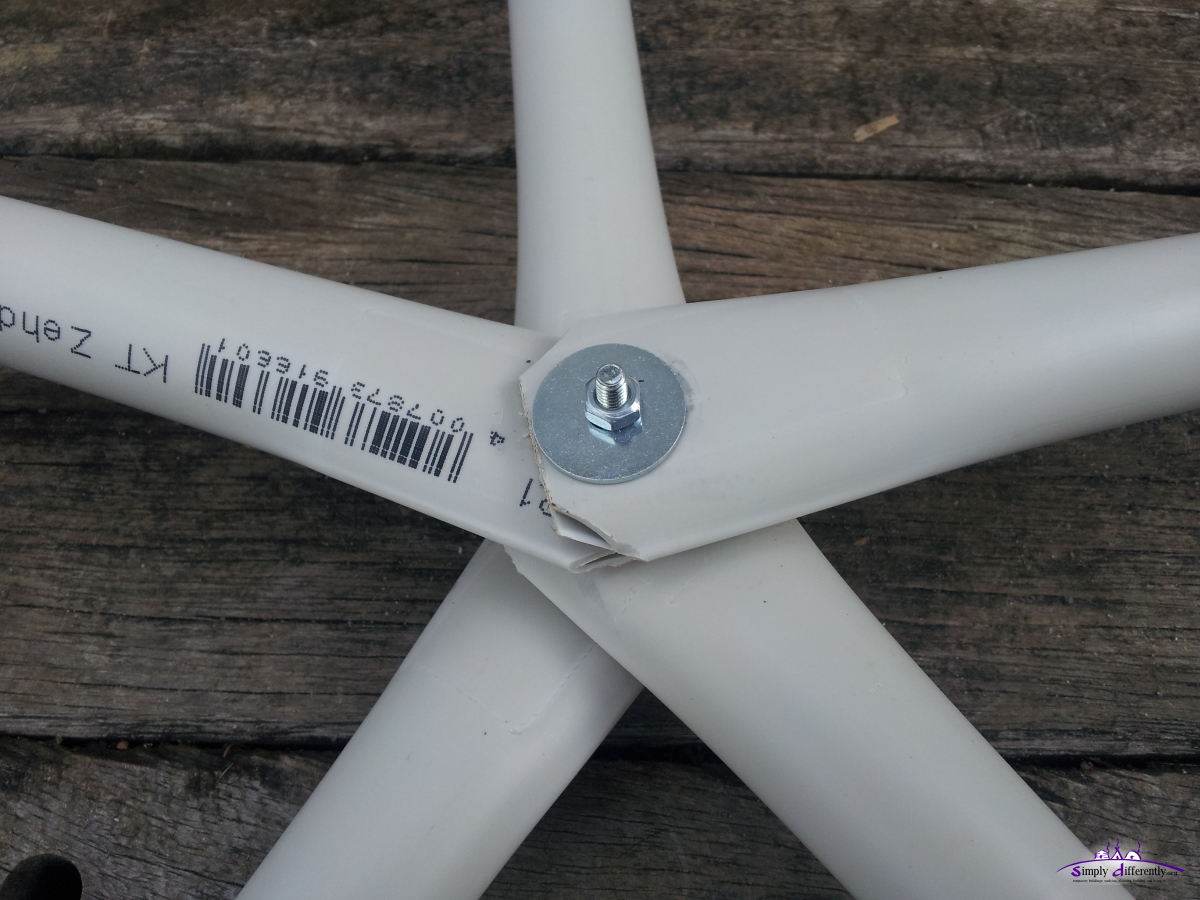 Top edge of the 2v icosa dome 2014/08/14 13:36 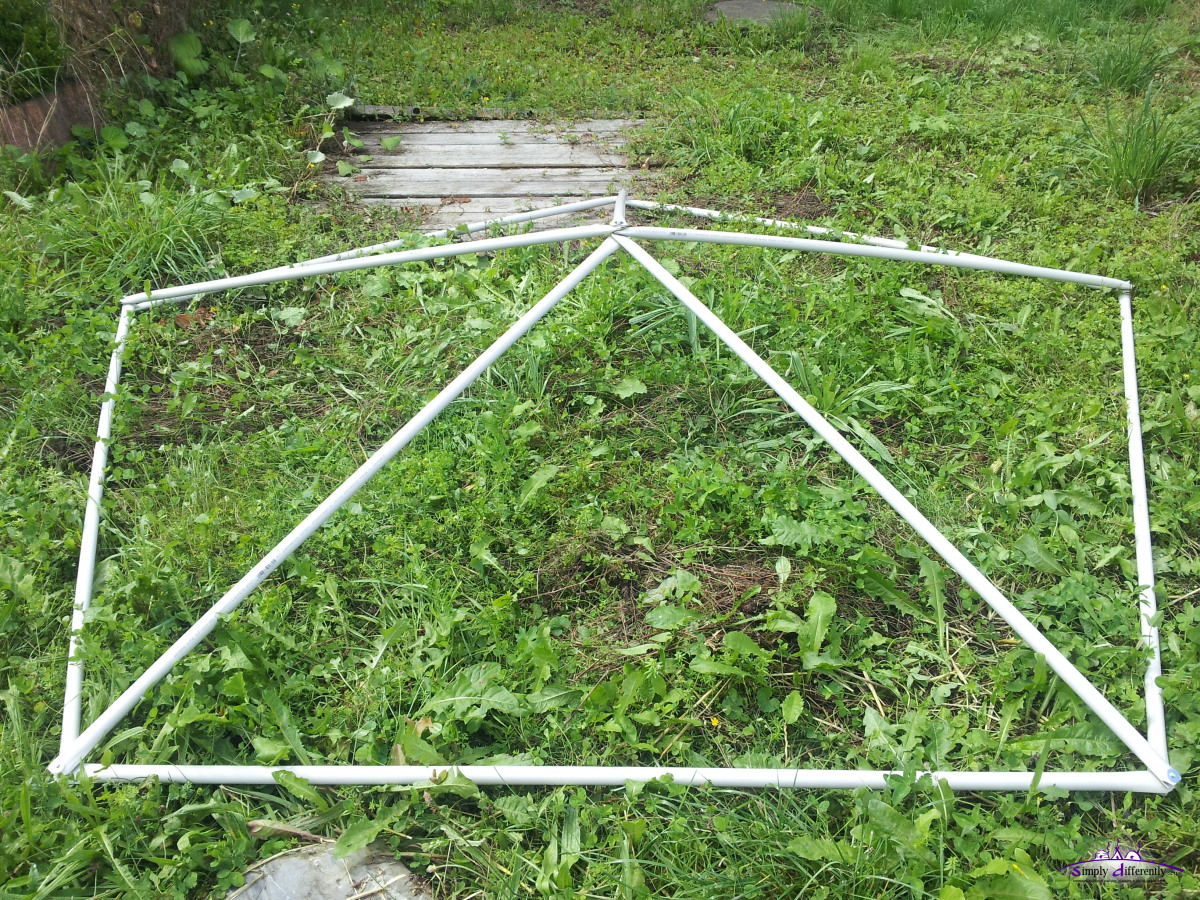 First segment with 5x A with 5x B surrounding 2014/08/14 15:16 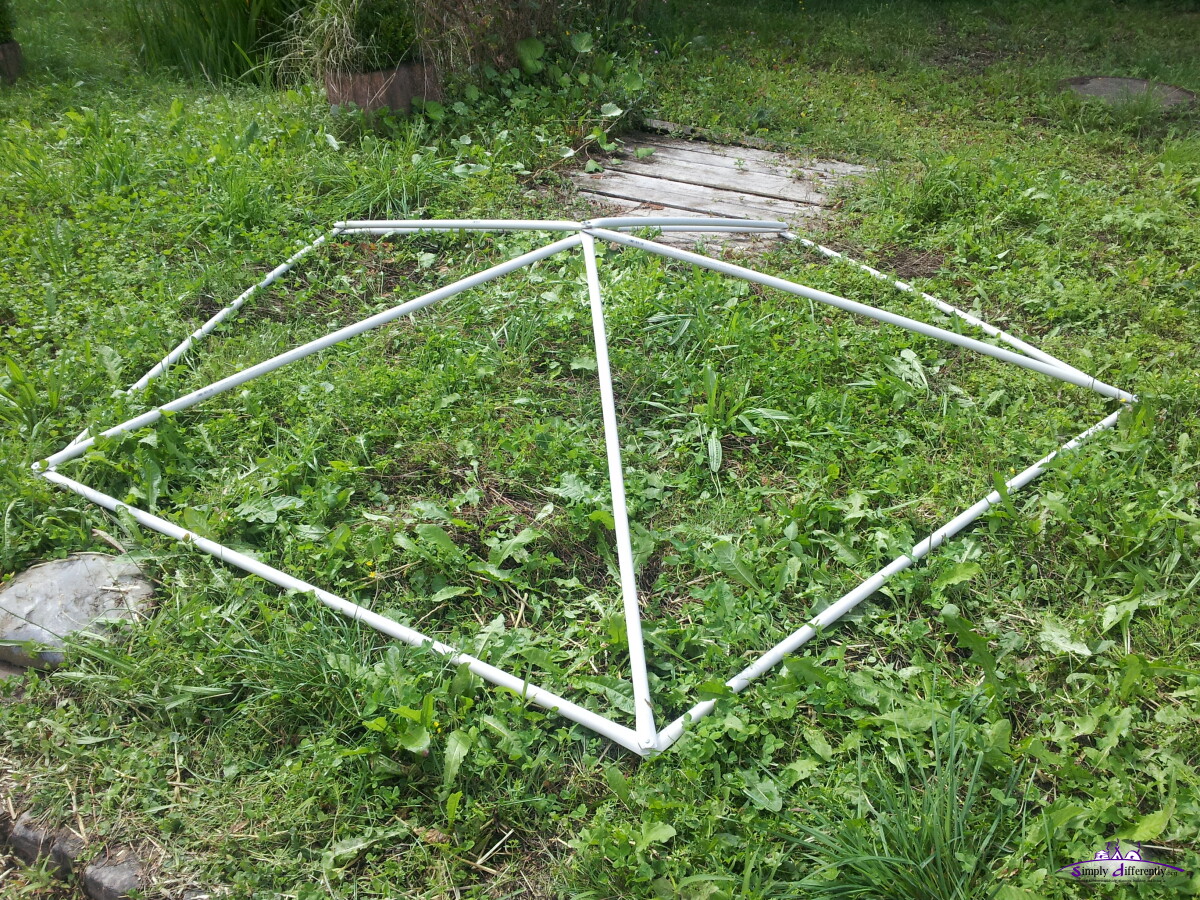 2014/08/14 15:16 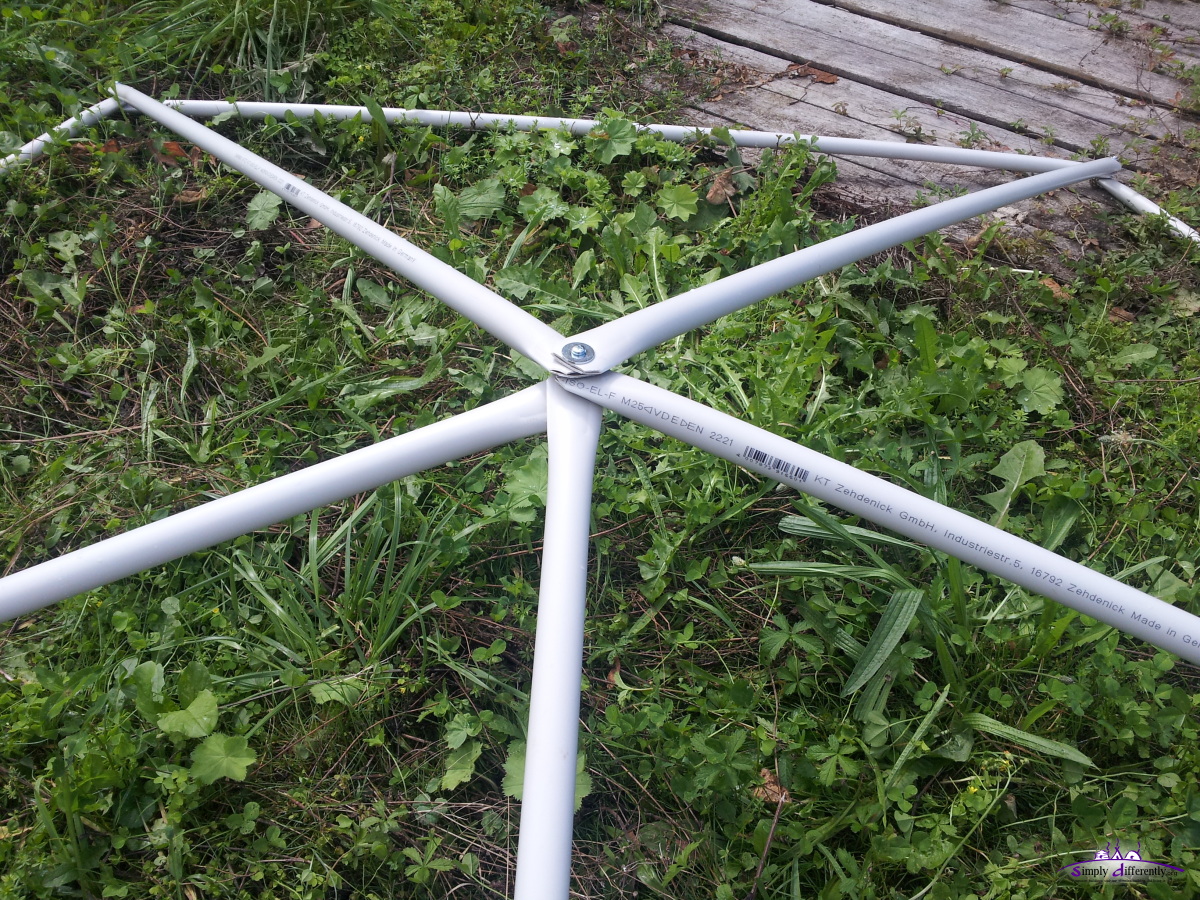 2014/08/14 15:16
Simple Stress Test
I pushed with apprx. 40-50N or 3-4kg on the tip of the segment, and the pipes formed an S slightly - such a single push is unlikely with winds as winds push the entire exposed region.
Reminder for non-metric people: 1m (meter) = 100cm (centimeter) = 1000mm (millimeter)
10. 8. 2014: Hubless with PVC Pipes (continued)
 Edges: a) no cut, b) slight cut, c) more cut ("duck beak") 2014/08/10 14:46 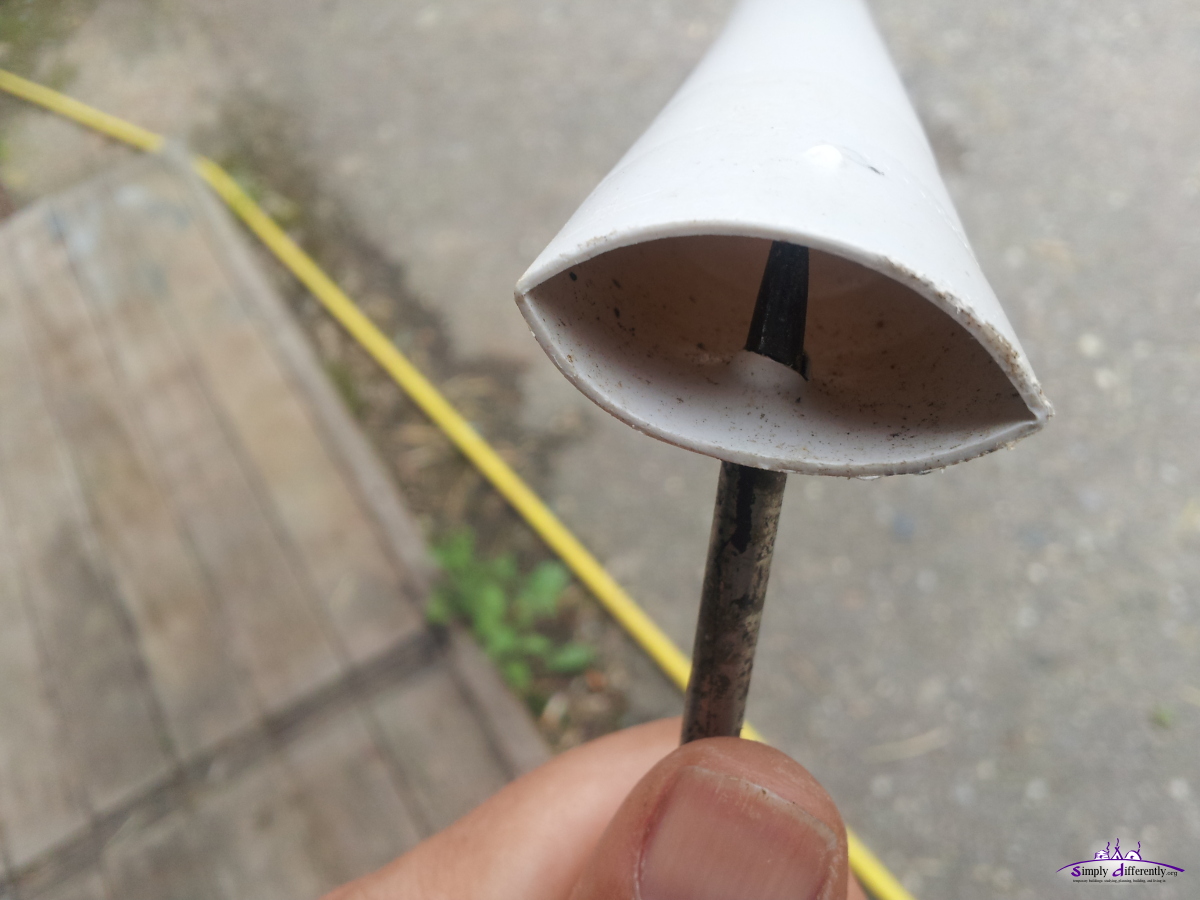 Mangle a hole with an awl from one side 2014/08/10 14:50 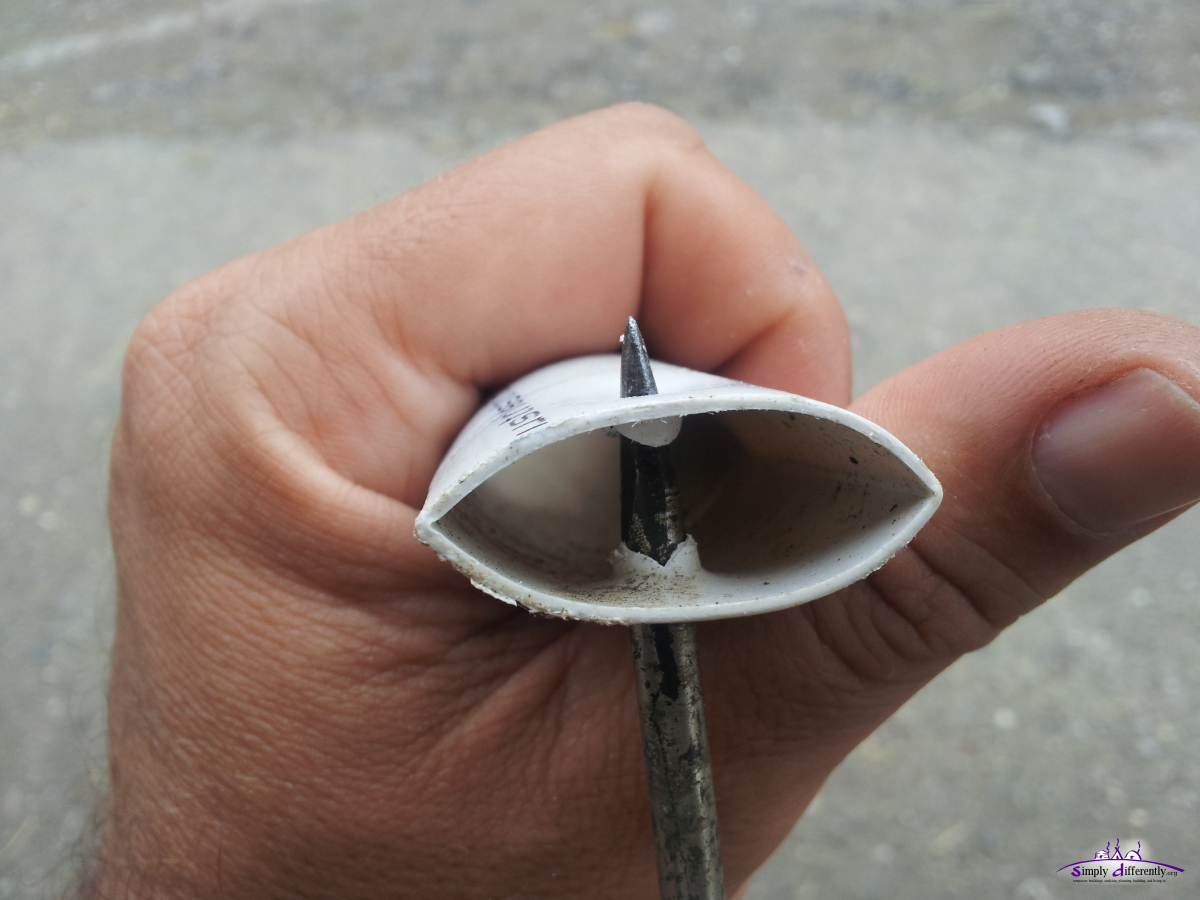 From the other side (see material pushed inside from both sides) 2014/08/10 14:51 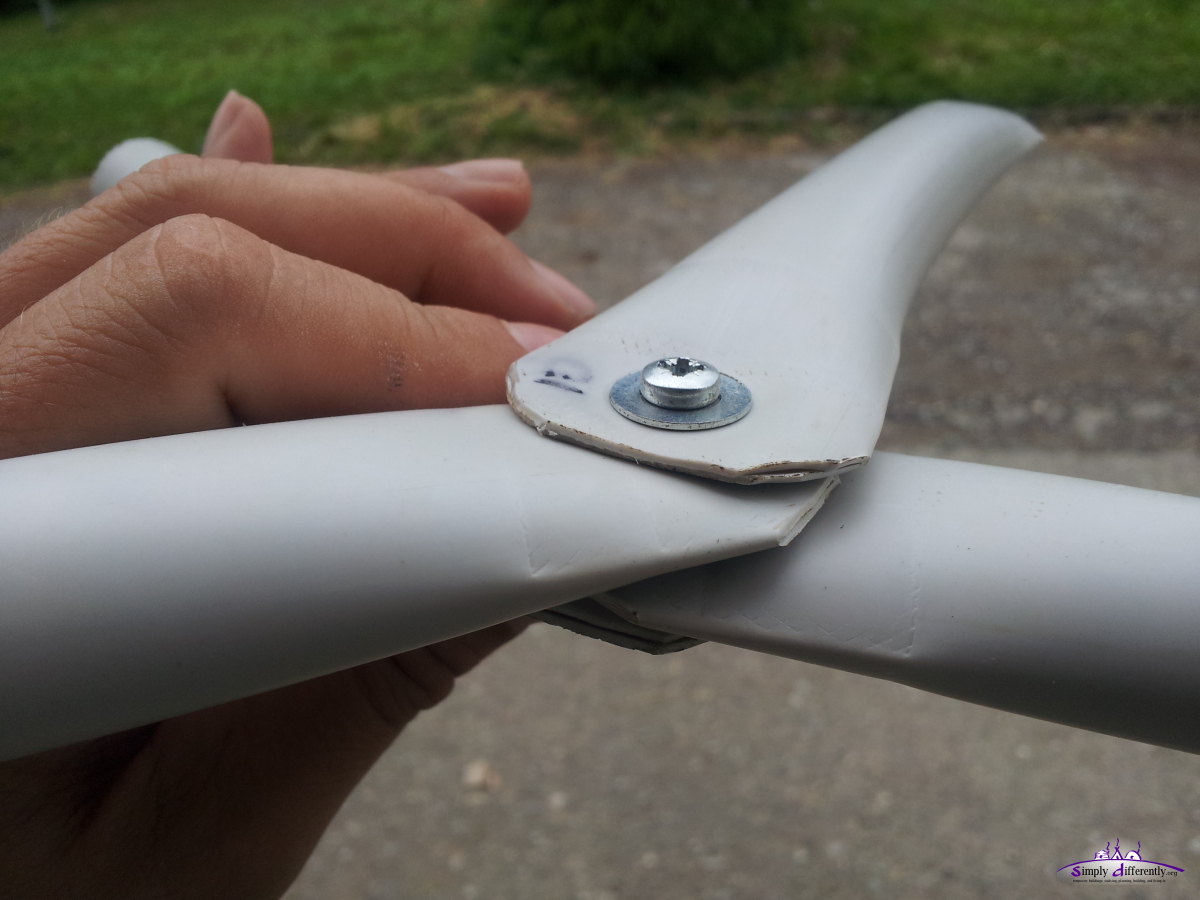 Putting together 3x 25mm PVC pipes (M4 x 30mm) 2014/08/10 14:55 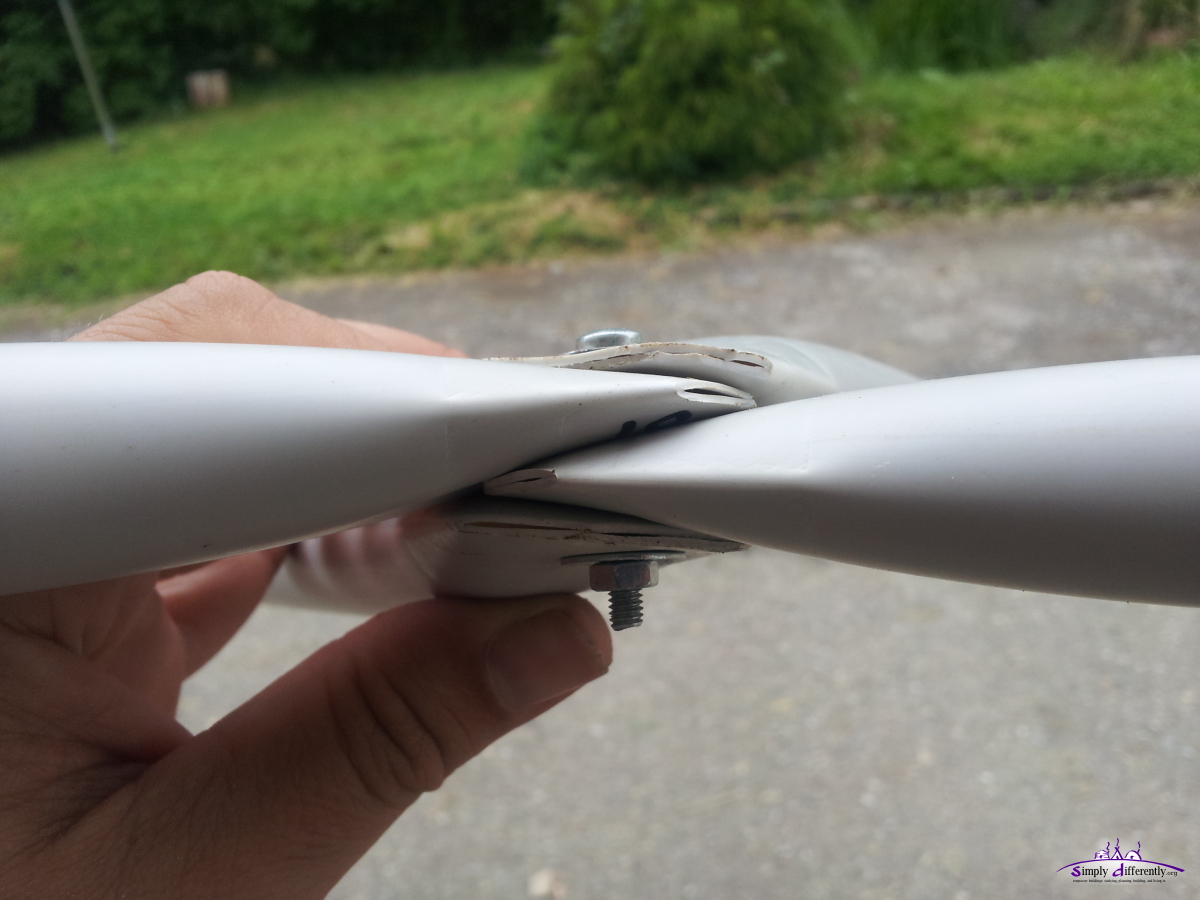 Putting together 4x 25mm PVC pipes (M4 x 30mm) 2014/08/10 14:55 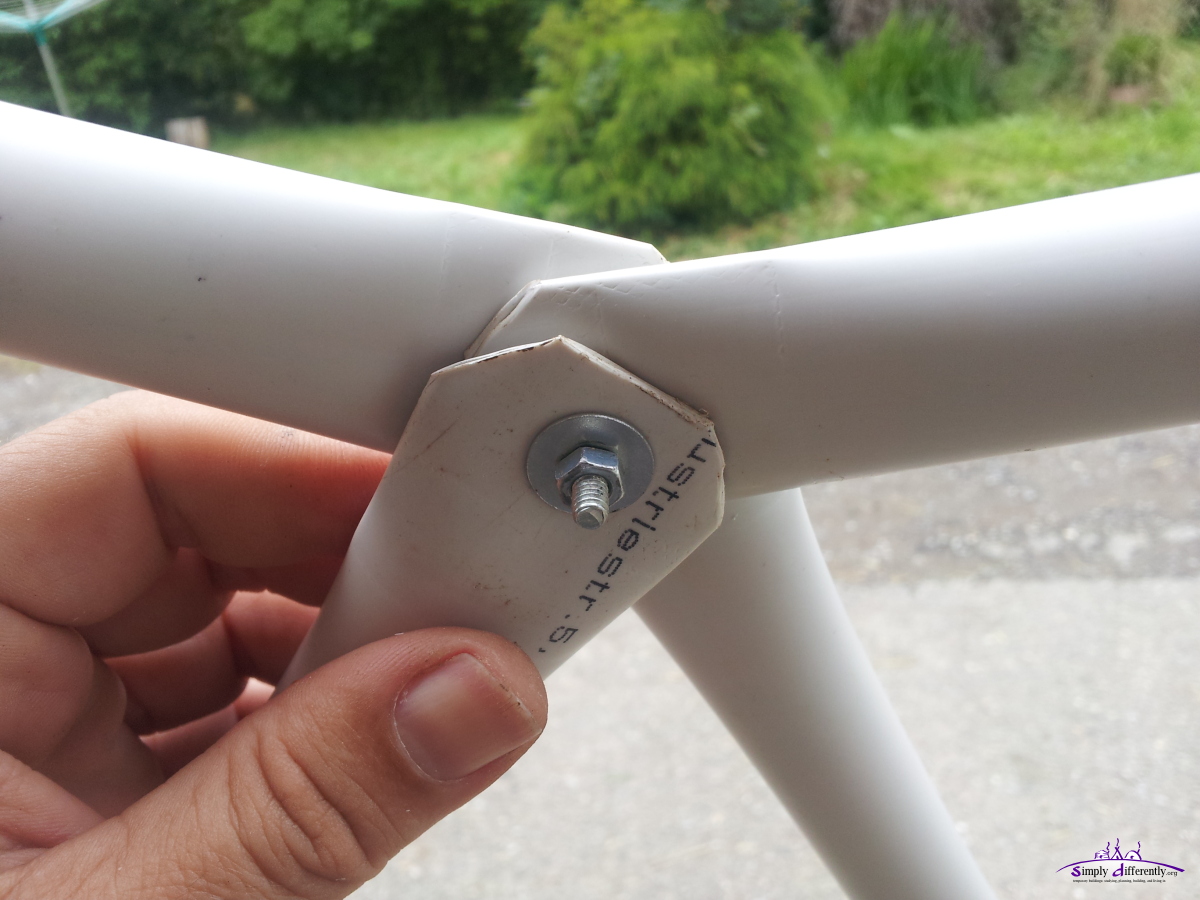 2014/08/10 14:55 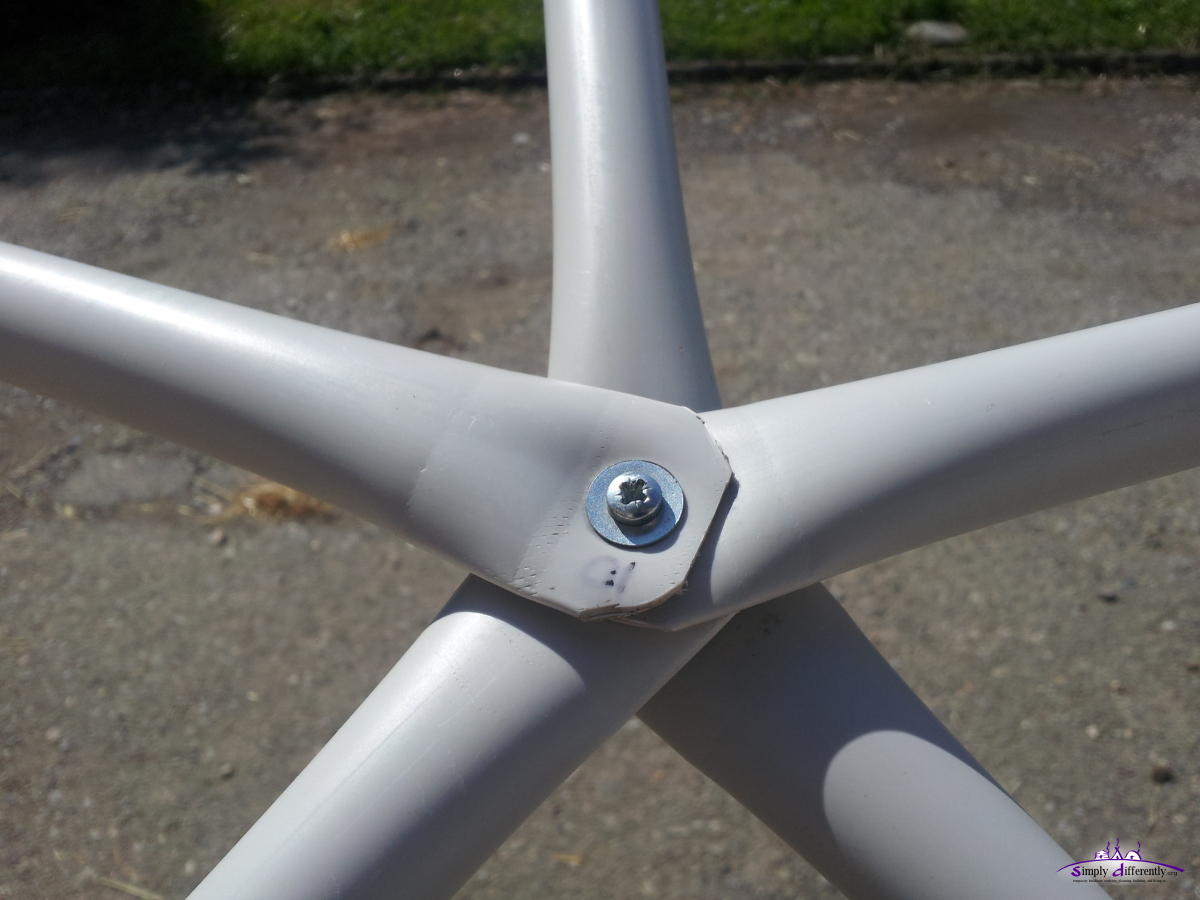 Putting together 5x 25mm PVC pipes (M4 x 30mm) 2014/08/10 15:59 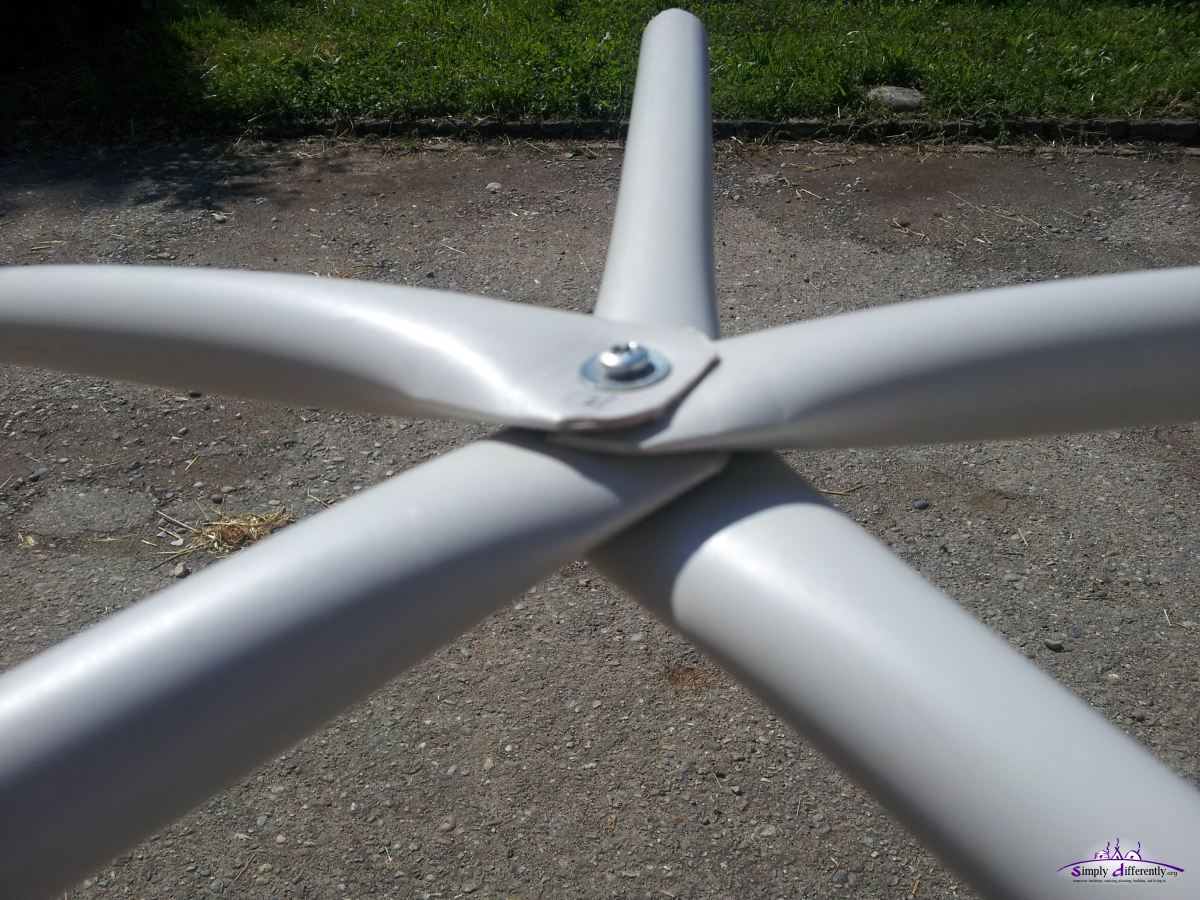 2014/08/10 15:59 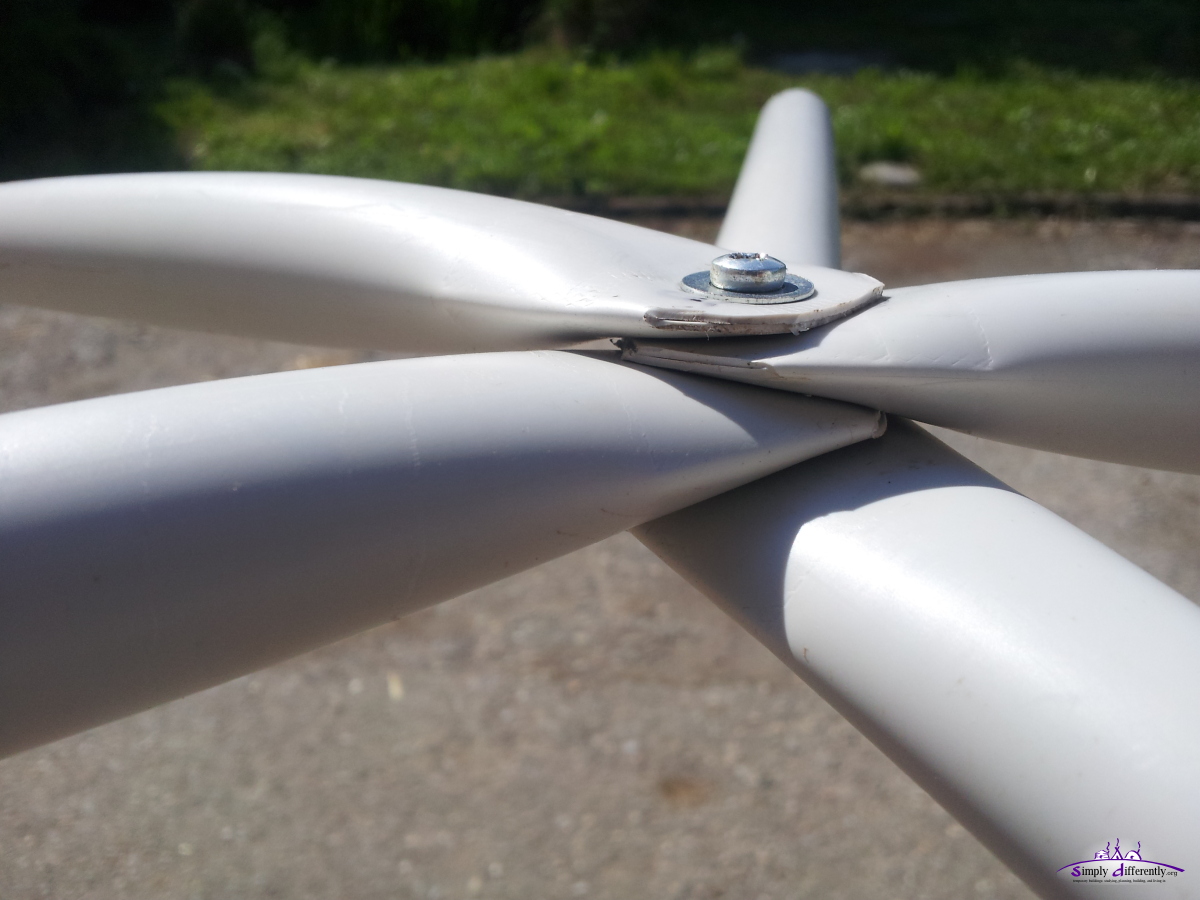 2014/08/10 15:59 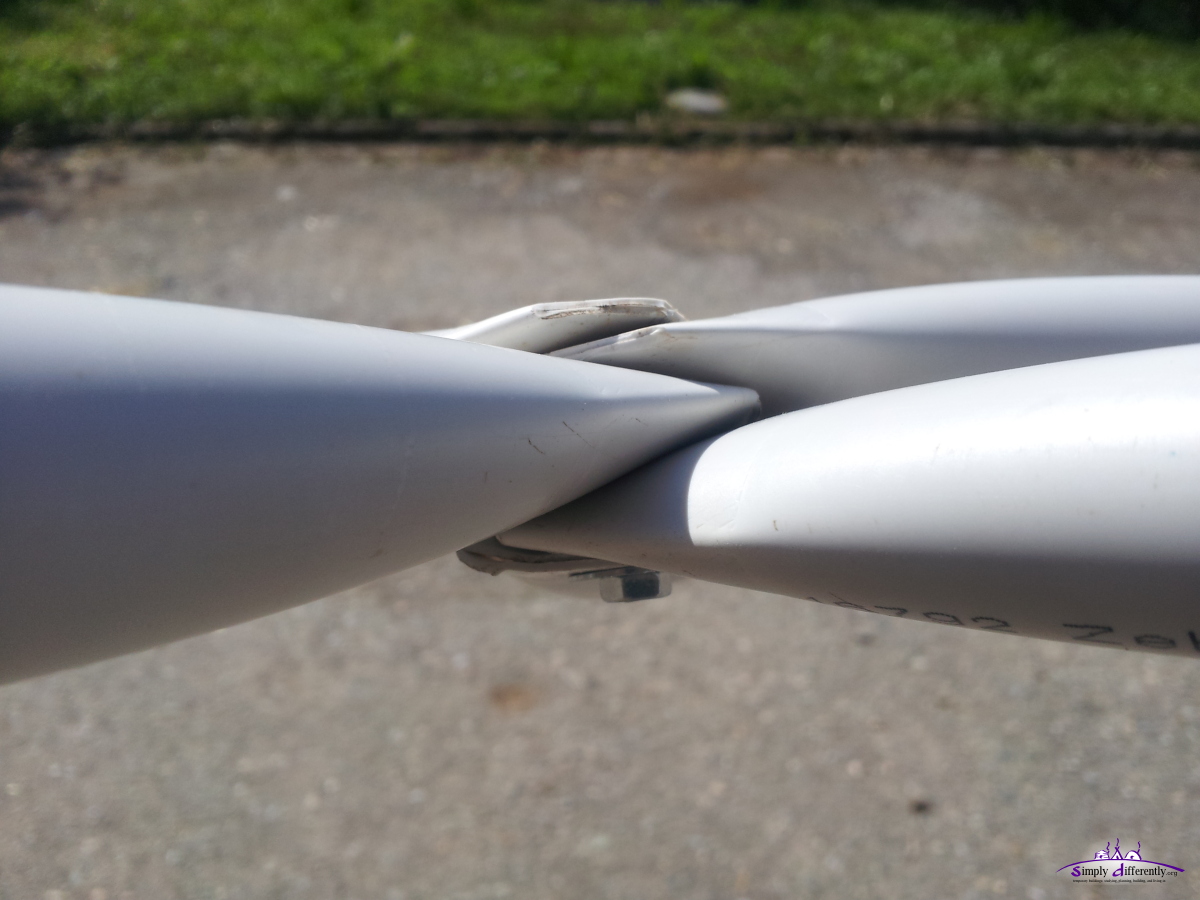 2014/08/10 15:59 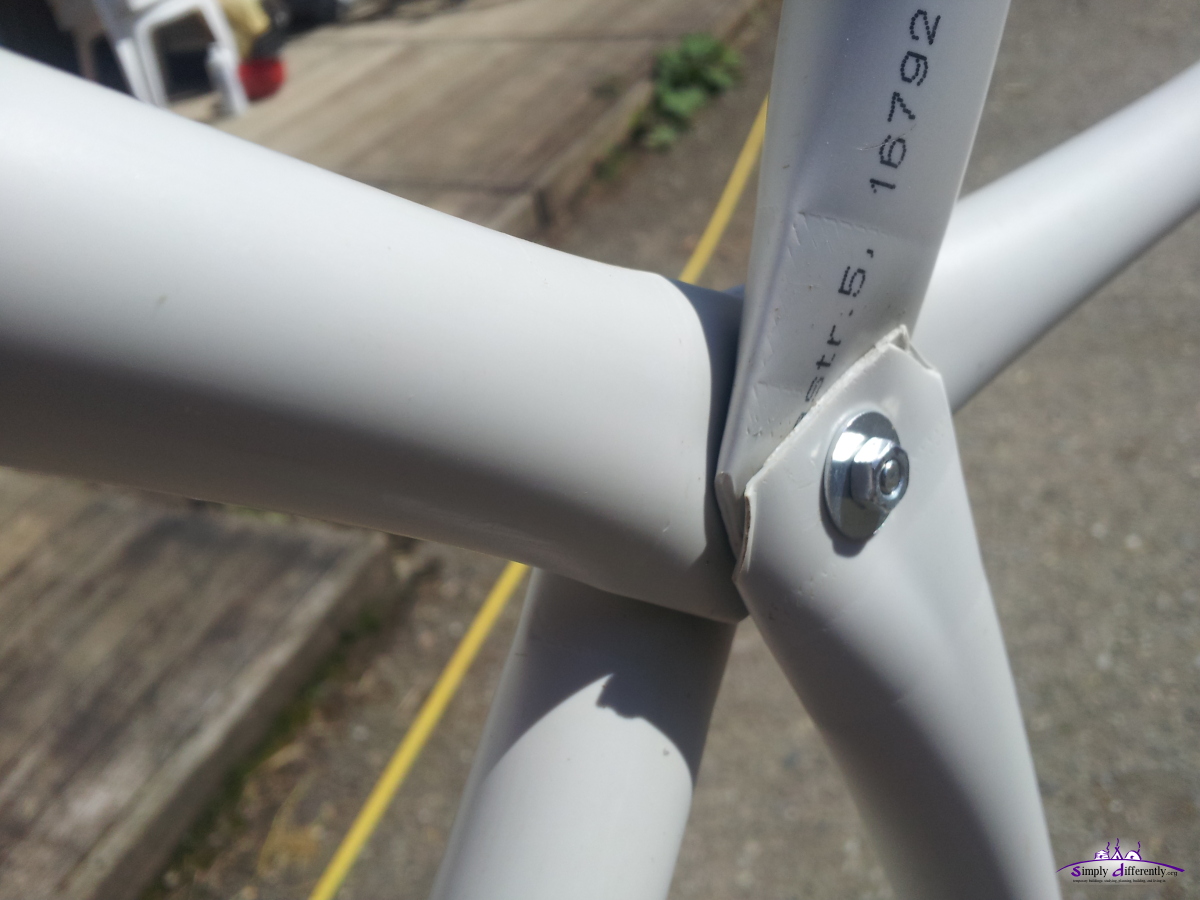 2014/08/10 16:00 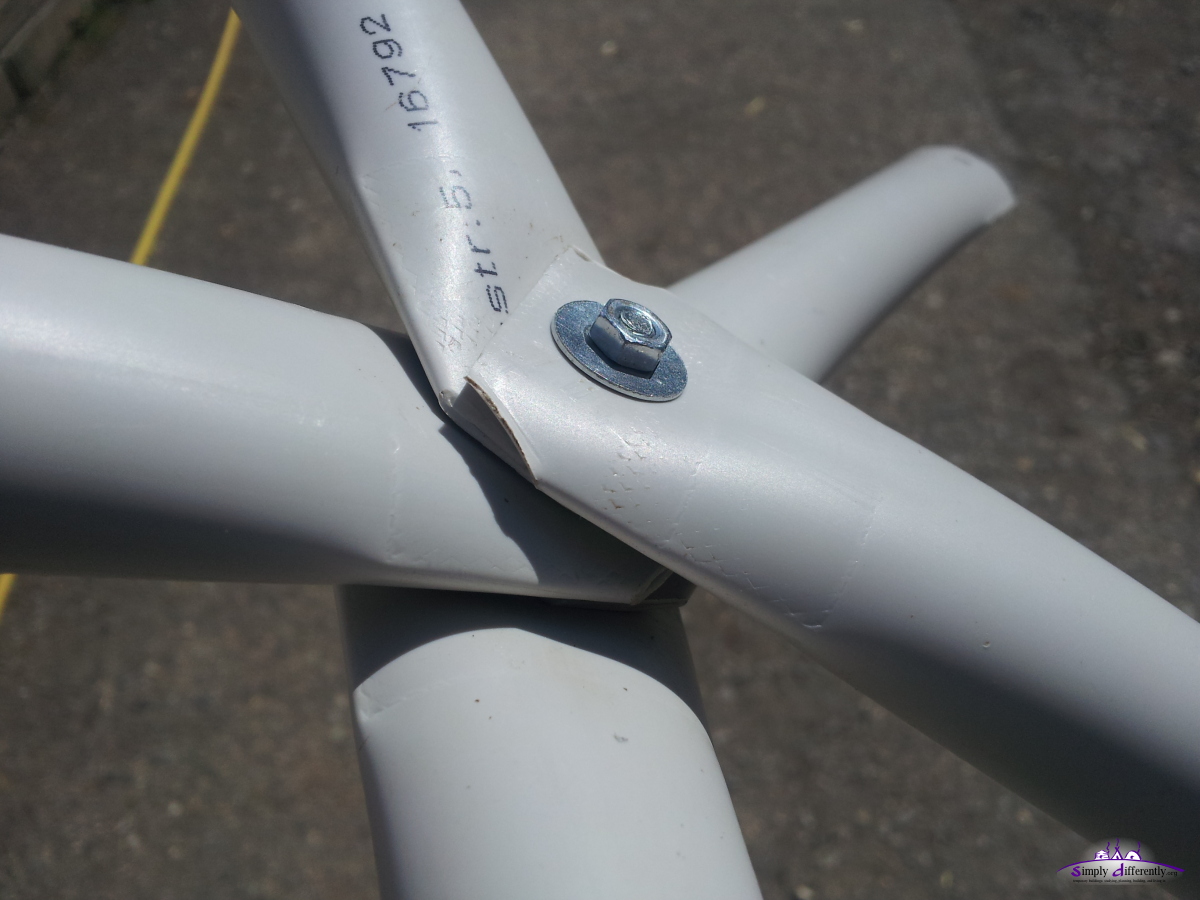 2014/08/10 16:00 7. 8. 2014: Hubless & Hub with PVC Pipes (continued)Hubless Approach
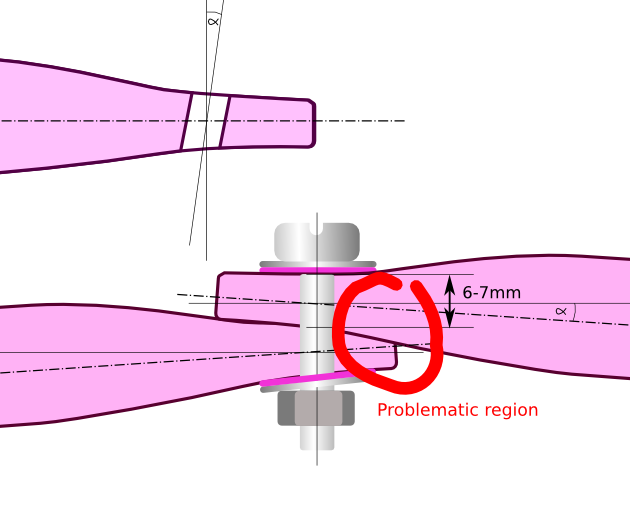
The planned 2v Icosa geodesic dome the struts have 15° and 18° - so I gonna make some more tests to see if this solution is feasible.
 2014/08/07 15:36 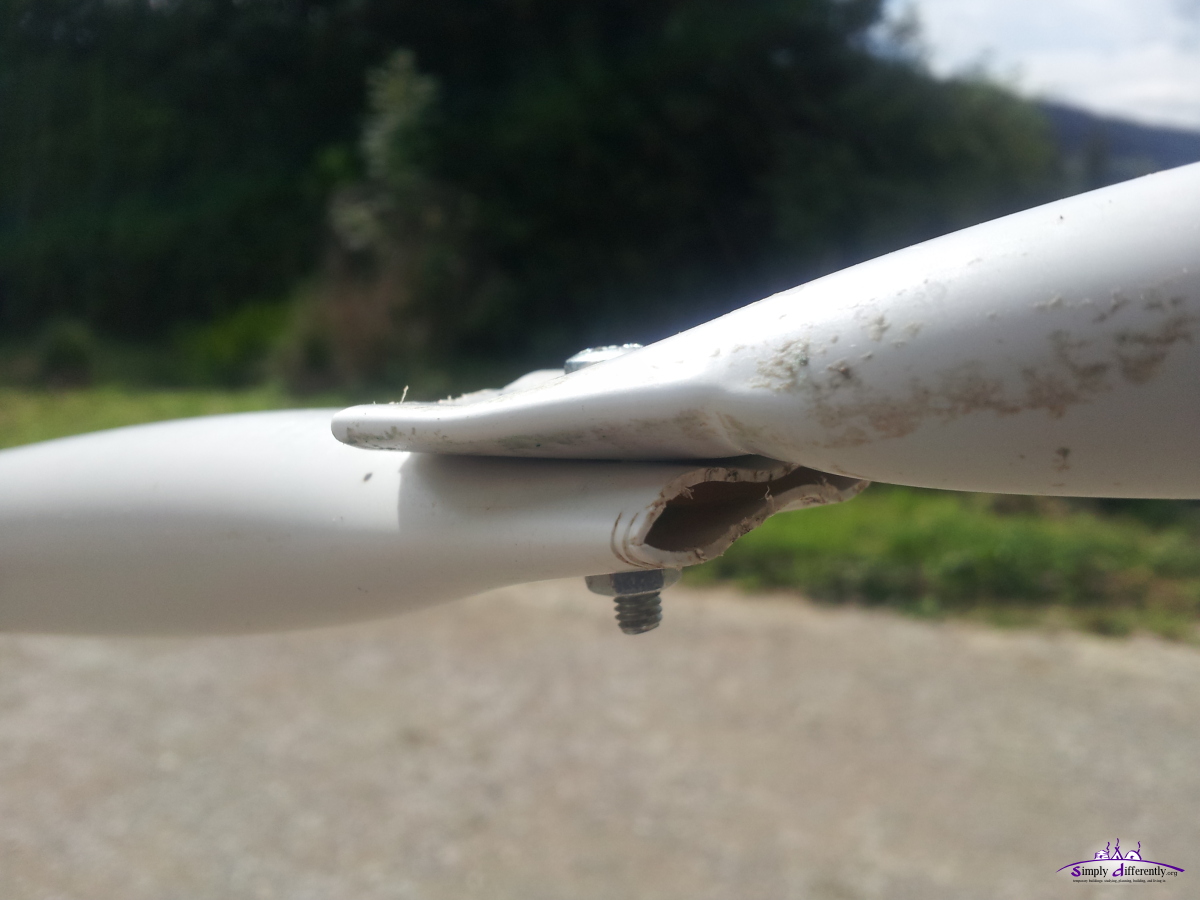 2014/08/07 15:36 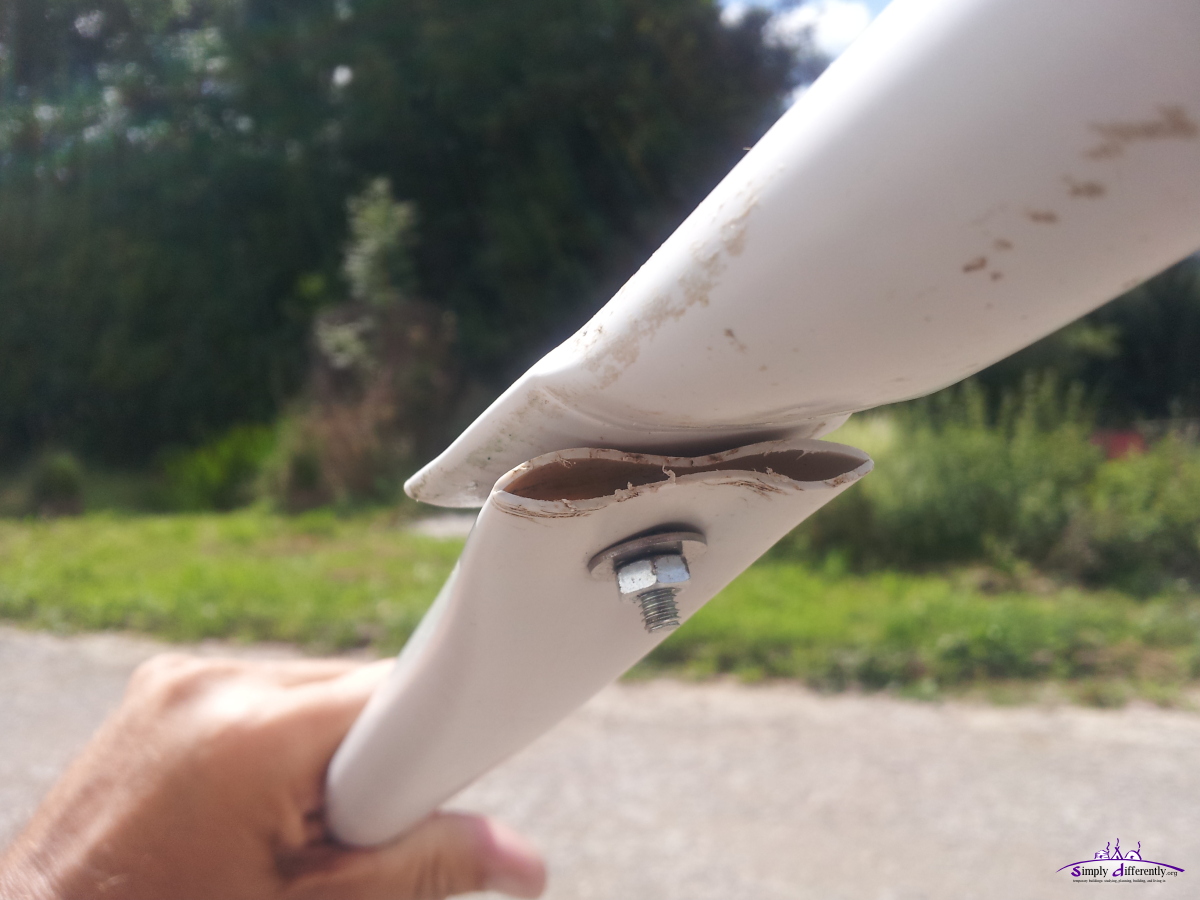 2014/08/07 15:36 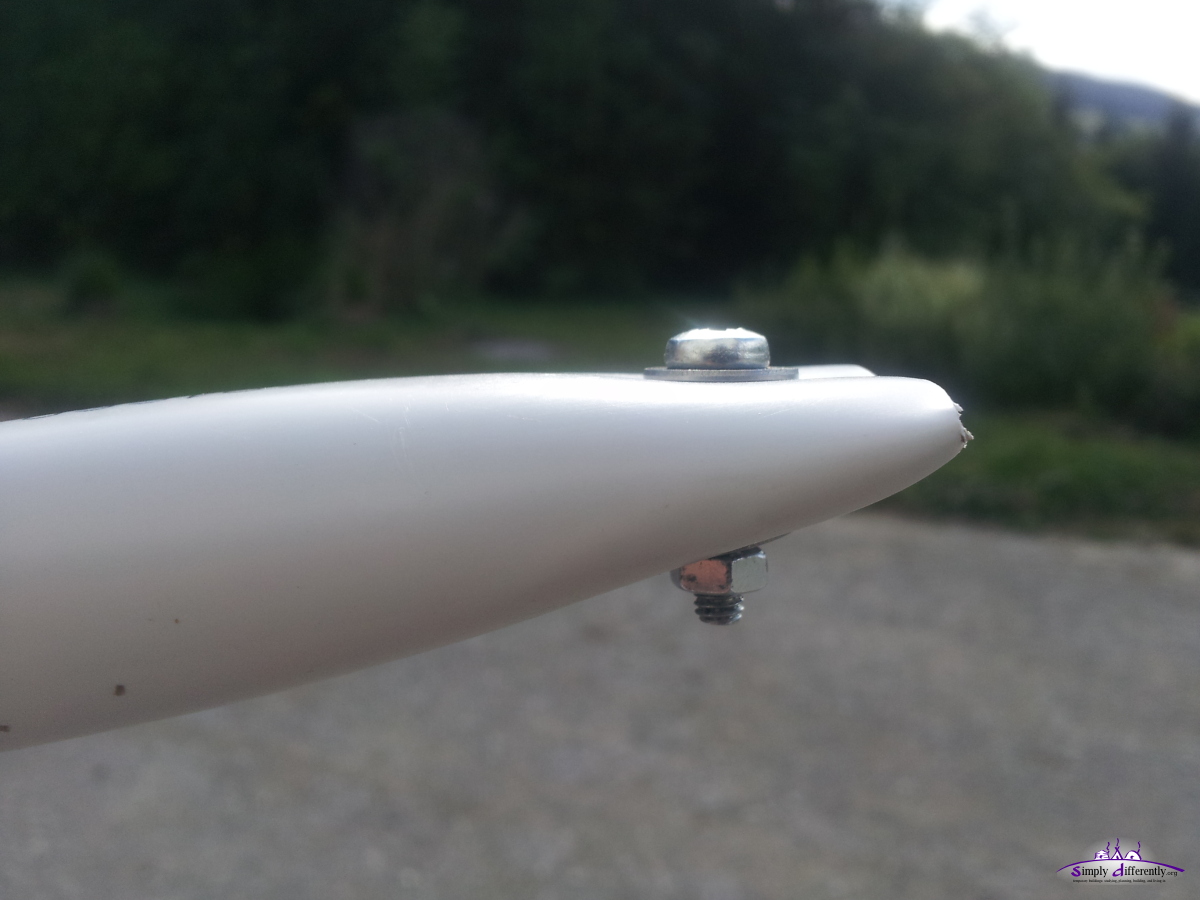 2014/08/07 17:33 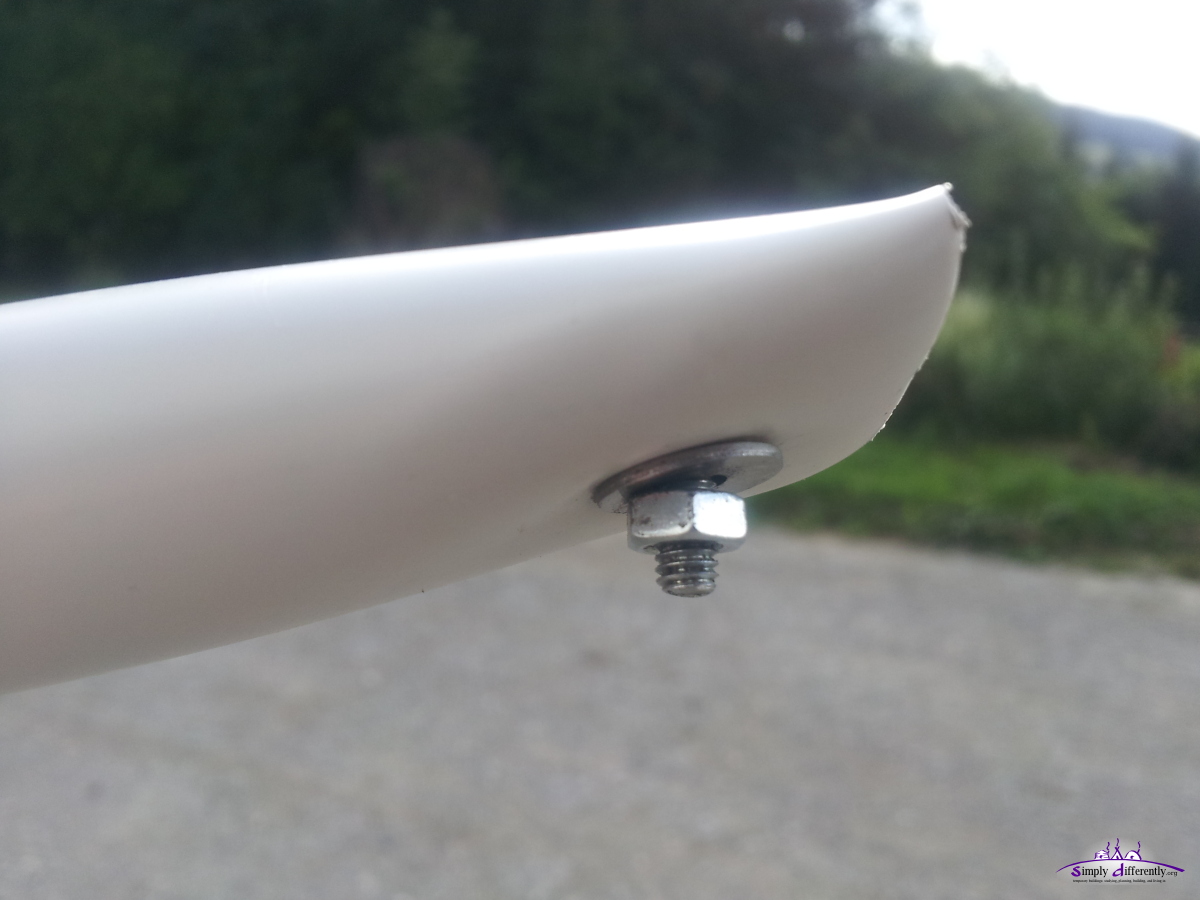 2014/08/07 17:33 Zip Tied Hub
On the net you find ZipTieDomes.com
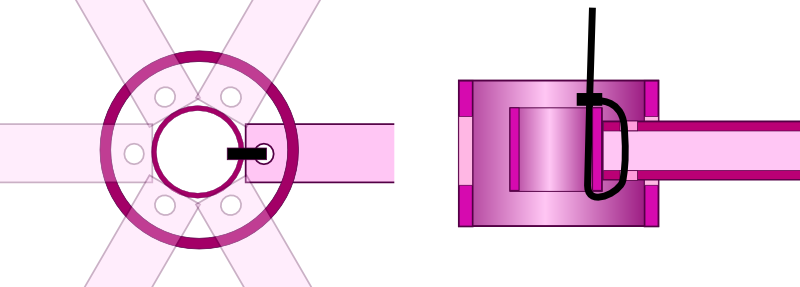
It's a nice setup but it's a bit more overhead: 2v icosa has 65 struts, which makes 130 zip ties (both ends), which are cut when the dome is taken down. 4. 8. 2014: Hubless with PVC PipesI did some simple testing with the 25mm diameter pipes, with a 2x metal support ring (sharp edge away from PVC tube), and moved the folding for 100x until one side broke: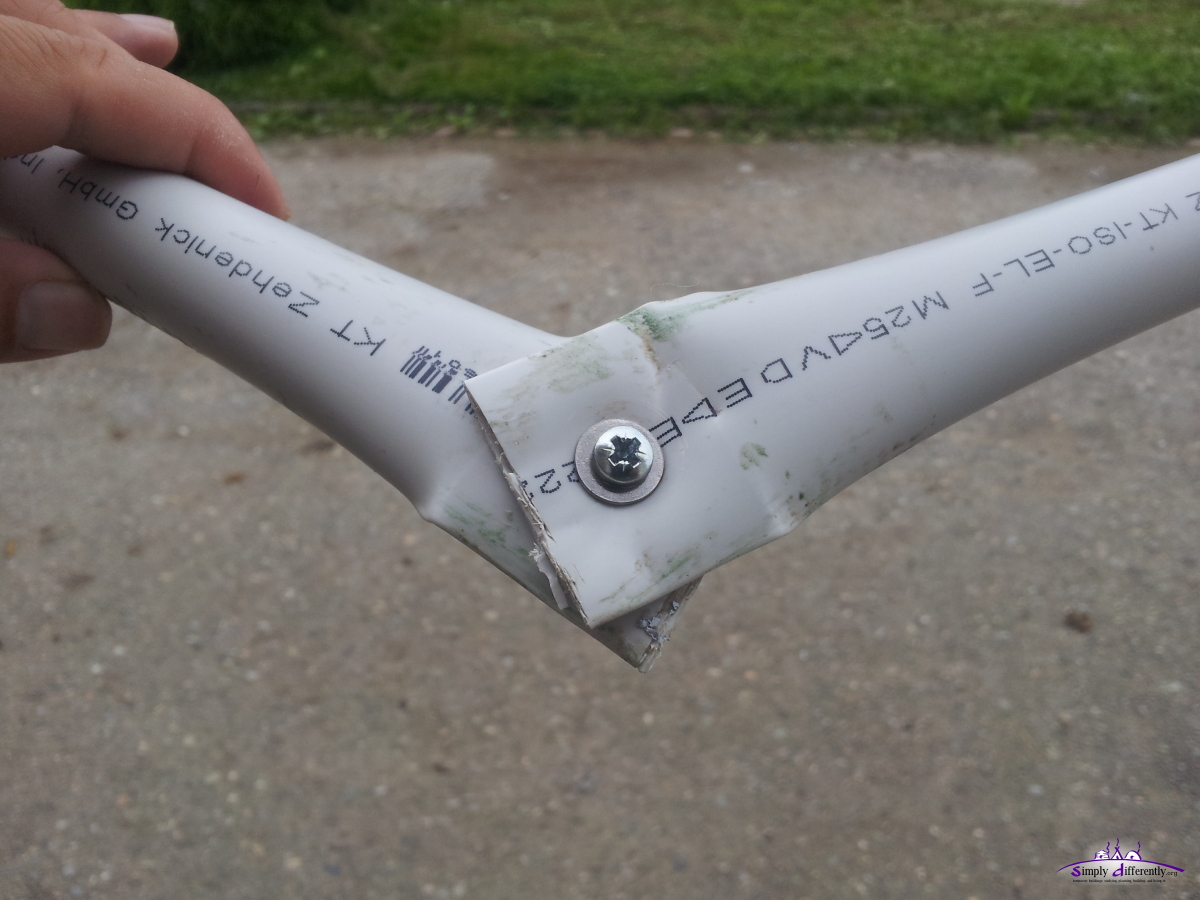 With support rings 2014/08/04 09:22 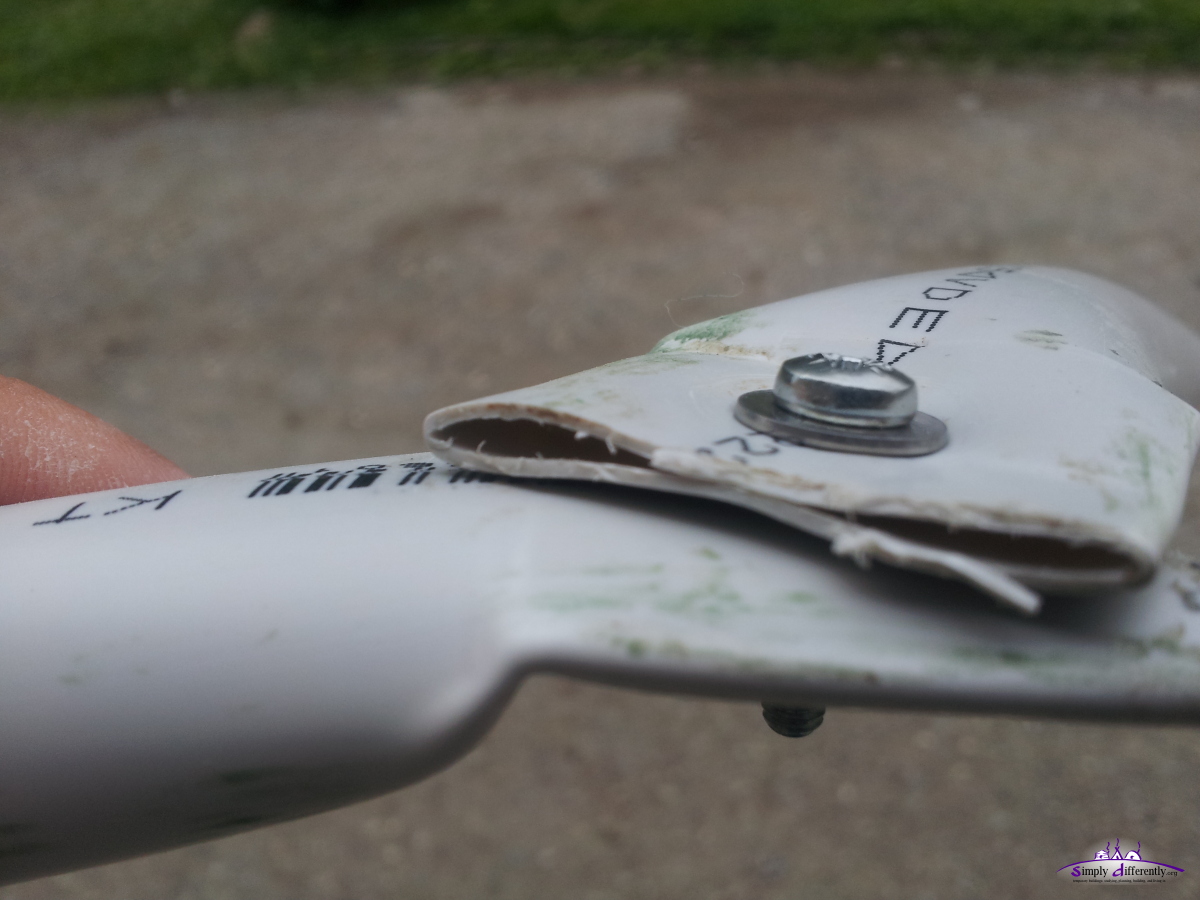 Sharp edge of ring looking away from tube (pastic ring not in place) 2014/08/04 09:23 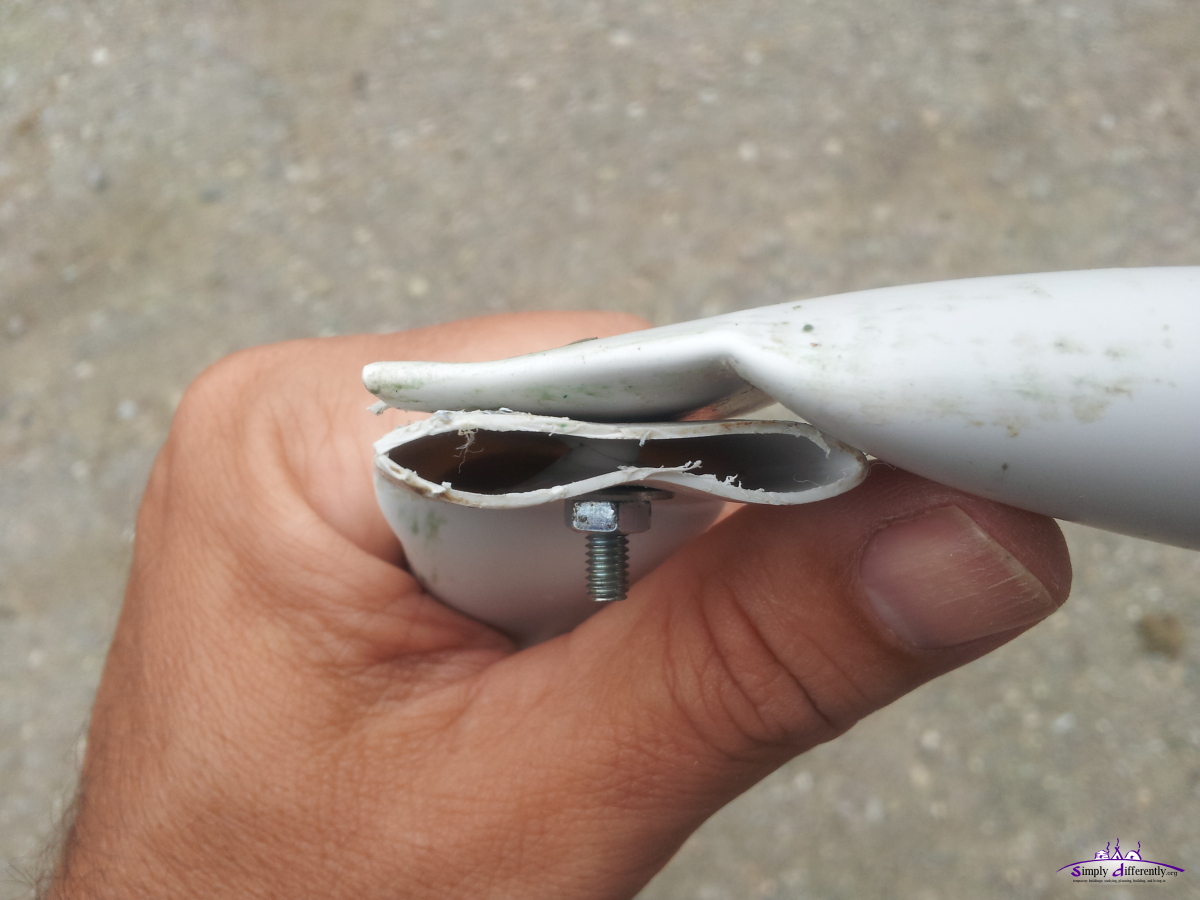 Hole not properly drilled but mangled, excessive material in between 2014/08/04 09:24 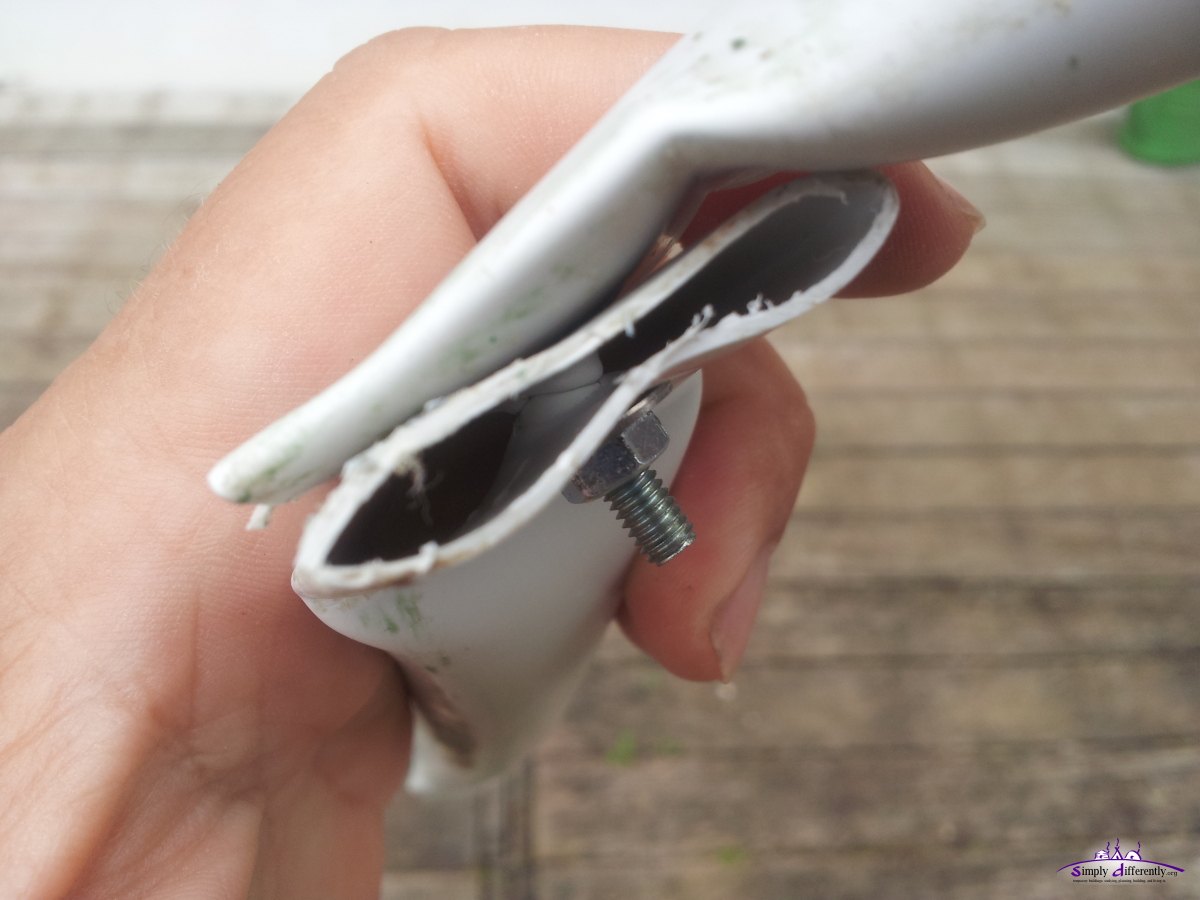 2014/08/04 09:24 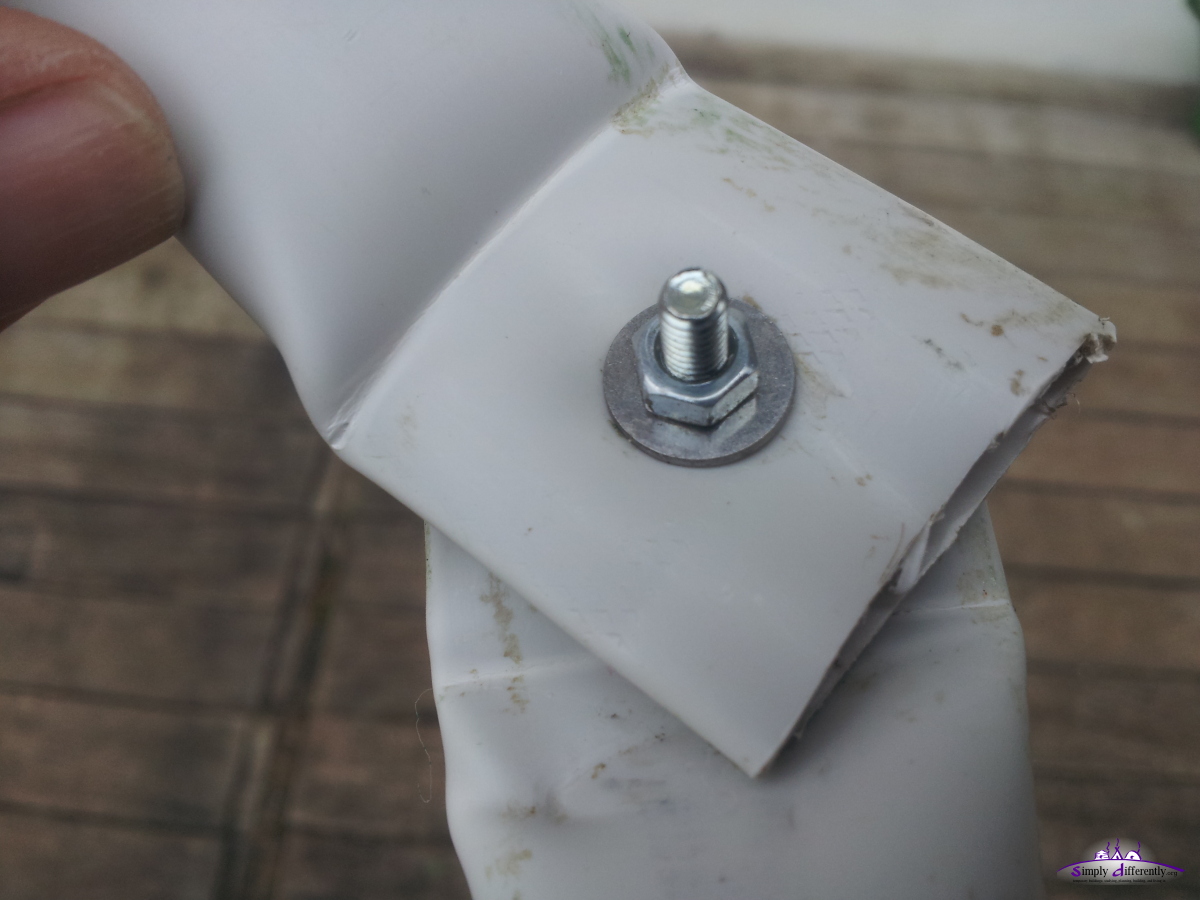 Slight tear at folding 2014/08/04 09:25 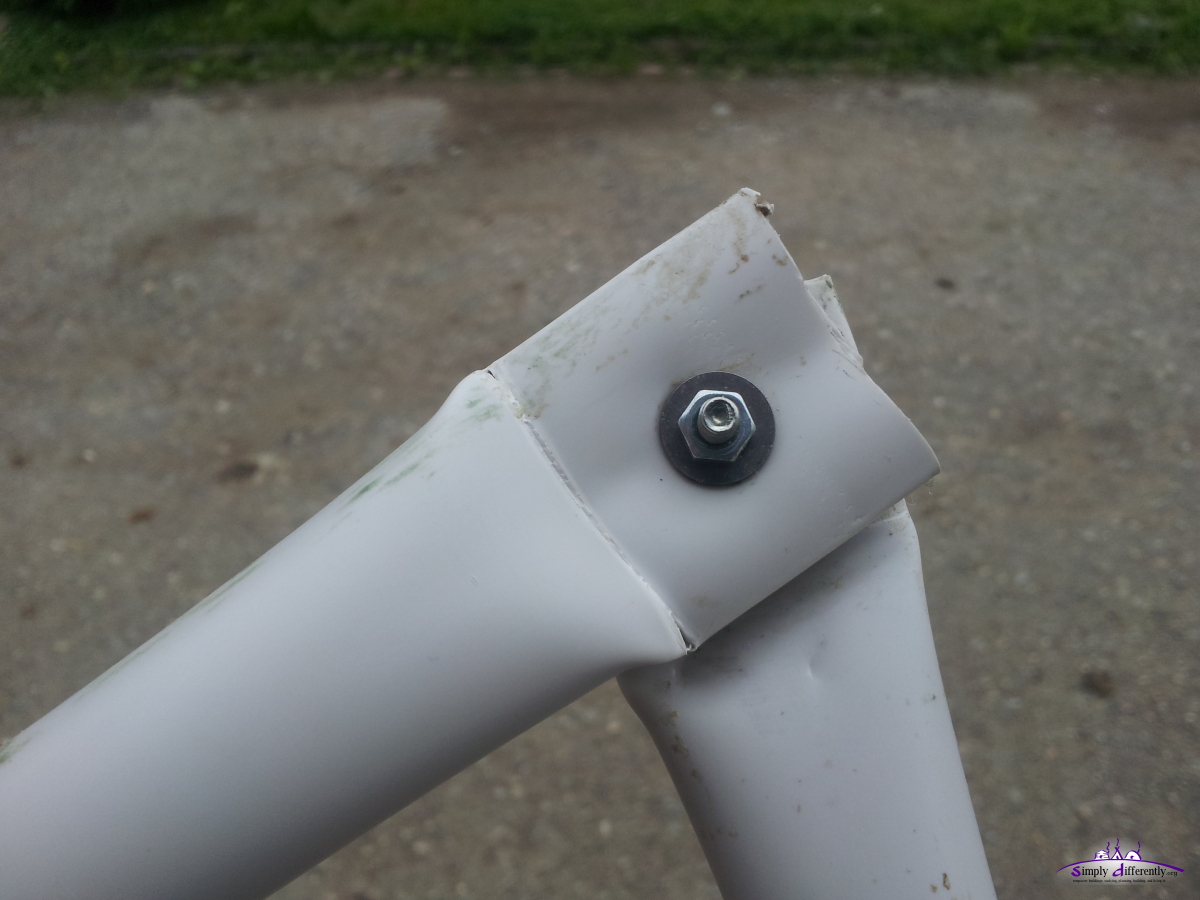 After 30x foldings 2014/08/04 09:26 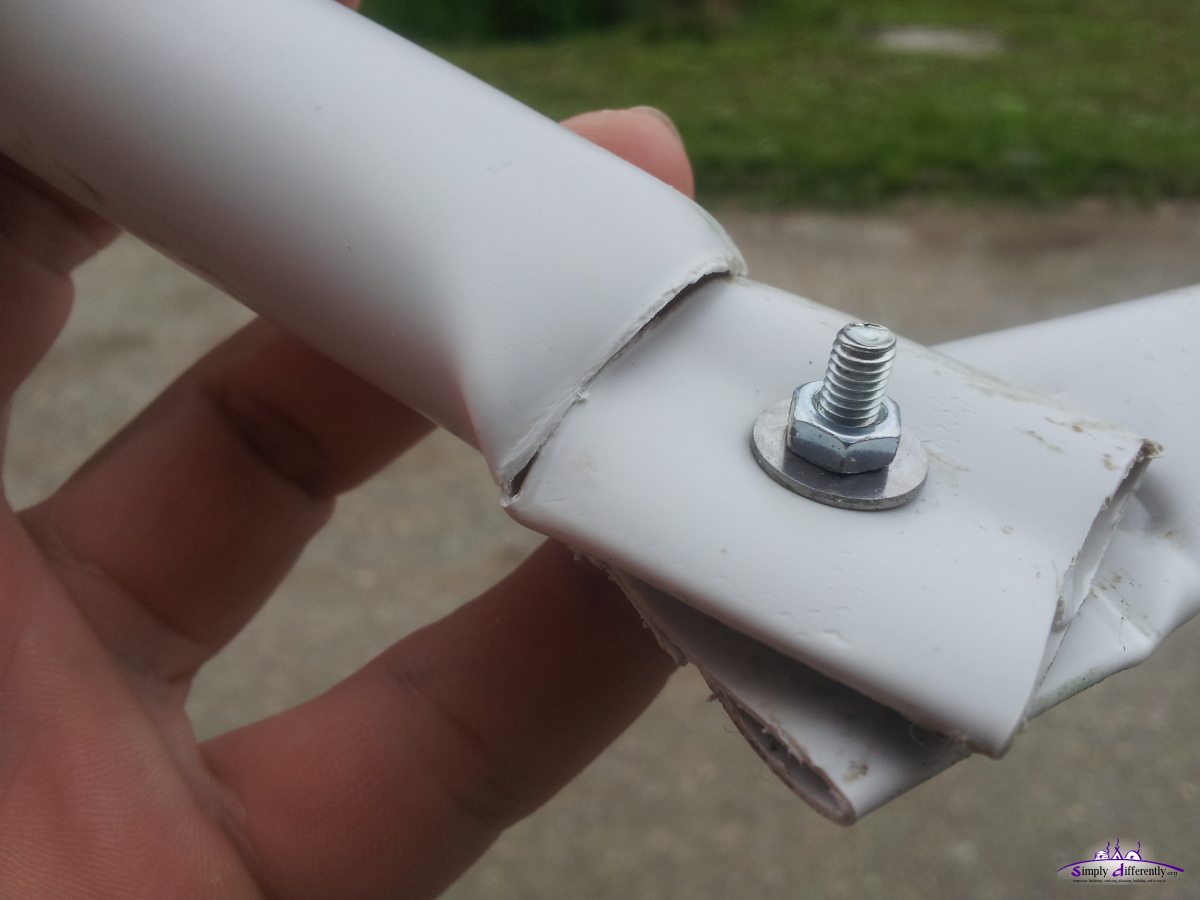 After 100x foldings 2014/08/04 09:28 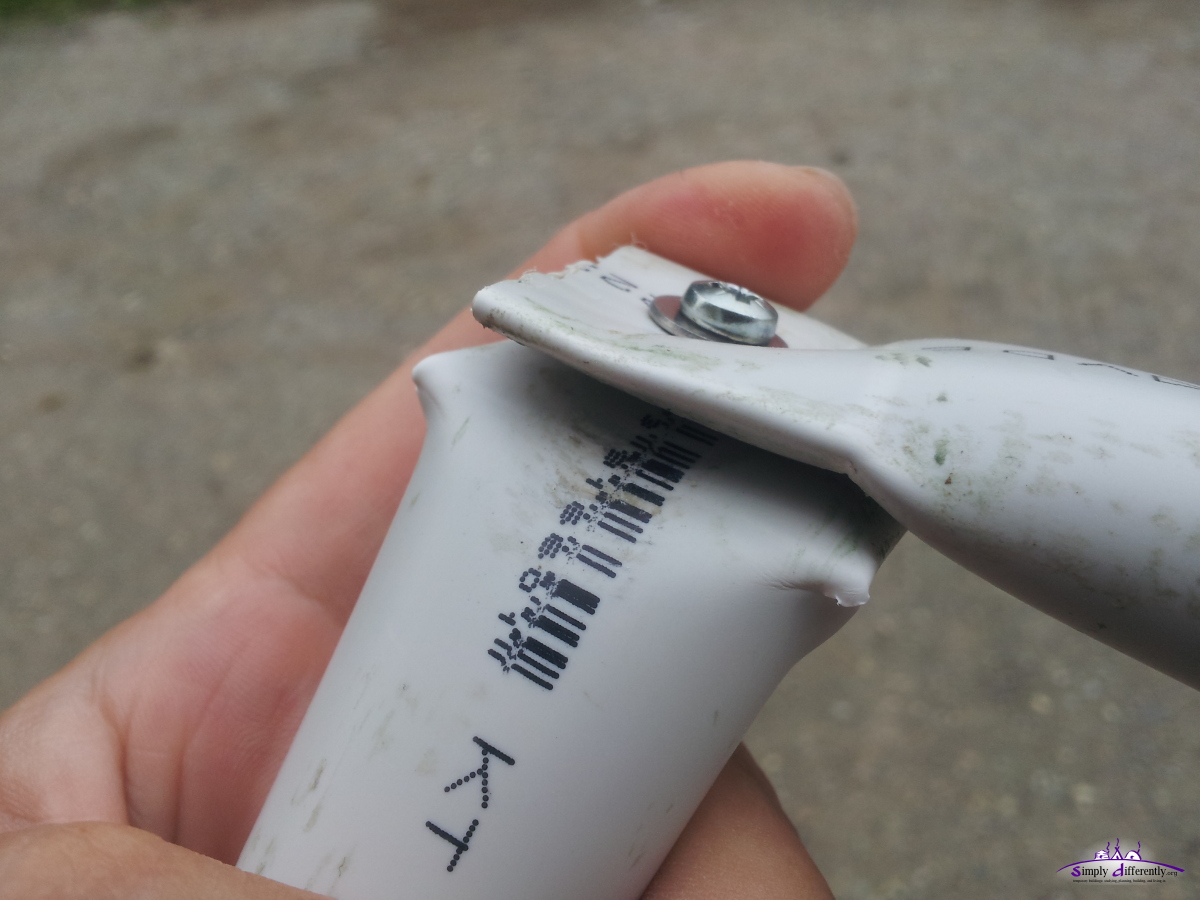 Other side (top), slight tears also 2014/08/04 09:28 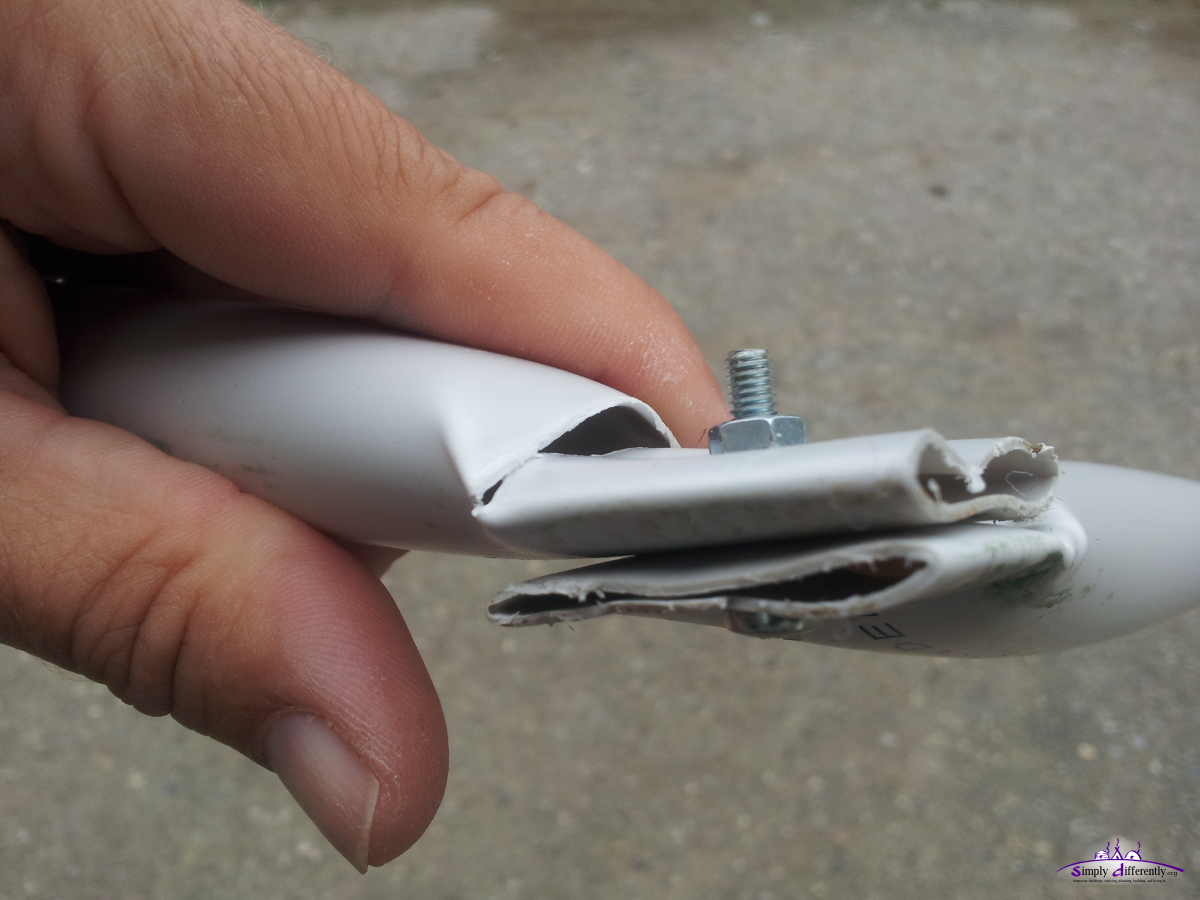 2014/08/04 09:28 It certainly won't work for long term, e.g. more than a year and with constant stress; but for a model and a simple installation without mechanical stress it would work. 3. 8. 2014: PVC Pipe DomeAfter 6 years I do some further tests this time with 16mm and 25mm PVC conduits (with some tape residue) instead of bamboo: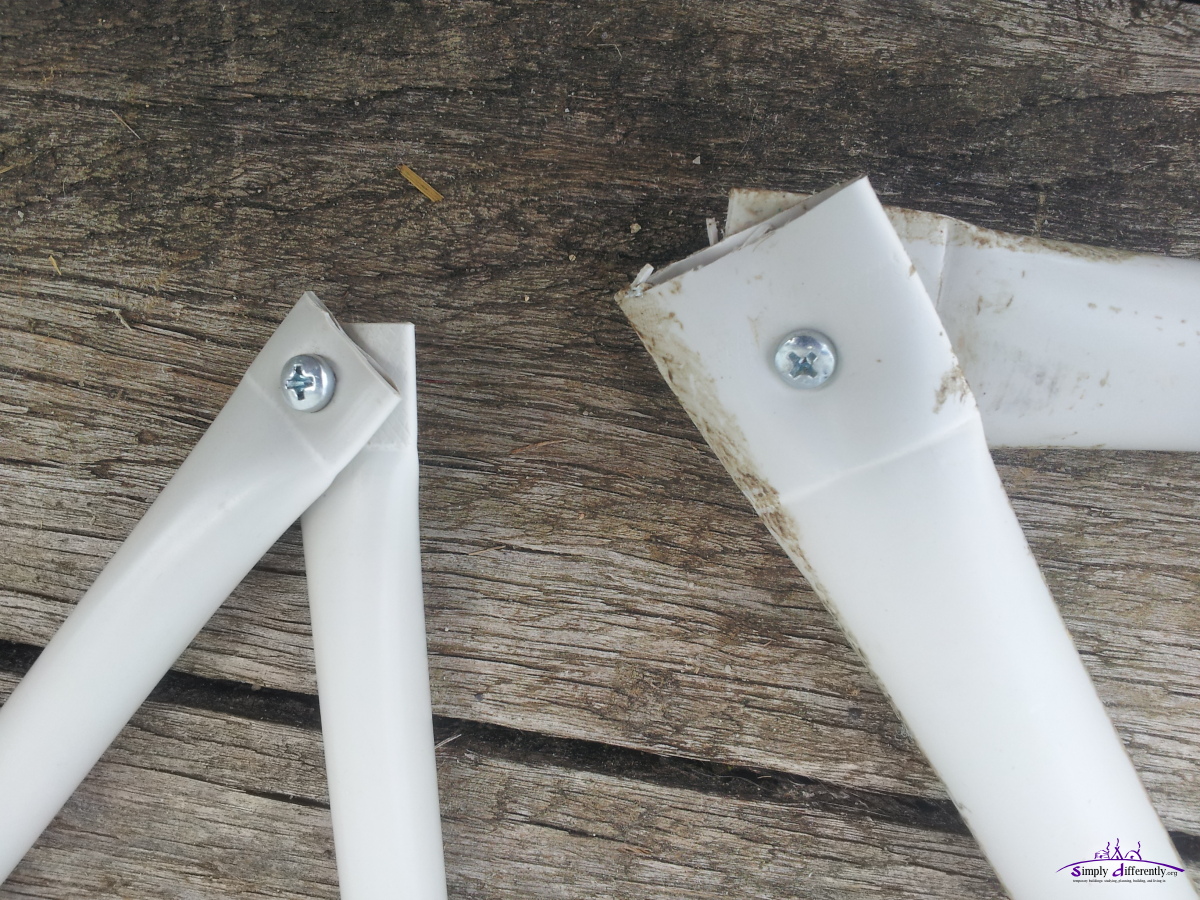 M4 fixing 2x 16mm and 2x 25mm PVC conduits 2014/08/03 14:01 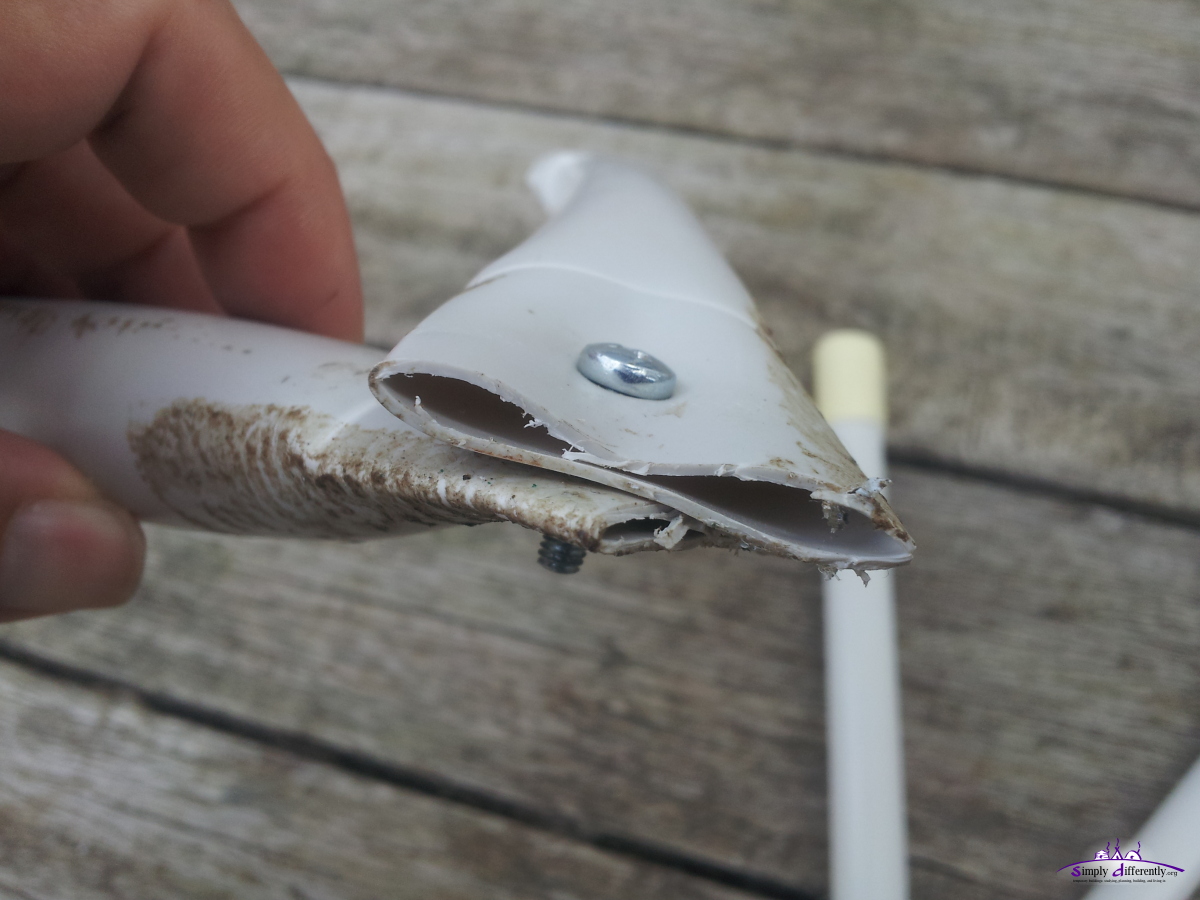 Squeezed 25mm PVC conduits 2014/08/03 14:01 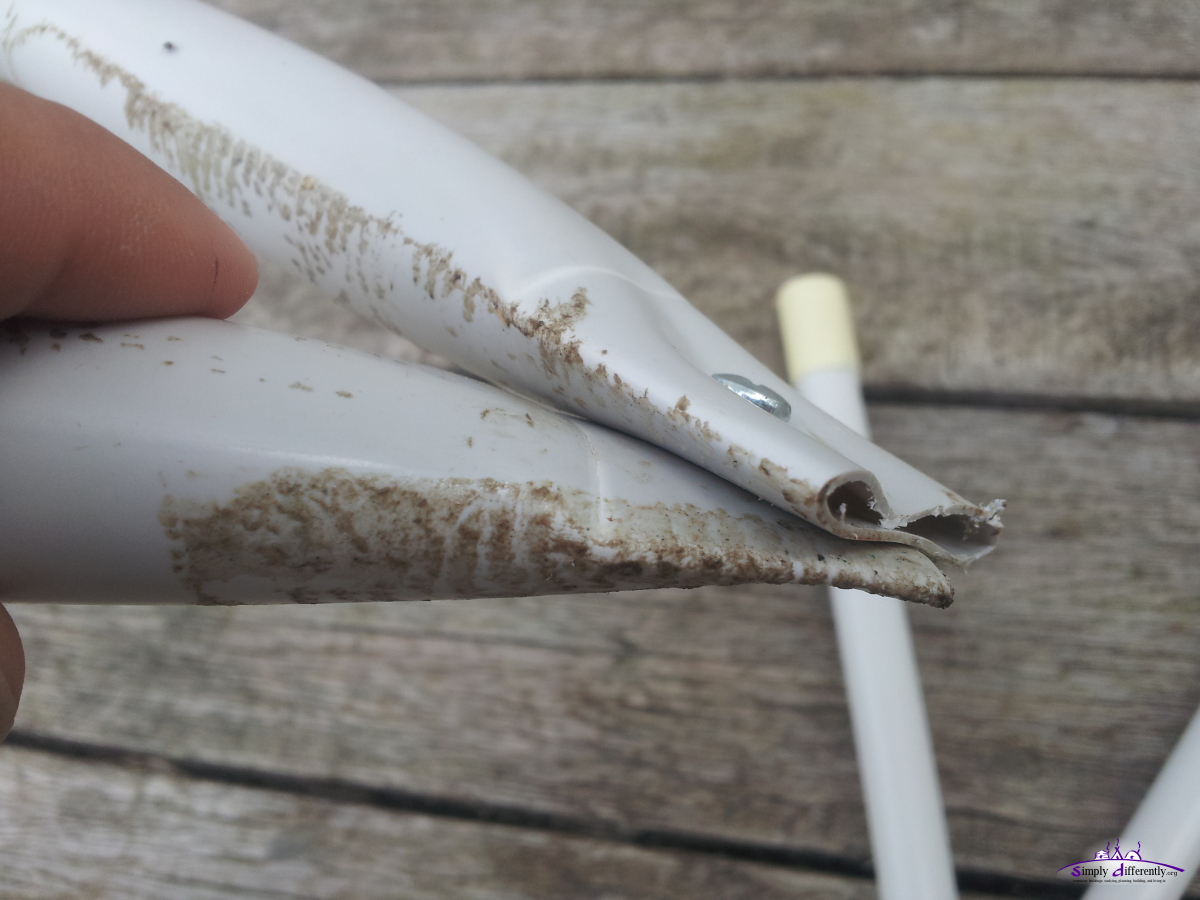 Squeezed 25mm PVC conduits 2014/08/03 14:01 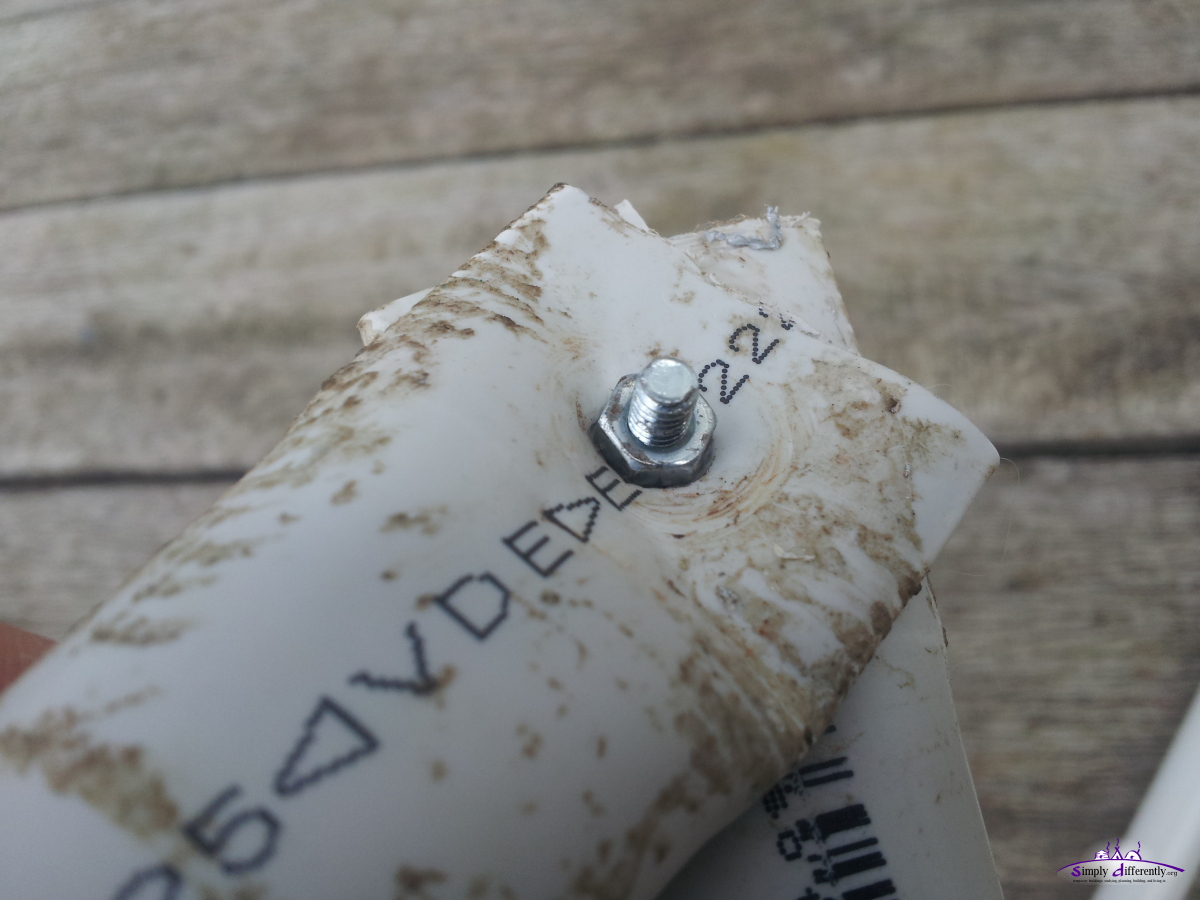 Nut cutting into pipe 2014/08/03 14:01 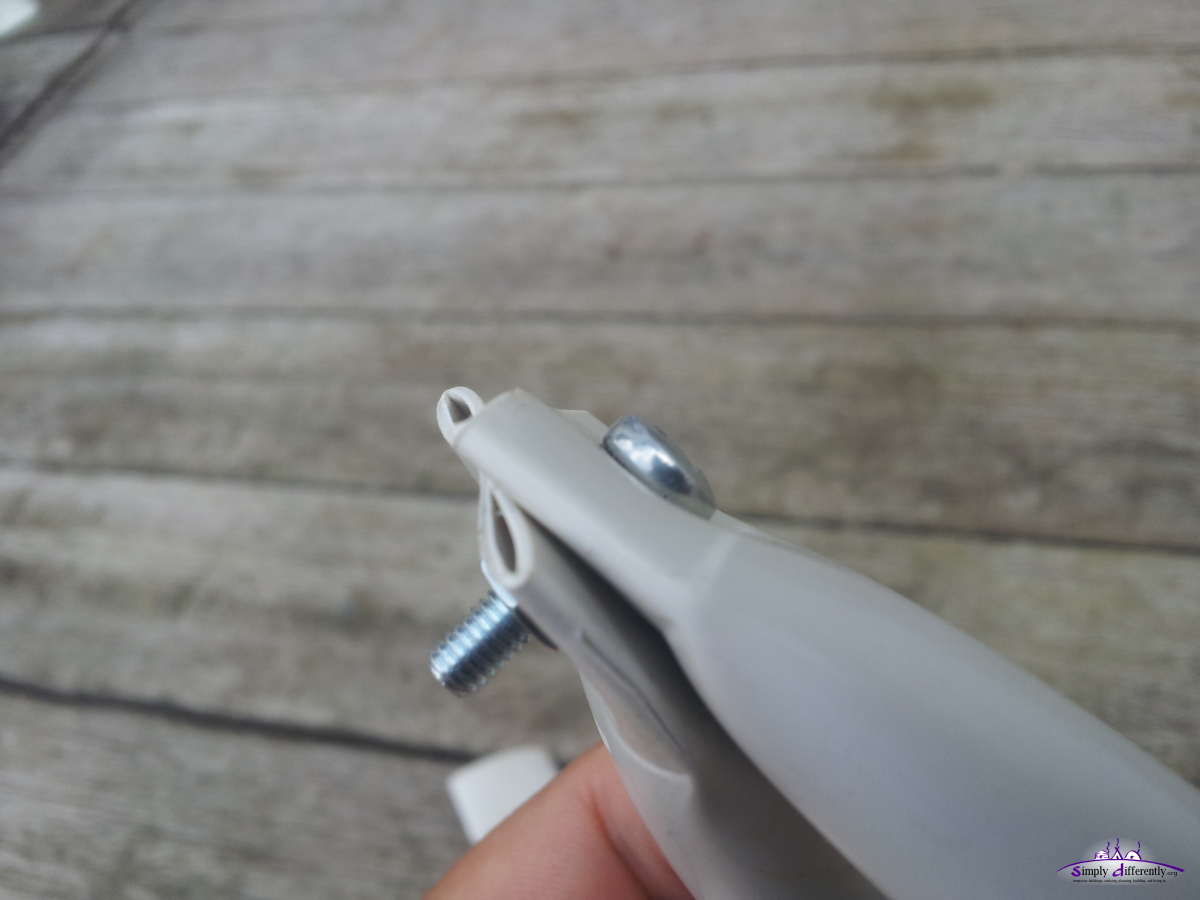 Notice the break/tear of the lower 16mm PVC conduit 2014/08/03 14:02  2014/08/03 14:02 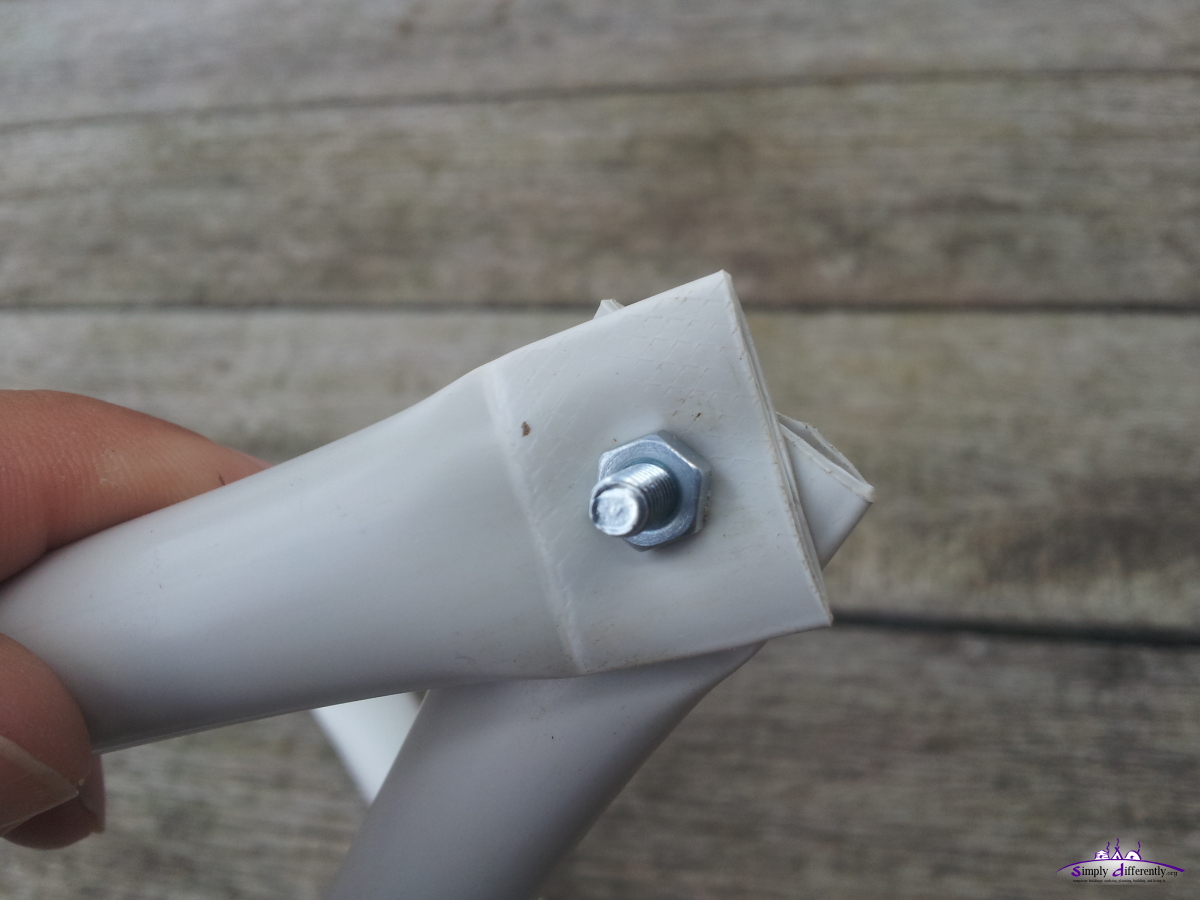 2014/08/03 14:02 The focus is for a 2v Icosahedron (65 struts) 5m diameter geodesic dome, hubless or with a dedicated hub: Hubless Approach
7. 4. 2008: Other Connector Ideas
At Bamboocraft.net Discussing with a friend of mine, who is a locksmith, brought up this design as the illustration shows, using a special foaming glue.
The glue, named "Fermacell 59010", is slightly foaming or expanding and seals the 1-2mm gap seamlessly - as a few tests have shown:
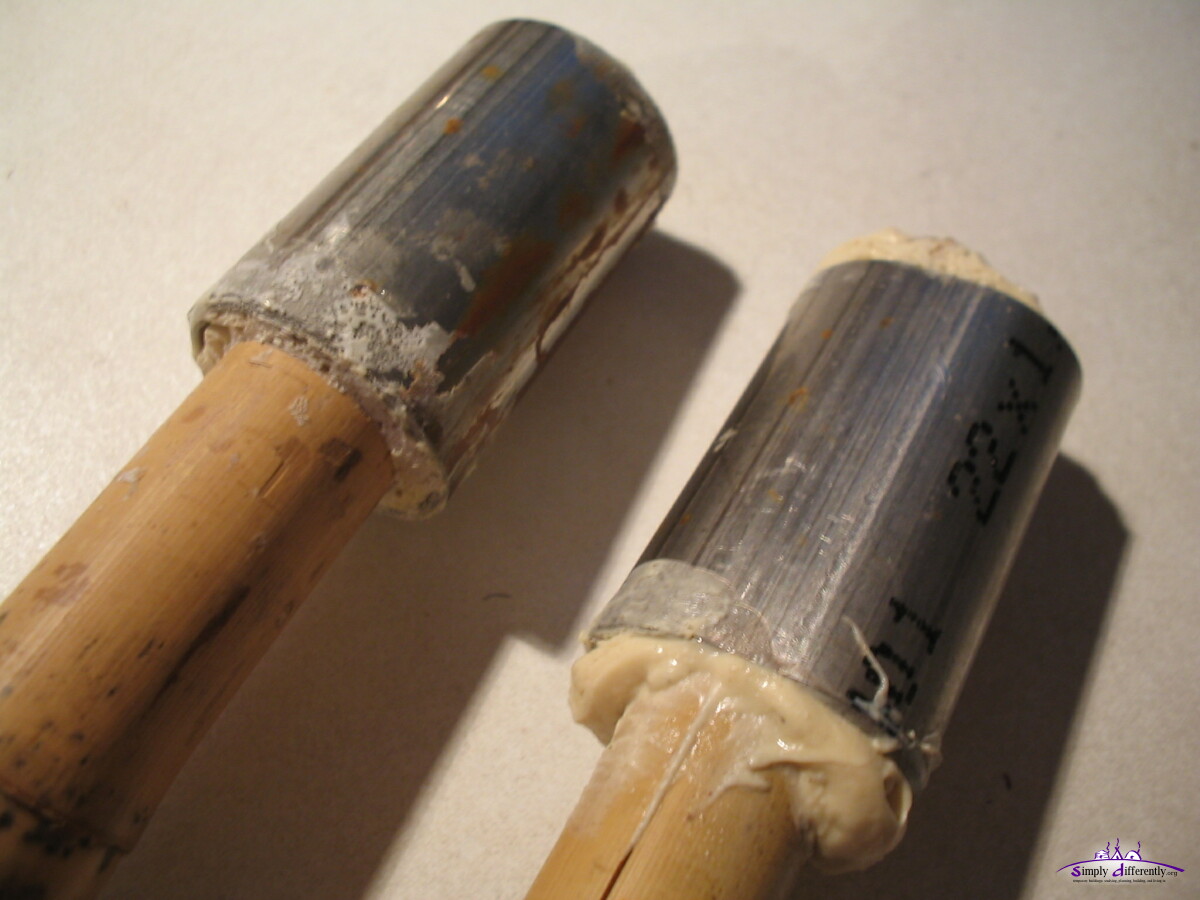 Bamboo with steel pipe 2008/04/07 17:56 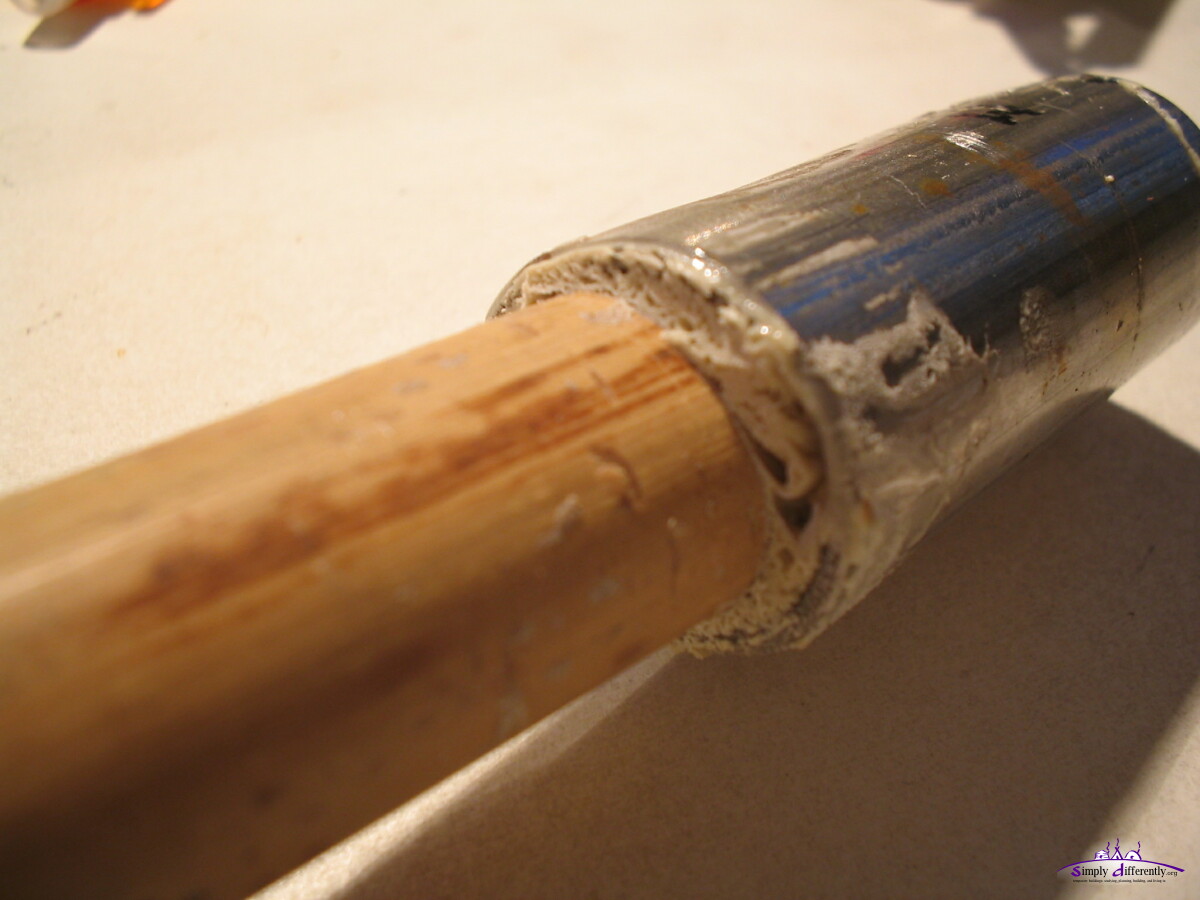 Bamboo with steel pipe (close up) 2008/04/07 17:56 One bamboo I cleared using a cutter to remove the glue and see small bubbles, whereas the other the overflowing glue remained as comparison. For the first tests we dented the steel pipe, and in one case too much where you see the bamboo split - which should be avoided.
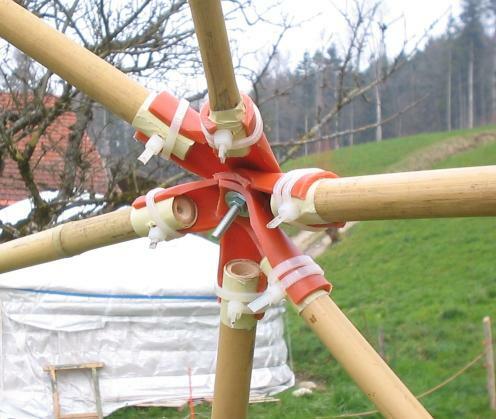
6. 5. 2007: New Connector Ideas
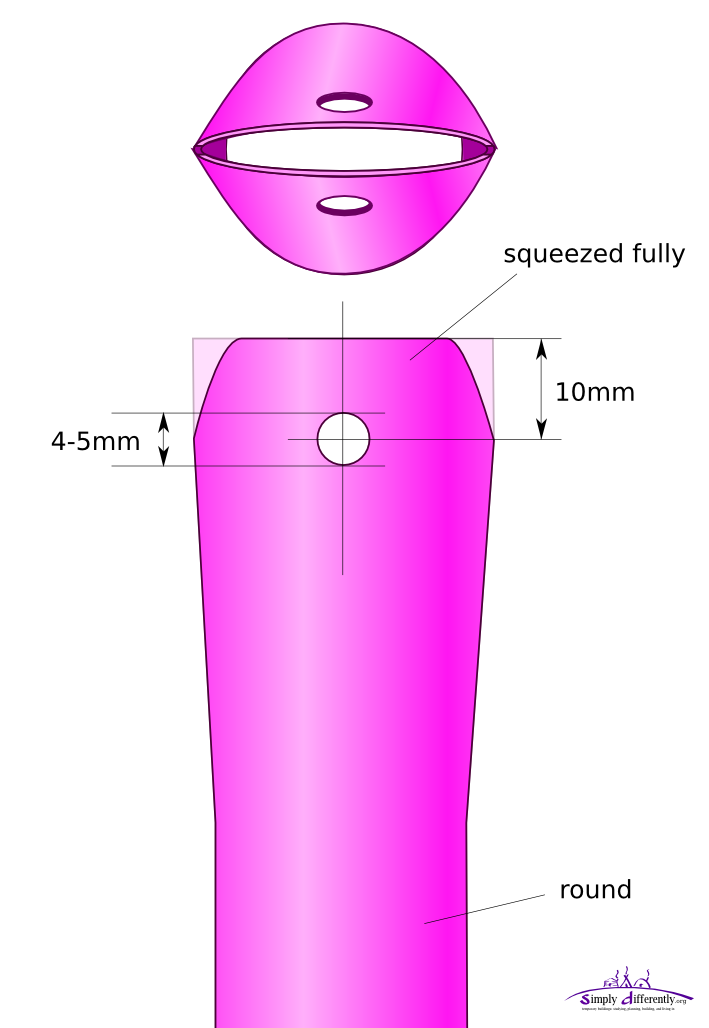
One idea is to use two kinds of metal tubes like electric conduits of 8mm and 10mm diameter, and either drill 8 and 10mm holes into the bamboo, and glue it into and stabilize it with a screw. For the few struts with less than 10mm using the 10mm conduit and move it over the bamboo. And then squeezing the end of the conduit and drill the 4mm hole for connecting the struts then. Will make a test of an A/B-pentagon to see who long the conduit requires to be, and also measure all struts diameter to see how much material of 8 / 10mm conduits I require. Update 2008/04/07: to use the pipe within the bamboo poses a slight risk of breaking the bamboo, as the inside of the bamboo is soft and rather weak: you can break the bamboo easier from within than from the outside; so it rather suitable to use the pipe surrounding the bamboo instead. 1. 5. 2007: Dome Taken Down AgainI stayed two nights in the dome, actually a wonderful experience with so much space, the spherical space makes an alike sacred impression as the tipi does, an cathedral like awe I've got. I gonna miss the dome, and will work for a stiffer but still lightweight solution using bamboo - as I like to avoid steel pipes which would make the frame too heavy and too hard to pitch up without additional tools, not to mention the inability to lift it up and move around when erected. The dome I took down by just unscrewing 5 or 6 connectors, and took it away like a collar, and folded it in itself as far possible - and later unscrewed all connectors on the side.
 2007/05/01 10:02  2007/05/01 10:32 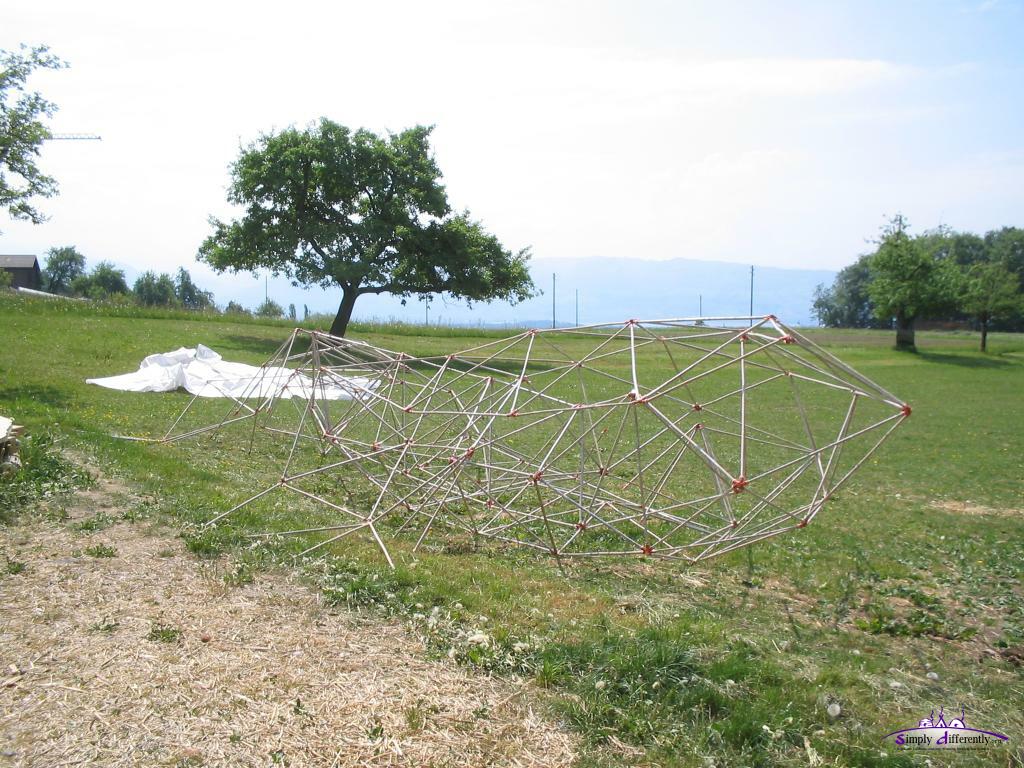 2007/05/01 10:32 29. 4. 2007: Weak ConnectorsWith the current setup with soft-pipe as connectors the skeleton is too weak, and the sun heat softens the pipe further - so much that tying the rain cover to the ground pushes the top down - so I likely will take the dome down much sooner. I definitely require to find a better connector for the bamboo, the softpipe might only work with smaller domes and average temperatures. Things learned with this test pitch-up:
Update 2007/12/14:
CONBAM.de 28. 4. 2007: Yurt Taken Down & Dome Put on the Floor
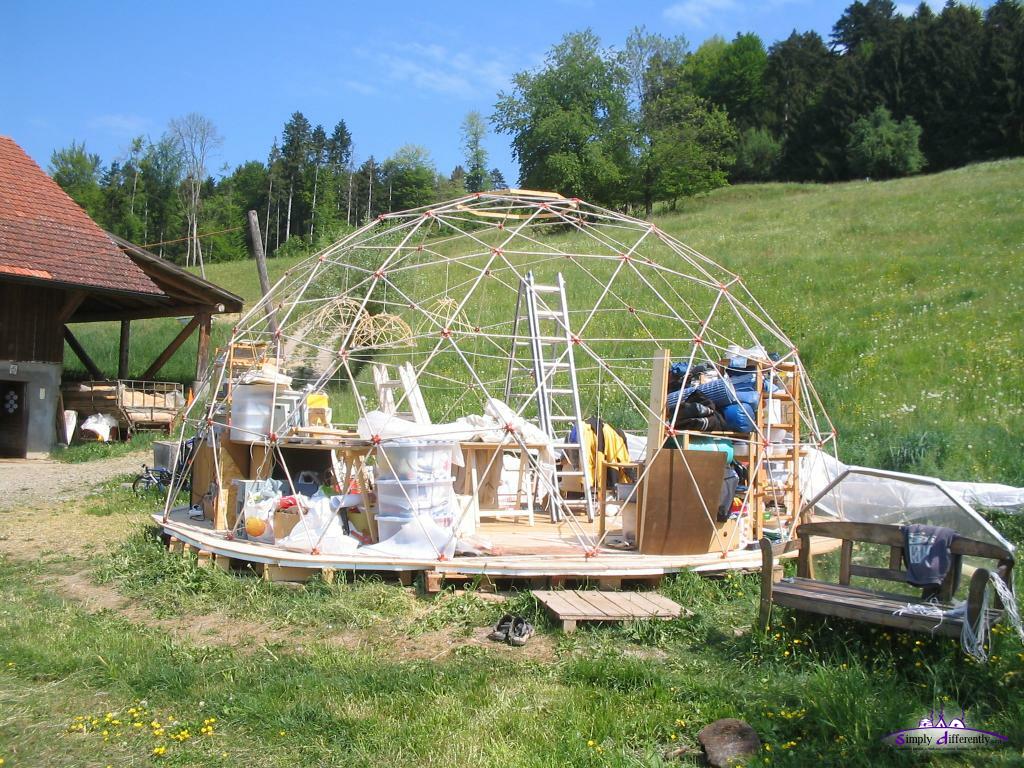
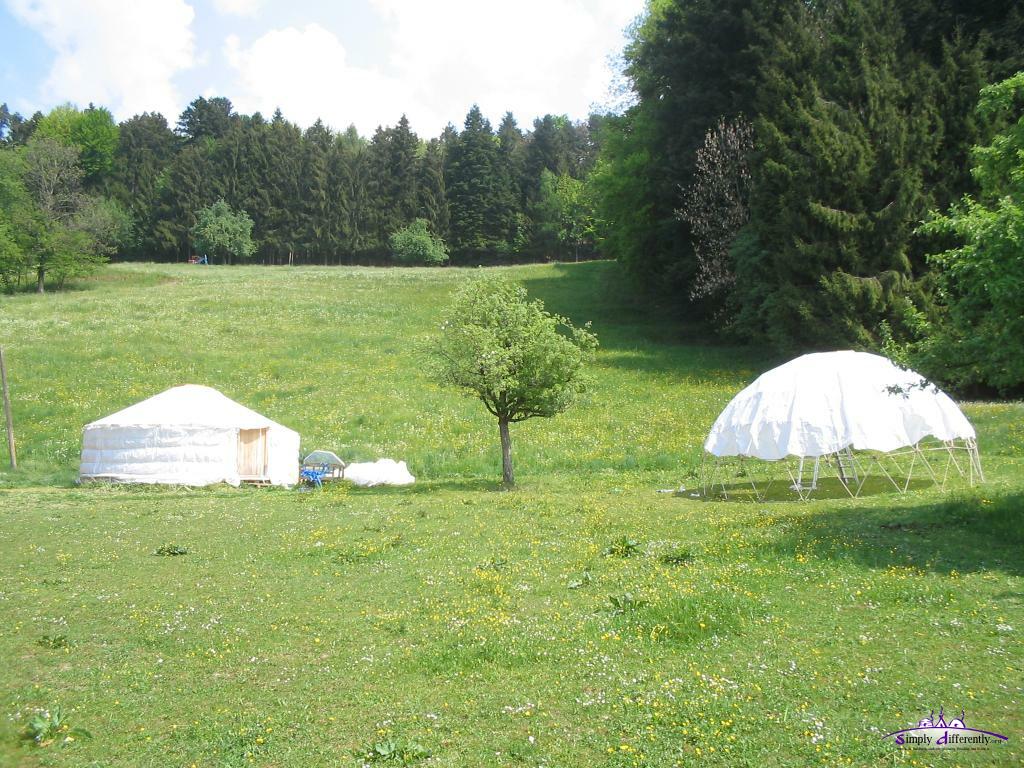 Yurt & Dome 2007/04/28 11:10 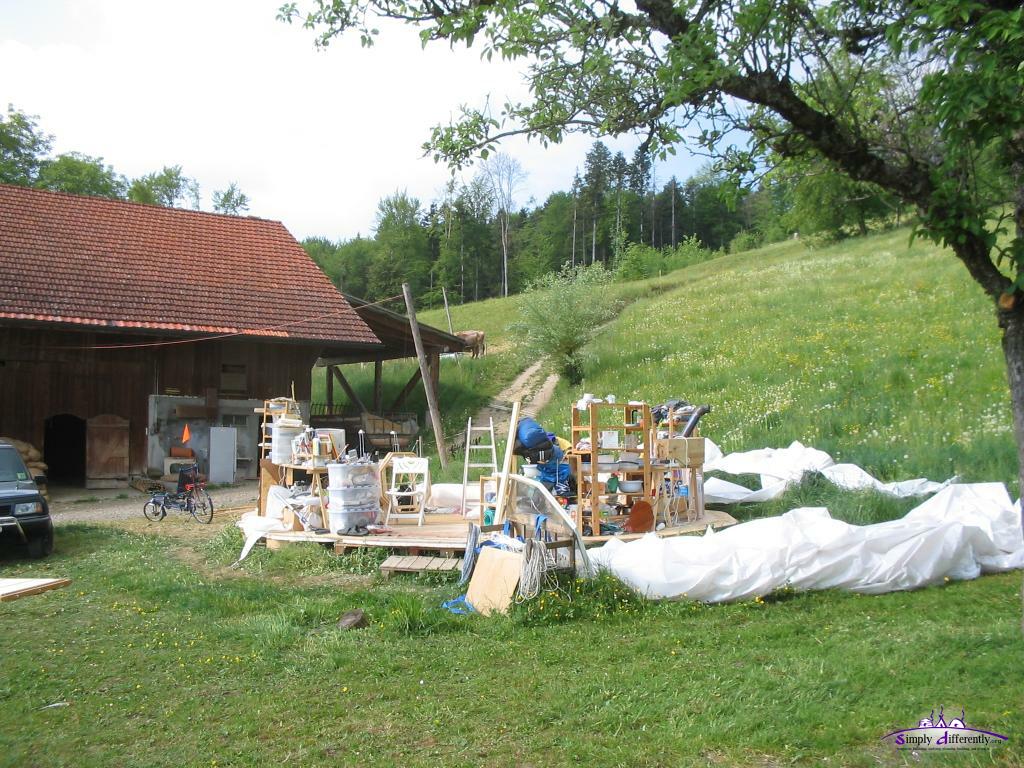 Yurt taken down, floor & interior left 2007/04/28 14:38 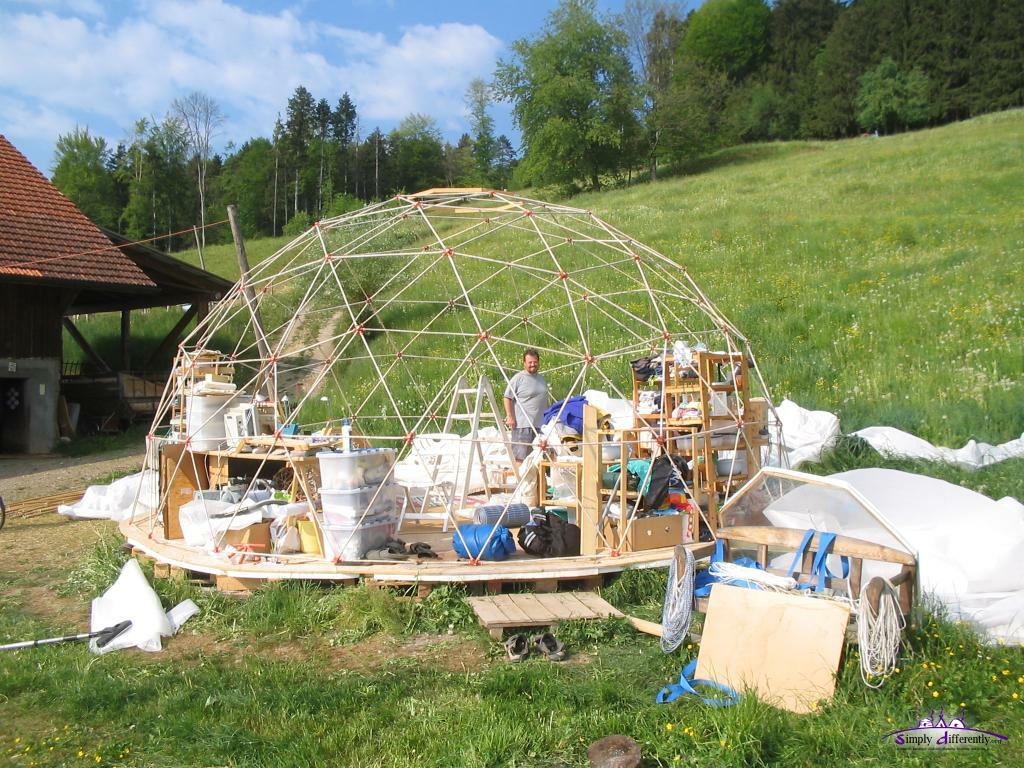 Dome skeleton moved on floor & interior (me inside) 2007/04/28 14:55  Dome skeleton moved on floor & interior 2007/04/28 15:02 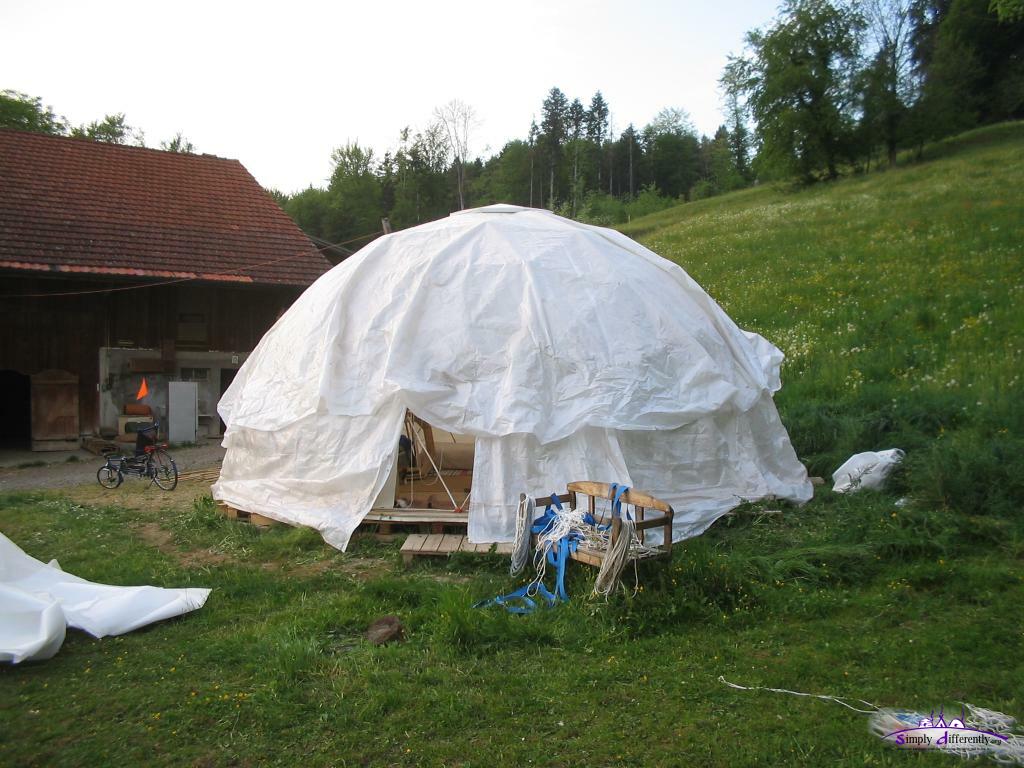 Preliminary dome setup (no robes & fixation, no door yet) 2007/04/28 17:49 Errecting Dome It took me a couple of days to erect the dome, usually it's a matter of an afternoon (4-5 hours) but it was so hot the last days I worked only early morning and evening before sunset. We had also some rain, which wasn't so good for the fully exposed skeleton - anyway.
 2007/04/25 12:50 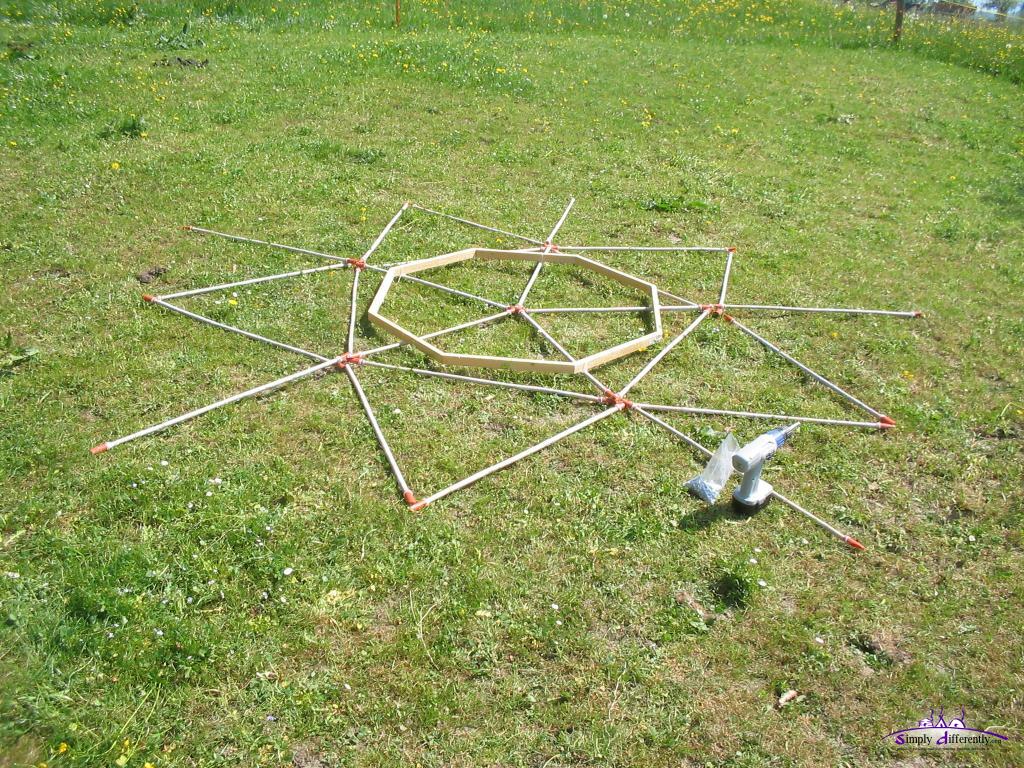 2007/04/25 13:10 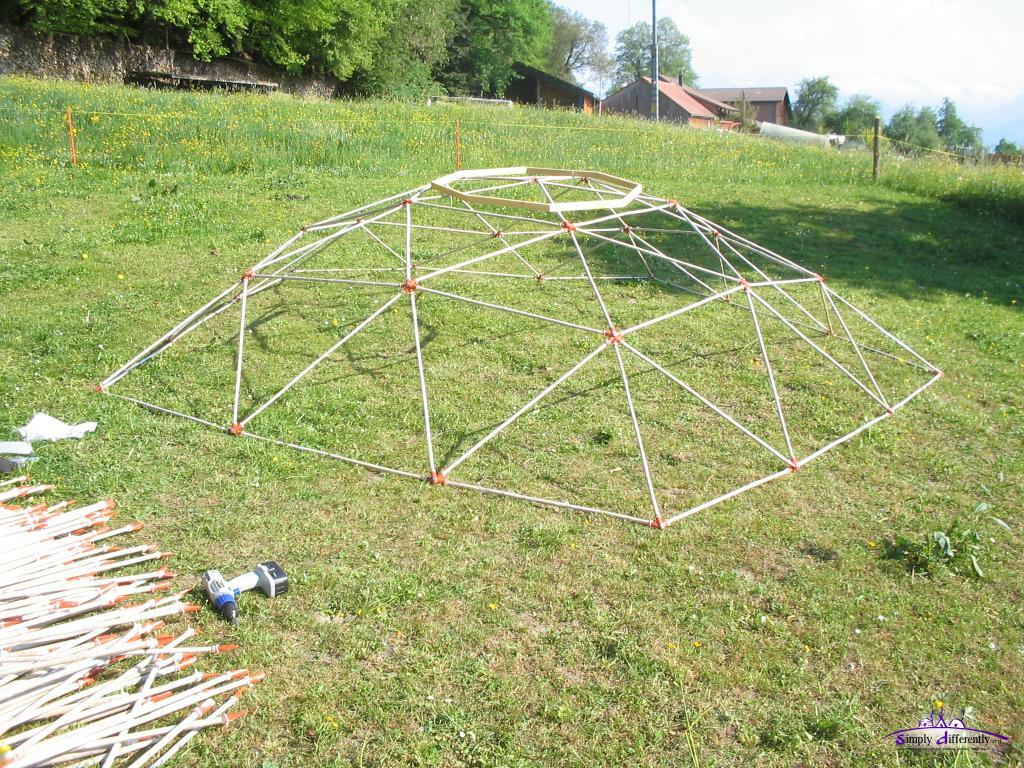 2007/04/25 14:51 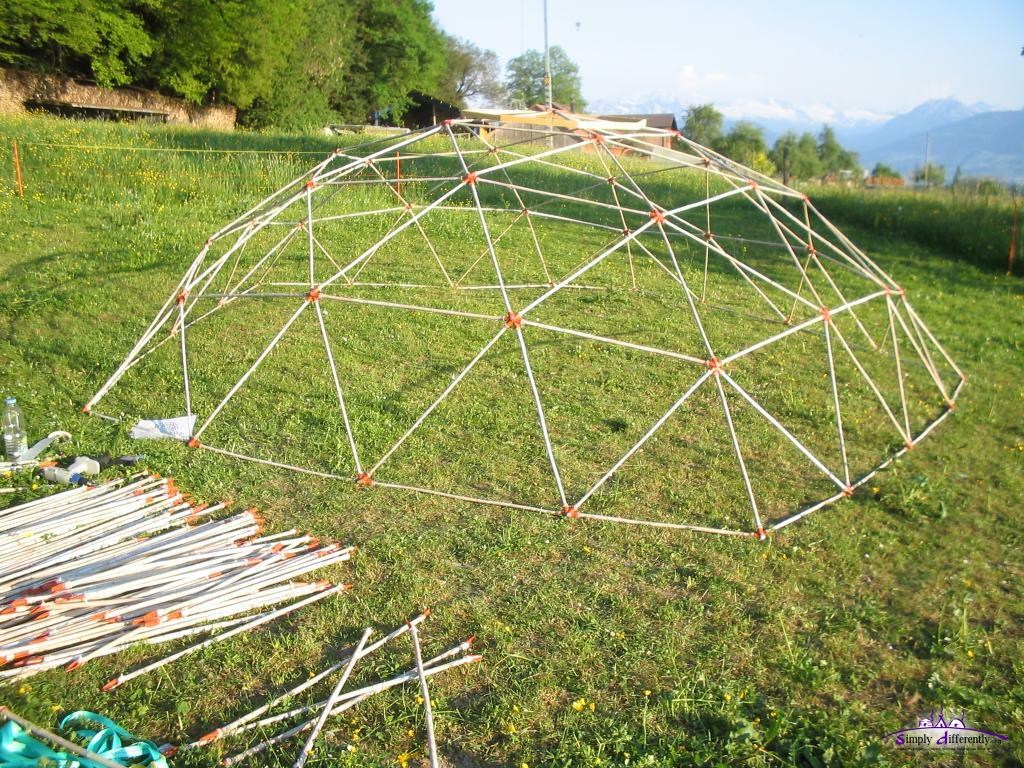 2007/04/25 17:08 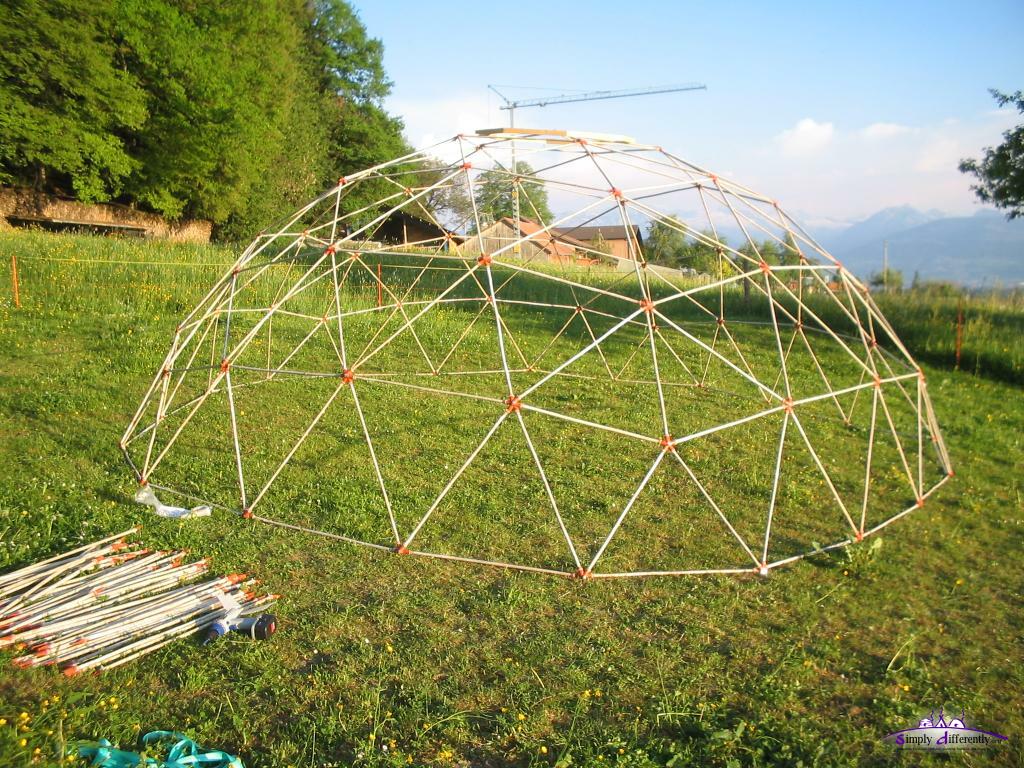 2007/04/26 17:36 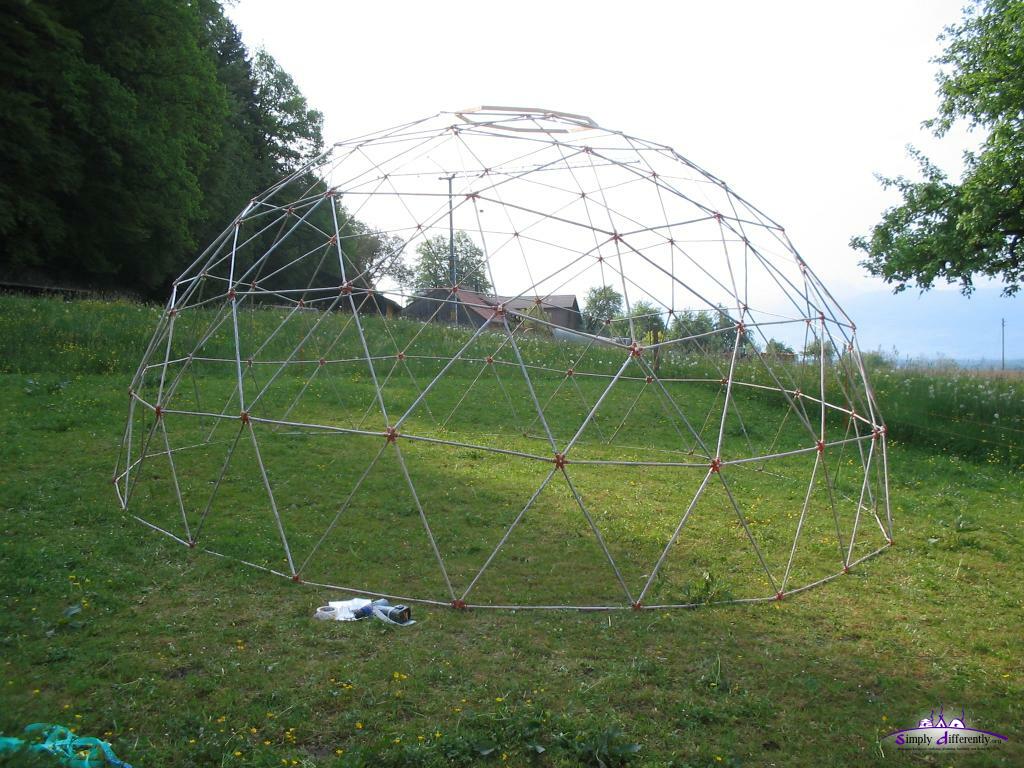 2007/04/28 07:55 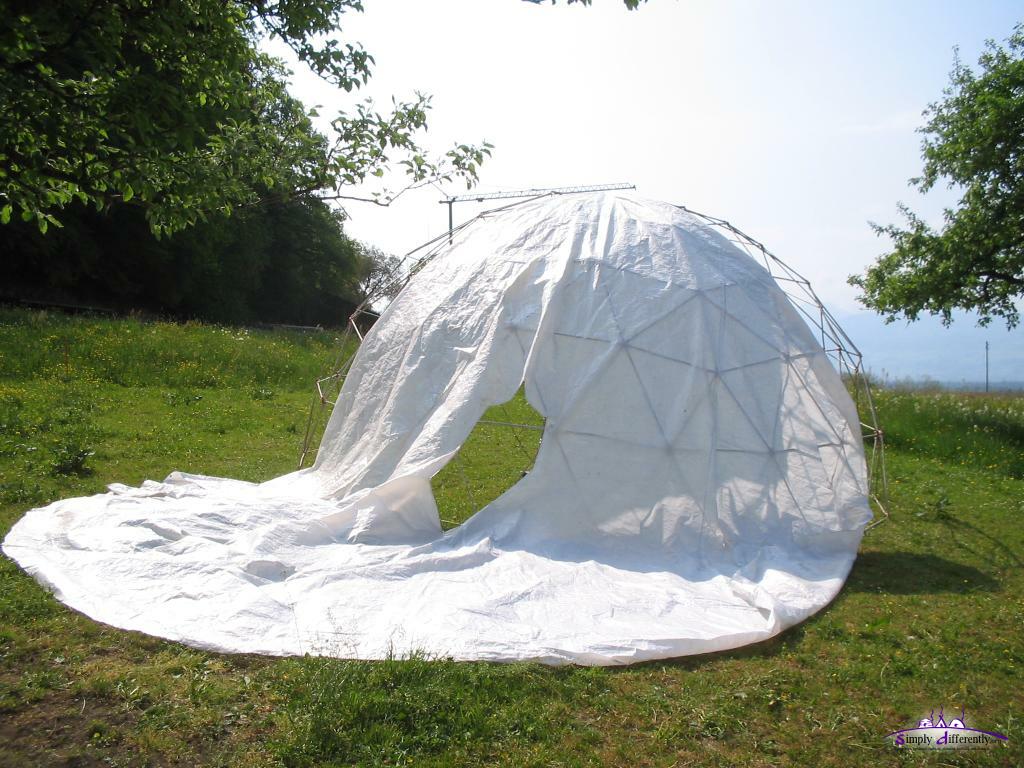 2007/04/28 09:05 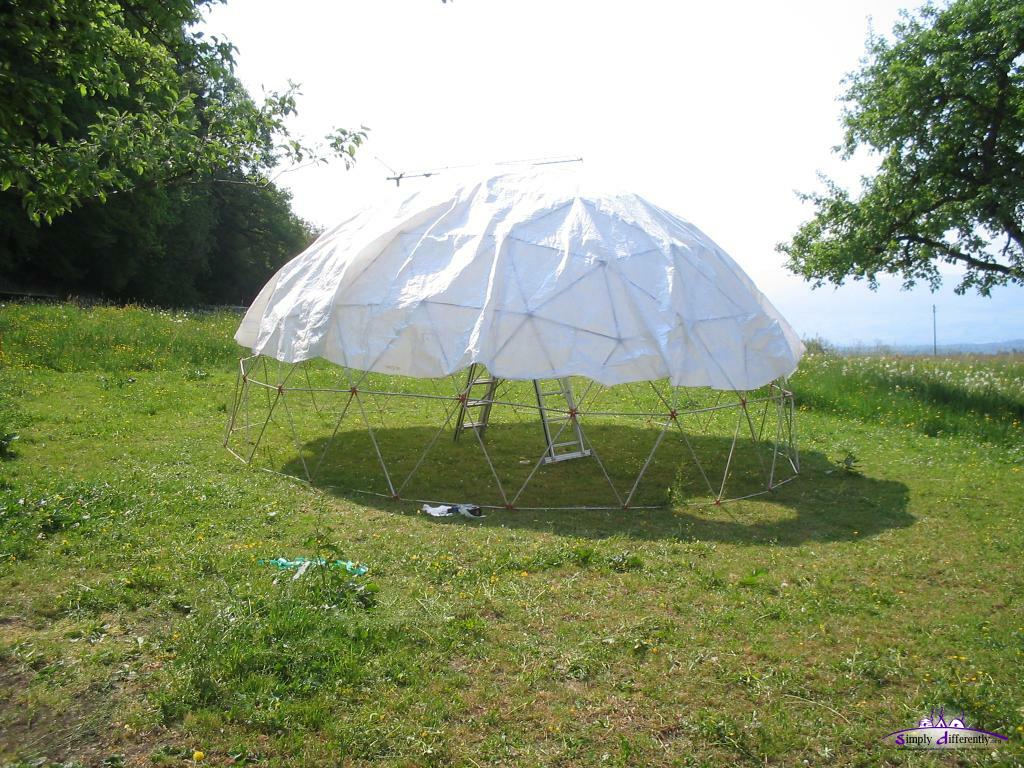 2007/04/28 09:11 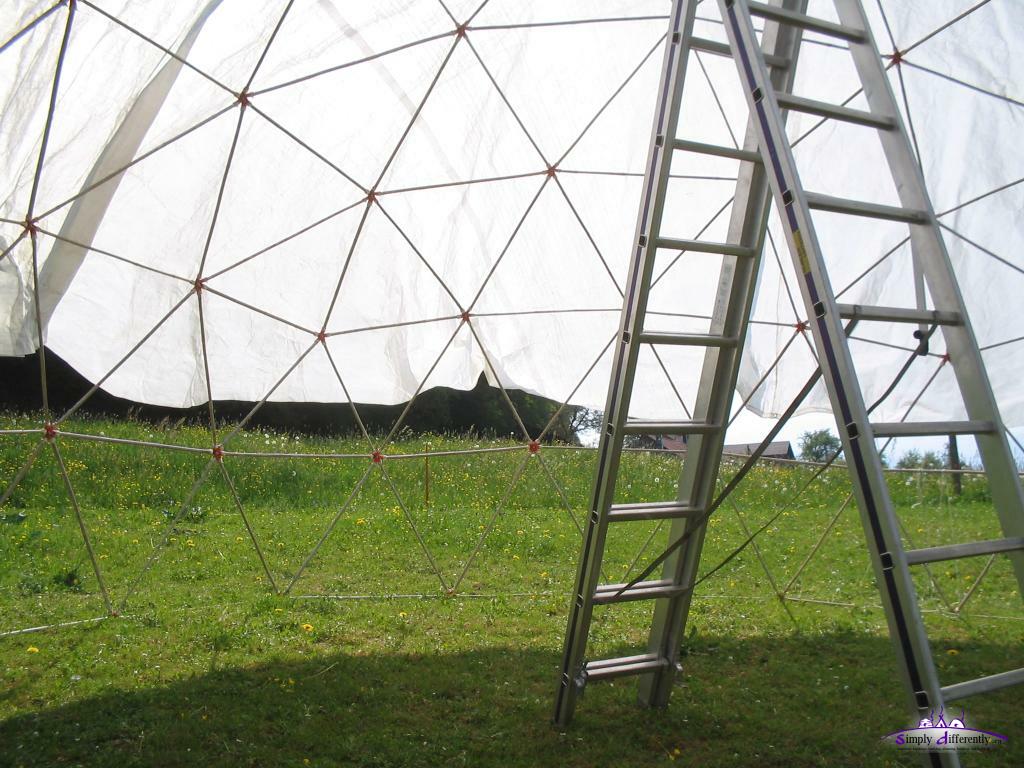 2007/04/28 09:12 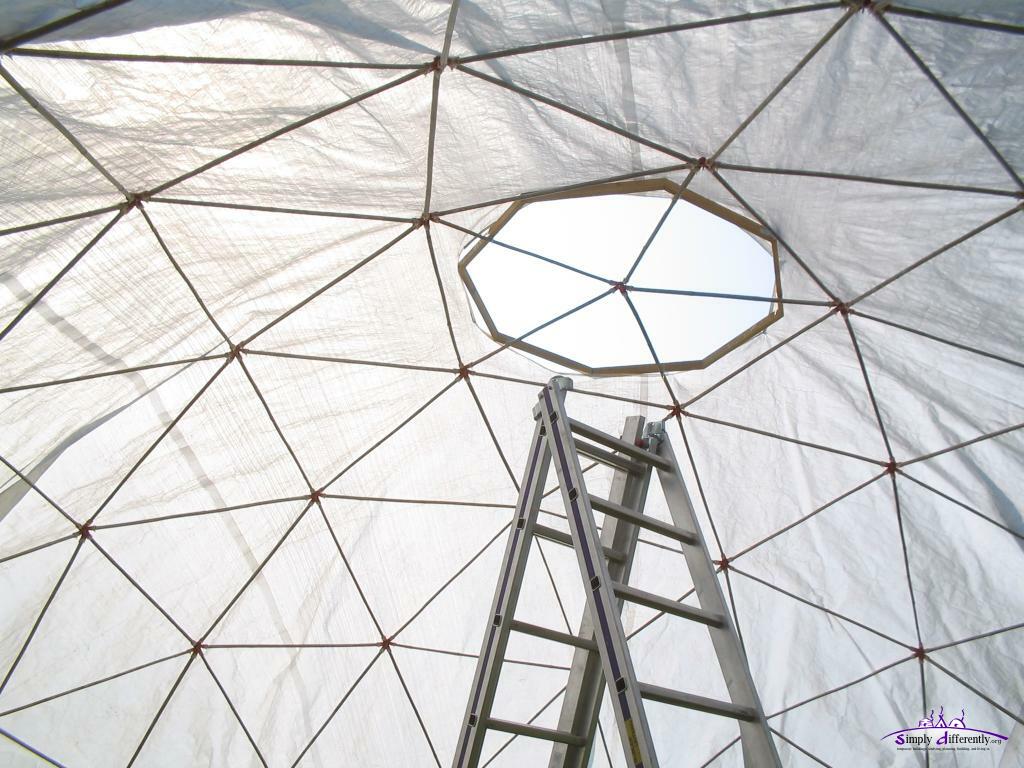 2007/04/28 09:12 I also use a skylight frame so I could reuse the skylight from the yurt. Finally, before I actually decided to switch I put over the rain cover of the yurt on the dome.
It took 4 people to move the skeleton as the base tended to fold inside, and 3 people might have worked too with some skills but finally with 4 people we did it. The skeleton itself is rather light, apprx. 40kg I think total. Once we had it over the existing floor and interior and moved it over the shelves, I had to move some interior further into the center, 10-20cm apprx., due the spherical walls. Interior Cover & Rain Cover Since I use the yurt covers (interior & rain) I had to use a cord which I tied on the height of 1.50m apprx. which is also the center of the A-pentagon - on that cord I tied the interior cotton, as first layer from outside. As next I added the yurt rain wall, also tied on the same cord - and finally put on the roof interior cotton, and then the roof rain cover from the yurt. Skeleton The skeleton with bamboo is strong, yet, the soft pipe junction are weak and soft, too soft. I don't expect it withhold a storm and make a tend (push a junction inside). The cable binders aren't that strong either, and while moving one teared apart, so I might have to use 2nd cable binder for all endings, at least on the west side where storms usually come from. I was aware that the bamboo/soft-pipe combo was only suitable for a lightweight setup, rain cover and cotton interior I reused from the yurt setup, and now realize I won't able to add another layer unless I would choose another strut endings other than soft pipe. The reason I use soft pipe was I could use them to various diameter as the bamboo came, 15-18mm - so I'm looking for other options. Anyway, I'm expecting to stay a couple of weeks inside the dome, but as far I can see won't last longer and then switch back the yurt. The next things to do:
25. 4. 2007: Raising the Dome AgainSo, finally again raising the dome, and checking if I can use part of the yurt setup, such as a skylight (octagon and a bit smaller than the top 'A'-pentagon) and this allows me as a first step to reuse the inner cotton cover (roof & wall) as well rain cover (roof & wall) of the yurt. If all does well, I will switch the yurt for the dome sometime this weekend. I noticed moving the dome is problematic due the base not being stable when it's not pushed on the ground, it bends inside and the entire dome looses its form - so I will stiffen the bottom connectors so the circular base is kept in shape so 3 person can lift it to the existing floor where my yurt sits on now. 11. 4. 2007: Coating Struts
I'm also about to finalize the connector reinforcement construction and updated the previous illustration with the new design. Next days I will make a few tests with the construction, and if the weather allows it raise the dome within the next week.
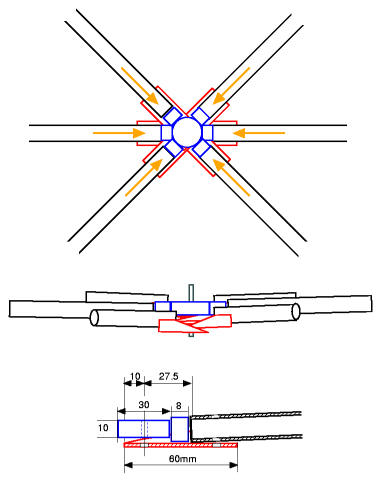
18. 3. 2007: Planning Extending/Reinforcing Connector
The wooden star would be composed by:
Since the struts are slightly bent, apprx. 8-9°, I leave 2mm as spacing, but final length of the spike will be measured on the erected dome again. Total 91 connectors, where as the bottom 20 connectors (4-way) I wouldn't enforce:
Total requirement of wood:
So, this is the plan for reinforcing the LDPE connector so far, I will of course think it over again and make small tests, e.g. the 8mm spike is small and some will enter the hollow bamboo, so maybe a small ending of larger diameter is required. The connector could be also stronger if I wouldn't have left 27.5mm but less, maybe 15mm could work too, or a whole pipe not a half but this would require a single diameter strut and with bamboo this is not possible - so it's likely worth to reinforce and find a strong connector solution in order to build the skeleton with lightweight but strong and rather cheap priced bamboo sticks. 17. 3. 2007: Taking the Dome Down Again
But before that I measured the dome:
16. 3. 2007: Raising the Dome Skeleton
Pitching the Skeleton I decided to build top to bottom, means, level by level until the bottom is reached - since the entire skeleton is apprx. 40kg it was easy to lift it for the last bottom level.
The construction map on the right helped me to lay out the struts on the ground and level by level attach them and screw them together.
Roger helped me and it took us about 4 hours.
 Preparing Pitching 4V Geodesic Dome (2) 2007/03/16 11:24 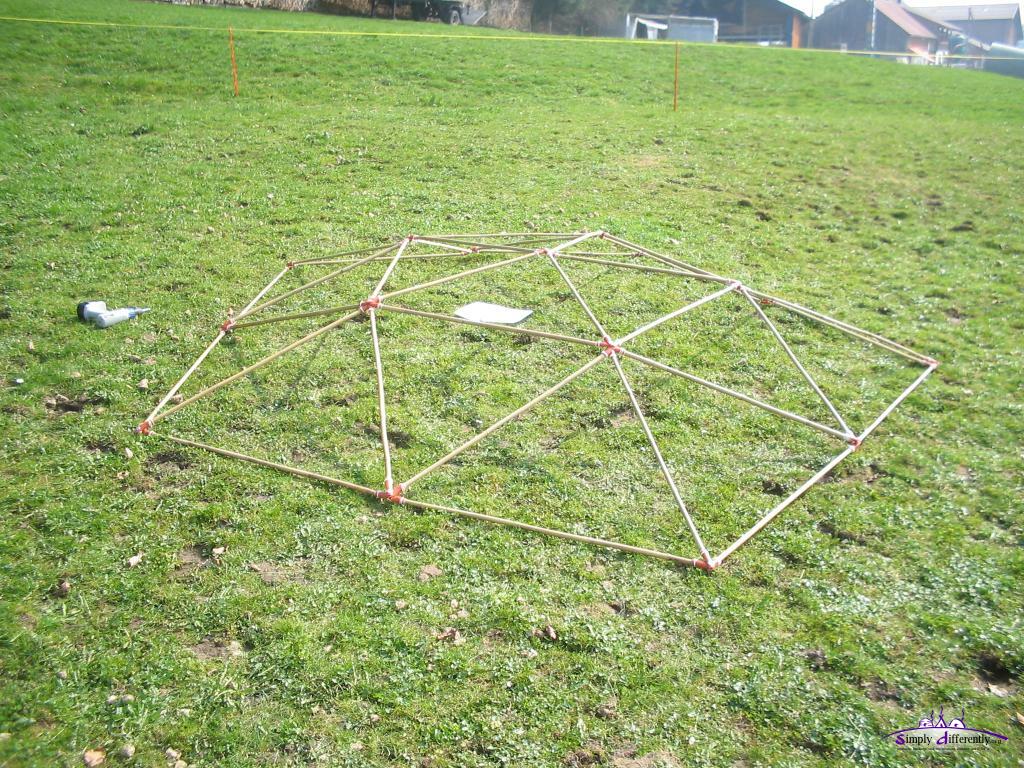 Pitching 4V Geodesic Dome, 1st & 2nd Level (2) 2007/03/16 12:08 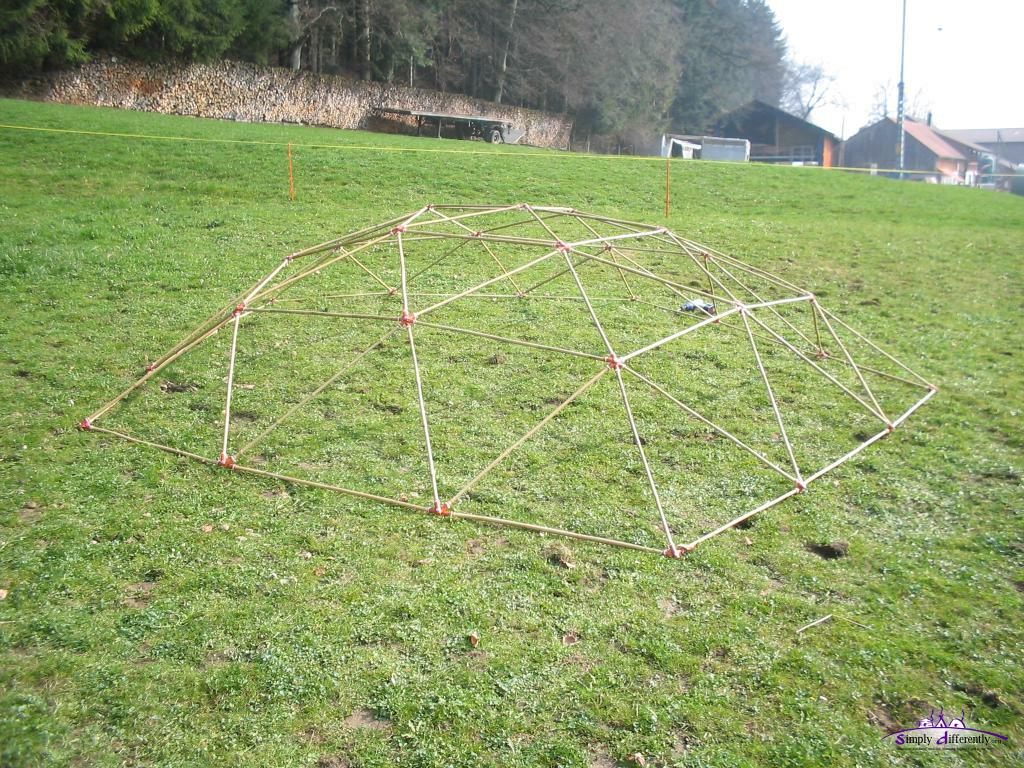 Pitching 4V Geodesic Dome, 3rd Level (2) 2007/03/16 12:49 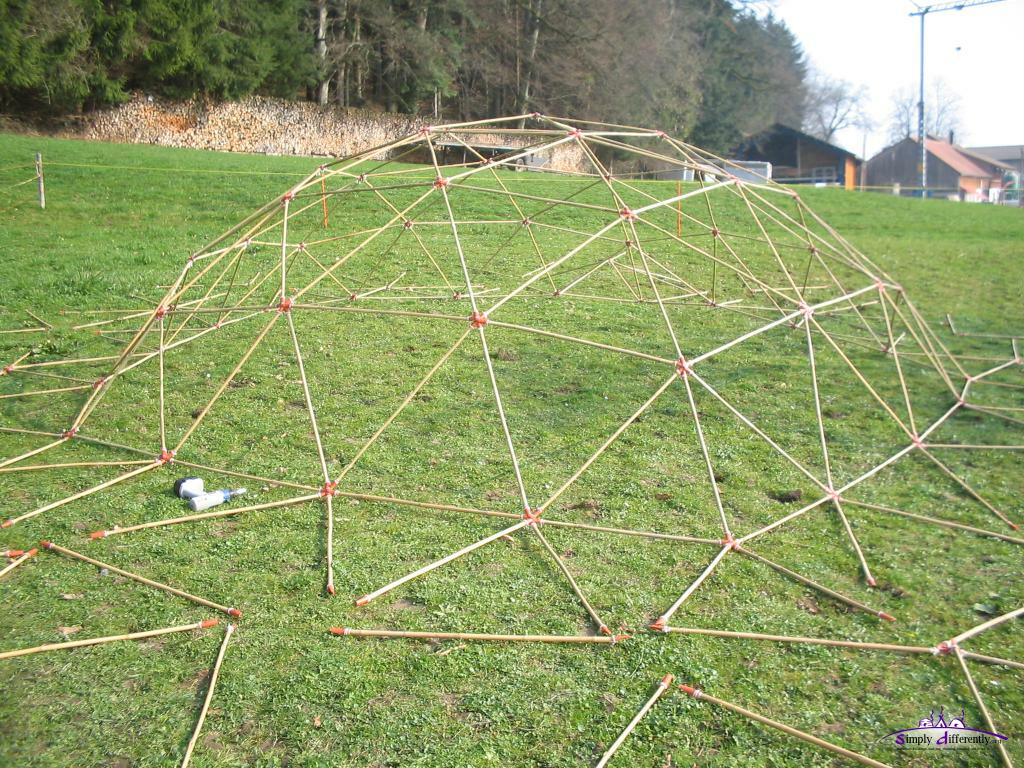 Pitching 4V Geodesic Dome, 4th Level (3) 2007/03/16 14:16 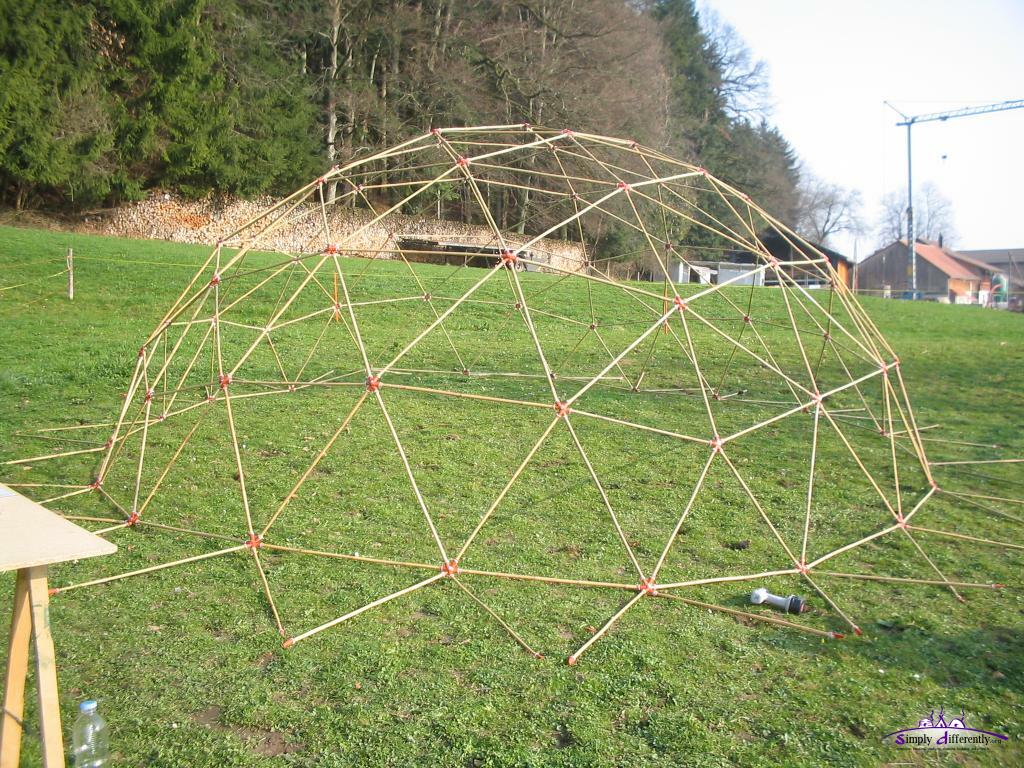 Pitching 4V Geodesic Dome, 5th Level (1) 2007/03/16 15:12 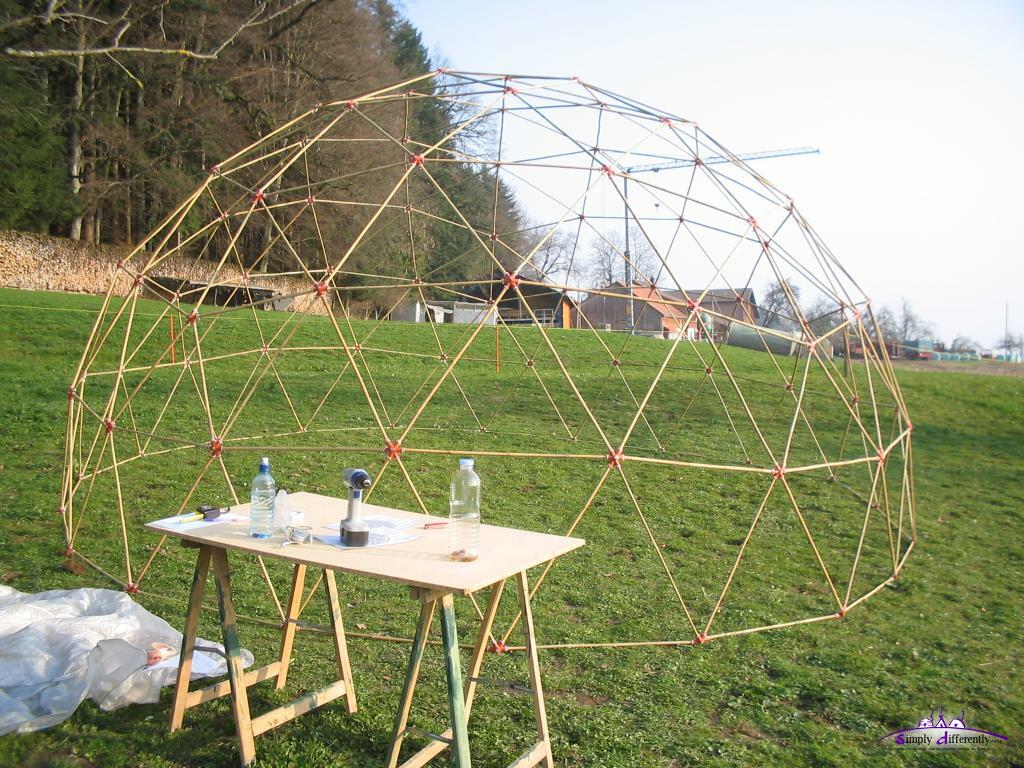 4V Geodesic Dome Finished (1-6 level) 2007/03/16 15:43 Some Impressions
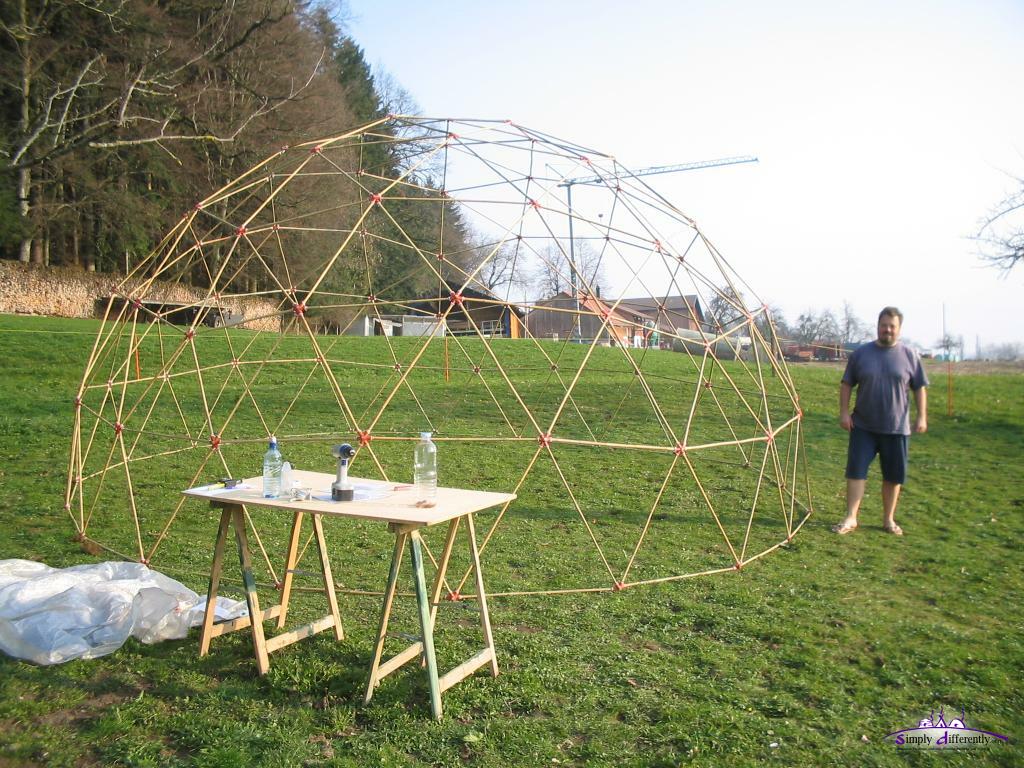 4V Geodesic Dome (6.33m) (1) 2007/03/16 15:43  4V Geodesic Dome (6.33m) (3) 2007/03/16 15:50  4V Geodesic Dome (6.33m) (4) 2007/03/16 15:50  4V Geodesic Dome (6.33m) (5) 2007/03/16 15:51  4V Geodesic Dome (6.33m) (6) 2007/03/16 15:51  4V Geodesic Dome (6.33m) (7) 2007/03/16 15:51  4V Geodesic Dome (6.33m) (8) 2007/03/16 15:51 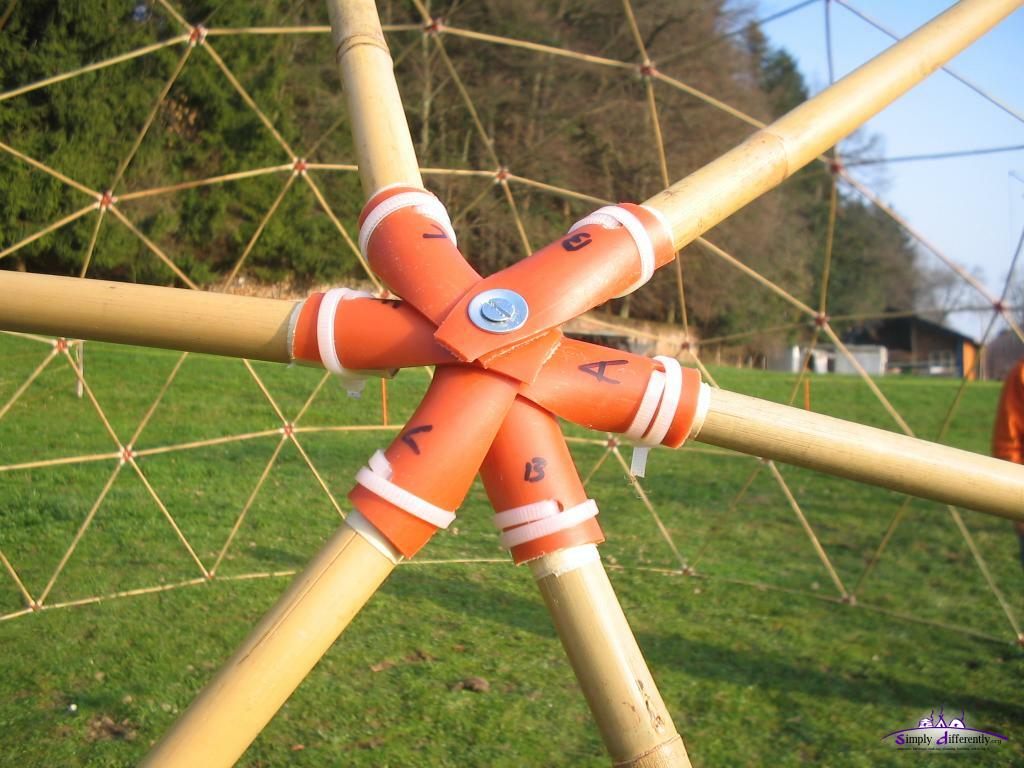 4V Geodesic Dome (6.33m) (Closeup 1) 2007/03/16 15:53 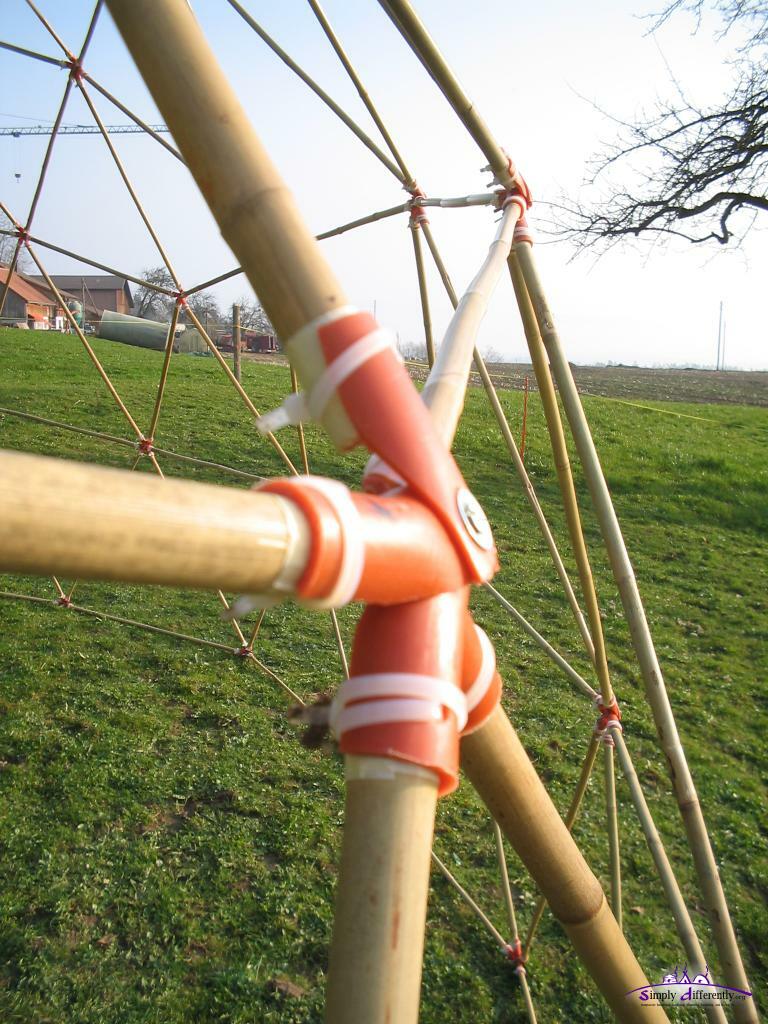 4V Geodesic Dome (6.33m) (Closeup 2) 2007/03/16 15:53 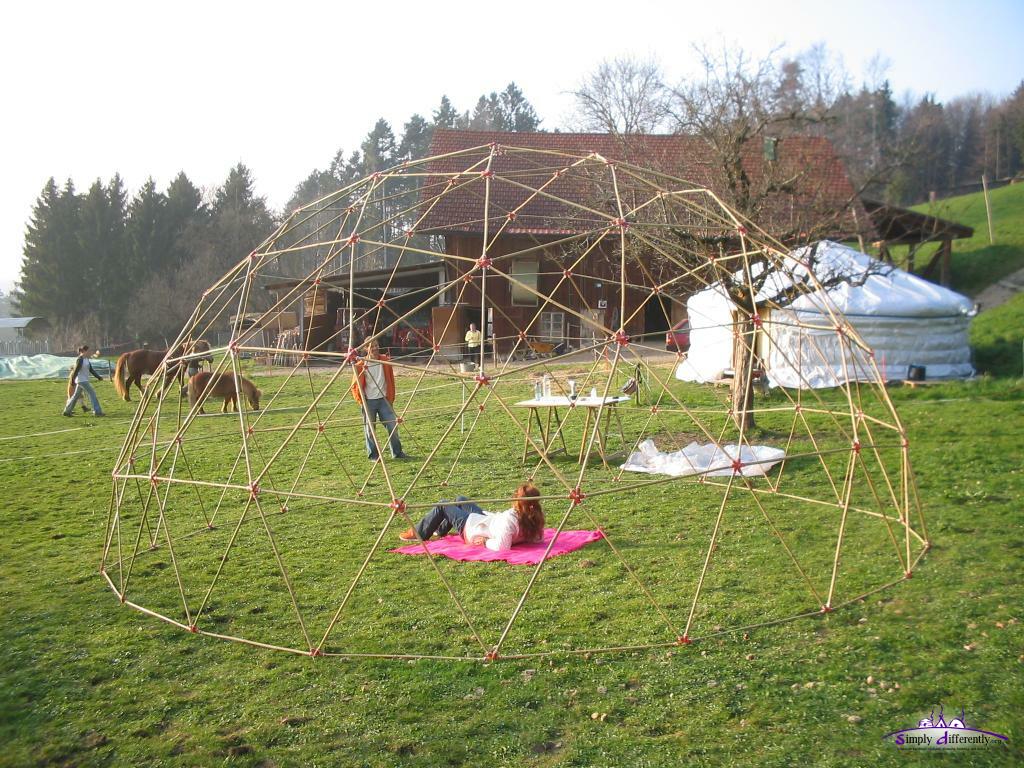 4V Geodesic Dome (6.33m) (10) 2007/03/16 16:04 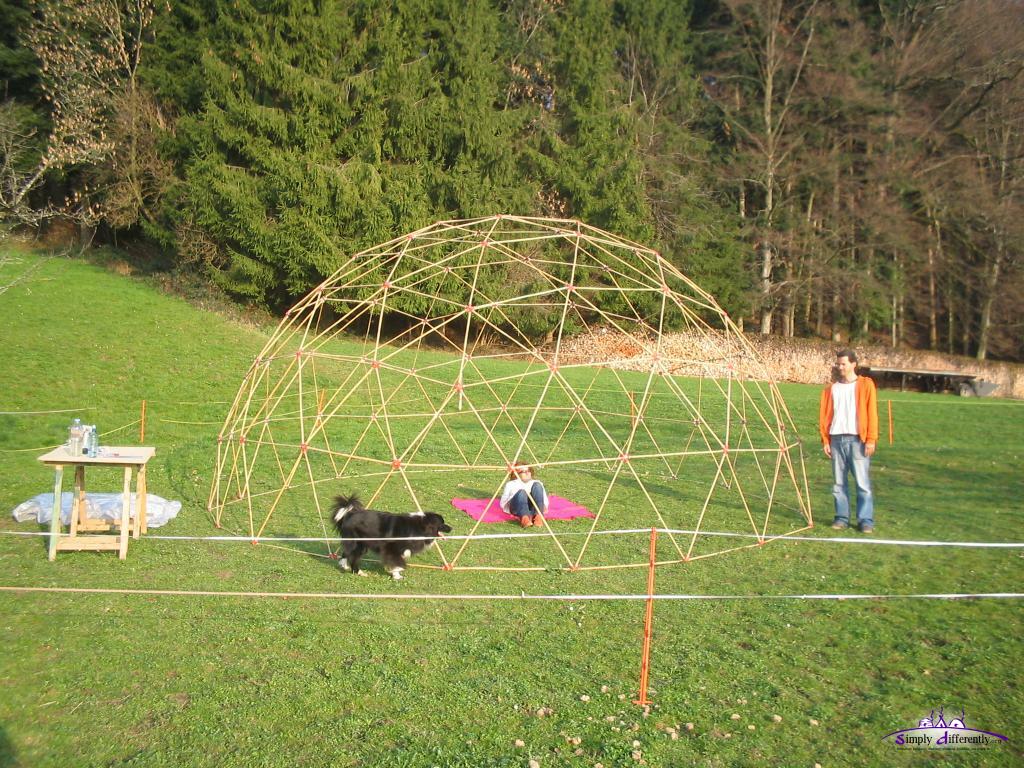 4V Geodesic Dome (6.33m) (15) 2007/03/16 16:07
11. 3. 2007: New Way for 4V Dome
After working a lot on geodesic polyhedra the last two or even three weeks, and finding out why my L3 variant of the Icosahedron didn't provide the same strut lengths as those from B. Fuller (via DesertDomes.com
I summed up 1/1000th or 0.1% variance of length to the same strut, so I ended up with 5 strut lengths, the 4V could also have 5 strut as two strut lengths are so close but not as close as the L3. But the variance difference is quite obvious and it would mean to have more alike triangles and probably also less waste (which I have to proof first). Anyway, I already have cut and assembled all struts, I won't change it - but for another and future version I might prefer the L3 over the 4V variant. Ln vs nV:
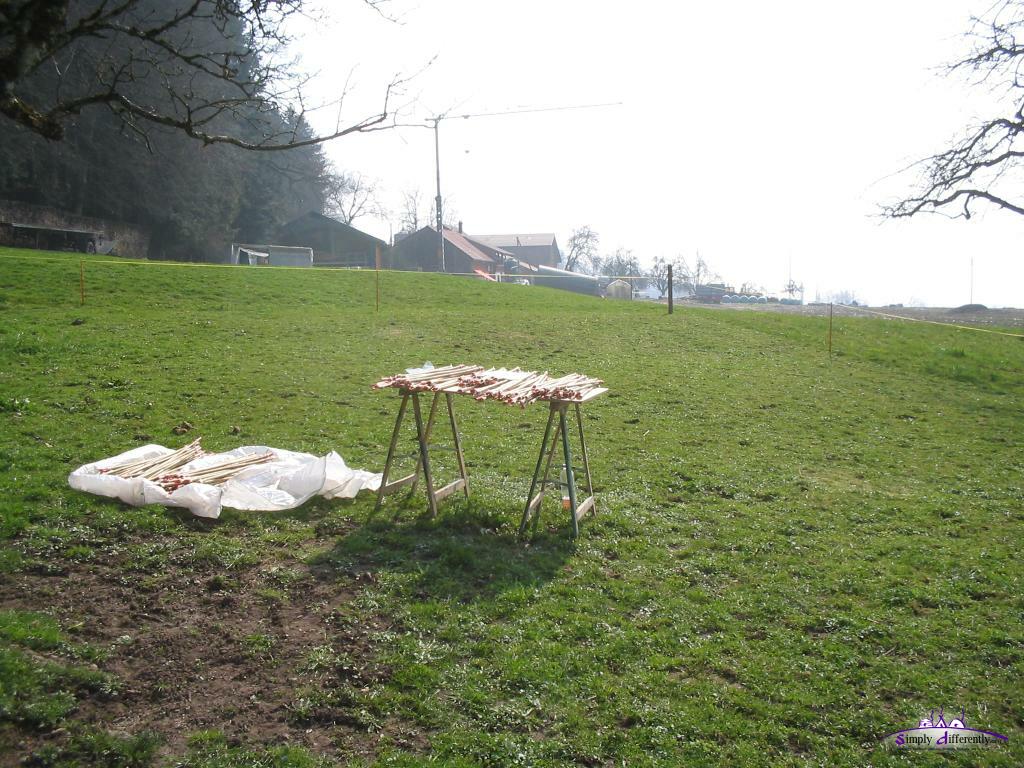
Pitching the Dome The last days were very sunny, but night and day temperature difference up to 15°C which I like to avoid to expose the bamboo struts - as I would expect them to crack more likely. So I likely wait a few more weeks before I make the first pitching of the dome skeleton. Content:
|


| Home | · | About | · |  Tipi | · |  Yurt | · |  Dome | · | Features | · | Gallery |


Creative Commons (CC) BY-SA-NC 2005-2017, developed, designed and written by René K. Müller
Graphics & illustrations made with Inkscape, Tgif, Gimp, PovRay, GD.pm
Web-Site powered by FreeBSD & Debian/Linux - 100% Open Source