
|
Yurt Notes & Calculatorwritten by Rene K. Mueller, Copyright (c) 2005, 2006, 2008, last updated Sun, September 22, 2013 Wall / Khana
I used bamboo for the khana, and used one "norm" lath with marks on it where the junction should be, and put it next to the lath I needed to bind, which I did with rubberbinders:
Bamboo Lattice WallRubberbinder I've got the rubberbinders from the wholesale garden company:
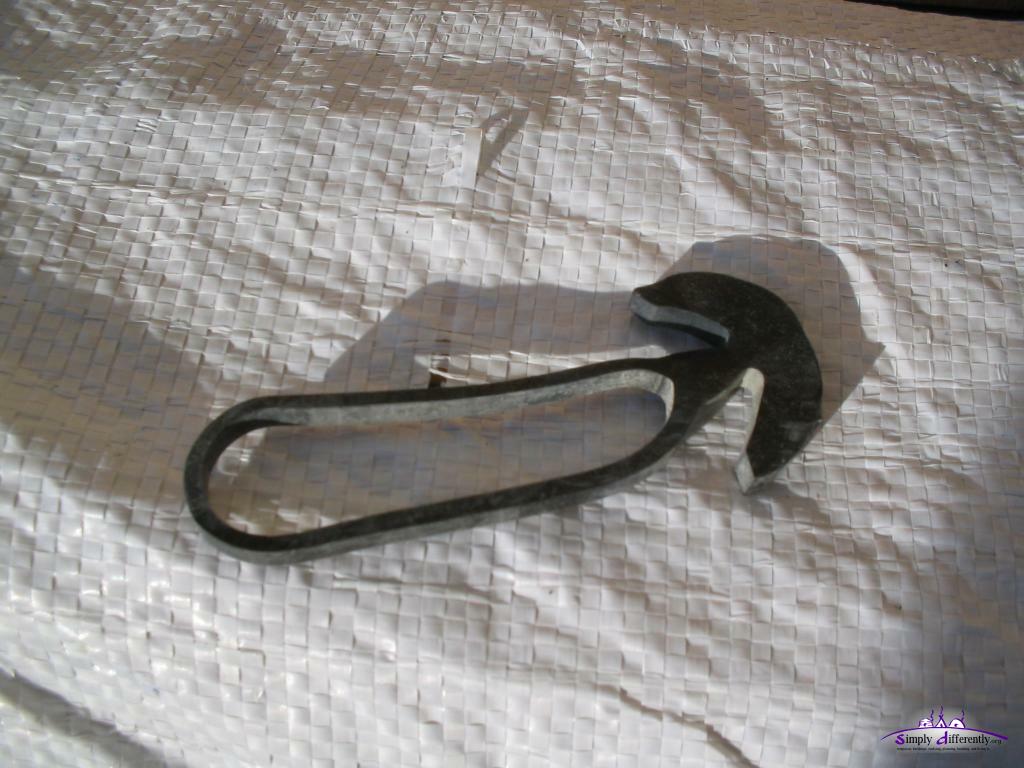 The rubber binder 2005/09/21 10:57 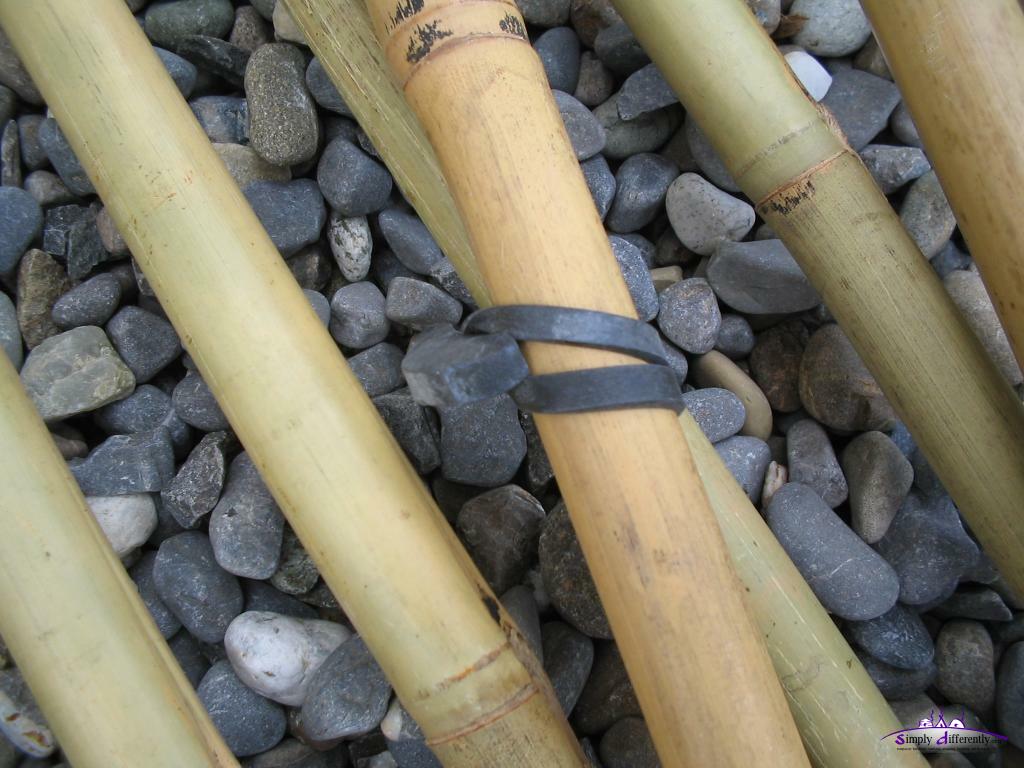 Closeup rubber binder 2005/09/20 15:21 It's not sure how long they last, as they contain softener which leaves the rubber slowly and finally gets brittle. Following options are contributed by Claudius Kern: Bent & Cut Nail The nail is bent first, and then cut off apprx. 4-6mm and finally with a grinder the cutted end smoothed. 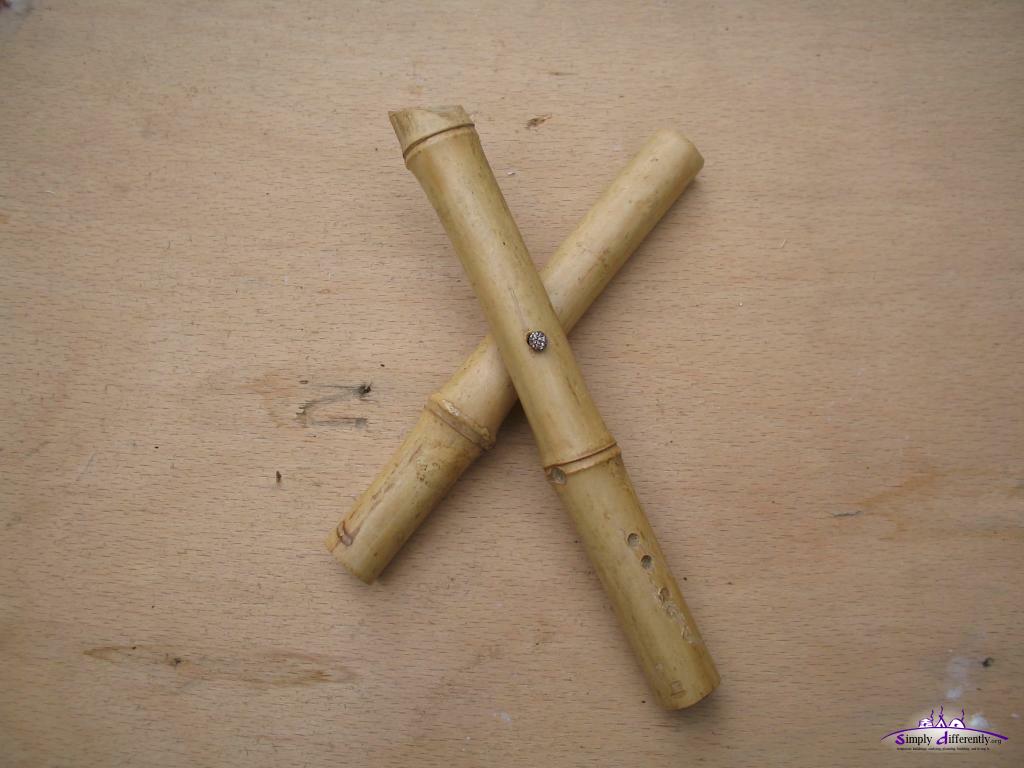 Bamboo Lattice Wall, with bent and cut nail (1) 2006/09/07 09:53 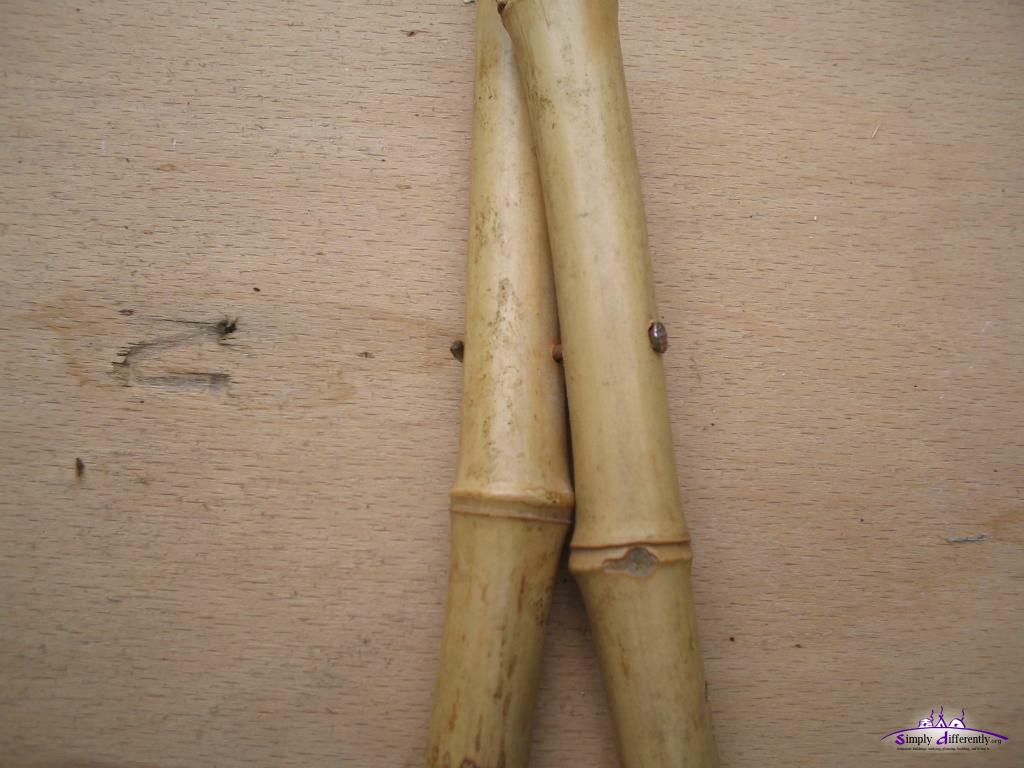 Bamboo Lattice Wall, with bent and cut nail (2) 2006/09/07 09:53 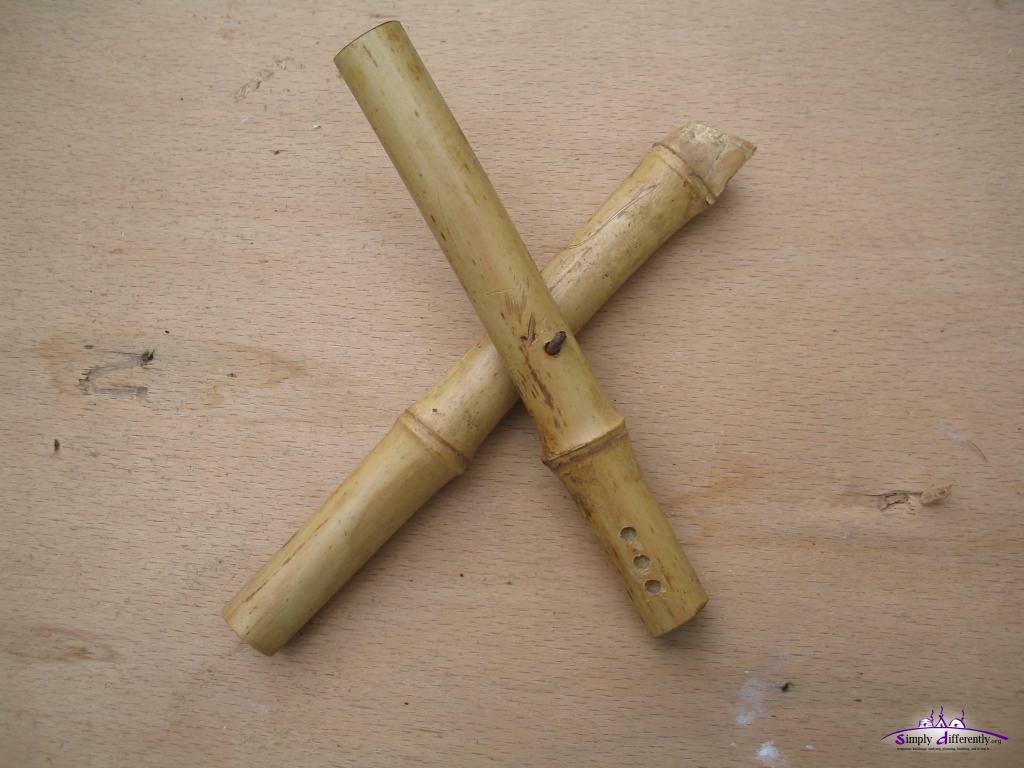 Bamboo Lattice Wall, with bent and cut nail (3) 2006/09/07 09:53 Single Cablebinder without Hole A knot is made between the laths, and finally tied. 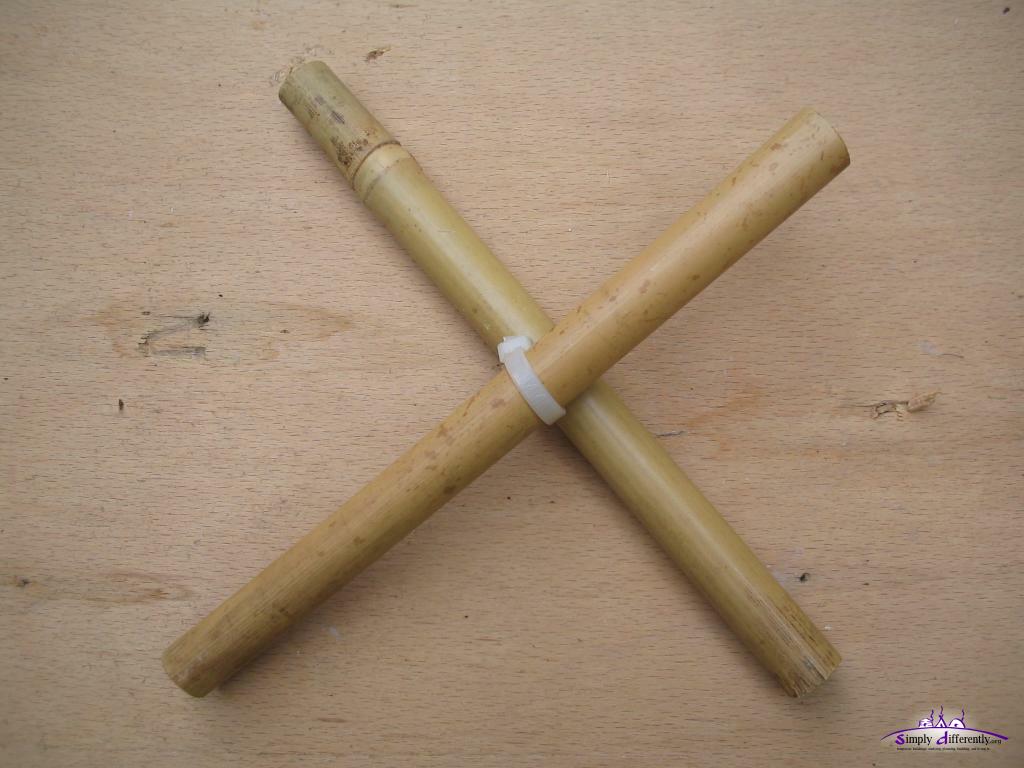 Bamboo Lattice Wall, with single cablebinder (1) 2006/09/07 09:53 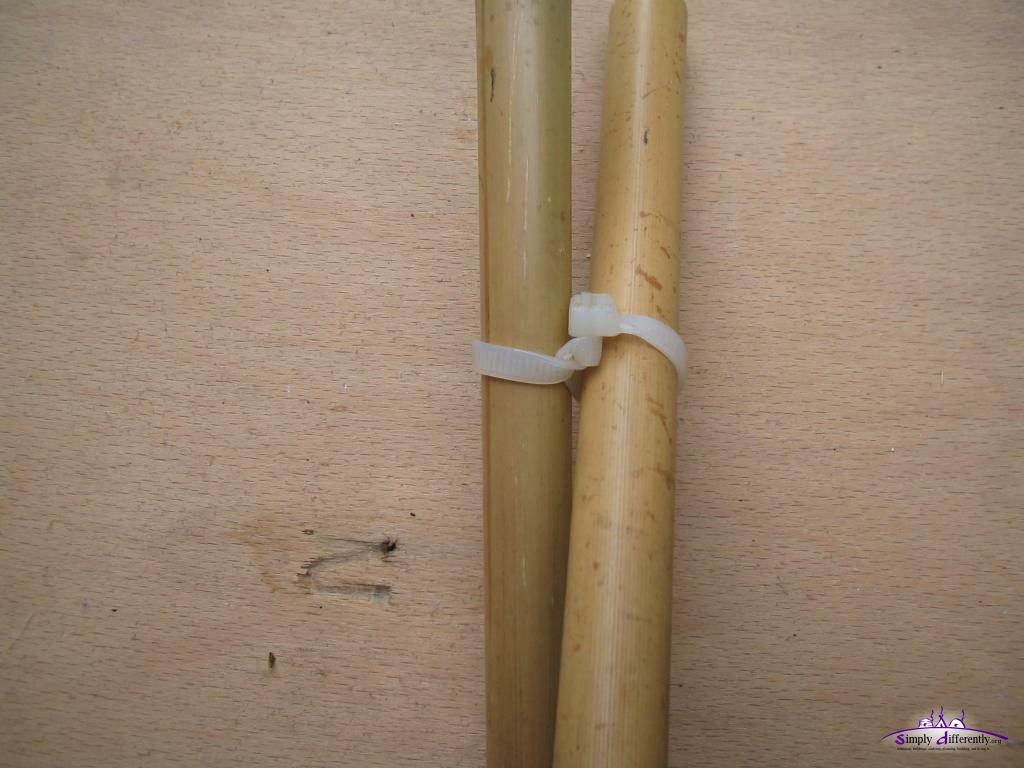 Bamboo Lattice Wall, with single cablebinder (2) 2006/09/07 09:54 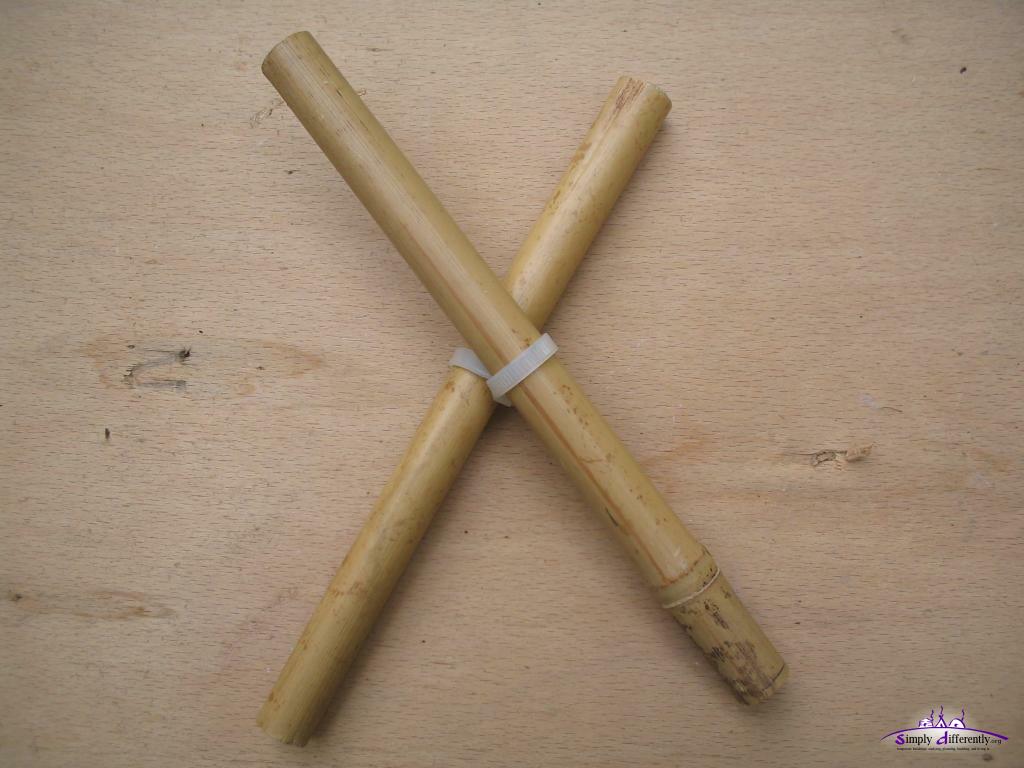 Bamboo Lattice Wall, with single cablebinder (3) 2006/09/07 09:54
Double Cablebinder without Hole Both laths are held with two cablebinders interlocked. This way is rather for short periods of time where the wall is compressed as otherwise the cablebinders wear out and the junction with the cablebinders slide away. 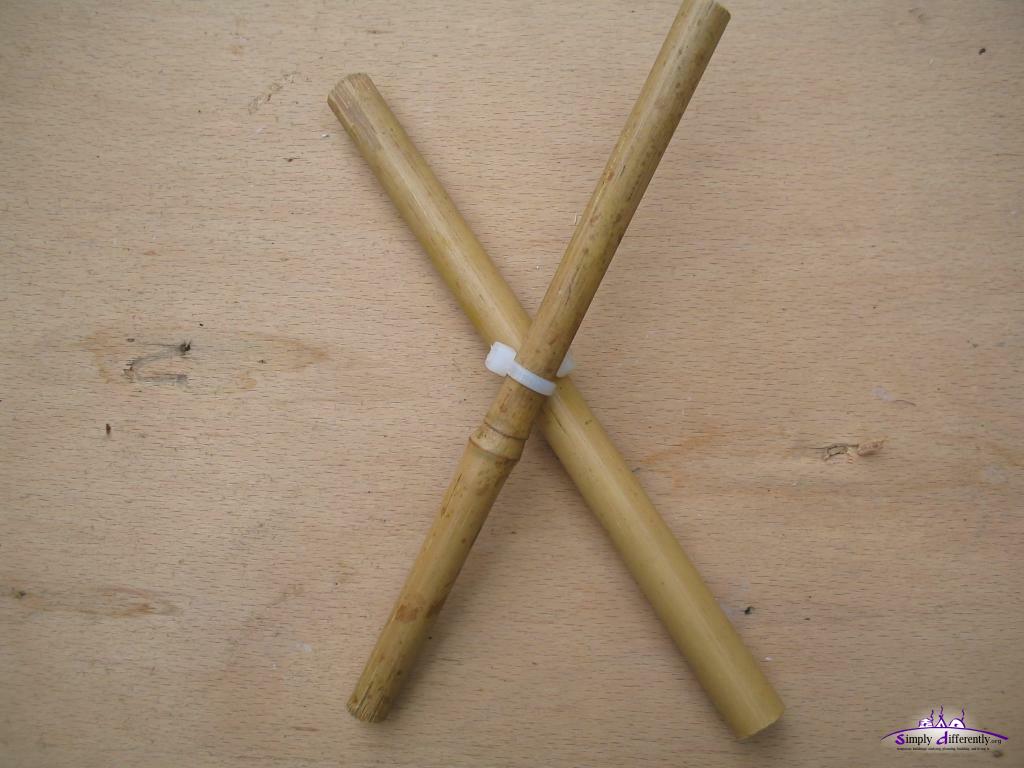 Bamboo Lattice Wall, with two cablebinders (1) 2006/09/07 09:54 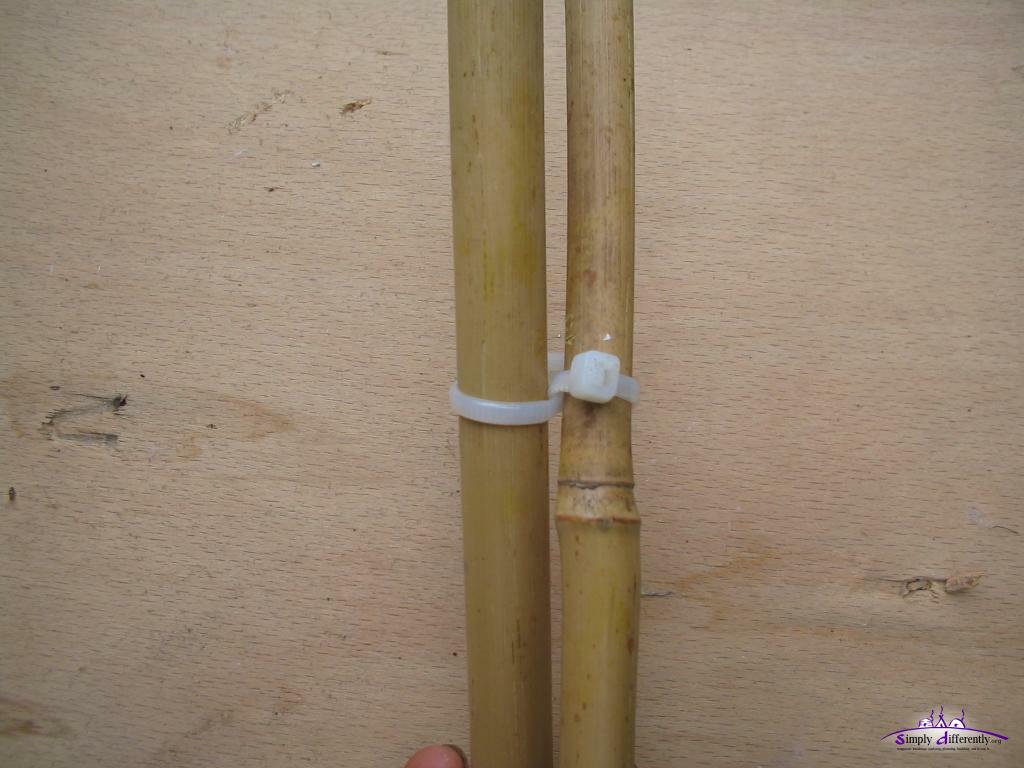 Bamboo Lattice Wall, with two cablebinders (2) 2006/09/07 09:54 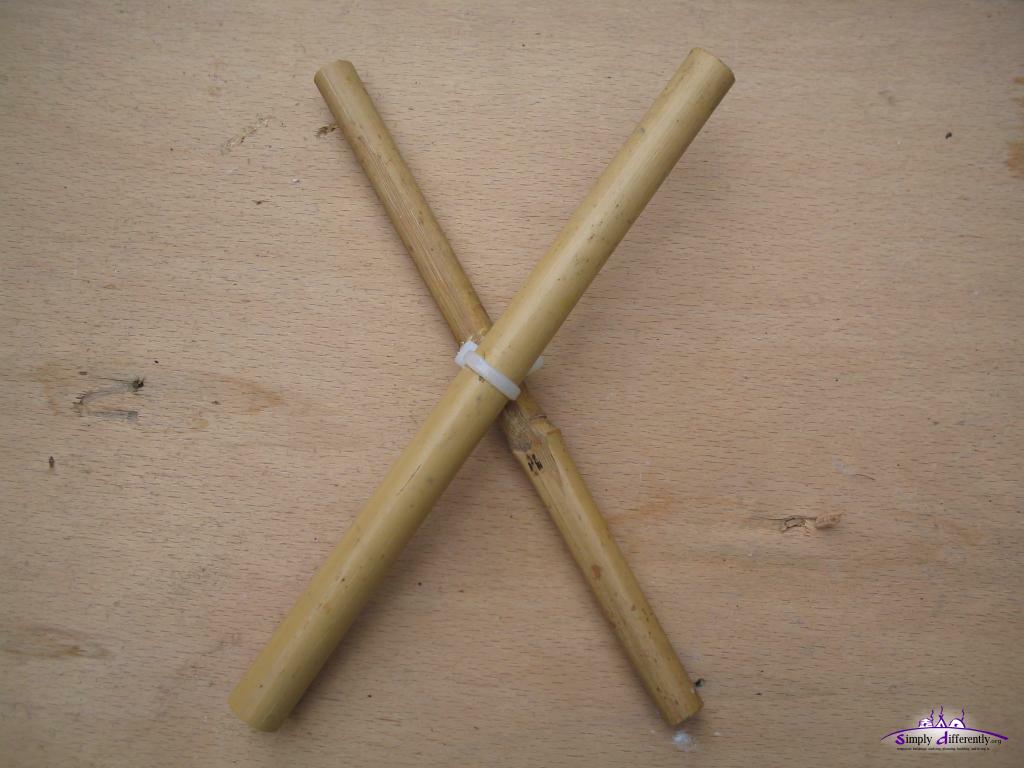 Bamboo Lattice Wall, with two cablebinders (3) 2006/09/07 09:54 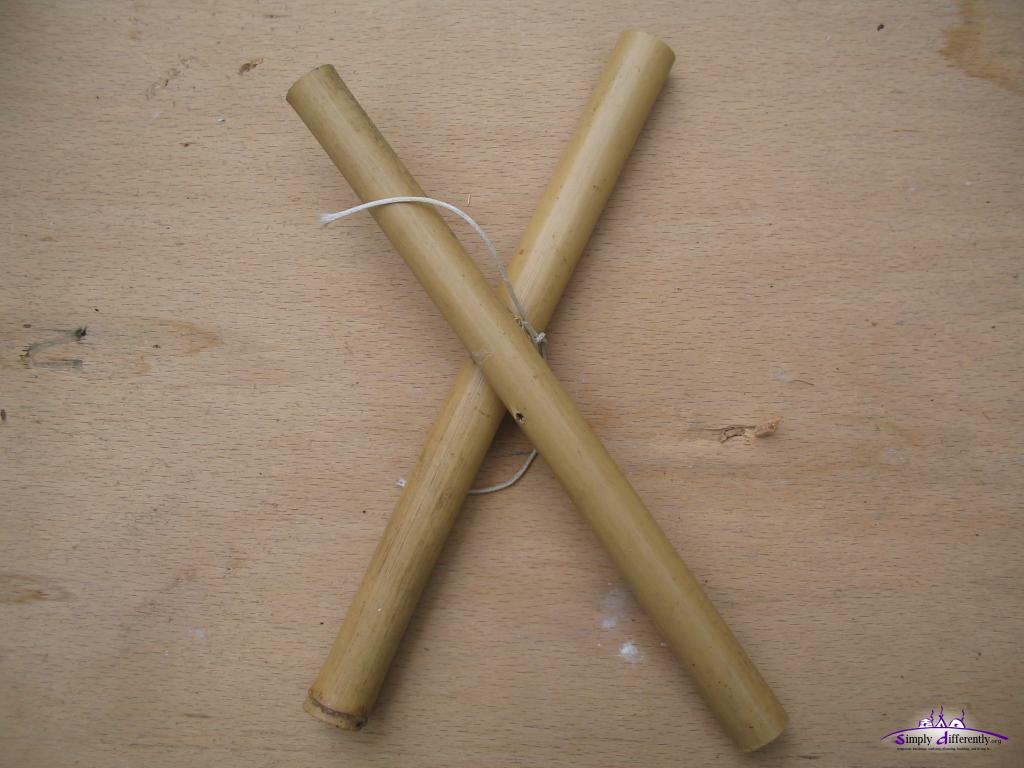 Bamboo Lattice Wall, with thread (1) 2006/09/07 09:54 Thread with Hole This option is rather interesting using a needle and a strong thread to bind two laths together. Bamboo Lattice Wall, with thread (1) 2006/09/07 09:54 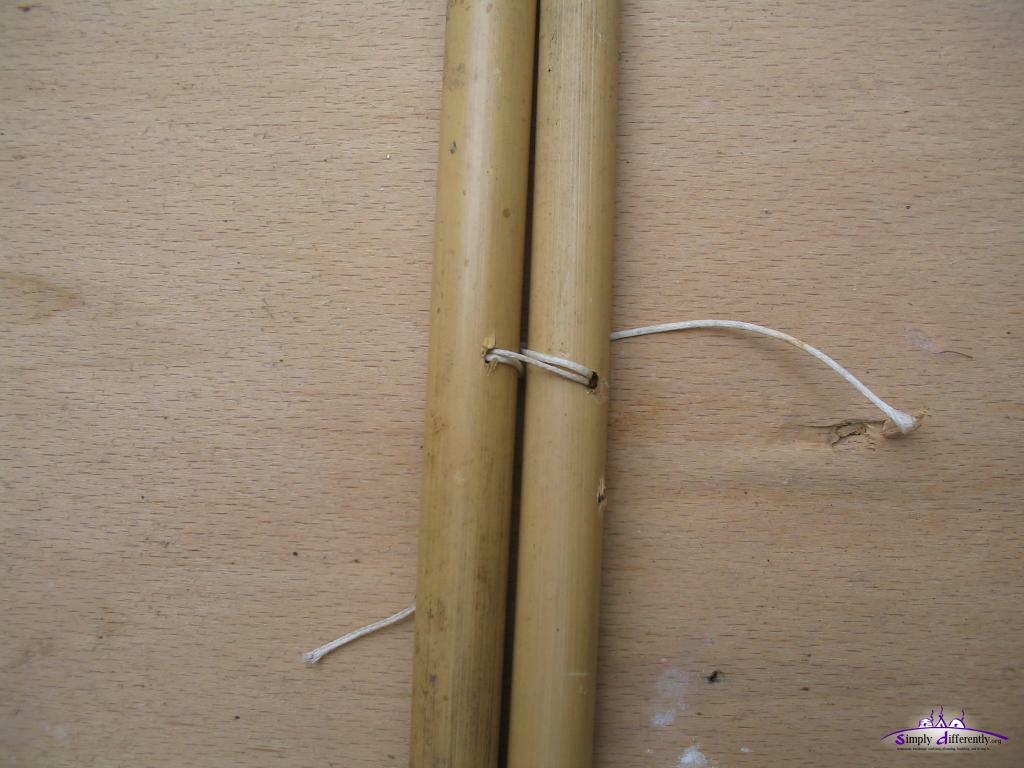 Bamboo Lattice Wall, with thread (2) 2006/09/07 09:55 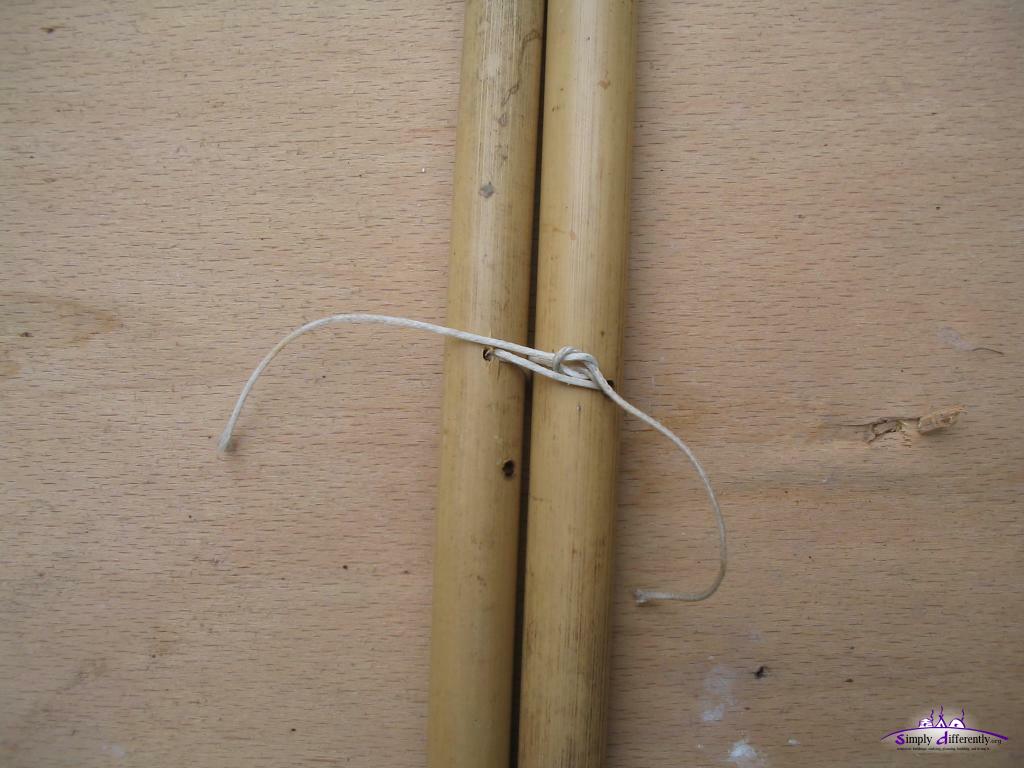 Bamboo Lattice Wall, with thread (3) 2006/09/07 09:55 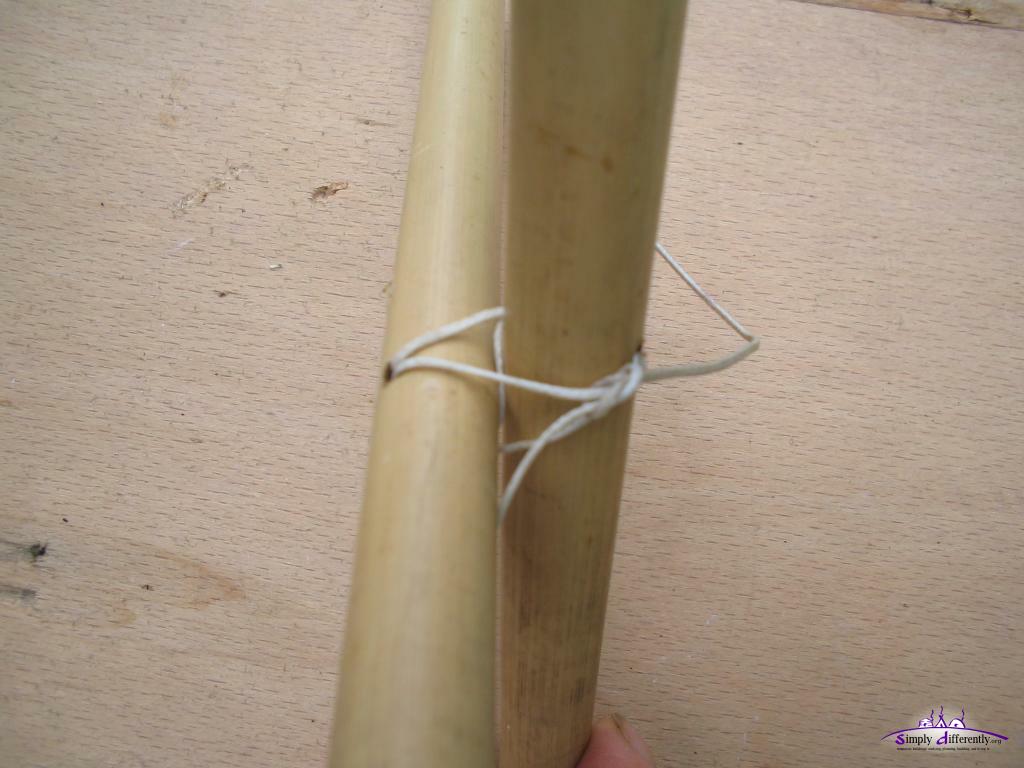 Bamboo Lattice Wall, with thread (4) 2006/09/07 09:55 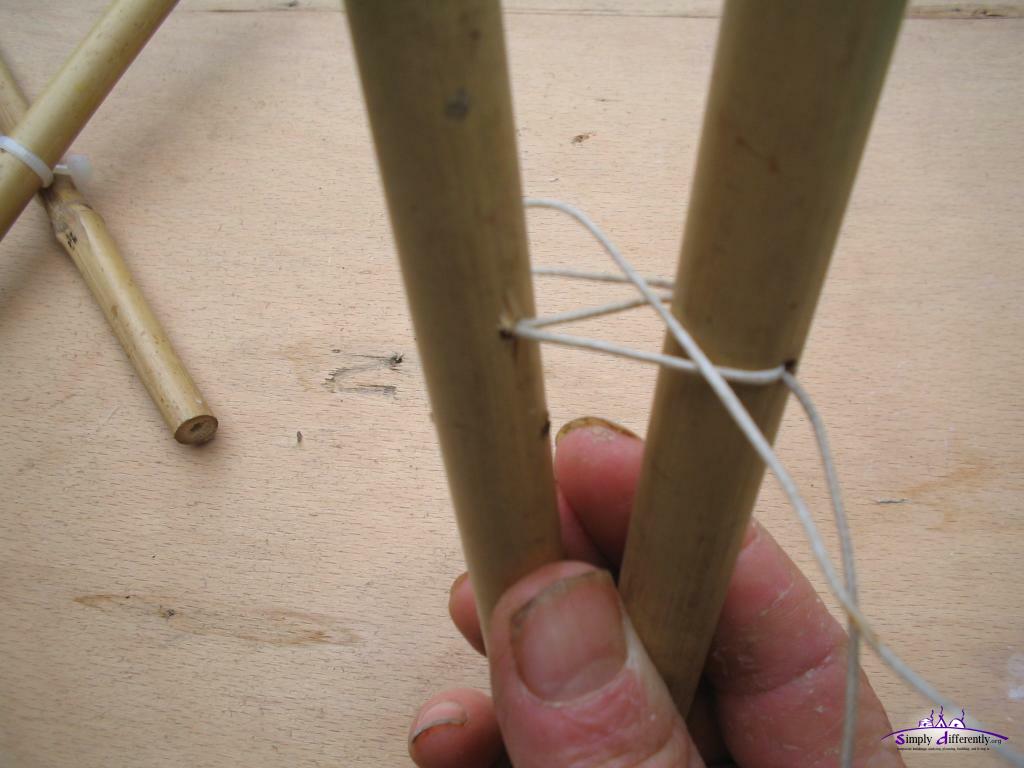 Bamboo Lattice Wall, with thread (5) 2006/09/07 09:55 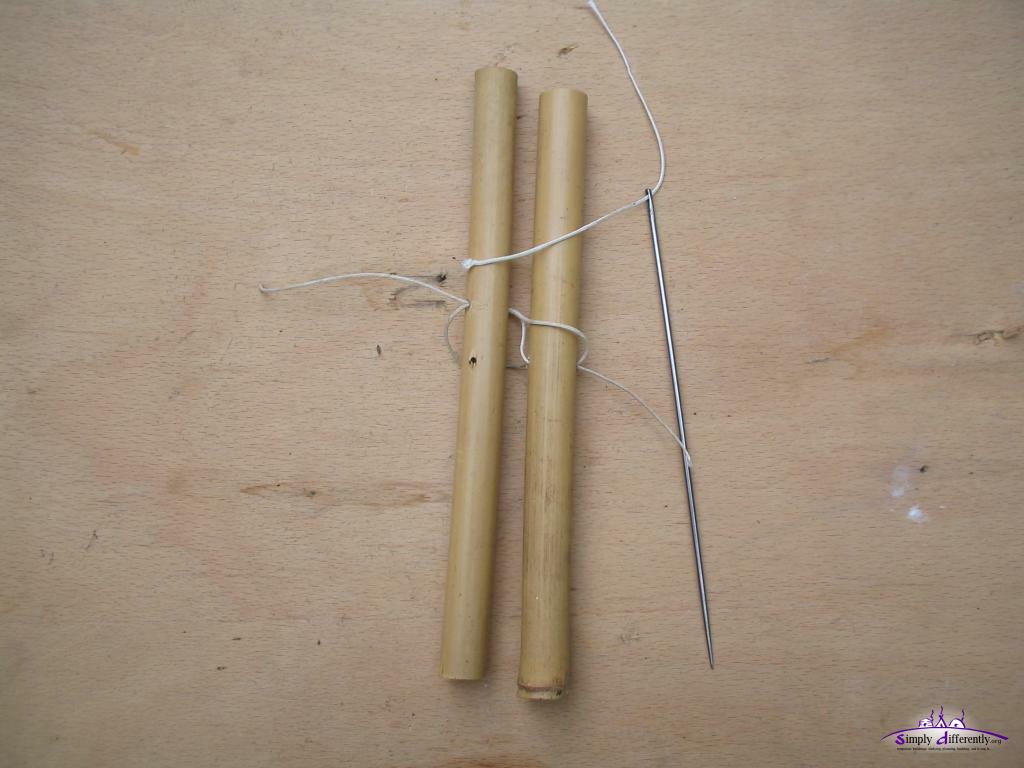 Bamboo Lattice Wall, with thread (6) 2006/09/07 09:57
Other Options You can also bind the two sticks with a thread without a hole, just make sure the knot doesn't move, e.g. glue it. Flat Timber Lattice WallFollowing option is also contributed by Claudius Kern: Bent Nail As you can see you need a special homemade tool, a thick and strong nail where you drill a hole which you can use to bend a smaller nail then. The bent nail is then hammered back into the wood, no cut.  Flat Timber Lattice Wall, with bent nail (1) 2006/09/07 10:09 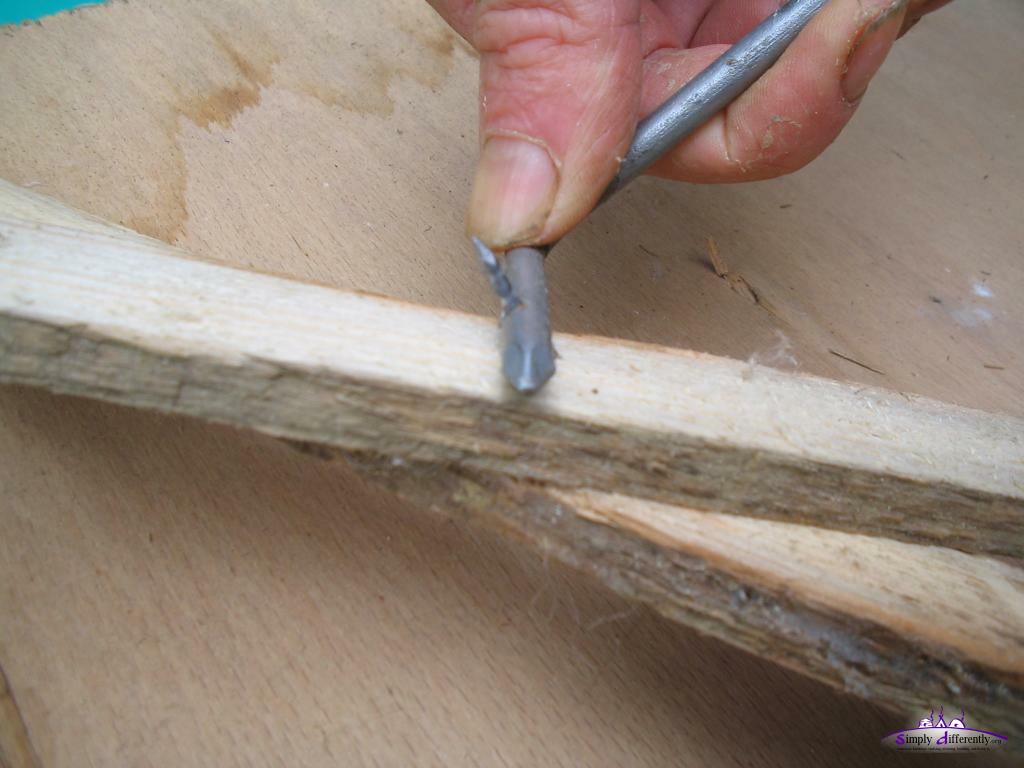 Flat Timber Lattice Wall, with bent nail (2) 2006/09/07 10:10 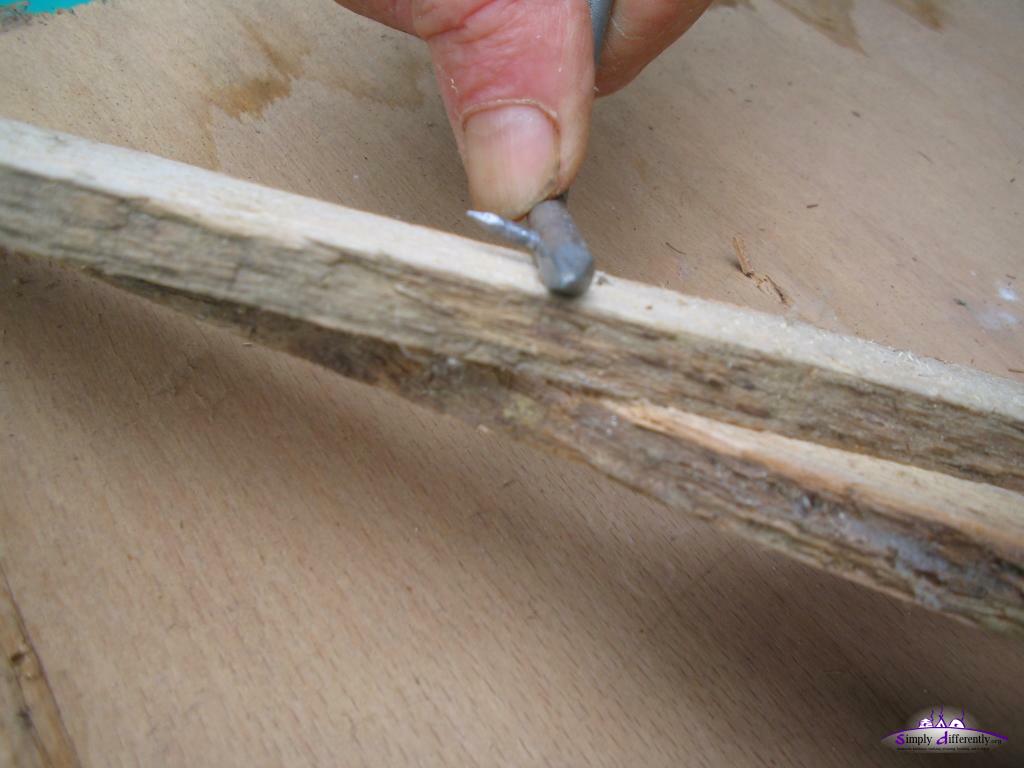 Flat Timber Lattice Wall, with bent nail (3) 2006/09/07 10:10 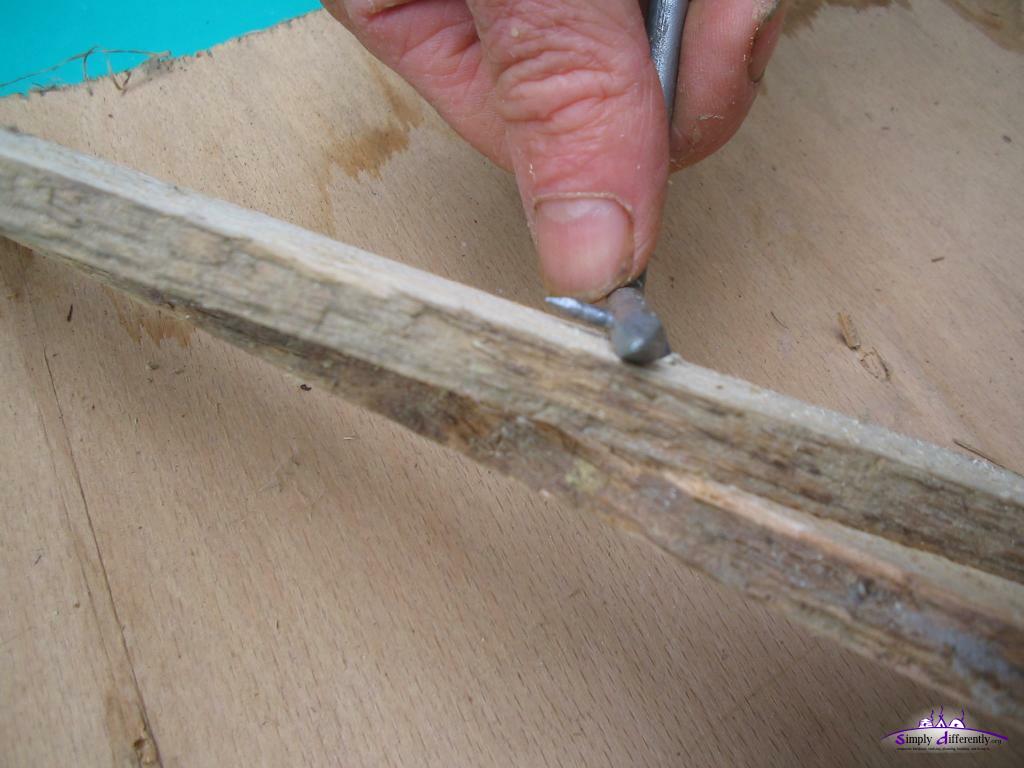 Flat Timber Lattice Wall, with bent nail (4) 2006/09/07 10:10 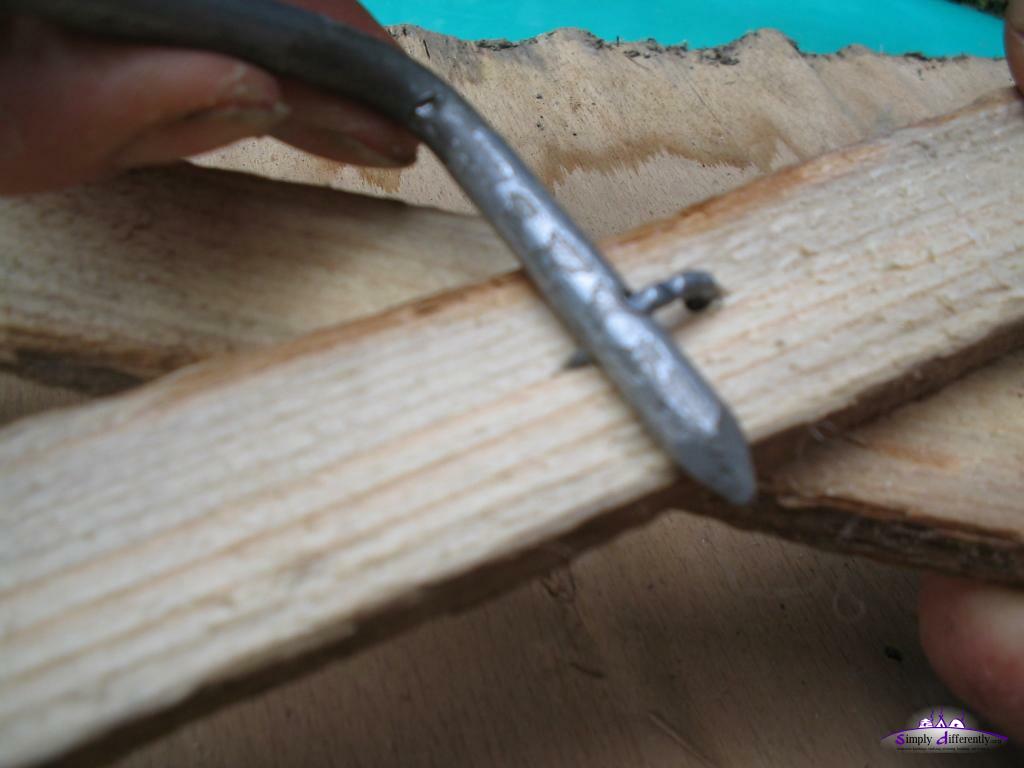 Flat Timber Lattice Wall, with bent nail (5) 2006/09/07 10:11 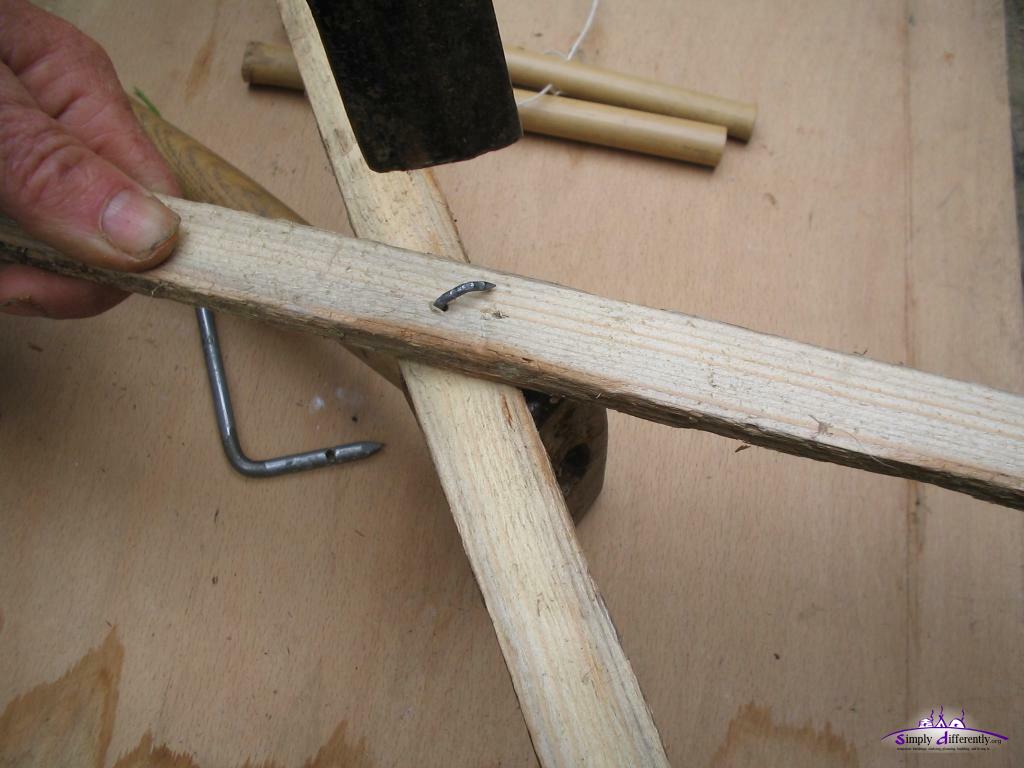 Flat Timber Lattice Wall, with bent nail (6) 2006/09/07 10:11 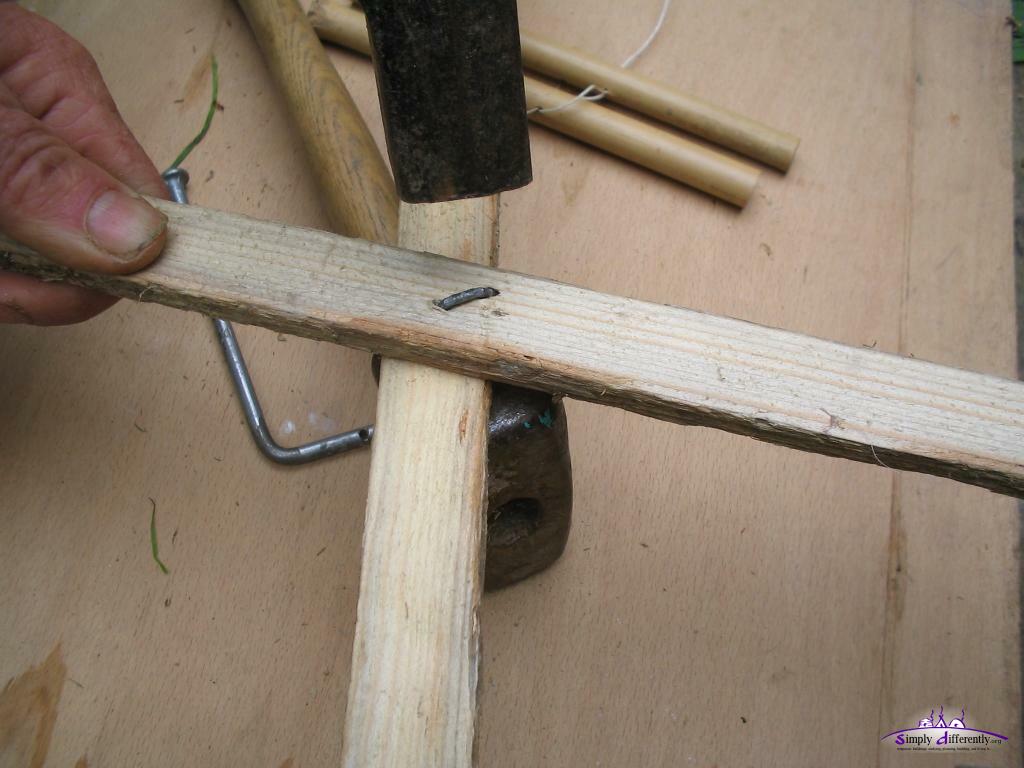 Flat Timber Lattice Wall, with bent nail (7) 2006/09/07 10:11 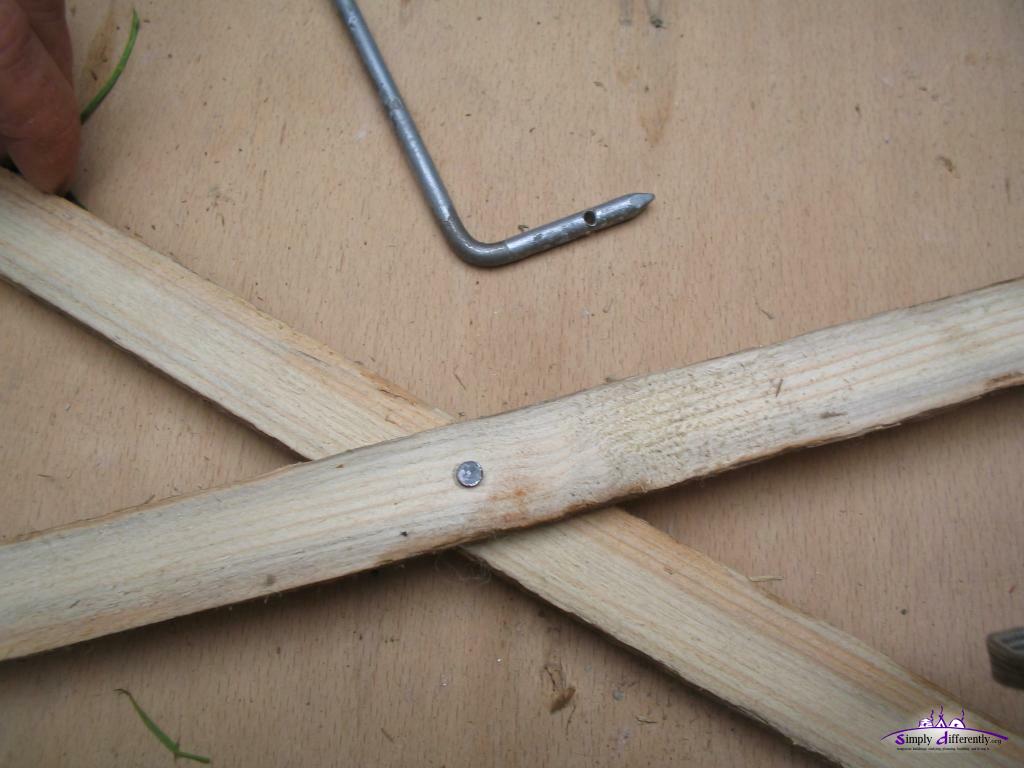 Flat Timber Lattice Wall, with bent nail (8) 2006/09/07 10:12 Other Options
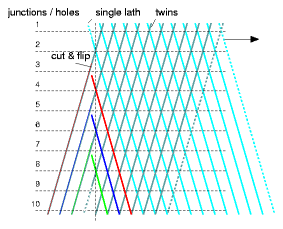
Termination of Wall SectionsThe termination of a khana-section you use a single lath (making 1/2 twin or roof pole junction), and cut the overextending laths and flip them (according the illustration), and shorten them a bit - this way you have almost no waste of laths or requirement of extra laths. The amount of laths nlaths from the calculator gives extra laths for the ending and junctions of the khana-sections as if you did not reuse them according the illustration, e.g. in case you choose another joining method for the khana-sections. The calculator gives you the opportunity to define the length of the sections of the wall / khana, those sections (e.g. 4 - 7m long) make it easier to handle. In case of bamboo khana I made mine 10m long per section, still possible to lift by one person. The way you separate and bind it together also does affect the counting, e.g. you count the lattice top junctions (twins), there the roof poles / uni lie on (unless you put the roof poles / uni on the top wall rope and not on the khana junctions direct, then simply ignore the rest of this section), two methods:
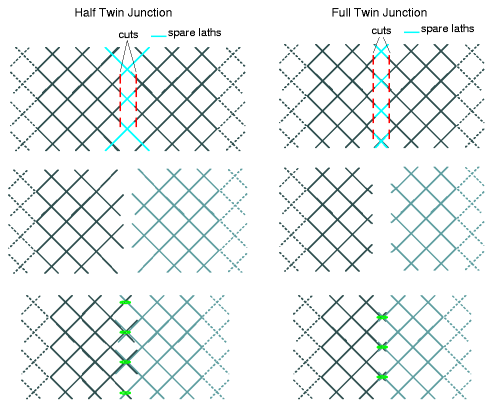
You may split the ongoing (while you build it) khana according this illustration. Later bind the separated khana sections with a waiste belt, cord or klett belt, depending if you plan to put up and take down the yurt frequently. Half Twin Junction: You split two twins (top junctions), and put the next top twin together; the khana sections are (n+1/2) + (m+1/2): it's ideal when you require an odd amount of (twin) junctions where the poles lie on. Full Twin Junction: You cut away one junction entirely, and put the next lower junctions then together; the khana sections are n + m: it's ideal when you require an even amount of (twin) junctions where the poles lie on. What may sound a bit complicate, here three examples:
A slight advantage may have "half twin junction", as there is one junction more to bind, and may provide a bit more stability - but I won't consider this really a main advantage. You may also say, the top junction you do anyway with a solid cord or screw to keep it stable, and you prefer "full twin junction" in order not to split apart the top junctions when taking down the yurt. As mentioned, for sake of symmetry I did 30 1/2 twice, to have the junction of both sections exactly the opposite of my door. The profile of the khana can be 2-4cm width, and 1-2.5cm thick, and the lkhana long as given by the calculator. Wooden laths (cheap "roof lath" of fir for house construction), others prefer hazel sticks, or also bamboo sticks but those tend to split when exposed to sunlight unless you paint them bright so they don't warm up with the sunlight. Bamboo provides strength at light weight, and may be most cost effective if bought by a wholesale source. The way I did the wall / khana, with bamboo:
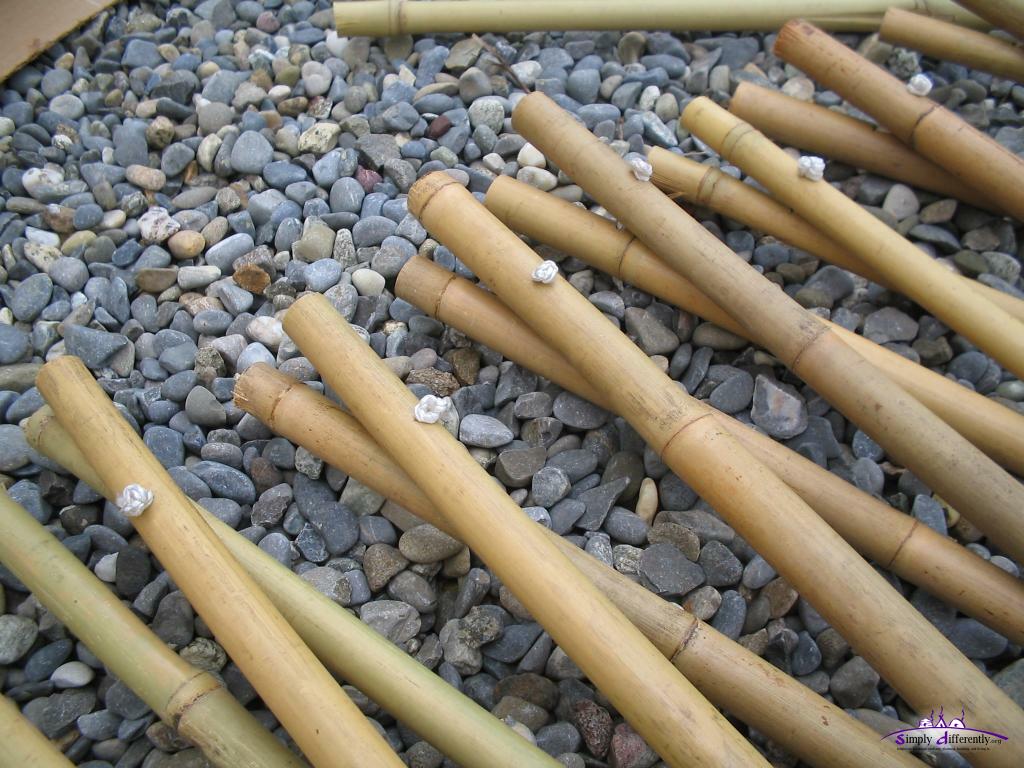 Drilling holes on the top, the rest of the "holes" using rubber binder as connectors 2005/09/20 15:21 Closeup rubber binder 2005/09/20 15:21 The rubber binder 2005/09/21 10:57 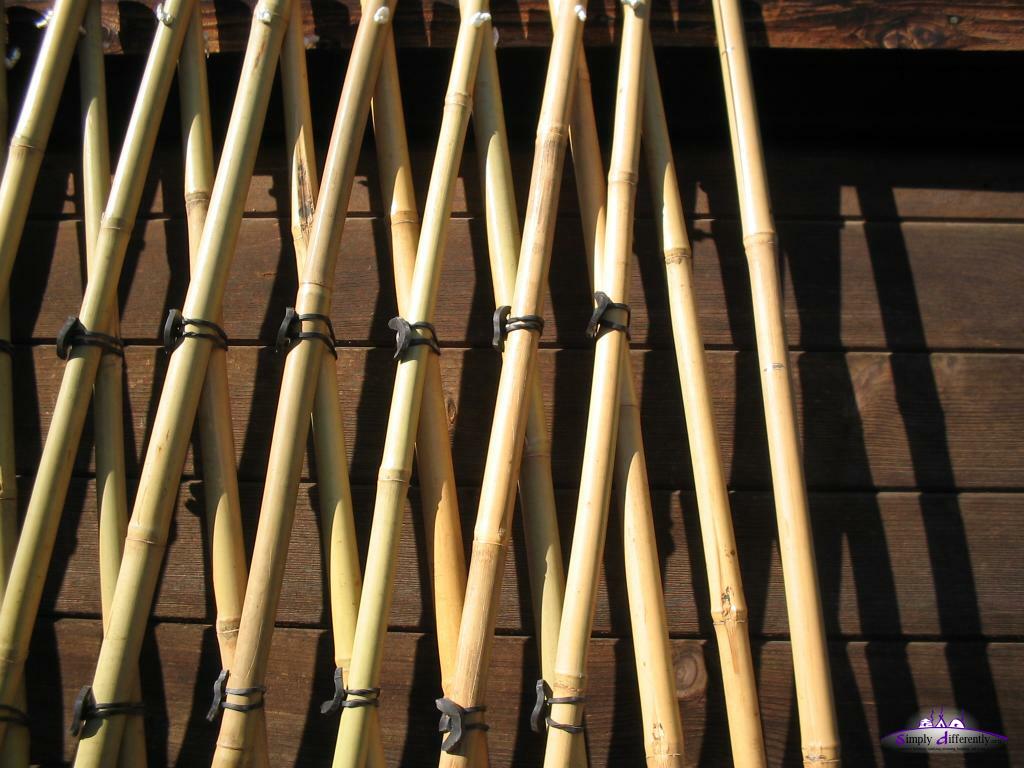 Closeup khana, binding vertically - much easier 2005/09/22 17:03 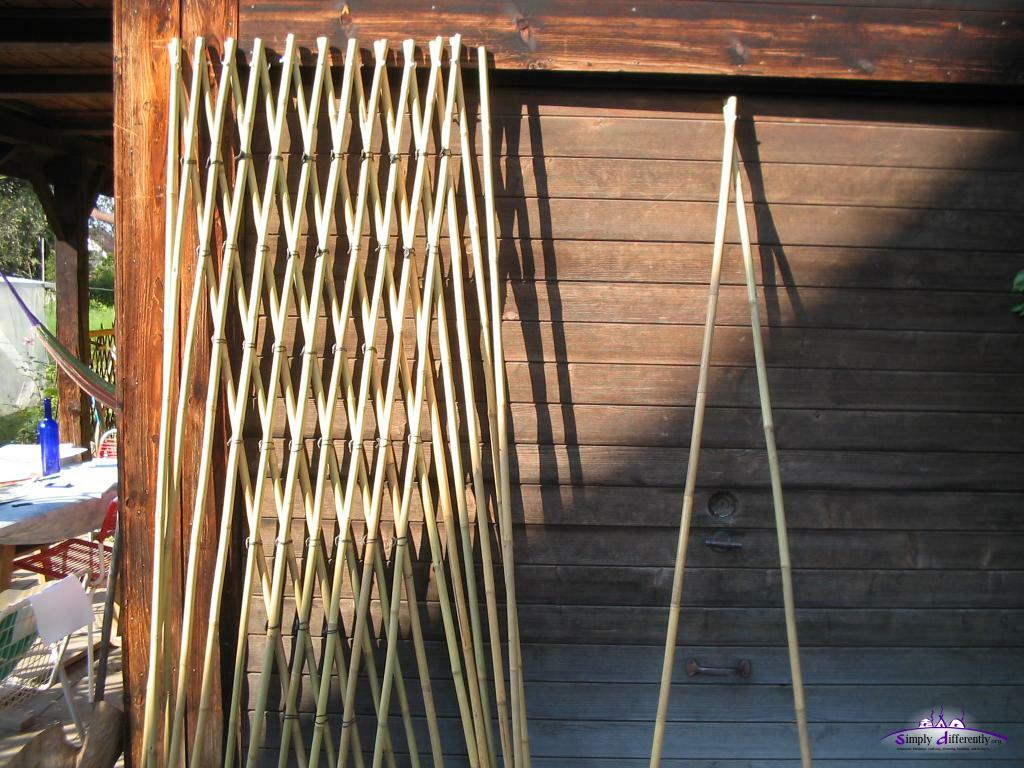 Adding twin poles individually 2005/09/22 17:04 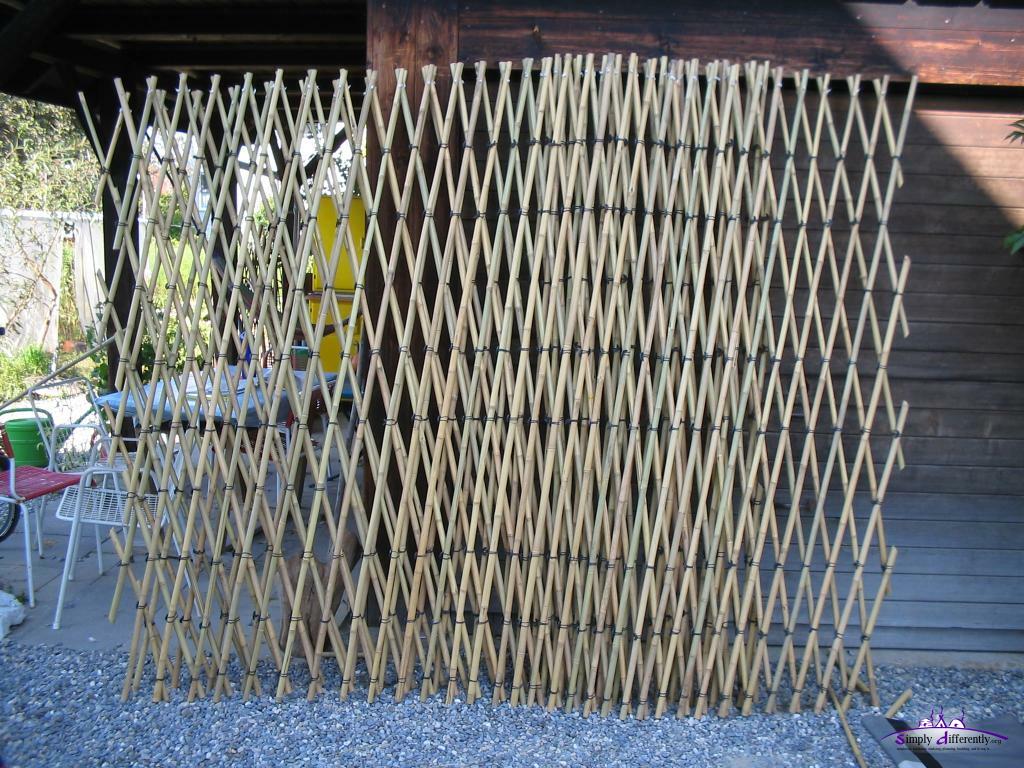 Finished khana, two sections, twice 30 1/2 total 61 junctions for poles, the door will be 3 poles wide 2005/09/23 15:04 Door / Khaalga
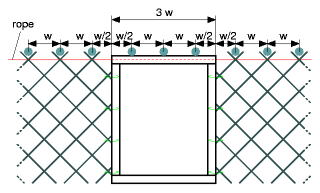
The door isn't considered in the yurt calculation, best you take the resulting w, and decide how many poles will lie on the doorframe, e.g. three poles, which means it's 3 times w wide. As mentioned in the previous chapter, subtract those roof-poles from your khana junctions.
Attach the door as illustrated, make "full twin junction" endings fit the doorframe. Attach the khana tightly to the door - be aware little to no pulling should occur as the main khana rope going at the top bar of the doorframe which holds the khana (with the door) all together; and rather do not attach the rope end on the doorframe, unless you know the doorframe can withstand the force which is applied by the final yurt roof pushing on the khana and the rope then. I tie this main rope at both ends together so the doorframe isn't under any mechanical stress. Door Construction
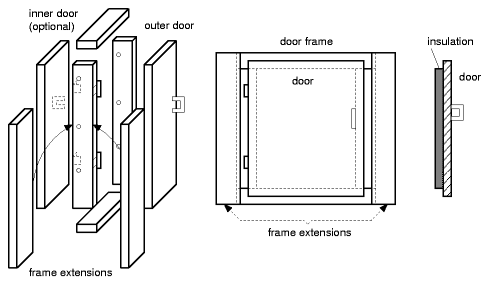
Either put together a door with some laths, or get a solid one piece wood plate for the door, or even use an existing door and shorten it. Traditional mongolian doors have two doors, one outer which opens to the outside, another inside, which opens to inside - for insulation. Here a vertical laths based door as I did for my yurts:
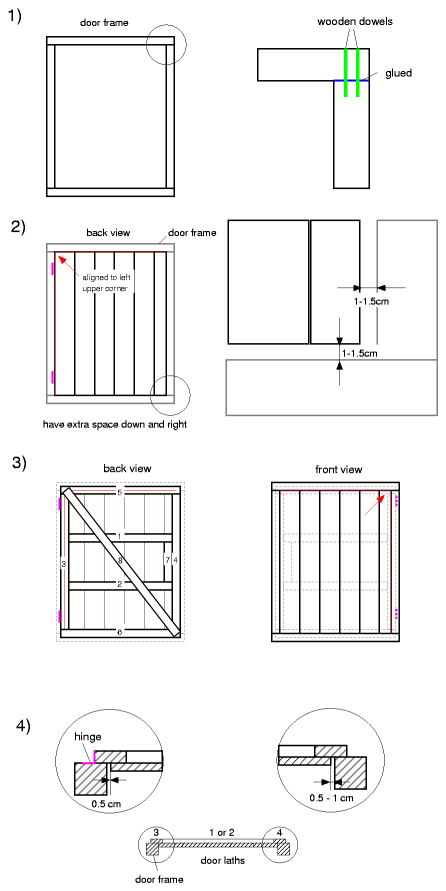
2) Layout of Laths: Lay the finished frame down, horizontally (e.g. on a table), and lay then all laths into the frame, and align all laths to the upper left corner, and leave extra space at the right and at the bottom. 1 - 1.5cm is good space, as when you attach the hinge later, those aren't exactly and the finished door with its weight will lean to the right and bottom, and the space you have there will be used, e.g. 0.5 - 0.75cm. 3) Fixating the Laths: While the laths still lay within the door frame, attach fixating lath 1 and 2, glue and nail it, and make sure the alignment and the spacing remains (it might move while you glue and nail) - this part is the most crucial and important step in building a door. Then remove the frame, and glue and nail the remaining fixation laths 3, 4, 5, 6 on the vertical laths. At last I usually put another lath 7 to it, which gives me a strengthened area where I can drill a hole for the doorhandle then. 4) Attaching of the Hinges: Once the fixation laths are fixed (glue dried), put the door on the doorframe again, this time the frame below, and the door on top, and orient the door again that way you have sufficient space when the door with its weight leans the opposite side of the hinge . . and then attach the hinges, I usually use four hinges instead of just two. My door construction (different photo series): 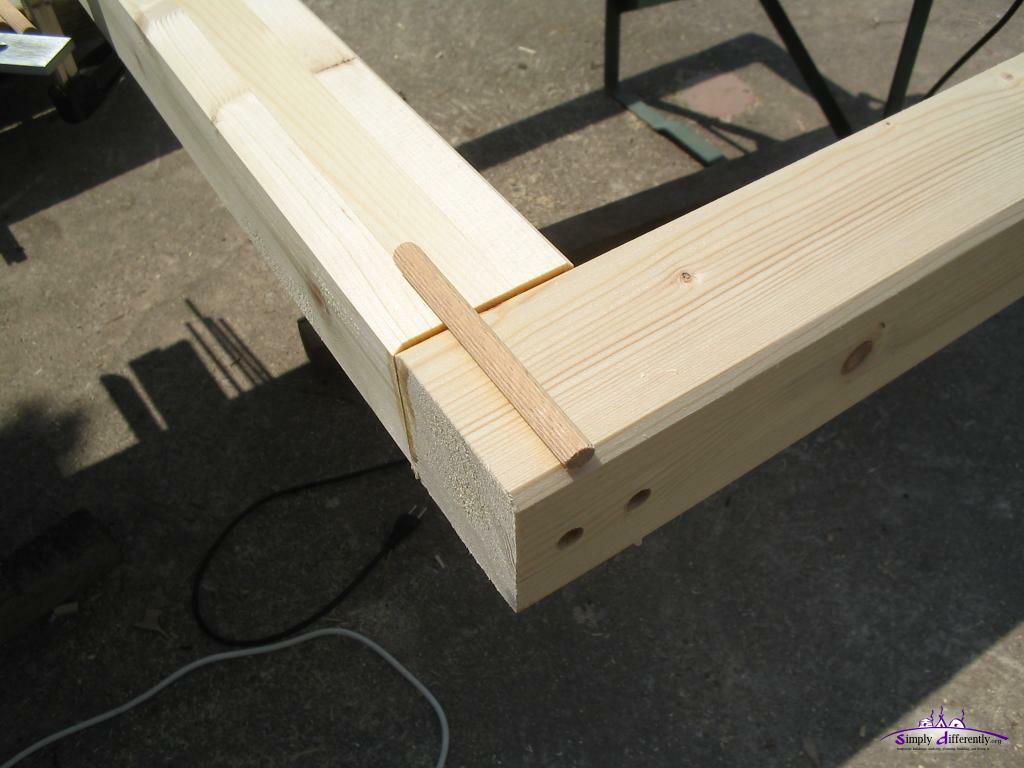 Door frame with dowel 2006/06/13 15:01 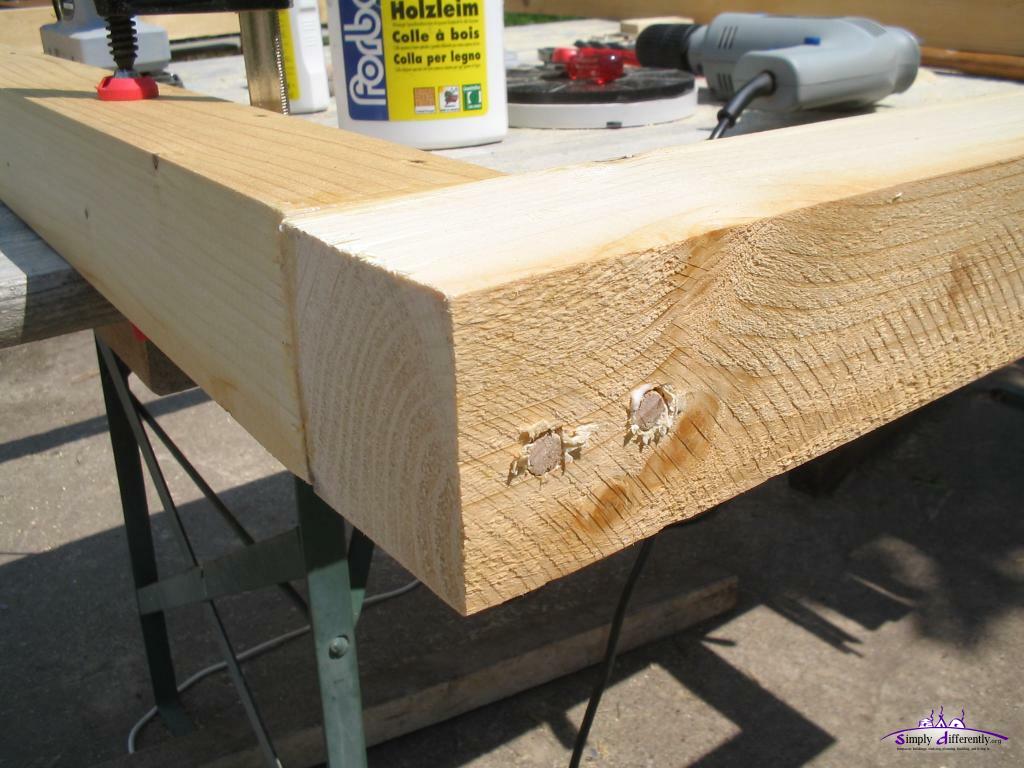 Door frame with wooden dowels, detail view 2006/06/13 14:51 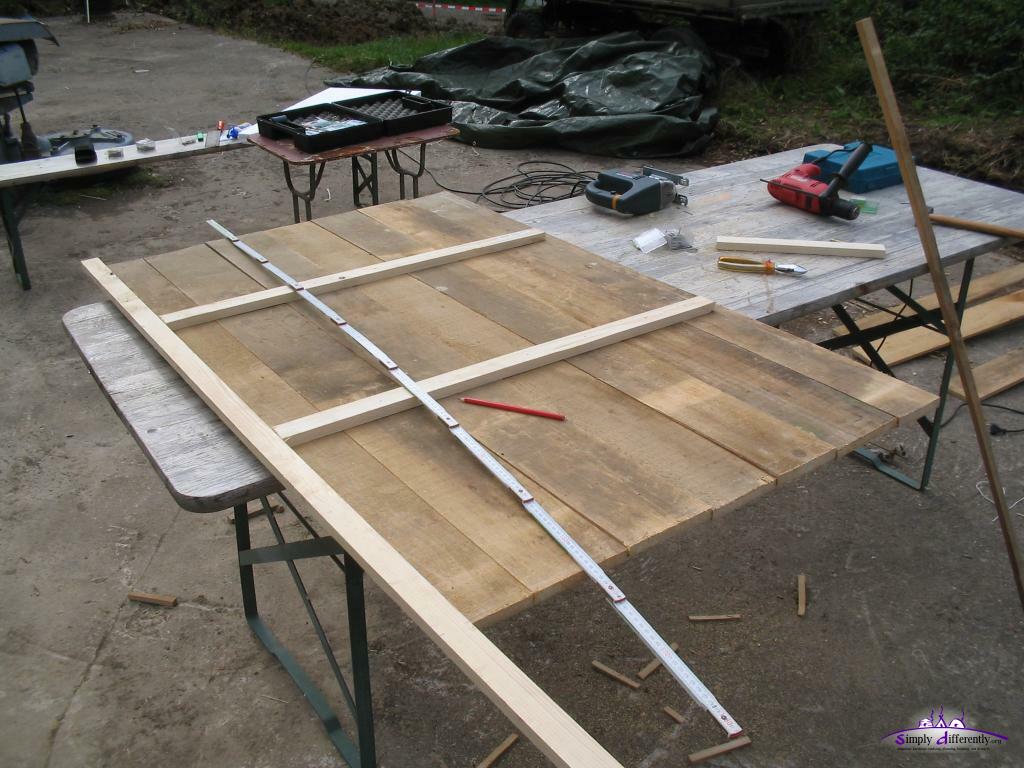 Door construction: laths vertically 2005/10/22 13:56 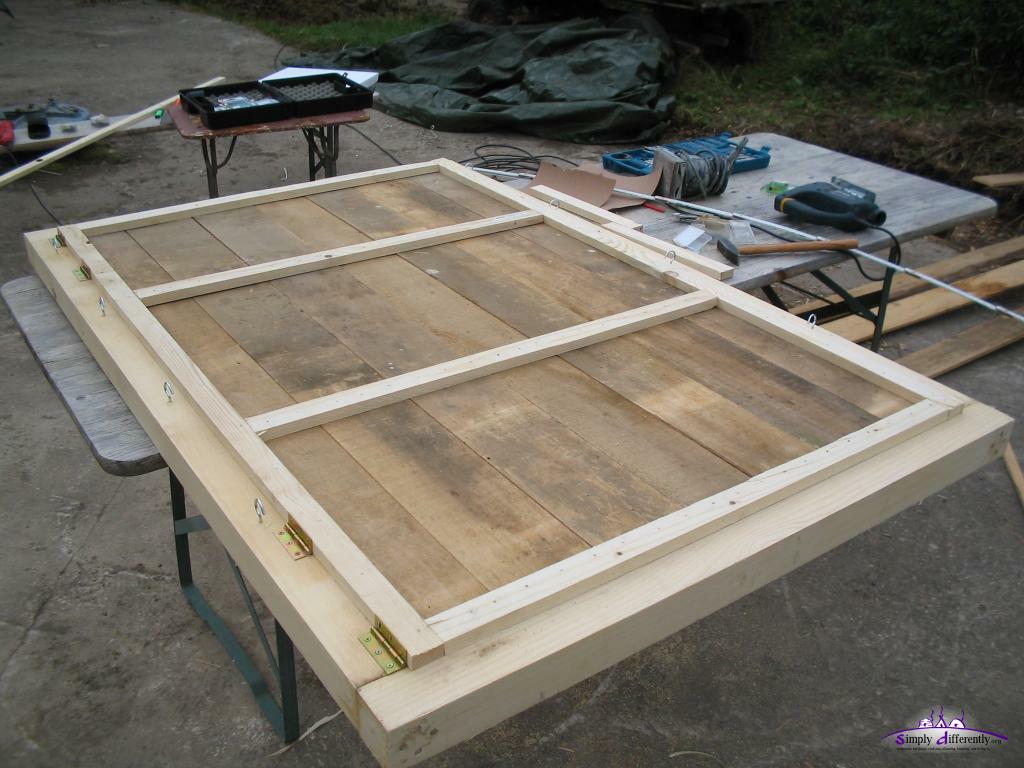 Complete door with hinge 2005/10/22 15:05 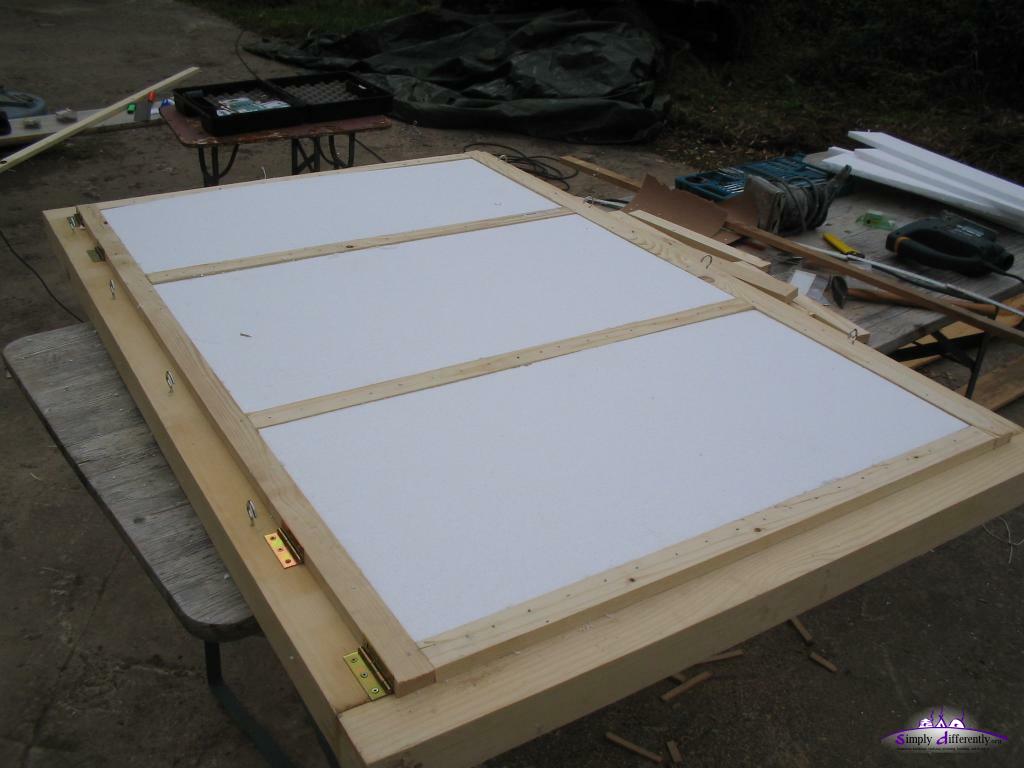 Sagex in between for insulation 2005/10/22 15:20 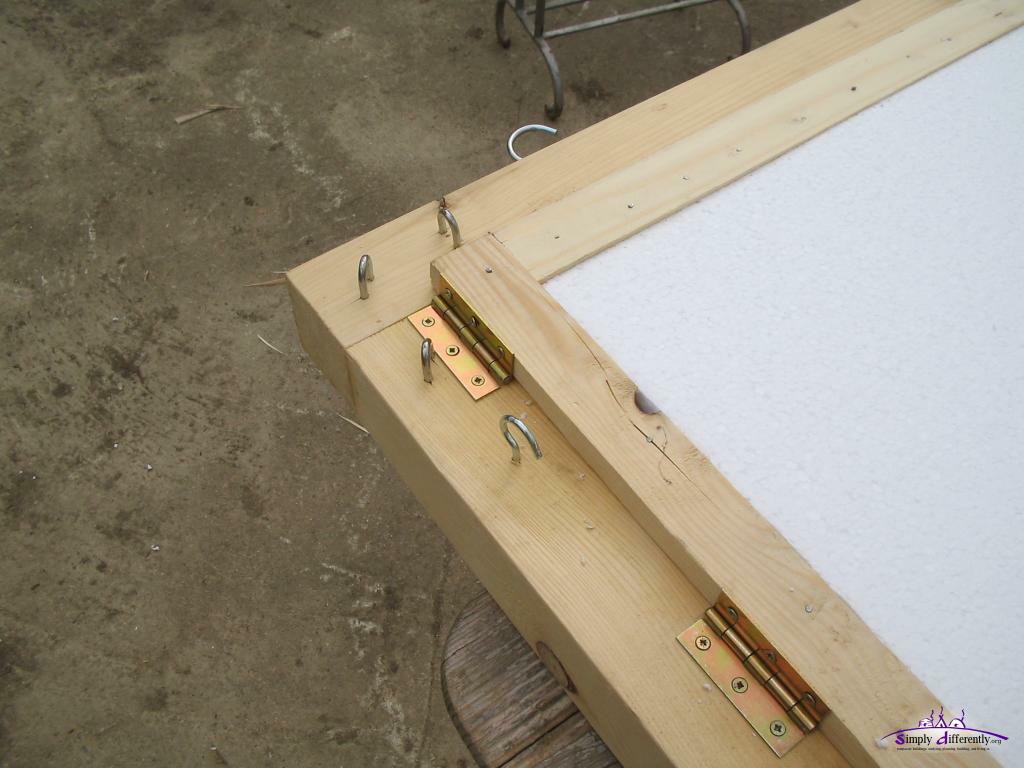 Door closeup: where the main wall/khana rope goes through 2005/10/22 15:31 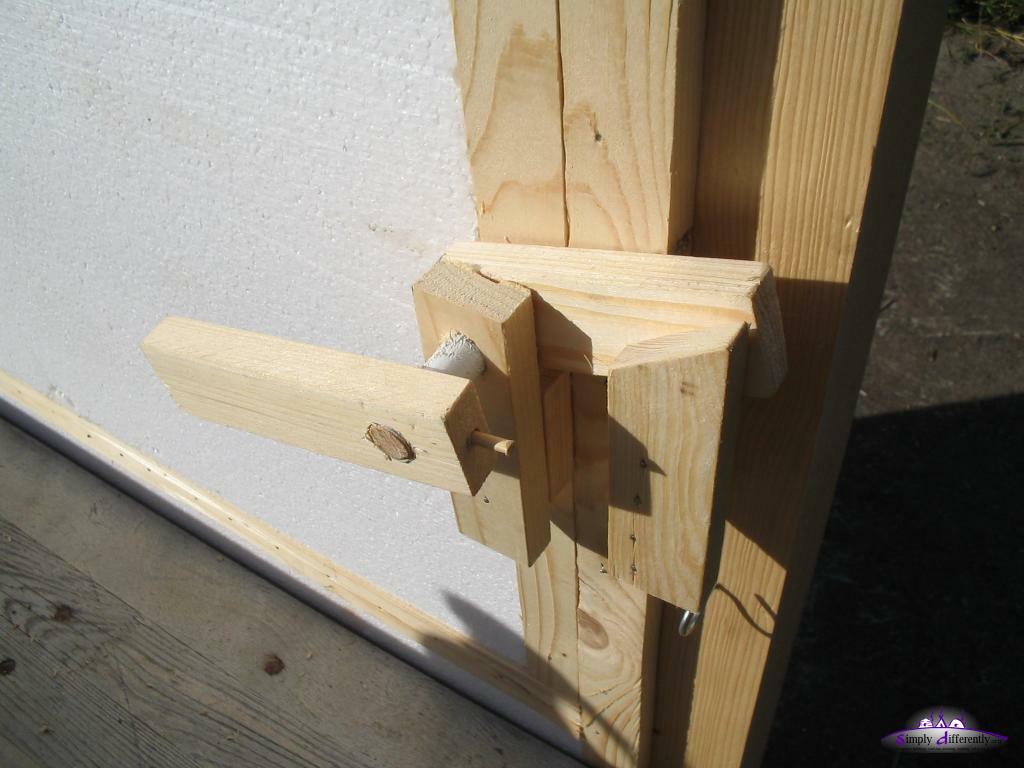 Simple door closing/locking mechanism 2005/10/26 16:17 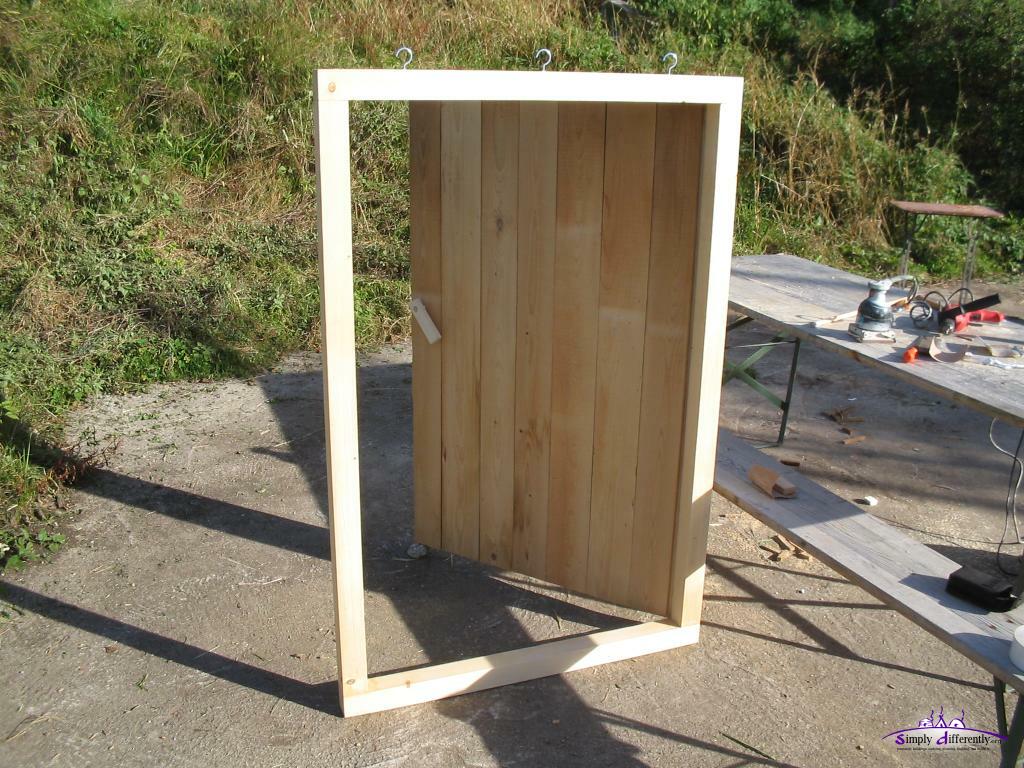 2005/10/26 16:18
Traditionally the door / khaalga and the crown-wheel / toono are carved and painted colorful with spiritual symbols, as the yurt / ger isn't just a nomadic house, but also a metaphor of the creation itself with each of its parts, such as the toono and the doorframe / nars, etc. I may later add also some of the spiritual consideration of the yurt / ger in the mongolian culture, as well some of the general spiritual perspectives of nomadic or alternative living in modern times.
Content:
|


| Home | · | About | · |  Tipi | · |  Yurt | · |  Dome | · | Features | · | Gallery |


Creative Commons (CC) BY-SA-NC 2005-2017, developed, designed and written by René K. Müller
Graphics & illustrations made with Inkscape, Tgif, Gimp, PovRay, GD.pm
Web-Site powered by FreeBSD & Debian/Linux - 100% Open Source