|
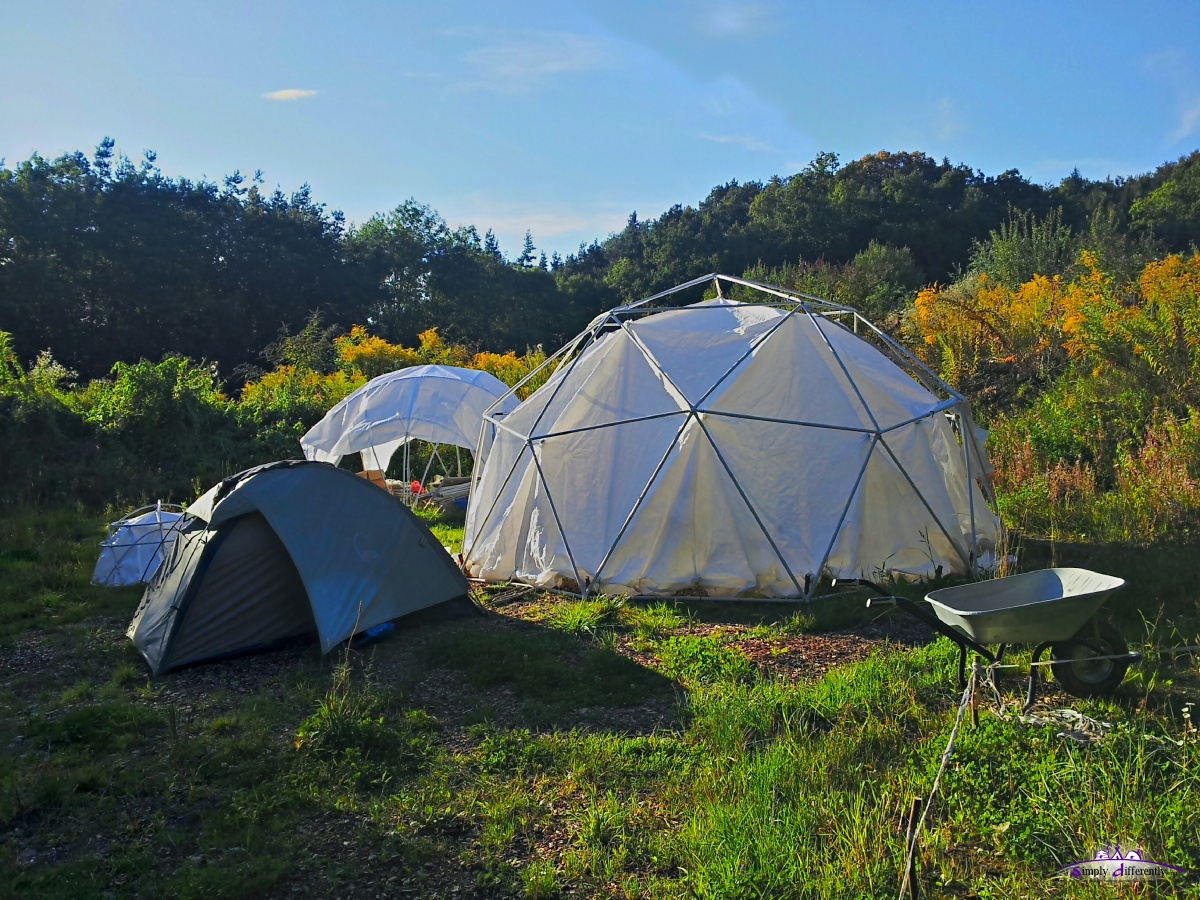
Idea is to have a very lightweight, simple and cost-effective 5m 2v icosahedron dome, using one piece 8m x 8m PE rain cover.
Status: pitched
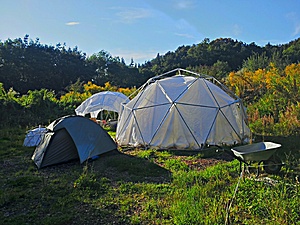
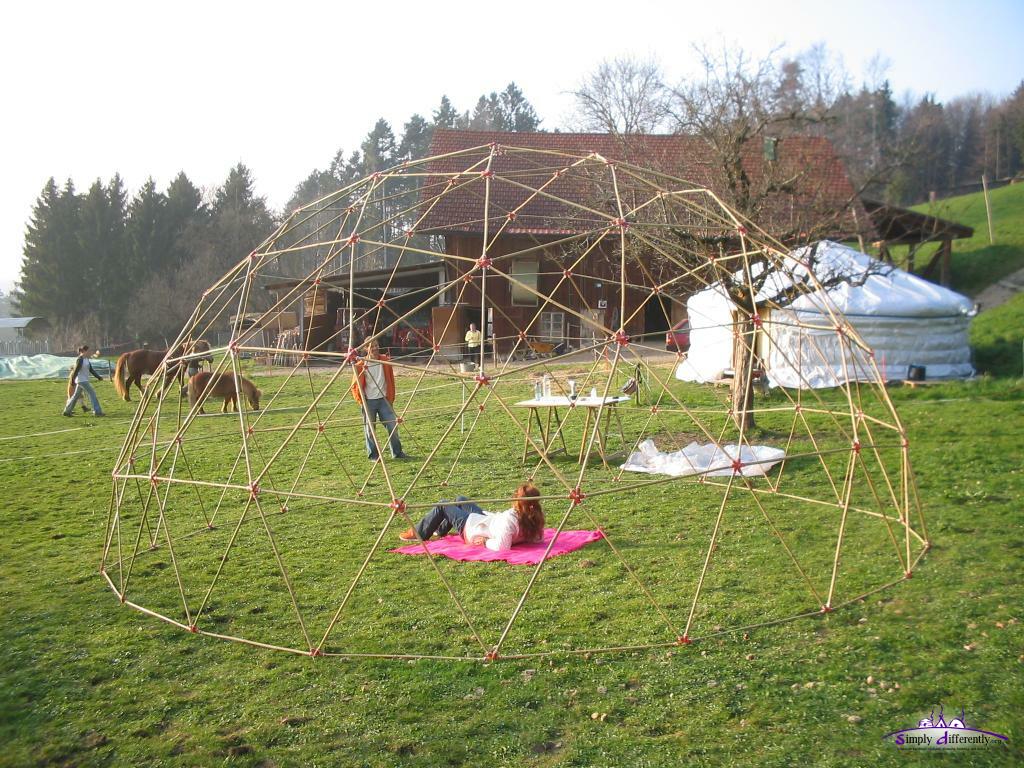
 5m 2v icosa gedodesic dome among other tents |
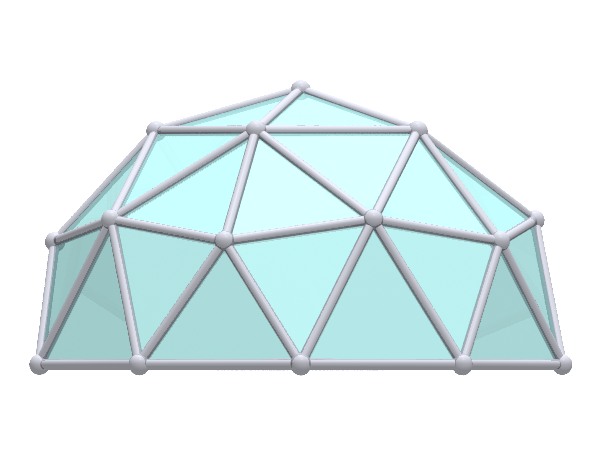
- 2v 4/8 Icosahedron hemisphere
- diameter: 5.00m
- height: 2.50m
- skeleton:
- 65x PVC 25mm diameter pipes (electric conduits)
- 30x A: 138.6cm, 35x B: 156.5cm with 1cm offset for holes at the end (A: 136.6cm, B: 154.5cm)
- total 26 edges, 40 faces
- rain cover: one piece white PE (8m x 8m), hanging inside the skeleton
- interior canvas: one piece white drainage material (4x 4m x 2m)

2v 4/8 dome |
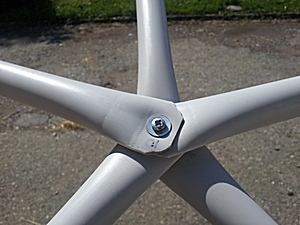
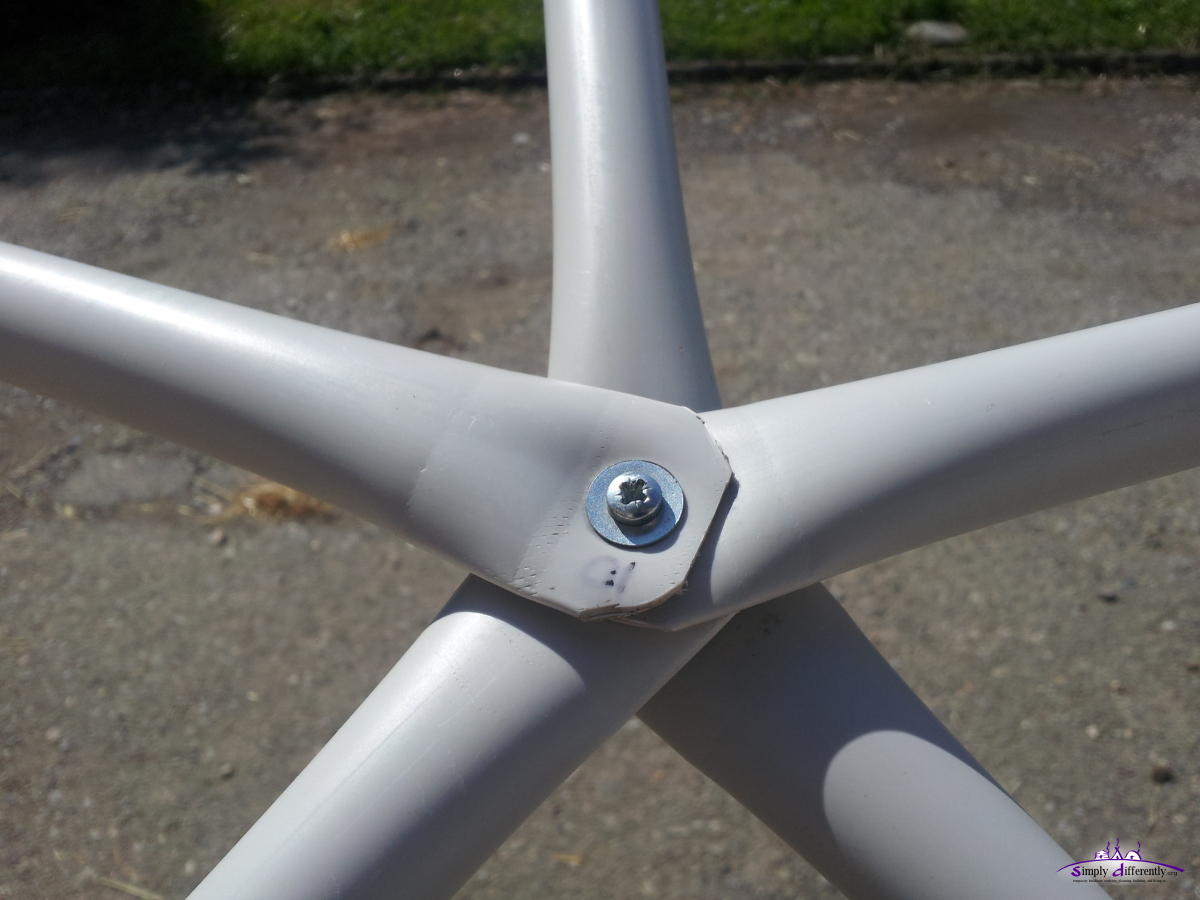
Putting together 5x 25mm PVC pipes (M4 x 30mm) |
Since I go "hubless" there are no connectors, but the PVC pipes are squeezed at the end and their edges cut to form a "duck beak".
Not yet defined.
Not yet defined.
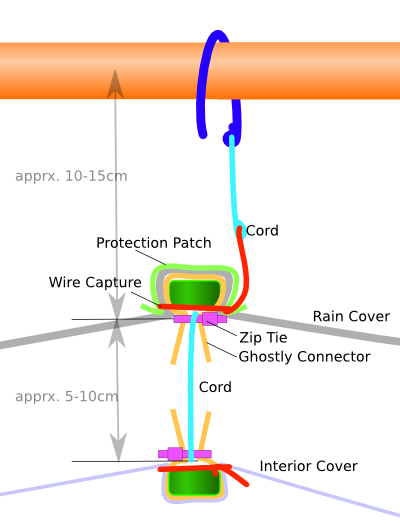
I use the setup which I developed for the LC Dome: wire hooks and bottle caps as "captures" to attach the rain cover, and hang the PE rain cover inside of the dome skeleton.
Not yet defined.
Read the next pages (scroll down) about individual steps taken.
|
The idea was to build a ~6.4m (19.4') hemisphere or dome, which I can put on the floor of my existing 6.4m yurt I built (2005), and also then try a star dome as well on the same floor and interior.
See also my star dome diary as comparison.

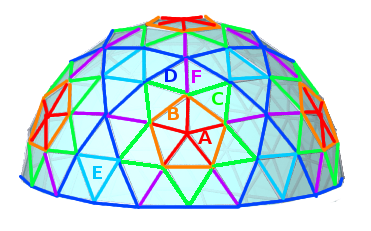
My 6.33m Geodesic Bamboo Dome (Skeleton), 2006 |
- 4v 4/8 Icosahedron hemisphere
- diameter: 6.33m
- height: 3.16m
- skeleton:
- 250 bamboo struts 15-18mm diameter: 2D = 187cm, dhole = 2.75cm,
- 30x A: 74.6cm, 30x B: 87.9cm, 60x C: 87.7cm, 70x D: 93.5cm, 30x E: 97.3cm, 30x F: 89.0cm
- connectors, using LD-PE pipe (outer 24mm, inner 18mm)
- 20x 4-way
- 6x 5-way
- 65x 6-way
- total 91 connectors
- rain cover: white PE (leaf-like), 5 leafs (10 halfs to save space)
- interior canvas: raw cotton (leaf-like), 5 leafs (3 lanes/stripes per leaf)

4V 4/8 building instruction |
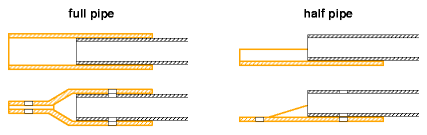
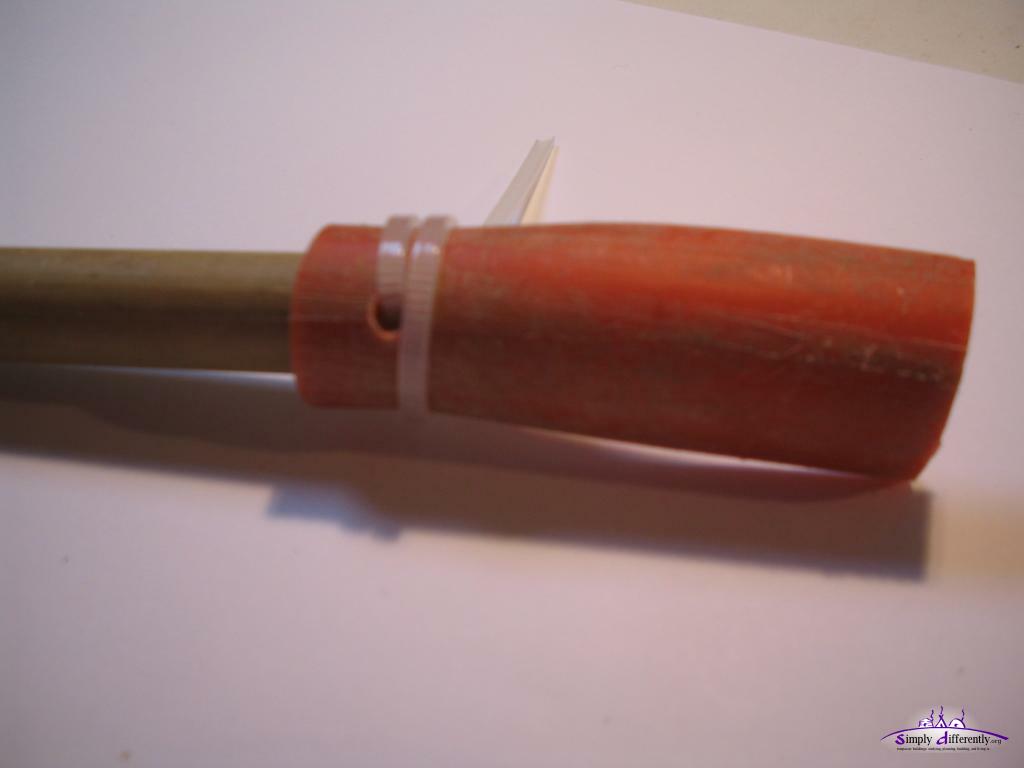
I'm thinking of using LD-PE pipe, 24mm outer diameter, 18mm inner diameter, and squeeze one side together:
As in case of the geodesic dome, the connector requires primary to provide pull and push stability, and so the squeezed part becomes the common connector with a screw, and 2nd hole keeps the pipe and the bamboo (with variable thickness of 10 - 18mm) and a pin, bent nail or a cable binder keeps them together. It might be important to have a round profiled pin to avoid the bamboo splitting when pushed or pulled - or otherwise strengthen so the bamboo doesn't split, e.g. tapeing the end.
Another approach with a half-pipe, less stable but saving material, and suitable when struts diameter varies (as in my case of using bamboo):
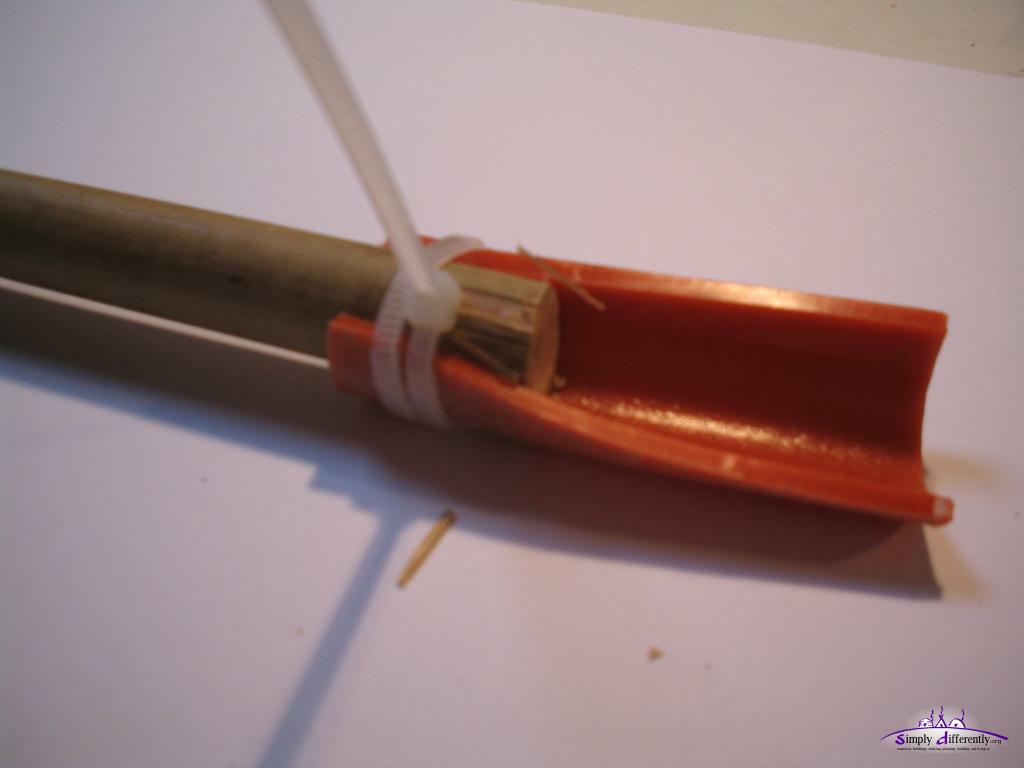
a longer cable binder 3mm wide and wind around 1 1/2 times, and use a M4 screw to connect the endings.
 LDPE half-pipe with 1 cable binder (1)
2007/01/22 09:02 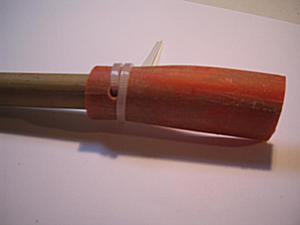 LDPE half-pipe with 1 cable binder (2)
2007/01/22 09:02  2007/01/22 09:08
As a result of the tests I gonna use 4mm wide cable binder instead just 3mm, this means I drill with 4mm the two holes per connector.
In order to guess the pull or push force on a junction, let's calculate 150kg for the entire roof. The maximum weight appears on the bottom.
There are 20 connectors 1st line above the ground, where 2 struts push (or pull), so 150kg / 40 = 3.5kg per strut - whether those two cable binders can hold that, let's test it.
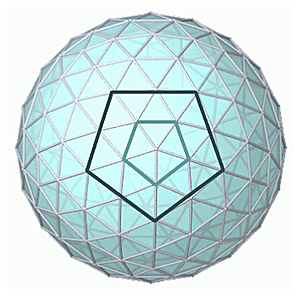
Skylight Options of 4V 4/8 |
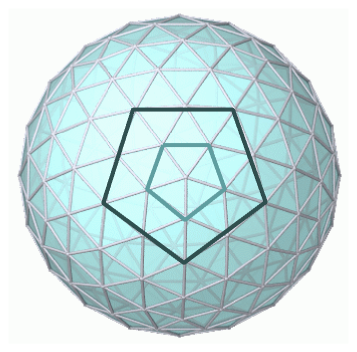
I lay a wooden frame on top, actually it could be any shape - yet, best is to align to the existing skeleton:
- smaller pentagon: each side is B length: 85cm, apprx. 146cm diameter (2A)
- larger pentagon: each side is apprx. 2 D: 182cm, apprx. 320cm diameter (2 (A+F))
I likely go for the smaller one.
The door provides some challenge, I tend to make a triangular door, fitting one of the triangles of the 4V, and remove 1-2 struts.
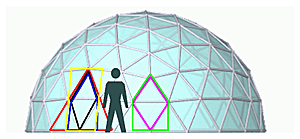
Door Options for 4V 4/8 |
- blue: symmetric, 3 struts removed, bottom struts not affected
- black: could be narrow but symmetric, 2 struts removed
- red: symmetric & high enough, 3 struts removed
- green: wide but too low, 3 struts removed, bottom struts not affected
- pink: narrow and too low, 1 strut removed
- yellow: wide rectangular door, 5 struts removed
The green and pink only suitable for >7m large diameter domes.
The yellow seems most suitable for me at 6.3m diameter, I can use an existing door I made already 1m wide and 1.7m hight for a 8.4m yurt (1.70m wall height).
I will sew a cover which fits also the star dome I have been planning, so I can exchange the entire setup.
Essentially leaf-like approach as described there.
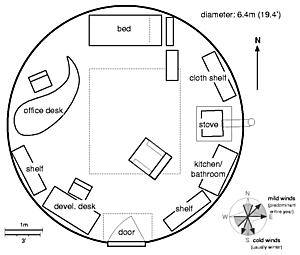
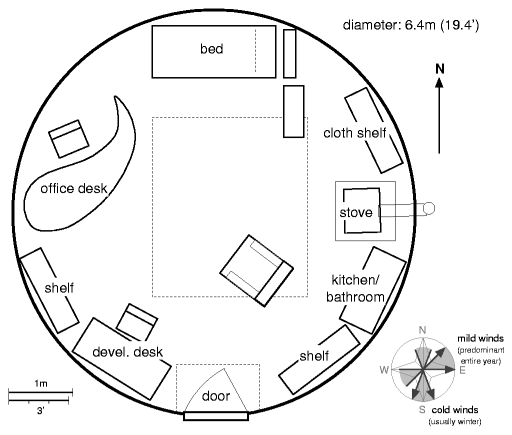
Yurt Interior 2006/2007 |
As mentioned above, I like to keep my yurt interior, and just take the yurt down and build the geodesic dome over it. Some of the shelfs are 1.5m high - so let's quickly calculate how far they have to move inside due the curvature of the walls of the dome:
- h = 1.5m
- d = 6.32m
- dist = d/2 - √((d/2)*(d/2)-h*h) = 3.15 - √(3.15*3.15 - 1.5*1.5) = 38cm
So I "loose" apprx. 76cm diameter if I keep shelfs on all sides, so I likely put the shelfs on one side, and lower stuff on the other, let's see. It's obvious a spherical space cannot hold rectangular or cubic furniture that well, in particular high furniture.
With a high ceiling and making a 2nd floor for beds is an interesting option, in particular in the winter-time when the heat from the stove rises.
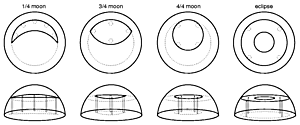
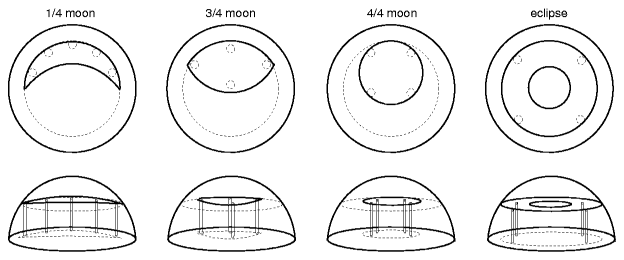
2nd Floor Options in Dome |
A few options I quickly drew, keeping the circular shape of the dome for the 2nd floor as well:
- "1/4 moon": 2 pieces and 5 columns, best light distribution from the skylight.
- "3/4 moon": 1 or 2 pieces, 4 columns
- "4/4 moon": 1-4 pieces, 4 columns
- "eclipse": 1 or 4 pieces, 4+ columns, the light from the skylight reaches both levels, the 2nd floor and also the base.
Once I'm further with the development, beyond just planning, some of the notes move into the Geodesic Dome Notes.
|