
|
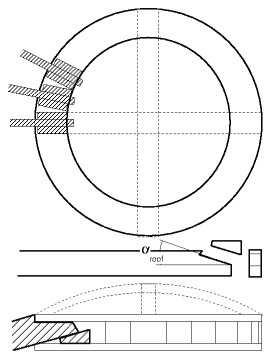
Yurt Notes & Calculatorwritten by Rene K. Mueller, Copyright (c) 2005, 2006, 2008, last updated Sun, September 22, 2013 Wheel / ToonoThe crown wheel or toono can be implemented in various ways, I feature two common ones more detailed: Traditional
The How-To Manuals on Yurts has more detailed information, e.g. the end of the poles you usually saw a small 2-3cm cut in, so the pole can lay on the top khana cord, additional fixation required. 8 Segment Wheel
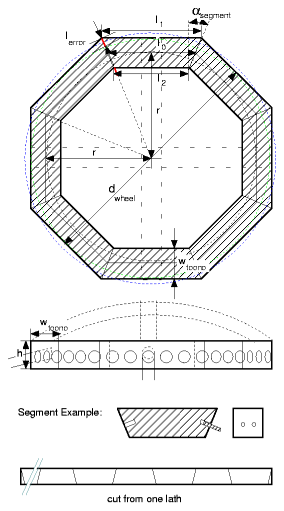
The higher the n-edges, the lesser the lerror to the ideal circle. I think it might be suitable to drill the holes deeper to compensate the lerror - I won't recommend you make certain roof poles shorter than others. I experienced that an error of 1-2cm can be neglected when the diameter of the yurt is 5m or larger. Note: You have to be very exact with angle and length of each segment, errors accumulate with higher degree or amount of segments.
Optionally I found that putting the dowels after I glued the segments easier, and less erroneous as the position of dowels can vary then more.
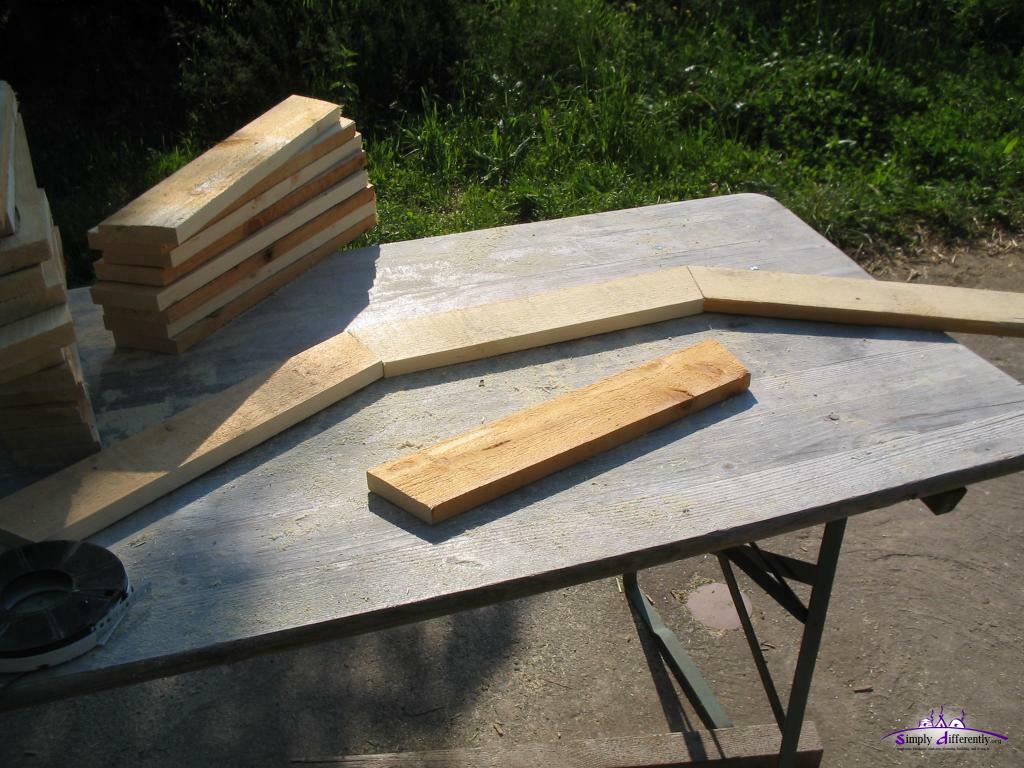
A 8-segment crown-wheel / toono 122cm diameter I made:
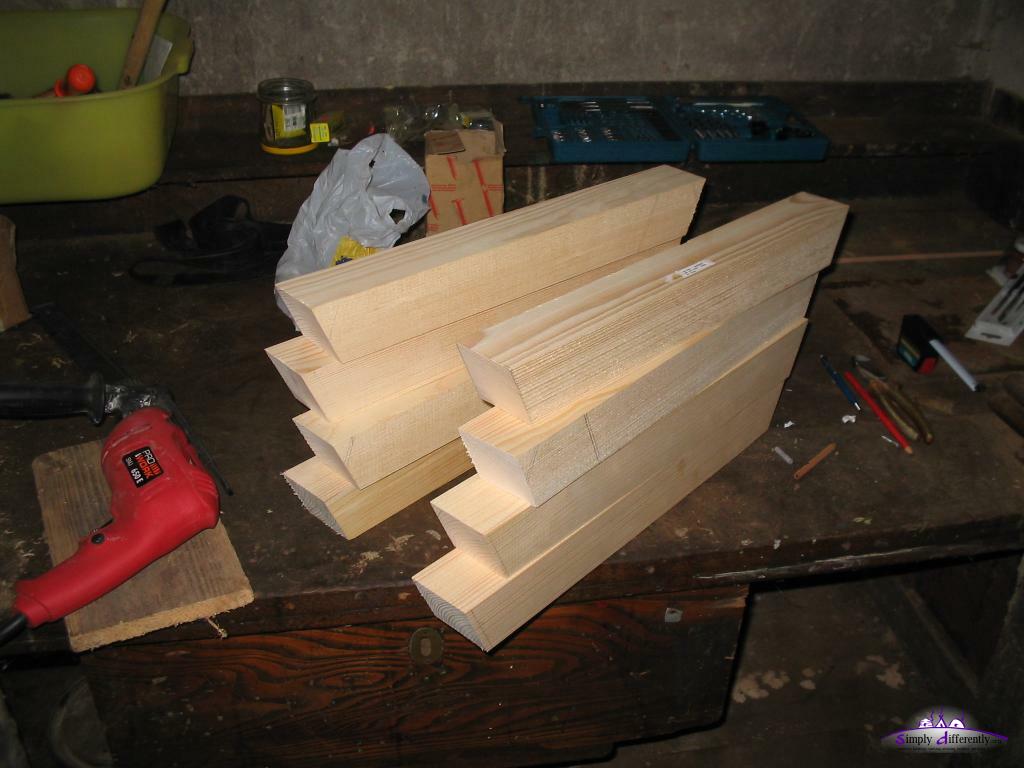 Toono 8 segments 2005/09/28 11:42 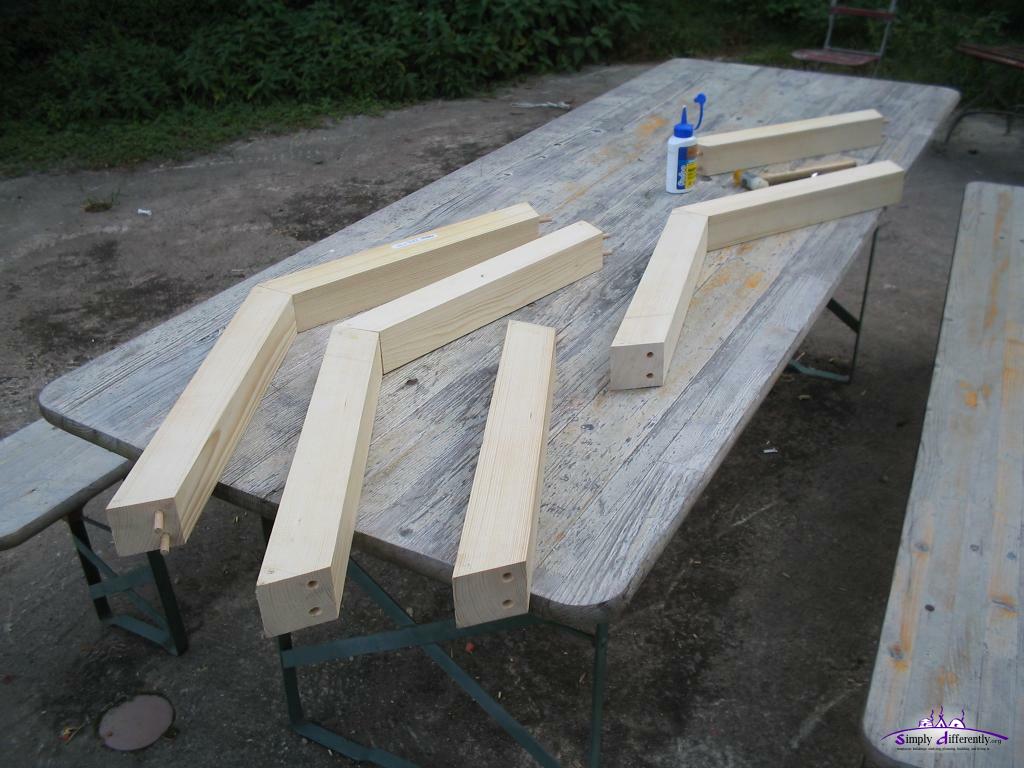 Putting together two segments 2005/09/28 13:35 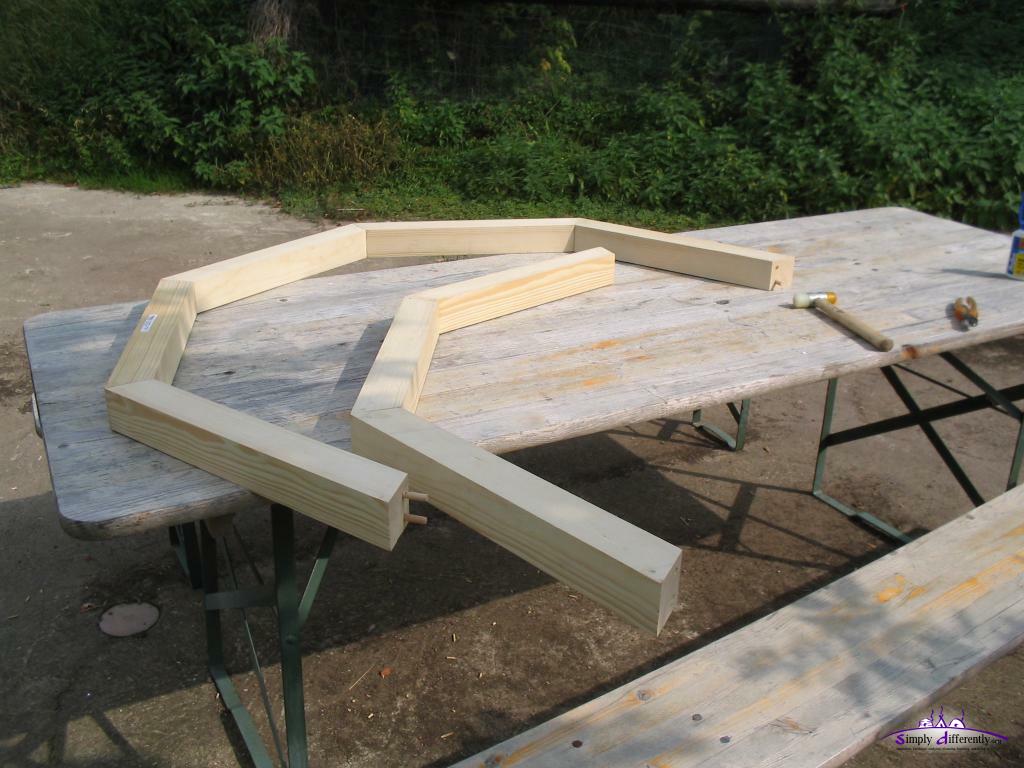 And so on ... 2005/09/28 13:56 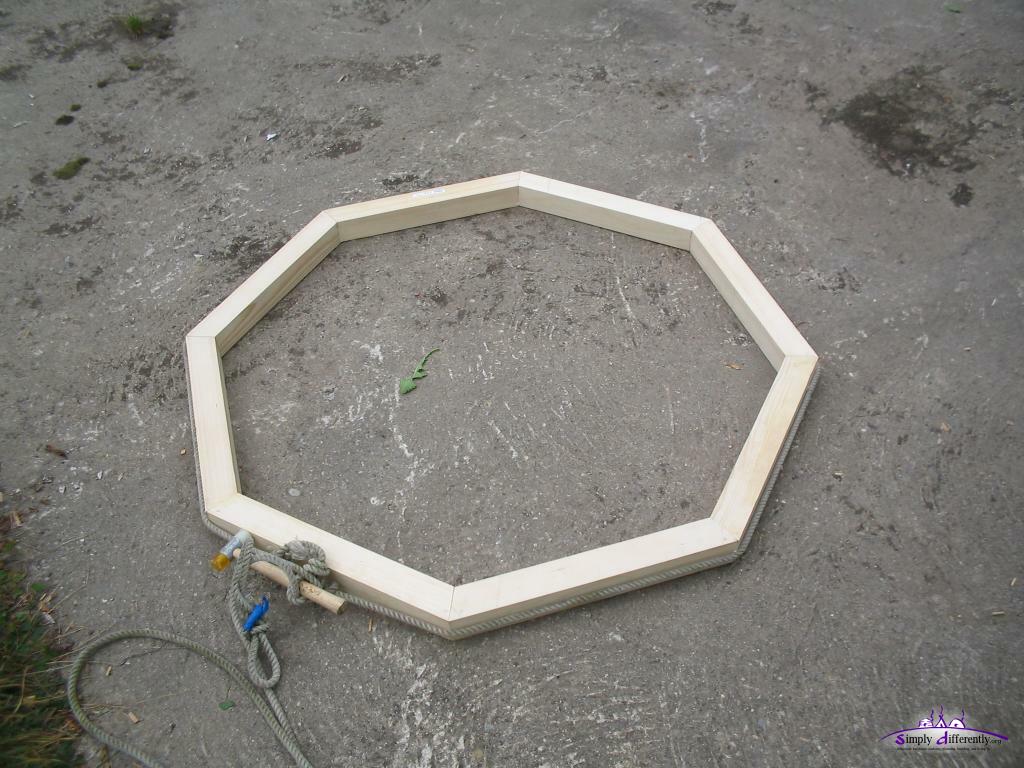 The toono finished, without roof pole holes, glued and tied with a rope to press together for 12 hours 2005/09/28 14:07
Multiple LayersYou may use multiple flat polygons (use the calculator above), and rotate each new layer a bit and overlay 3 or 4 of them (e.g each 1.5-2cm thick), glue and maybe screw them together as well - and then saw a circle (outside, and inside), this approach has more overhead, but is most suitable for larger diameters.A 12-segment 3 layers crown-wheel / toono, 195cm diameter I made:
 12 Segment, 3 Layers Crown-wheel (36 segments): laying out a quarter (1) 2006/06/13 17:41 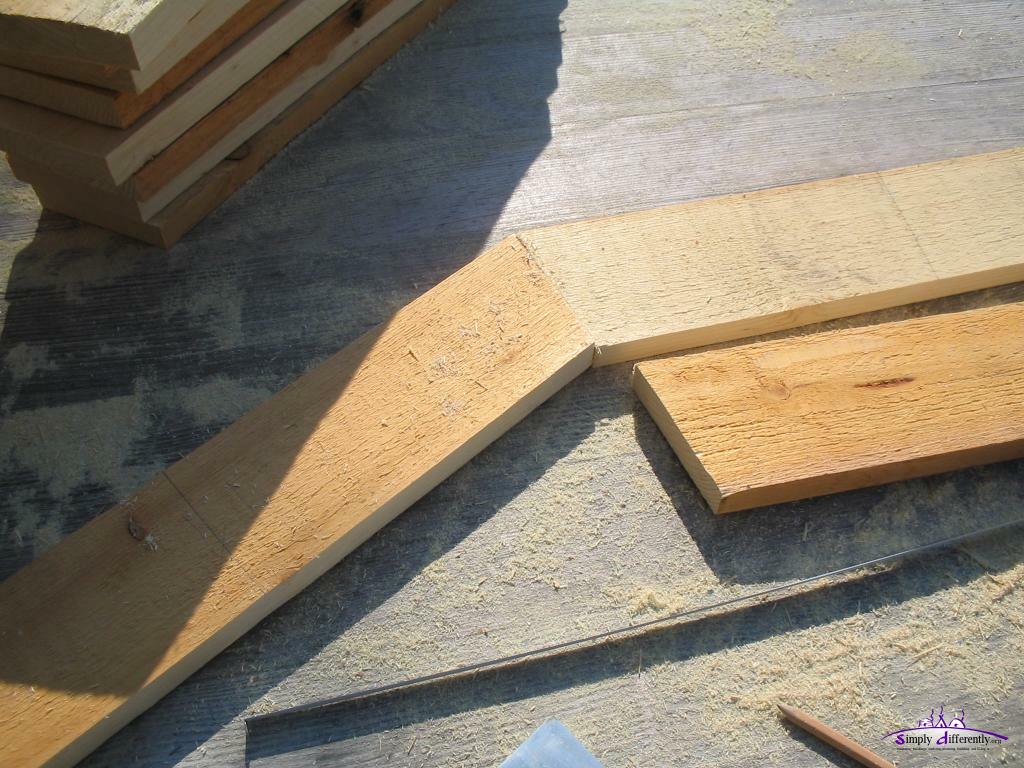 2006/06/13 17:42 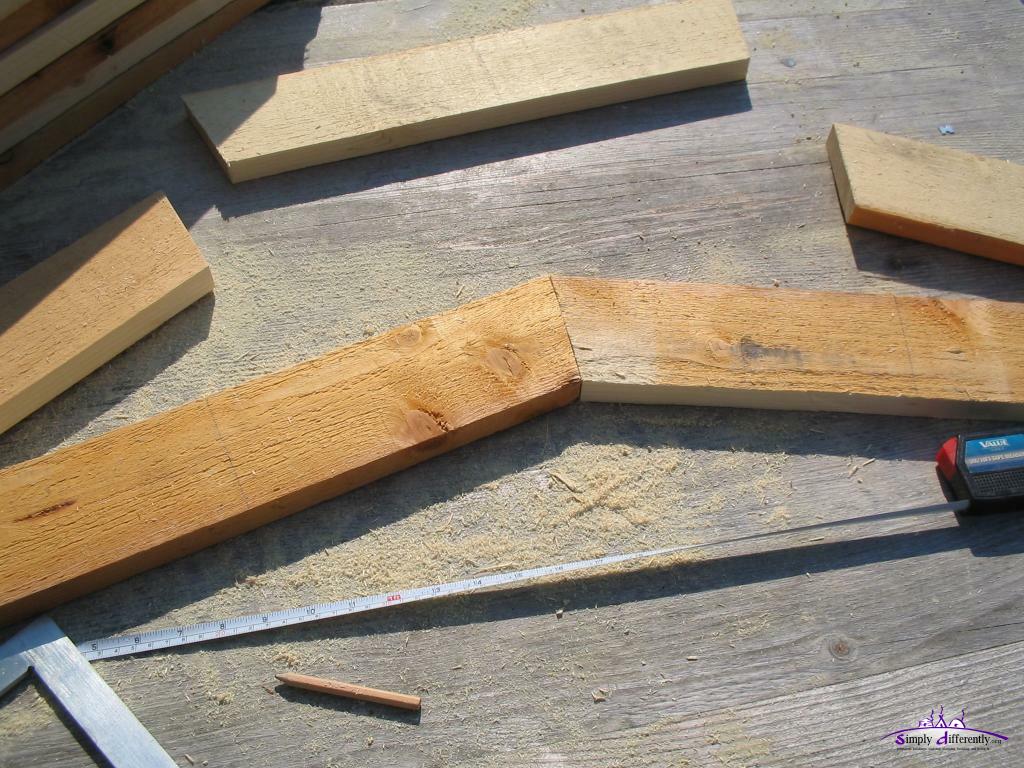 Marking the half of each segment in order to position the segments 2006/06/13 17:44 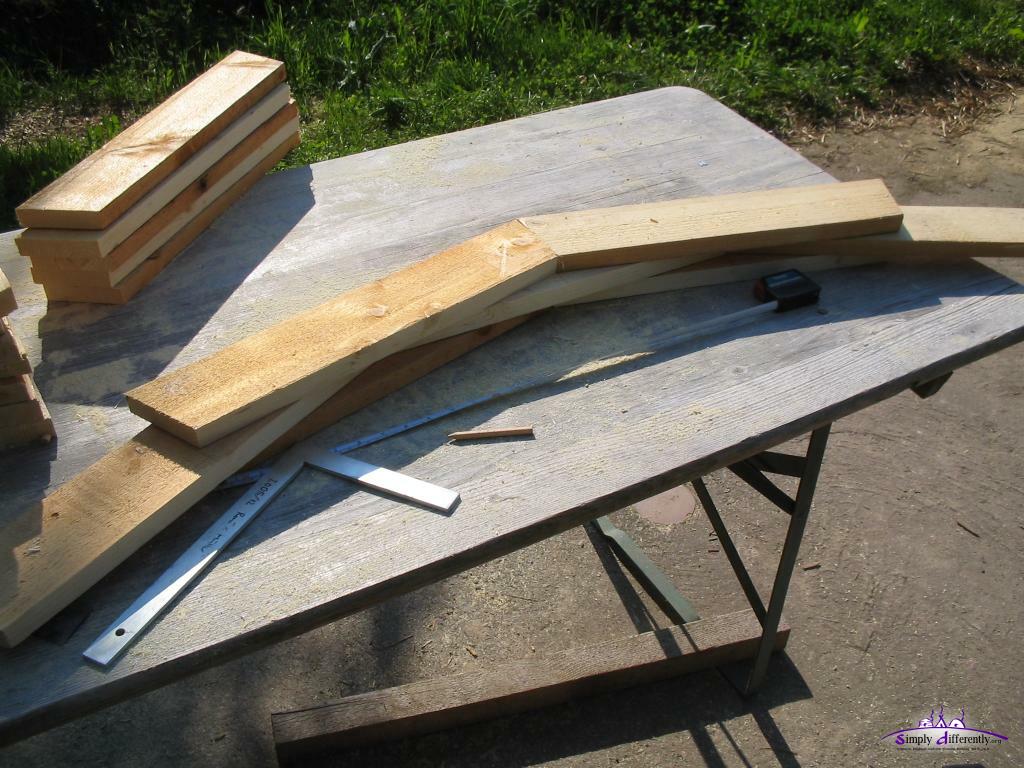 12x3 Segment crown-wheel: quarter layout (not yet glued) 2006/06/13 17:45 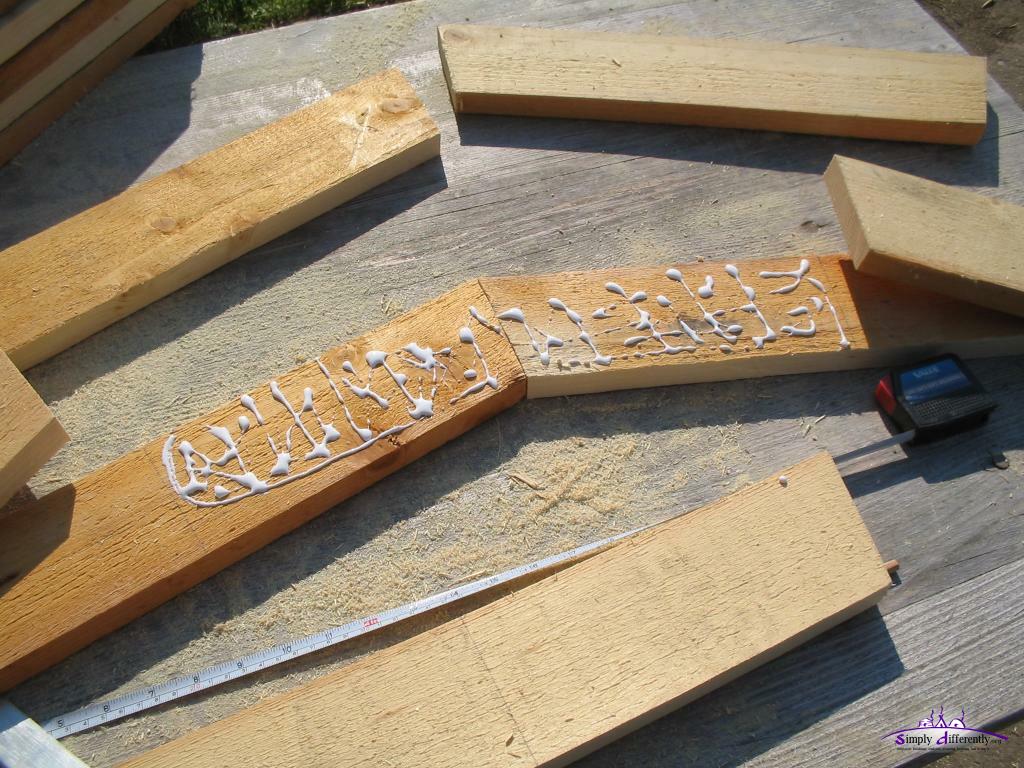 Glueing . . . 2006/06/13 17:46 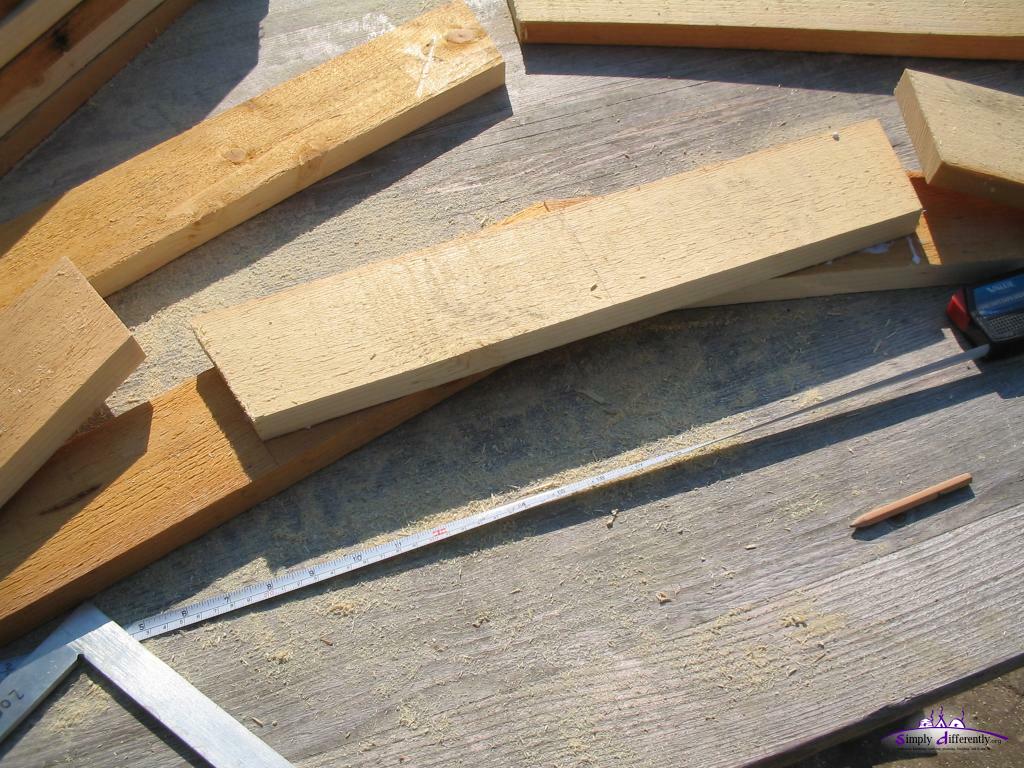 Positioning . . . 2006/06/13 17:46 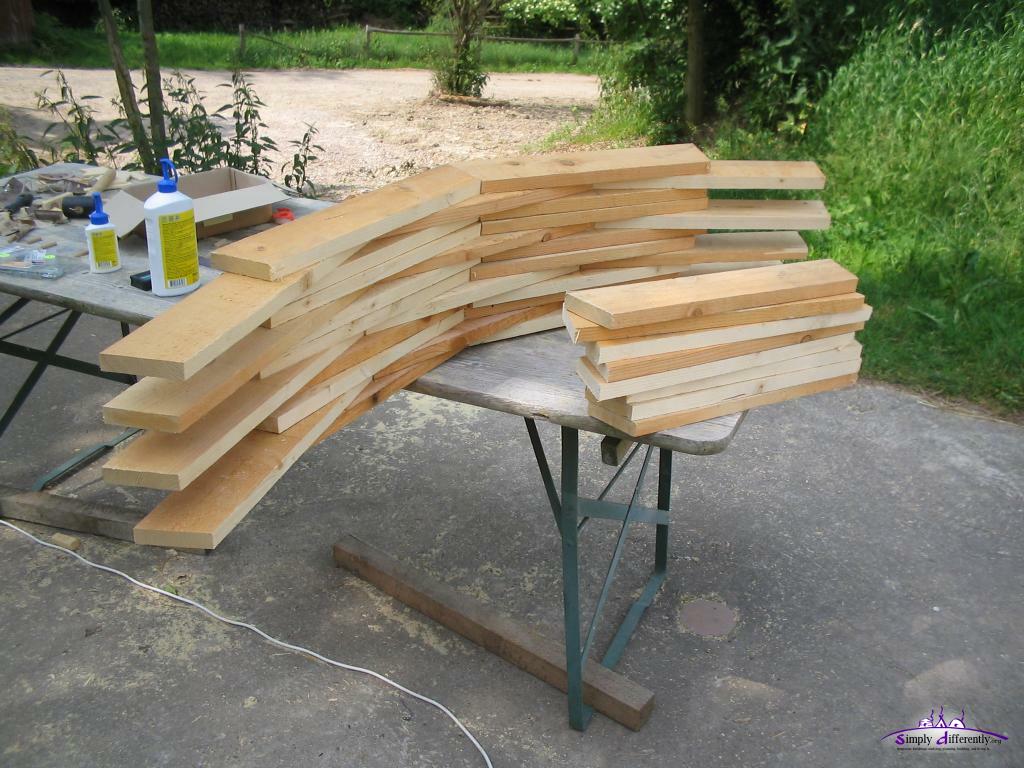 12x3 segment crown-wheel: 4 quarters glued, with remaining connecting segments 2006/06/15 11:07 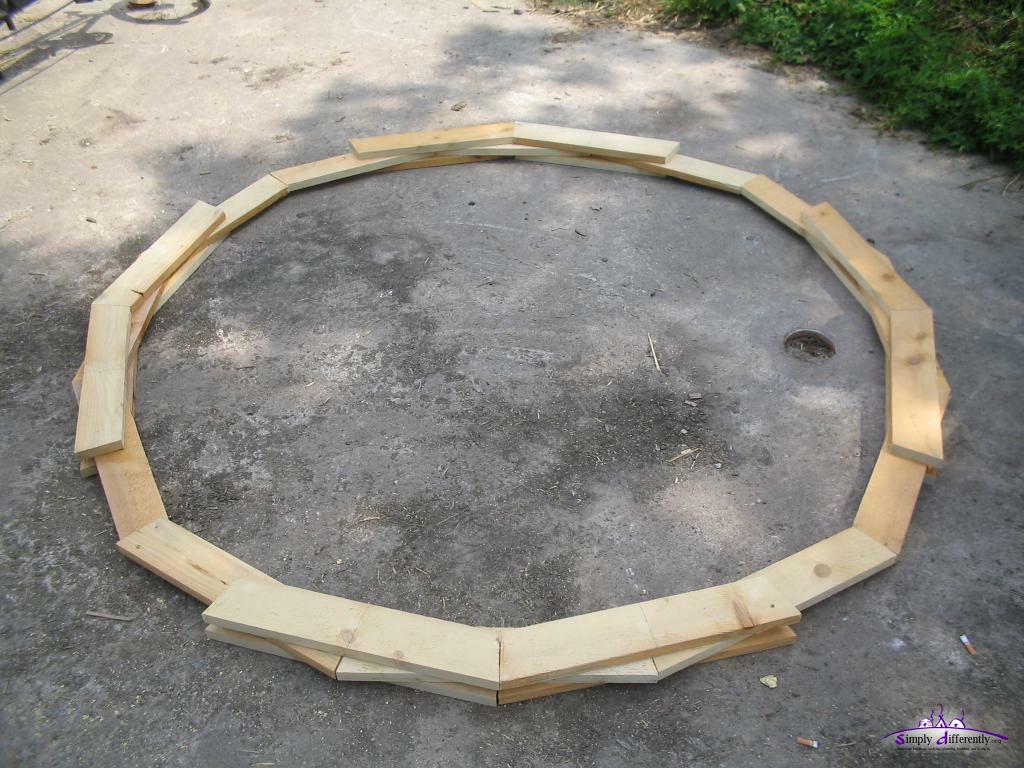 Completing the 12x3 segment crown-wheel: layout (not yet glued) 2006/06/15 11:09  12x3 segment crown-wheel: completely glued 2006/06/15 11:32 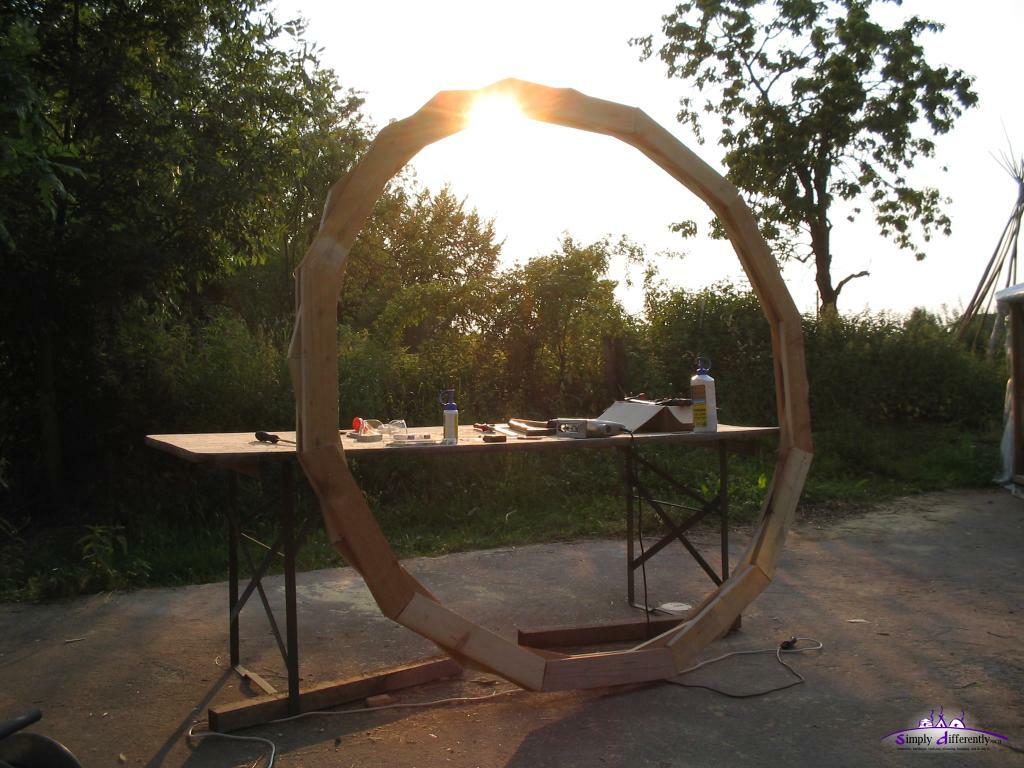 12x3 segment crown-wheel: complete (no frame or pole holes yet) 2006/06/15 19:41 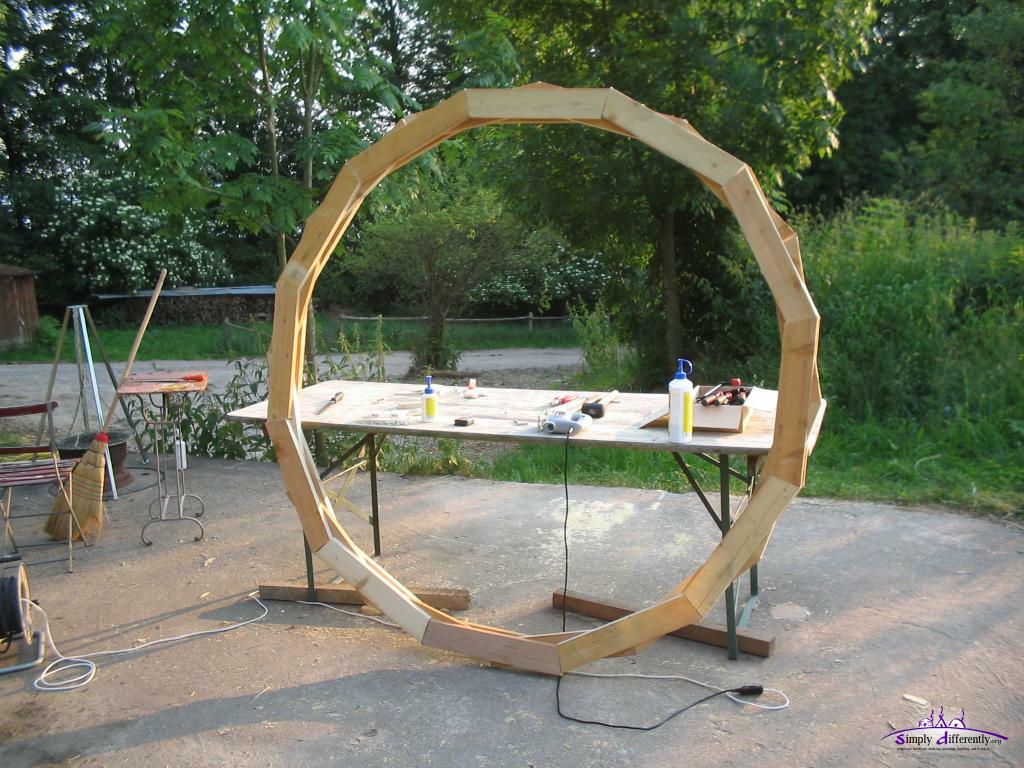 12x3 segment crown-wheel: complete (no frame or pole holes yet) 2006/06/15 19:42 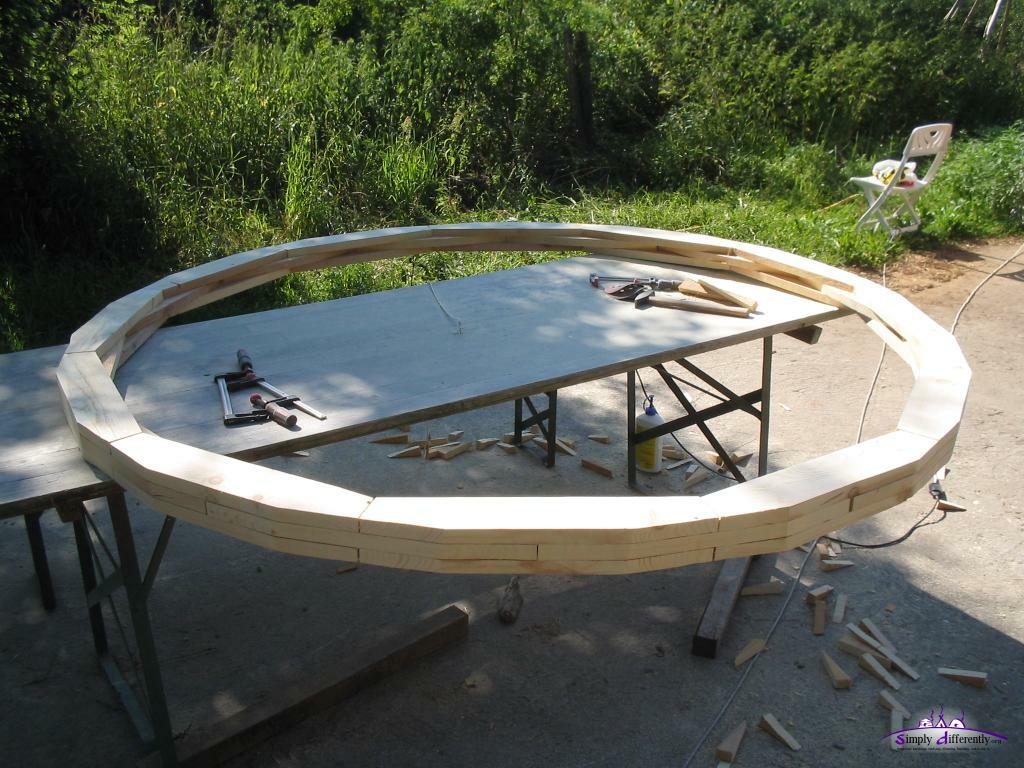 Beautifying the wheel 2006/07/10 16:54 And finally I will use screws to fixate the layers - photos will follow of this version of a crown-wheel. CrownlessThere is also a "crownless" option available by laying the roof poles unto each other, and thereby form a stable crown and cone-like roof of the yurt. A few photos of a quick experiment I made a while back for a dome model, but using the same "crownless" approach:  Closed the circle 2006/05/06 18:26 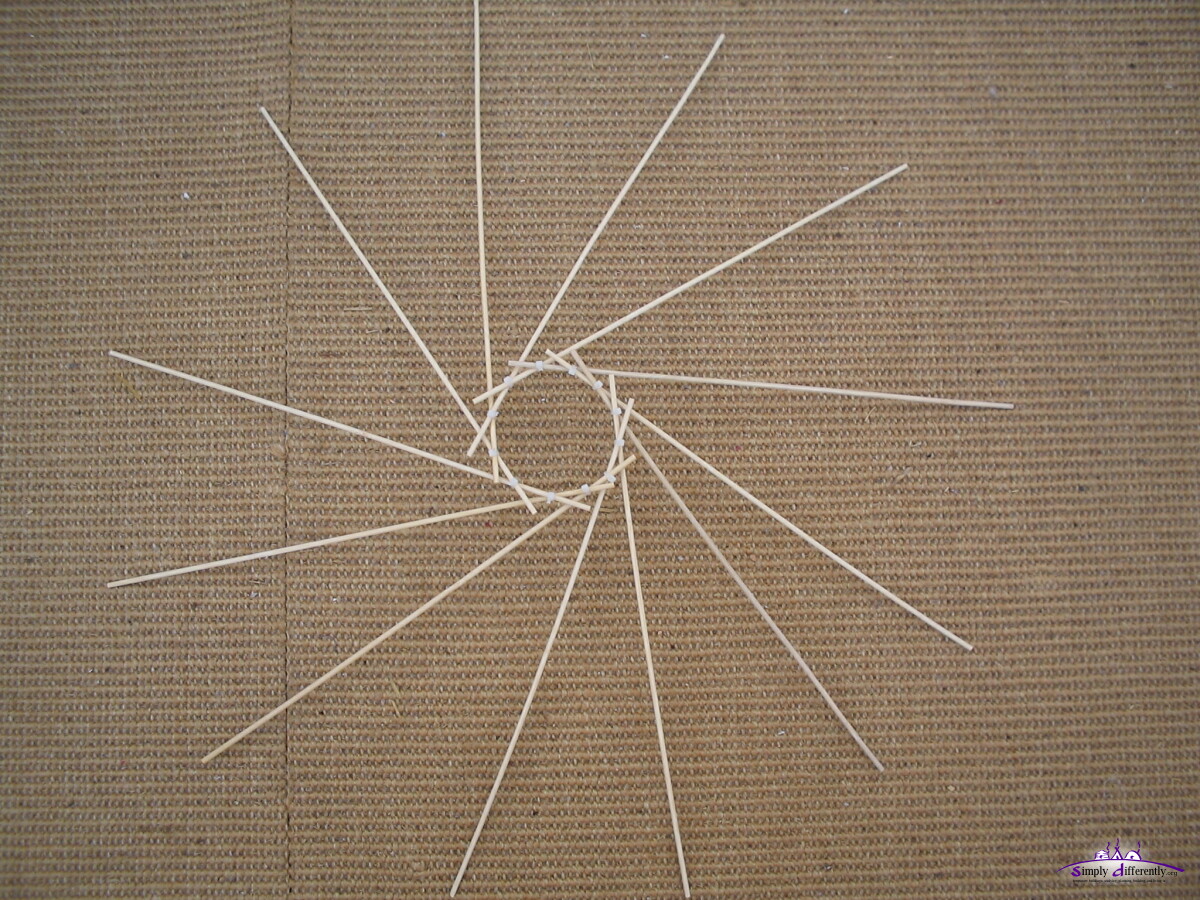 Overview 2006/05/06 18:27 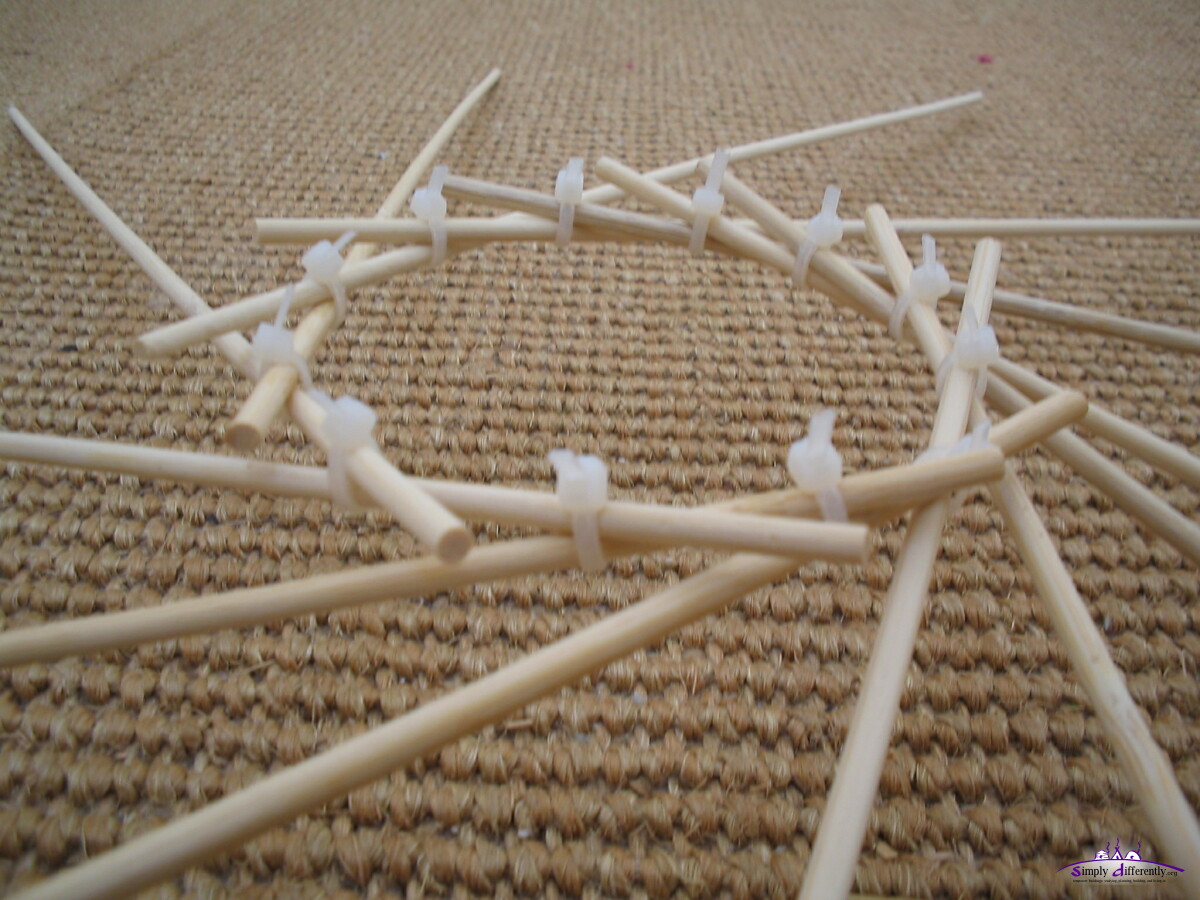 Closeup (3) 2006/05/06 18:27
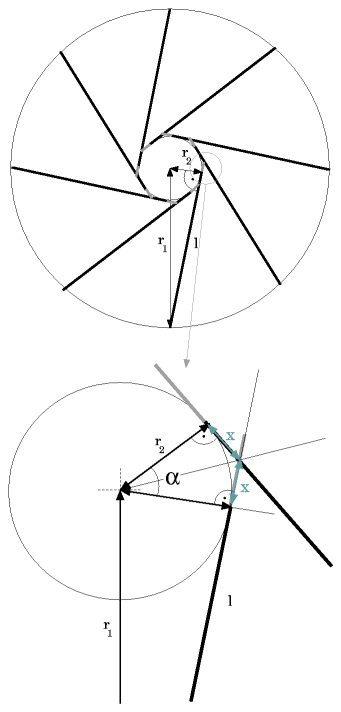
Expressions:
Note: this is a 2D calculation approach, the 3D calculation approach with tilted roof with αroof and poles with a certain thickness is a bit more complex to calculate, but it won't differ as much from this 2D approach I would say; I may later extend this to a full 3D calculation approach. It's also a certain challenge to fixate the crossing of the poles, where they lay on each other. Be aware this approach is a bit more complex: e.g. you may have to build the roof grid on the ground and lift it up unto the lattice wall, as you cannot create a stable crown with 3 or 4 poles, you require to assemble all of them - for a more stationary yurt but it may be a good option, as you only require roof poles, no rather complex crown-wheel. I'm considering this approach for stiffening a soft skylight or creating a supporting skylight grid, using the inner diameter as airing opening, and have a solid cover of that inner most and most top cover, compare the notes below on "Skylight". Other WaysThere are other ways to build a toono, e.g. 6 round segments put together to form a full round circle, or two copper rings held together with distance husks which have the length of the diameter of the poles plus some spare, this solution like the traditional toono tend to rotate, and the roof poles instead to reach the toono by 90° but 70-80° (see photo below), and so the toono often has tilt, and makes the roof look asymmetric. This is why I like to build a toono with holes so the poles keep angle (vertical & horizontal) to the toono.
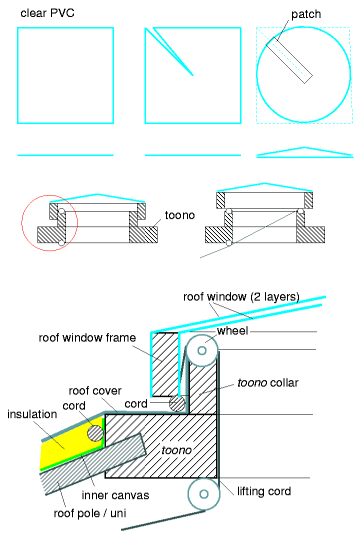
Roof WeightTo estimate the weight of the roof, dried wood is 550kg/m3, which is 0.55g/cm3, so all laths, plus the cover (e.g. 300g/m2), e.g. a 6m yurt with cotton cover, and 3m x 3cm x 3cm wood lath apprx. 90kg for laths, plus 15kg for the cover, and the toono apprx. 10kg = 120kg total, divided by nlaths e.g. 60 poles, apprx. 2kg per pole; this needs to be kept in mind that this weight will on the toono and on the khana per pole. Skylight / Toono Cover
Here the step by step how I did it:  Preparing clear PVC 2005/11/22 15:39 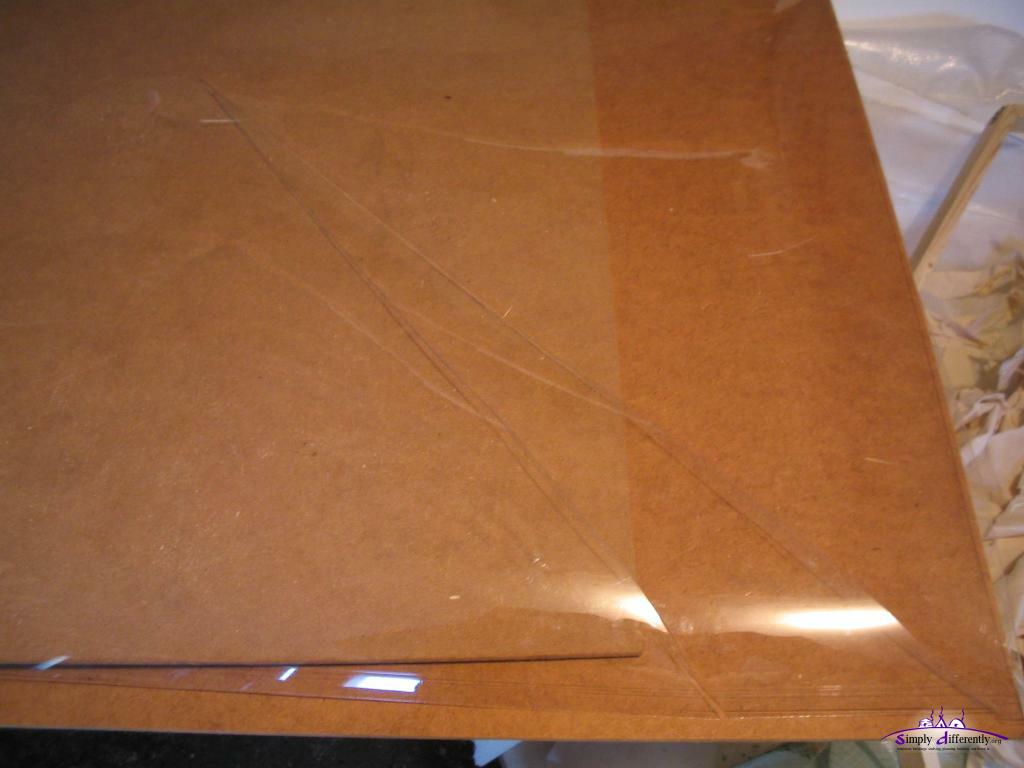 Clear PVC cut-out, to form a cone 2005/11/23 12:00  Roof cover frame segments 2005/11/22 15:39 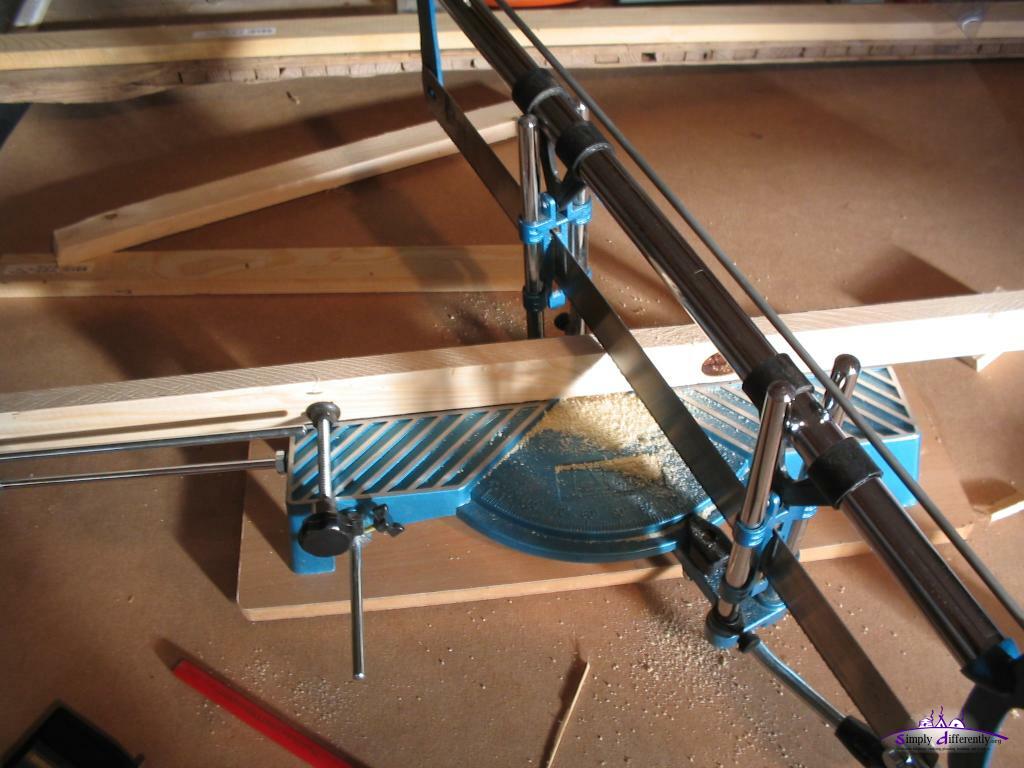 22.5° angle for 8 segment polygon frame 2005/11/22 15:56 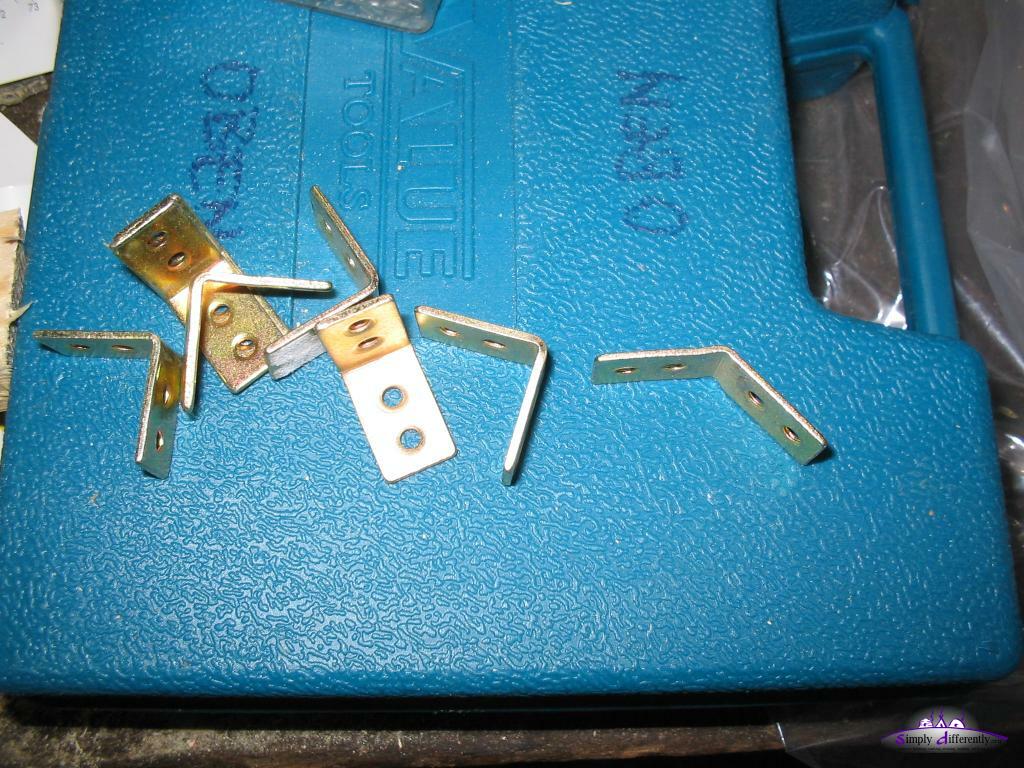 Reenforcement to screw segments together 2005/11/22 16:07 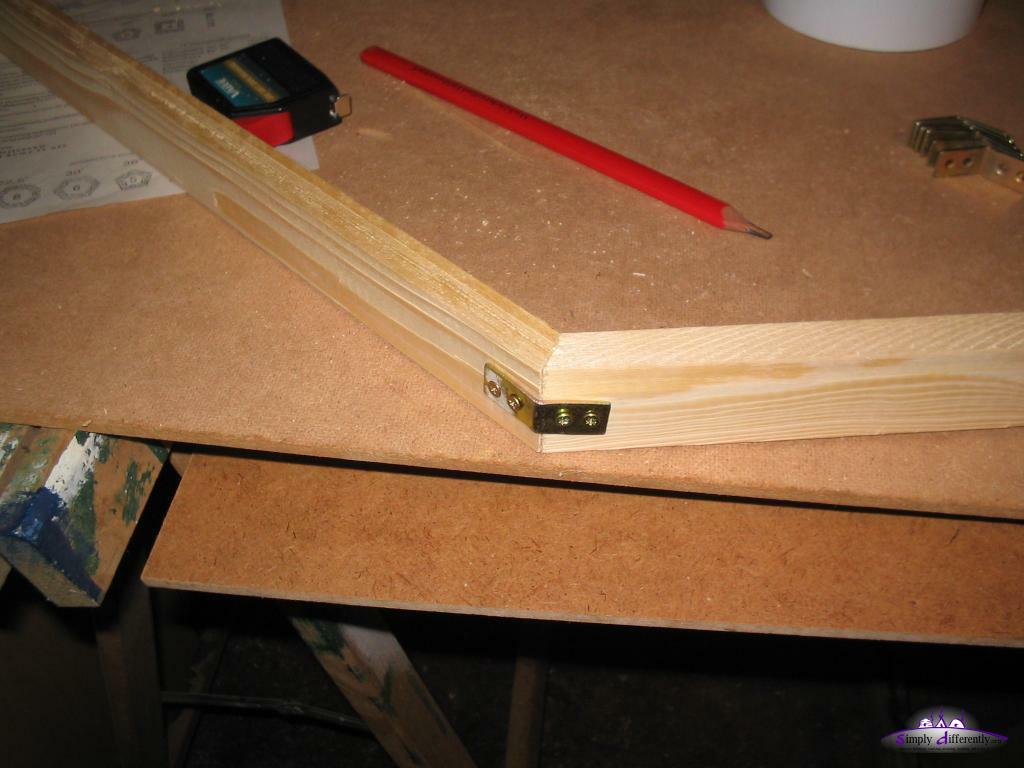 2005/11/22 16:23 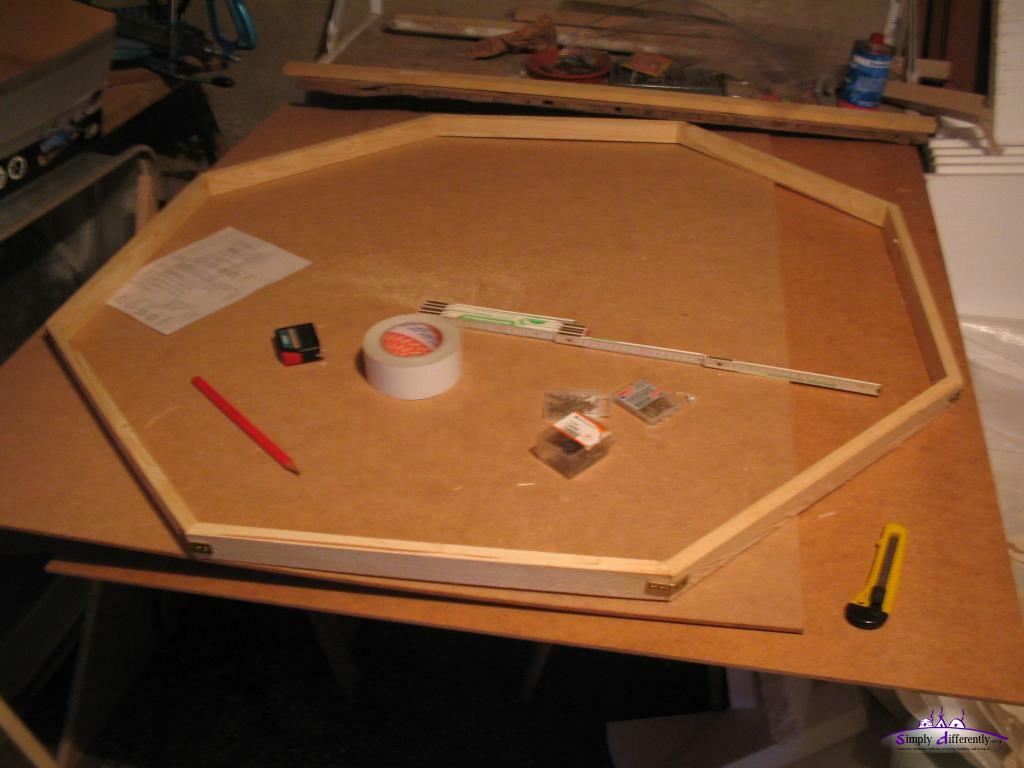 2005/11/22 17:26 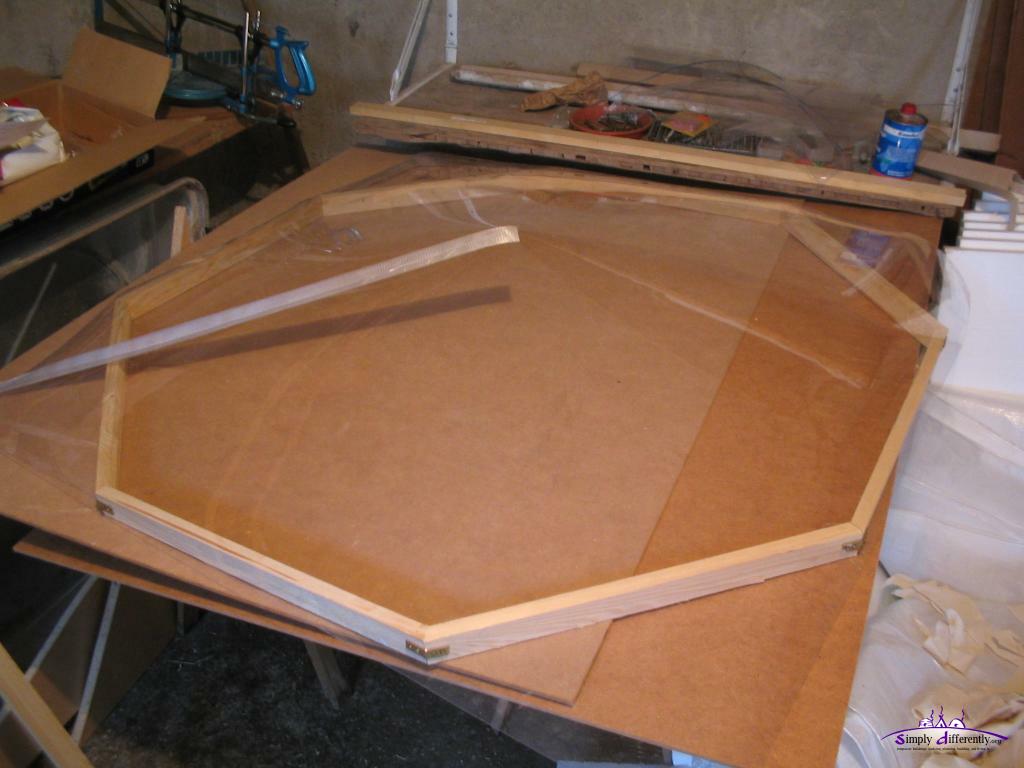 Clear PVC patched, and laid over frame 2005/11/23 12:13 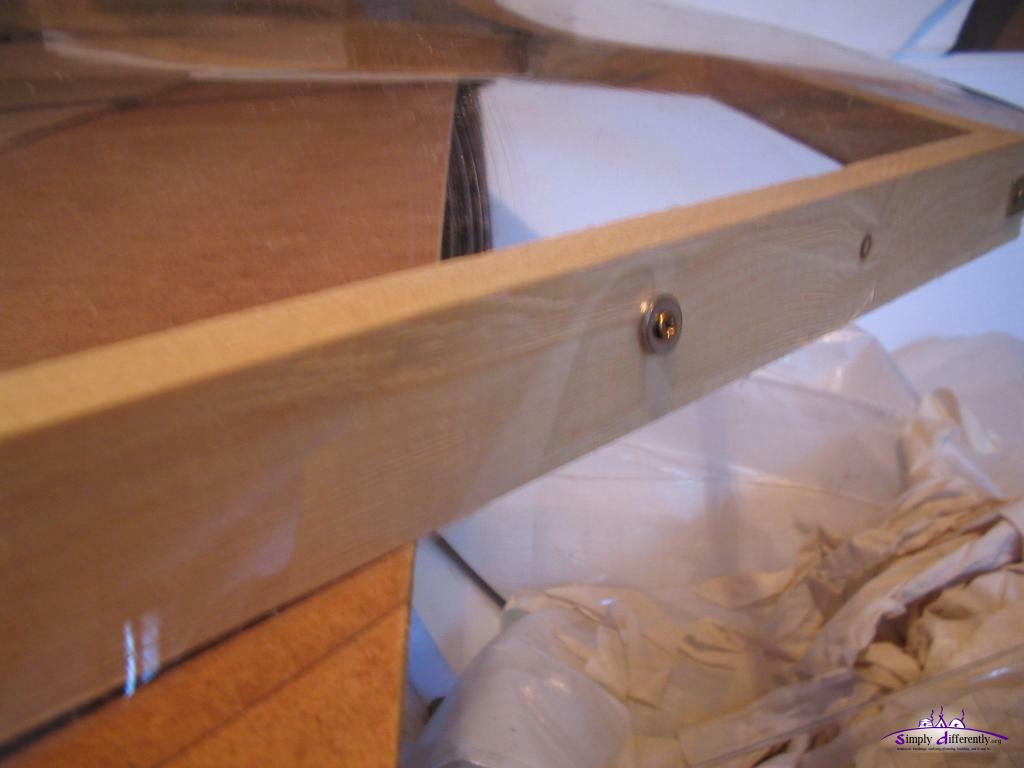 Attaching clear PVC 2005/11/23 13:09 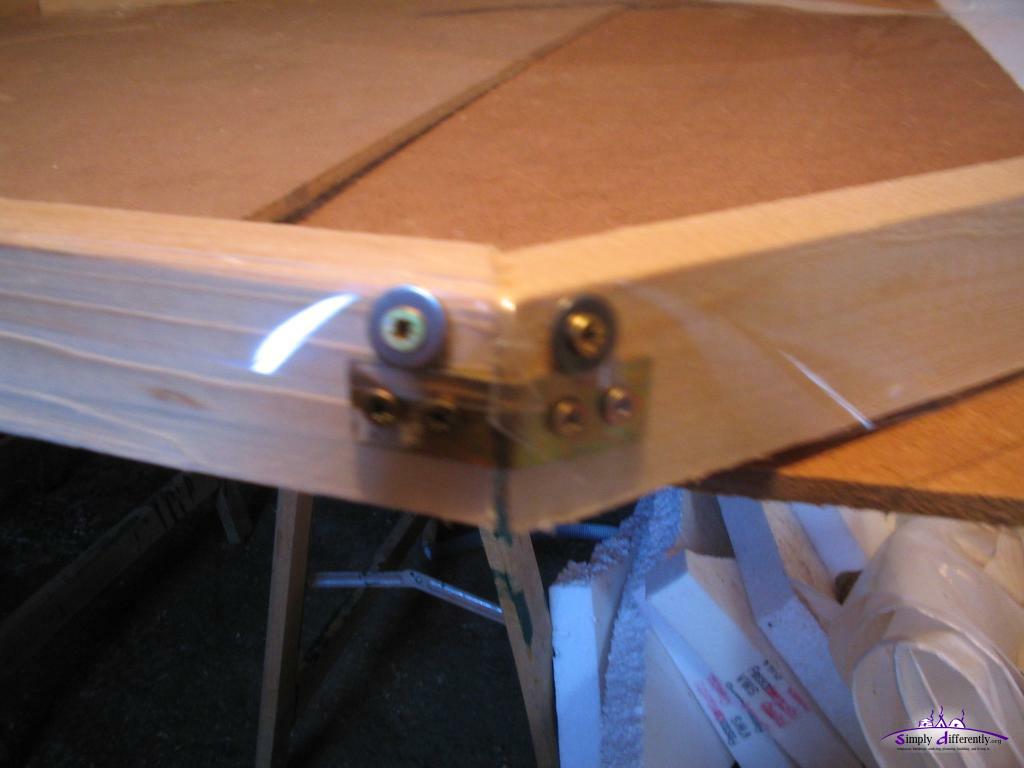 2005/11/23 13:09 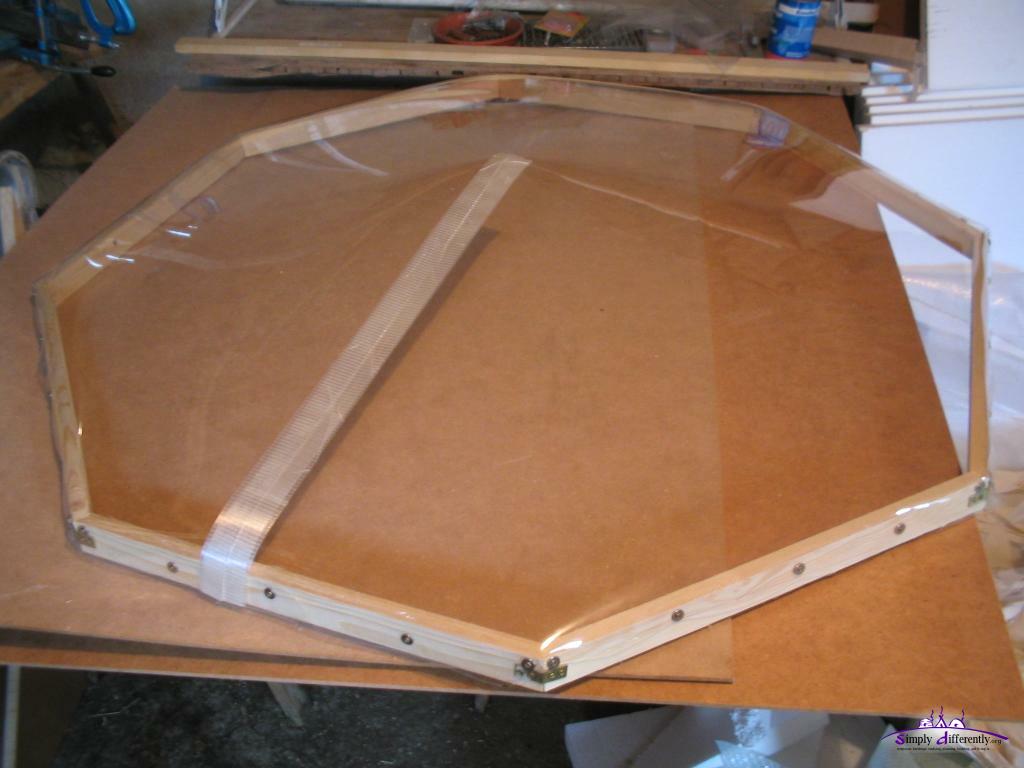 Outer clear PVC layer attached 2005/11/23 14:12 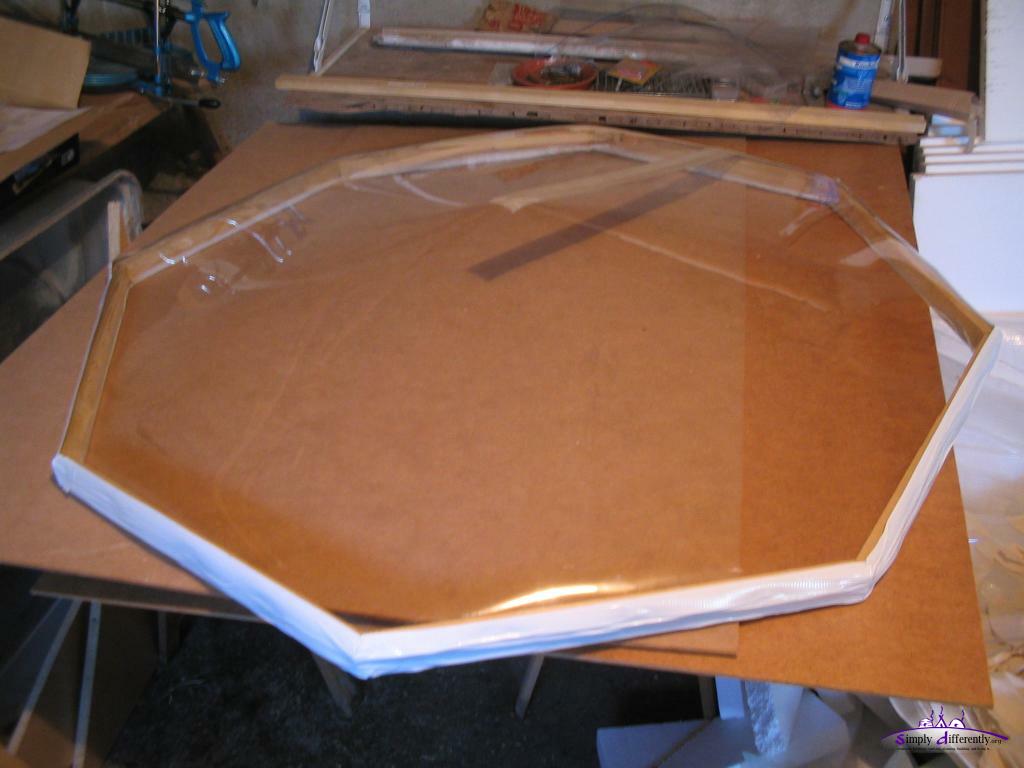 Taped frame 2005/11/23 14:35 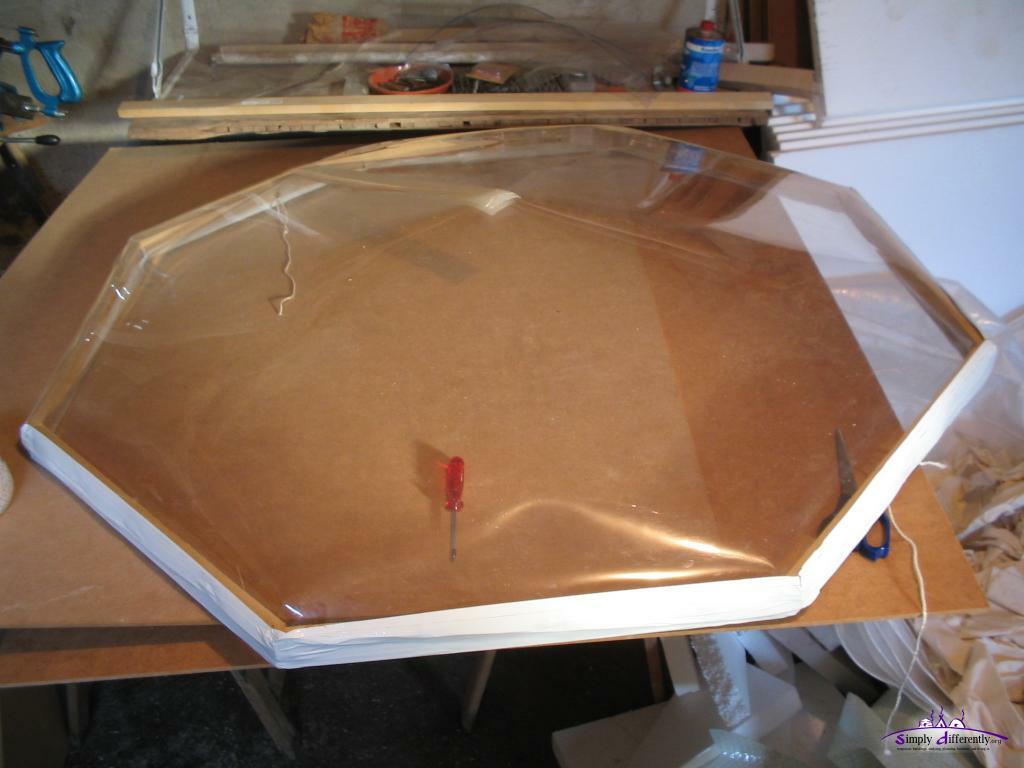 Two layers: one inside, and outside reaching over the frame 2005/11/23 15:49 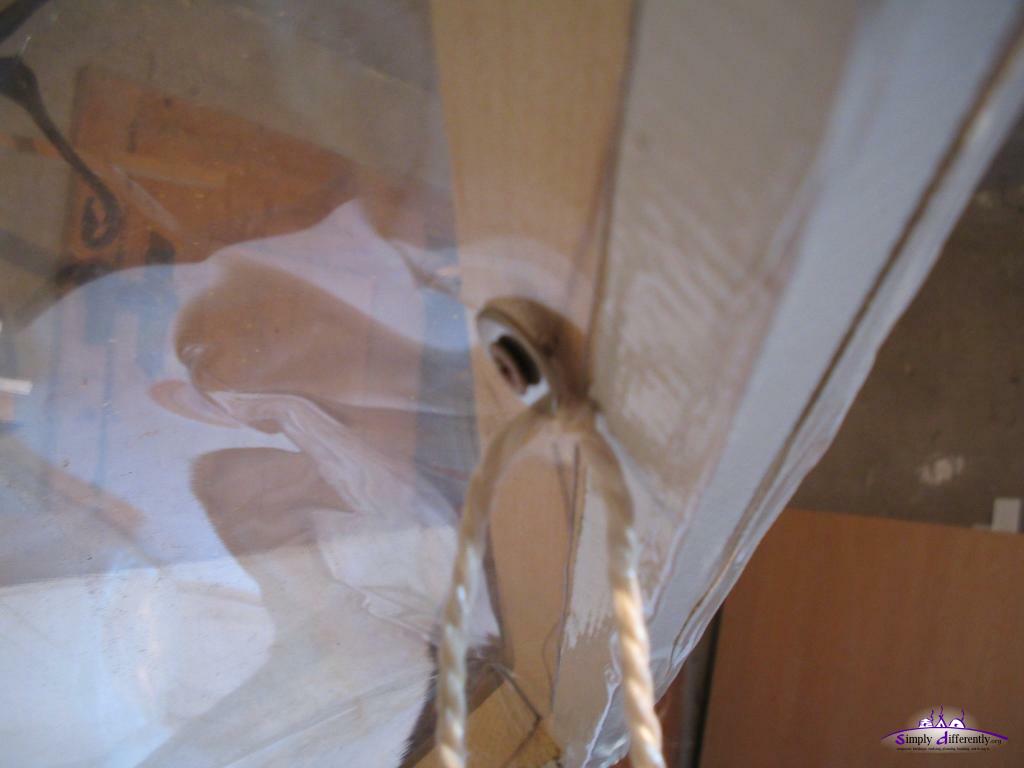 Attaching cord to fixate roof cover to roof 2005/11/23 15:49 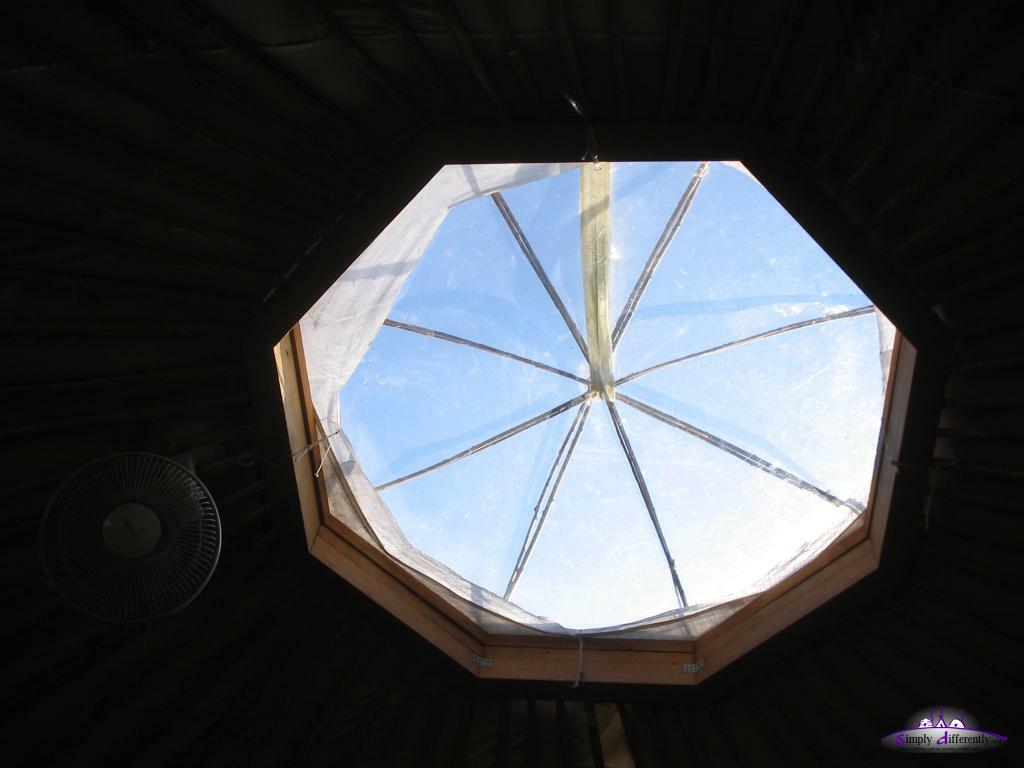 Dual willow spokes skylight enhancement 2008/02/18 14:09 As an upgrade I used willow sticks as spokes and formed a supporting star between the two layers of PVC preventing heavy snow pushing the cone inside which only happened a few times (2-3 times in the winter); often the snow slided or even melted when I was heating the yurt, but the few times it happened it was early morning when I usually didn't heat yet (see last picture above).
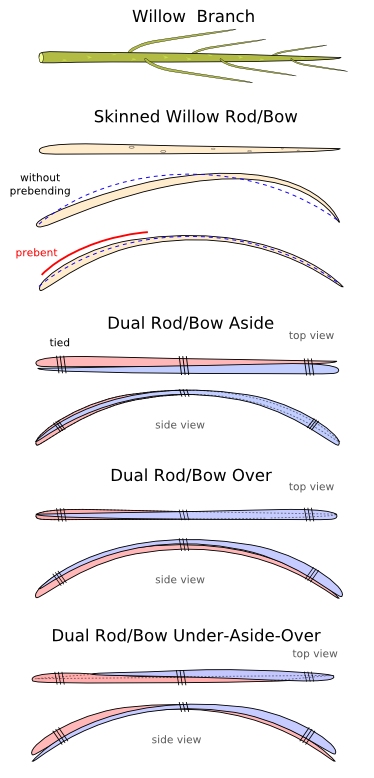
Single Rod/Bow: the branch doesn't narrow too quickly, and is moderatly thick, at least 8mm at the narrow end. I noticed, the willow bow is easy to prebend in order to create a symmetric bow.
Double Rod/Bow Under-Aside-Over: two branches are arranged that one branch narrow end goes below the thicker end of the other, aside of each in the middle, and then again the thicker end over the narrow end.
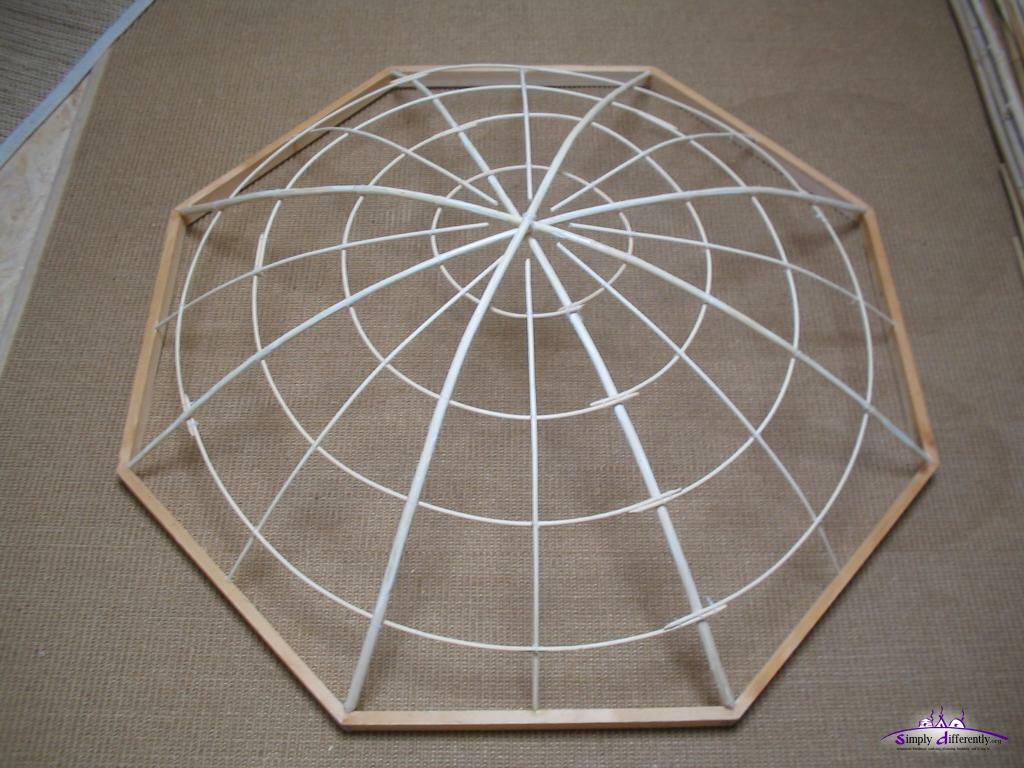
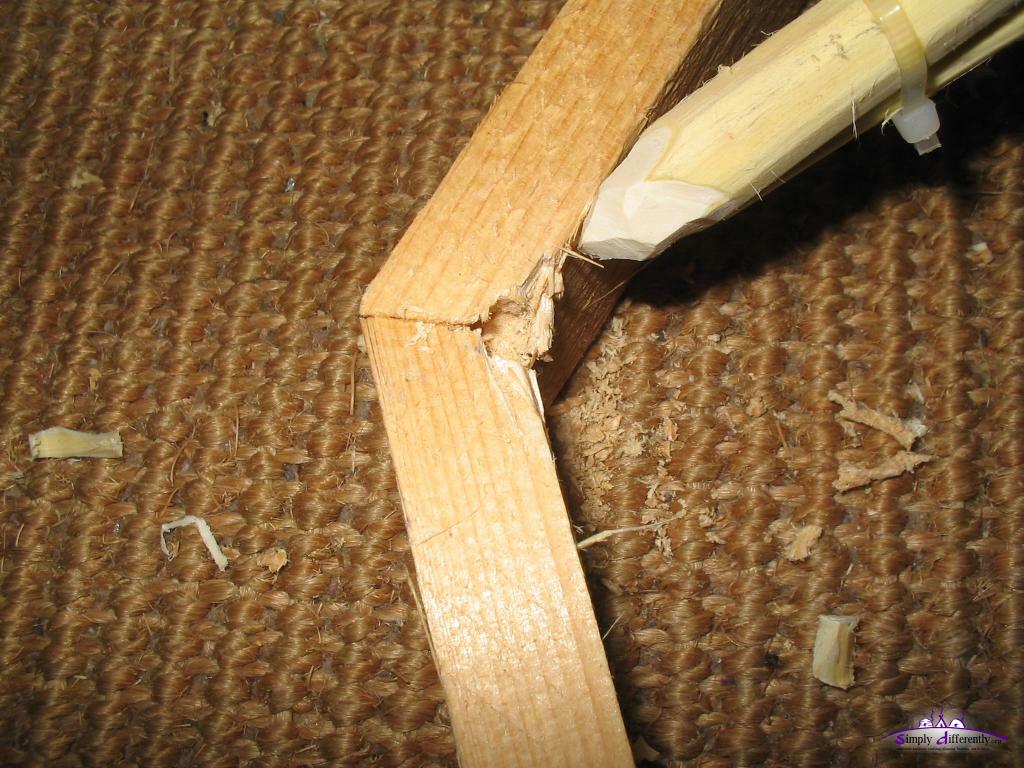
The third example in the photo series below shows that I used bamboo stick connected in the mids of the segment of the octagon (8-sided frame), this was due the length of the bamboo stick as I would have prefered to attach the spoke in the junction frame segment like the other two skylights.
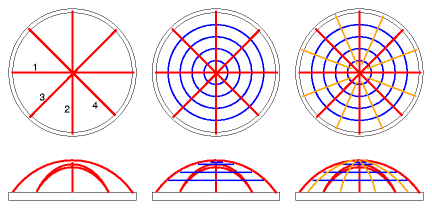
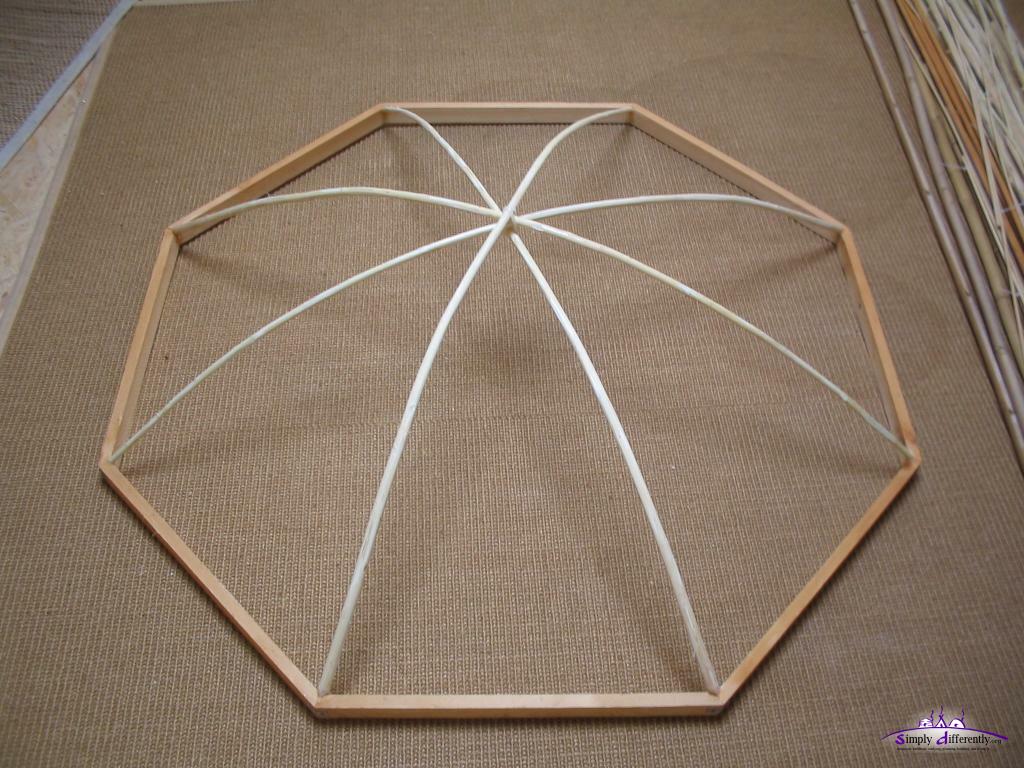 Skylight grid: single willow rod (diameter 122cm) 2008/03/22 13:48 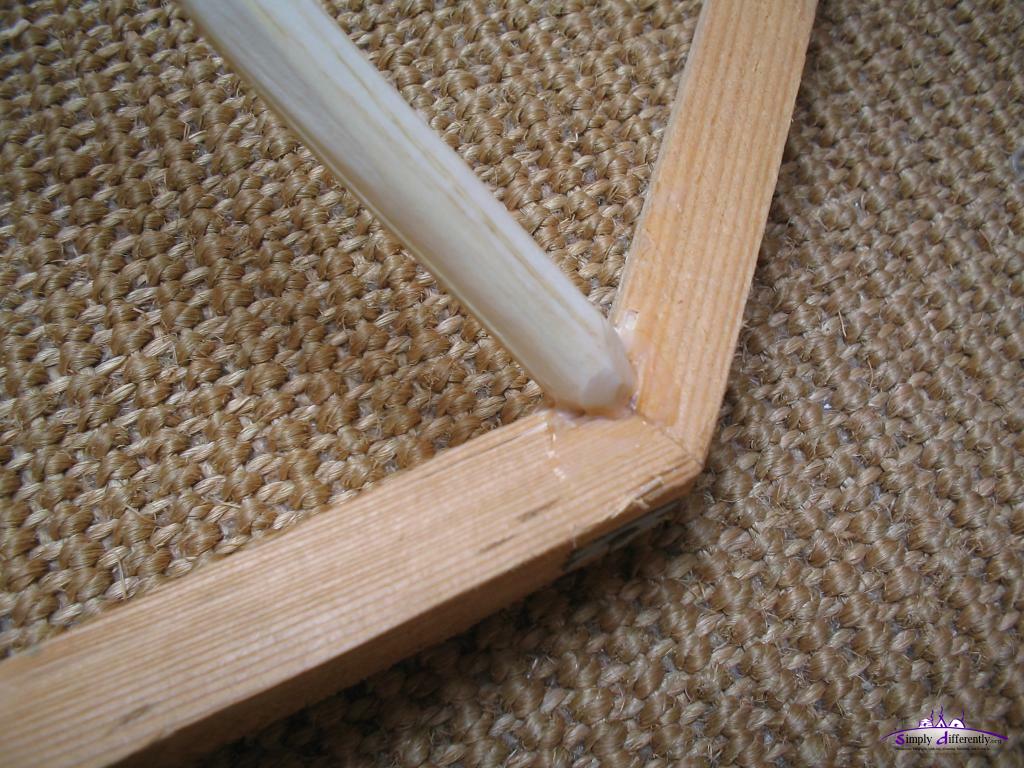 Skylight grid: single willow rod, close up connection to frame 2008/03/22 13:48 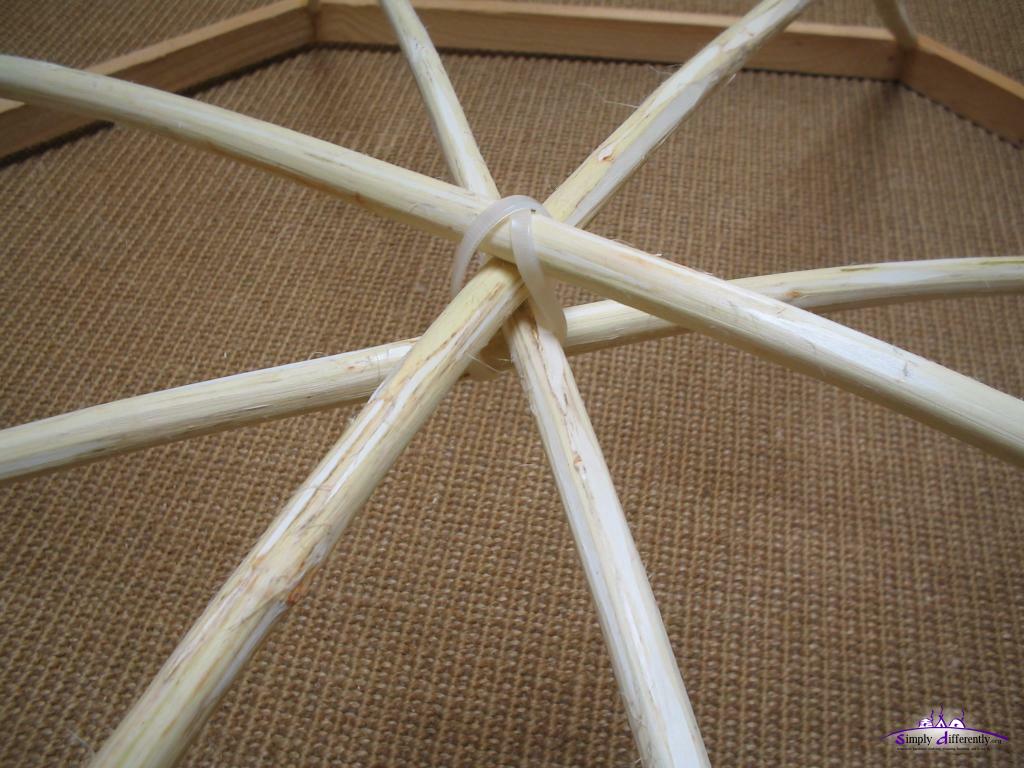 Skylight grid: single willow rod, close up center 2008/03/22 13:48 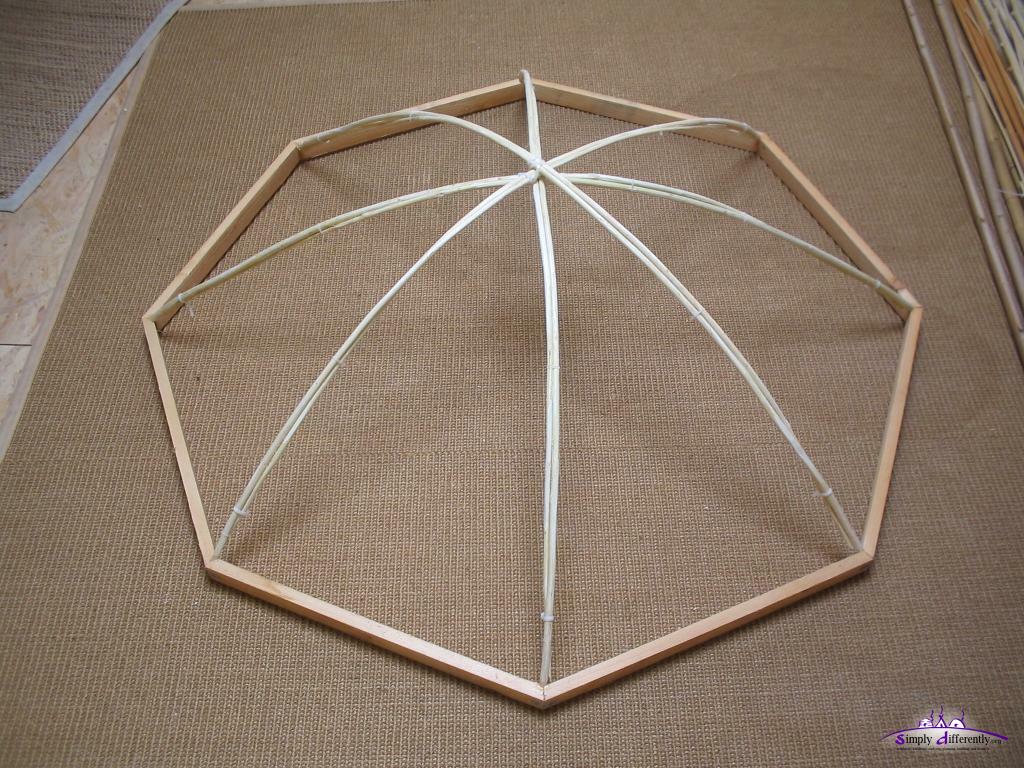 Skylight grid: double willow rods under-aside-over (diameter 122cm) 2008/03/22 13:47 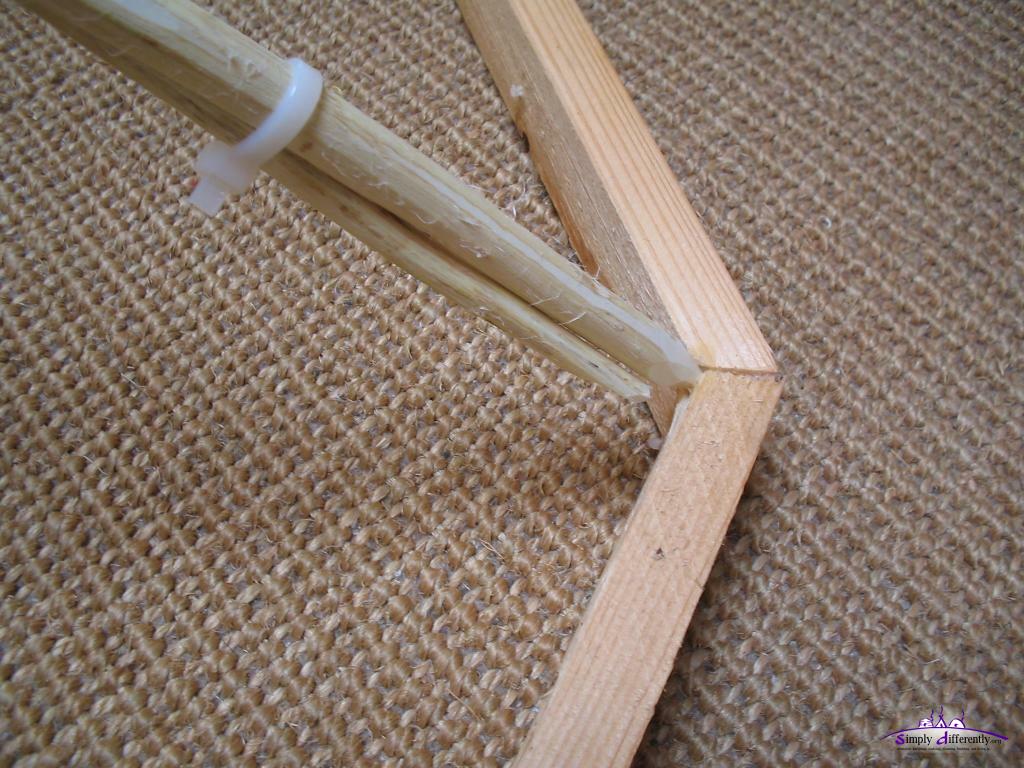 Skylight grid: double willow rods under-aside-over, close up connection to frame 2008/03/22 13:47 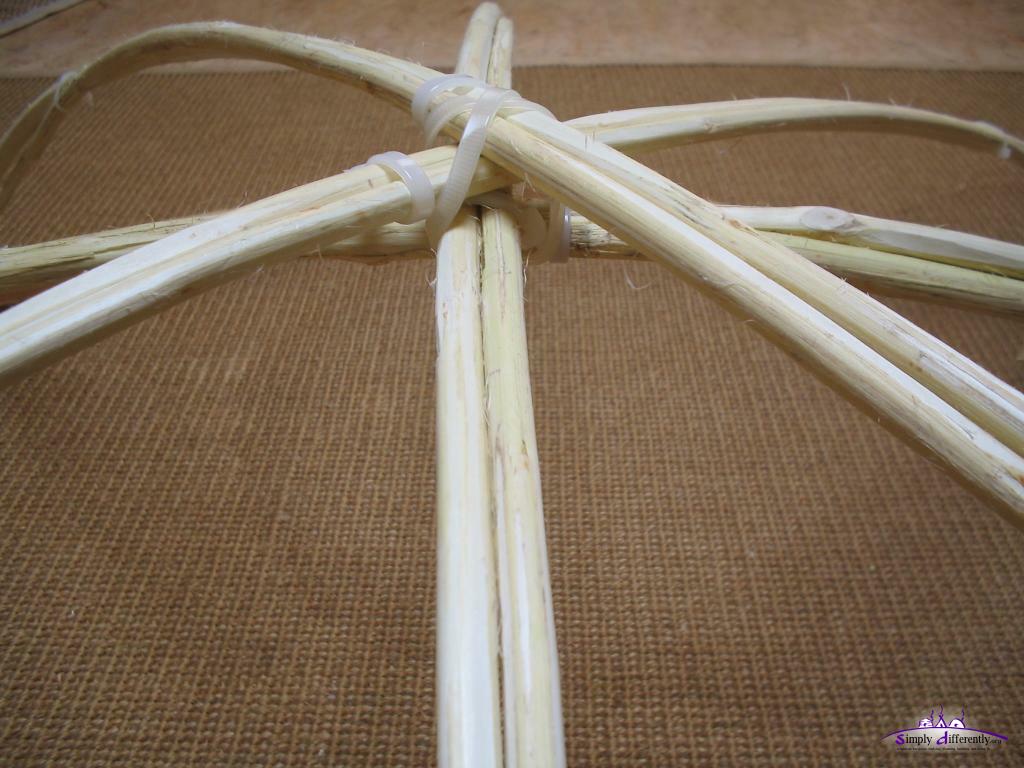 Skylight grid: double willow rods under-aside-over, close up center 2008/03/22 13:47 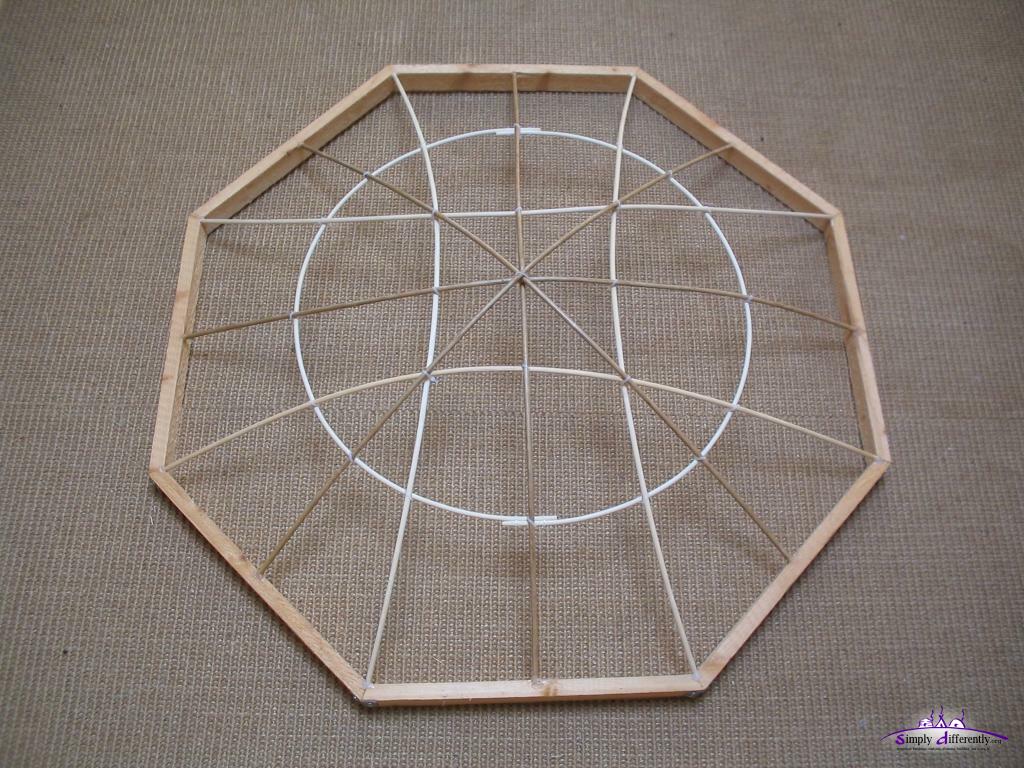 Skylight grid: bamboo sticks (4mm thick) (diameter 95cm) 2008/04/07 17:03 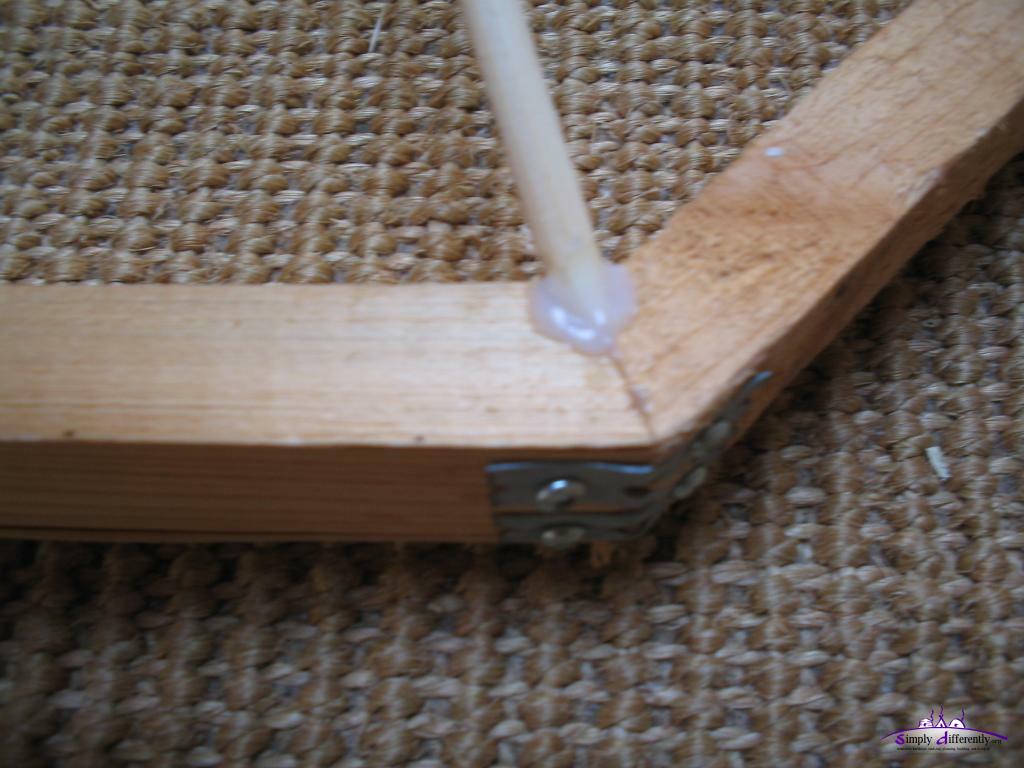 Skylight grid: bamboo sticks, close up connection to frame 2008/04/07 17:03 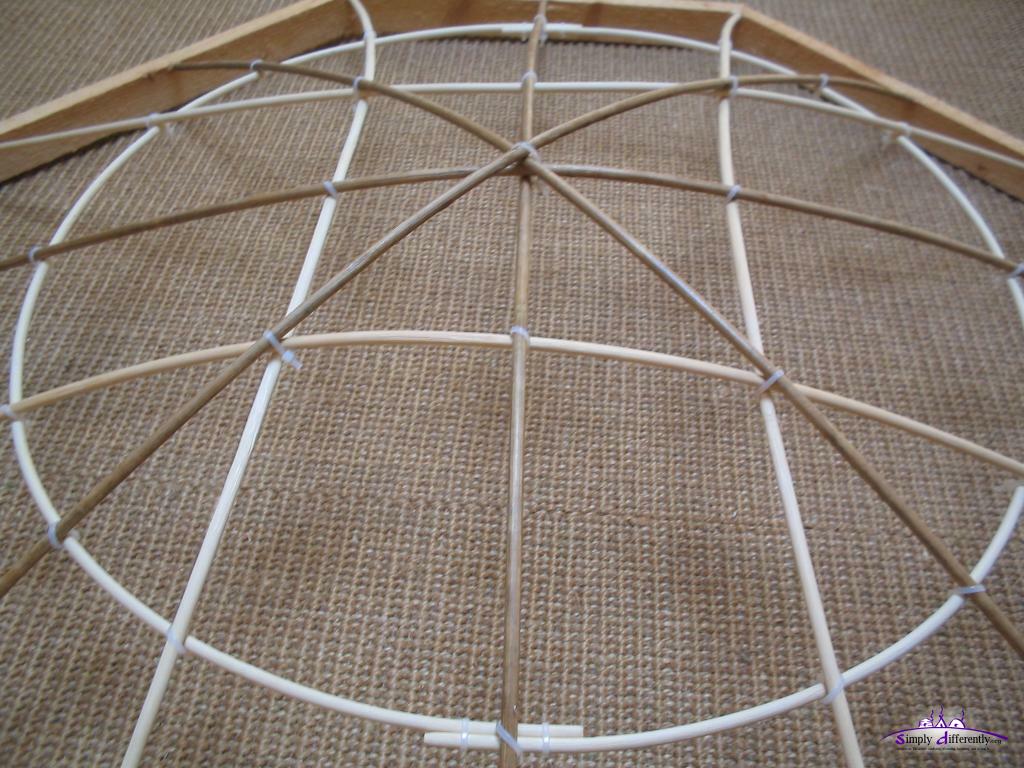 Skylight grid: bamboo sticks, close up center 2008/04/07 17:03 Detail Observation
Refining the skylight grid In case some further refinement is required, I decided this procedure:
 Skylight grid: single willow rods with bamboo rings & shortened subspokes 2008/04/05 14:37 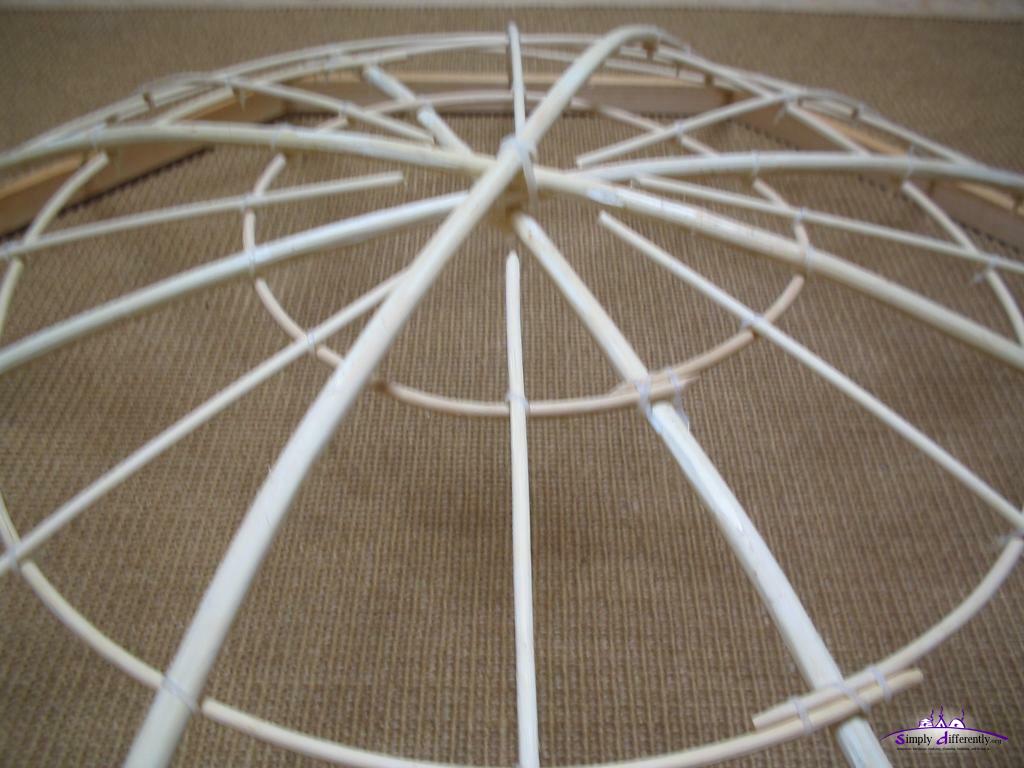 Skylight grid: single willow rods with bamboo rings & shortened subspokes (closeup) 2008/04/05 14:37 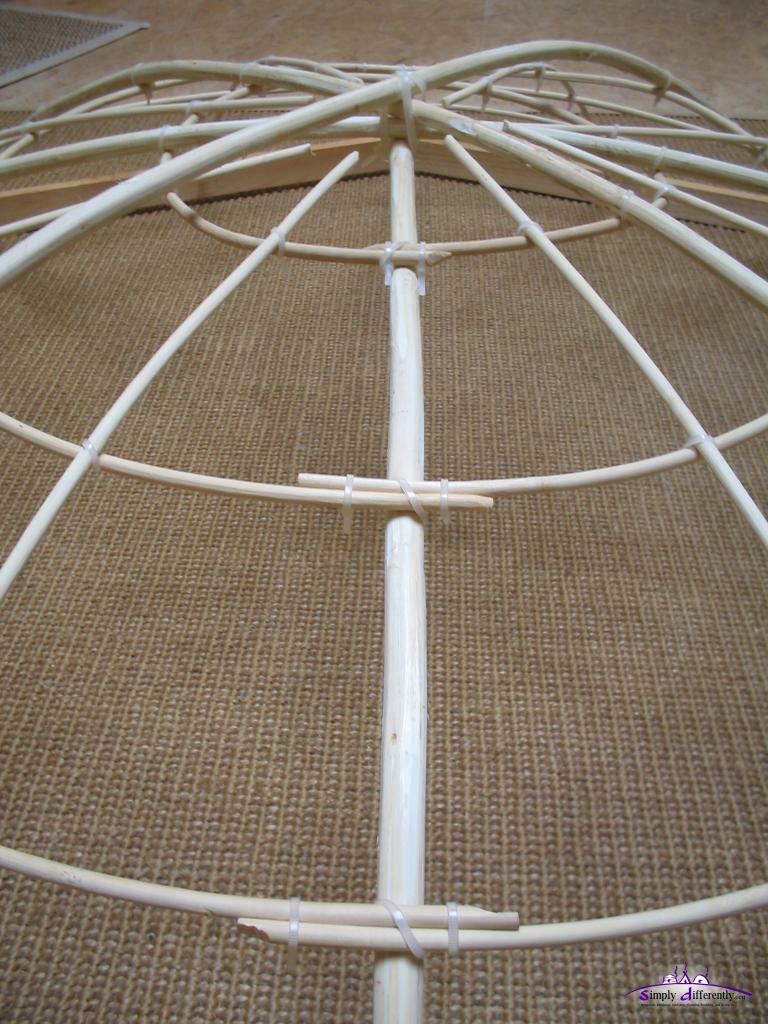 Skylight grid: single willow rods with bamboo rings & shortened subspokes (closeup) 2008/04/05 14:37 The final cover will be either some bubble-wrap or if I find a material which is a bit flexible then pull it over the skylight grid. Btw, the frame segments are glued and with a short strip of eyed sheet metal screwed over the junction on the side to reinforce the corner. Skinned vs Unskinned Willow
Unskinned willow remains flexible and has better bending and overall stability. Fresh skinned willow is very flexible, and one can bent it and undue bows and make it straight, or bent it to a certain radius and let it dry while remaining in this form; once dried out is stiff, but has somewhat limited strength compared to bamboo.
Skinned willow is almost white, and looks aesthetically.
Content:
|


| Home | · | About | · |  Tipi | · |  Yurt | · |  Dome | · | Features | · | Gallery |


Creative Commons (CC) BY-SA-NC 2005-2017, developed, designed and written by René K. Müller
Graphics & illustrations made with Inkscape, Tgif, Gimp, PovRay, GD.pm
Web-Site powered by FreeBSD & Debian/Linux - 100% Open Source