
|
Yurt Notes & Calculatorwritten by Rene K. Mueller, Copyright (c) 2005, 2006, 2008, last updated Sun, September 22, 2013 StoveFor the wintertime a stove (and preferable also useable as cooking stove) is an option to heat the yurt.
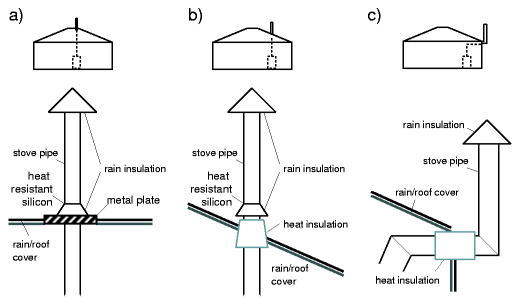
Traditionally the stove pipe is coming through the crown-wheel / toono; but you may also position it on the side. a) Stove in Center, Pipe through Crown: The traditional way is the pipe through the crown-wheel / toono and using a metal-plate to protect the roof canvas and crown-wheel / toono. Have the pipe long enough so the fire-sparks die and don't fall on the roof while still being hot.
b) Stove on the Side, Pipe through Roof: an additional hole for the pipe of the stove is required, and good insulation to the layers of the roof canvas (e.g. ceramic flowerpot) as the pipe can become very hot. Also, in this case the pipe should extend as high as possible from the top of the roof as a too short pipe will cause firesparks still falling hot back to the roof and burn holes into the roof canvas. Thanks to Andrea Weibel from Jurtendorf.ch 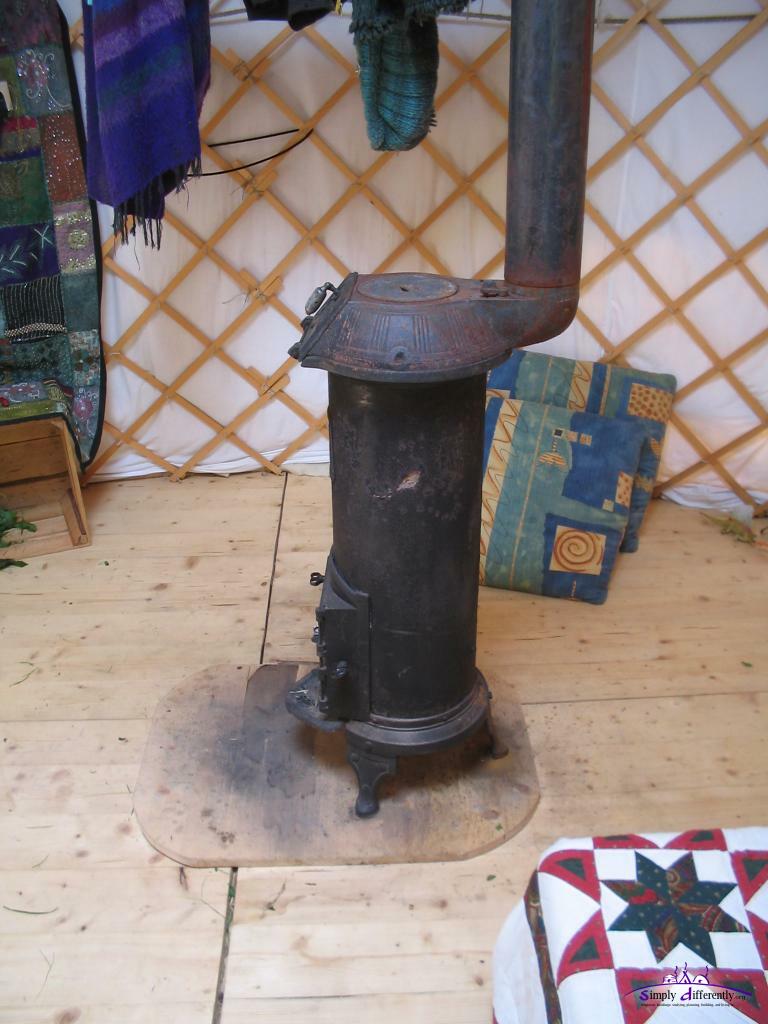 Jurtendorf, stove pipe through the roof (2) 2005/07/26 15:10 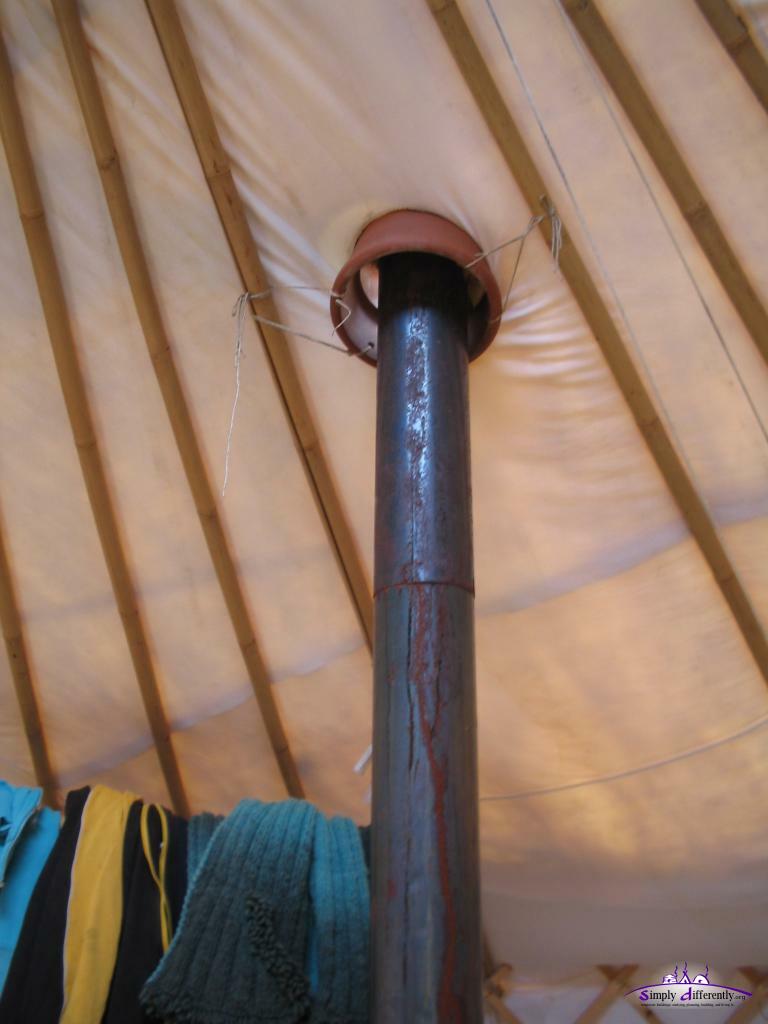 Jurtendorf, stove pipe through the roof (1) 2005/07/26 15:10 For insulation I used glasfoam, apprx. 2cm thick, and wrapped it around 3-4 times, fixated it with a wire, and then tin foil around, 3-4 layers and then taped it - Note: test if this setup actually is sufficient and if necessary use more glasfoam. 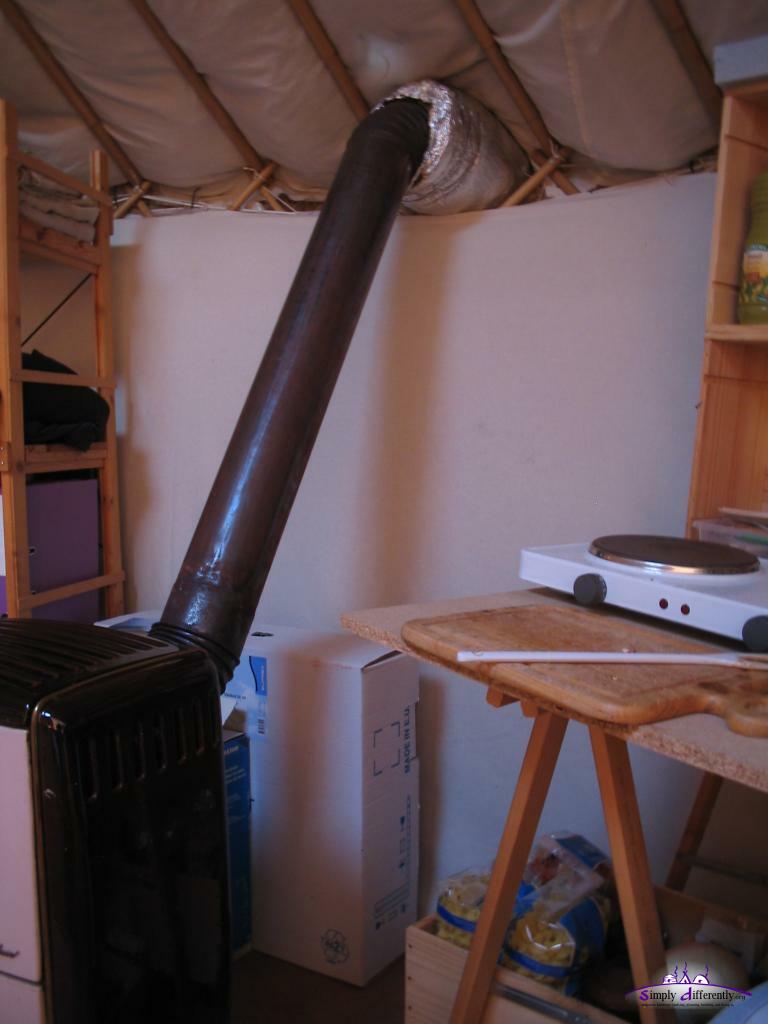 2006/12/13 16:10  2006/12/13 16:11 As you see on the last two photos above I positioned the stove on the side near the wall, not just for sake of having the stove pipe leave outside between roof and wall cover, but also to have the center of the yurt free and makes the room in the yurt more grand, that's my personal experience.
Fan
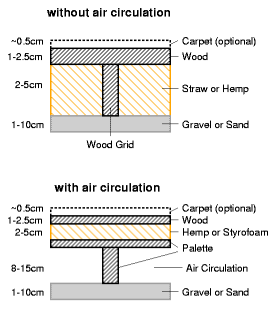
FloorThe floor is a very important aspect of the actual building, which often isn't covered in all details by yurt making handbooks. Insulation for the floor is as important as the yurt insulation itself.
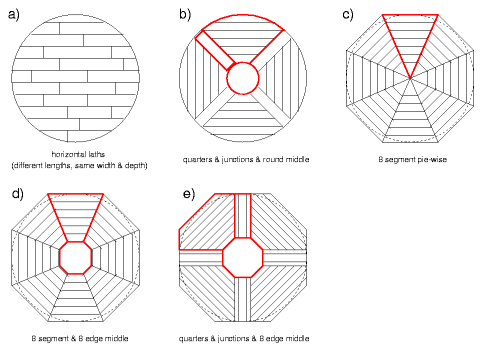
The floor calculator gives you the amount of pieces and the left-overs, you may subtract the left-overs from the total amount in case you gonna reuse the left-overs. Also, play with the geometry, the smaller the pieces the better a circle can be patched together, the less left-overs happen area-wise, e.g. also switch width and height of the pieces. Each lane given by the floor calculator has the length of the lane, and the left-over in braces, center the pieces of a lane in order to get symmetrical layout of the final pieces (red line in the illustration). Also, the illustration gives you an impression of more left-overs to be reused to decrease the amount of pieces further. Of course there are other layouts for a circle floor, a few examples.
The red outline indicates segments as whole pieces or segment to handle by a single person (to put up and take down). The first example a) requires a lath grid underneath so the laths can be put on - so personally consider d) most elegant. Floor Layers
In case you choose straw as insulator you may require a grid creating chambers which you fill with straw or hemp, and hold the laths. Some other more complex layouts provide small enough chambers for straw insulation.
Attached RoomAttaching new rooms (with or without thermal insulation) is an easy way to extend the space, e.g. for a storage room. For extending the living space I would rather suggest to build an entire new yurt and connect them with a tunnel, see the front page about this option.
I distinct between two ways:
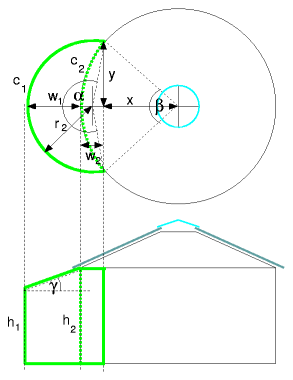
Either way, it is obvious to use a lattice wall as well. MathA quick lookup at MathWorld.com: Circle-Circle Intersection helps: helps:
b = ryurt - w2/2
and the other terms:
r2 = w1 - w2/2 (e.g. around ryurt * 66%)
h1 = h2 - tan ( γ ) w1 (whereas γ = αyurt, e.g. 25°)
CalculatorI implemented a simple calculator, you may use a smaller angle than αyurt for γ in order to have h1 not getting too low.
For a storage room, which was my first thought for this approach, preferable has a seperate door outside.
If the attached room is WC or shower, the room would be thermal insulated and have a door to the inside of the yurt.
ExampleAn external room using lattice wall of a smaller yurt (4m in diameter) without using the above calculator: 2007/08/04 14:34 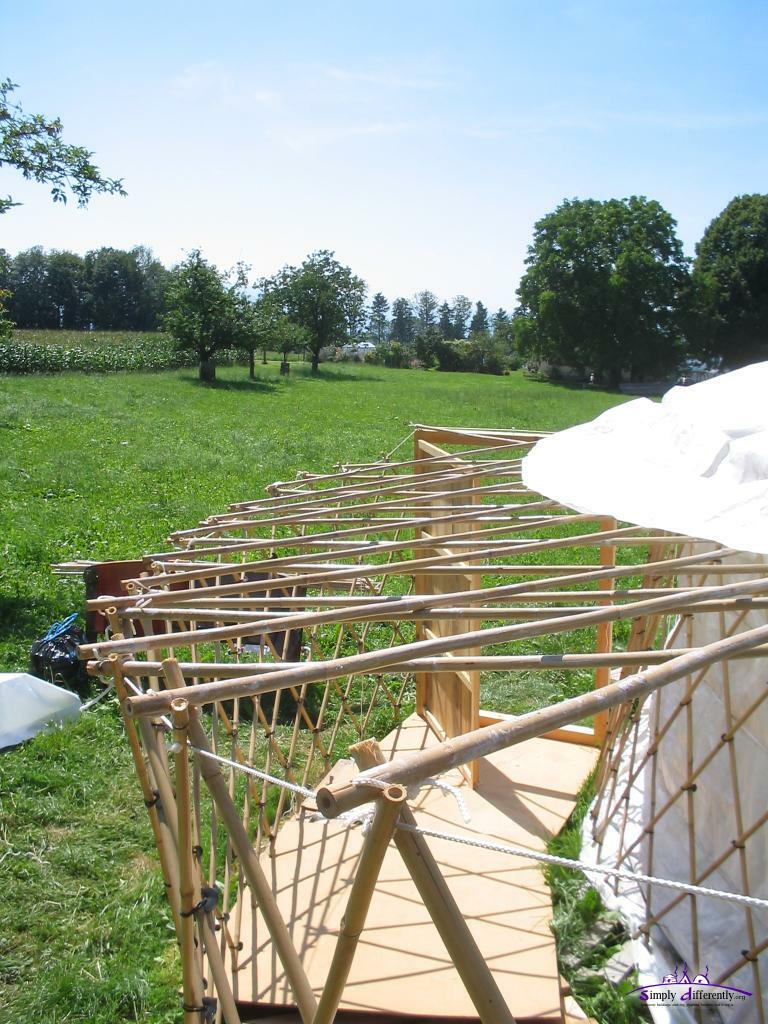 2007/08/04 14:35 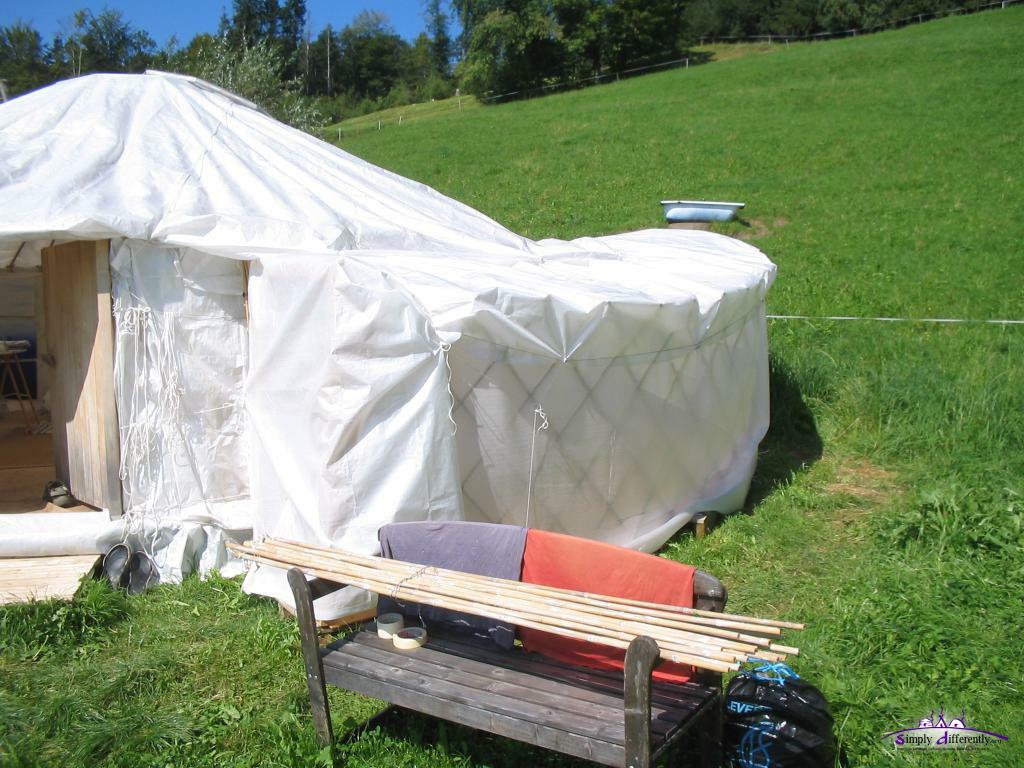 2007/08/04 15:53 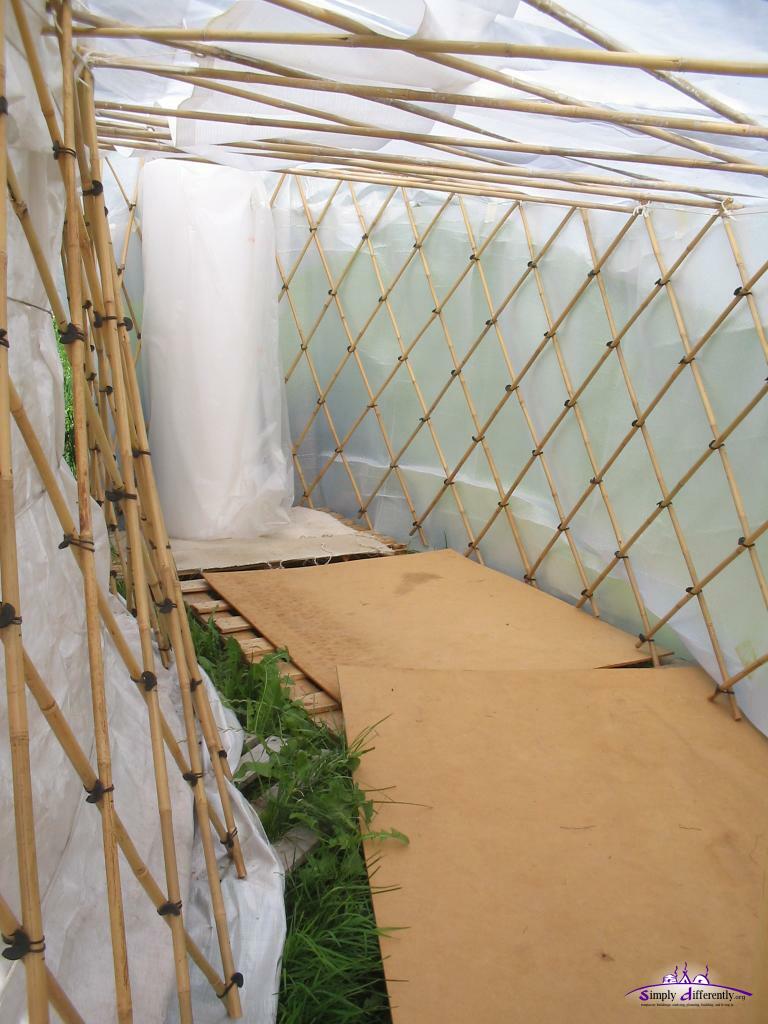 2007/08/04 15:57
Modern vs. TraditionalThe modern yurts disregard some of the tight restrictions of the traditional yurt, such as the roof poles / uni lie on each lattice wall / khana junction; the modern approach put the roof poles on the main wall rope which binds the khana together. Advantage is that the khana can be build and produced independent of the size of the resulting yurt, disadvantage is that the lattice wall does provide more stability than the rope, so the rope often is a steel rope to carry the weight of the entire roof. Especially US yurt makers have shown new aspects of its beauty when it's large (>10m) and bright inside with translucent walls, which of course only works in mild climate zones. Standard vs. Non-StandardI had a conversation with a yurt builder strictly following the standardized yurts, e.g. 68, 81 and 98 amount of roof-poles/rafters, spacing of lattice wall junctions 23cm - this is pretty much a preset. Although I have not followed the lattice-wall to roof-pole/rafter to crown-wheel definition chain, it is worth to quickly ponder on this issue. The standardization has one big advantage, it gives a common ground, a manufacturer quickly comes up with some standardization, even myself after my first yurt and working on three more yurts realized I like to exchange and replace door frames, lattice-wall and so on, and also looking that roof poles available I don't need to cut too much away or at all, so also creating or adapting partially other standards. On the other hand the non-standard approach, as I primarly do with providing the Yurt Calculator in these notes here, gives you the opportunity to set your amount of poles/rafters, set your own spacing of the lattice wall junction (w), and so on. For me it's clear in order to handle such vast amount of options, one requires to study and understand the yurt - and ironically I think the Yurt Calculator itself provides some understanding how everything at the yurt is related to each other, the crown-wheel, the roof poles, the lattice wall and all involved angles, there is almost nothing truly independent. It is obvious due such wide range of options, and also due economic consideration, having parts from one craftsman to another, from one village to another be exchangable and standards make sense. How to Derive a Yurt StandardThe most obvious is to set a spacing of the junctions (w) constant (e.g. 20, 25 or 30cm), and then decide how long a lattice wall section is, e.g. 10, 20, or even 30 poles a section (in mongolia 15 poles longs lattice wall sections are typical according Paul King), by having multiple lengths of sections more options of yurts are possible compared if you just use one kind of length of a section. As next take in account 3 or 4 poles width (w) is the door frame, e.g. to make the door 90-120cm wide. So, in order to derive a standard, substract from amount of poles (and circumference and therefore diameter of the yurt) the door width in amount of poles, and find a way to compose those amount junction with lattice wall sections: E.g. I use w = 31.4cm, diameter in meter / 10 = poles, therefore for ~1m wide door, there are 3 poles laying on the door frame. Since I personally prefer to make harmonic amount of roof poles:
so with 10, 12 and 13 junctions long lattice wall sections it's achievable, but it's already some work to find those, especially if more sizes or total poles are considered. It looks much better when the door is 4 poles wide (just as a comparison):
so that makes some of my prefered amount of poles work with 10 and 12 junction lattice wall sections. Anyway, you may get my point, it leads to make the amount of lattice junctions harmonic, but sacrifice the harmonics of the total amount of poles - which was what I didn't want and the Yurt Calculator deliberatly didn't follow therefore - but it's obvious for yurt and particular lattice wall section makers they come up with something like this:
which means, you can compose with 12 junction long lattice wall section all of those yurts, but as said, the total amount of poles aren't harmonic, e.g. multiple of 12 (2, 3, 4 and 6) anymore, but even prime numbers in some cases. I find it not a good choice to sacrifice those harmonics of the total amount of roof poles or rafters just for the sake to use one kind amount of lattice wall section length. To sum up, it's harder to start with total amount of roof poles / rafters and derive an economic suitable set of lattice wall sections, than starting with lattice wall sections and then having the total roof poles / rafters following as consequence, but worth the effort I think.
Closing Thoughts on StandardsOne thing I'm although very convinced, that we should have more influence of the buildings we live in, giving us options we can choose from, as I wrote in the About-section, to live in rectangular spaces due to solely economic constraints and simplicity to build such habitats is a lack of options. To follow or even define yurt standards which solely focus on one kind or length of lattice wall section, and by it obmit many options of total amount of poles / rafters isn't the spirit in which yurts or anything should be made. Content:
|


| Home | · | About | · |  Tipi | · |  Yurt | · |  Dome | · | Features | · | Gallery |


Creative Commons (CC) BY-SA-NC 2005-2017, developed, designed and written by René K. Müller
Graphics & illustrations made with Inkscape, Tgif, Gimp, PovRay, GD.pm
Web-Site powered by FreeBSD & Debian/Linux - 100% Open Source