Introduction
|
|
|
|
|
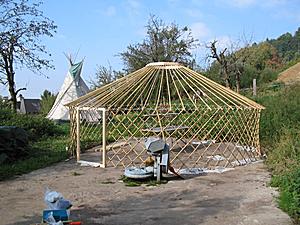
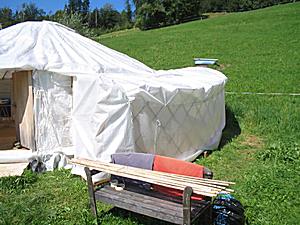
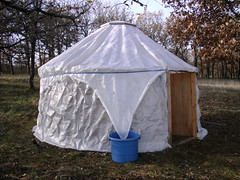
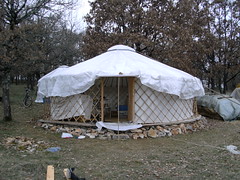
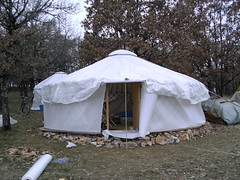
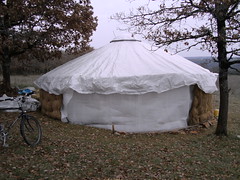
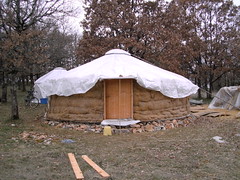
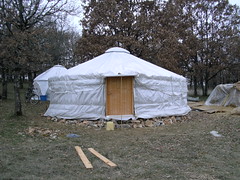
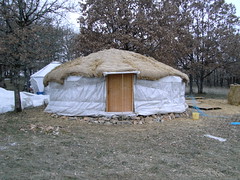
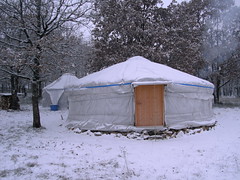
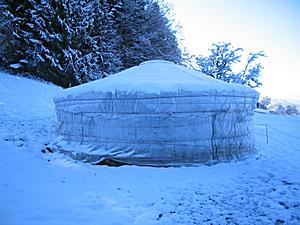
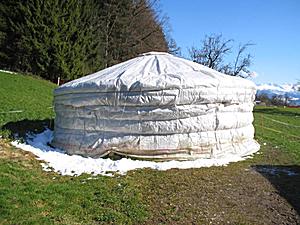
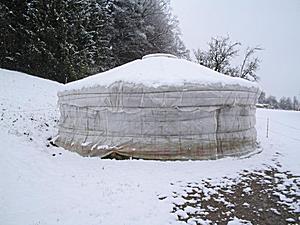
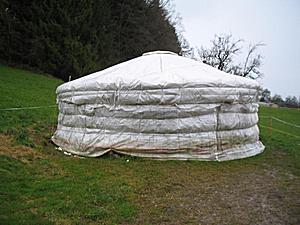
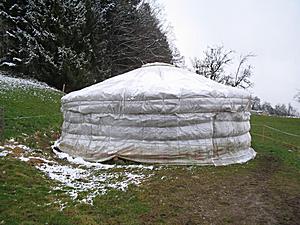
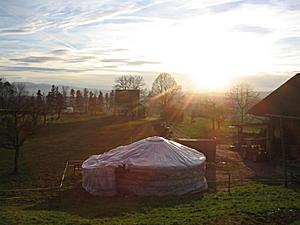
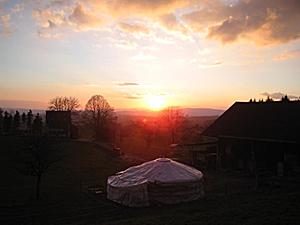
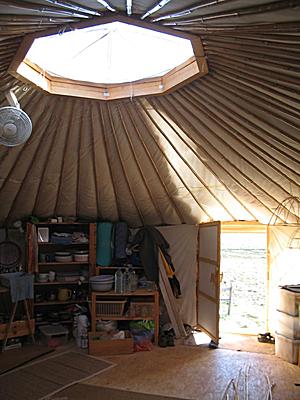
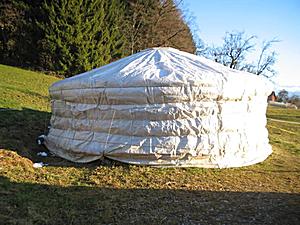
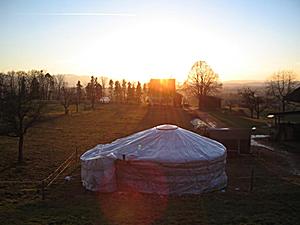
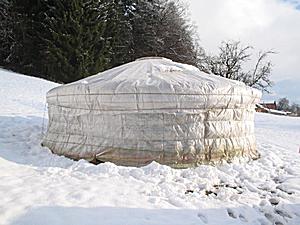
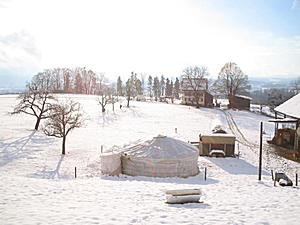
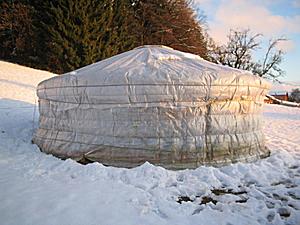
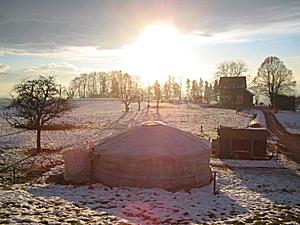
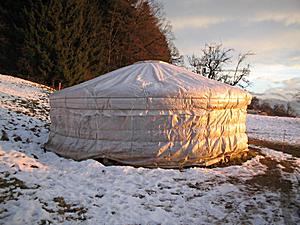
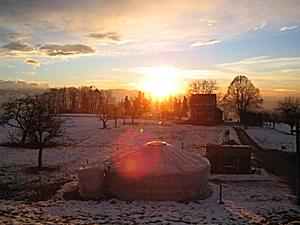
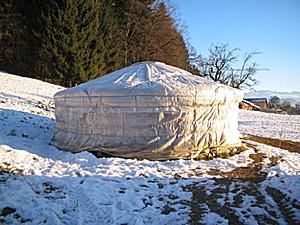
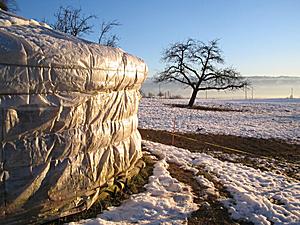
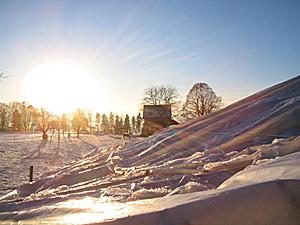
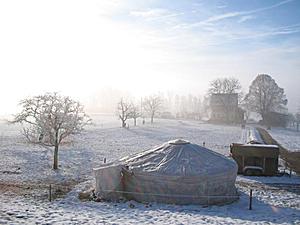
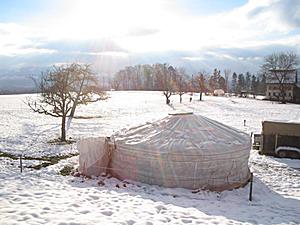
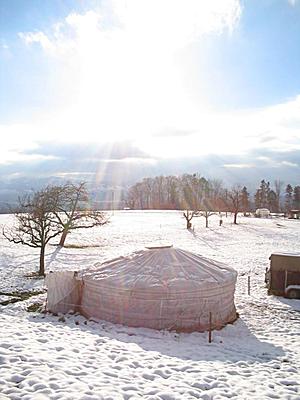
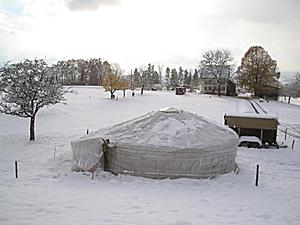
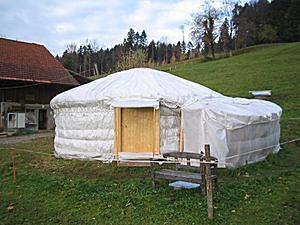
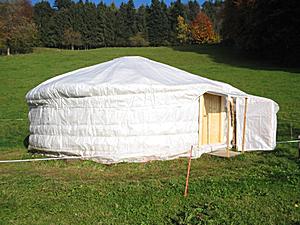
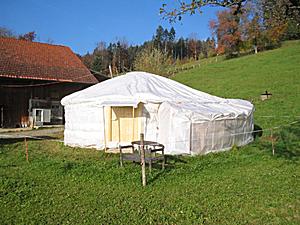
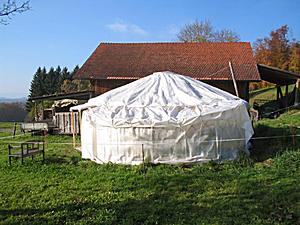
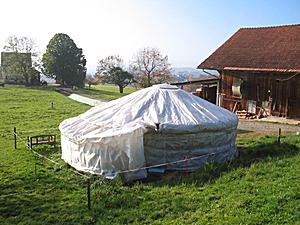
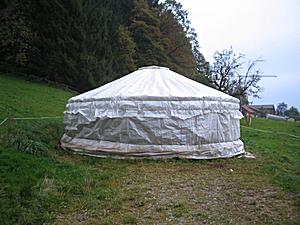
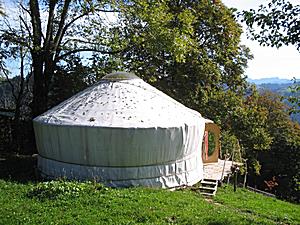
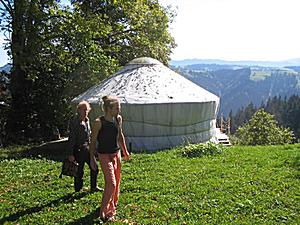
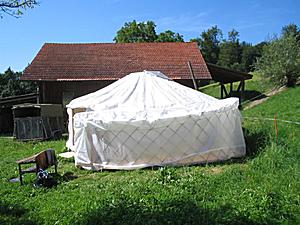
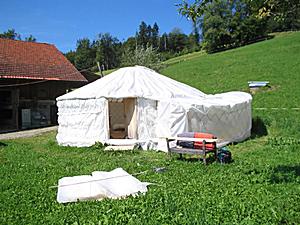
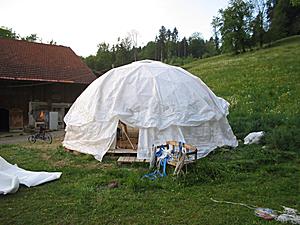
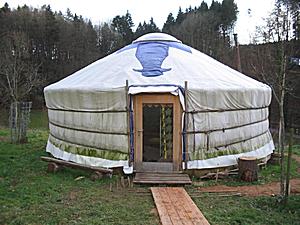
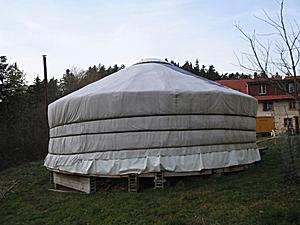
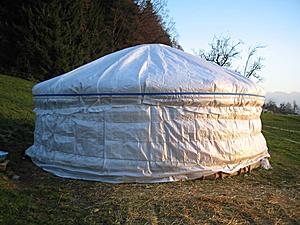
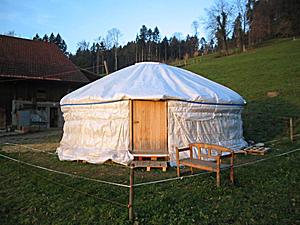
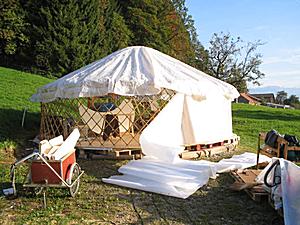
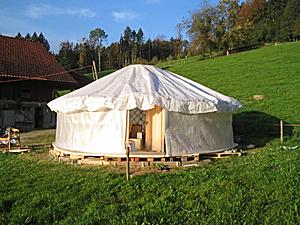
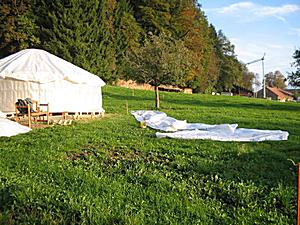
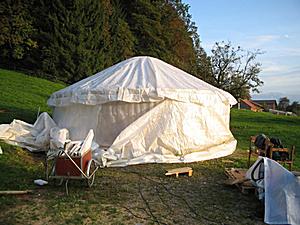
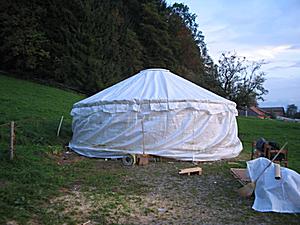
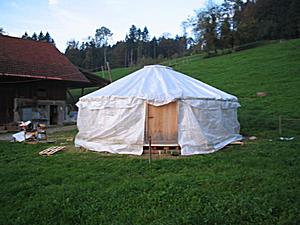
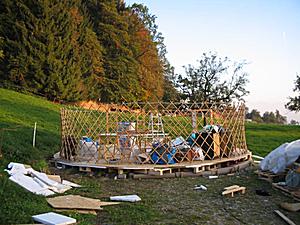
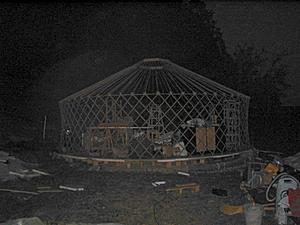
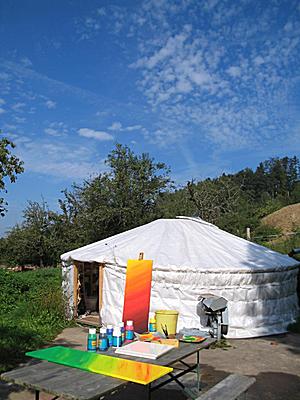
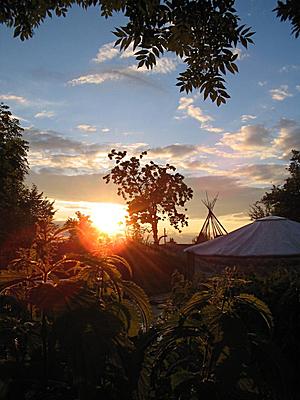
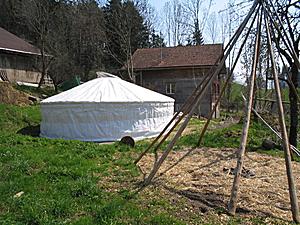
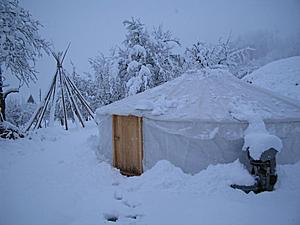
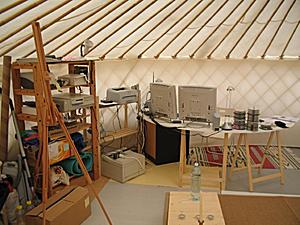
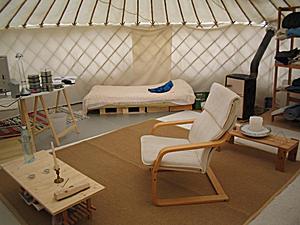
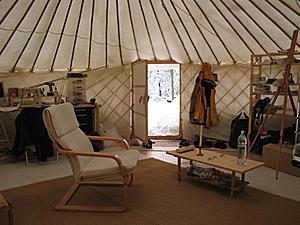
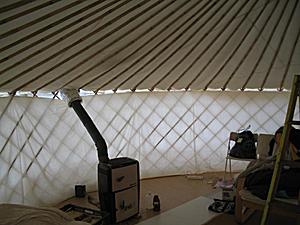
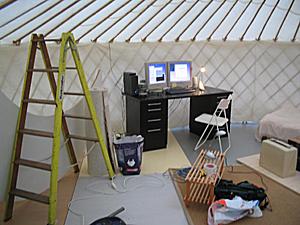
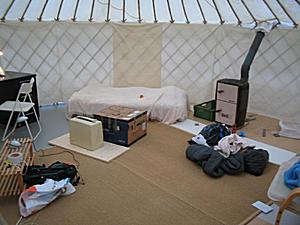
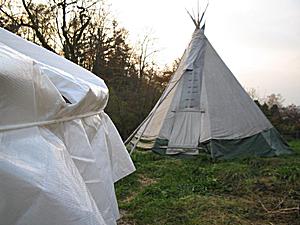
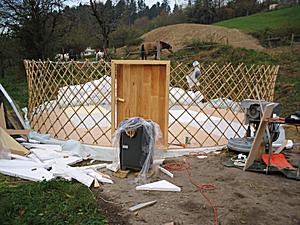
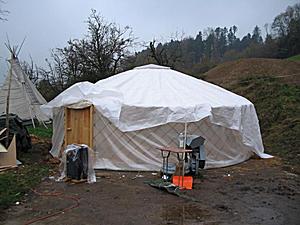
I spent the summer 2005 in a tipi, and prepared myself a shelter for the winter 2005/2006: a yurt - which this diary started.
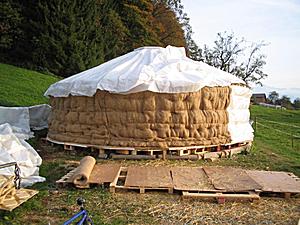
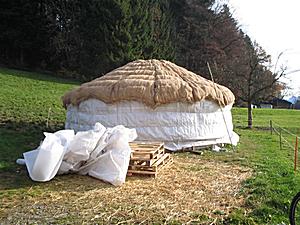
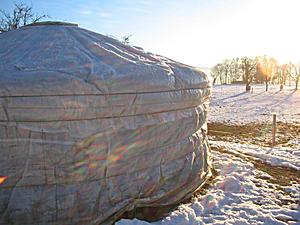
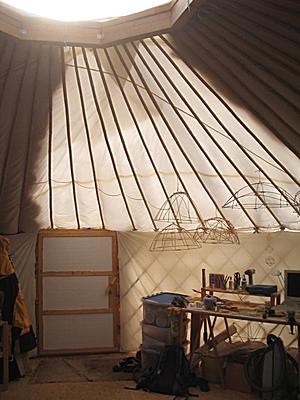
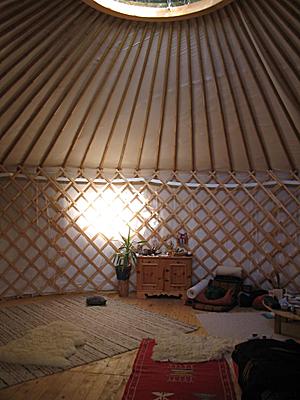
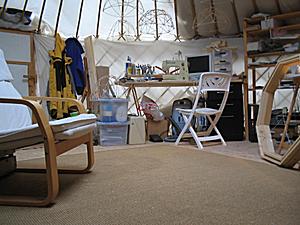
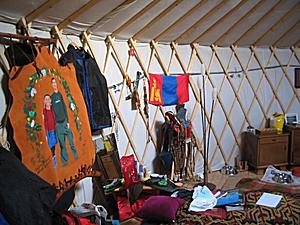
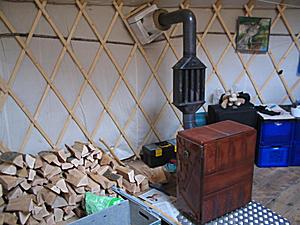
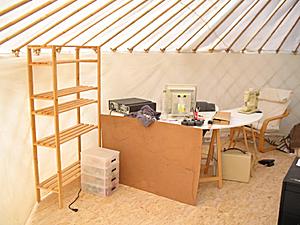
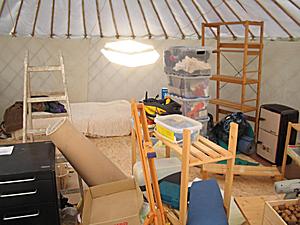
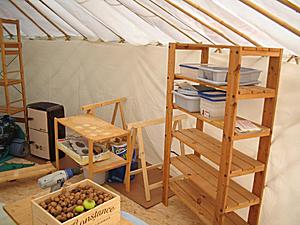
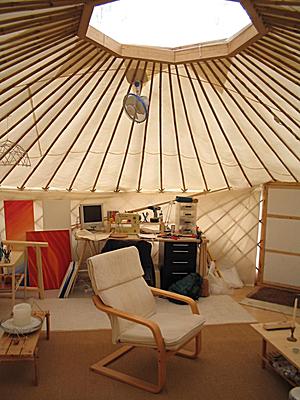
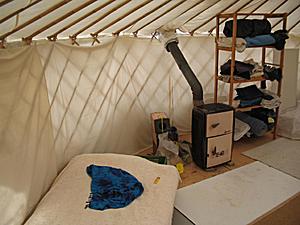
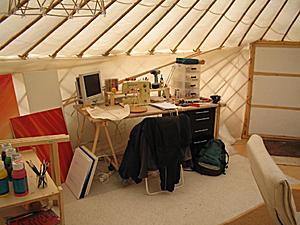
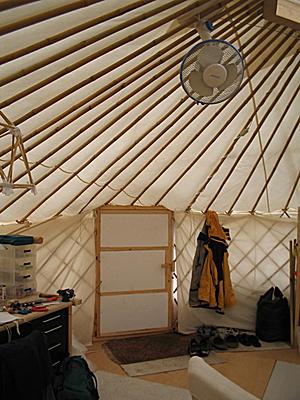
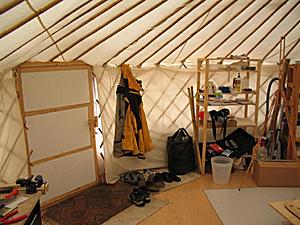
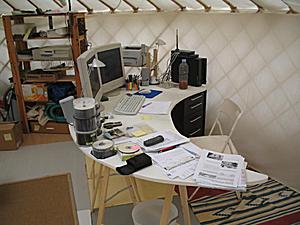
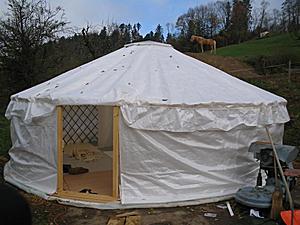
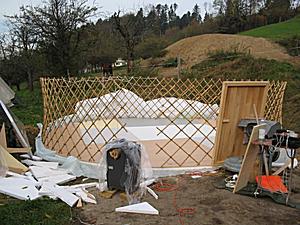
A friend of mine joined me to build a yurt in fall of 2005 - we acquired some material together, but actually build our own yurt separately. As of November 2005 I moved from my tipi to the yurt, which I erected with thermal insulation. Then I prepared the interior with stove, bed, tables and infrastructure to live and work in it - I was using WC, shower, washing machine and kitchen in the nearby farming house.
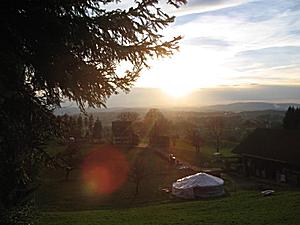
As of October 2006 I moved to a new place, apprx. 500m to a neighbouring farmer with a great place, a bit exposed to winds but on the other hand a great vista. At this place I have running water (spring, cold and hot), and I'm able to use WC and washing machine from the neighbour; kitchen and shower I build now myself. As of April 2008 I took the yurt down and no longer update this diary anymore, but keep it online.
Update October 2009: I relocated from Switzerland to France and pitched my yurt a new grounds.
It has been a wonderful experience so far to live and work in the yurt.
Some who know me personally may miss my spiritual perspective on this all, but for now I like to keep this Yurt Diary rather informative for yurt builders than for people who know me personally and like to know what I'm doing these days and so forth.
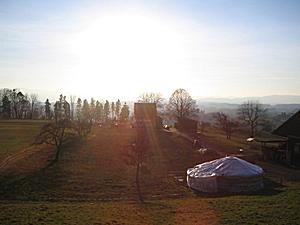
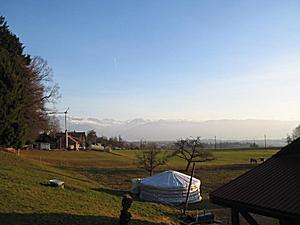
My Location
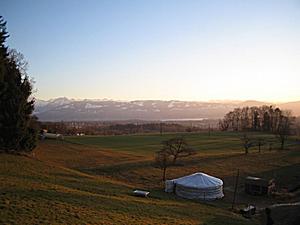
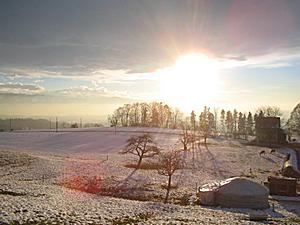
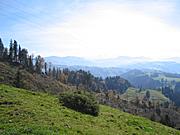
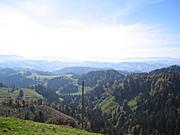
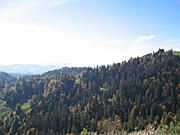
  Panorama, Oberduernten (Switzerland) 2006 |
- 2005: Oberduernten (Switzerland), in summer living in a tipi, in fall moving into the yurt
- 2006: Oberduernten (Switzerland), in fall moving to a new place nearby, upgrading yurt, and a colleague, joins me with her yurt placed nearby yet wishes not be documented here
- 2007: ditto, alone on the location and spending winter 2007/2008 still here, spring 2008 moving to a new location
- 2008: took yurt down by April 2008 and moved on
- 2009: moved to Midi Pyrenees (France), pitched the 6.4m and the 4.0m yurt as storage room
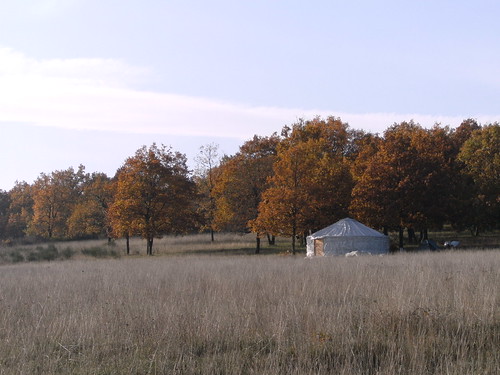  Midi Pyrenees (France) November 2009 |
The Yurt: Numbers & Materials
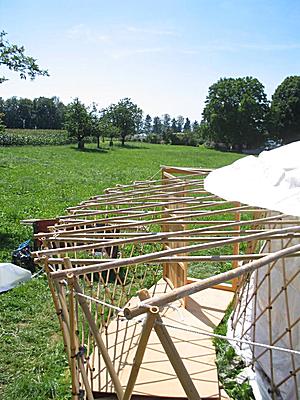
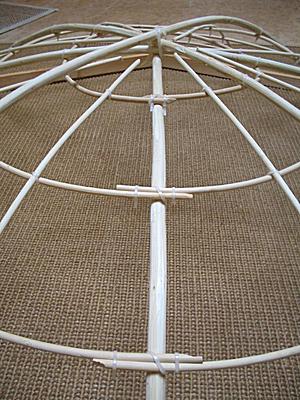
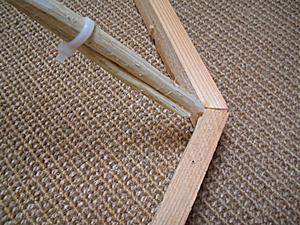
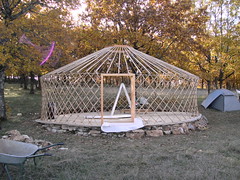
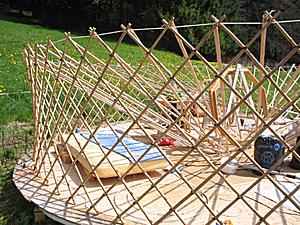
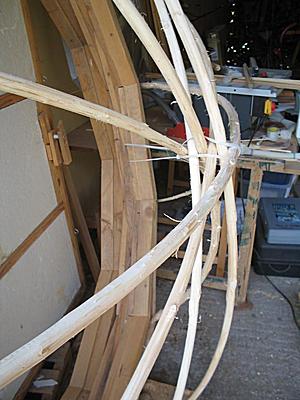
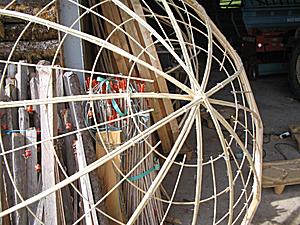
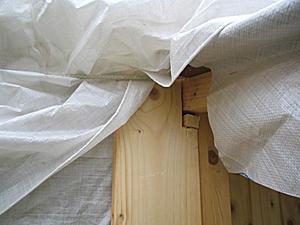
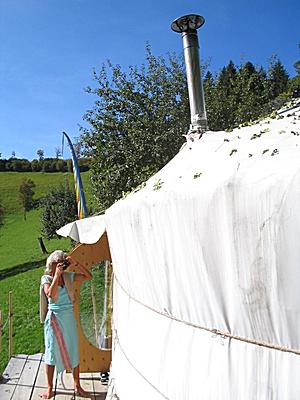
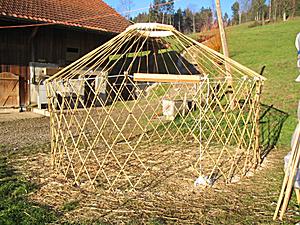
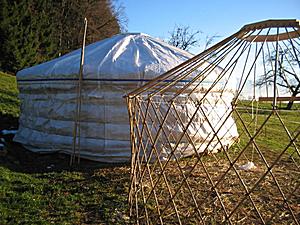
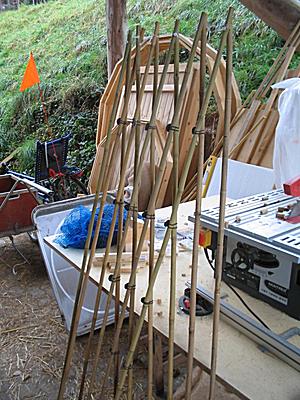
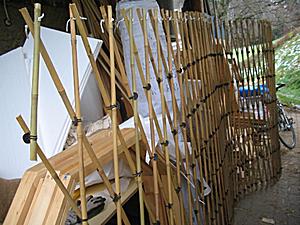
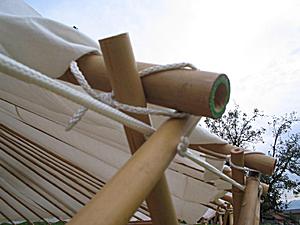
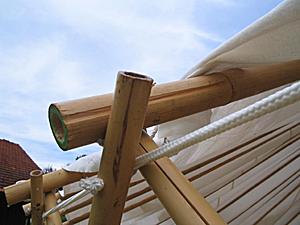
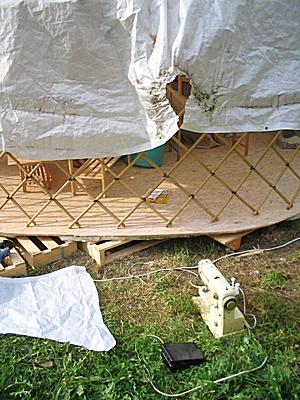
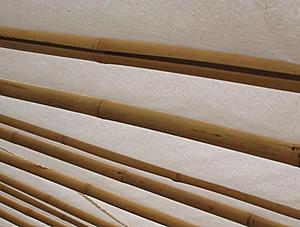
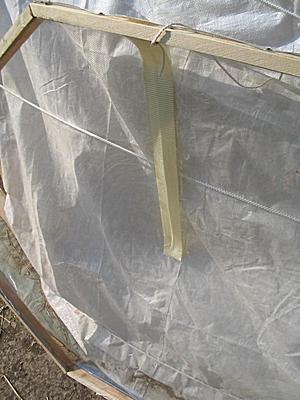
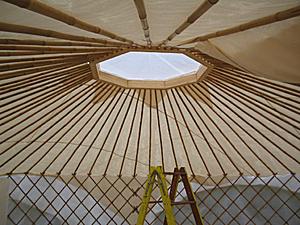
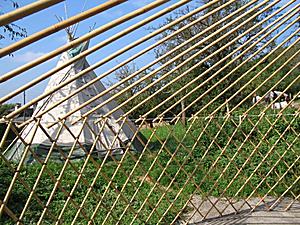
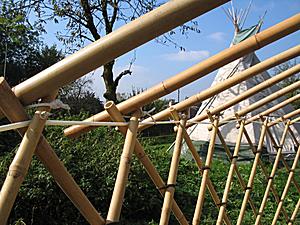  Roof Poles on Lattice Wall / Khana, Closeup |
Numbers
- diameter 6.40m (19.4')
- circumference 20m (67')
- 64 roof poles
- wall height 1.50m (4.5')
- wall geometry
- roof poles/junction width 31.4cm
- hole distance 21.2cm, first hole 6cm below top
- 10 holes/junctions
- roof tilt αroof apprx. 26°
- total height apprx. 2.77m (9.2')
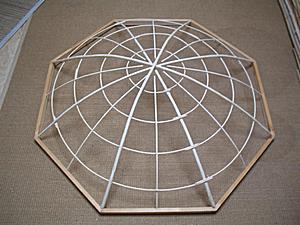
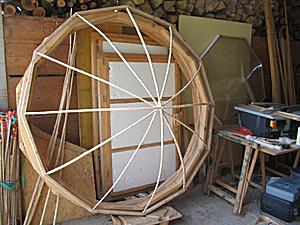
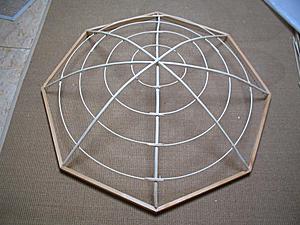
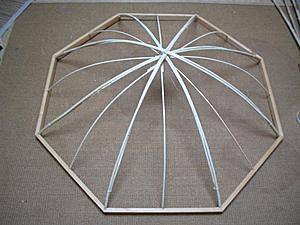
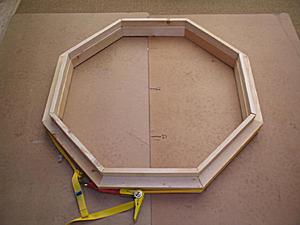
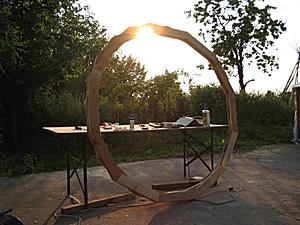
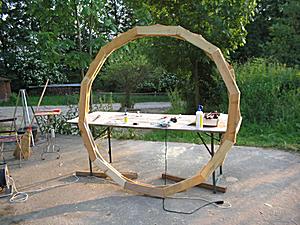
- crown-wheel diameter 1.22m (8 segment polygon)
- area roof 38m2
- area wall 30m2
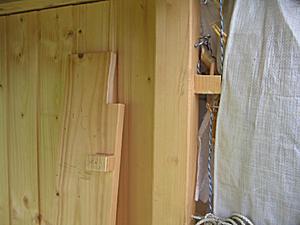
- door width 94.2cm (3 poles wide, 3 x 31.4cm), 150cm height
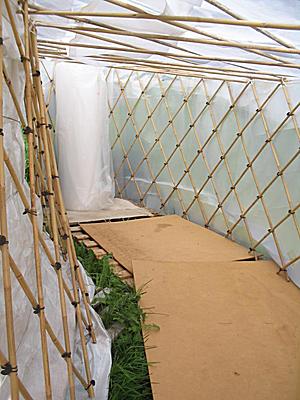
- wall/khana: 2 sections each 30 1/2 twin laths
Calculation done via yurt notes I collected.
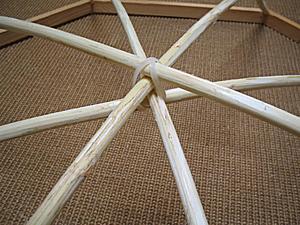
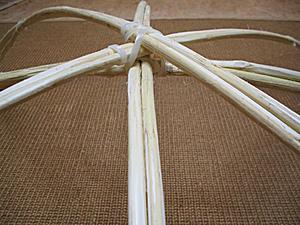
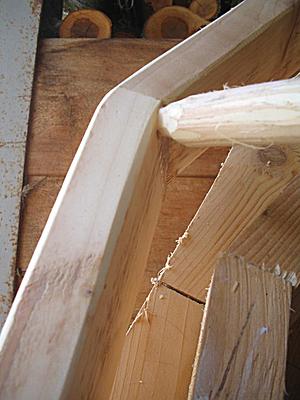
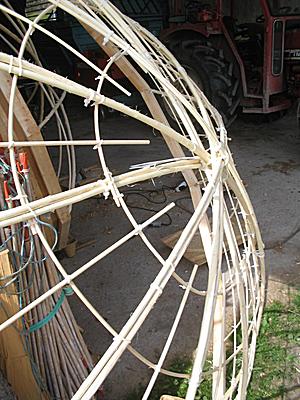
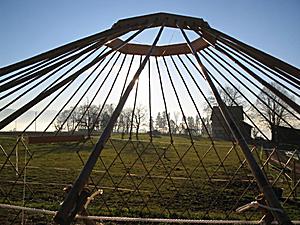
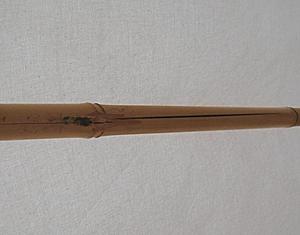
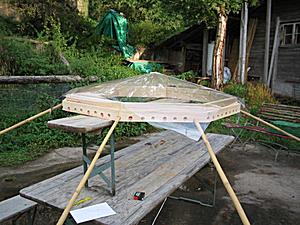
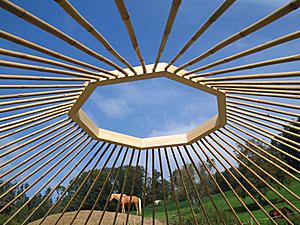  Roof Poles into Crown-Wheel / Toono |
Materials
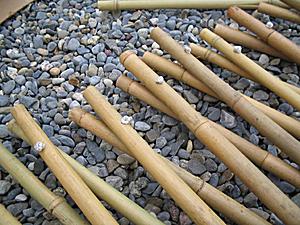
- roof poles: 64 bamboo poles 3.05m long, diameter 2.6-2.8cm (thicker ends)
- 40 poles 2.0cm (narrow ends) and toono holes
- 24 poles 2.3cm (narrow ends) and toono holes
- for a quarter of the toono of 16 poles/holes, 10 x 2cm + 6 x 2.3cm, evenly distributed as far possible: 1+0+0+1+0+1+0+0+1+0+1+0+1+0+0
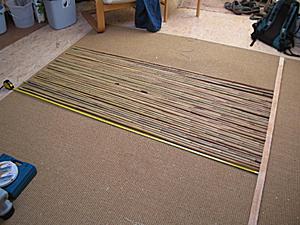
- wall poles: 142 bamboo poles, 2.12m long, diameter 2.0-2.2cm (thicker ends)
- rain canvas: polyethylen (PE), 8m x 8m (roof) and 20m x 2m (wall)
- insulation: two layers of 1cm thick bubble wrap (roof & wall)
- inner canvas: white wholesale cotton, 6m + 7.3m + 7.5m + 7.3m + 6m each 1.5m wide lanes, sewed together; 2 sections each 10m long and 1.5m height with cords sewed on each 1m.
Total cost apprx. CHF 1000 or € 666 or US$ 800, apprx. 6 work days work to assemble.
- Additional insulation CHF 180 (2x two layered bubble wrap) I added later around January 2006.
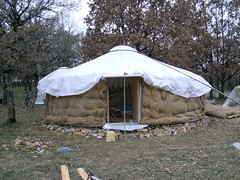
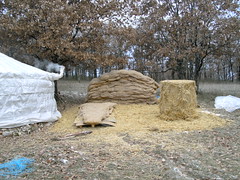
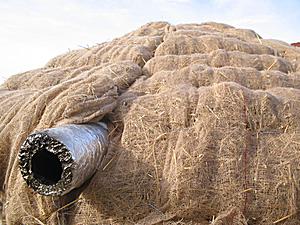
- Additional straw based insulation CHF 230 (apprx. 150m jute plus 13 strawbales) apprx. 4 days of work to assemble, as of November 2006.
Additional Small 4m Travel Yurt
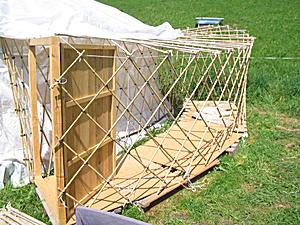
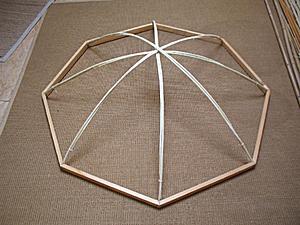
During 2006 I started to work on more yurts: 2x 6.4m, 1x 8.4m and 1x 9.5m yurt, where doors and crown-wheels are done. Due to limited space I started a small 4m travel yurt, where the skeleton is finished:The Numbers
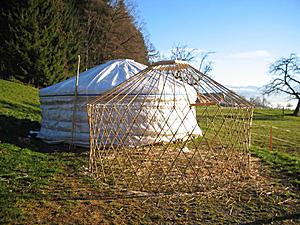  Travel Yurt Skeleton (4m) |
- diameter 4.0m (12.5')
- circumference 12.5m (37.9')
- ground area 12.56m2
- 40 roof poles (1.82m long)
- 8-segment crown-wheel 0.9m diameter (6cm thick)
- roof angle 28°
- door frame: 1.0m x 1.5m (3 poles wide)
- lattice wall:
- wall height 1.5m (using 1.82m lattice wall laths at 68° crossed)
- lath: 7 holes/junctions 28cm apart, 14cm left (2x 7cm), junctions: 7cm, 35cm, 63cm, 91cm, 119cm, 147cm, 175cm
- 1 section: 37 junctions + 3 poles on door = 40 poles
I intentionally used 1.82m long (15-18mm diameter thicker ends) bamboo sticks: 40 roof poles, apprx. 82 lattice wall laths = 122 bamboo poles. See diary entry around 14. 12. 2006 for more details and photos of the travel yurt. It will have only a rain cover (PE) and interior cotton, and a simple door frame, where the wall cover will cover the door as well.
Upgrades & Lessons Learned
A summary of upgrades and lessons learned since I started in fall 2005:
Upgrades for Winter 2005/2006
I started with two layers of single layered bubble-wrap, but it was not sufficient to as thermal insulation, so I added two double layered bubble-wrap as mentioned already, which kept the daylight still enter the yurt, but the winter 2005/2006 was long and cold which you can read on the following pages. As a consequence I was looking for other options for the next coming winter of 2006/2007 to resolve this somehow.Upgrades for Winter 2006/2007
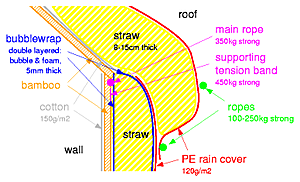  Thermal Insulation (Wall/Roof Setup Detail) Winter 2006/2007 |
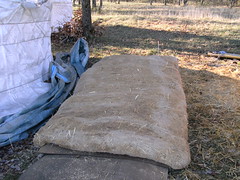
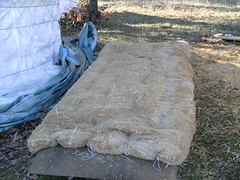
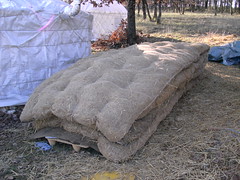
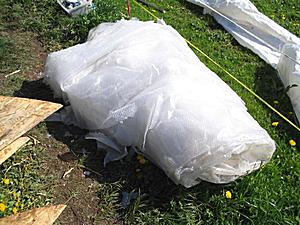
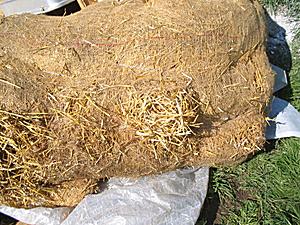
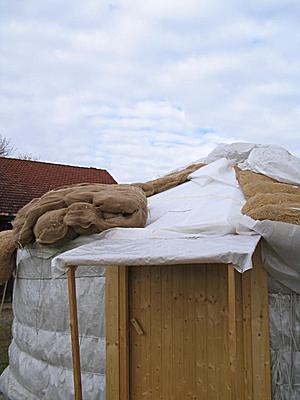
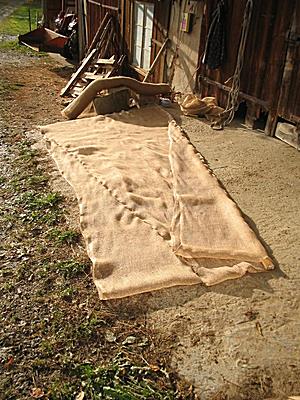
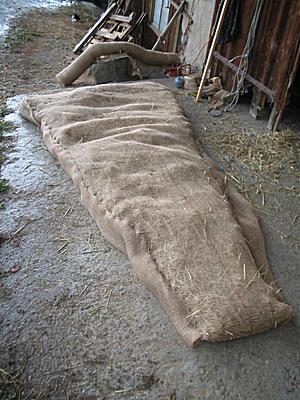
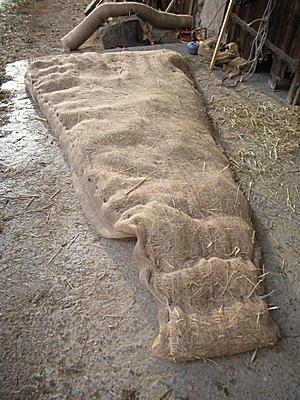
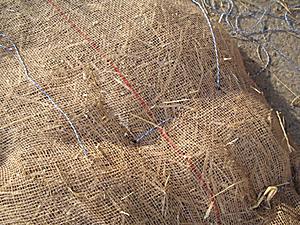
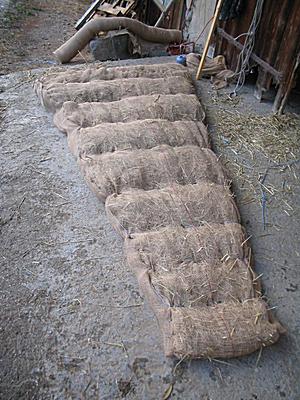
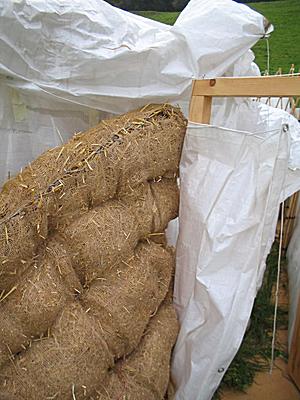
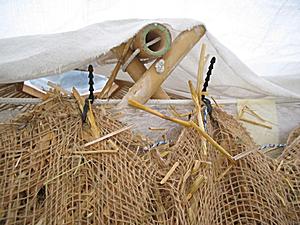
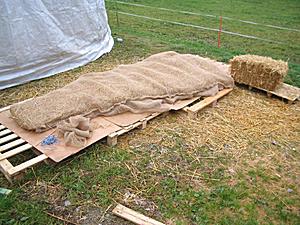
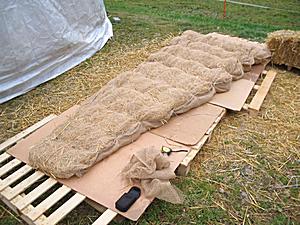
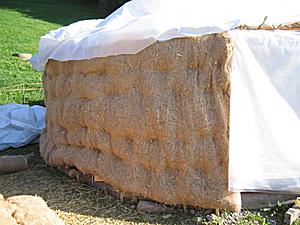
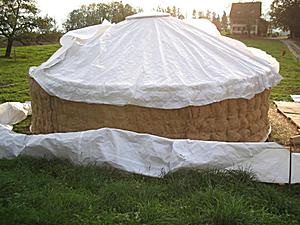
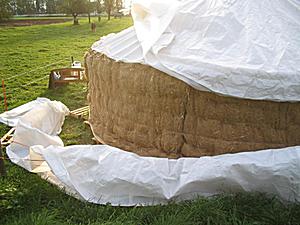
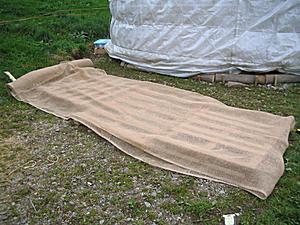
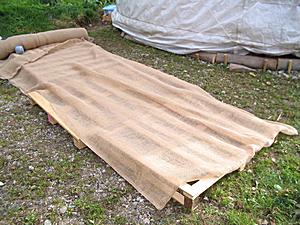
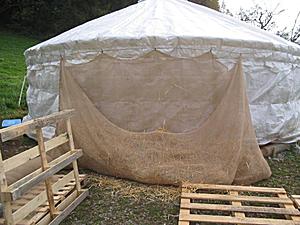
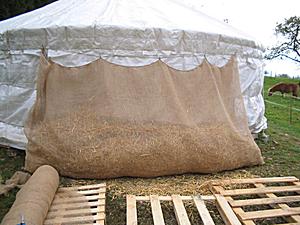
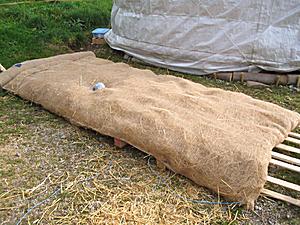
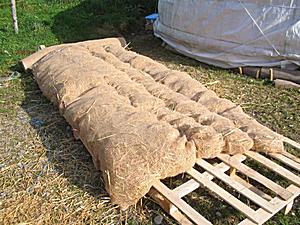
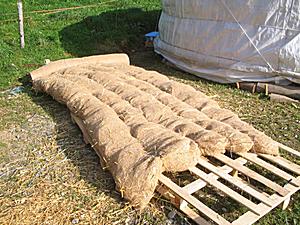
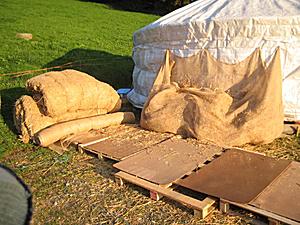
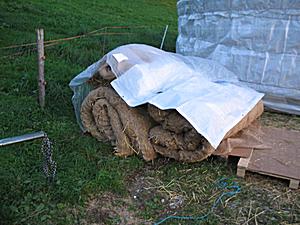
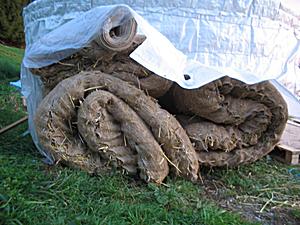
For the wintertime 2006/2007 I made blankets with jute and filled with loose and open straw, apprx. 10-15cm thick.
- wall: blankets 7x 3m long, 1.6m height
- roof: pieslice-wise setup, 12x slices, 3.0m long, 1.6m -> 0.3m wide
and expect much better thermal insulation than 4 layers of bubblewrap (2 layers of single layer & 2 layers of double layer) I had for winter 2005/2006.
Upgrade for Winter 2007/2008
One quick upgrade I did was attaching an external room using lattice wall of the travel yurt (4m in diameter otherwise):
and covered it with PE left-overs. The floor I did with 'one-way' palettes, with some cardboard covered.
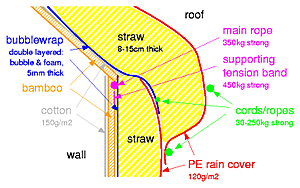  Thermal Insulation (Wall/Roof Junction Detail) of Winter 2007/2008 |
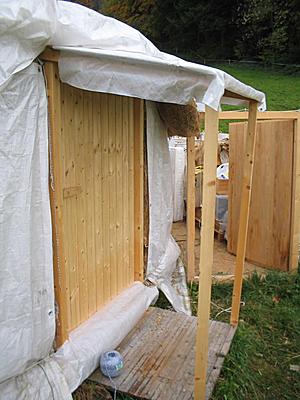  Roof Extension over Door |
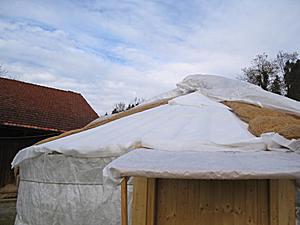
This year I used an additional bubblewrap layer on the roof as moisture blocker and dust blocker from the straw insulation, which gave a slightly better insulation, apprx. 0.7°C/hour drop instead of 1°C/hour drop of last year (temperature difference 15°C inside to outside).
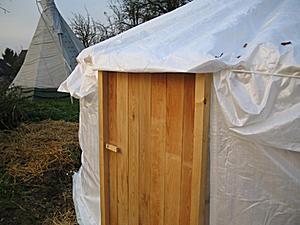
I also extended the roof for the door, in order to protect the door from rain and extend its usage this way.
Finally also I made a "classic" wider door frame, to cover up the junction where thermal insulation and rain cover approaches the door frame.
I also was able to conclude following by January 2008, after 27 months using PE as yurt material:
- roof PE cover (120g/m2) lasts 12-16 months, then it has significant holes leaking rain through; putting up and down and fold the roof rain cover reduces lifetime
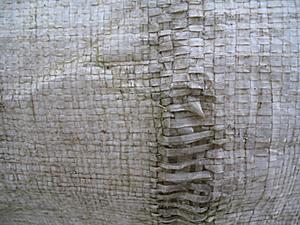
- wall PE cover (120g/m2) lasts 24-28 months, then it becomes brittle, and becomes wet itself and leaks thereby
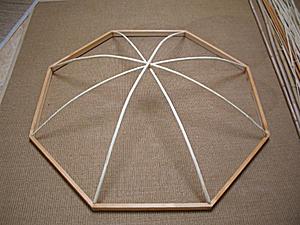
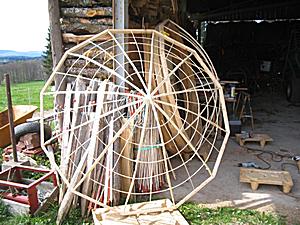
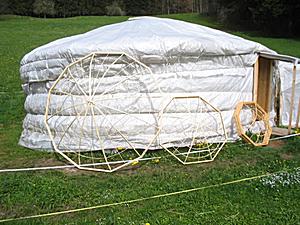
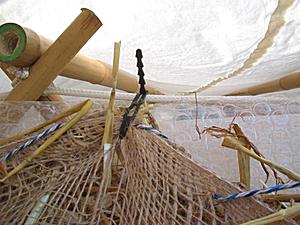
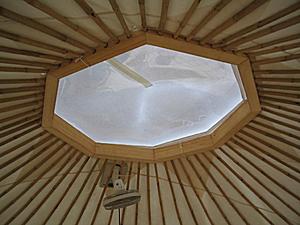
As another skylight upgrade I used willow sticks as spokes and formed a supporting star between the two layers of PVC preventing heavy snow pushing the cone inside which only happened a few times (2-3 times in the winter); often the snow slided or even melted when I was heating the yurt, but the few times it happened it was early morning when I usually didn't heat yet. Another two skylights for two 122cm diameter crown-wheels I made using skinned willow bows:
Continue to read my detailed diary on the following pages.
Diary
As I proceed I will update the diary. Most up-to-date entry at top, first and oldest entry at the bottom respectively last page.05. 05. 2010: Leaving
After a half year I moved back to Switzerland, as I didn't fit into that french eco-village project. It was a very nice place and enjoyed the nature there immensly. Later that year I sold the yurts to a friend who lives a few hours away were I resided in France.23. 10. 2009 - 18. 12. 2009: Moved to France, Pitched the Yurt Again
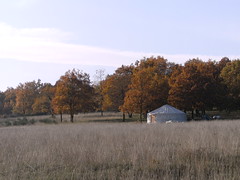 |
 , and came
back to Switzerland, and looking for a suitable place to continue my
passion with the yurt - but this turned out not very successful: either the places
were expensive, or tiny, restricted or otherwise not suitable (I've got a bit picky, why aim for less).
In May 2009 I attended the Yurt Builder Conference where I made contact with an eco-village project in southern France, and I traveled with my recumbent in France again and paid them a visit. After getting to know the group a bit and the eco-village project at its startup phase I decided to provisoral join it. In September 2009 I returned from my recumbent travelings to Switzerland, and roughly a month later, October 23 I moved with a truck and about 2000kg material to south of France about 1100km long trip.
Surprise, there is a legal way to live in a yurt, and it's rather simple solution.
What does it mean? In Germany, Switzerland and Austria yurts essentially aren't permitted to be lived in, either you ignore the law and get along with the local authorities, or make a touristic hotel like setup with yurts, it might work. In France you are allowed to pitch a tent, a caravan or a yurt or some sort of temporary building for at least 2 years after you have been given permission to build your own house. To get permission to build your own house is a multistep procedure - so, I was given permission to pitch the yurt before I even filed the details of a house building; but also that the parcel I'm on will be used for a future yurt camping facility - either way it seems a legal way to live in a yurt for a "limited time". With all the feedback of the recent years it seems the easiest way to live in a yurt is when a "legal" house is nearby.
So, it took a while to get everything setup legally, as being part of an eco-village project I had to wait 2-3 weeks until the permission was granted. And then of course you can only work as fast and make head when the weather allows it, which slowed down preparing and putting the yurt up further.
What's different from Switzerland?
First of all unusual winds: in western Europe most "weather" comes from the west, but in south of France the winds come from south where as the clouds come from the west. The south winds are warm and stormy, up to 70km/h where I am - which make working on the yurt impossible, only with calm or no wind you can put up or take down the roof covers properly.
Also, in Switzerland it was very humid, lot of rain, and then cold in November and first snow. In southern France, Midi Pyrenees to be specific, it also rains, but the ground and earth is dry from the summer, the earth hardly gets damp even after days of rain. This ideal for a yurt setup, the humidity is rather low, but it also means not much water.
So, back to my place, I arrived to a spot:
- without (direct) access to water, 20min walk to a small water source; solution: rain water collecting and filtering, use water wisely
- without (direct) electricity; solution: solar panels
- without waste water connnection; solution: dry/compost toilette
I have choosen a shady place a slope facing east, open area from North, East and South, and in the back (West) a small forest, supposed to slow down storms from the atlantic. In the summer I get shadow around 11:00 until rest of the day, this will lower the UV impact to the cover I have. Summers are rather hot, 35-38C, and very dry. No rain for weeks, and rain only briefly.
The eco-village project owns about 55ha of land, about 140 acres - and some is located in a narrow valley, with at summers is nice to be, at winter only brief sunlight and rather cold. I have chosen a spot at the plateau, exposed more to the winds, and in summer time to the heat - that's why the shady spot. I positioned the yurt between two or three trees, at winter they loose the leafs and sunlight reaches me until 15:00 or a bit more, in summer, with all the leafs I have shadow, as mentioned, around 11:00.
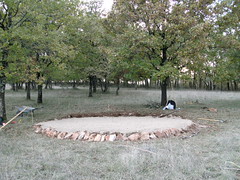
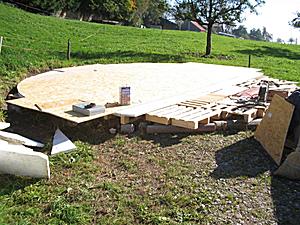
It's a slight slope, about 30cm or 1 feet to dig away at 6.50m diameter, the yurt has a diameter of 6.40 or 19'. We displaced the earth from one side to another and many stones we discovered just a bit under the the surface, and put them aside. Further, we used 2t of gravel to fine tune the surface.
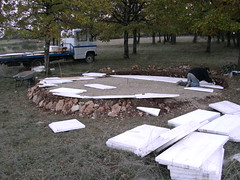
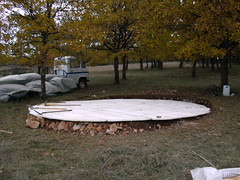
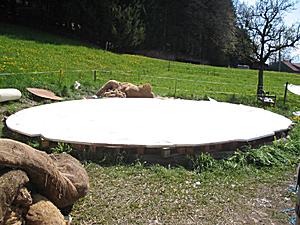
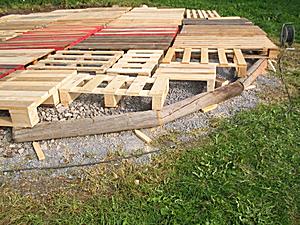
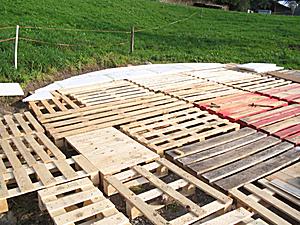
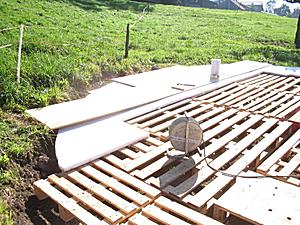
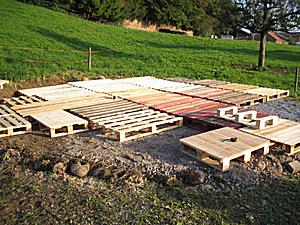
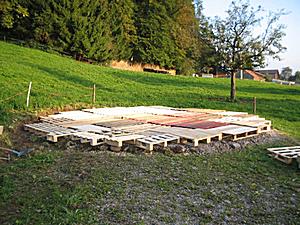
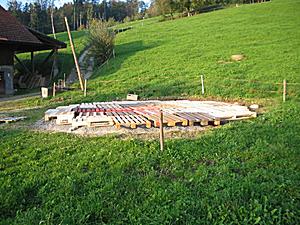
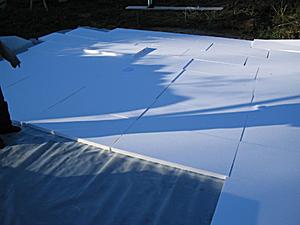
I dropped the palettes, as the ground is dry, and put the polystyrol direct on the gravel, not even ditched a drainage. Then direct on top the wooden floor - very simple setup. I would not recommend this setup unless you are located on an alike dry site.
As next we pitched the yurt, and moved all my stuff from a nearby storage place into the yurt. It took me about a week to open and place all stuff, and clean up the items from the dust of one year storage and also the dusty place it was stored for 4 weeks here in France. I took with me the empty bags of my thermal insulation and refilled them with local straw, straw roles a 180kg each and € 15 each, harvested in spring of 2009.
What else to write? The eco-village project has attracted like-minded people,
one of them is Nicolas Causse, who builds Helix Zomes  , a variant of
domes quite known here in southern France, e.g. check Zomes-Concept.com
  , the carpenter who build most of those "zomes" lives just nearby.
This also made me add two pages on zomes:
In a nutshell, I continue my endevour now in France . . .
26. 4. - 27. 4. 2008: Taking Down the Yurt
Here the photos of the take down; with these photos also my Yurt Diary ends.
20. 4. 2008: Last Days, Total Wood Usage & Larger Skylights
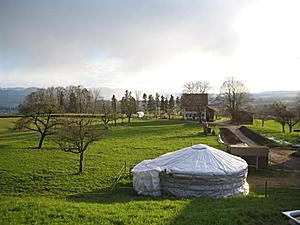  Sunset of 19th April 2008 |
Total Wood Usage
It has been warmer and I didn't fire the stove anymore the last week - so I can conclude now the last winter season 2007/2008 total wood usage of 27 boxes = 1.58 ster or m3 loose wood, hard and soft wood mixed (50%/50% apprx). I fired the stove from November 2007 until 3rd week of April 2008, total 23 weeks.
Skylights
Here a few photos of the skylights I made during the last few days:
Details for the 190cm skylights:
- I used 12x apprx. 50cm long segments, 2.5cm thick, and 10-12cm wide, glued and use wooden dowels (8mm thick, 4-5cm long, precut)
- I will use a tension band around the 12 segment skylights to stabilize it when used as skylight with a cover
- I used two methods with skinned willow bows:
- single willow bow, but as you can see on the 2nd photo the 12 layers bows make it quite unregular, and I won't do this again
- double willow bows, it's much flatter as the double bows are put aside and create less uneven center hub, this is why I fine-grided that option further with 5mm thick 90cm bamboo
- I used cable-tie/zip-ties again extensively - so far so good
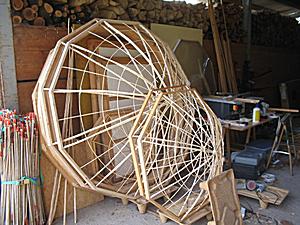
Crown-wheels/toono & skylights (for my own inventory):
- 1.90m diameter 3x12 segment multi-layer (without holes, likely 94 holes later) with fine grided skylight (part of a future 8-9.5m diameter yurt)
- 1.90m diameter 12 segment (without holes, likely 94 holes later) with skylight (part of a future 8-9.5m diameter yurt)
- 1.22m diameter 8 segment (without holes), with fine grided skylight (part of a future 6-7m diameter yurt)
- 1.22m diameter 8 segment (without holes), with fine grided skylight (part of a future 6-7m diameter yurt)
- 1.22m diameter 8 segment, with skylight (to be fine grided), (part of my current 6.4m yurt I live in)
- 0.80m diameter 8 segment 40 holes, with fine grided skylight (part of 4m diameter yurt)
so total 6 crown-wheels for 6 yurts (4m - 9.5m diameter), something like 1x 4m, 3x 6.4m, 1x 8m, 1x 9.5m.
15. 4. 2008: Rain, Sunshine, Snow
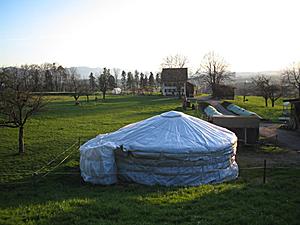  Sunset of 13th April 2008 |
In about a week I plan to take down the yurt and put all my stuff in storage and start with a longer bicycle ride through Europe.
I still work on larger skylights (195cm in diameter) using the same technique I tested with the 122cm diameter skylights using willow rods - once I finished them, hopefully within this week (it's a bit too cold outside so the wood glue very slowly dries), I will show the results here.
7. 4. 2008. April Weather: No Snow, Snow, No Snow ...
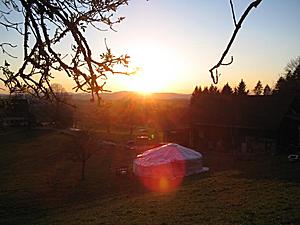  Sunset of 7th April 2008 |
I fired the stove in the morning 1-2 hours as it cooled significantly down due cold winds; in the afternoon the sun warmed up the yurt further almost to summer temperatures.
6. 4. 2008: April Weather: Snow, No Snow
I used this last winter season now 26 boxes of wood (17 boxes = 1 ster or 1m3 chopped wood) which gives 1.52 ster/m3 wood (apprx. 0.75m3 compact wood), maybe another 2 boxes until temperatures are high enough so the stove is no longer required to heat the yurt.
5. 4. 2008: Skylight Refined
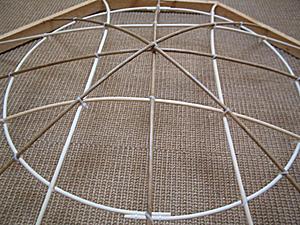
I finished the grids of the skylights I started earlier. At first I tried two different methods:
|
|
- strong single willow bows with bamboo circles
- dual willow bows with bamboo subspokes
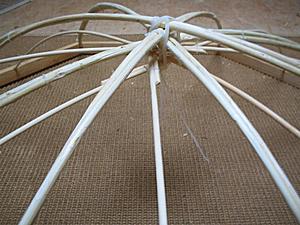 |
The bamboo rings I made out of 90cm long 4mm thick bamboo split; and the inner most was one bamboo stick soaked in water for 2-3 hours in order to bent it; the other 3 rings were made out of 2x, 3x and 4x 90cm bamboo sticks, and bent respectively assembled dry with cable ties.
The additional subspokes I then aligned below the outermost ring, and above the three smaller rings and again fixated with cable ties.
The polygonal frame didn't really interfere with the bamboo rings or the willow bows at all.
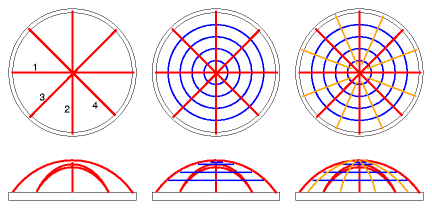 Skylight grid with rings and shortened subspokes |
30. 3. 2008: Warm Days
Today the temperature reached 20°C outside with foehn, it was a sunny day - inside the yurt the temperature reached 21°C - which maybe was the first day after winter where the straw didn't keep the heat but cooled, otherwise the temperature inside would have gone much higher.
24. 3. 2008: Sunny & Chilly
More snow, temperatures below 0°C in the night, and next morning a clear sky and temperature slowly rising to 3-4°C - and so the snow & ice slides from the roof by itself.
I'm using again more wood to heat the yurt, apprx. 2 boxes of wood per week.
22. 3. 2008: Willow Rod/Bow Based Skylight Grids
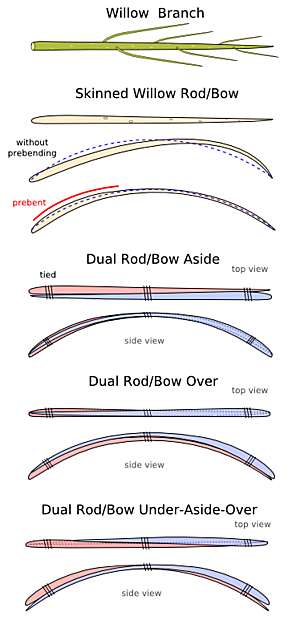  Willow Rod/Bows Options |
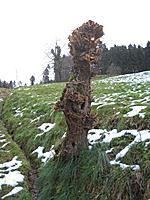  Willow trunk (~40 years old) |
Single Rod/Bow: the branch doesn't narrow too quickly, and is moderatly thick, at least 8mm at the narrow end. I noticed, the willow bow is easy to prebend in order to create a symmetric bow.
- length: ~140cm
- thickness: 0.9-1.5cm (variance 66%)
Double Rod/Bow Under-Aside-Over: two branches are arranged that one branch narrow end goes below the thicker end of the other, aside of each in the middle, and then again the thicker end over the narrow end.
- length: ~140cm
- thickness: 0.5-1.0cm (variance 100%)
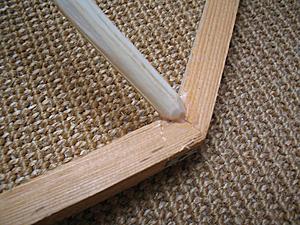
The third example in the photo series below shows that I used bamboo stick connected in the mids of the segment of the octagon (8-sided frame), this was due the length of the bamboo stick as I would have prefered to attach the spoke in the junction frame segment like the other two skylights.
Detail Observation
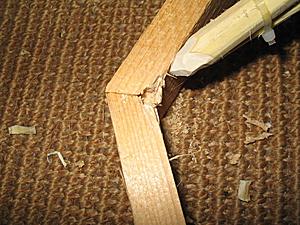  Close up on skylight spoke to frame |
I will refine the grid further, but I haven't decided of the procedure: either using concentric rings attached to all spokes, or use straight sticks and form an octagon again, both variants would then give support to further willow bow sub-division, but then using rather narrow branches. The final cover will be either some bubble-wrap or if I find a material which is a bit flexible then pull it over the skylight grid. The option I used previous with clear PVC formed cone as skylight worked well, except with heavy snow it happened a few times that it flipped inside - as remedy I used some unskinned willow branches to form a supporting grid.
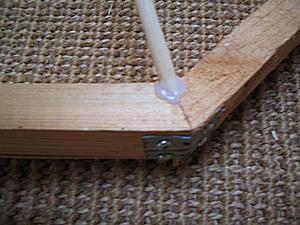
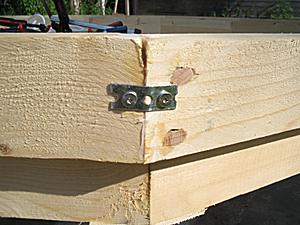
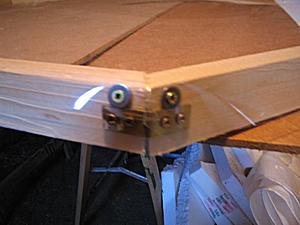
Btw, the frame segments are glued and with a short strip of eyed sheet metal screwed over the junction on the side to reinforce the corner - I will enventually add further reinforcement by adding a thin layer wood covering the top and bottom of the junction - once I did this I will add more photos.
Skinned vs Unskinned Willow
Unskinned willow remains flexible and has better bending and overall stability. Fresh skinned willow is very flexible, and one can bent it and undue bows and make it straight, or bent it to a certain radius and let it dry while remaining in this form; once dried out is stiff, but has somewhat limited strength compared to bamboo. Skinned willow is almost white, and looks aesthetically.
Yesterday
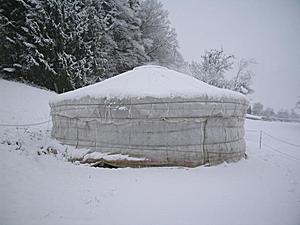  Morning of 21st March 2008 |
20. 3. 2008: March Equinox
Today we have March Equinox ("Spring Equinox" would only apply to northern hemisphere). Last night it snowed 8cm apprx. but it's melting away during the morning. I have been using now 22 boxes of wood (17 boxes = 1 ster or 1m3 chopped wood) for this winter season. Several days in the last weeks I didn't have to fire the stove as the sun warmed up the yurt nicely, but the last few days with temperatures around 0°C fireing the stove was required.
My time at the current site is slowly expiring, about end of April I will take down the yurt - whether I dislocate to a new place or put it into storage and go on an extended recumbent tour - let's see. That's kind of the advantage having a temporary shelter which you can either pack up, move, store and unpack on-demand.
12. 3. 2008: Another Storm
|
|
|
I rarely fire the stove at storms because of that - today I decided to fire the stove nevertheless. Once no smoke but just glowing wood was in the stove, the problem with pushing air backward is gone.
On the world sunlight map you also see nicely that we are approaching March Equinox, when day and night have the same length, when the shadow is equally cast over northern as well southern hemisphere.
10. 3. 2008: Milder, Snow Gone
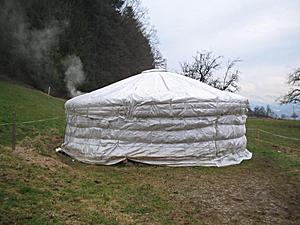  Evening of 10th March 2008 |
Storm Aftermath
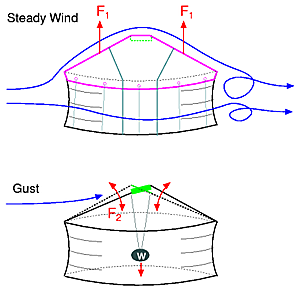  Winds on a Yurt |
The force F1 in the illustration is the same force occuring on an airplane wing, the wind goes faster over the roof, creates a lower airpressure, and pulls the rain cover up. Usually the ropes around the yurt a bit below the wall roof junction cannot keep the roof cover sufficiently, but using cords to pull the roof cover down on the ground does it usually - or ropes going over the entire roof. Usually behind the yurt some whirls occur, I have noticed it quite well at heavy winds the smoke from the stove whirling behind the yurt, and even sometimes forward against main wind direction, but it's also because I'm close on a slope of a mountain, where the winds create a whirl on the entire slope along with the nearby forest. In a way, it showed at strong winds the nearby environment can create large whirls as well.
The F2 indicates a swinging force of a gust, pushing down the front roof, and then releasing it and counter balance by going up - there the risk of roof poles falling off their holes in the crown-wheel.
The mentioned weight pulling down the crown-wheel limits these swings - I would not recommend to fasten it with a cord direct on the ground, but rather have a floating weight able to give in.
5. 3. 2008: Little Snow, Temperature Drop
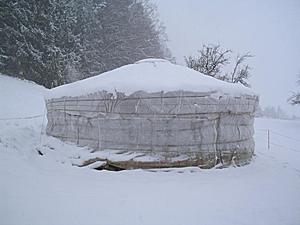  Snow & winter is back ... |
I noticed the grass, flowers leafs and bush buds has been growing the last two weeks. Some willow cuts I have been putting into a vase has been growing, creating buds, leafs, and even blooms after 3-4 weeks within the yurt aside of the stove.
I have been skinning larger willow rods for some construction for a larger skylight of a 2m diameter crown-wheel, and the cut away twigs are those I put into a vase - handling the 4-25°C temperature within the yurt quite well.
While researching a bit about willow, I found out the skin can be used as medicine - which later was synthetic replicated and then known as "Aspirin" (see Wikipedia: Willow  ). Now I use the willow skin as fire starter, kind of using it well below its potential.
2. 3. 2008: Fixing Skylight
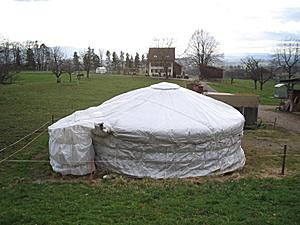  After storm "Emma" ... skylight fixed |
The newer skylight has strong frame, in particular at the corners - so I taped the broken PVC a bit, and covered it with a double layer bubblewrap, and keep the older skylight for replacement. The newer skylight actually looks much older than the old skylight - as I didn't use the old skylight that much. The light inside the yurt is still bright, but I can't see the clouds, sun or the stars anymore due the bubblewrap.
I'm thinking of another skylight approach without PVC which breaks too quickly when exposed to UV and then under physical stress like falling on the ground while fixed on a frame - a rather softer material would be good, still bendable and clear as PVC.
I also had to replace a few cords of the attached room and readjust the rain covers - now everything is set again.
Last night we had another more tame storm passing by - it kept me awake a bit.
Storm "Emma" seemed to be even stronger than "Kyrill" back in 2007/01 with over 220km/h in the alpes, in particulary it hit Germany and Czech Republic.
In Switzerland where I reside it was up to 177km/h according various news sources.
1. 3. 2008: Winter Storm, Skylight Damaged
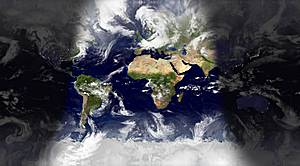  World Sunlight Map 1st March 2008 |
- roof ropes were loose, the chimney was detached from the stove pipe where I attached some ropes (won't do this again)
- 6-7 roof poles were laying on the ground inside the yurt; it must have been shaking a lot
- skylight was still attached on two strings, instead of four, while fasten the cover it flew away and hit the ground and broke the outer PVC - lukely I have a replacement I could put up as with wind also some rain approached
- a few paper sheets laid around on the floor, I guess due the partially open skylight wind entered and could lift up a few paper sheets
I knew there would be a storm or even hurricane approaching Germany, and partially also hit Switzerland, but I hoped I would be early enough back to fasten everything which is loose, and I sort of was able to do so - would I have stayed in the yurt during the storm likely I would have fasten the cover more and roof ropes hold the roof in shape. Afterwards you are wiser. I have dealt now with 1-2 strong storms the past two years, and I thought the yurt will withstand that past storm, it did - but I could have done better preparation especially being away.
I'm also still looking for a good solution to fasten the cover tightly and still have snow slide - usually when winter storms occur, a major temperature change is happening, e.g. from warm to cold and then often intense snow fall follows. An easy solution would be to cover the entire yurt to eye the roof cover and tie it down to the ground.
22. 2. 2008: First day without Stovefire
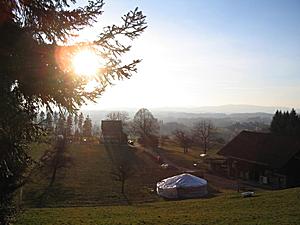  Afternoon of 23rd February 2008 |
Yesterday evening the temperature reaching 22°C after fireing in the morning until 11:00, the warmth kept until midnight, with 18.5°C - outside 5°C.
We are not yet end of February, and a day without fire and wood usage . . .
19. 2. 2008: Chilly Days & Enhancing Skylight
In the night -4 to -6°C as before, sunny days, but 6°C only, in the sun up to 10-12°C I would guess, but fierce cold north wind.
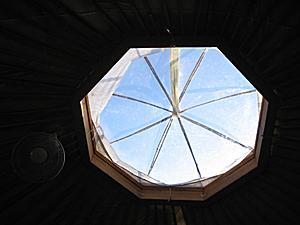  Dual willow spokes skylight enhancement |
Anyway, I positioned those dual spokes into the corners of my octagon based crown-wheel, the corners are strengthened to withhold those new spokes - I deliberately didn't position them between the corners because that way vertical push could break the skylight frame much easier.
Detail: I cut pointy endings on all dual spokes, and simply forced them unto the soft wood based skylight frame - no screw or glue - I like to remove it during summertime and in wintertime insert again easily.
After 30 mins I was finished, the spokes are positioned between the two layers of PVC cones.
12. 2. 2008: Chilly Sunny Day
The last days have been sunny, -4 - -6°C at night, and 10:15 sun hits the yurt, usually I heat the stove in the morning til noon, and then after sunset again. Today I worked outside and didn't heat the stove, 7°C inside the yurt at 9:00, and 17:30 in the afternoon just at sunset it warmed up to 16.7°C, outside 6-7°C. The first small flowers are coming out - the ground is still frozen in the morning, but warms up til noon.
7. 2. 2008: Rain, Milder & Climate
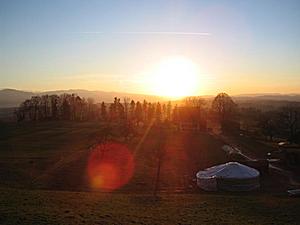  Sunset of 7th February 2008 |
I'm reaching 16 boxes of wood, which is almost 1 ster or 1m3 loose wood or 0.75m3 compact wood for this winter season (11/7 to 2/9 is 3 months or 12 weeks), calculating mid of March as end of winter gives another 6 weeks, a total of 18 weeks. Estimation total wood usage for winter 2007/2008 16 boxes / 12 weeks * 18 weeks = 24 boxes gives 1.41 ster (17 boxes = 1 ster or 1m3 loose wood) or 1.05 m3 compact wood. I have been guessing a few weeks ago I would use 1.5 to 2 ster wood this winter, let's see mid or end of March for definite numbers, and then also conclude the overall wood usage of yurt vs house.
Usually the last weeks of January til mid of February are the coldest, well below 0°C, but not this year, not so last year.
I'm aware many entries of my yurt diary covers weather issue, yes, it is is or it became a main factor. Cold or wind, or storm affects living much more than living in stone or concrete walls. Once in a while I receive emails from people asking me about how to keep warm in the yurt, how to insulate it; yet, the local climate is important, is the winter humid, cold, dry, etc - affects the choice of canvas for the rain cover and insulation material. You can also say that local flora flourishes on the local climate, obviously, using it as building material (cover, canvas, insulation) isn't just convinient but also logical. Of course processing and using material out of the season rhythm affects the material used of course, e.g. in case of straw, but using reed to protect UV or additional rain cover for a yurt a suitable option.
So, using materials for your yurt, look how your local climate and your local flora looks like closely - sure, right now the climate world-wide seems erratic, so it requires a yurt which can adapt, e.g. more snow, more rain, more heat, more extremes essentially.
2. 2. 2008: Snow is Back
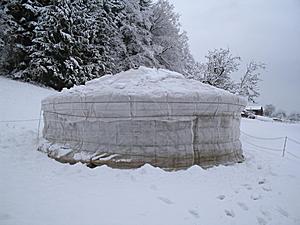  Snow is back ... |
It's a bit warmer than 0°C so the snow melts slowly now, and falls off the trees.
The afternoon has been sunny again, 4°C in the shade - I almost cleared all of the roof before it cools off tonight.
29. 1. 2008: Mild January
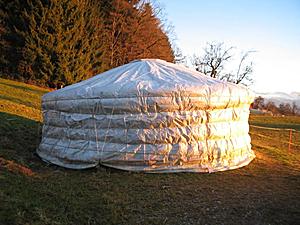  Yurt in Sunset of 23th January 2008 |
This also meant less wood usage, apprx. 1 to 1.5 boxes a week, usually fireing the stove in the morning for 1-2 hours, then lasting temperature of 21-23°C until sunset, then I usually fired stove again for 1-1.5 hours.
I also did some laundry and dried the cloths inside the yurt near the hot stove around noon, and a dark blue t-shirt I dried on the bench outside even - while drying off the cloths I kept the door open 20cm to have humid and warm air leave the yurt and not recondense inside the yurt.
21. 1. 2008: Warm Winds & Sunshine
Today I even encountered a bee searching for blooming flowers - but none to be found. 15°C outside, the yurt warming up to 19°C inside, partially with open door. The yurt would be warmer and warm up faster if the sun would hit the yurt early, and not just around 10:15 independent of season due the nearby forest range. I usually fire the stove at the evening after the sunset, for 1-2 hours only, wood usage is low again therefore.
15. 1. 2008: First few Insects
To my great surprise the first young flies are flying inside the yurt, likely entered from outside where I saw a few - in other words it has been warm enough so flies could be born. From November til now I didn't see any flying insects, there were some very small bugs, less than 1mm in size, green/transparent in color walking on the floor, obviously acclimated to 0-15°C. I suspect the straw insulation giving some habitat for those insects, and I don't mind them.
Last summer time I had quite a few larger insects (5mm in length), who laid eggs into the opening of the bamboo of the lattice wall - next time before I raise the yurt I will fill all bamboo openings, also the roof poles, with some foam to close them.
8. 1. 2008: Sunny January Day
 |
7. 1. 2008: Milder, Rain & Sunshine
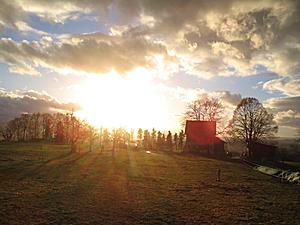  Sunset of 7th January 2008 |
Near sunset around 16:30 the brief direct sunlight increased the temperature to 19.3°C inside even, yet 19:00 I fired the stove to have it cozy again.
Wood Usage Comparison
The farmer nearby, who rented me some of his land, told me they used 3 boxes of wood a day to fire their two stoves, total area 3 floors each 70m2, whereas I used 2/7 boxes a day (2 boxes in a week) the two last colder weeks, the yurt 32m2. The farmer yet admited, they heat to 23°C at evenings, not just 20°C - and the house is really bad insulated, and is occupied by 4 people currently, but have been 6 people in the past. Since the house isn't heated entirely but only partially, I also list 50% of the house as well:
Comparing wood/m2 (disregarding amount of people occupying the space):
- House: 3 boxes / 210m2 = 0.014 boxes/m2 = 100%
- House 50%: 3 boxes / 105m2 = 0.028 boxes/m2 = 200%
- Yurt: 2/7 boxes / 32m2 = 0.0089 boxes/m2 = 62.5%
Comparing wood/person (disregarding space):
- House w/ 6 persons: 3 boxes / 6 person = 0.5 = 100%
- House w/ 4 persons: 3 boxes / 4 person = 0.75 = 150%
- Yurt w/ 1 person: 2/7 boxes / person = 0.285 = 57%
Conclusion:
I use 1/3 to 2/3 of wood comparing the wood per m2, or 1/2 to 1/3 of wood per person disregarding the space.
He uses up to 1 ster wood (16-17 boxes, 1m3 loose wood, ~0.75m3 compact wood) per week, whereas I expect 1.5-2 ster for the entire winter (Nov-Mar, 5 months), which means max 2 sters per winter for me in the yurt, and him and his family apprx. 20 sters, 10 times more - but keeping in mind they are 4 persons, and having apprx. 6 times more space, yet not sure how much space is actually heated.
5. 1. 2008: Adding PVC Layer to Seal Wall Rain Cover
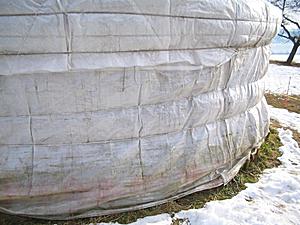  Brittle PE wall cover (slightly darker, speak wet, areas near the bottom) |
Conclusion: the roof PE last 12-16 months, whereas the wall PE lasts 24-28 months - it's 120g/m2 lightweight PE I use(d).
I tend to use tight woven canvas for rain- and sunshades for the rain wall cover, and add heavier PE (220g/m2 or so) at the last 1/4 or 1/5 of the height for the next yurt. This upgrade either comes in spring once I dislocated and pitch the yurt again.
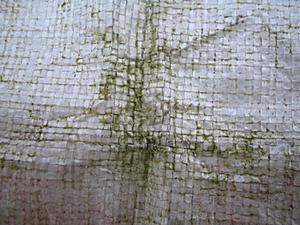
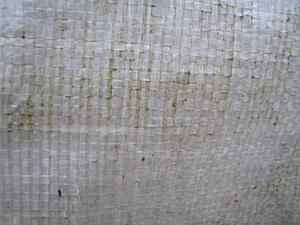
Brittle PE Wall Cover
Here a few closeup of the PE cover, after 27 months in use:
The first two photos show likely a fabrication error in the waving, the spacing of the brittle is unusual large, the other two photos show the usual brittle all over the wall cover.
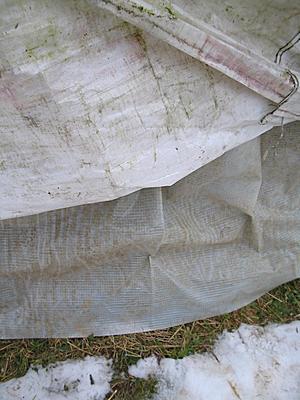  Adding PVC sublayer to seal brittle PE wall cover |
I still will use PE as roof rain cover for the future, even it only lasts 12 months, but the advantage of sliding snow is convincing, for the wall I will look for another material, and then decide to keep going with PE or another material. Using a more breathable material than PE for the wall would allow humidity to transpire from inside to outside better, without paying so much attention to regularly freshing the air by opening the skylight or door and thereby also allow humidity to escape the inside of the yurt.
The last few days we had föhn again, a warmer wind coming from south - 6°C outside today, inside 12.5°C without firing the stove.
Later in the afternoon rain is expected, also for the next few days.
Few Impressions of First Days in 2008
29. 12. 2007: Cold Nights, Moderate Warm Days
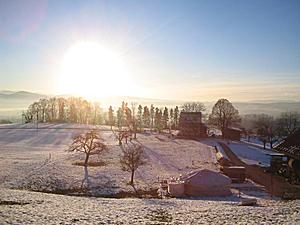  Afternoon of 29th December 2007 |
A quick look on wood usage, I used up 8 boxes of wood so far for this winter season, the last two weeks I used 4 boxes - (1 box ~ 1/17 ster, whereas 1 ster ~ 0.75m3 wood), in other words, instead 1 box per week I use 2 boxes now.
21. 12. 2007: December Solstice
I hoped to make a photo of the early sunset yesterday afternoon, but I'm in fog and today this half hour the sun could penetrate I took the photo - and small ice crystals growing from my rain cover due the fog.
The last weeks I spent most of the time in the yurt, and this meant often also to fire the stove almost the entire day and evening too. I took the time to make more jam again, some more unusual mixtures like ananas with ginger and a bit kurkuma, kiwi with kardamon, among the more common mixtures like plum or apple with cinnamon, delicious!
18. 12. 2007: Colder & More Wood Burning
The last days have been below 0°C all day long, with partially covered sky. I use more wood for heating the yurt, instead of 1 box now 1.5 to 2 boxes a week (17 boxes = 1 ster = 0.75m3 wood).
The insulation only slowly dries, the newspaper I used to soak the water has captured some. I likely require to repeat this procedure a few times until the straw insulation has dried.
16. 12. 2007: Drying Insulation
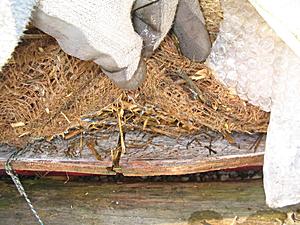  Wet insulation (seen from outside) |
Only 3m long section of the wall leaked, and part is already frozen - other part of the wall rain cover is buried under hard snow.
I won't tie the rain wall cover so tightly the next 2-3 nights so cold air can reach the wet parts and dry it, additionally to the newspapers.
15. 12. 2007: Wet Straw Insulation
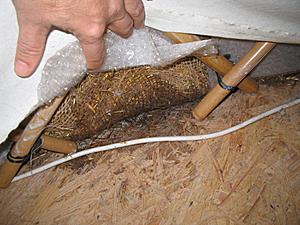  Wet straw insulation due leaks in rain wall cover |
Fortunately it's cold now, and -4 to -8°C last night and tonight, and I'm thinking of letting the entire yurt cool down to 0°C or even more in order to dry the insulation. Additional I have to fix the leak in case it warms again and more rain is occuring. I still have plenty double layered bubblewrap available which I will use to cover the insulation just over the wall/floor junction, where the wall rain cover has leaks.
The last night has been cold, apprx. -4°C and a bit of wind, in the sun this afternoon it maybe reached 12°C so I could sit outside with a t-shirt. After sunset the temperature drops immediately, the air is dry and below 0°C again.
12. 12. 2007: Winter & Snow Back
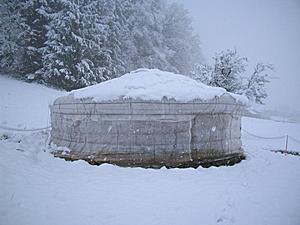  Winter & Snow is Back |
I partially cleared the roof, especially the attached room which has not that steep roof and therefore must be cleared manually, otherwise the snow slides down by itself - unless, there are ropes stretching over the roof as mentioned earlier, which I still had.
You may notice the wet parts of the PE rain cover on the wall near the bottom, compared to other photos of the yurt from two weeks ago. The 3-4 days rain and the brittle parts of the wall rain cover (PE) soaked water, and partially leaked rain inside the yurt as mentioned in the previous entry.
10. 12. 2007: Rainy Days, Dry Door, Rain Leaks in the Wall
The recent days have been wet, lot of rain through the days and nights - the ground is soaked, typical fall weather - some fall winds and minor storms again, but just for 1-2 hours. The new extension of the roof over the door works very well, the wooden step in front is soaked, yet, the door is dry - as well the door frame is dry. The last door I replaced due the frame adjustment due ropes pulling (outer main rain cover, which this time did not attach to the frame direct, but made a knot from rope end to rope end) and door frame junction on the ground catching water, and compromise the fixation. I hope to fix the old door in order to reuse it again.
Some of the wall rain cover shows leaks, on the bed side some water has leaked from the wall/floor junction, but with heating up the yurt quickly evaporated. Interestingly enough the rain wall cover is almost straight outside, with no wrinkles - so it's time to replace the rain wall cover as well next spring, after two year usage. It looks like the leak is where the rain wall cover (PE) folds over the floor, maybe some softer edge might have done better for the cover.
In general, I'm still very pleased with the current setup, I heat the stove twice a day now, in the morning once, the heat last til sunset (17:00), and depending of temperature outside I additionally heat it again 19:00 for a short time. The last days the temperature outside was 6-8°C outside, so the temperature inside the yurt was 12-13°C all morning until I fire the stove again.
3. 12. 2007: Second Fall/Winter Storm
  World Sunlight Map 3rd December 2007 |
The additional thermal insulation segments seem to have balanced the roof further, so the crown-wheel neither the roof really has really shaken. The rain cover has been fasten with additional cords, the only place the wind could enter was to the attached room, and lift up a bit the rain cover.
27. 11. 2007: Winter - No Snow Anymore
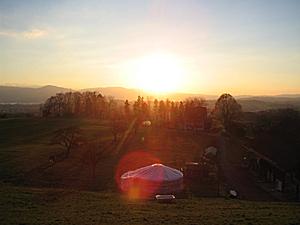  Sunset of 27th November 2007 |
Föhn kept the temperatures high (over 10°C at some days) even after sunset. Now we just have typical November weather, cold winds from north / north east.
20. 11. 2007: Warmer Temperatures, Very Localized Climate, Wood Usage
The last days I usally fired once a day, in the morning to reach 22°C inside, lasting til sunset. After sunset the temperature fell rather fast as outside it dropped below 0°C and finally -10°C outside, inside the yurt down to 15°C at 22:00 and next morning down to 2°C.
Yesterday and today "föhn" (see Wikipedia: Föhn  ) occured, a warm wind which let the temperature rise to 6-7°C - the place I'm situated is exposed to föhn, which in the summer time can be very strong almost storm like, in the winter time it gives higher temperature than usual, and the location just 50m below my location, apprx. 500m away does not have this warm wind but fog, and lower temperature.
It is very interesting to observe so localized climatic differences - and one thing worth to look at when a new place is reviewed.
Anyway, the 10-15 cm height heavy and partially melted and refrozen hard snow is now melting slowly, the ground is soft again and not frozen anymore.
The temperature drop isn't has hard anymore, through entire afternoon I had 21°C without firing the stove at all, after sunset and now 17:30 it's still 19.7°C, 22:00 still 16.0°C (3.7°C in 4.5 hours, apprx. 0.82°C/hour).
Until now I used 2 boxes of wood, hard wood predominatly beech which burns slower than fir, 17 boxes make up 1 ster (1m3 chopped wood), which is apprx. ~0.75 m3 compact wood. If I fire the stove once a day I use 1 box a week, 1/17 of ster the week. Five more weeks til end of year, plus apprx. 10 weeks til first mid of March when usually a warmer period comes, which makes estimated 17 weeks or 17/17 or 1 ster for the fall/winter season, but I expect, if this winter is colder than the last warm winter (one of the warmest recorded here), that I will use for sure more than 1 ster of wood, at max 2 ster I would say. Let's see.
18. 11. 2007: Chilly Temperatures, Fixing Pipe Insulation
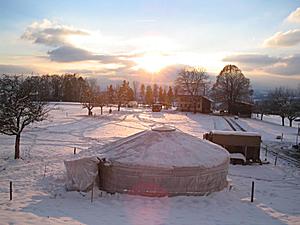  Sunset of 16th November 2007 |
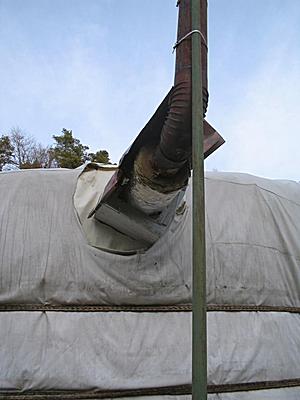
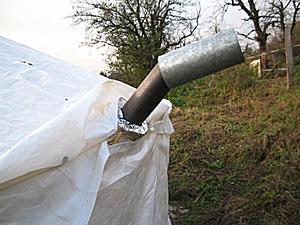
Yesterday I also fixed the thermal insulation of the stove pipe, where the pipe goes between wall and roof outside - the junction has been a bit under tension as I used it to attached to fixate some of the cords over the roof. The junction, two pipes moved into each other, moved apart and leaked a bit smoke inside the yurt - which I had to fix, and finally I had to dismantle the insulation partially again in order to push two pipe parts into each other again. My pipe insulation looks like this: I use glasfoam, apprx. 2-3cm thick, 60cm wide, 1m long, and rolled it over the stove pipe 60cm wide, 2-3 times around - then I used stiff wire to fixate it, and then aluminium foil, which I taped with clear tape so the foil is not teared away when I move it between the lattice wall/roof junction.
This is also a number one might think about when constructing a yurt, the width w (as mentioned in yurt calculator) of the junction distance of the lattice wall, keep it larger than your stove pipe plus thermal insulation, this way if you choose the pipe to leave the yurt by the wall/roof junction, you don't need to cut any part of the lattice wall.
16. 11. 2007: Deep Wintertime
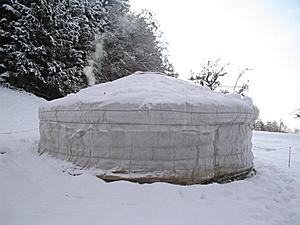  Deep Wintertime |
After 1.5 hours firing the stove I reach 15°C inside - and the sun reaches finally the yurt as well around 10:15.
15. 11. 2007: More Snow
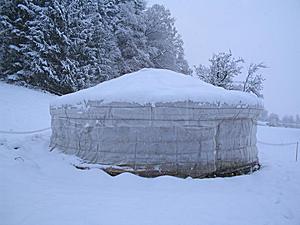  Even more snow in mid of November |
Later in the afternoon I cleared part of the roof which extends over the attached room, there two cords fasten the extension yet prevented the snow to slide.
14. 11. 2007: First Lasting Snow of the Winter Season
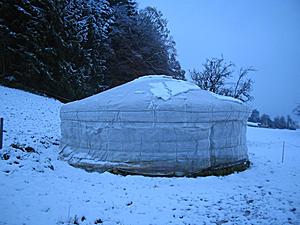  First snow of winter 2007/2008 |
Maybe bands may pose less resistance to sliding snow, than cords - I'm not sure. As mentioned before, one of the main advantage of PE as rain cover is that snow just slides down, one has little to worry of snow piling up on the roof and risk breaking the entire yurt once 50cm or more heavy snow remains on the roof (e.g. as with cotton/polyester rain cover).
13. 11. 2007: Putting Up Two More Roof Segments
I just moved the two segments on the roof, balancing the overall weight of the thermal roof insulation thereby - with the sacrifice of less translucent bubblewrap section on the roof. On the wall I have apprx. 1/4 of the circumference with 4 layers of single layered bubblewrap, probably the last season as it disintegrate slowly due UV exposure.
It's now significantly darker as seen on the last picture, but the crownwheel already adjusted slightly, there is a slight remaining adjustment which will occur within the next days or the next storm, as I can't simply shake the roof that hard to bring it in balance. In such cases you realized how "alive" a yurt is, how the lack of hard fixations make it almost a liquid setup, for the lack of a better word.
12. 11. 2007: 3 Days Storm, Rain and Snow Fall
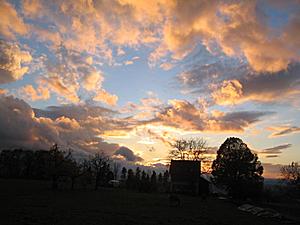  Sunset of 12th November 2007 |
I decided to make at least 2 roof segments of thermal insulation, and narrow the bubblewrap segment further, and balance the weight on the roof more even. As the storm titled the crownwheel even more, it's just 5cm maybe at most, but I like to maintain a horizontal crownwheel to have all vertical forces of the roof poles distribute the force at the same angle to the crownwheel.
For now I didn't put up the two roof segments as still hail/snow is on the roof which fell this afternoon, so I wait til the rain cover is clear and dry to partially lift it up and get access to pull the segments on the roof.
The roof segment have the same size as when I made them last fall, 50cm (top) - 180cm (bottom) wide, and 340-345cm long (empty) and filled finally apprx. 30cm (top) - 160cm (bottom) wide and 320cm long when filled. I used 1 1/2 bales of straw for the two segments.
9. 11. 2007: First Fall Storm
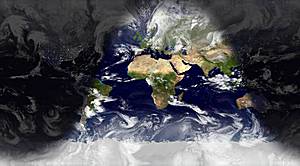  World Sunlight Map 9th November 2007 |
The crown-wheel tilted further due the storm, unfortunately, due the one quarter of the roof where there is no straw-based insulation, but light bubblewrap layers.
Tonight first lasting snow falls, at 0°C - not really covering up the entire ground.
7. 11. 2007: First Snow Briefly
I was away for a few days visiting friends, and temperatures from 0° to 8°C, with N/NW winds, and some brief snowfall (750m above sea level) which didn't last, only a few spots the snow remained. And I had friends coming by and stay overnight, so I started to use the stove now - heating up to 25°C, with little wood fireing for 1.5 hours last evening.
The new roof extension over the door works well, it might not really storm proof as I just nailed the two jambs on the first step on front of the door - but the front door didn't catch any direct rain water.
I also catched the two mice which walked or eat themselves from my straw insulation.
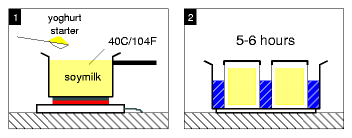
Since the weather is cooler I also have more space to make again soy yoghurt and keep it stored for a couple of days. I refrained to make soy yoghurt during the hotter months due lack of sufficient cool storage space.
 |
1. 11. 2007: Sunny Day Again, Passive Heating from the Sun
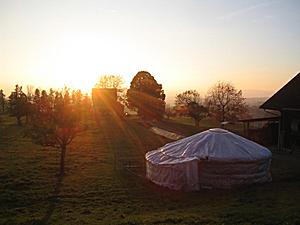  Sunset of 1st November 2007 |
Below a few photos of my winter setup 2007/2008 which I likely won't change through the winter, except maybe tighten some of the cords of the attached room once snow is falling. Will be interesting to see if the attached room behaves with sliding snow, I guess some will be withhold at the junction of roof cover and attached room roof cover.
Winter Setup 2007/2008 |
I also noticed two mice which began to climb through the straw insulation, I will lay out a mouse trap again to capture them. As I wrote earlier, I wouldn't mind mice if their droppings and urin would be outside, but inside the insulation I don't want it.
Yesterday we had covered sky with a bit of rain, the temperature was 10°C in the morning climbing slowly to 17.2°C max in the late afternoon, I didn't fire the stove but weared more cloths.
29. 10. 2007: Sunny Day
Today we had a sunny day, direct sunshine reaching the yurt - now with thermal insulation and south-west quarter of wall and roof with multiple bubblewrap layers translucent, it warmed up the yurt from 10°C to 20.5°C - at 19:30 still 18.4°C (apprx. 2 hours after sunset), outside 5°C with a bit cold draft.27. 10. 2007: Roof Extension over Door, Door Frame Extension
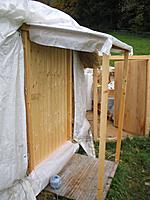  Roof Extension over Door |
I also extended the roof for the door, in order to protect the door from rain and extend its usage this way - it's covered with PE. The supporting timber will be fixated on the first step in front of the door. I'm also thinking to use some PE to cover one side (west) where most rain & wind comes from.
Detail: The top outer rain cover rope is reaching over the extension, holding down the roof rain over - once it's raining I will see how the water flows and may make further detail adjustments.
Door Frame Extension
Finally also I made a "classic" wider door frame, to cover up the junction where thermal insulation and rain cover approaches the door frame.
26. 10. 2007: First Experience with new Thermal Insulation
 Thermal Setup (Roof/Wall Junction Detail) of Winter 2007/2008 |
It's 6°C outside, inside 14°C without stove around 21:00, I fired the stove for 30 mins with little wood, and I reached 19.1°C and now that the stove warmed for 1 hour, the temperature stays at 19.0°C after an hour - very good. Next morning 9:00 still 12°C - apprx. 0.7°C drop per hour. The door frame isn't yet insulated and has 1-2cm gaps, once those gaps are sealed the insulation will be even better.
I also tied the yurt again, tried to clean the ropes with little success, this time with hot water and a bit soap, some moss went off, but I assume to clean the ropes they would require to be soaked 12 to 24 hours really, not sure putting them into laundry would do it. After all ties were attached, finally the attached room I was able to put up again.
As first experience, the attached room is suitable as very temporary setup, but otherwise it's a bit a hassle when once is work on the yurt itself, for everything the attached room needs to be detached which implies partially disassembled. Anyway, once getting a new place with more space to use I will put up a regular 2nd yurt, the 4m diameter one I made.
25. 10. 2007: Thermal Insulation of the Roof
|
|
Finally the roof got thermal insulation, using the straw filled blankets with jute - this time I put them alternate on the roof in order to keep the crown-wheel in balance and not tilt as the last year. Since I left 1/4 with multiple layers of bubble-wrap again to have daylight also enter on the south side, there is weight missing, yet, this time the crown-wheel is still in position, a good sign.
I made a bubble-wrap layer as moisture stopper for the straw insulation, it's tied with a separate rope close to the wall rain cover. As next I put up the roof segments, a friend helped with this part who briefly came by, but this part is also doable as single person.
Finally I put the roof rain cover and tied it temporary - tomorrow I will tie the yurt more exact, and try to clean off the moss of the ropes.
23. 10. 2007: Replacing Door & Thermal Insulation of the Wall
Today I made the decision to stay for the winter time at the current place after the farmer agreed to extend the time, even though I spent time reviewing other spots, but none was really suitable or available right away. I keep looking for a place for springtime, when I definitely have and want to move. Two things I did today, replacing the door and putting up the termal insulation of the wall I made last year.
Replacing the Door
Finally I replaced the old door, which I just realized, had a tilted frame due the uneven ground, which finally was sufficient so the door was off 1.5cm, too much. The new door is more beautiful as I used higher quality wood and no gaps between the lath as they are interlocked with each other.
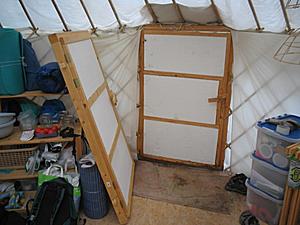  Replacing door: Putting new door aside (1 of 9) |
- put the new door in front of old door
- untie & move main rope (between khana junctions and responsible for main static) off the old door, the same moment the outer rope for the rain cover maintains static integrity
- tie main rope again, keep it moveable, e.g. move from old to new door
- untie all other ropes from old door, and tie on new door
- remove old door
- move new door in position
This all can be done by one person, point 2 & 3 are most important.
Putting up Thermal Insulation of the Wall
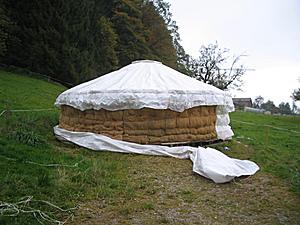 |
So I first assumed I had to remove the entire attached room first, and then add the insulation and then erect the attached room once again - but then I realized I only had to remove one side of the room in order to have access to the rain cover of the wall, and keep the shape of the attached room and didn't have to move anything I store there.
The thermal insulation I made last year, jute with open straw and the whole thing quilted, 5 pieces - and I hang them all on flexible PVC binders which one uses to bind plants on sticks. After 2-3 hours the blankets were put up, and bound on the main rope, which on this new addtional weight got very tight. Again I let 1/5 of the entire circumference with 4 or 5 layers bubblewrap so some daylight can enter the wall, this on south side of the yurt, all the rest with the straw-based insulation.
Finally I put the wall rain cover back again, as well the attached room, but not yet fully with all ropes as the after tomorrow a friend visits me to assist me to put the thermal insulation on the roof, when I require again to untie some ropes again.
I also took the chance to clean the rain cover with cold water and a lobe, mostly stain like a bit moss where the ropes went along.
The PE ropes I tried to wash in a small container with hot water, some moss went off, but the ropes remained with green moss on it - maybe I need to soak them longer and maybe with a bit of soap, let's try tomorrow this.
It's still above 0°C during the day, 4-8°C and working outside gives warm quickly. We have high fog covering up the sky, so almost no sunheat is able to heat up the yurt and remains the same temperature like outside. That's also why I decided to put up the thermal insulation so heating with the stove is more effective.
22. 10. 2007: Golden October, Chilly Days
I just returned from a trip visiting friends of mine through Switzerland, which I made with my recumbent. Last Thursday, 17th October, the weather changed dramatically, from the "Golden October" (15-18°C) and sunny days, to chilly winds and temperatures from 2-8°C, and where I was even below 0°C with kind of first snow (called "graupel", kind of condensed snowflake).When I arrived in the yurt this afternoon, around 14:00, it was 3.7°C - and even thought it was slightly warmer inside than outside - even my LCD screen refused to start up at that temperature. So I heated the stove, to reach 13°C after 1.5 hours - and this still with summer setup (without thermal insulation). The attached room had some ice on the roof, so it reached well below 0°C the last days - and time to insulate the yurt now as I decided the first frost is the time to put up the winter setup with straw-based insulation again.
|
|
|
|
||||
| Panorama Sunset of October 15, 2007 | |||||||
8. 10. 2007: Sunny Days, Preparing New Door
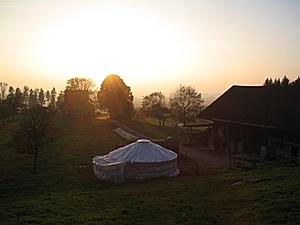  Sunset of 14th October, 2007 |
I have been working further on enhancing the door with a extended roof over the door, and extension of the left and right frame parts to cover the junction of rain cover to the door (some photos follow later).
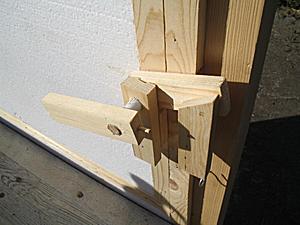
5. 10. 2007: Mild Days, Adding Locking Mechanism to Doors
The last days I spent reviewing alternative places and connected with like-minded and like-spirited people. A few places I visited was in a remote and less populated area of Switzerland, the Napf region:
|
|
|
At one location on this trip was also a yurt, made by Thomas:
6.5m diameter, heavy cotton rain cover with a 2nd light cotton cover over it, 1.70m diameter acryl skylight, and 2m high walls, lattice wall made of fir laths, the roof poles apprx. 3cm thick bamboo, and stove pipe through the roof.
|
|
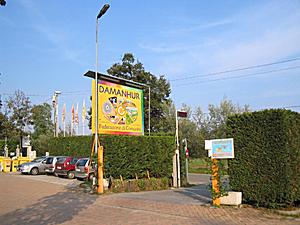
27. 9. 2007: Equinox, Fall Approaching, Visiting Damanhur (Italy)
September Equinox I spent visiting Damanhur.it  , a spiritual ecological community, for two days, and traveled with friends near Turino over Grand St. Bernard pass:
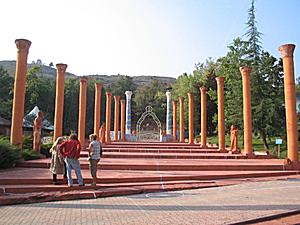
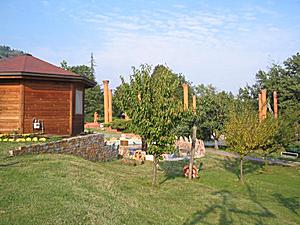
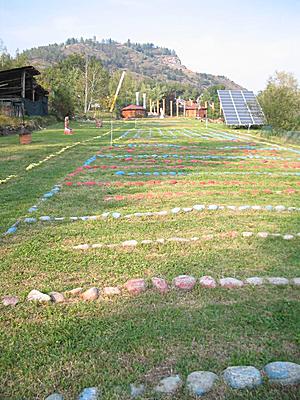
A few photos from one of the "nucleo" at Damanhur:
The bridge of old egyptian mystery school and alternative sustainable energy is shown in the photos quite well, the labyrinths are made for walking meditation and next to it some photovoltaic modules.
Upon return from the trip, the weather changed and cooled off, with rain temperature down to 10°C, and inside the yurt 12°C - this afternoon the sun briefly comes through the overcast sky and warms up the yurt to 20°C. Within the next days I will put up the straw insulation I made last year, as soon there are a dry sunny day to remove rain cover and so forth.
20. 9. 2007: Cooler & Sunny Days
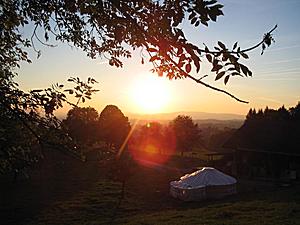  Evening of 20th September 2007 |
I'm also thinking putting up the winter insulation to ease the temperature drop after sunset.
This sunset was wonderful, soft gold light from the sun - some slight fog in the far distance softening the atmosphere.
17. 9. 2007: Fixing Skylight
Today I just fixed the skylight again, the clear tape I used to seal the junction of the cone-like form of the PVC I used. It usually lasts for 5-6 months before the tape glue is dried and looses any adhesion - a quick look in my diary here shows it lasted now over 10 months. The PVC isn't as soft as it used to be, a bit rough handling and it cracks, might be time to replace it again.
Again a couple of days of mild temperatures, 18-22°C outside, and up to 30°C inside when I keep the skylight and door closed, with door open it goes down to 24°C inside.
While looking for alternative locations for my yurt I made contact with more tipi and yurt-enthusiasts. Yet, Switzerland  is kind of small country with about 7,500,000 residents, and once you get to know a dozen of people with this kind of interest you quickly realize somehow they all know or at least heard of each other one way or another.
5. 9. 2007: Temperature Range
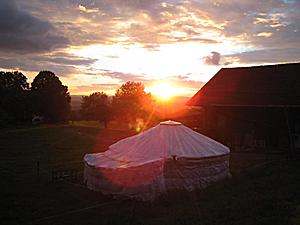  Sunset of 4th September 2007 |
I fire the stove only at night, from 20:00 for 1-2 hours only - in the morning I put on some more cloth at 8°C til the sun reaches the yurt and heats up the interior by 20°C then. It would make sense to put up the thermal insulation to keep more warmth through the night.
Compost as Heat Source
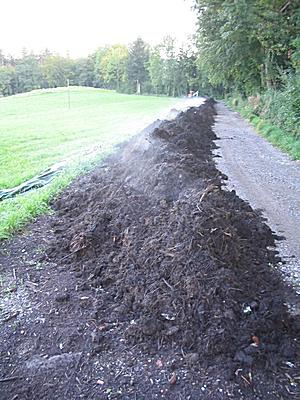
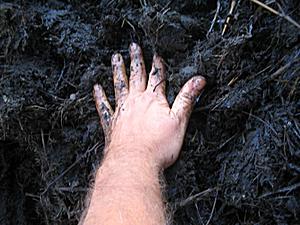
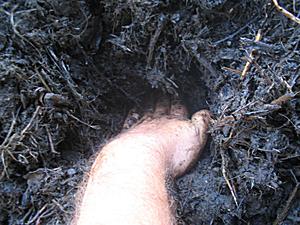
I also had a talk with the farmer a few days ago about the compost he takes from a waste deposit facility, and he piles the compost in lanes for a couple of weeks, those create heat of 70-80°C. After two weeks or so the compost drops its temperature.
So I tried it myself, approached the mildly odor giving pile of compost, and on the surface the temperature is a bit below my body temperature, the compost is surprising very wet or moist and slippery. Then I reached into the pile and at 10cm depth it goes well above 40°C, maybe 50°C as I can't keep my hand there without burning the tips of my fingers. It's incredible to realize it's so hot that you can burn yourself, and this kind of heat without a fire or electricity, but an organic decomposting process.
- Extracting Heat from Compost by RMC Green Team (Canada) (PDF)
Paper about an industrial approach extracting 40°C hot water - US-Patent 5144940: Compost water heater and method (1990/1992) (PDF)
This patent paper is interesting as it gives some background info and experiences by the inventor - US-Patent 7135332: Biomass heating system (2002/2006) (PDF)
3. 9. 2007: Attached Stove Pipe Again
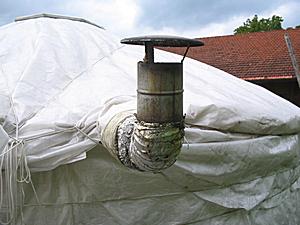  Attaching stove pipe (2) |
Also the negotiated one year to stay at the current place is approaching its end, and this means either renegotiate or find another place, let's see.
30. 8. 2007: Harvesting Bluebyrd Plums
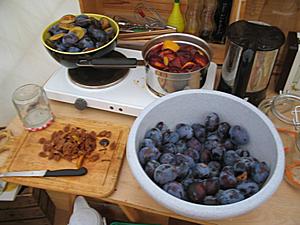  Making plum sauce and jam ... (1) |
So, I harvested apprx. 8kg plums myself, way too much to make jam from, but I also can't store them without processing them as they ripe further and then rod then. I will prepare them by remove the core/seed/stone/pit and cook and make unsweetened sauce and fill up in glasses. Finally I made half as jam and half as sauce without additional sweetener and thickener, some I blended even to make it smoother. I used a lot of water (8l) to sterilize all glases and keep everything clean - but it's worth the effort.
These are the little things which come along living in a temporary habitat, and close to nature - you are harvesting what nature provides, such as cherries, plums, and soon apples, and when it's season they come in abundance, in large quantities and require preparation to store them, e.g. for a year. Watching Neolithics of Pfyn in a row, and considering more food from the nature close by leads to build a garden, and this of course involves a longer commitment to stay at a place, which I'm pondering on now.
The last days I also noticed the first dry leafs falling from the trees, and fog in the morning - fall is approaching.
29. 8. 2007: Neolithics of Pfyn
 |
The slow pace of the life, and closeness to nature became appearant and was well captured in the coverage. The print media mocked the experiment as boring, slow and without any uniqueness - but I can't subscribe this, I rather find it odd that people cannot appreciate the different pace of living in such a setting, maybe even unable to relate and understand themselves.
Anyway, it was also from the ratings very successful, 50% market share here in Switzerland which is exceptional well, especially given it wasn't made with any silly sensationalism which otherwise seems predominant in TV productions. I personally don't watch TV anymore, not even live-streamed.
I took the time to write a little feature on this TV project, you can reach it at SimplyDifferently.org: Neolithics of Pfyn  .
.
23. 8. 2007: Radio Feature
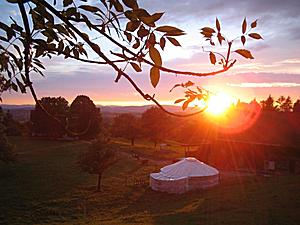  Evening of 23th August, 2007 |
Update: 2007/10/10: it took them forever to send me a copy, so finally:
|
FreiTalk: Thema 'Austeiger' (2007/08/24), 60mins (spoken in swiss german) |
If I get some spare time I may transcribe it. The feature turned out surprisingly nice, and kind of hilareous to listen myself and the jokes I made, silly.
I also just realized that SF1: Pfahlbauer von Pfyn  as ended by 20th August; a swiss-german reality documentary of two families living in a bronze age setup, one participant, Joerg Maeder, I met by chance who participated with this project a few weeks ago.
The episodes have been very successful on swiss german TV, but since I don't watch TV anymore (not even live-streamed online) I don't how how the entire project unfolded - there are daily 10-15 mins summaries available, but with my setup I haven't been able to watch them yet - I will download them and convert in order to watch.
I will later maybe cover some of this project here as well- especially when I've got chance to talk to Joerg direct.
19. 8. 2007: Mild Days & Attached Room
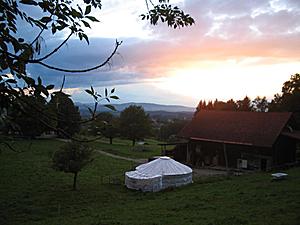  Evening of 19th August, 2007 |
The attached room does well, no strong wind or storm yet tested it, but heavy rain I had and the room was steady and the overall setup leakfree.
I also captured a few mice again, with the alive-trap I had - and dislocated them in the nearby forest.
9. 8. 2007: 2-3 Days Rain: Some Floods & Drinking Water
Apprx. 24-36 hours intense rain over a period of 2-3 days created some floods here in Switzerland (e.g. up to 100l per day per m2, which is apprx. 75% of total rainfall for month August in average), various rivers run high and a few areas are evacuated, or are not reachable anymore on the ground, and have no electricity anymore, not really dramatic but significant to see it takes just a few days of rain to create this kind of effect. Southern Germany and northern Italy are alike affected.
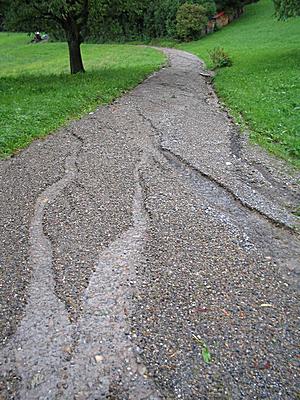 |
My newly attached room did fine, at one part I had a dent where water collected (maybe 15l), which I use now as drinking water - as due the heavy rain the water I get from the well contains surface water too, not sufficient filtered through the ground - so I prefere the rain water.
The rain water itself should be very sterile as it has been evaporated and now are clouds (removed all remaining particles), the only contamination is due the air pollution, but given I collected rain water of 2nd day (flushed the early collected water from the first day of rain) should minimalize the pollution based contamination.
With the rain it also cooled off, from 28°C temperatures down to 12°C now, and covered sky - inside the yurt now 16°C around noon.
4. 8. 2007: Attached Room
In order to create some additional space I thought to use the lattice wall of my 4m yurt and its door in order to create an attach room:
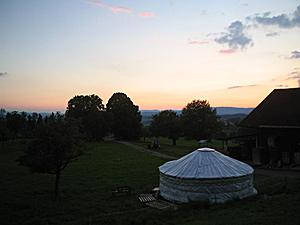  After Sunset of 30th July 2007 |
The last weeks have been mild, a few days with lot of rain again, but it cleared up again.
13. 7. 2007: Summer Back & Bamboo Treatment
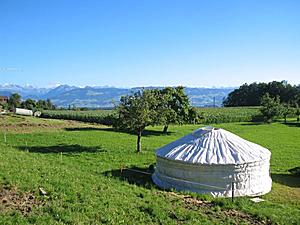  Evening of 13th July 2007 |
For the first time since I brightened the roof and wall bamboo, I had one wall bamboo crack again due the heat. Until now no additional roof bamboo has cracked which I painted more carefully than the lattice wall, harder to paint due all the spaces within the lattice grid (rather brighten the lattice lath before binding them to a wall). I may prematurely conclude already, the brightening of the bamboo minimizes the risk of the bamboo to crack, contrary to what I first was told by the whole sale garden company. The older the bamboo, the greater the risk of splitting as the bamboo get drier and thereby stiffer and less flexible to react to temperature changes like expansion and compaction, the oposite as I was told that remaining humidity within the bamboo was the reason for cracks - I don't think so now anymore.
Evening of July 14, 2007 |
I also test a piece of fleece, made of PE fabric I guess, quite robust, aprx. 2-3mm thick, it's used by the farmer for covering compost he processes (formerly "green" waste), I thought to see if I could use it as thermal insulation or wall cover. It soaks itself with water quickly, but drains it quickly too, and dries even so fast. It doesn't rot at all and catches little moss.
10. 7. 2007: Cooler Weather & Rain Again
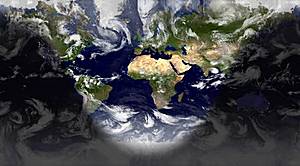  World Sunlight Map 11th July 2007 |
The door frame bottom I covered additionally with a piece of PE also does much better, much lesser water entry at the door as before. Having an extending cover for the door entry for rainy regions is highly recommended, and I may even extend mine further for the fall - this way to protect the wodden door frame further (I used water protecting finish, yet it didn't last much longer than 4-5 months).
The rain also made the ground around the yurt soaked, and I'm glad the place I put up the yurt had gravel already for quite some time which made it more solid, additionally to the gravel I put on - otherwise I would think the floor remaining as stable as it is now.
The last weeks, before it began to rain, I harvested cherries from the farmer's trees, and made jam, the same with peaches I bought, they ripe faster in the warm yurt and I didn't want them put in the plastic box in the water well, where I otherwise store food which needs to be cool. In general I cook vegetables entirely, one part to eat as meal direct, another parts I blend and mix with olive oil as salty paste and put (still hot) it into empty jam jars, to use later as cooking additives or on bread. Maybe it's getting time to collect my cooking recipes too.
The last 3-4 days I catched 4 mice with a living mouse trap, it seems the rain of the last days and week made them seek drier place, my yurt - yet, their urine and feces make co-living the same space inacceptable, sorry mice! So I dislocated each of them in the nearby forest.
30. 6. 2007: Tipi & Stone Age Enthusiast
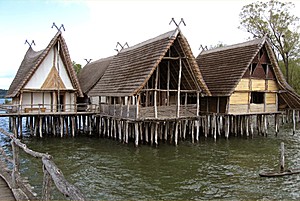  Bronze age village replication in Unteruhldingen (Germany) |
 (can be translated as "forest fun") quite a good match for this project.
I try to follow the experiment online as I don't own or watch TV anymore.
- SF.TV: SF1: Pfahlbauer von Pfyn
 , official site (incl. livecam and blog)
- Pfahbauer von Pfynn
 , scientific site
- Pfahlbauer Pfyn.ch
 , ethusiasts web-site
I showed him my yurt briefly and he was surprised how bright it was inside, and hearing that pitching up a yurt skeleton can be done in 40 mins - and another 1-2 hours to cover it for a summer setup.
One speciality of his tipis he rents out, he uses bamboo poles, 7m long, the tipi are 6m in diameter, and smoothed the bamboo knots. For long term usage it might require the top and bottom to be sealed with varnish and for the top even cover it with 100% waterpoof seal so no moisture goes into the bamboo. No long-term experience of usage of bamboo poles for a tipi as he rents them just for a couple of days and then takes them down and stores them dry.
27. 6. 2007: Cooler Weather
The last days it has cooled off, from 28°C peak to 12°C now, but with the translucent roof and wall setup (without thermal insulation) even with covered sky it warms up to nice 21°C (with closed door and closed skylight) and 28°C when the sun quickly shines directly on the yurt. After sunset and raining it drops slowly from 20°C to 16°C, and I wear a thicker sweatshirt again while sitting on the computer.
I add those notes on the weather for my own, so I can read back the summer 2005, 2006 and 2007 - it's interesting to see summer time doesn't imply hot weather at all, and a stove to heat for the evening might be nice yet for me not really necessary, as the stove is still in the yurt but I disassembled the stove pipe for cleaning.
As it was published today on various online news-sites, the climate is changing in Switzerland more drastically than in other regions of Europe, e.g. it warms up twice as fast. It has a direct impact on permafrost, and more earth avalanches due heavy rain are expected, glaciers faster melting, and less water reserves due less snow but rain falling in the alps. And so on ...
21. 6. 2007: Summer/Winter Solstice
  World Sunlight Map 22nd June 2007 |
Southern hemisphere celebrates the winter solstice, shortest daylight - at some places like Antartica no direct sunlight at all.
Somehow related, I received an electronic networking newsletter which also mentioned a solar cooking project, and I thought to consider to bake bread with it as such a cooker reaches 150°C - see SolarCooking.org  .
Definitely an option for me for spring to fall, in wintertime I doubt to be that useful unless strong sun is available and good insulated cooker.
Additionally, I cut the grass near the yurt the first time this year, as snails came into the yurt when it started to rain heavy, as some grass has grown into the yurt beneath the rain cover - so something to pay attention too.
19. 6. 2007: Summer Time
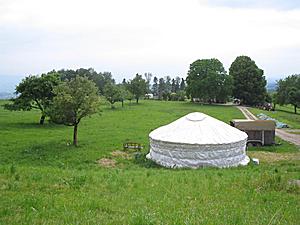  Yurt in June 2007 |
I also resolved the refrigerator issue by placing the plastic box where all to cold kept things like salad, margarine, soy yoghurt etc into the small well near the yurt, filled it with a 5cm water itself so it swims a bit deeper. I might have thought of this better by having digged a hole beneath the wooden palettes below of my yurt floor to have a natural earth-based refrigerator (e.g. where you can reach as low as 12°C), but with the well nearby where the water is around 10°C steadily this is also a way. Anyway, next site I go I dig a small hole before I do the floor of the yurt, and have easy access to it.
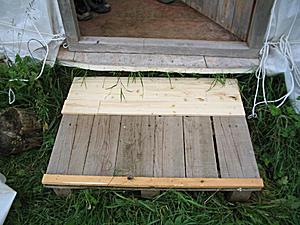
One smaller pallete (so called one-way pallete) I used as single stair to enter the yurt, due the frequent rain and sunshine or wet & dry periods within a day, got weak and one lath broke, and need to strengthen with more and additional laths - it lasted now through entire winter til mid of summer without special preparation.
Additionally I covered the low bar of the door frame and the extending floor beneath.
Raining on the Yurt |
This brief video, in particular the sound, gives you an idea of rain on a yurt with PE rain cover and no thermal (and sound therefore) insulation, the PE cover operates like a membrane. With thermal insulation, as I had through the winter time, the sound is absorbed and much more silent inside the yurt during heavy rain.
25. 5. 2007: Vacant Yurt
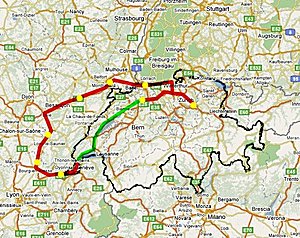  Recumbent Trip through Switzerland and East of France (May 2007) |
The yurt was closed: fixed skylight and closed door - without thermal insulation the yurt heated up to 45°C as I entered, after opening the skylight and leaving the door open it dropped to 38°C still with direct sunlight, outside temperature aprx. 28°C. I made sure nothing easy flameable remained (gasoline for cooker or matches) - since I didn't know how hot it could get while I'm away.
It's 20:00 and still 33°C inside, and 28°C outside the yurt - summer has arrived (again). I'm gonna take a shower with the douche bag I have - this time cold water prefered.
Later I tried my first pan pizza, by simply preparing the pizza (yeast based dough) in a frying pan before putting on the stove, and then flipping it to bake it on both sides - and it worked to my surprise. My oven doesn't provide baking - and right now I have only electric stove with two plates, and one thing I miss living in the yurt: baking. Baking flat bread in the pan or even on top of the wood stove worked too, but pizza is the first time I tried.
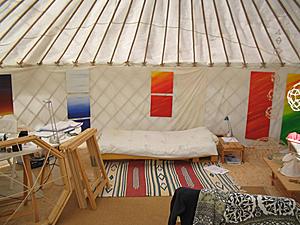
16. 5. 2007: Chilly Morning
 |
It would be nice to have a thermal buffer which balances the extremes a bit, which thermal insulation does, but I like to maintain the translucent roof and walls, so looking for transparent thermal insulation, multiple layers of bubblewrap I used before might do it, yet, it isn't UV stable, and gets porous after a summer season such as exposed on the roof.
6. 5. 2007: Raining
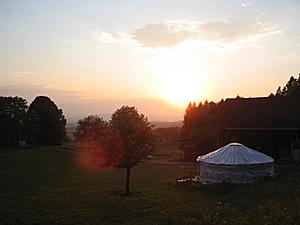  Sunset of 6th May 2007 |
The moment the sun comes through just a bit, even still raining, the temperature rises above 20°C within 30mins.
Also some stronger winds up to 80-100km/h have been coming, and the removal of the straw insulation makes the yurt now very light and lacking inertia.
2. 5. 2007: Summer Setup & Rain after Weeks
Since I removed the winter insulation the temperature drops are fast after sunset, and midnight unusual low 15°C already - something to get used to again. April 2007 has been 5°C above average temperature since 1870's - and almost no rain except a few drops, it will be interesting how the summer will become.
Tonight we seem to get the first rain after weeks but just 1 hours long - good for the land and farmers. Like before, I used the old PE rain cover below the newer one I've got in fall 2006 - let's see if both seal the rain 100%, the PE gets brittle after a year and small holes leak rain. Anyway, I still use PE as rain cover because it's rather cheap and very light (150g/m2), and therefore easy to handle by one person.
1. 5. 2007: Yurt Raised Again
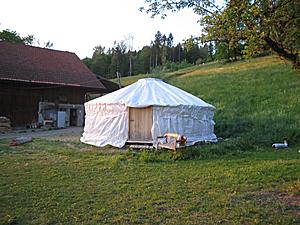  Yurt pitched up again ... |
I gonna miss the dome, it provided a larger or grander space, of course due the spherical shape it's numerically provides more volume, and it makes quite a difference, whether ~2.75m (yurt) or 3.20m height (dome), just 50cm higher but an immense difference as the roof is spherical and not cone-like as the yurt.
Anyway, I'm back in the yurt.
For comparison:
- Dome: takes 4-5 hours to pitch up the skeleton (1 person, to move skeleton at least 3 persons), apprx. 2-3 hours to disassemble
- Yurt: takes 1 hour to pitch up the skeleton (1 person, for larger yurts 2 persons when putting the crown up), 20 minutes to take down
29. 4. 2007: Fixing Door and Crown-Wheel
I likely will put up the yurt within next 1-2 days again as the dome isn't as stable as desired.
Having taken down the yurt allowed me also to fix the door (the door itself got loose a bit, enough to jam it when closing) and the crown-wheel, which was under much stress as the main rope pulled the circle in a slight oval (hardly noticeable) and tilt the wheel, which usually isn't a problem but with the winter insulation with straw that tension had 100kg weight now - fixing that too and strengthening the wheel further (octagon with segments).
28. 4. 2007: Yurt Taken Down - Dome Raised
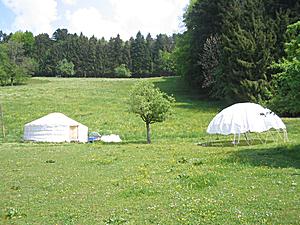  Yurt & Dome |
This ends the 1 1/2 years non-stop living in the yurt.
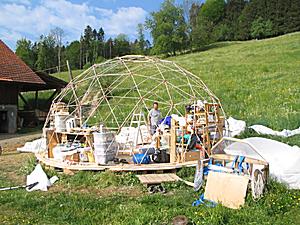
I'm in a geodesic dome now from today, read more at Geodesic Dome Diary. I plan to stay in the dome at least a couple of weeks, depending on my experience I will switch back to the yurt again.
17. 4. 2007: Some Impressions of an Early Summer
These days are wonderful over here - all is blooming, mild or even warm winds during the day.
14. 4. 2007: Premature Summer
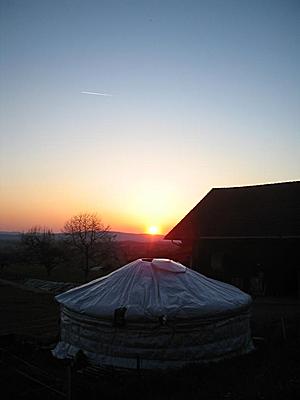  Sunset of 14th April 2007 |
The usual "April" weather over here is unsteady (like sun and rain changing during the day) - but this year it's like summer time already, and inside the yurt up to 30°C (with closed door but open skylight), with both opened (door & skylight) the temperature doesn't rise above 28°C as a nice draft enters the yurt by the door and rises up through the opened skylight.
The nights have been at midnight at 20°C outside - incredible.
7. 4. 2007: Easter Weekend
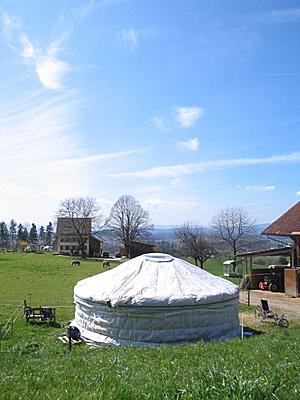  Easter Weekend (7th April 2007) |
Easter: first weekend after the full moon in spring (or fall for southern hemisphere), quite a pagan way to calculate a christian day, isn't it?
It's a complete denial over here in Europe (maybe elsewhere too), the symbols of rabbit, eggs etc, all pagan symbols of fertility, and then an ascended saint of Jesus - a packed celebration, a mixture of symbols - pagans and christians united finally? Or never separated but not aware of it? Anyway.
27. 3. 2007: Getting Warmer
The 40cm snow are melting away during these days, up to 12°C in the shade, strong sun - and the yurt heats up to 26°C so I open the door. The skylight is still fastened, but it's getting time to open to cool off the yurt during the day. It's 19:00 and warm 24°C inside the yurt, let's see how long the heat now lasts, around 22:00 still 19.2°C, outside maybe 4-5°C.
Until now I had four cords to fasten the skylight on the crown-wheel, but I like to have a simple mechanism to open and close the skylight without using a ladder as I do it now - so pondering on a simple but reliable mechanism.
21. 3. 2007: Spring Equinox
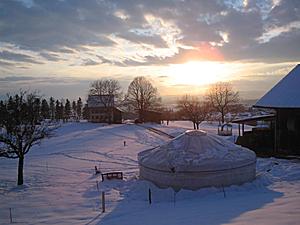  Spring Equinox 2007 |
As you maybe noticed, I really love sunsets like this one . . .
On the photo you see some snow still "hanging" on the roof, due the ropes/cords
(which I otherwise used to fasten the yurt for previous storms as mentioned before)
which prevent easy sliding - otherwise with PE as rain- or snow-cover snow just slides down, which is really is a nice feature and I recommend for snowy regions, because otherwise you have to clean the snow from the roof regularly (e.g. in the midst of the night) when it snows to prevent too much snow and thereby weight piling up - of course it depends what kind of snow, either cold, fluffy and dry snow isn't heavy, but snow like in spring we have here, is warmer, wet and therefore heavy.
19. 3. 2007: Winter is Back . . .
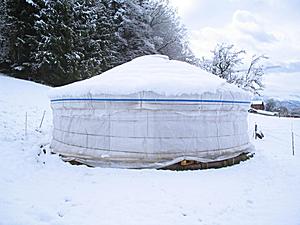  Winter is Back - 19th March 2007 |
At 20:00 more snowing, heavy wet snow - at midnight push some from the roof from the inside as it's just 10cm high but heavy and bending the roof bamboo poles significantly.
It's now more obvious the 110kg of the roof thermal insulation plus the heavy snow to make ~10-15cm dent of the 2.88m long roof poles, by flattening them at the dent the snow doesn't slide as easy anymore. Additionally the cords I used to fasten the roof because of storms in January also hinders the slide of snow.
16. 3. 2007: Spring Approaching & Planning Yurt/Dome Swap
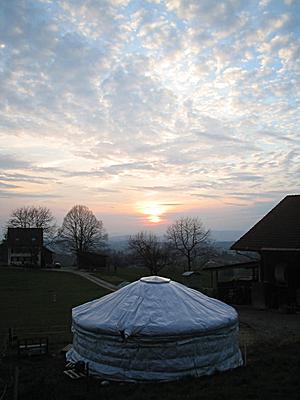  Sunset of 17th March 2007 |
Today I raise the geodesic dome skeleton for the first time, and see if the diameter is the 6.328m as calculated.
The next week colder weather is expected, maybe even snow again - once this cold-front has passed I will plan the swap of the yurt and geodesic dome:
- taking down the yurt, leaving the interior and floor intact
- raising geodesic dome aside, and move the complete skeleton over the interior and on existing floor
- putting interior cotton from the yurt on the dome, then part of the thermal insulation, and then the rain cover
19. 2. 2007: Mild Days
The last days the temperature during day around 10-12°C, inside the yurt it heated up to 24°C. I'm riding the bike with shorts and t-shirt. Until now through this winter I only used 0.82 of a ster or apprx. 0.54m3 of wood (1 ster equals 0.66m3 wood).
14. 2. 2007: Working in the Yurt
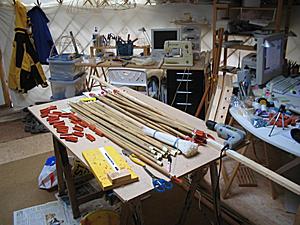  Working on a geodesic dome in the yurt |
It's certainly nice to work in heated workspace, but I won't work with heavy duty machines like the table saw which create lots of dust. So I'm pondering how to resolve this in the long term, e.g. finishing another 6.4m or larger 8.4m yurt to have more space for everything and then also do the shower which I have postponed since I have no space left for it.
I expect to finish the 4V geodesic dome skeleton this week, but will put it up when there are a few dry days.
9. 2. 2007: Warm Day & Mouse Caught
Today warm day around 10°C outside at almost cloudless sunshine, inside it warmed up to 22°C around 16:00 - so it's the first day I didn't heat the stove in this year while I stayed the whole day in the yurt, 22:00 it was 14°C.
Tonight also the mouse got cought in the trap, and I dislocated it this morning to a distant forest - it started not just going through my straw insulation, but also nagged on fruits and food boxes - so I lent out a "alive trap" (a trap which doesn't kill the mouse). There is surely a way to seal up a yurt against mice (e.g. use fine grided fence to seal rain cover to floor junction), but I would suspect it would be quite an overhead and a mouse trap seems an easier or simpler solution, for me at least at this point.
31. 1. 2007: Warmest January Recorded
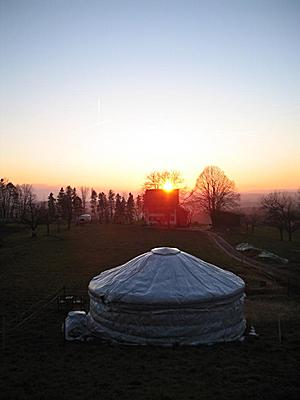  Sunset of 4th February 2007 |
The snow from last week is almost gone again.
Temperatures in the yurt, without heating the yurt for 36 hours cools down to 0°C at midnight, when there is -8°C outside. I assume with the series of recorded temperature I have enough samples to calculate now the R of my straw-based insulation.
24. 1. 2007: Winter Arrived Finally
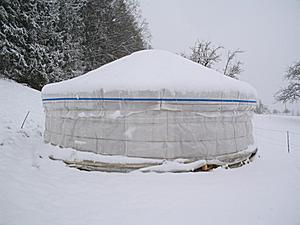  Winter 2006/2007 Arrived |
I came back late night yesterday night, 4°C and heated with the stove to 15°C around 02:00, and 12:00 next day 4°C again whereas -4°C outside.
18. 1. 2007: Another Stronger Storm, Still Mild & Mouse
Storm
  Storm "Kyrill" next morning |
Arround 20:00 strong gusts, maybe 100km/h - with the additional ropes the roof hardly shakes, skylight doesn't move anymore so no wind enters the yurt anymore; I started to heat the stove again (with winds from NE and strong gusts it's possible the smoke pushed back into the stove into the yurt but since the storm isn't as strong as expected I start the stove again); it seems to hit Germany more strong than here in Switzerland.
During the night the winds got stronger, and peaked around 03:00 in the morning, and around 06:00 the winds get stronger again and more gusts wobbling the roof; hardly got any sleep. At 08:00 now the temperature is at 12°C, and the winds are still steady but slowly soothing.
Anyway, the storm wasn't as strong as predicted here in Switzerland by wheather forecast, faster winds yet lesser strong gusts, but Germany was affected more serious. The straw insulation added inertia and so the roof did not wobble as strong as I had with my summer setup. With the 4 or 5 ropes I used to fasten the roof the yurt can withstand easily a strong storm, important is that the ropes tie down the roof canvas so the wind cannot lift it up (as the yurt roof operates like a wing of an airplane).
 |
The temperatures the last week have been 3-5°C at night, and 8-10°C at day - since I was away during daylight, and only slept in the yurt I didn't heat the yurt, and still 10-12°C at 21:00 or 00:00 when I came home, apprx. 5-8°C warmer than outside.
Mouse
One mouse found the way into my straw insulation, and climed through the wall, and reached to roof as well. It sounded like eating some of the corn in the straw - there isn't much but still attractive for the mouse. I'm not really fond of scaring it away, but the faeces and urine of the mouse in the insulation isn't what I want.
I'm very pleased otherwise with the straw insulation and plan to keep the insulation for the next winter season as well, and actually extend it further.
12. 1. 2007: Strong Storm
  Earth Live  (2007/14/01) (2007/14/01) |
I also found a live shot on Earth, the sunlight and shadow on Earth is calculated, mapped on a cloudless Earth (day & night) and then the clouds are merged from real satellite pictures, updated every hour - see the World Sunlight Map  .
.
9. 1. 2007: Mild Days
| Time | Inside | Outside | Heat Source |
| 16:00 | 22°C | 10°C | stove |
| 21:00 | 18°C | 7°C | - |
| 06:00 | 13°C | 5°C | - |
| 12:00 | - | - | covered sky |
| 23:00 | 12.5°C | 8°C | - |
| 08:00 | 10.7°C | 3°C | - |
Once in a while I write down all the temperatures, and with 2-3 more series I will be able to calculate the insulation factor of my current setup.
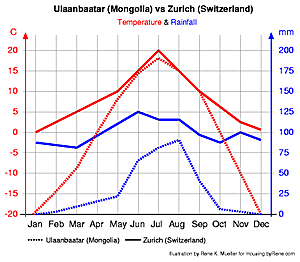  Climate Comparison Mongolia vs Switzerland |
 and drawn this chart.
Interestingly the temperature range of Ulaanbaatar is quite extreme, from -20°C to 20°C average in a year, between May and September the temperatures are similiar. Looking at average rainfall it becomes obvious how dry it is in Mongolia compared to Switzerland (or general Central Europe).
2. 1. 2007: Interior Photos & Water/Wood Usage
Some photos of the interior:
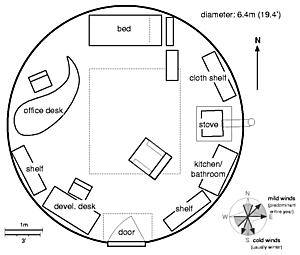  Yurt Interior Layout (2006/2007) |
The kitchen/bathroom combo is mainly a table, with electric stove, water cooker and two bowls, one to wash dishes, another to wash myself (bathroom). Below the table a box with hoards (pasta, rice etc food which has to be dry but isn't that temperature sensitive). A shelf with bathroom utilities, dishes and food. The food which requires to be cool I have in a plastic box outside, and leave outside as long it's above 0°C - and take it into the yurt when it gets colder than that. That's in short what has changed with the setup recently.
Since the main water access nearby with the sink had to be shut down due freeze, I solely use now the spring water. I use apprx. 6l water (4x 1.5l bottles) per day, apprx. 3l to cook, clean dishes and wash myself, the other 3l for drinking. I can use the washing machine of the neighbour, so the total water usage I can't say - I wash cloths 2-3 times a month, gonna look up the water usage of the machine - just curious about average water usage living like this.
Wood Usage
Since mid of November til now I used 8 boxes of wood (17 boxes = 1m3 = 1 ster) apprx. 0.5m3 for 6 weeks to heat the stove and the yurt thereby. This usage of wood is partially due the mild winter until now, and also the new straw-based insulation I have for this winter. The coming weeks with lower temperatures (e.g. below -10°C) will show how good the insulation does.
Here a few numbers I found (3.6 MJ = 1 kWh):
| Oil (l) | Gas (l) | Electricity (kWh) | Wood (Hard) (m3) | Wood (Soft) (m3) | Pellets (kg,m3) | Chipped Wood (Hard) (m3) | Chipped Wood (Soft) (m3) |
| 1000 | 1085 | 10080 | 4.9 | 6.8 | 2060, 3.2 | 13.2 | 16.1 |
Efficiency: Oil/Gas = 94%, Wood = 87%.
- 1m3 Wood (Hard) = 204 l Oil = 222 l Gas
- 1m3 Wood (Soft) = 147 l Oil, = 159 l Gas
- 1m3 Wood (Hard) dry = 520 kg = 2000 - 2300 kWh = 7200 - 8300 MJ
- 1m3 Wood (Soft) dry = 370 kg = 1445 - 1780 kWh = 5200 - 6400 MJ
 : Holzkennzahlen
  (PDF)
(PDF)Of course it needs to be noted, using a stove and fireing with wood is even less efficient, the first 20-30min 80% of the heat leaves the stove through the pipe outside, only when the pipe can be closed (75%), and the smoke and air draft soothes, and majority of the heat radiation remains in the stove, then the efficiency is getting better. So, I would guess at least 25% of efficency is sacrified using a stove with wood.
Baking Bread on a Stove
I also tried to bake a small bread on the stove (unfortunately the stove is otherwise not suitable for baking), prepared a small dough (flour, salt, yeast), and let it rest for over an hour, and formed a longer apprx. 1-2cm thick bred, laid it on the stove direct - and after 10-15min I turned it until both sides where brown - so, it's possible to make a small bread this way, maybe in a (frying) pan even.
Of course a real stove with an oven to bake would be much better, or even making a stone-oven outside of the yurt, e.g. into the ground or an earth oven.
- Building Earth Oven
 , detailed how-to with photos
- Mother Earth News: Wood Fired Earth Oven
 , good description, click on "Image Gallery" to get illustrations or "print this article" there
- Greg's Earth Oven
 , nice overview and how-to with photos
31. 12. 2006: Visiting Chris Aeppli & His Yurt
Via my yurt neighbour I've got to know Chris Aeppli (DeepMongolia.com  ) who lives in his 7.5m diamater yurt near Winterthur (Switzerland):
- 7.5m diameter, 1.80m wall height, and
- thermal insulated with large hempmats (apprx. 2m x 3m) 4.5cm thick,
- a strong/heavy polyester/cotton mixture as rain cover, and
- on top a cotton layer to protect the rain cover
- floor with wood planks, 6cm thick glas-wool in a grid, and leveled apprx. 1m of slope using a wood construction.
As you can see his outer cotton cover catched moos along the north side of the yurt, on the southern (sun) side there is none.
He used a multi-layered crown-wheel, and round wodden bars at the ends with steel pin which enters the crown-wheel. The lattice wall is made of 3 layered wood, sawn into laths, fixated with bolts. As skylight an acrylic 1/3 sphere. If time permits I will make a brief interview with him and publish it in the yurt-section.
Update 7. 1. 2007: a dedicated page with Chris Aeppli's yurt construction and a brief interview.
26. 12. 2006: Winter/Summer Solstice & Humidity
  Winter Solstice 2006 |
21./22. 12. winter solstice (or summer solstice for southern hemisphere) - fired a "finnish candle" to celebrate this day and night.
Humidity
The last weeks I noticed humidity within the straw, at the outer overlapping region where the roof overlaps the wall, where the humidity actually condensates - so, the water drops undernead the rain cover, on the wall. Some humidity consensates higher on the roof, apprx. 20-30cm up to the roof from the wall, and does collect 10cm away from the wall, and drops through the straw on the interior cotton. When I hang up wet cloth to dry the next day that region I hung up the cloths I had water drops along the interior cotton. So, I'm thinking using humidity passing foil, and let humidity intentionally condensate and let the water flow between that foil and rain cover over the outer wall rain cover then.
More Experiences with Heating
Outside -1°C morning and noon, getting up fire the stove for 2 hours, to apprx. 18°C, and then let it last for a couple of hours, drops 1°C per hour, down to apprx. 10°C when I fire the stove again for the evening. Just sitting, e.g. on the computer makes one feel 15°C as fresh, whereas little physical activity makes it feel warm - so it's essential to keep doing physical things as well, otherwise it doesn't make sense to fire the stove all day long to keep the temperate above 20°C. At -5°C I require to fire the stove constantly and moderately to keep ~24°C steady, which is non-sense (way too hot for my personal taste), but a value for the new insulation. I usually have the temperature between 12°C and 18°C when I work on the desk, which I experience as comfortable.
I also got better in handling of the stove, apprx. 20-30 mins to heat up the stove, before actually closing the pipe, actually 3/4 closed, and keep the heat raising above the stove and ventilated around in the yurt with the fan. I'm also thinking using a "swedish stove" where you see the fire, and little or no stones which store the heat in the stove. Let's see.
14. 12. 2006: Skeleton of Travel Yurt Finished
I finished today the skeleton of the travel yurt, essentially drilling holes into the crown-wheel, using a small tool to drill holes with the correct inclination (28°) and angle (since I use a polygon form for the crown-wheel this matters), using two cords to mark the center and directing the tool to the center:
As next I wanted to quickly test the yurt setup, I used just a piece of timber placed where the doorframe would be; and used a tripod in order to have the crown-wheel high enough so I could erect the yurt myself:
Since I drilled the hole with 20mm and majority of roof poles are 15-18mm (narrow ends), there is too much space and the crown-wheel twists too much as you can see below. The solution is to use some tape and increase the diameter of the roof poles just at the ends where they enter the crown-wheel, to have only 1mm spacing (increasing diameter to 19mm). Otherwise the yurt works very well, very light, and the lattice wall is one section, 37 junctions, compressed about 80-95cm wide only, extended apprx. 11.5m wide.
Some more impressions at 10°C and cloudless sky:
10. 12. 2006: First Snow
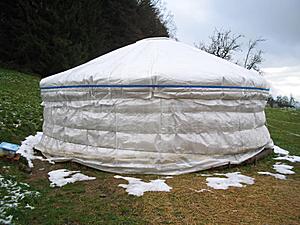  A bit of snow left the next morning (2) |
A couple of days ago I also finished the lattice wall for the travel yurt, things still to do:
- drill holes into the crown-wheel, 40 holes, ~28° angle, 18-20mm diameter
- interior cotton (1.5m wide: roof: 4.5m + 4.8m + 4.7m + 2.5m, wall: 12m x 1.5m)
- rain cover (roof: 5m x 5m, wall: 12m x 1.5-2m)
1. 12. 2006: Building Another Yurt: 4 Meter Travel Yurt
The two 6.4m yurts (64 poles), the 8.45m (84 poles) yurt and the 9.45m (92 poles) yurt I postponed til spring time (crown-wheel, skylight-frame and doors done for all), but I thought to do at least a small lightweight yurt, which I can use when I travel and optionally also as small workspace.
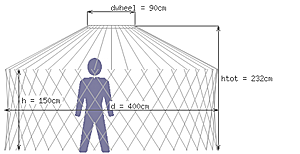  Travel Yurt (4m) |
- diameter 4.0m
- circumference 12.5m
- ground area 12.56m2
- 40 roof poles (1.82m long)
- 8-segment crown-wheel 0.9m diameter (6cm thick)
- wall height 1.5m (using 1.82m lattice wall laths at 68° crossed)
- roof angle 28°
- door frame: 1.0m x 1.5m (3 poles wide)
- lattice wall: 7 holes/junctions 28cm apart, 14cm left (2x 7cm)
- junctions of the 182cm lath: 7cm, 35cm, 63cm, 91cm, 119cm, 147cm, 175cm
- 2 sections: 18 1/2 junctions + 18 1/2 junctions + 3 poles on door = 40 poles
I use 1.82m long bamboo poles (1.5-1.7cm the thicker ends) for roof and lattice wall, one pole weights (80kg / 250) = 0.3kg. Total poles: 40 (roof) + 37 * 2 = 114 * 0.3kg = 34kg weight of the skeleton (without door). I will use a PE rain cover with an cotton interior canvas, a simplistic setup.
While doing the crown-wheel in the evening, the next morning I noticed the glue did not dry at all - with the fog and temperatures around 2-3°C it couldn't dry at all. So, I have to take the crown-wheel into my yurt, take it apart again, saw the junctions again, and glue again (crown-wheel, collar and skylight frame), and maybe even the rest of the yurt construction too such as binding the lattice wall and preparing the roof poles as the night we had fog, and under the shelter where I work it was wet too, not good for the bamboo.
26. 11. 2006: First Experience with New Thermal Insulation
| Time | Inside | Outside | Heat Source |
| 12:00 | 15°C | 10°C (shade) | Sun |
| 15:00 | 20°C | 10°C (shade) | Sun |
| 18:00 | 18°C | 5°C | - |
| 19:00 | 17°C | 5°C | - |
| 20:00 | 24°C | 5°C | Stove |
| 6:00 | 12°C | 1°C | - |
| 9:30 | 11°C | 2°C | - |
| 11:30 | 14°C | 6°C (shade) | Sun |
Here a few more photos around sunset:
Yurt for Winter 2006/2007 |
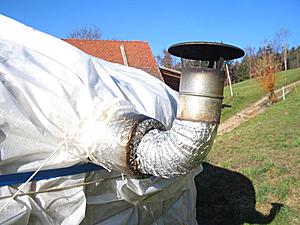  Pipe ending |
Once I cleaned up the interior a photo series will follow also showing the details of the rope and tension ribbons.
Next Plans
I realized, as you may have noticed on some of the photos, that the PE rain cover almost comes horizontal under the clear skylight, which means with wind rain water could leak into the yurt. Therefore I consider to heighten the collar of the crown-wheel additionally so the PE rain cover has to go a bit higher again and that slope prevents then rain coming in - this because the straw filled segments used up all space I planned for the insulation.
Now that I'm almost done with the winter setup I can focus now for the interior, where I like to make a shower using a "camp-shower" I've got, as mentioned before, a black bag simply which holds 20l water, but I think one can shower easily with 3l without washing hair, or 4-5l with washing hair (I use apprx. 1.0 to 1.5l to wash or shampoo my hair). When one ponders that statistically 125 to 150l water is used per person per day in Europe, e.g. water-based toilette takes 8l per flush or 70l for 5min shower etc, there are other ways to use water, more conscious I would say. I have noticed the obvious myself, if you don't have running water in the building then you are using water much more careful, one becomes very appreciative of it - to many things actually as a consequence, not just water.
Heat Storage
I also pondered about another way to store heat, especially since I have a small stove, and after the fire is out the temperature used to drop quickly back then when thermal insulation wasn't as good, but now I have with straw based blankets on the wall and roof, which shows significant better heat storage already as mentioned above, but I still ponder on additional options.
One additional solution could be a bag or canister to keep 50 or 100l water, behind the stove, and store and release the heat more slowly. The advantage is obvious, the canister could be light and easy to transport without water. The stones used in the stove to carry the heat are heavy, and a water-based heat storage and release facility would be much better for nomadic living.
25. 11. 2006: Roof Thermal Insulation Put Up
Today again an incredible warm day for November, 18°C with föhn, walking in shorts and t-shirt - ideal weather, lightly overcast sky.The bubblewrap layer I wanted to keep for protecting the new PE rain cover I ordered and got, but the föhn, a warm wind from the south, teared it my lanes I taped before apart again, so I put up the straw filled segments direct on the interior cotton, knowing dust will go through the cotton and later at the evening it was confirmed on my desk, slight dark dust. I will see if there will be more the next days, anyway.
Due to heavy or strong quilting I did the width of the segments were more narrow than calculated, and so I put up all 13 segments, and still apprx. less than 1/4 uncovered, the bubble-wrap layer in lanes I patched together again and cover the remaining roof, it will function as pseudo-window, just bringing the daylight into the yurt. Since this evening is very mild, still 15°C outside and inside I can't tell how good the straw-based insulation actually is, the next weeks will tell.
Ready for the Winter
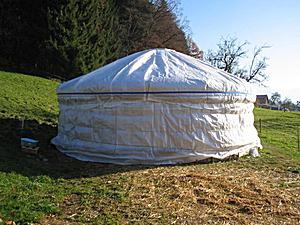  Finished straw insulation with new PE rain cover |
So the current roof setup is:
- PE rain cover (new) (top)
- PE rain cover (old), to protect new rain cover from straw
- straw filled jute segments, apprx. 10-15cm thick
- interior cotton
The PE functions as 100% water resistance (for apprx. 12 months before little holes appear due to UV and therefore porousity), also functions as 100% humidity blockage - all humidity either goes into the straw (which will eventually make the straw insulation unuseable) or leaves the yurt at the skylight or opened door. In other words, this setup requires air circulation from inside to outside and vice-versa - so far this happened by itself as the yurt isn't 100% air tight, openings are at the skylight and around door, and I will look where I make those openings air tight and make a more controlled air holes (e.g. near bed and stove).
17. - 20. 11. 2006: Mild Days in November, Finished Roof Segments
Sunny days, and temperatures up to 20°C with the support of föhn - still hand sewing the jute blankets for the roof, 12 or 13 of them.
Finally finished them, took 1.5 to 2 hours per segment; for the wall I used 5 strawbales, and for the roof 7 strawbales, each strawbale 17kg, which makes apprx. 110kg just on the roof, 85kg on the wall, total 195kg. This goes away from the threshold when snow remains on the roof, which with a steeper roof shouldn't be much anymore when using PE as rain cover where snow slides very well. I haven't thought so much about the additional weight, but now it seems far more than I expected - so, I going to add more stabilization as
- tighten existing rope where the straw filled jute blankets hang
- use strong ribbon to tighten roof/wall junction further
and then I put up the new roof insulation, and finally when the rain cover goes over it I use an additional strong ribbon outside to strengthen that part further.
Since I used flexible binders for the lattice wall junction, except the top junction which I bind with cords - we will see (!!) if the lattice wall is able to carry 200kg plus some snow. Each roof segment is 8.5kg (1/2 strawbale), laying on 5 roof poles (1.71kg per pole) - or 200kg (roof + wall insulation) on 64 twin lattice wall laths, which makes 3.125kg per twins, yet the wall blankets partially distribute the weight among the lattice wall, so not full weight is pulling on the lattice wall top junctions.
To sum up:
- wall: 5 blankets: 3.2m x 1.8m filled with 1 strawbale (17kg)
- roof: 13 segment blankets: 3.2m x (0.3m - 1.6m) filled with 1/2 strawbale (8.5kg)
- costs: straw filled jute blankets: 0.80 €/m2 (10-20 min per m2 work though)
I gonna replace the PE rain cover, as it has too many tiny leaks and the bubblewrap collects underneath too much water. Once the weather allows it I will put up the roof segments and replace the rain cover as well. So the setup of the roof will look like this:
- rain cover PE (top)
- double layered bubblewrap (to protect PE cover from the straw blanket)
- straw filled jute segment blankets
- double layered bubblewrap (to keep straw dust from falling on or even through wide woven interior cotton)
- interior cotton (wide woven, apprx. 0.2-0.3mm)
11. 11. 2006: Working on Roof Straw Filled Jute Blankets
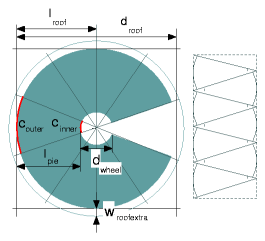 Pieslice Approach |
lroof - dwheel/2 = lpole = lpie = 2.88m, but I have apprx. 3-4cm extending roof pole, and the wall thermal insulation hangs a bit, so I make it 3.20m to be on the safe side. I have jute 100m x 1.8m wide again.
I have to do 12 or 13 of those slices:
- d = 6.4m, c = 20.1m (adding some overlapping makes 21m)
- 21m / 1.6m (wider end width of slice when filled with straw) = 13.12 slices, we make it 13
and
- dwheel = 1.22m (outer), cwheel = 3.83m
- 3.83m / 13 = 30cm (narrow end width of slice when filled with straw)
As I previously experienced, with 10cm thickness width and height require additional 20cm, so the slice has following dimension:
- unfilled: 340cm x (50cm - 180cm)
- filled: 320cm x (30cm - 160cm)
Some numbers which may help you as well, in case you consider this approach as well:
- one strawbale 100cm x 46cm x 35cm = 0.161m3 or ~ 1/6m3 compact, has 12 slices composing the entire bale
- the pieslice
- unfilled: 50cm - 180cm wide, 340-345cm long
- filled (half bale or 6 slices or 0.08m3 or 1/12m3), apprx. 10cm thick and quilted: 30cm - 160cm wide x 320cm length
- horizontally quilted each 20-35cm to prevent vertical slide of straw, will finally lie with roof angle, in my case ~27-28°
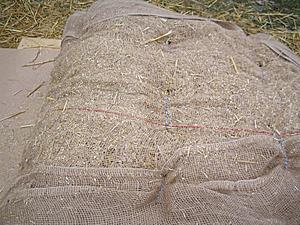  Bottom of blanket, smaller straw parts |
I could only finish two slices for today, as it started to rain around noon and I had to stop working on them. I hope during the week I get chance to work further and finish all by next weekend if all goes well. But I also still enjoy the bright interior of the yurt as PE and light interior roof cotton canvas I use keep it daylight bright inside, and when putting up the thick thermal insulation will make it darker, how much I will see.
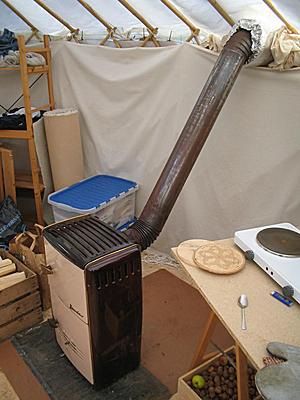 |
I finished the pipe installation and slightly changed the setup, now the pipe goes 45° from the stove up to the roof/wall junction, and then horizontally outside. I insulated the pipe at the wall/roof junction with one layer of glass wool (2cm thick, 100cm x 80cm), and wrapped it around apprx. 2-3 times, then used thin wire to fixate it, and then wrapped aluminium or tin foil around it, and then taped it with clear tape.
The day before yesterday I did a small fire with some saw leftovers, but tonight I used "regular" stove wood from the farmer to heat the yurt despite not being finished with thermal insulation. It's nice!
4. 11. 2006: Continuing Straw Blankets, Finishing Wall
Another wonderful day, clear sky - the night was again below 0°C but with the sun it warms up quickly again inside and outside in the sun it feels much warmer - a good day to work outside.
I made the blankets a bit more than 3m each, total 5 blankets required for the remaining 15m wall circumference. Once I'm done the 4 blankets I measure the required remaining wall piece/blanket. Finally made the 5th blanket, also a bit over 3m again, and overlap all blankets 5-10cm. I used some garden fixation binders, very useful.
Addtionally I used 4 cords to tie them all around at different heights to increase stability of the straw blankets.
Finally I added some leftover bubblewrap to most of the wall, before I added the wall rain cover preliminary again, as tomorrow I likely have to take the wall rain cover down again when I put up thermal insulation on the roof. The next days I do the roof thermal insulation, also with straw filled jute blanket in shape of a pieslice.
3. 11. 2006: First Snow Flakes, Straw Filled Blankets
Straw Filled Blankets
I'm doing my first jute blanket filled with open straw:
- preparing myself a handmade wodden needle to sew with 2mm cord
- sew two sides, one side is folded, one side remains open (340cm x 180cm)
- hang up "bag", and fill with open straw, for now one bale of straw (100cm x 46cm x 35cm), closing bag by sewing last side
- lay on the ground and distribute straw evenly as possible (320cm x 160cm)
- start to sew lanes (lengthwise compartments), 4 lines per 160cm width (each apprx.35cm) as I don't really need horizontal compartments since I hang the blankets, only vertical move prevention.
As a brief preliminary summary: 1 strawbale (100cm x 46cm x 35cm = 0.161m3) opened gives 10cm thickness of 5.28m2 (flat from 6.3m2), width and height decrease of apprx. 20cm. I intentionally did 160cm height (extra 10cm) to my 150cm wall height, to have some left-over. More details I will add once the blankets truly work (hanging) and include the data in the Yurt Notes then as well.
First Snow Flakes
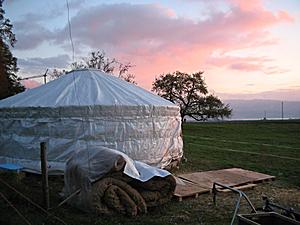 |
First Kitchen Experience
A brief update on the kitchen, I still need to cut a large plank for a kitchen table, for now I use a smaller pressed board without water resistant surface (really preliminary). I found a microfiber cloth, which helped me to clean my dishes without any soap, I heat 1/2l water, and pour into a bowl and use the microfiber cloth to clean dishes and pots even when they are oily like when I cooked with oliveoil - it's easy way to clean dishes this way. Since I can use electricity up to 6A, electric stove with two heating plates uses 2200W, and a water cooker (built into a mug) 1800W - but I can't use them together which isn't truly necessary. So I usually heat up water for tea and bathroom usage with heating mug, and cooking otherwise with the electric stove.
Preliminary Bathroom
I use another bowl to wash myself, 1/3 cold water, 2/3 hot water, and use an oldfashion washlobe for the entire body. Without running water behaviour really changes, and water becomes something precious to not waste careless - even without thermal insulation and temperature around 0°C (without using the stove yet which I start once all thermal insulation is put up) I like the setup and site here and consider it as a gift to be here. Once I'm done with the thermal insulation I will work on the interior shower, which will give some luxury using a simple camp shower (black bag) and shower floor and some bubble-wrap as shower curtain to keep things really simple.
Photos of kitchen and bathroom which I actually combined will follow later once I'm really complete with all.
Another Sunset
A brief 360° video clip in front of the farmer's house, just apprx. 100m from my yurt site. I'm aware some moments cannot be capture, with no device - it can only experienced first hand.
Sunset in Oberduernten (Switzerland) |
2. 11. 2006: Freezing Cold
This morning, -2°C outside, and likely inside around the same without winter thermal insulation - my digital desk thermometer in the yurt shows 0.0°C, likely doesn't measure below 0°C.
 |
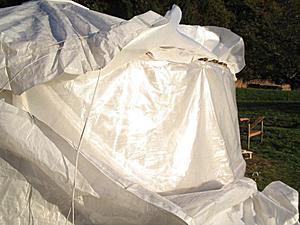 |
31. 10. 2006: Preparing Winter Setup
I'm not yet finished with the kitchen and the interior shower for the yurt, also majority of the interior isn't setup completely, once done photos will follow.
 Winter Setup Details (2006) |
- wall interior cotton
- wall straw blanket
- wall bubble wrap
are tight on the main rope; the wall rain cover I like to fixate separately - whether this works or not I will see, optionally also take the wall bubblewrap from the main rope away with the wall rain cover.
The roof layers remains more or less, the straw blankets are in pieslice-wise form, this way I can fixate the segments better on the crown-wheel and prevent from sliding down due their own heavyness.
This morning I had 6°C at 8:00 inside the yurt, and at 10:10 the sun hits the yurt, and 15:00 peaks at 22°C - in 2-3 days a temperature drop is expected, and actually the first snow for this coming winter season, odd enough, extremely mild or even warm October, and now a sudden jump into winter time, let's see.
24. 10. 2006: Strong Föhn Wind, Rain & Leakage
Tonight it lifted my rain cover and actually flew away as I only used one rope instead of the usual two ropes to fixate it - at 3:00 I had to put it back and fixate it better, and then it started to rain and to my surprise I realized the rain cover has leaks, apprx. 30-40 tiny holes, which only revealed themselves with steady rain (I had rain before at the new place when it did not leak), since I disposed the porous thermal insulation the rain water run on the cotton, and from there dropped steadily on the wood floor - very bad. Fortunately the rain only lasted 3-4 hours and today strong föhn  wind came again and this evening cloudless and mild weather again. Since the new place is very open, as you see in the panoramic photo below, especially the föhn from the south is hitting the yurt hard.
So I will make one layer of waterproof thermal insulation using two layered bubblewrap, in the knowing it won't last for more than 10 months under UV radiation. As a conclusion, the PE rain cover (180g/m2) is UV stabilized, yet, already leaks after 12 months significantly, and isn't useable without additional layer for the rain cover truly, very surprising. I'm not sure whether I go ahead using PE roof rain cover for the future again, for the wall it seems to last better.
22. 10. 2006: Golden October
  Golden October 2006: A Panorama |
The PE rain cover I was able to clean with cold water and a piece of cloth easily - especially moss which started at the bottom in the fold, with cotton-based fabric this could be much more challenging.
I still work on the interior, different setup as before as bathroom and kitchen is added, and likely one desk removed, additionally some of the shelfs are shortened in order to be able to move them closer to the wall than before.
Also net connection is already available (usually takes several weeks here in Switzerland), via ADSL and wireless link from the house of the farmer to my yurt, apprx. 100m distance - which I will install tomorrow. This also meant I moved the rest of my stuff, server and workstation to the new place with my small bicycle trailer full packed.
And finally tonight I took my first solar shower at the new place, a black plastic bag essentially warmed up during the day, I only filled it 1/3 (apprx. 7 liters) and still has apprx. 3 liters left. The day was warm enough to heat it to apprx. 25°C or so, my estimation. In the winter time I will use this bag and fill it with mixed 1/3 hot water and 2/3 cold water to shower that way; I have a shower floor (with drain) which I will extend then.
18. 10. 2006: Preliminary Setup
Today I finished overglazing the floor, and used varnish for roof pole and wall junctions ends, to avoid fungus. Also used varnish to seal the cut OSB planks and around the edge on the floor.
As next I put up one layer of double layered bubble wrap on the wall, and the wall rain cover as well.
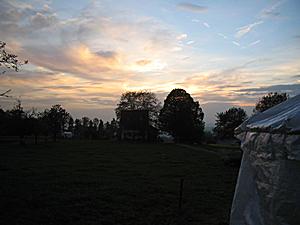 |
The next days I start to position all my interiors, fix some details for this winter such as new skylight as current clear PVC has several cracks and leaks water slightly now through the top layer; in other words, clear PVC skylight lasts apprx. a year, maybe longer with a stronger frame unlike I did.
17. 10. 2006: Finishing Floor & Yurt Skeleton Errected
In an effort I finished the floor, Styrofoam (50cm x 100cm x 4cm) and taped them together, and on top the 33 pieces of OSB planks (183cm x 67.5cm x 1.5cm with groves), and partially painted it with an overglaze.
Cloudless bright sunny day - what a joy to work even it was a bit tension to finish as much as possible today, as the next days the weather will change - so working on the floor is weather depend.
As next I moved majority of my stuff on the floor, and then began to extend the lattice wall / khana, and then crown-wheel / toono and its roof-poles / unis. Arround 19:00, already dark with little sight, I put the roof cotton canvas and rain cover over it, to reduce the moisture of the air fall unto the interiors. The wall I didn't put up as it was too late for the day, as around 19:30 it's dark.
I put up the yurt with slightly reduced diameter so the planned winter thermal insulation fits on the 6.40m diameter floor, and I was surprised to see the roof raise significantly, making the roof steeper too which is good for having snow slide easier, quite welcome for the winter-time.
As a quick reflection: it took me quite some time (~2 days) to level the ground, as the palettes I used had different heights (11cm to 15cm) which meant to level the ground accordingly - I will use gravel the next time for the entire floor (this time I used only 2/3 of the area with gravel and leveled the other parts by displacing the ground, which was very time consuming), and fixating the gravels on the edge with heavy round wood. So, the overhead for making a floor for a yurt in humid climate like here in Switzerland is notable. I hope it is worth the effort, as the last time I didn't use palettes and had the thermal floor insulation get wet from rain.
Thoughts for new additions for the yurt:
- Kitchen
- kitchen sink (without drain)
- electric or stove-based cooking
- small fresh cold water reservoir (25l or so)
- fume hood
- Bathroom
- small warm or hot water reservoir (10l) heated by a sun thermal exchanger and by the stove
- sink
- shower
- Stove
- dedicated pipe from outside to inside near stove
- heat exchanger for warm/hot water reservoir
- External Storage Room
- using 'C' (only outer wall) or 'Cc' (with inner wall) shaped yurt and attach it to the existing yurt
and all additions still be highly transportable - let's see what I can implement.
Working on the other yurts as I planned I had to postpone til early spring I guess.
16. 10. 2006: Still Moving & Preparing Floor
I'm in the midst of preparing the floor now, multilayered as mentioned before, and moved all my stuff today (bed-room, office, etc) using a large trailer, and tomorrow probably finishing the floor, and then erect the yurt again with the summer thermal insulation. The winter thermal insulation I will within the next 1-2 weeks, blankets filled with straw so far my plans.
While taking down the yurt I discovered that the roof with its bubblewrap was porous and I had to throw it away - really bad, the culprit is the UV radiation. So, one lesson of my first setup is, which I also will include in the Yurt Notes that the bubblewrap must be UV resistant when using semi-transparent PE raincover as I did, otherwise the wrap is only useable for one summer season.
12. 10. 2006: Preparing the New Site (continued)
So here the next steps, leveled the place by displacing the ground a bit on the slope, and adding more gravel to make it more even. Then I began to place the collected aged "euro"-palettes and "one-way" palettes (used only once and then thrown away by companies) from big chain stores nearby:
The detail or fine leveling of the palettes (+/- 1 to 2cm) I do with gravel, couple of small stones and if neccessary short wood pieces (left-overs from constructions I did before).
This morning I visited the place, and saw it was still in the shade of the nearby forest around 10:00 in the morning - I oversaw it at the first sightings of the place which happened in afternoon. On the other hand the sun lasts very long as the sunset happens in a far distant horizont, unlike the place I used before which has a range of trees nearby where the sun sets relatively early at the evening.
Especially for the winter-time good exposure to sunlight is important and reduces heating requirements - so the new places isn't that optimal in that regard, otherwise the new site looks very good and I'm happy I found it.
11. 10. 2006: Preparing the New Site
As first I checked the distance (radius) to all sides, and then set the center accordingly - as next I used a stick with a cord with the length of the radius, and marked the circle by scratching the ground a bit, then marked it with sewing dust to make it more viewable.
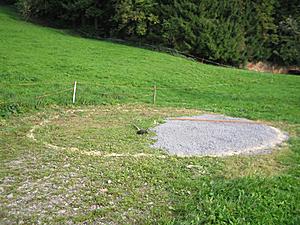  Leveling the slope with street gravel |
The left-hand side of the photo, the starting slope of the hill already, will be displaced as next.
The planned layers for the floor:
- OSB Planks, 1.50cm thick with groove (top-level)
-
PE/PVC Layer, 0.1cm thick, to block moisture from the ground - Styrofoam, 4.5cm, as thermal insulator
- Palettes, 8-10cm, for air circulation
- Street Gravel (bottom-level)
9. 10. 2006: Sunny Fall Days, Reusing Bubblewrap
Outside of the yurt: 7°C at night, and 15-17°C peak during the day - sunny days.
Inside of the yurt: late night apprx. 8-10°C, and from 9:00 to 11:30 it increases to 20°C, and 13:00 over 25°C - after 17:00 is decreases slowly to 12°C around 2:00 at night. I still use 4 layers bubble-wrap as thermal insulator.
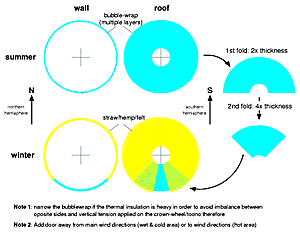  Reusing Bubblewrap Summer/Winter |
4. 10. 2006: New Place Found, Preparing Moving
Finally a new place has been found, generously offered by a farmer nearby, south oriented, flat with gravel ground, spring water, electricity nearby from the farmer, and hopefully net connection again. A new friend joins me, she made her own yurt more the traditional way in regards of materials, and will assist her to finish it like the skylight cover and door.
I will document the moving here. For those of you who read through the diary already know my floor setup wasn't that good, and time I raise it 10-12cm from the ground using palettes, and on top some insulator (reusing my styrofoam if possible) and then a new set of press board or three level wood boards. As I get a new floor moving but reuse some of the floor insulator is a bit complicate to move in several moves, e.g. the floor insulator becomes available after I put interior, the yurt itself and top layer of the floor away - and this only possible on a day without rain otherwise it would require to shelter it (e.g. another yurt, a bit a catch 22 if you know what I mean).
The best way to move a yurt is:
- a truck which can hold interior, the yurt and the floor: pack all in that order, and unpack it the natural reverse order (last put in you take out first, e.g. the floor)
- several trucks or trailers, distribute interior, the yurt and the floor - make sure you have access to floor, then the yurt and the interior
Since I have access to a small truck which cannot hold all of my yurt (interior, the yurt itself and the floor) I have the juggle or shuffle a bit around - will be fun!
3. 10. 2006: Fall approaching, Fire Salamander, Painting and so on ...
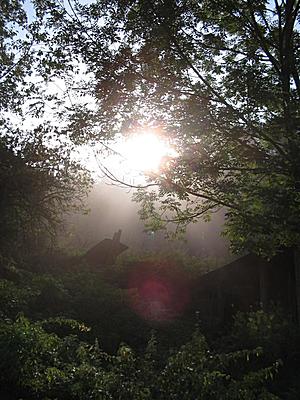 |
Wonderful morning with little fog and the bright sun shining through - wonderful moment.
Finding New Sources
While looking for a new place to settle down, and doing other projects little time was left to do the diary here. Researching cotton canvas from german whole-sale manufacturer (20% of price of the cheapest place here in Switzerland), and rain cover also from a direct importer in Germany (PE blankets seem manufactured in China), apprx. 40% of the price as I've got before - so doing price research makes sense for larger volumes.
Nightly Visitor, A Fire Salamander
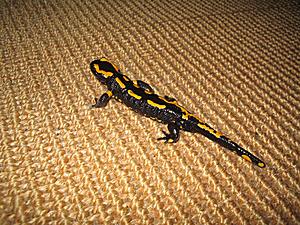  Fire Salamander (1) |
I had no problems with mice as I didn't have a food and kitchen in my yurt (used the one in the house nearby) and so no smell of food and thereby no attraction for mice, which otherwise could become an issue.
Painting Outside
One day, one of the bright and dry ones, I did some painting, to have a few colorful paintings for the inside of the yurt - what a joy having a bright sun and a mild breeze drying the paintings so fast and painting really a matter of real flow . . .
I will make photos of the paintings later and will then be available on my art web-site which I still design (since quite some time actually).First Fall Storm
Fall Storm inside the Yurt |
A brief video clip, a few roof poles shake a bit, the roof cover lifts 5cm or so, since I have no cords or ropes over the roof this is to be expected. For regions with lot of wind ropes reaching over the entire roof is recommended to increase overall stability of the yurt, making it compact.
Sidenote: I upgraded my content-management system with a new support for streaming videos using an embedded flash player, expect more short video-clips now that I found an easy way to embed them and avoid using web-services like YouTube.com and the kind.
Another Yurt Enthusiast
A few weeks ago a yurt enthuastic woman approached me to join me in this winter season to live in a yurt, so we are looking together for a place nearby - she hasn't finished her somewhat traditional yurt (polyester/cotton mix solely for rain cover and pressed hemp as thermal insulator) yet, only a few things left to do. Once we settled down I will include a few photos of her yurt and doing my straw insulated yurt as I planned.
3. 9. 2006 - 7. 9. 2006: Visiting Claudius Kern
Last week I traveled to Graz (Austria) to visit Claudius Kern in his two level yurt he built. Here a couple of photos:
The ground level of his yurt building is rather solid, with solid walls, one extra room at the entry with a shower. The upper level is the "real" yurt construction, with lattice wall and roof poles, and bubblewrap based skylight. More pictures of his yurt you find at Claudius Kern.
We discussed intensively about the "european yurt", the one which also is useable in humid climate, where 100% water resistant rain cover is used and humidity within insulation is withdrawn by various ways. He also contributed a few approaches to bind the lattice wall, best look in the yurt notes and the wall section then for the photos. Needless to say we continue to work together in various ways and share our experiences, either privately but also publically, me with this web-site, and him through his seminars.
1. 9. 2006: Lot of Rainy Days
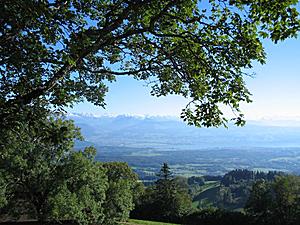  Bachtel, Switzerland |
 360° Panorama from the Bachtel |
What does this mean and has to do with the yurt, well - when there is no sunshine for 3-4 weeks in August, and I plan to use passive thermal sun energy to heat the water during summer, I need to expect one month no thermal energy from the sun, but 10-12°C. Bummer 
6. 8. 2006: Rainy Days
After weeks of heat (around 30-35°C) the weather has changed, since 5-6 days it's raining, 5-10 hours a day, and 14-18°C, 20°C drop in temperature. When the rain stops, and clouds get more translucent the yurt warms up immediatly well over 25°C again; but with rain and covered sky it's 3-5°C warmer inside than outside, due my own thermal energy. Also due the long rain I have to keep opening the door for fresh air - and I'm thinking of having a simple air openings I can easily open and close as I require, let's see if something simple can be done, or simply change a bit the setup of the skylight cover.
28. 7. 2006: Bamboo Splitting
|
|
|
Exported bamboo is dried for 1/2 to 1 year, and has apprx. 50% remaining humidity - during shipment on a ship it dries additionally, until it arrives e.g. in Europe, apprx. 20% humidity. I was told it would take another 5-10 years til the bamboo is fully dried, but nobody keeps bamboo that long, it's sold earlier.
So far the bamboo expert of the whole sale garden company said, the spliting comes from the knots in the bamboo, which cannot expand and shrink the same way as the hollow parts of the bamboo, and that the tension there, with the remaining humidity in the chambers, increase the probability of the spliting: fast temperature changes, e.g. in the summer from hot afternoon in colder evening.
I mentioned that I used the bamboo for a yurt construction, and that I was thinking of painting the bamboo so with my half transparent cover setup it would not get as warm anymore by having it bright or even white painted. So, it's a common issue, for us westerners it's an aesthetic issue (or also a problem when you handle split bamboo with bare hands that you can injure yourself easily as the edge along the split is extremely sharp) but otherwise a known thing that bamboo simply splits. I will try to reduce this splitting of bamboo, and then share my eperiences here.
24. 7. 2006: Hot Days
The last weeks it has been very warm, actually hot for our climate zone (Switzerland), over 30°C, up to 35°C at peak. Inside of the yurt it is and was very hot. I left the door open all day long, and moved the skylight open, additionally I kept running the fan, which I used in the wintertime to distribute the stove heat in the yurt, now for venting air to my desk where I work. I'm thinking of making a cover for a sunshade, to have not so much heat radiation reach inside of the yurt.
Since I'm teaming up with other projects where temporary buildings play a significant role I haven't worked further on the yurts as I need to order the bamboo sticks and poles (apprx. 700 pieces total for 3 yurts) and have postponed that order until I moved to my winter 2006/2007 domicile.
5. 7. 2006: Door Construction
I was working today on three doors again whose frames I already made, two 1.5m height and one 1.70m high. Two I made with used and old laths, and one door I made with new wood. I will include a how-to build a door in the Yurt Notes with illustrations.
What's left to do is the closing mechanisms, which I do with wood as well. An additional locking mechanism with a locker I will maybe do too.
25. 6. 2006: New Concepts & More Details on Crown-Wheels
Got a visit from Claudius Kern and discussed intensivly new concepts of his to extend the traditional yurt for humid climate like central europe; the main idea is to use air space just behind the rain cover so humidity does not condense at the rain cover or within the thermal insulator. The air space should be vast enough to operate as air channel, from the ground up to the crown-wheel. We are still discussing the details how to do this, and Claudius will work the next days on such simplified version of his rather complex approach he teaches at his yurt-build seminars. Expect updates on this in my Yurt Notes, and more details then.My first crown-wheel I used wooden dowels inside, which was hard to make exact. This time I made two new attempts:
- no dowels, but patches on the edge
- dowels later from extern
Additionally you see how I strengthened the skylight frame (which fits over the crown-wheel collar).
The door frame construction:
And finally the 12x3 segments based 1.92m crown-wheel I started:
I'm not yet sure of the stability of just 3 layers, as more layers the better; I will work on this crown-wheel a bit more and see if it is useable.
13. 6. 2006: Heat & Warmth
The last days have been very sunny, and warm; and I noticed more bamboo roof poles splitting (loud cracking) lengthwise, which doesn't descrease their stability - and I finally found out why they split. It is not the humidity as I was told, it is the heat I think. In my case of the yurt, with semi-transparent covers the heat radiation goes through the canvas (the rain cover itself isn't warm) to the bamboo poles, and they warm up due their color (brown/yellow). So, I'm thinking of painting the roof bamboo poles next time in white, to avoid those warm up and create tension and split then. So far only 3 or 4 poles splitted like this (out of 64 poles), and made a 2-3mm gap, I likely will replace with some extra poles I still have. I assume when I have a more thermal insulated yurt where the heat radiation of the sun doesn't reach the inside this won't be a problem anymore.
In order to keep the inside of the yurt as cool as possible I leave the door open, and have the skylight on the side (see photo below), this way the temperature is inside the yurt 38-40°C vs outside 31°C (measured at the shadow side of the yurt).
9. - 12. 6. 2006: Finishing Wheels
Finally again some dry and sunny days to work outside, and finishing the crown wheels for the two new yurts. See the photos enclosed in the 26. 5. 2006 entry. I also have some wood left which I want to use before I relocate and so I started to do a 3rd new yurt (6.4m diameter), and today I made its crown-wheel.
|
|
The three yurts I work on:
- 2x 6.4m diameter yurt, 64 roof-poles (bamboo), 1.5m wall height, 8 segment 1.22m skylight
- 1x 9.45m diameter yurt, 92 roof-poles (bamboo), 1.7m wall height, 12 segment 1.92m skylight
since I documented my first yurt in quite some detail, I won't do so for the following, only if I changed a procedure or so.
31. 5. 2006: Beautiful Sunset
It has cooled down the last days, lot of rain and even a bit snow again; and this evening we had a wonderful sunset:
|
|
It looks like I'm living in a jungle - yet, the plants are so green, and alive, and after the rain - a wonderful moment I tried to capture.
26. 5. 2006: New Wheels / Toono
1.22m Wheel, 8 Segments for 6.4m Yurt
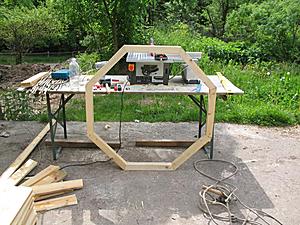  8 Segment 1.22m Wheel / Toono |
So, I also made the crown-wheel collar which holds the frame of the skylight.
1.92m Wheel, 12 Segments for 9.45m Yurt
The large wheel, 1.92m diameter, I do with 12 segments, 15° per segments - I did saw the 3 * 12 segments (50cm long, 2.5cm thick), total 36 segments, but I haven't had the space (flat enough area) to assemble. So I used my working procedure using 6cm x 6cm timber to form also the 1.92m wheel.
Maybe later I reuse the 36 flat segments when I figured out a good procedure to assemble it with limited space, e.g. making quarters first and glue them and as 2nd step assemble the 4 quarters in a whole wheel.
22. 5. 2006: New Beginnings
The last weeks I have been working on more dome models, started a small web-site for an interest group for temporary buildings here in Switzerland called EinfachAnders.ch  (german), and visited a group of people who started a project called "Global-Natives.com
  " (german/english) in southern part of Switzerland, in an abandoned valley. Depending on their success of acquiring legal permission to take the valley over, I will provide and develop yurts and domes with them, for the summer time there. Additionally, my time in Oberdürnten where I spent the last year in tipi and yurt is coming slowly to an end, and I'm looking now for a new place with more space to work, build and erect developments, in particular the two planned yurts and a dome.
30. 4. 2006: Cold Night, Warm Day
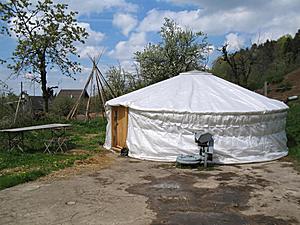  Trees start to bloom |
Today I expect a full range of temperature, starting at 0°C at 8:30 rising to 35°C at noon with open skylight and open door (slight draft and whirl inside the yurt).
21. 4. 2006: Skipped Spring, Summer is Here & Repairs
|
|
Well, it feels at least that way. We have 18-22°C the last days, no clouds, inside the jurt 37°C with open door and open crown-wheel cover (skylight).
I also took the time to check the skylight in detail, and saw the tape I used as dried out, and had to be replaced, it lasted 6 months (11/2005 - 04/2006) The clear PVC ist still ok, but the tape I used I encapsulated too much of the wooden frame so water collected there, when I removed the tape the frame was wet - now I taped it only on the side but not underneath the frame anymore.
11. 4. 2006: Winter is Back (Again)
After days of heavy rain the temperature dropped again, and we had 15-20cm snow again:
Additionally I started to work on the new yurts, and began with one crown wheel, will document this in a later entry here.
7. 4. 2006: Reflection on the Yurt
Now that I made it through the winter 2005/2006, which was very cold and long, in my own self-built yurt, and truly became to appreciate and turned into a passion for the yurt. I truly love and loved every moment being in the yurt, with its (semi-)translucent materials I used the yurt is daylight bright inside. The simplicity of the yurt, how the static is achieved - wonderful. I look forward to spend the first summer within it and work further and refine the details, and document my experiences further on this website.
For now the yurt is my favourite temporary shelter to live the entire year in - but I also will explore dome-like shelters and see if I can insulate it for heat/cold as good with the yurt.
19. 3. 2006: Cleaning Stove Pipe
Today I cleared and cleaned the stove pipe, its parts. They were full of coal dust as I had problems yesterday night to heat the stove as the smoke didn't pull up through the pipe anymore and I assumed it was filled with too much coal dust. While dismantling the pipe parts, I saw the main rain cover (PE, polyethylen) had a hole along the main cord pushing unto the heat insulator - unfortunatly it seemed the pipe heat insulator wasn't good enough. I have to fix that hole, e.g. sewing a patch on it, and increase the insulator.
The last days with sunshine gave again plenty heat, over 35°C inside - while I cleaned the stove pipe I experienced the hot air leaving the yurt. It is expected to get cooler again the next days, the spring time is once again delayed. I await warmer weather in order to have the rest snow melted and able to work outside on the crown wheel of the next yurts I planned.
6. 3. 2006: Interior Photos & Video Clip
I realized I had very few photos of the final interior, so here some:
Yurt Interior |
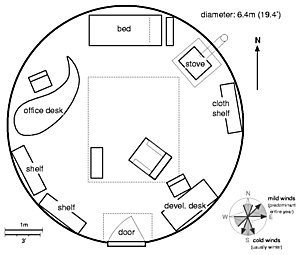  Yurt Interior Layout (2005/2006) |
Sun is stronger, 30°C inside, whereas outside 2°C, so I left the door open for a few mins to have fresh and cooler air. Still lots of snow, and a bit more snow to be expected.
5. 3. 2006: Spring Time, Not Yet
Yesterday and tonight is snowed over 55cm - more than ever as recorded history within such a short period of time (24 hours) here in Switzerland and the area I live, instead of mild temperatures we got a lot of snow, beautiful!
Temperature wise it's around 0°C, the snow did slide down the roof during the night, at day I forced it by punching to the roof from the inside. For a felt roof such a night with so much snow might have caused a breakdown of the yurt, and unlikely the snow would have slide down by itself.
27. 2. 2006: Warm Inside
We got snow again, 10-20cm in one night; during the next the day temperature arose to 5°C, and inside of the yurt I've got 25°C without heating the stove. Until 18:00 I didn't heat the stove. Question is how the interior temperature is in spring time, or summer time, whether it will be too hot.
12. 2. 2006: Still Winter
Aprx. -10°C at night, and 1-2°C at the day; a few days ago it got snow again (~ 20-30cm). At the weekend I fired the stove again all day. With bright sunlight the interior got 30°C at 1.50m height and at the ground 15°C. Only at the evening after sunset I had to actually fire to stove to heat up the yurt, and then the ice on the roof melted, not as fast when I still had two insulation layers, but it stills melts; means, the insulation isn't yet good enough. It won't make sense to add more 0.5cm thick bubble wrap layers. One idea I've got from another web-site is to use plastic bottles between layers to have more air as insulation; or I go for "jumbo" bubble wrap with 3cm large bubbles, and 1-1.5cm thick. The option with felt is also available, but this would imply no daylight interior anymore in the yurt. So, I definitly need to test more in this regard.4. 2. 2006: Experiences
The last weeks the temperatures have been at night -6°C and at day 2-3°C. I have been in the yurt only at weekday nights and at weekends all days, so I didn't fire the stove that often. As wood burned so fast, actually too fast and I used a lot of it, I changed to brown coal to fire the stove: it burns slower, and last much longer (over 16 hours). If I had a larger stove (and less transportable) wood would be better, also more ecological. I will look for other stoves to use "pellets" (pressed woodshred) and see if controlled and slow burning to deliver steady heat exists.
With the four layers of insulation the ice on the roof doesn't melt when I have heated the inside of the yurt, good sign.
14. 1. 2006: Impressions of the Yurt at Night
Here a few contemporary photos of the yurt's interior. The photos are a bit blurry as they were taken without tripod, but I thought I still put them online as they give an impression how it is at night in the yurt: a wonderful experience.
8. 1. 2006: Finishing Insulation Upgrade
I finally finished the 2nd additional roof layer (7.4m + 2x 6m + 2x 4m patched with the left over of the previous roof layer). Now I have
- rain-cover (PE, 180g/m2) (outmost layer)
- double layer bubble wrap (5mm bubble, apprx. 7mm thick, with foam layer)
- double layer bubble wrap (5mm bubble, apprx. 7mm thick, with foam layer)
- single layer bubble wrap (5mm bubble, apprx. 5mm thick)
- single layer bubble wrap (5mm bubble, apprx. 5mm thick)
- raw cotton canvas (interior)
For the wall I have the bamboo wall in between the last bubble wrap and the interior cotton canvas, which gives 2-3cm air space as insulator. For a future yurt I will use heavier and stronger cotton, which might work better.
This morning I had 5°C inside the yurt, outside it was -8°C, so it seems the 3 layers I had (without the 2nd layer I put up today) it was able to insulate 11°C totally; with the 4th layer I put up I assume it will be more, I will see tomorrow morning.
It's 17:30, the sun has set, -6°C outside, in the yurt at the floor 6°C, at 1.5m height it's 17°C; and I fire the stove currently with the fan turned on (to push the hot air from the roof downside); after 2-3 hours finally the floor temperature raises as well to 12°C, and at 1.5m height it's 18°C. Now the next morning (9.1. 2006) I had 0°C inside and outside it was -10°C, the stove fire was out of course, so the insulation was able to hold a difference of 10°C - that's looks acceptable for the rest of the winter.
7. 1. 2006: Adding more Insulation Layers
  Double Layer Bubble Wrap |

2006/01/05 13:36

2006/01/07 12:05
Since 4th January I'm also without Internet connectivity as the deal with one of the neighbours expired, and having a cable through a little opened window wasn't suitable for him anymore - so, I will update the site once I get access to the net again (doing two paying networking projects currently so I have access there, just not in the yurt anymore).
30. 12. 2005: Coldest Night of the Season & New Plans
We had -14°C this night, and in the morning my tea in the bottle was frozen, it was maybe -5°C in the yurt. I had to leave to Zurich, in the afternoon I bought wood and tools for building . . . another yurt, actually I like to build two additional ones. A large yurt with 9.45m diameter (28 feet), and a crown-wheel/toono of apprx. 2m diameter; the roof poles will be roughly 4.2m long, bamboo again to build again apprx. 25° roof angle. I also bought a table saw where I can do the crown-wheel segments, 12 segment polygon this time; I use the yurt calculator again to get all measurements.
The next days the temperature will rise above 0°C and I hope I can add the new layers of insulation material, as right now the roof and wall is icey and I didn't want to untie it until all ice is melted.
21. 12. 2005: Winter Solstice
I received a visit from a friend, working on a web-site of his, and I also bought stuff for the interior of the yurt using the bicycle (recumbent) with a trailer, the roads uphill were icy. I also ordered more insulation material (bubble wrap, 10mm bubbles, 7mm thick, 150cm wide, 100m long), and will arrive 23th December, I hope to add two additional layers during Christmas and New Year - but I actually consider Winter Solstice a more important day than the other two holidays, but that's another topic. Anyway, I just felt to write a few words on this for me special day.
16. 12. 2005: Winter Storm with Rain
The afternoon a winter storm from the west began, and I left for home early from Zurich to Oberduernten so I had the chance to take care of the young yurt. Until 19:00 the wind was moderate, after 21:00 stronger and the wind began to push the entire yurt, deformed the circular wall, and a few roof poles fell to the floor, also part of the outer rain-canvas began to get loose. I tightened the cords, and readjusted the circular form of the wall. I definitely require to fixate the entire wall and the door specially so the wind cannot push it from the wooden floor away. In a traditional setup the yurt is put direct on the ground and provide rather good stability. In order to withstand a stronger wind or even storm I require to use ropes to fixate the entire yurt to the ground, and two crossed ropes reaching over the roof and fixate it from drifting.
Additionally, the last days have been cold (-7°C apprx.at night) and the ground was frozen, today it began to rain at 3-5° C and the rain did not seep into the ground, and so much more rain actually remained on the concrete - unfortunate. Also, due to the wind and the push on the walls the outer rain canvas slipped over the planks, which resulted in that the rain poured on the planks inside the yurt, not much, but surely something to pay close attention from now on to have the walls fixated to the ground and/or the floor.
It's 21:15 now, and it's raining vividly, wind still strong and I assume this night I won't able to sleep a lot but remain awake to take care of the yurt.
1. 12. 2005: Cold Nights
Tonight the temperature fell below -6° Celsius, interesting enough it's getting cooler between 5AM and 8AM than the night as it seems, and just before the sun rises and shines unto my place it's quite cold. I was heating the yurt but the roof icecrystals did not melt as before; I have a hard time to get the yurt heated, I just reach apprx. 12°, which is ok, but given the amount of wood I'm burning this is not good.
25. 11. 2005: Winter Arrived
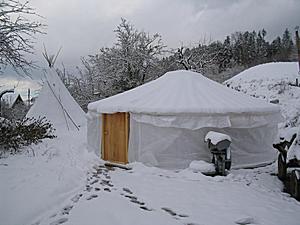  Winter Time |
I tried to get rid of the snow on the roof cover, but the snow is apprx. 10cm high so it fell through the opening inside the yurt, so I hope it melts or slides from the roof cover at least so I have a clear skylight again . . .
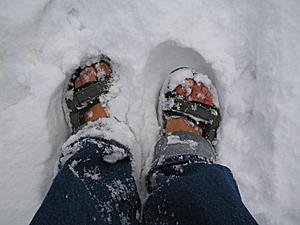  Warm Feet |
It's a beautiful sight to see the yurt and also my tipi in the snow. I planned to take down the tipi this weekend, but now that there is snow I have to wait.
23. 11. 2005: Fixed Roof Cover
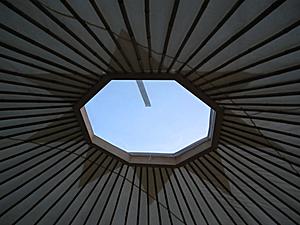  New Roof Cover Installed |
22. 11. 2005: Stormy Night
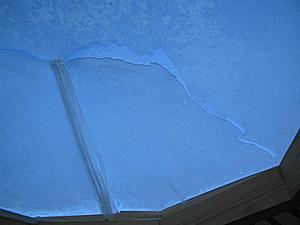  Broken clear PVC of the roof-cover |
I knew of the problematic, but thought until there is strong wind I won't need to fix all things - wrong.
The last days I used plenty of dried wood to heat the yurt, during the day with sunlight the yurt heats itself to apprx. 15° Celsius, but once the sun has set it cools off quickly, very quickly and stove needs to heat the interior.
I also got some more rope which I used to tie it partially over the roof, so the roof cover doesn't lift as easy anymore as before. For heavy storm I need to fixate the entire yurt, e.g. on the ground, but since I put it on concrete this is might be difficult, so I need to stretch it further to have rope anchors reaching the grass and soft ground.
17. 11. 2005: First Night Below Zero Celsius
Well, it's not really the first night, but tonight it rained first, drops remained on the clear PVC skylight, in the morning all were frozen - now in the morning til 10 AM the sun came out again, melting away the frozen drops. The raincover PE in white doesn't warm up itself, if I had chosen another color it would be quite different, but then I wouldn't have the advantage of bright interior during the day. The next days will show how the PE cover does with freezing water - so far heavy rain was ok and no leaks. I'm also considering to add another two layers of insulation; I heat the stove and after 90min or so the warm is gone; and dry wood burn too fast, and the stove doesn't allow me to burn it slowly and have steady heat source, so I consider to get "brickets" which supposidly should burn slower.
15. 11. 2005: Moving Stuff
I put up another 2nd layer insulation, and the wall cotton canvas as well. Additonally I moved bed, desk and chairs into the yurt.
10. 11. 2005: More Photos
Some more photos:
7. 11. 2005: Minor Adjustments
|
|
I cut away the square raincover of the roof to a circle; which makes it look more a yurt than before now. The sun came out briefly and it got warm immediatly, also in the yurt - at the current setup it warms up quickly, good at winter time, but for summer time not preferd and additional draft is required to have the heat leave the yurt.
6. 11. 2005: First Night
  Insulation mattress and sleeping bag |
I start now to fixate the khana (wall) to the floor as I realized it just moves too easy when you push the walls, also the door needs to be fixated to the floor. What I still need to do is adding thermal insulation to the roof. Next steps is to fill the interior of the yurt with my daily stuff, a desk, install the stove, etc and also the computer I will install.
3. 11. 2005: Errected Again
After delays to get the floor and its insulation, I'm finally able to erect the yurt again, adding the cotton interior roof canvas, its raincover, thermal insulation for the wall - unfortunately it begins to rain and the surrounding gets muddy, so I have to wait for the next steps.
My floor setup looks like this: lanes of PVC, apprx. 7m diameter, then Sagex, then the wooden planks (1.30-1.42m and 2.00-2.05m in size) on top, I let 5-10cm extra to the 6.40m, just in case.
I put up the wall, with door - which turned out to be more difficult than expected because I considered to attach the main wall rope not on the doorframe to be a good idea to remove any stress unto the doorframe - yet, where else? I attached the ends on one or two of the wall junctions, and those stretched quite away. I was cautious to pull and adjust the previous fastened wall rope; but my roof and bamboo roof poles seemed light enough so I was able to tighten the wall rope further and pull the diameter to its 6.40m - as I had 6.50m or even more and the outer wall raincover didn't fit by 10cm, so the diameter was too large, the roof pressed the walls outside, and the rope needed to be tighten.
The toono (crown-wheel) and roof poles I put up as before, worked fine now that I knew what I had to pay close attention for. The cotton canvas for the roof we pulled through the toono, and unwrapped it on the top of the roof with a ladder. The rain canvas for the roof we pulled over from the side, and moved the hole to the toono, and then put on the clear PVC cover, which fixated the rain cover further.
24. 10. 2005: Door Finished
Added door handling and simple locking mechanism.
22. 10. 2005: Door
Finally did the last thing, the door. I used some laths, with frame and insulated with Sagex. I assemble a simple door locking mechanism with wood next days.
The only thing left is the floor.
15. / 17. 10. 2005: Cotton Interior
Sew the main cotton interior cover, 5 lanes: 6m, 7.3m, 7.5m, 7.3m and 6m again, each 1.5m width, apprx. 1cm overlayed to sew the lanes together. Took a lot of threat more than expected. Also attached cord each meter of the two 10m x 2m wall covers in order to bind them to the main wall rope, made seam for each ends.
14. 10. 2005: Toono Cover & Rain Cover
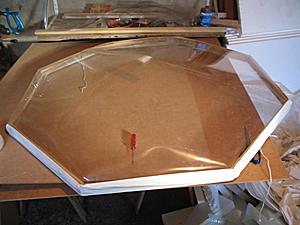 |
The pictures above are from the 2nd cover I made, since the first broke during stormy winds (flew away because I didn't tie it); when I made the first roof-cover I didn't document or photograph each step.
13. 10. 2005: Rain Cover
The last days I took down the yurt again, had to protect wood (crown-wheel / toono, its collar and door frame) from water using wood wax, but also wood lacquer, not yet sure which is better.
Today I sew the PE rain cover, from 8x10m -> 8x8m and 8x2m, and fixed the cut making a seam with a cord within. The 6x4m with one cut making 6x2m twice, also sew the seams with a cord.
I folded the 8x8m so the center appeared as corner (twice folded), then cut with scissors 2-3cm cut, this made 4-6cm hole, the center; as next step I put the crown-wheel / toono with its collar (where the clear PVC comes on) on the opened cover, and cut out the hole, had 4-6cm spare to the crown-wheel / toono collar. Finally sew along this hole with a strong cord, to have the canvas just fit the crown-wheel / toono and its collar.
The floor wood is coming soon, yet, the floor insulation (Sagex) I have to wait for 10 days to get - so if all goes well October 26 I raise the yurt with all.
What's left to do: crown-wheel / toono cover (frame & clear PVC), cotton cover (lot to sew), door and the floor.
7. 10. 2005: First Yurt Erect
Finally complete erect the yurt with all roof poles (uni), test-wise to see if the poles, roof angle etc are matching my calculations before I cut the roof poles (just a few centimeters though).
Since I had two drilling diameters for the toono (two diameters of roof-poles since I used the smaller end of the bamboo sticks on the toono and bamboo sticks are sorted by thicker ends when you buy them - which meant I had to resort them, and we ended up with four different diameters: 2.0, 2.2, 2.4 and larger than 2.4 (those we took aside, just a few); I took the 2.0cm and 2.2cm diameters. I color-coded the roof poles and holes in the toono (2.0cm: green, 2.2cm: red) so when I put it up I see right away where which poles goes in.
Some angles are a bit off, e.g. wrong tilt, wrong angle, but due the length of the roof poles it didn't matter as much, the poles just bend a bit. I also didn't recalculate anything (unlike previously thought), but had the cord on the end of the roof-poles give more or less space as required as I couldn't compensate the unevenness of a 8-segment polygon vs. perfect circle with deeper holes in the toono - glad it worked out this way. So, the 8-segment toono was a good choice, just the segments and their end-angle of 22.5° needed exact cut - the resulting toono with 6 x 6cm profile looks filigree.
I calculated 2.88m roof pole length (6.4m diameter, 1.22m toono diameter, αroof 26°), the bamboo poles are 3.05m long, so plenty left. I assumed 2-3cm fitting into the toono, plus some extra as the cord at the end; so I just drilled the hole for the cord at 2.90m, which seems just right after I put up now all roof poles.
I also now realized after the first put up that the toono holes for the roof poles are short enough to support different angles, I had a bit little space and the diameter is less than 6.4m, apprx. 6.25-6.30m, and so the roof angle is a bit steeper. When I build it up again with exact 6.40m I assume the roof comes down a bit, good to know I can make 6.20-6.50m diameter - just one thing needs to be kept in mind: it needs to be a near perfect circle so the roof poles truly fit and are pressed unto the toono, no sloppyness allowed there.
The main rope on top of the khana I moved between the junctions (over a junction and next under the junction) all around, and then tightened it several times til the rope at strong tension, then I began to put up the other roof poles (started with 4 and then the rest).
Anyway, I'm impressed by its beauty in real life, the toono with its roof poles in it looks like a sun . . .
5. 10. 2005: Making of Toono & Cover (Cont.)
I'm a bit delayed with updating the diary. Haven't been working on the yurt each day, and also was a bit slow when I had to glue wood (waiting til a part has dried and then doing the next part etc). So here a few photos of the state currently with my yurt developement. Due to rainy weather I haven't been able to work on the yurt and do some required measurements of the toono plus roof poles.

2005/09/28 12:07
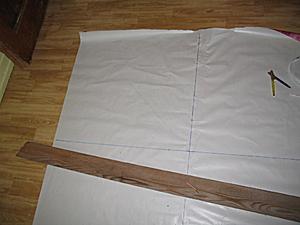
2005/09/29 14:10
- saw the segments for the toono (22.5°), glueing it together
- doing plan for angles for the roof-pole holes, drilling the holes with right tilt (26°) and angle - was hard since I had to do this by hand and drilling machine
- additional collar on top of the crown-wheel / toono, the rain cover will be pulled over it to have no rain reach the inside of the yurt
- crown-wheel / toono cover (clear PVC) frame (8 segment again), a bit larger than the crown-wheel / toono collar so it can be put inside of each other, the crown-wheel / toono-cover frame gives the form for the clear PVC (slightly tilted done using a cut)
The next days I sew the canvas and cut the roof-poles and attach some cords for the fixation to the khana. More pictures follow.
24. 9. 2005: Making of Toono (Crown)
I bought 6cm square wood lath, 2.5m long, for the door but also for the crown-wheel / toono. A collegue saw the other lath for the 8 segment toono, but I also realized a small bug in my n-polygon calculator, and now I require to decide if the quite thin (6cm) 8 segment toono works, and may have to cut the roof poles individually (aside of the different diameters and required holes), which I wanted to avoid, more calculation required, but might be worth it.
23. 9. 2005: Making of Khana (Wall)
The bamboo poles for the wall and roof arrived, and we are using black rubber binders and not drilling the holes, just on the top of the wall, the other holes are done via those binders. The first attempt was laying out the wall poles on the floor which turned out time consuming and not very efficient, the next khana section I did vertically which I did quite faster.
So, I decided the make the door 3 times w wide (3 roof poles), also 3 * 31.4cm, 94.2cm - so the khana carries 61 remaining roof poles, two khana section with 30 and 1/2 twin poles. Since I used bamboo two khana sections works, expanding apprx. 10m, but otherwise apprx. 70cm wide when compressed.
We also had to sort the roof-poles, since we decided to use the thicker ends on the khana and the thinner ends into the crown-wheel / toono, and there holes need to be drilled - so I got two diameter sizes of roof poles / uni, less than 2.0cm and less than 2.3cm.
16. 9. 2005: Starting: Roof & Wall Poles
After weeks of planing and calculating & taking notes Melanie got the bamboo poles from a garden wholesale company I researched beforehand:Per yurt:
- 150 wall poles 2.12m, 20/22mm diameter the thicker ends
- 75 roof poles 3.05m, 26/28mm diameter the thicker ends
We require just 64 roof poles, but it was cheaper to get 150 poles (for two yurts) than buying the exact number. The cost per yurt for the poles apprx. CHF 200 or € 130, or US$ 160.
