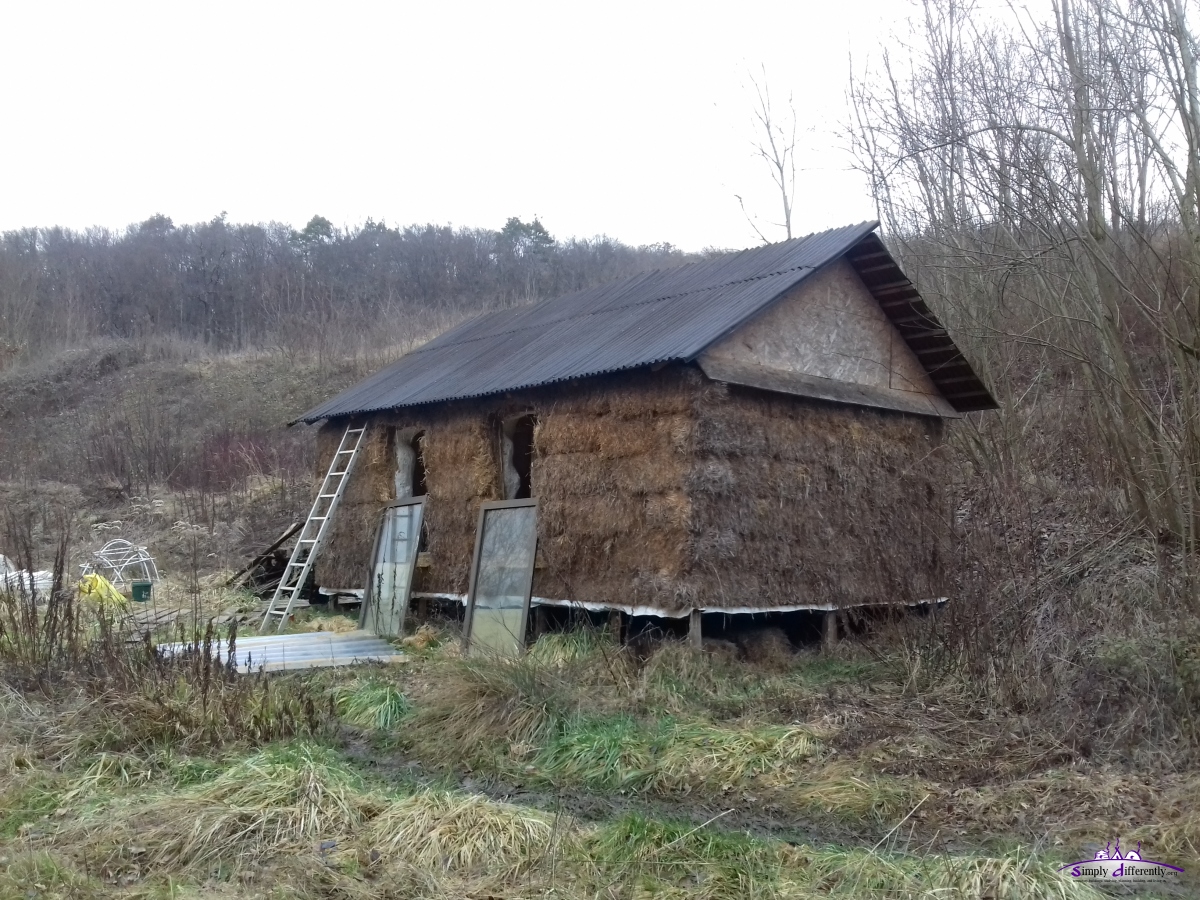
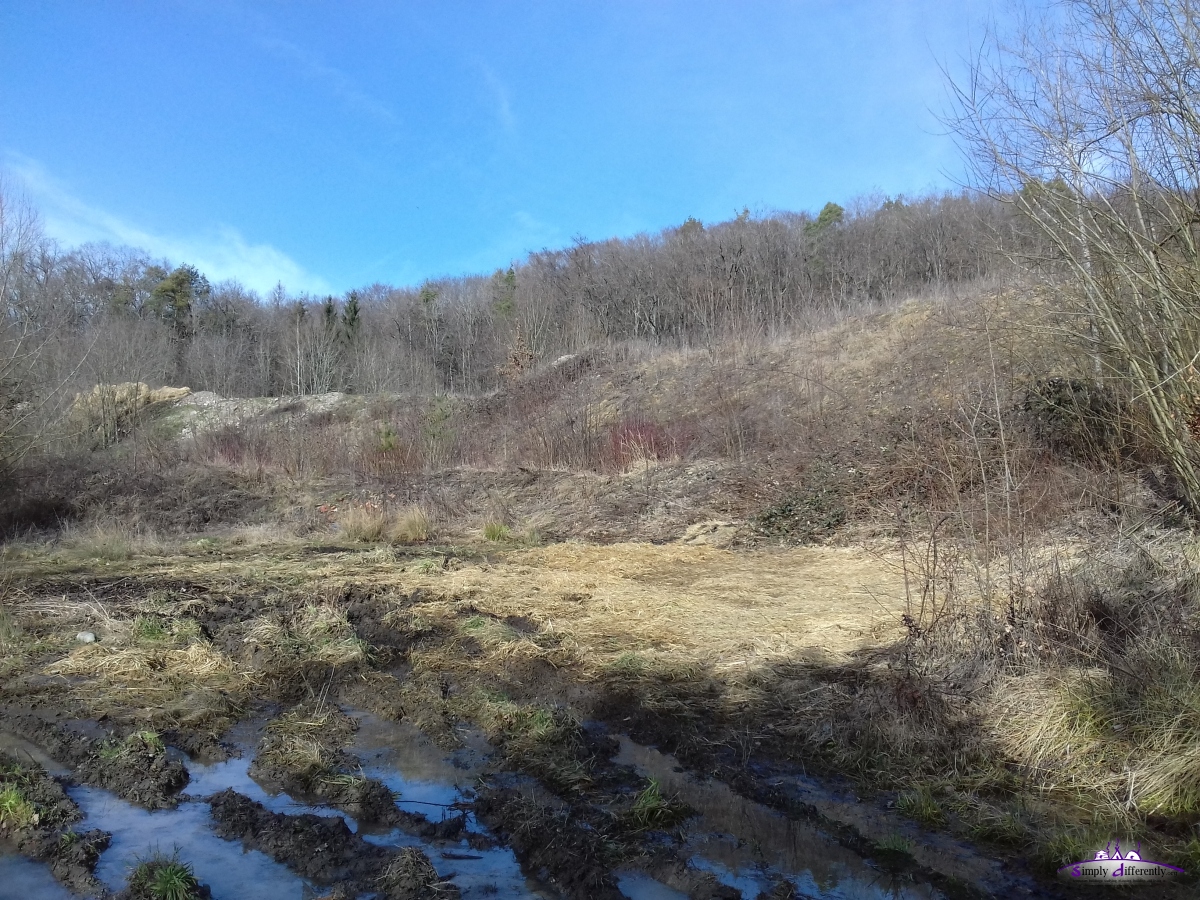
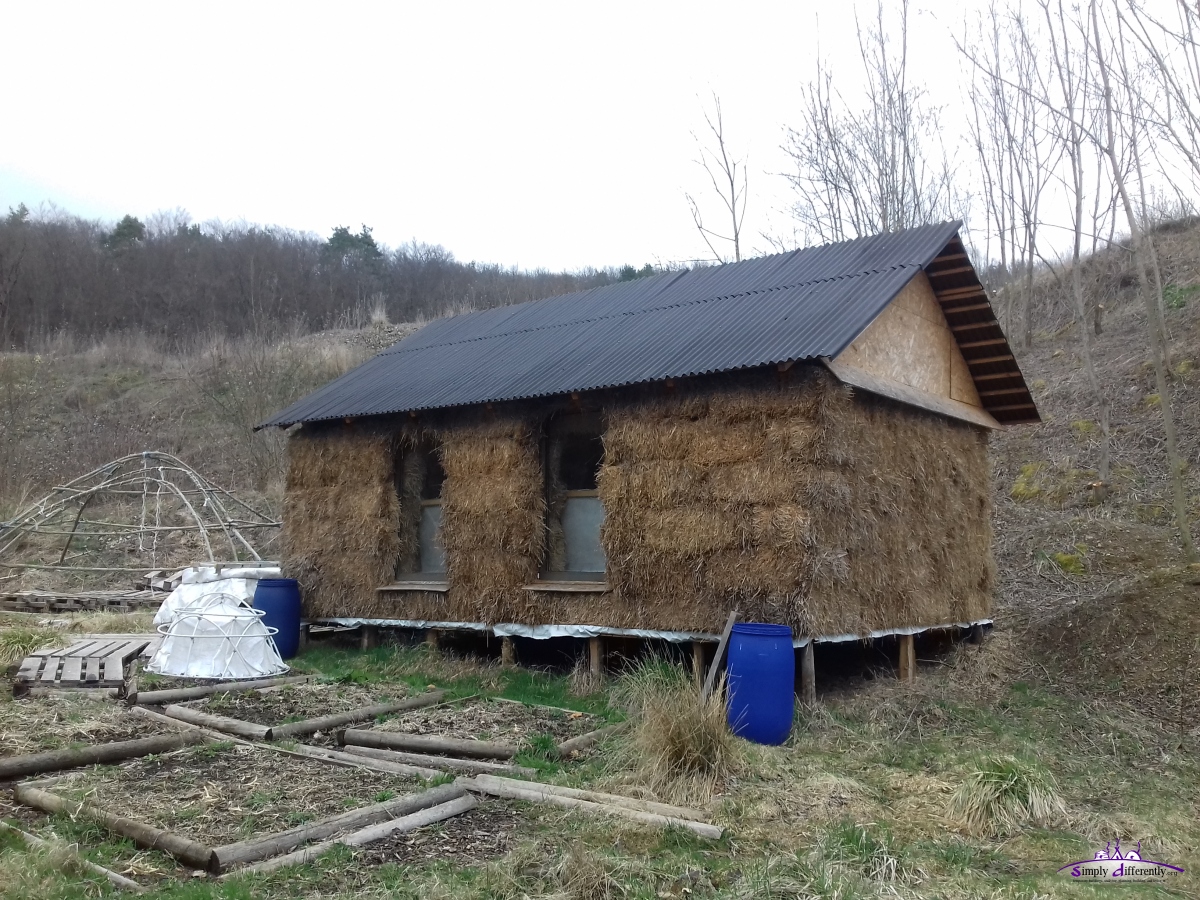
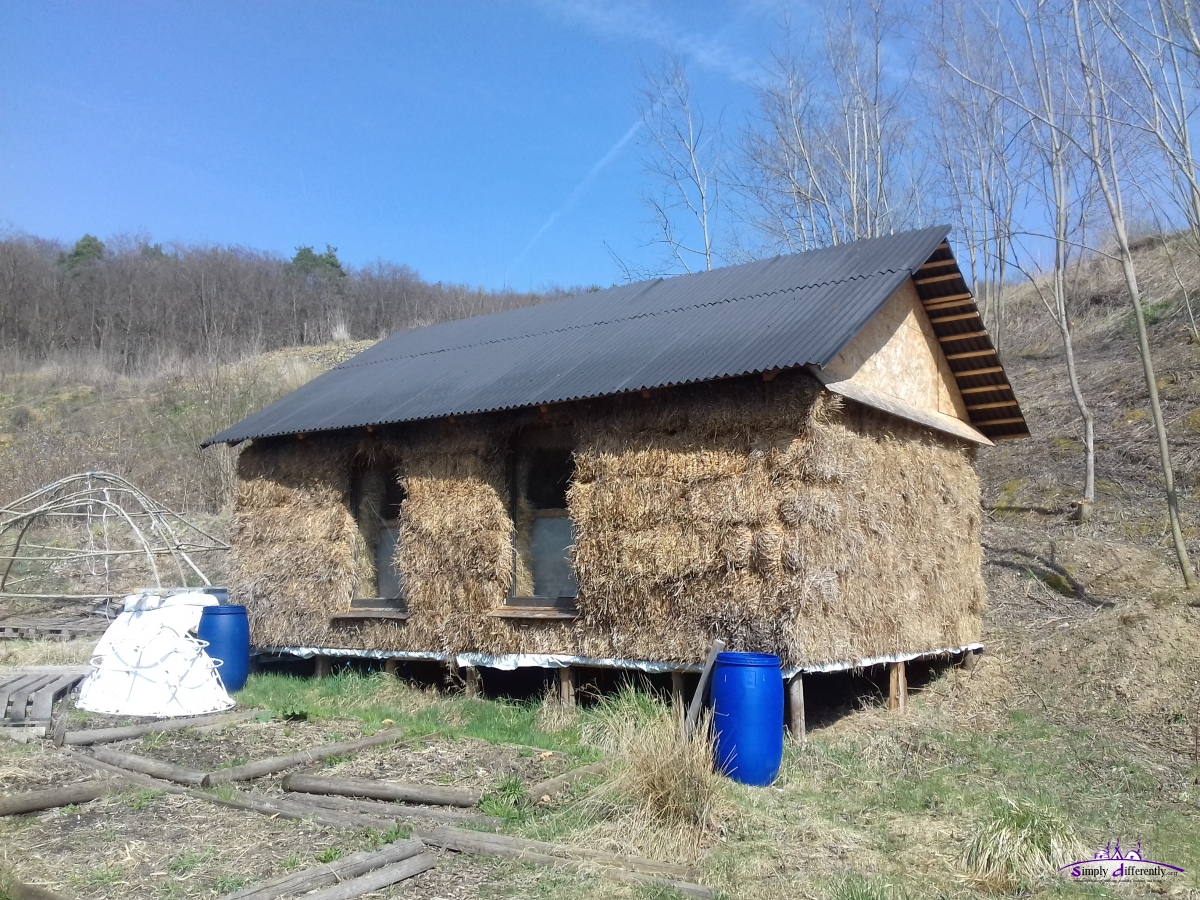
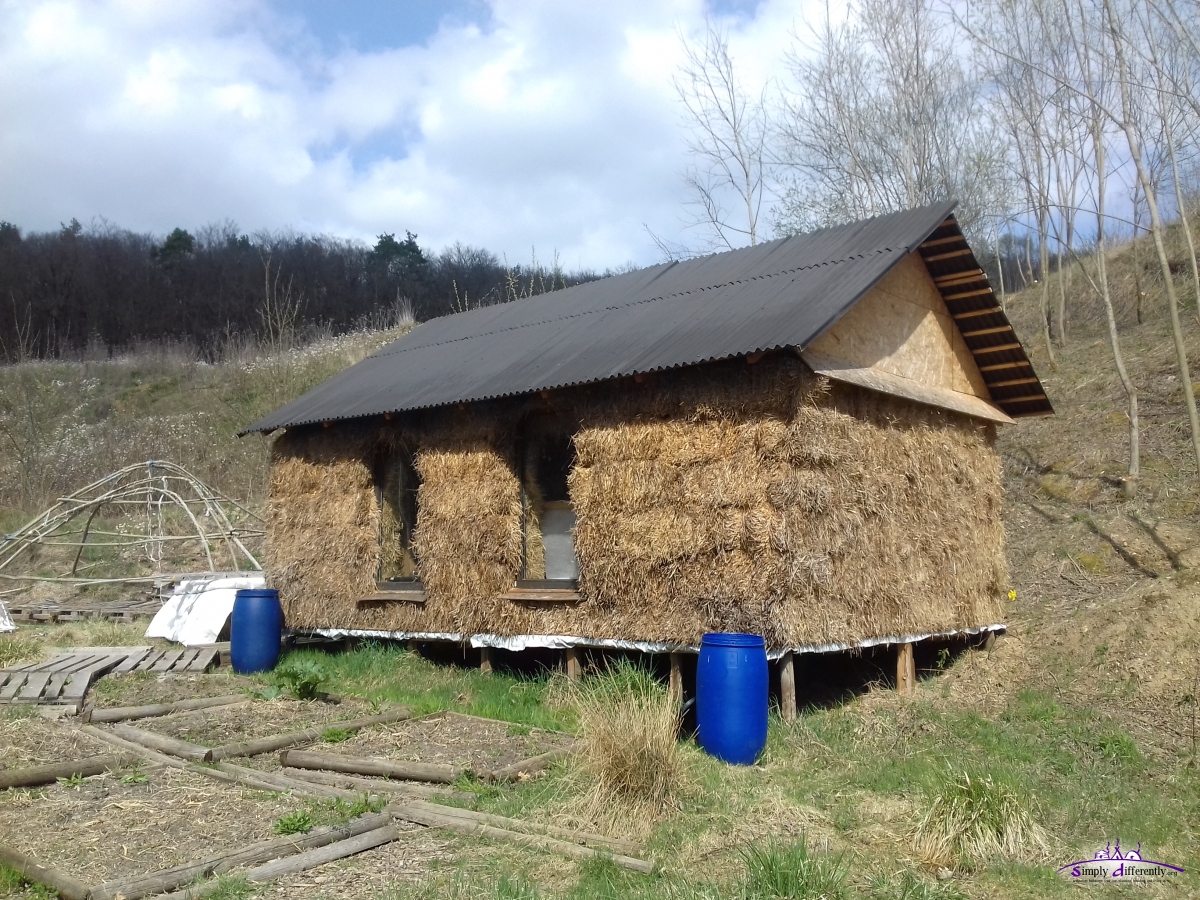
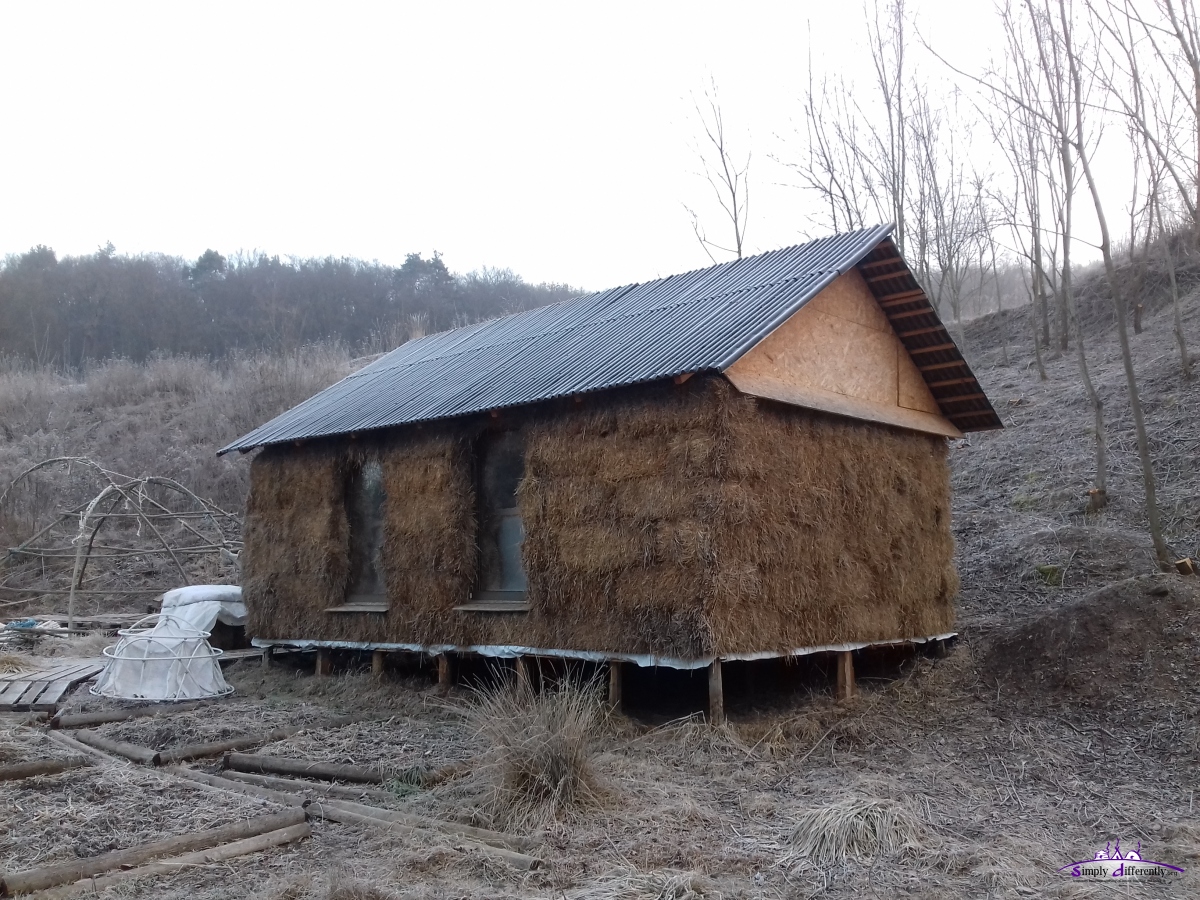
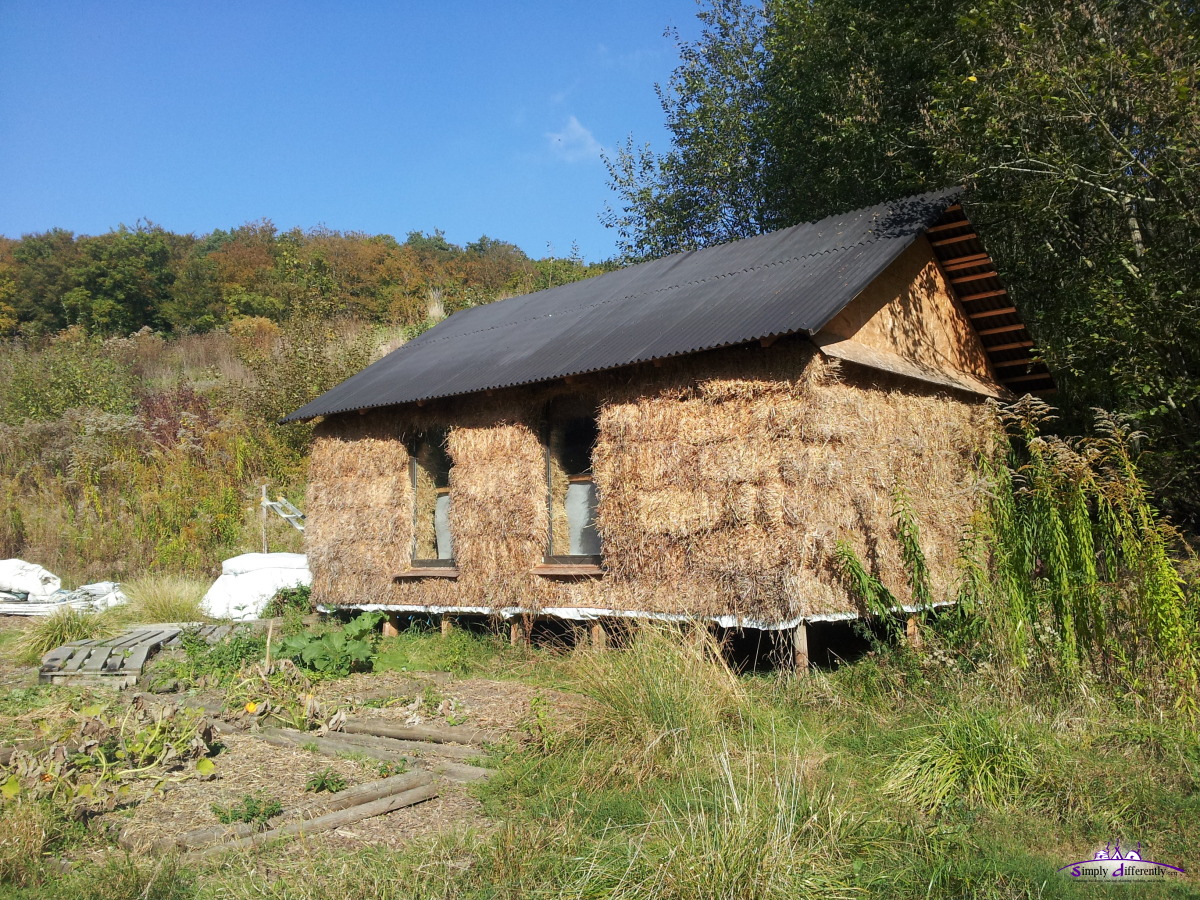
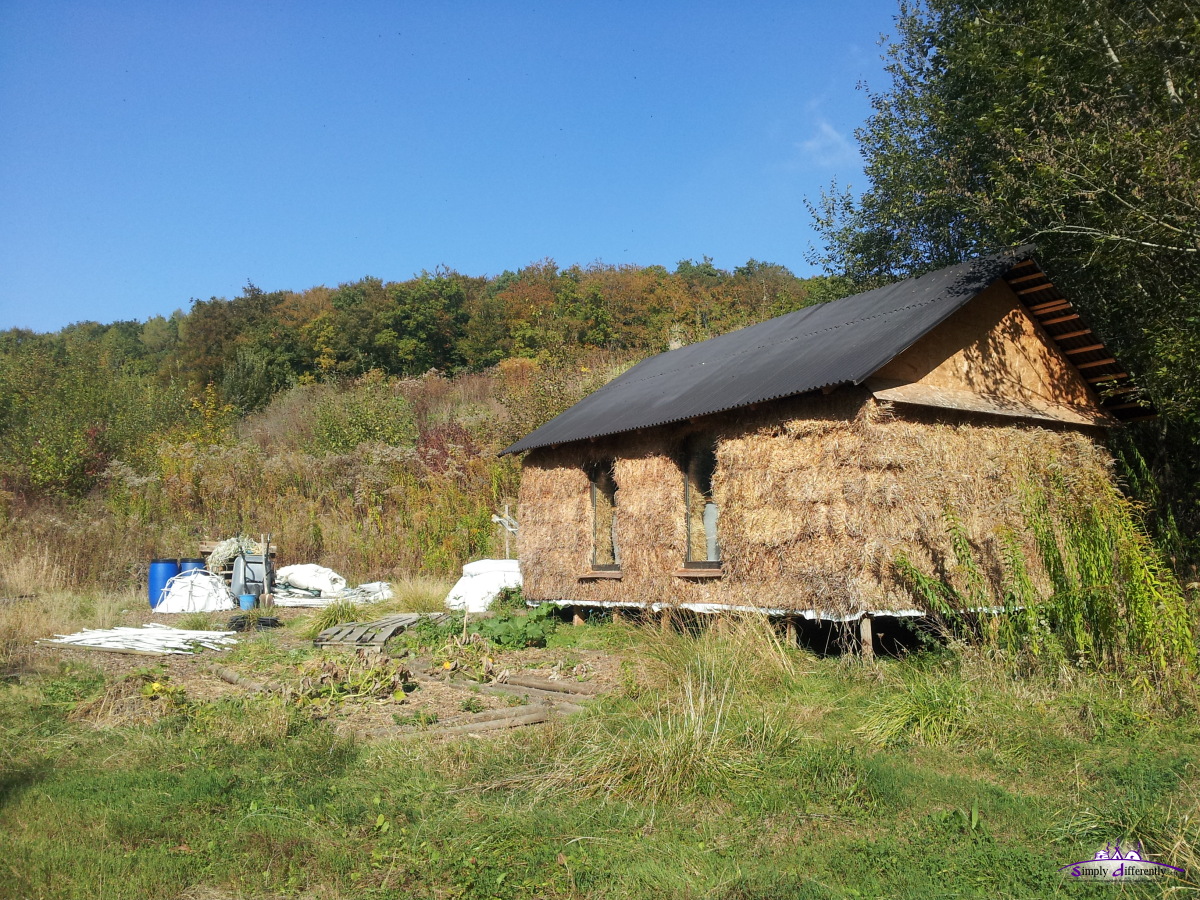
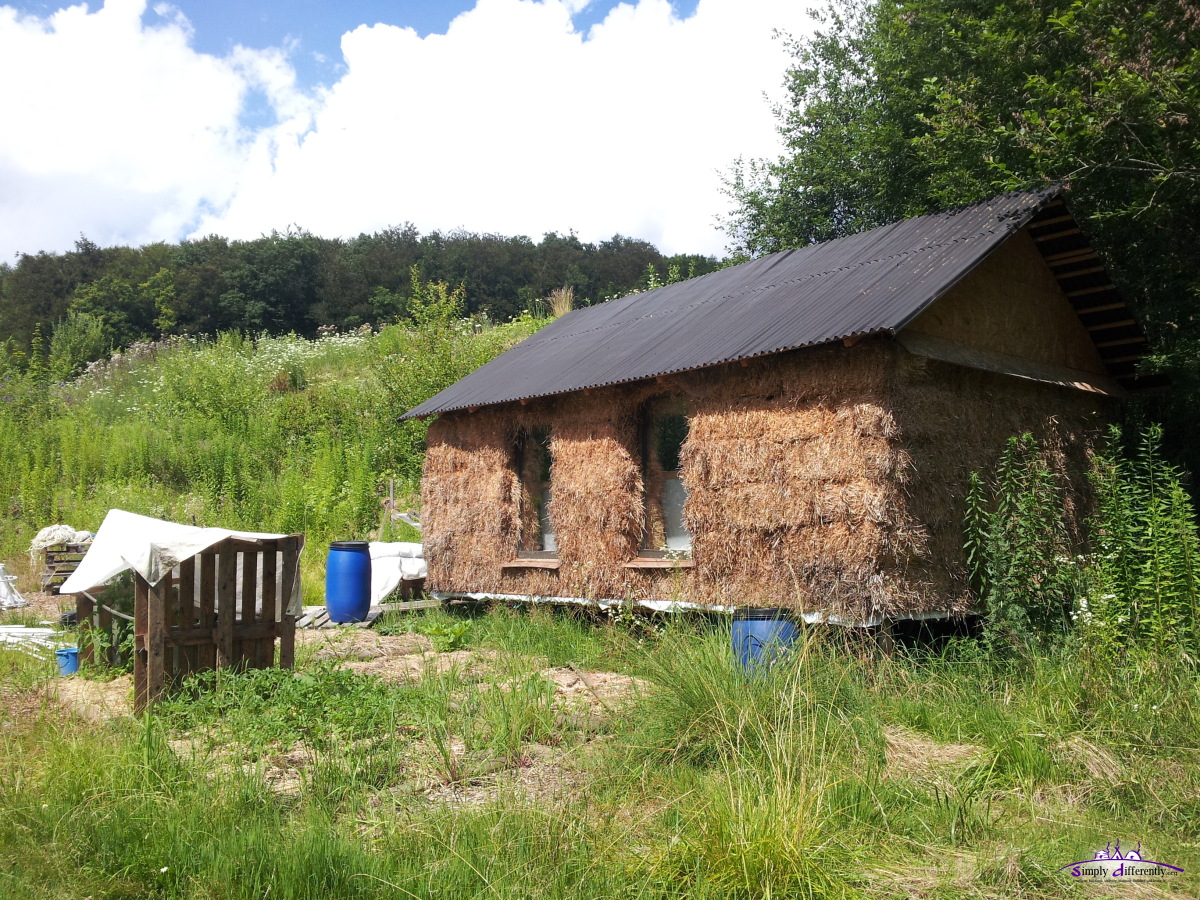
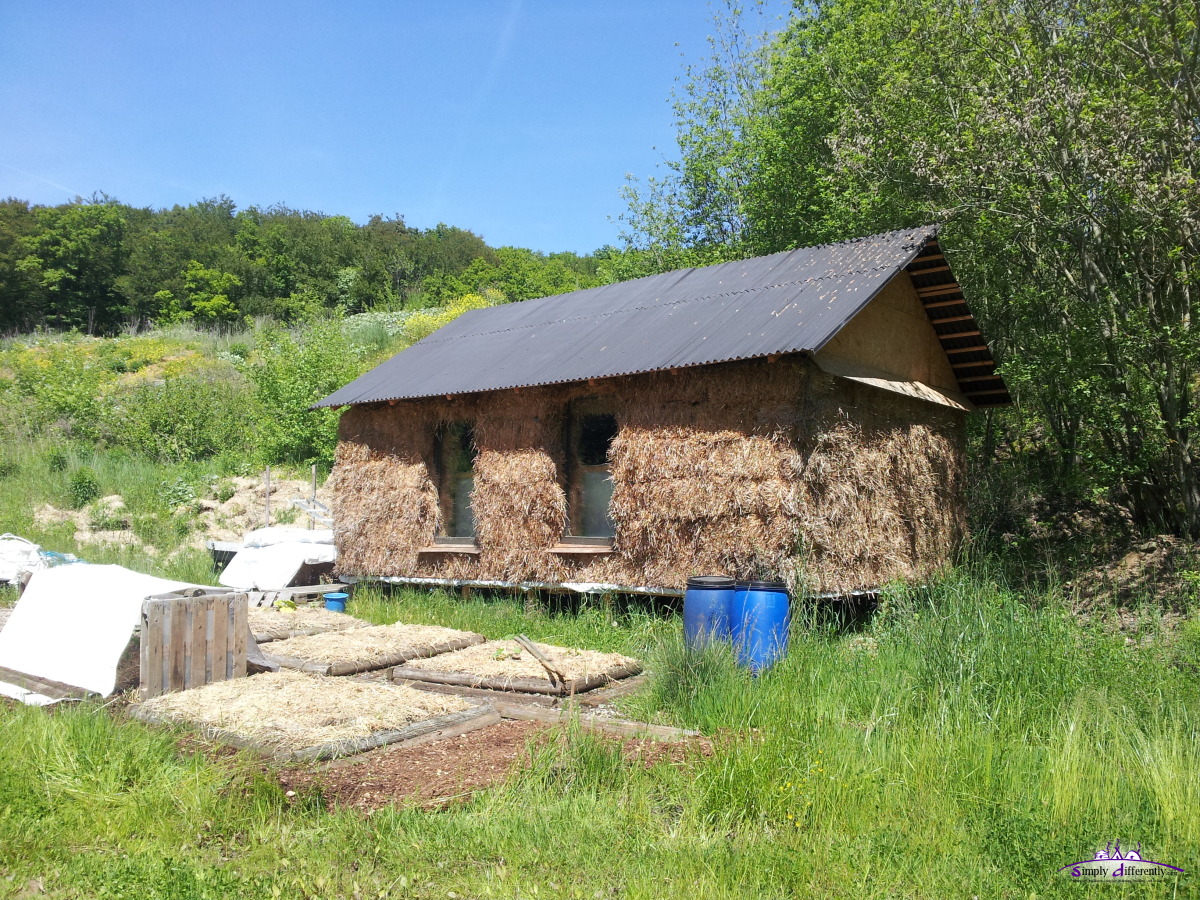
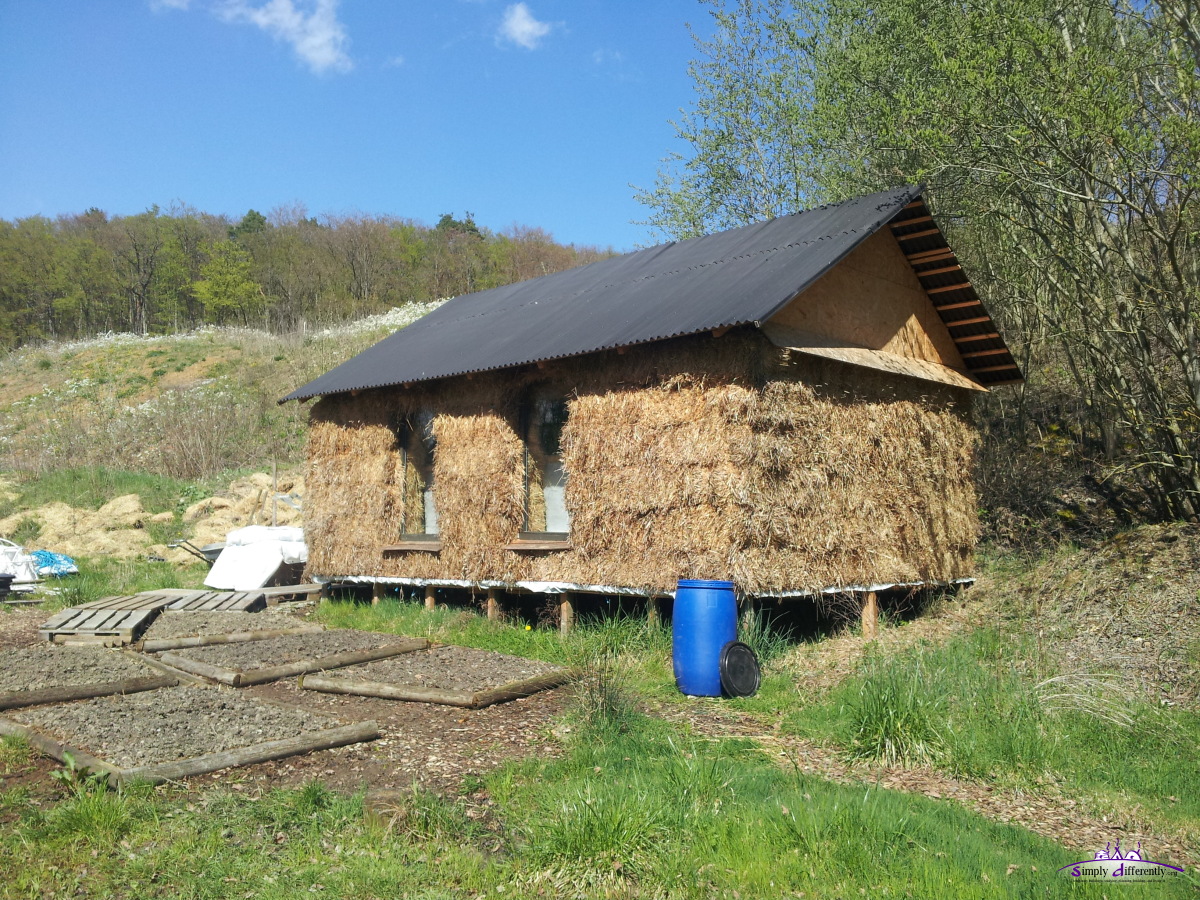
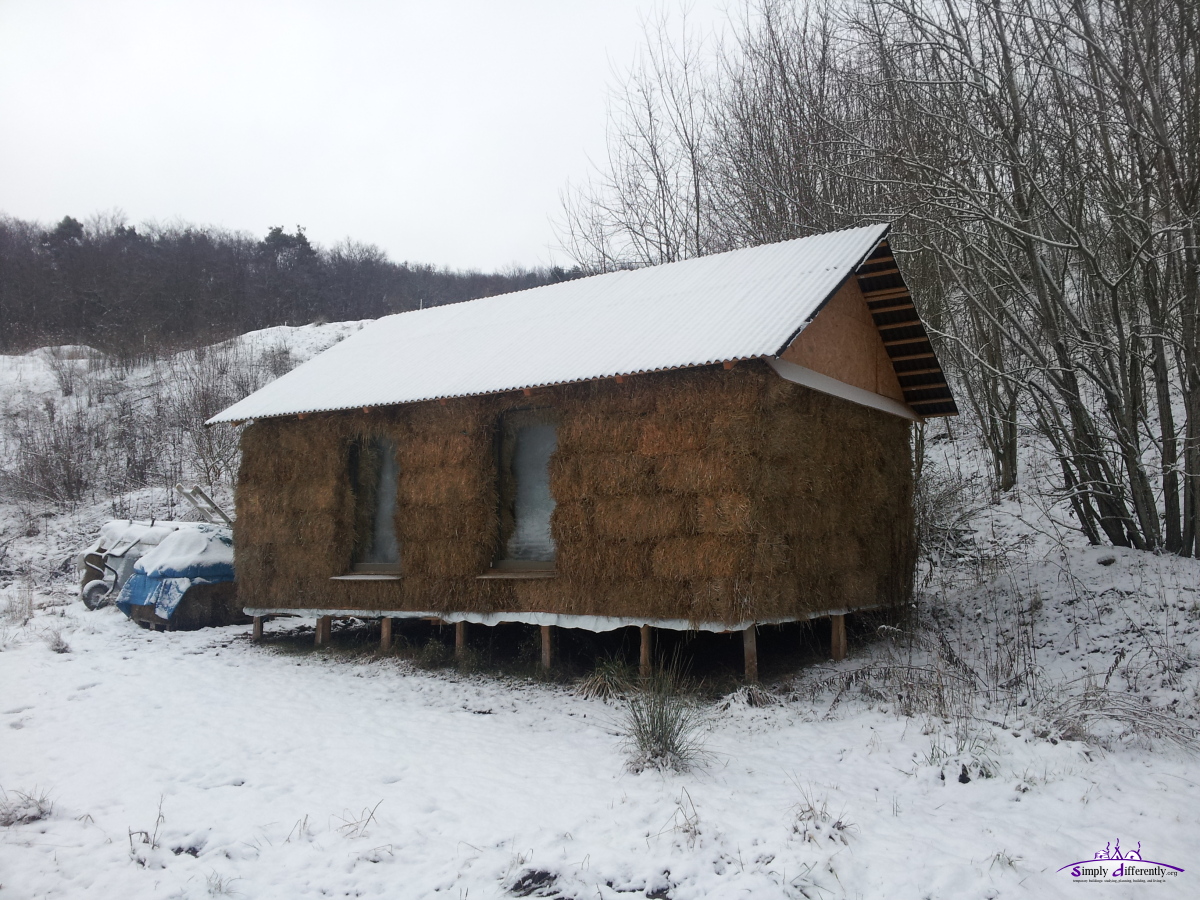
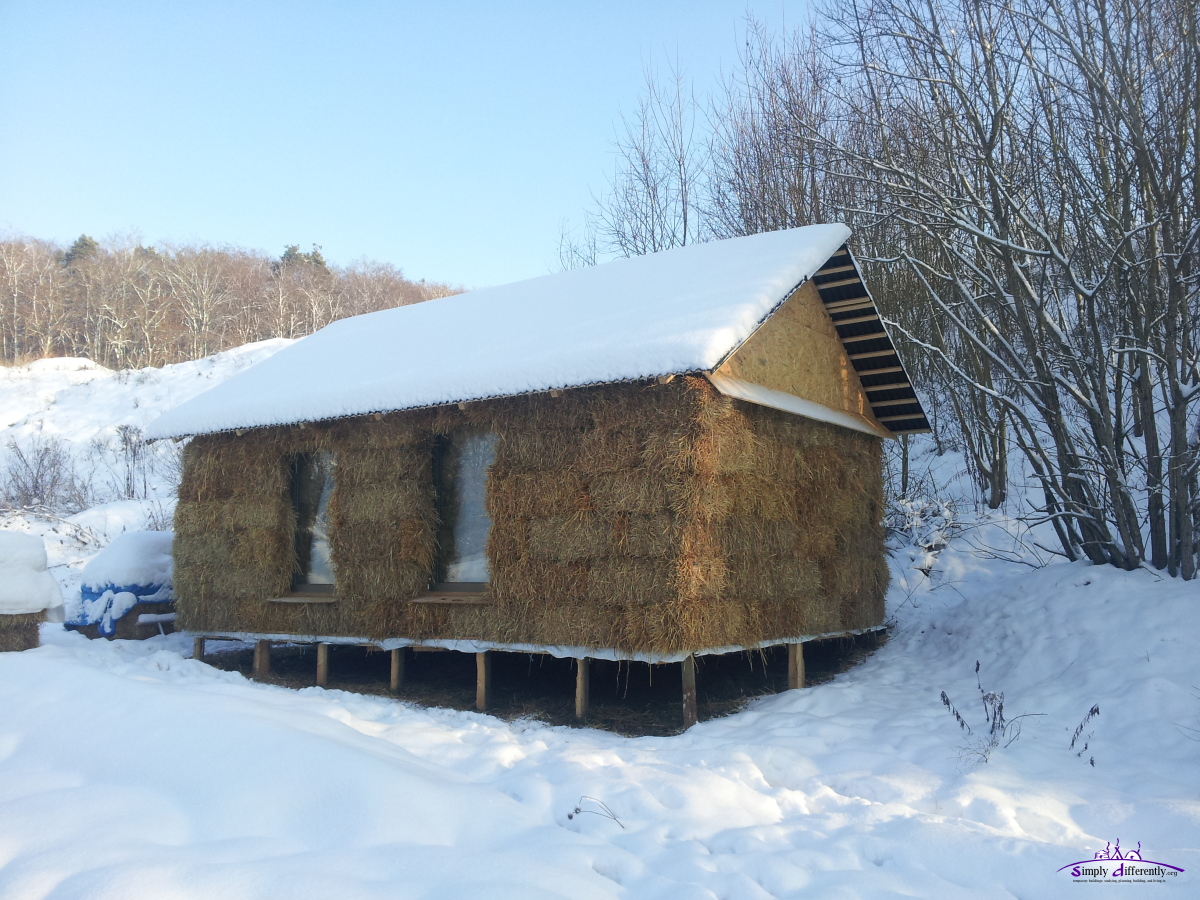
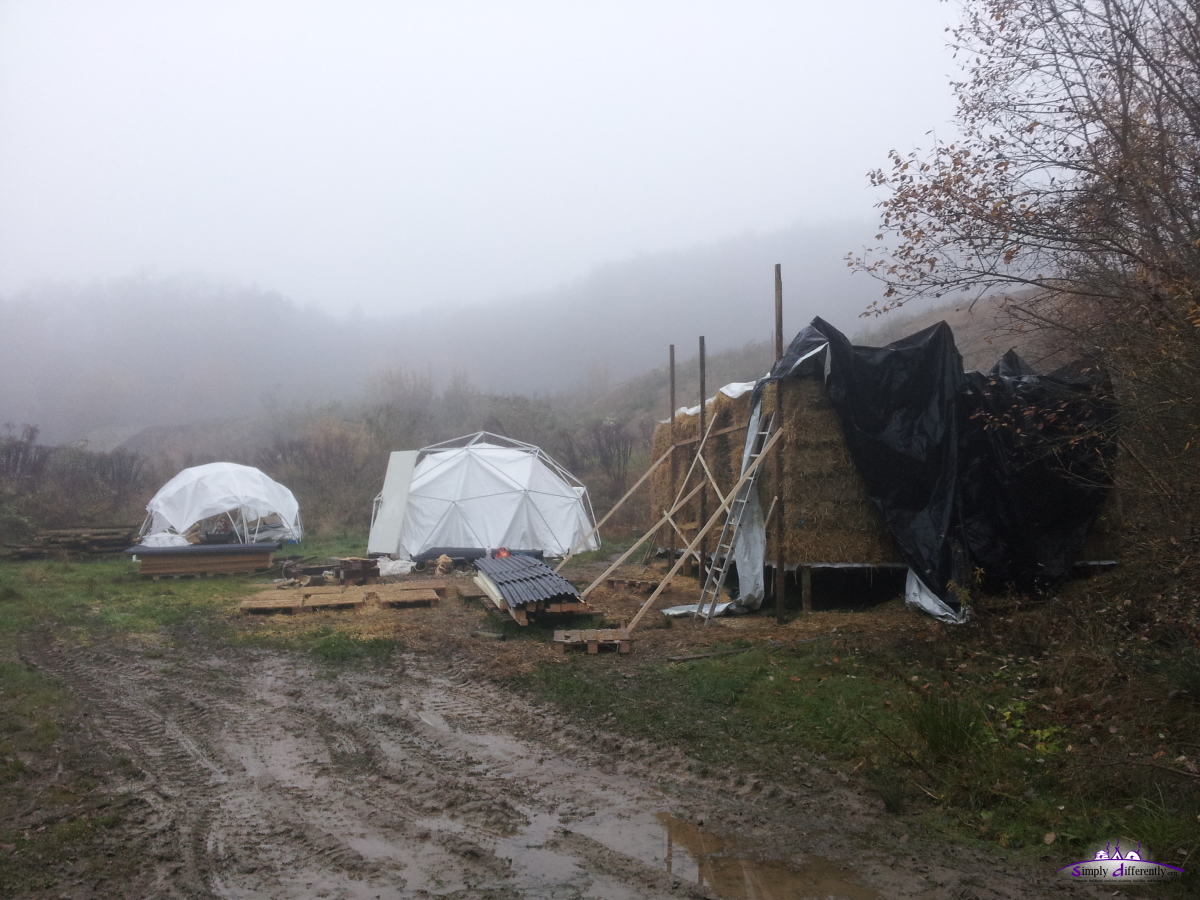
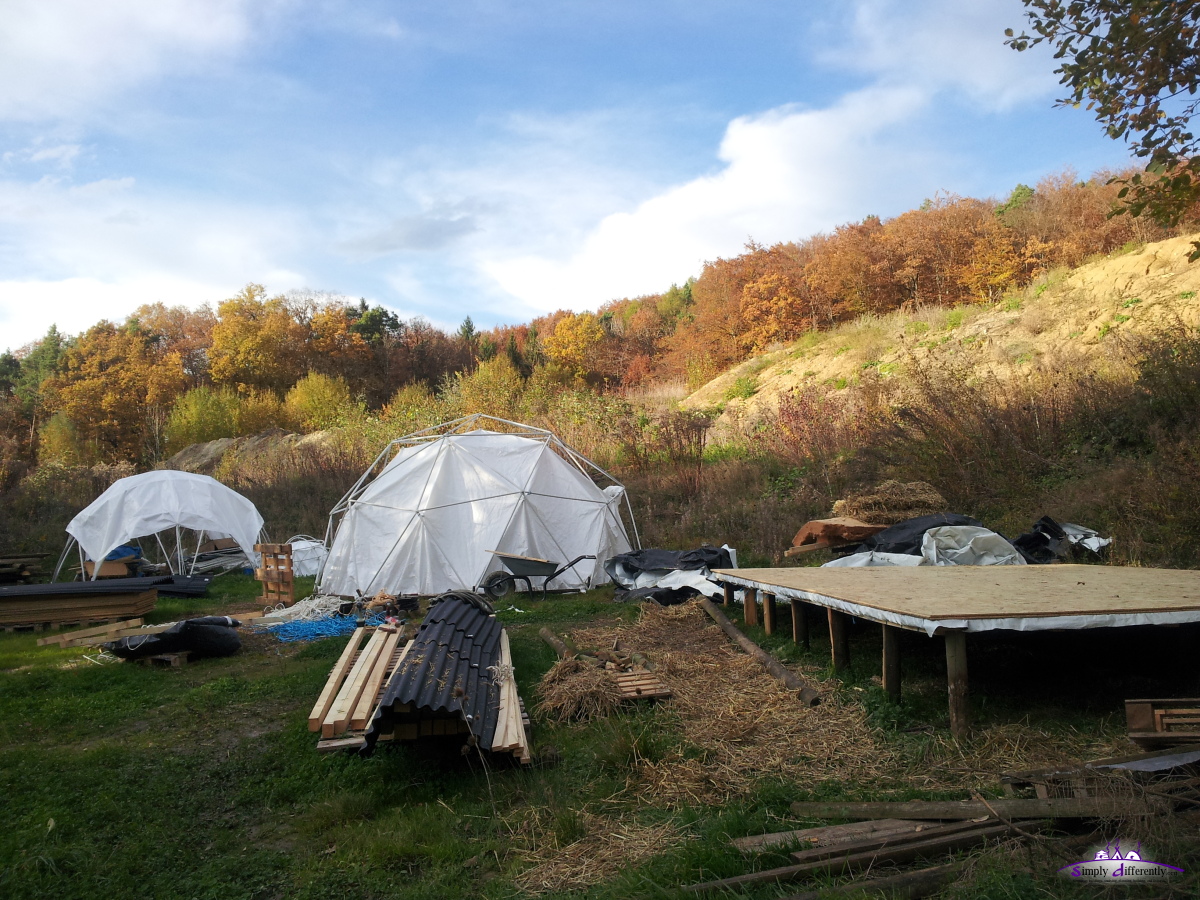
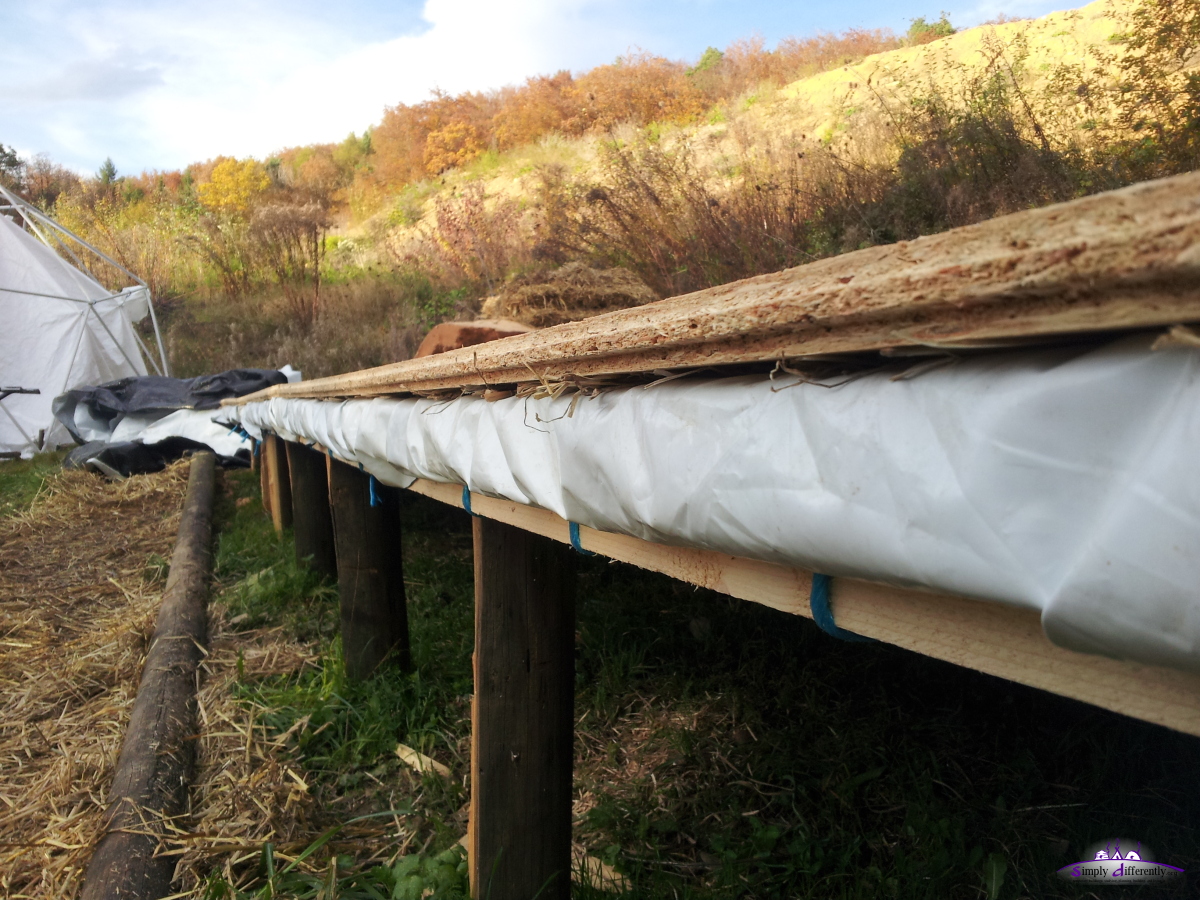
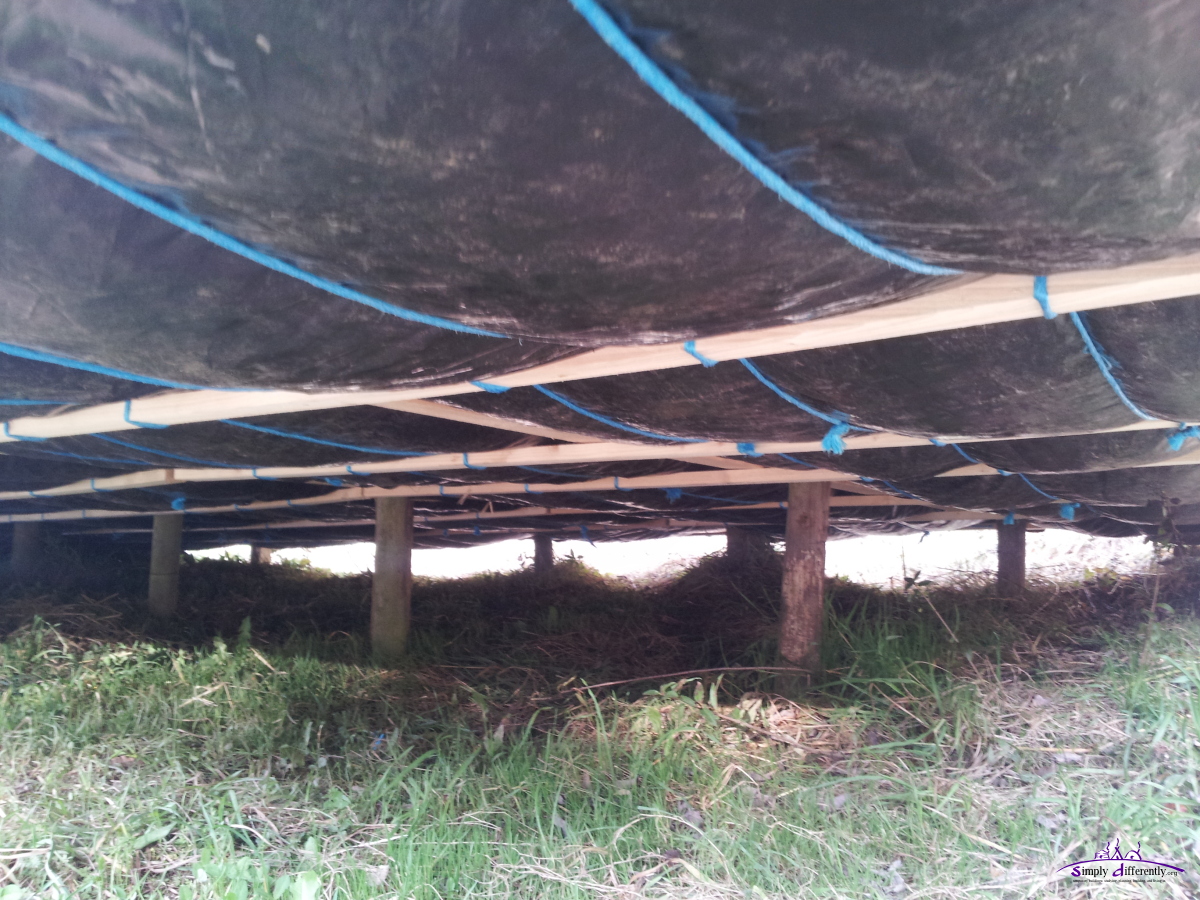
  Current state 2017/04/10 |
The main idea is to be modular and cutting as little parts as possible of common sized timber, like 3m and 4m long beams, and maintain bare strawbales, inside and outside and see how it does.
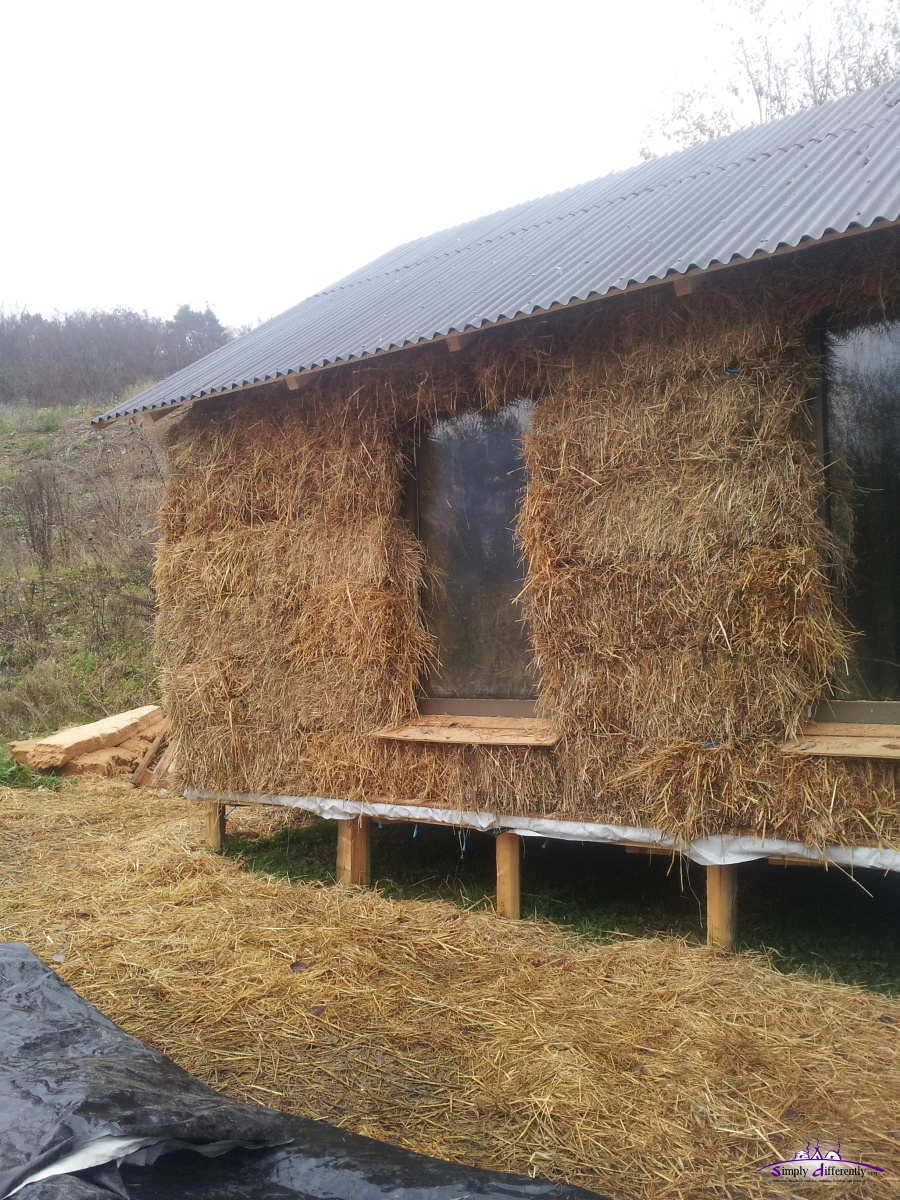
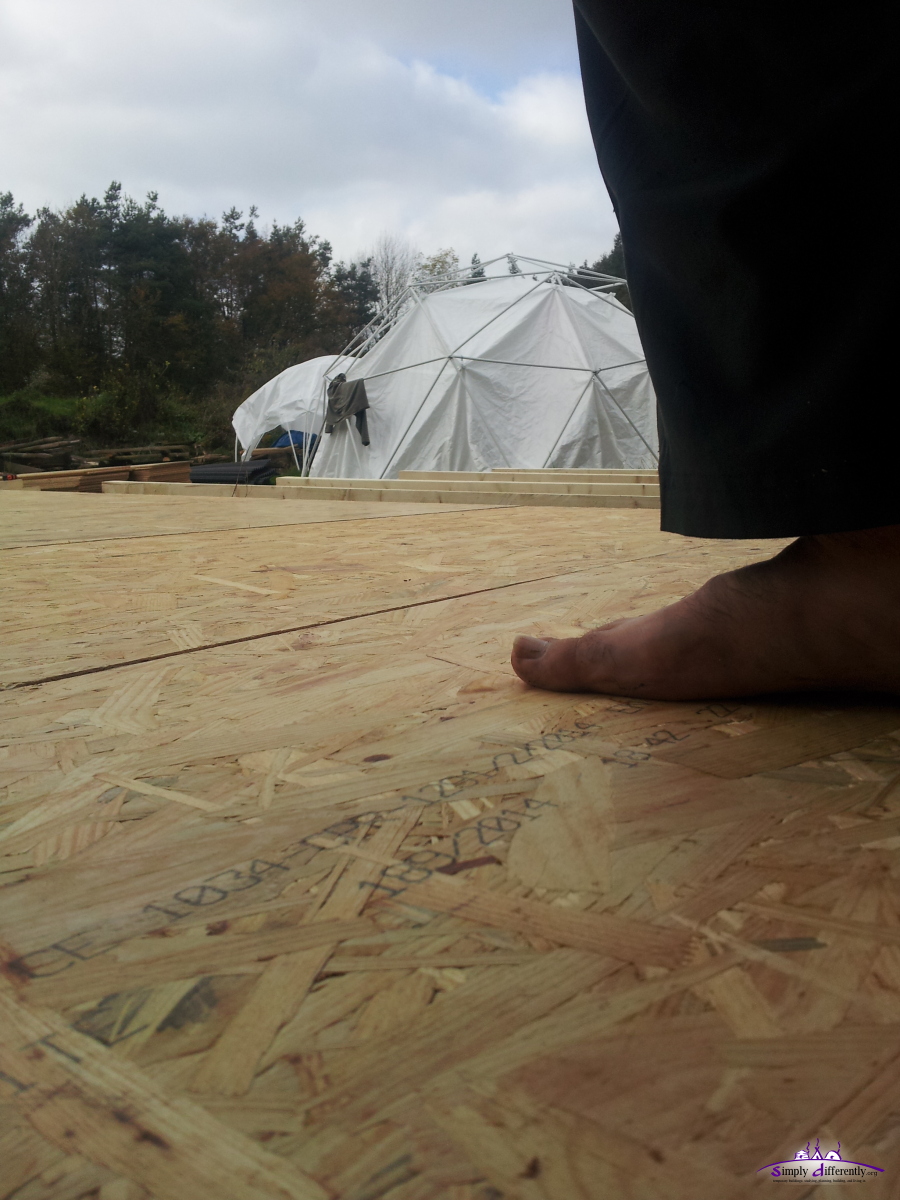
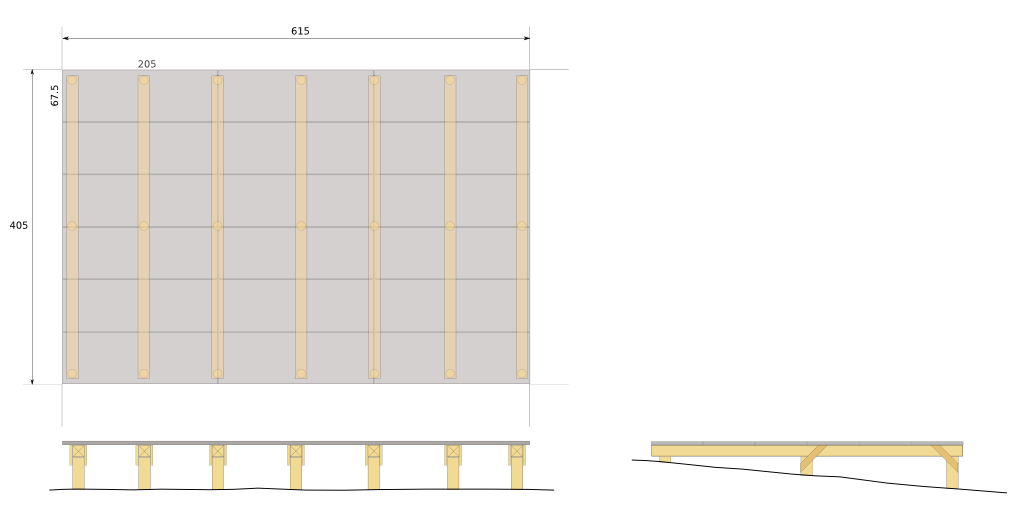
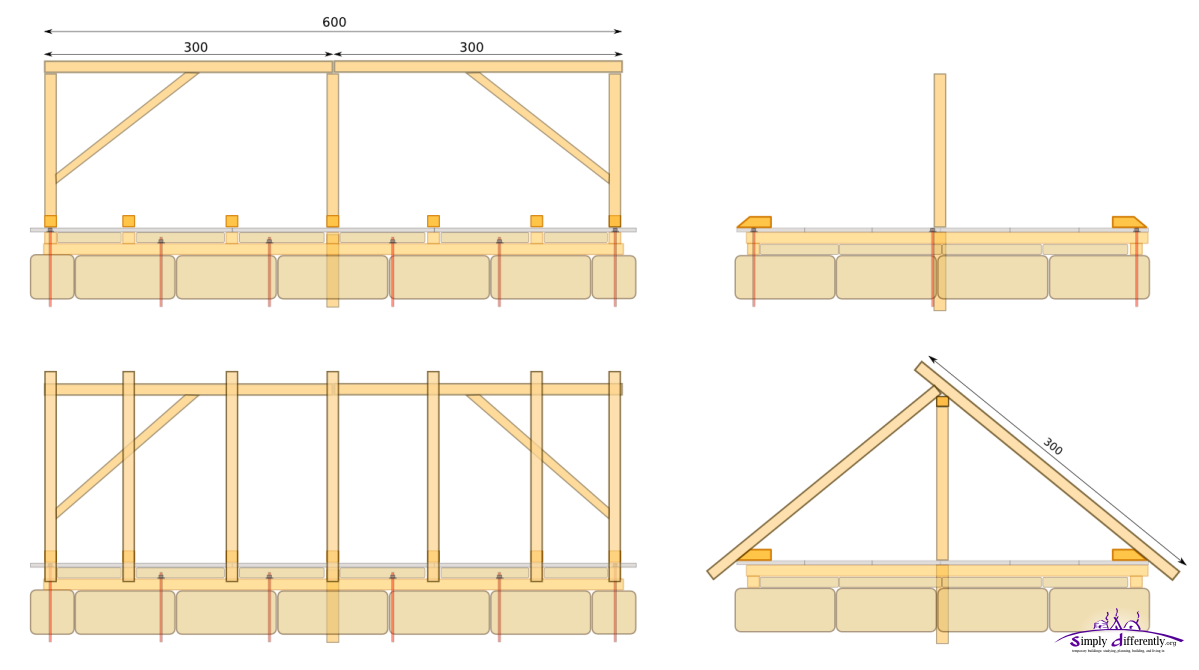
The main measures are based on the OSB/MDF, in my case I used 22mm thick 2050mm x 675mm OSB/MDF, and I ended up with roughly 4m x 6m, or to be exact: 3 x 6 x OSB 2050mm x 675mm = 6.15m x 4.05m floor size, the room height is around 2.20m.
Reminder for non-metric people: 1m (meter) = 100cm (centimeter) = 1000mm (millimeter)
Plans
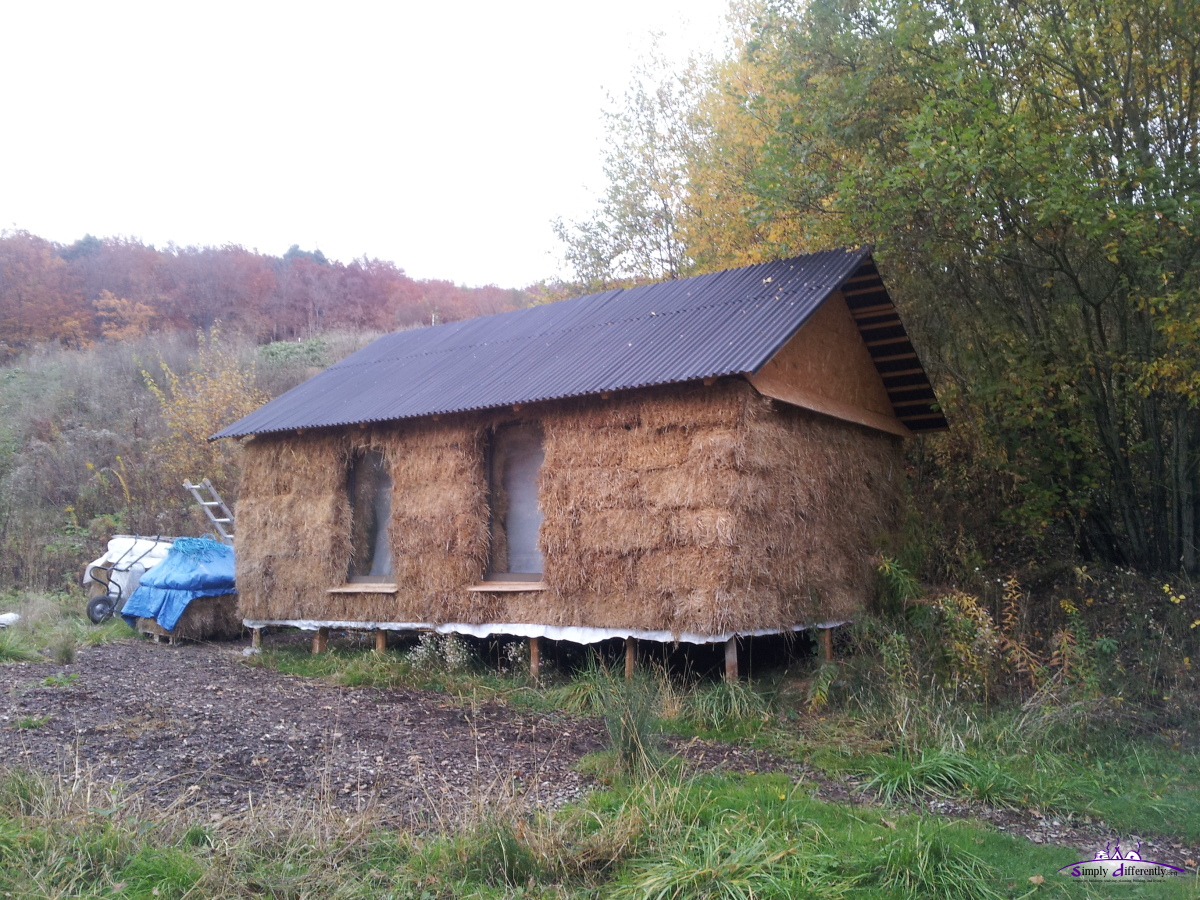
 Rough Sketch with 2 Options for the Roof |
Numbers
|
|
|
|
|


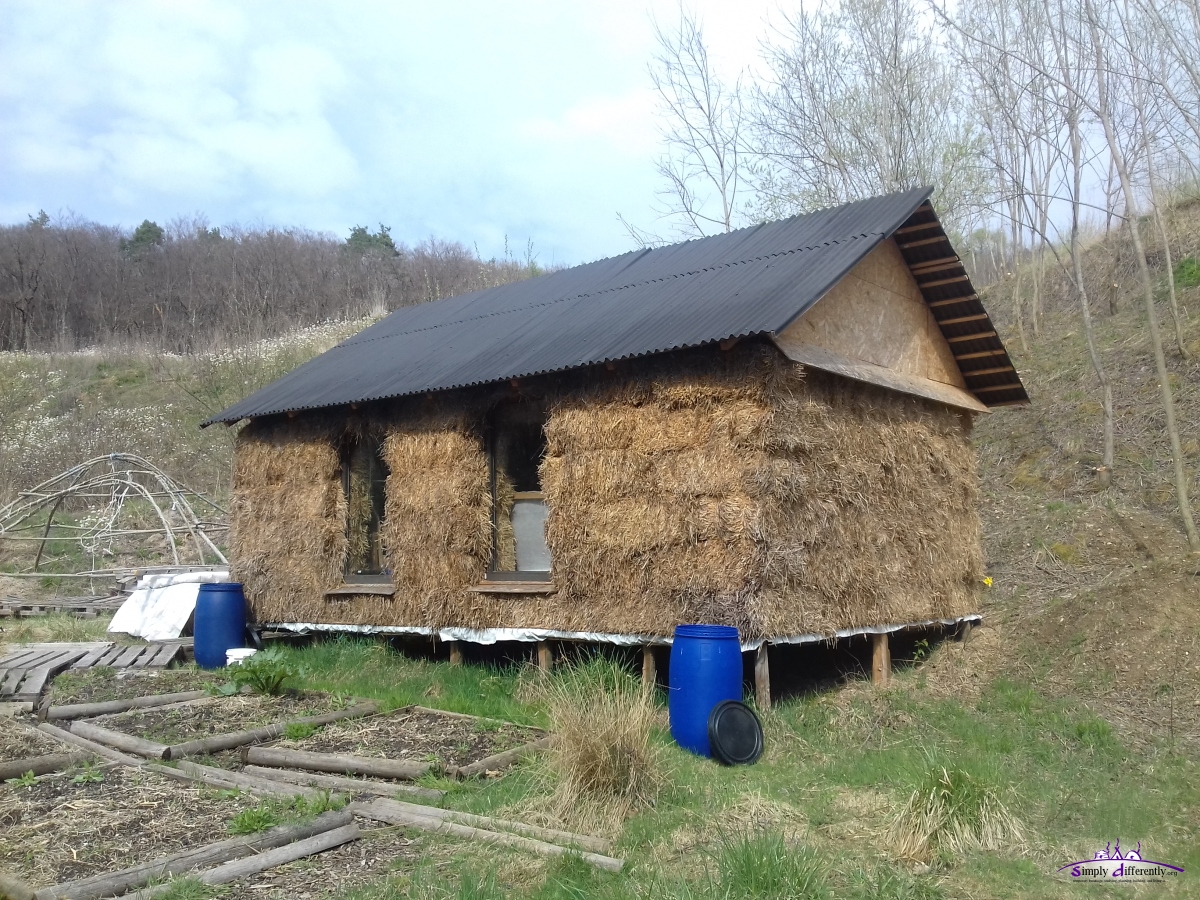
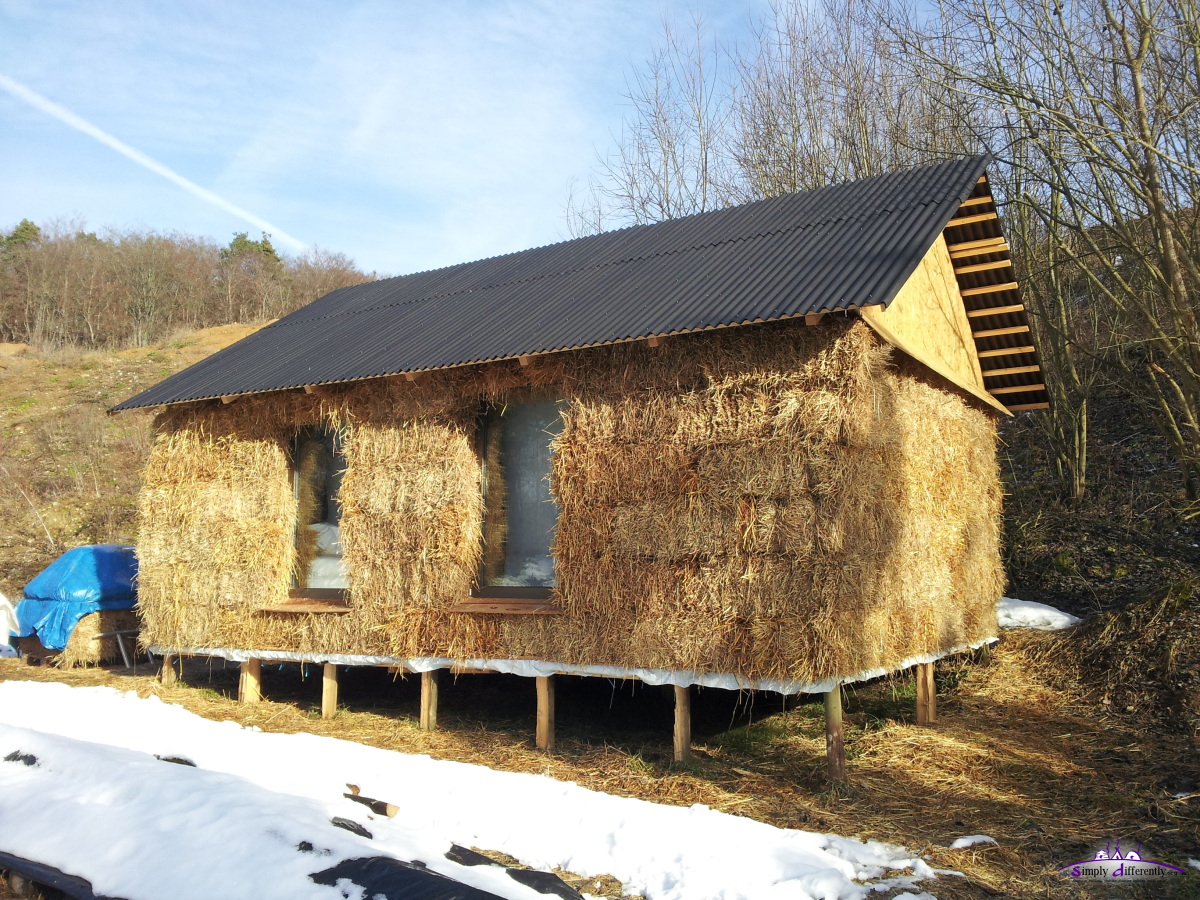
- Floor: 6.15m x 4.05m, ~24m2 (interior: 5.5m x 3.4m, ~18m2)
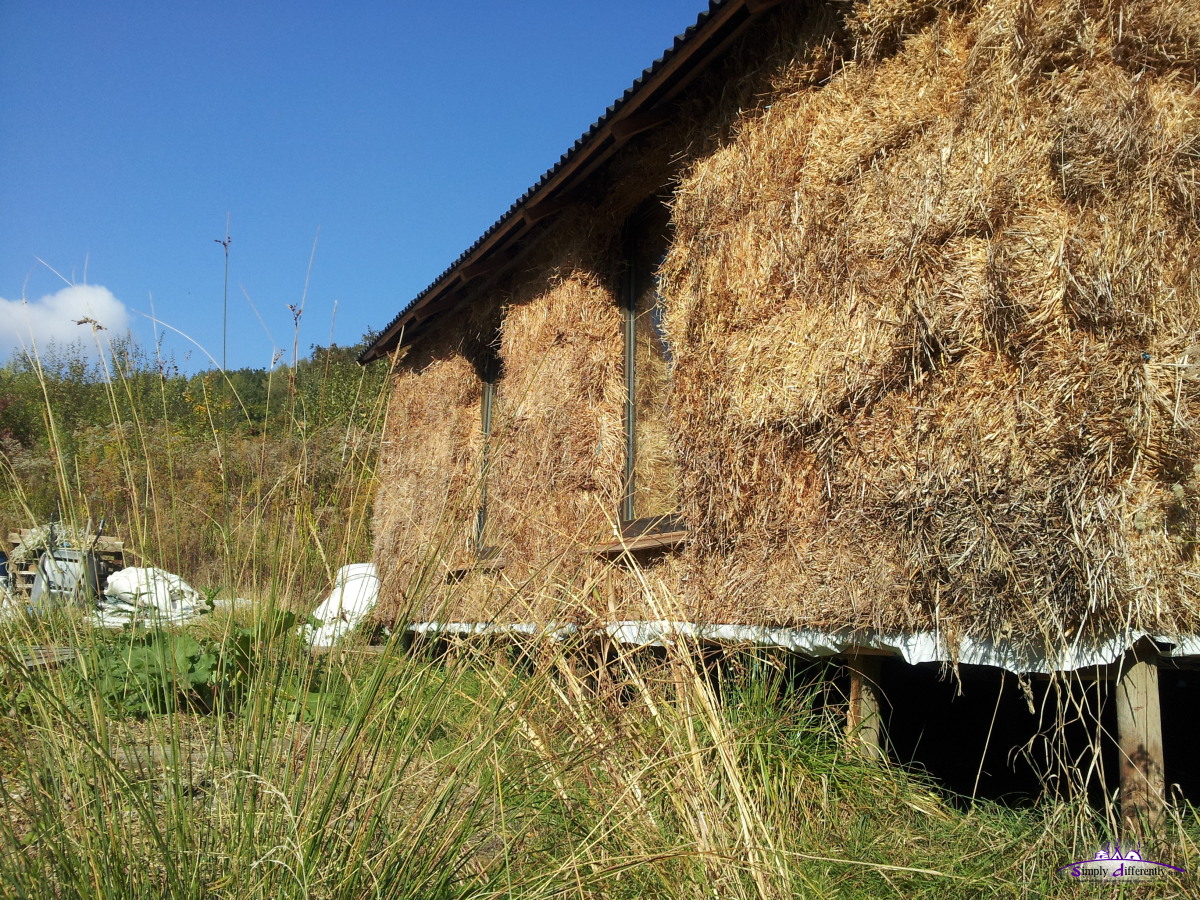
- Wall Thickness: 45-50cm
- Ceiling Height: 2.20m
- Strawbales: ~140 pieces (apprx. 90cm x 50cm x 35cm per strawbale)
- Features:
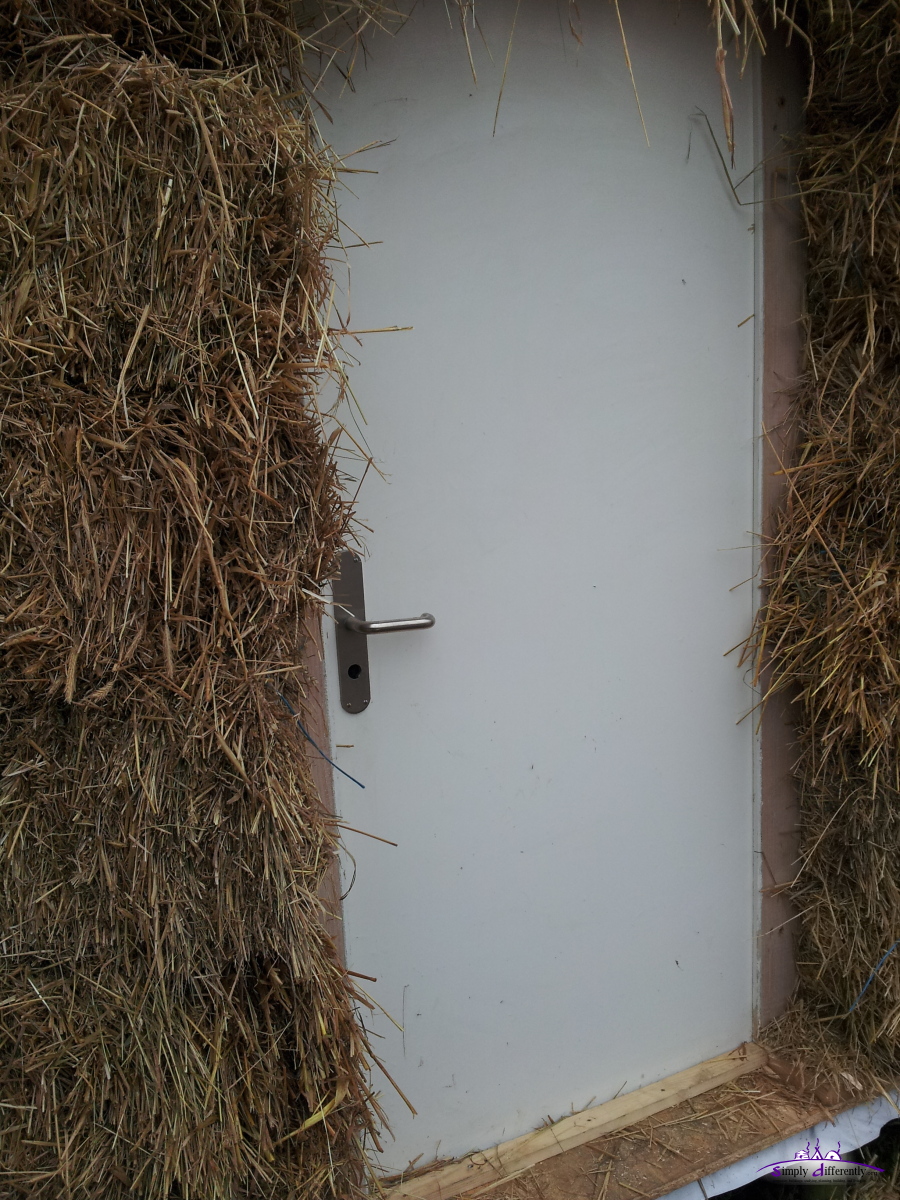
- 1x door (prefabricated)
- 2x windows (prefabricated)
- Total Height: ~4m
Material
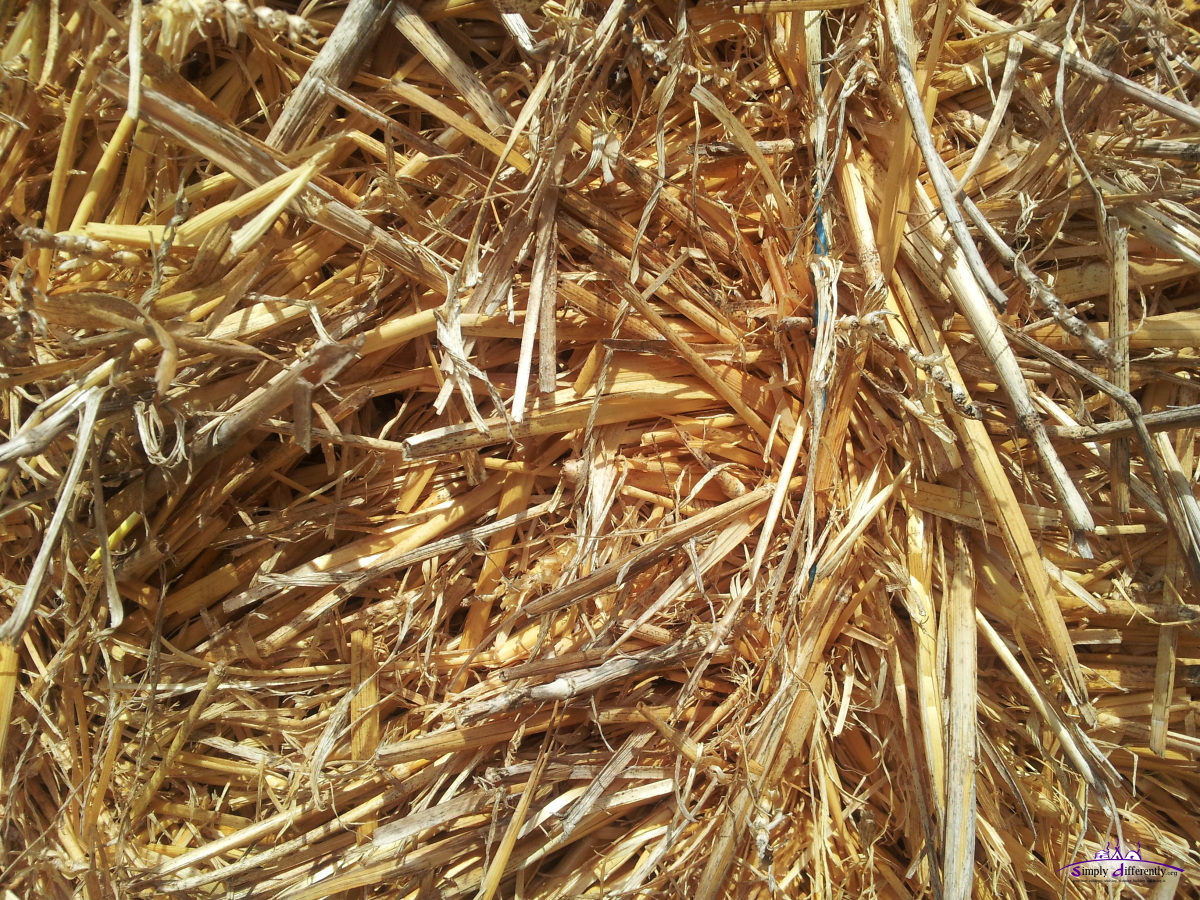
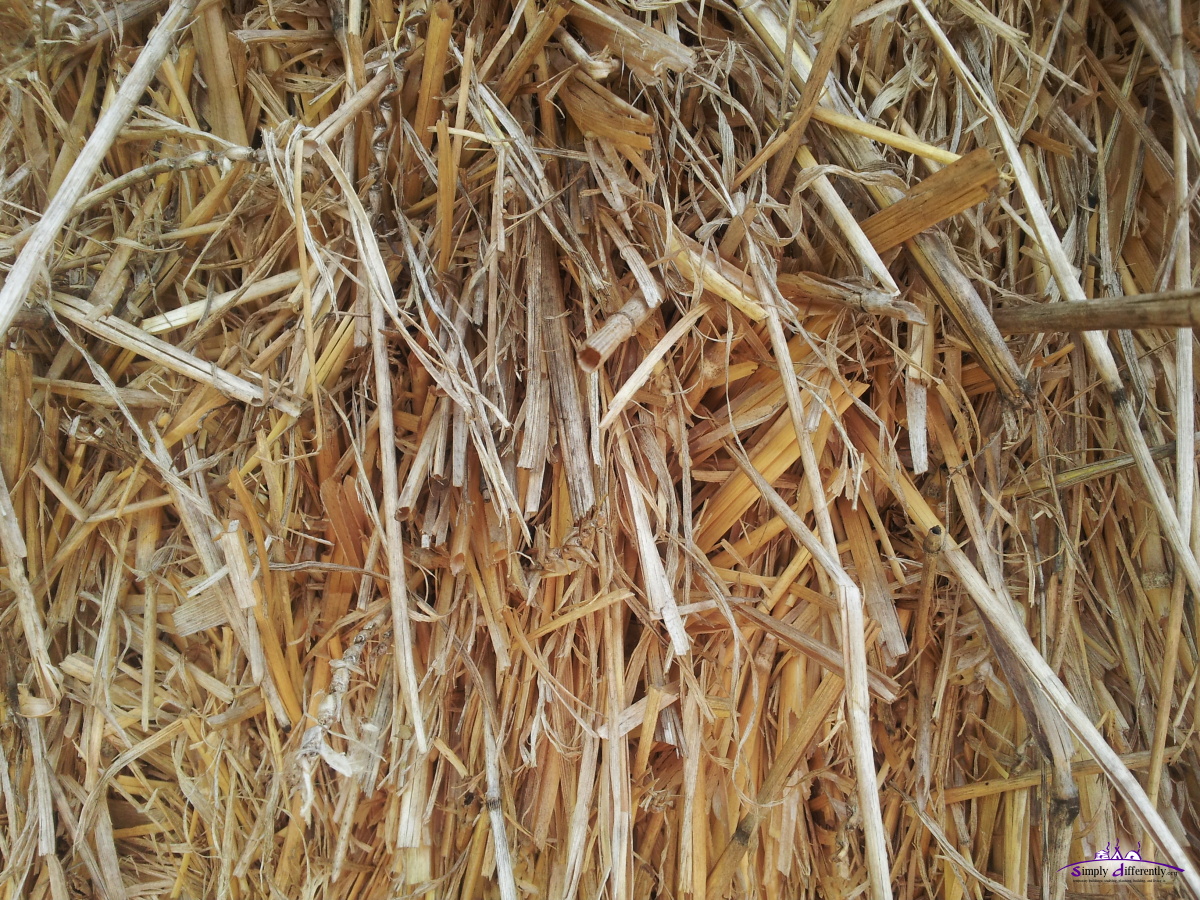
Strawbales
- ~180 x small strawbales (90cm x 50cm x 35cm, apprx. 2-3 Euro/pc)
Solid Wood
- 20 x 4m x 7.8cm x 5.8cm wood beams (a 5.80 Euro/pc): floor and ceiling (14 used, 6 spare)
- 30 x 3m x 5.8cm x 5.8cm wood beams (a 3.50 Euro/pc): roof
- 50 x 4m x 4.8cm x 2.4cm wood struts (a 1.30 Euro/pc): floor and roof
- 30 x 3m x 4.8cm x 2.4cm wood struts (a 1.00 Euro/pc): roof
OSB
- 20 x OSB 205cm x 67.5cm x 22m (a 10.50 Euro/pc): floor (18 used, 2 spare)
- 25 x OSB 205cm x 67.5cm x 12mm (a 5.20 Euro/pc): ceiling (18 used, 7 spare)
Misc
- 24 x 2m x 0.91m bitumen roof (a 8.65 Euro/pc): roof
- 1x door with frame
- 2x windows with frame
- 7m x 7m PVC: to cover construction to prevent rain entering the strawbales
Prices as of 2014/10, wood & OSB from Bauhaus.info  (Germany), strawbales from local farmer, door and windows were spare.
Reflection
I started to plan the cabin with the idea for a single person to build it, and test some of the wall construction methods. Due to logistic issues like belated arrival of strawbales, the late fall and more humid and rainy days cut the experimentation period short and I had to accept help by two people.
 |
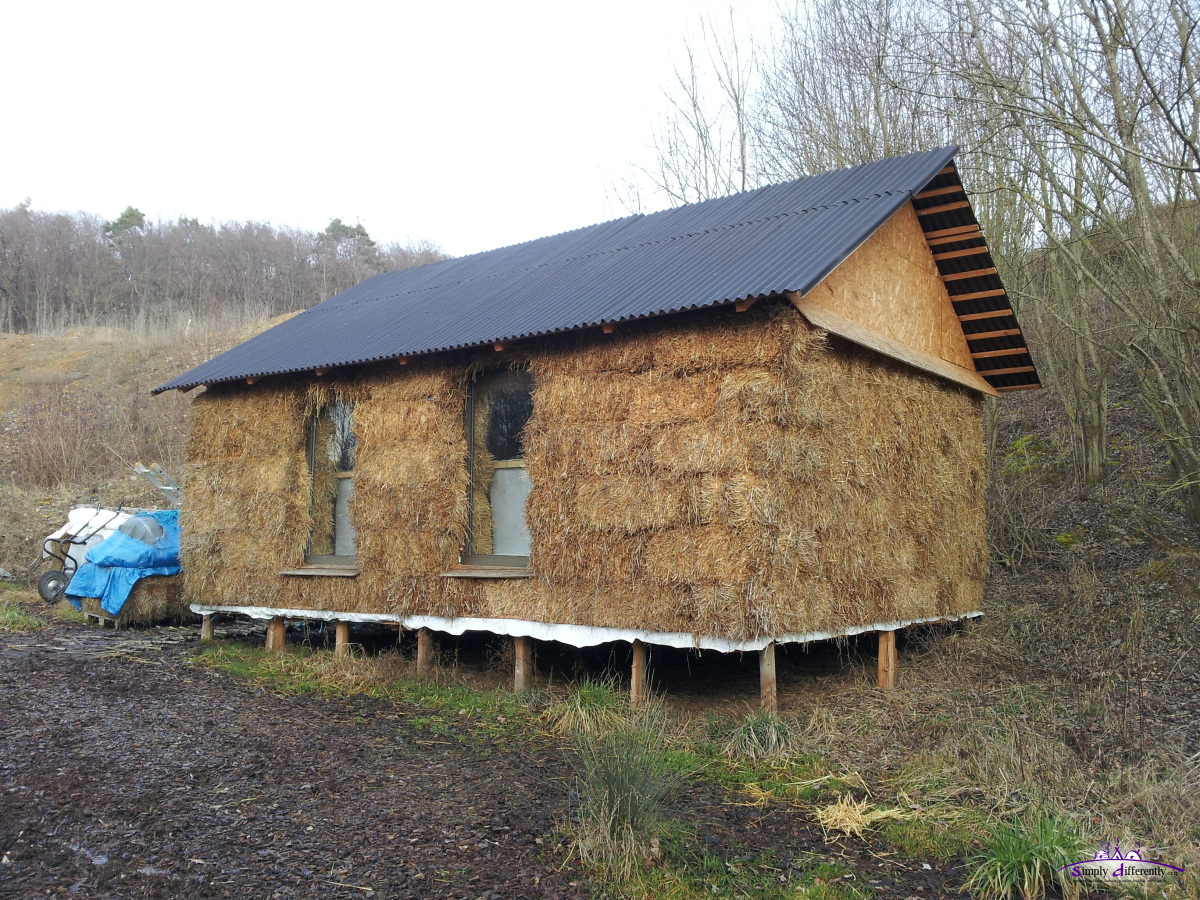
  Compressed Wall with Threaded Rods |
I estimated the material cost about ~1500 Euro overall, given you have the basic tools for construction, and door and windows are already available.
It took 9x afternoons (~4 hrs), or ~4 1/2 days to raise the cabin with the roof complete, apprx. 2-3 persons worked on it. A single person might work 10-14 days on it, an experienced person a few days less.
So far this has been the most "solid" temporary building I did, and also the first were I had to accept help from others to actually raise the building,
with domes, tipi and yurt, you can raise it as a single person (up to 6m diameter of those). With some patience and dedication one can build a strawbale cabin as a single person as well,
e.g. by compressing the wall with cords instead of threaded rods as I did, and this way simplify the manual handling when positioning the bales.

The main disadvantages of constructing with bales are
- the sizes are not even or regular, one has to account to margins and compensate accordingly
- prevent water (rain) to enter the strawbales while you raise the building
whereas the main advantages on the other hand are
- the bales are flexible and not too rigid, which gives 2-3cm margin on the side to jam things, e.g. window, door, or general unevenness (of the bales themselves)
- light(er) bales might not be perfect for larger buildings, but they are easy to handle
- rather inexpensive construction material
- has good insulation properties
About the actual exposure of the bare strawbales as I plan, I can't say anything yet (2014/11/26), check later in a couple of months.
I'm more fond of circular and spherical structures, as the rest of this web-site tells, there were two reasons to go rectangular with the strawbale cabin:
- the strawbales are rectangular
- the bitumen roof sheets are rectangular
in particular the roof sheets were a strong reason to keep the rectangular shape. I thought first of a strawbale based dome, but the rain cover would have been very cumbersome, as the entire surface or most of it, to be properly sealed, as straw does compost quickly when exposed regularly to water and air. So, to minimize the roof I decided to go with vertical walls and due the assembly of overlapping bitumen roof sheets, I went rectangular overall.
Diary
Most up-to-date entry at top, first and oldest entry at the bottom respectively last page.
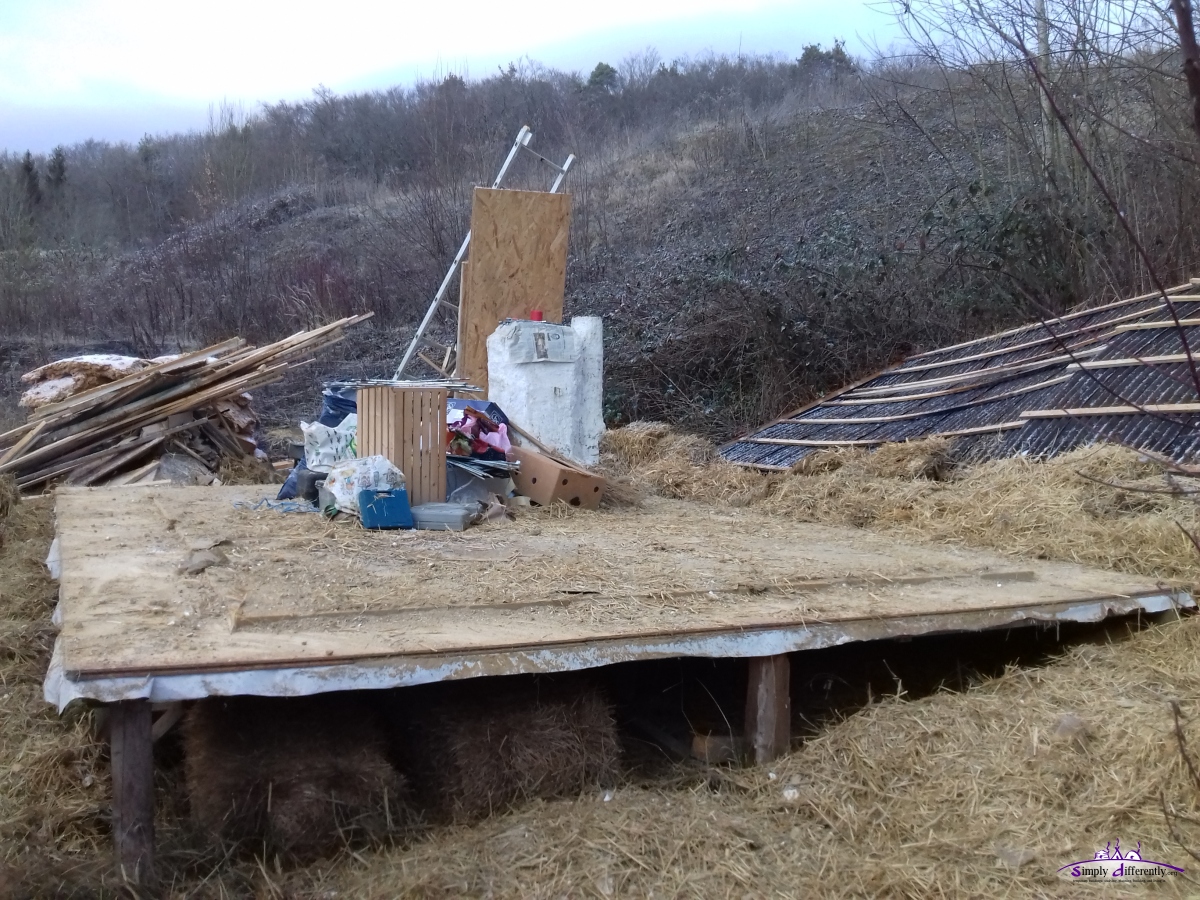
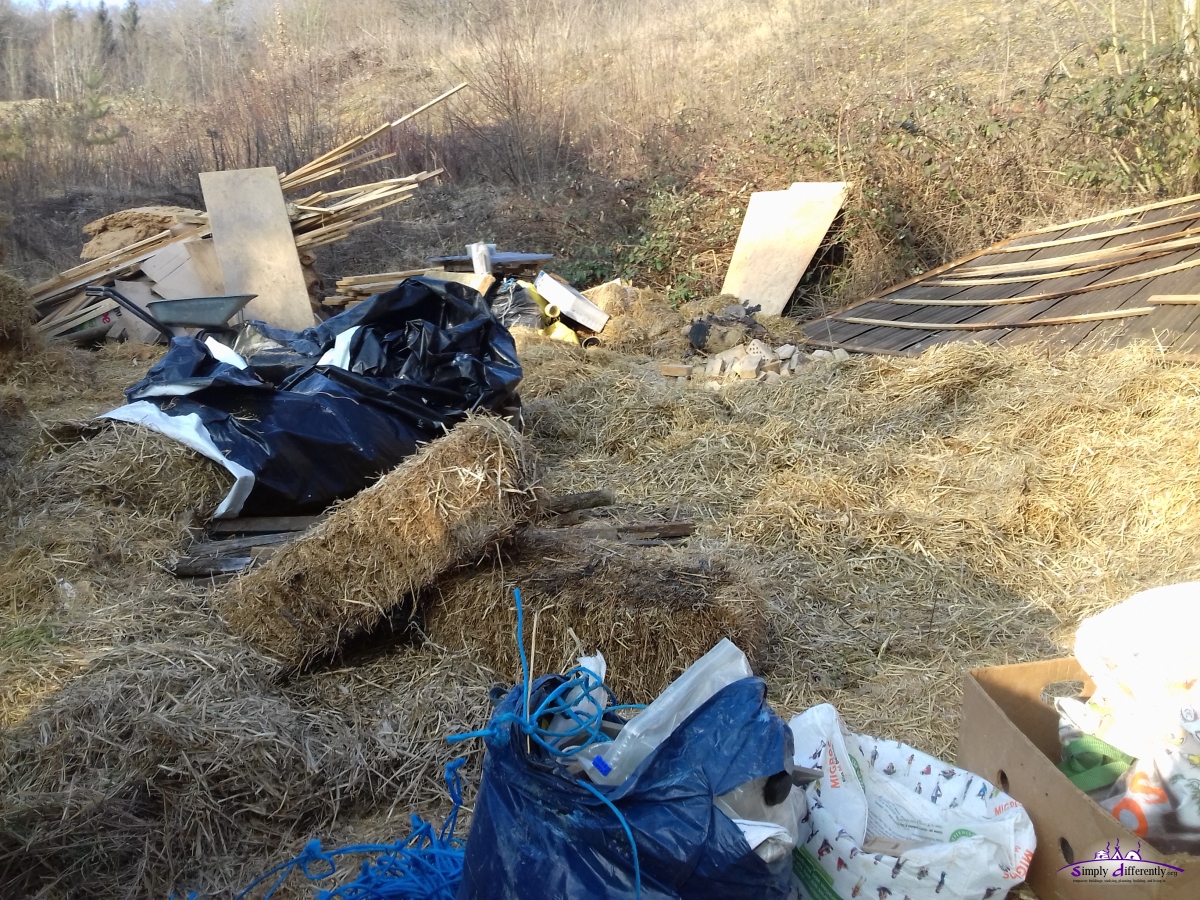
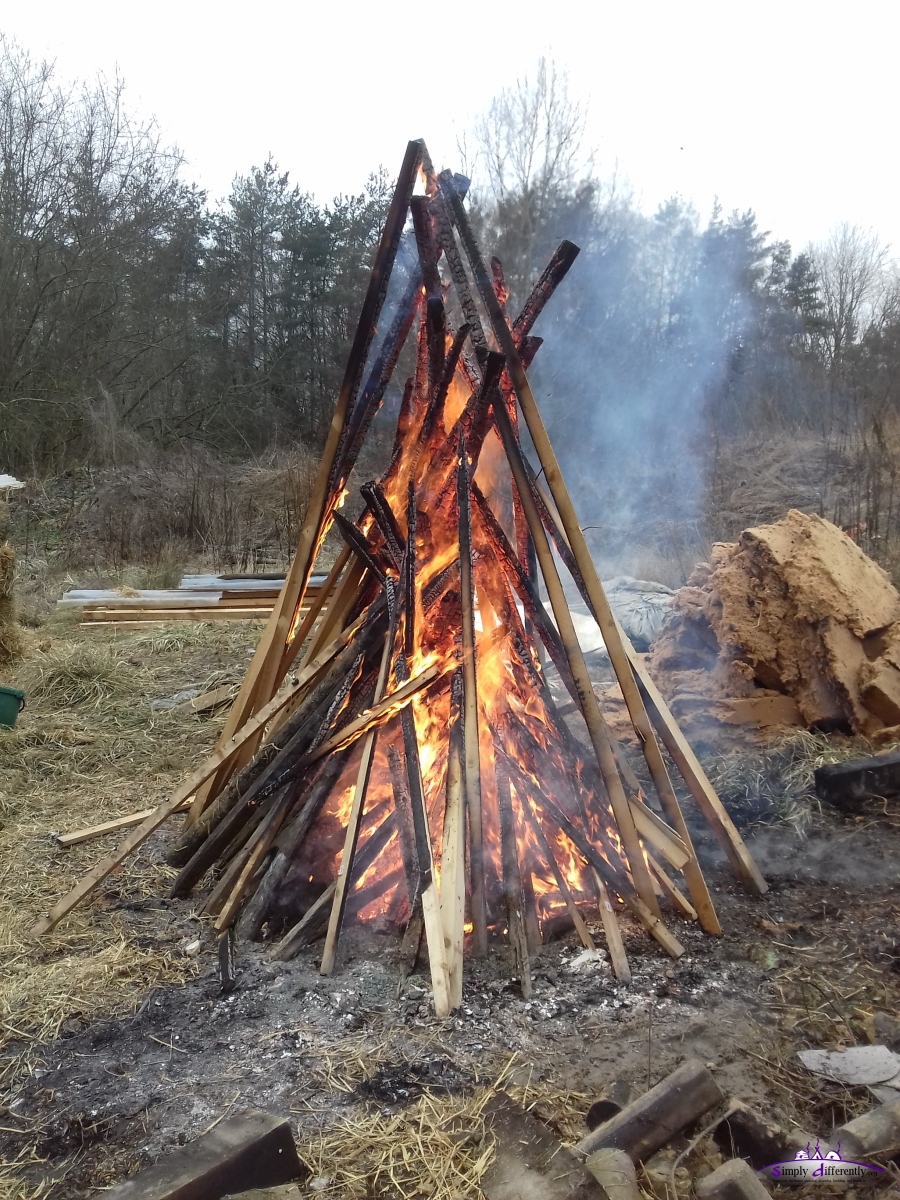
2020/01/07: This Is The End
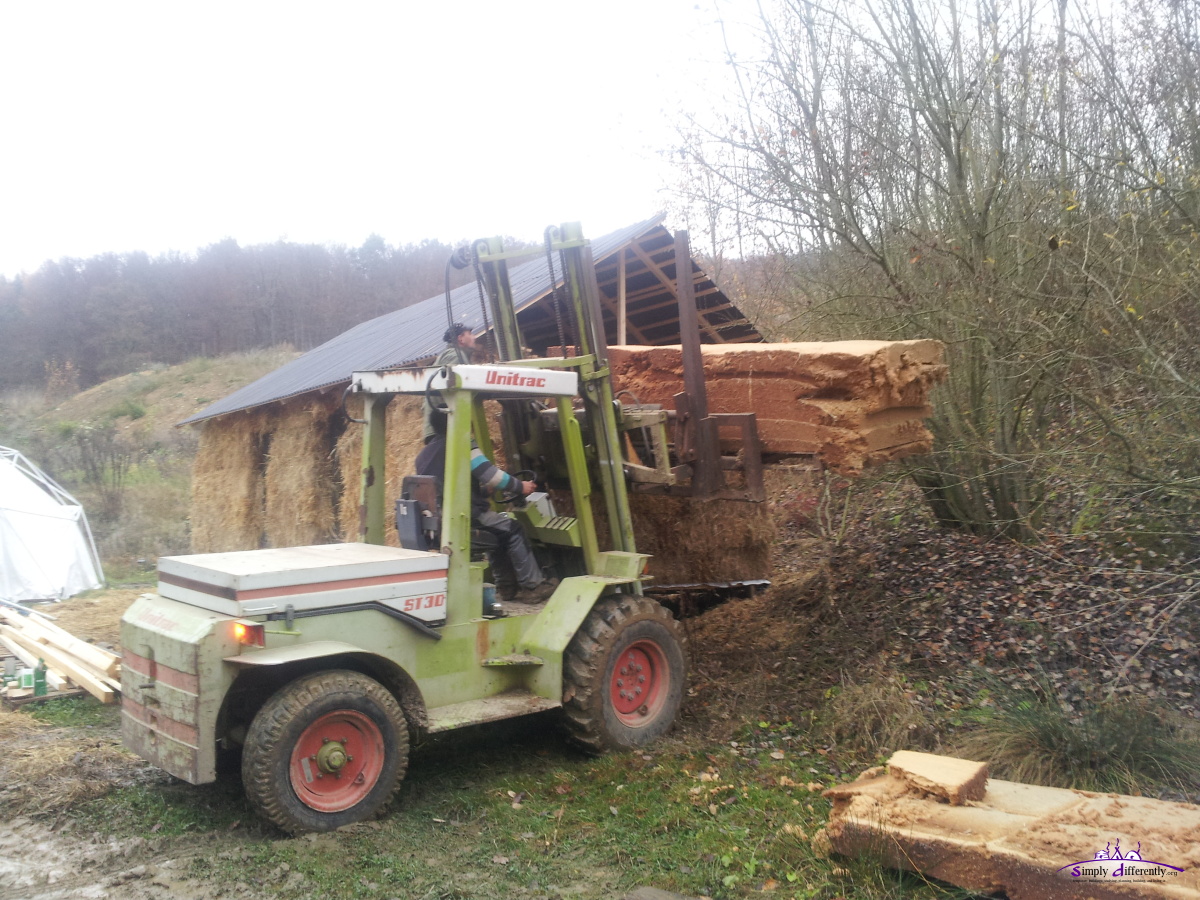
The farm and its land, where the cabin was built on, was sold, this meant it was time to take down the cabin again . . . after ~6 years occupying it.- strawbales were reused for horse boxes at the farm
- roof was properly disposed / recycled (contains bitumen)
- construction wood (strong beams) and floor were reused
- scrap wood / broken beams put in a fire
- clay walls & clay oven were hammered away and redistributed on-site where it came from
I took down the cabin in almost the reverse order it was built: windows, roof, ceiling, walls, floor; and I was able to do so all by myself with just an axe and hammer as tools. Most nails and screws used I collected again for future use.


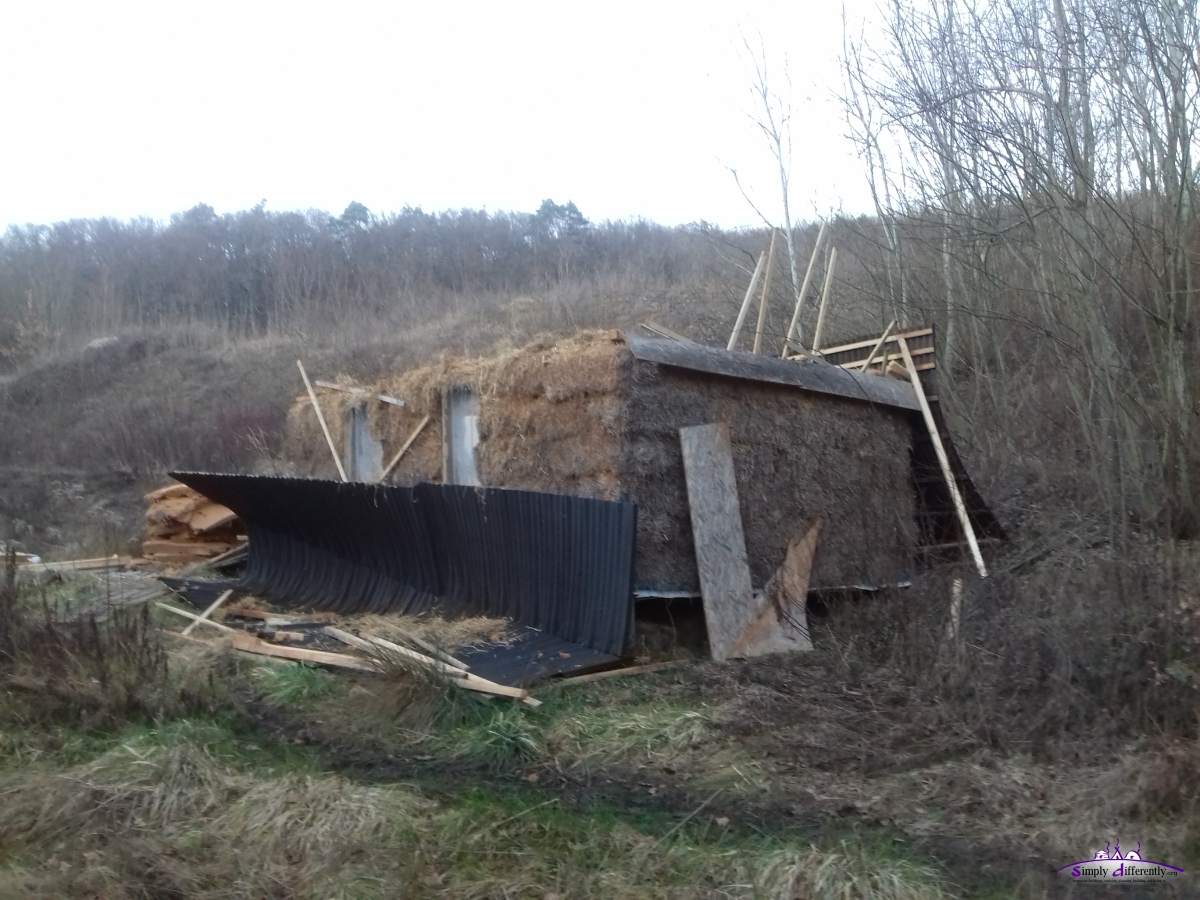

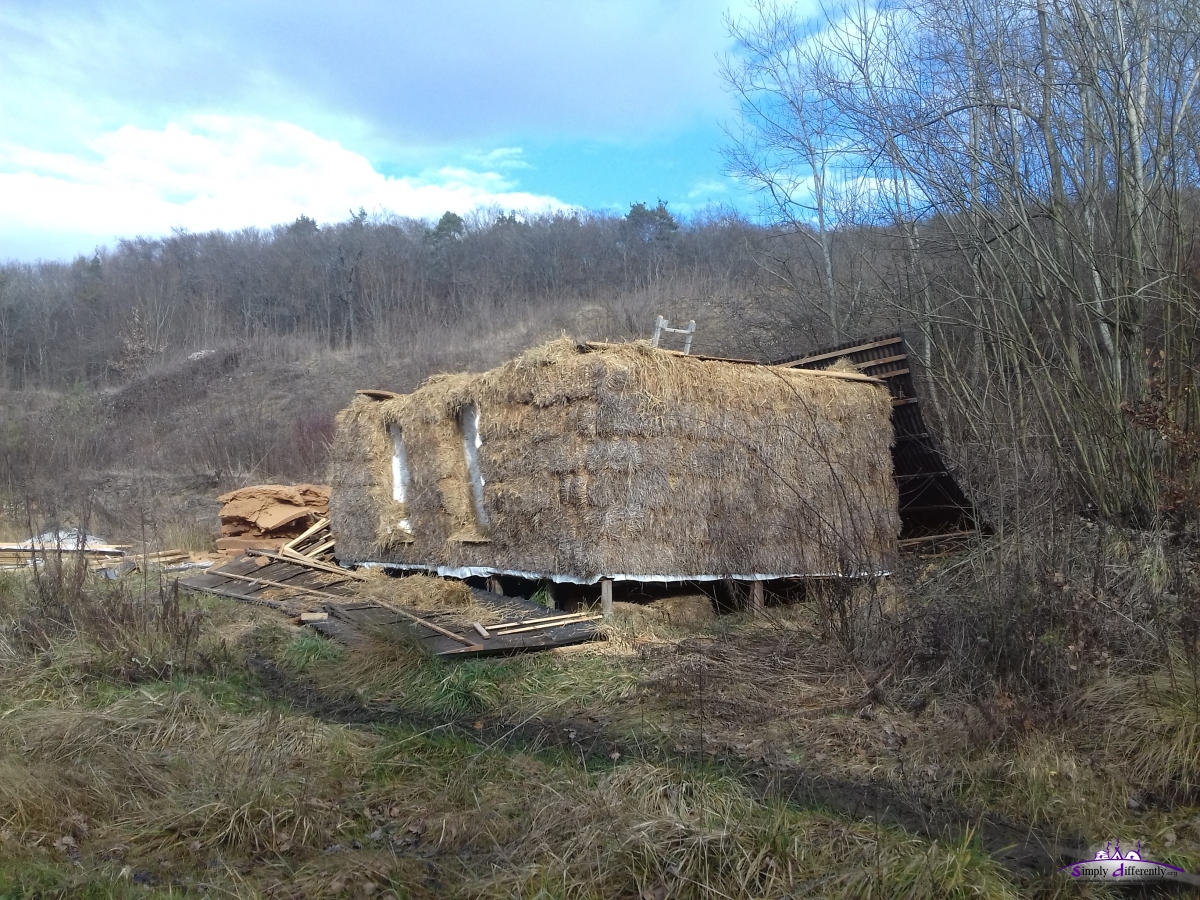
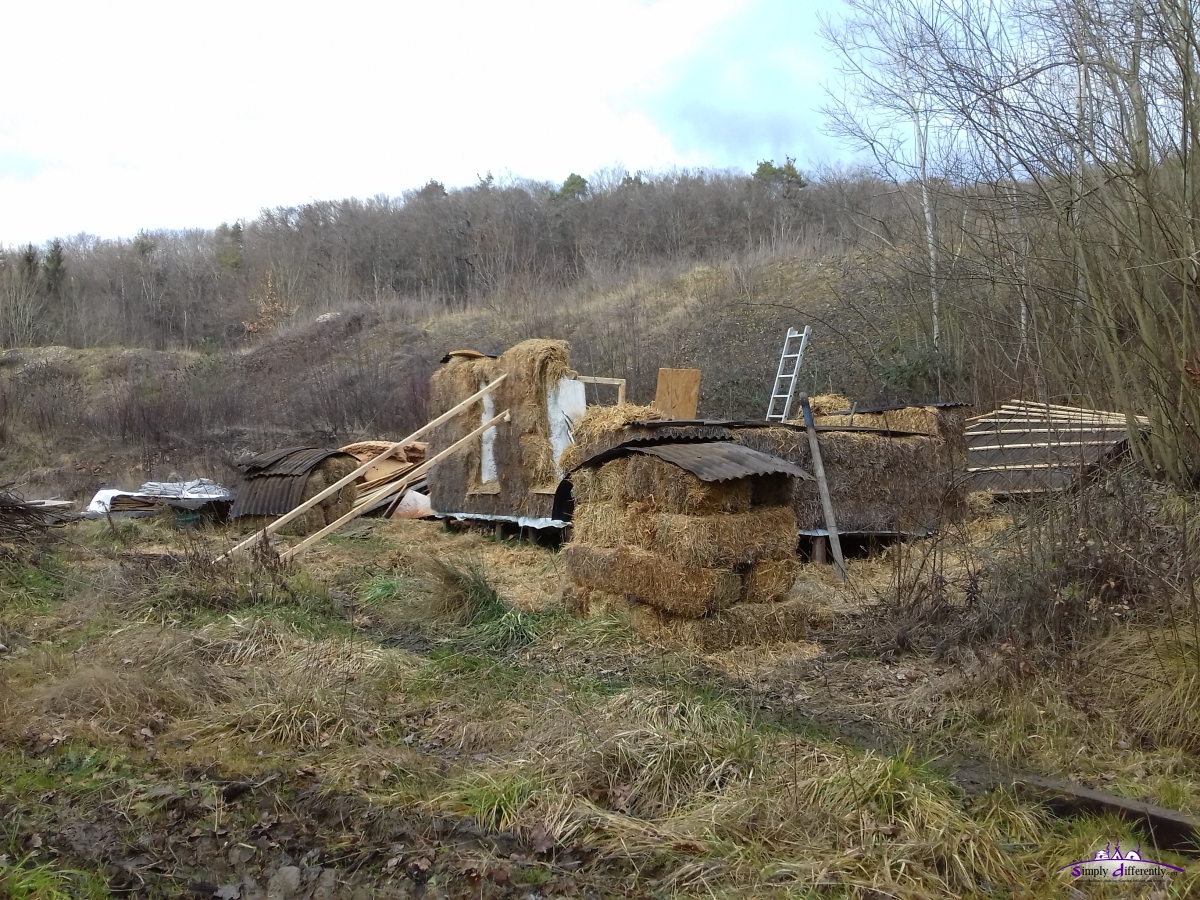

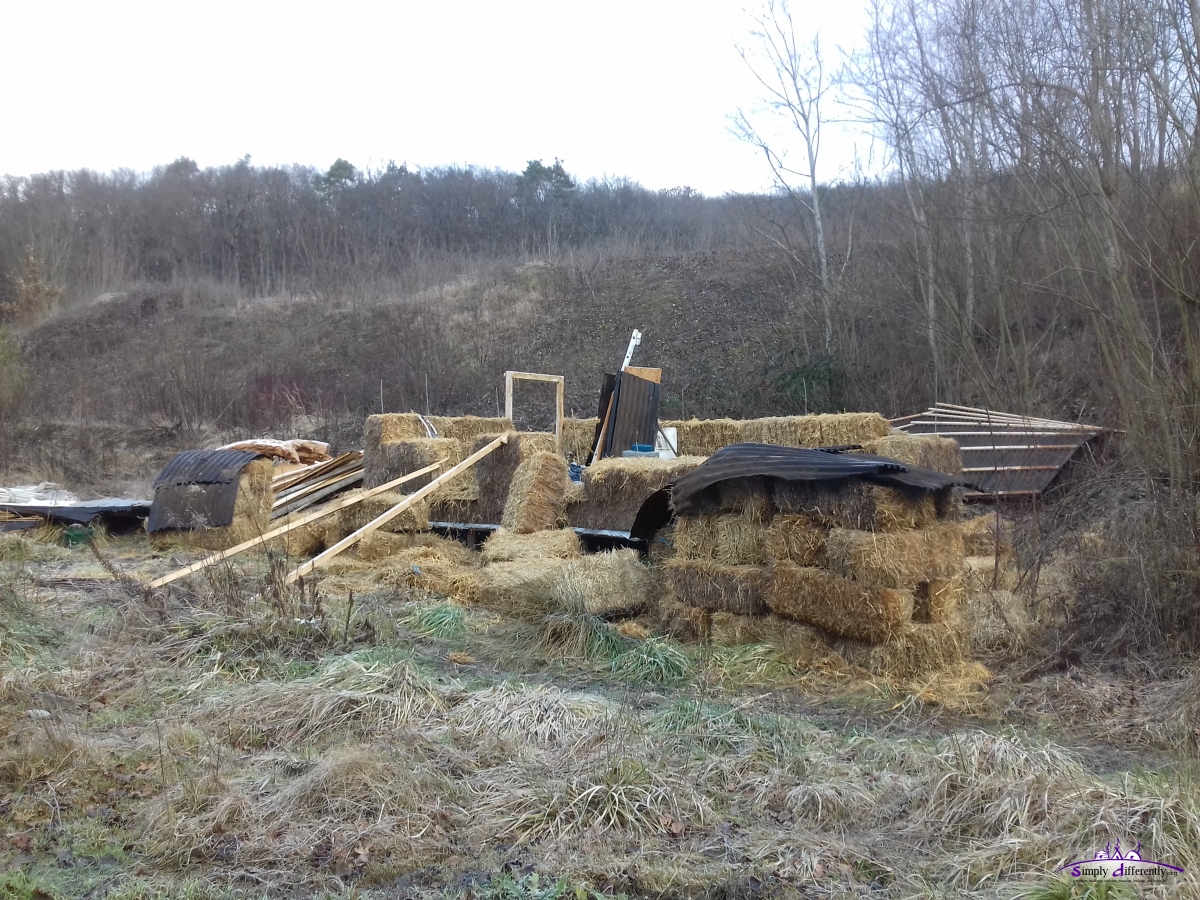


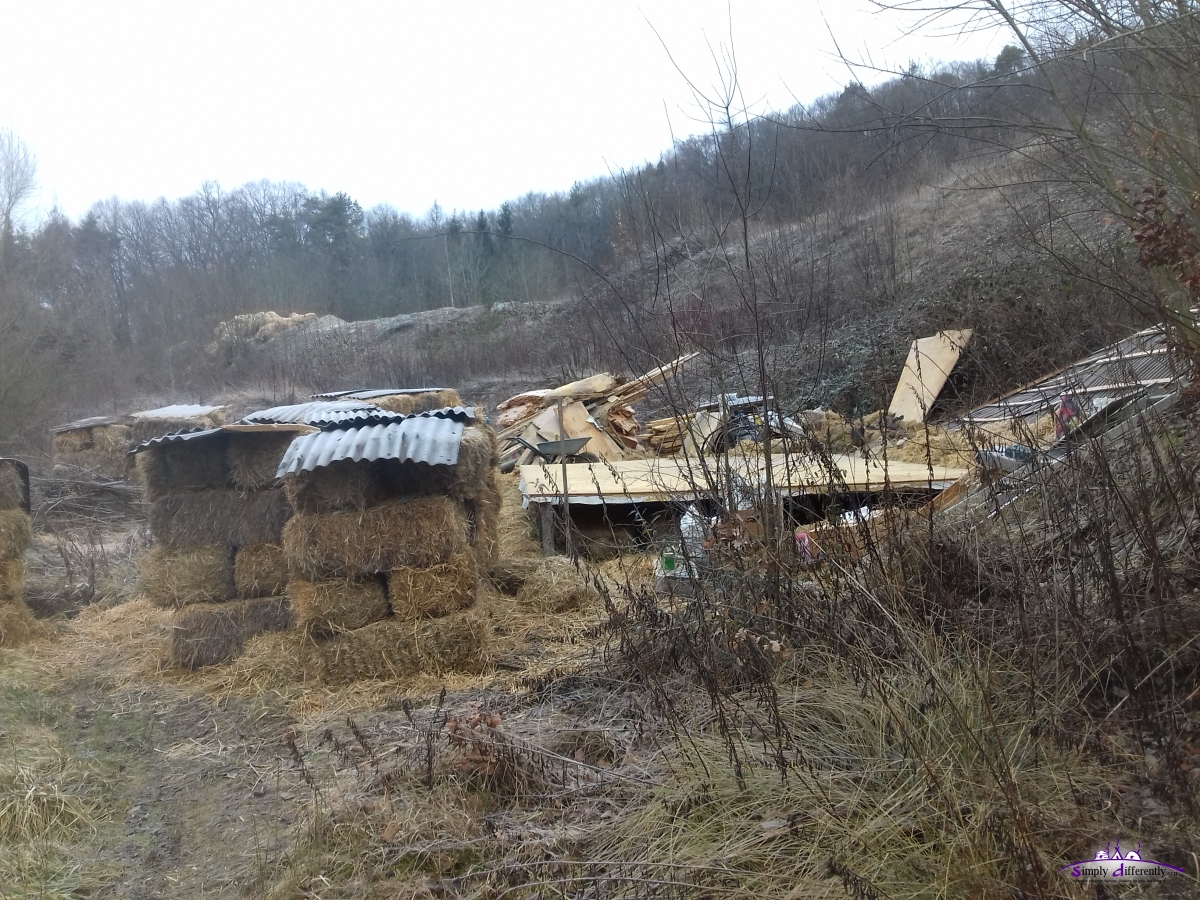
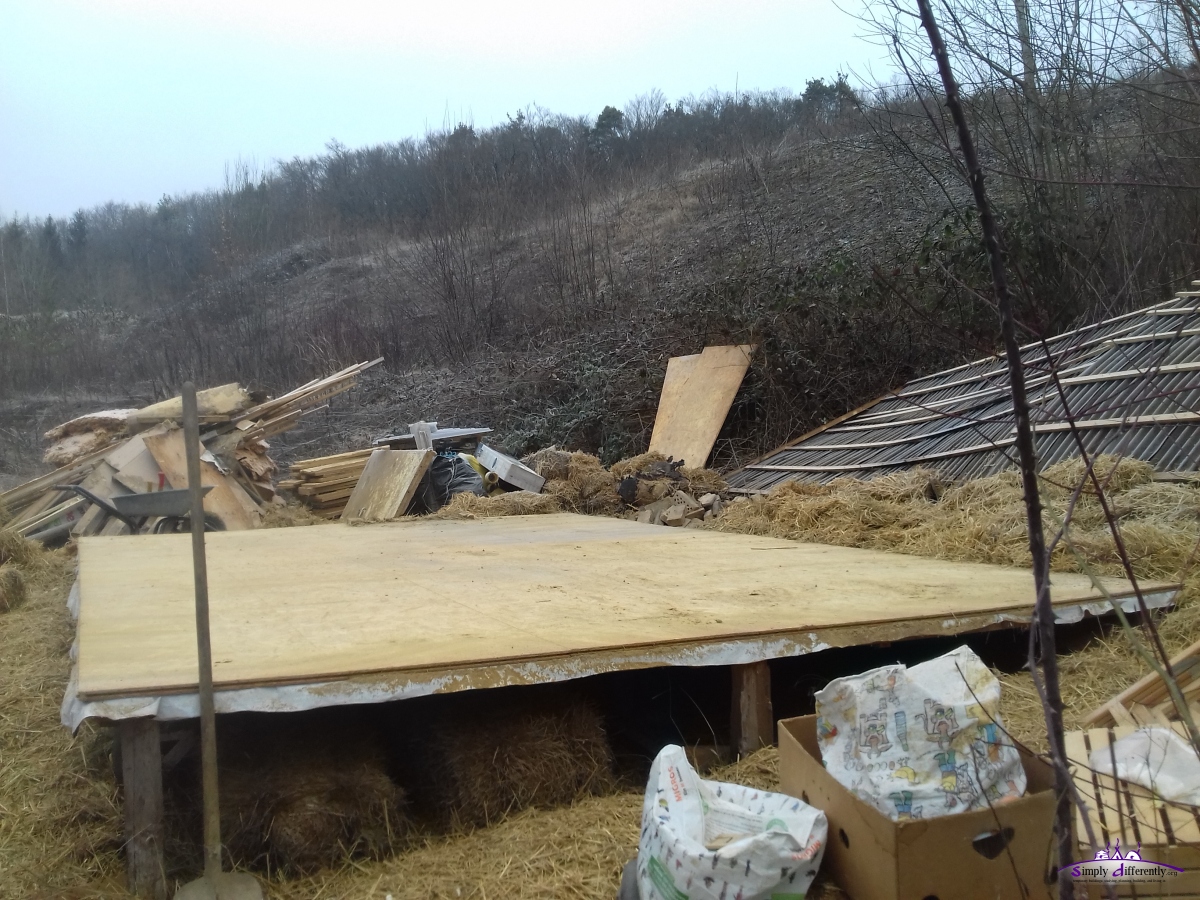


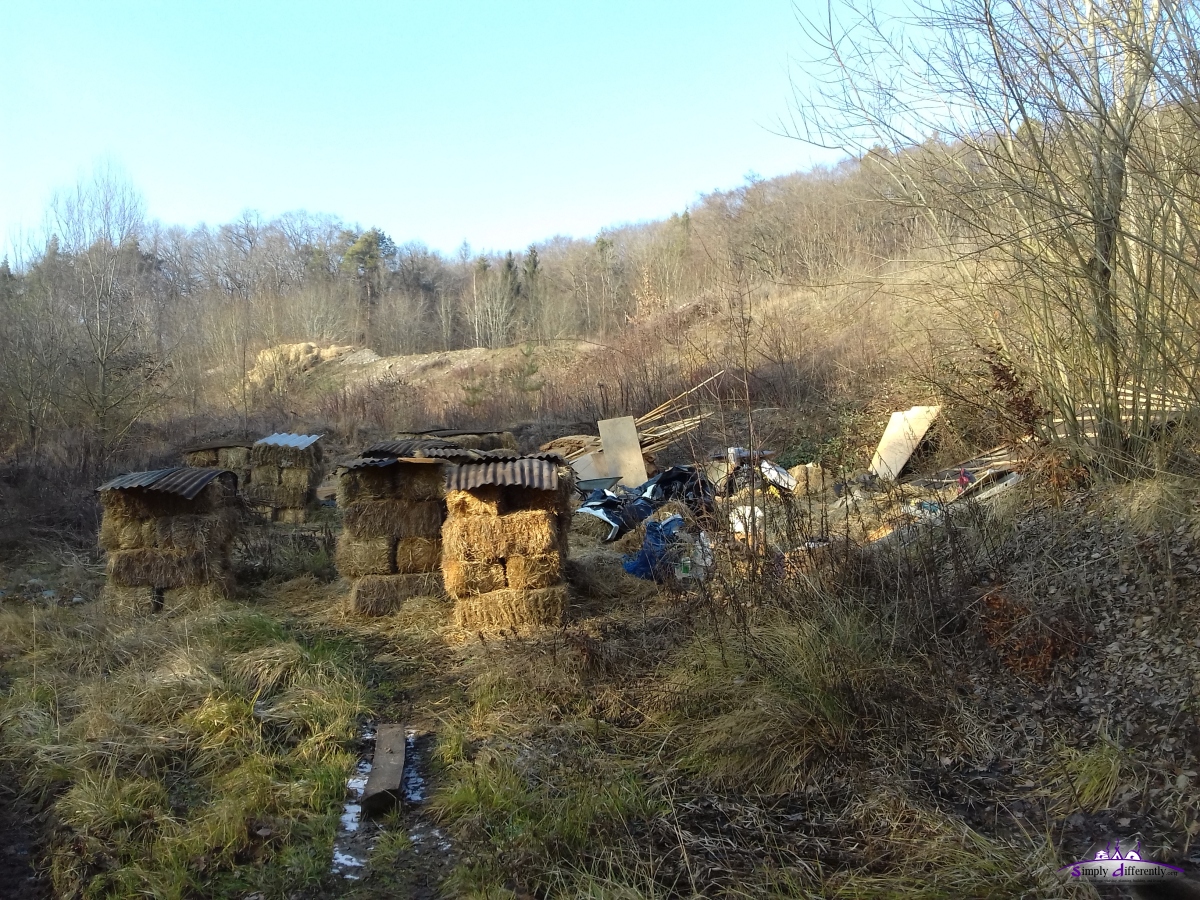
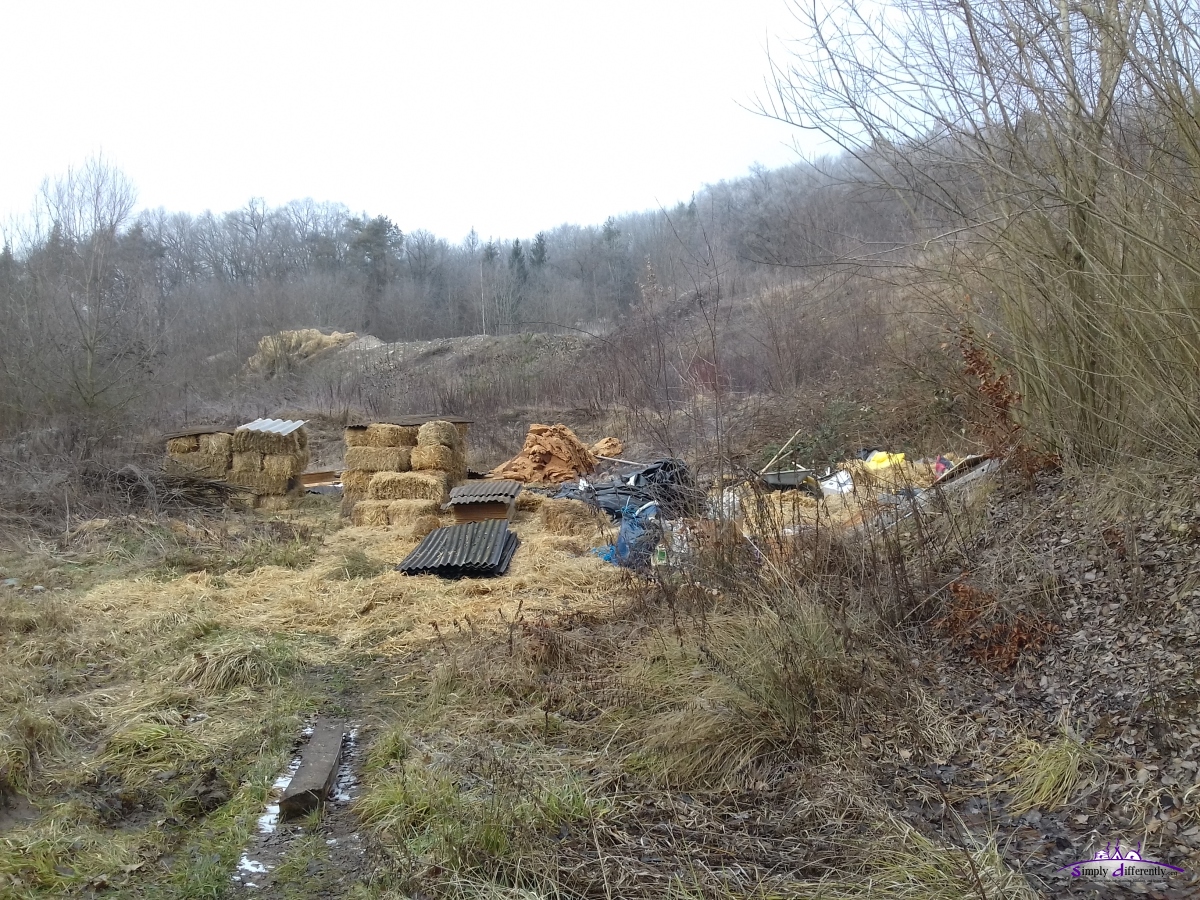


It took me apprx. 10 days to dismantle the cabin, about 4-5 hours per day. A thin layer of straw was left on-site which eventually would decompose in the spring.
It has been a gift to be able to live this experiment with a low impact, low cost strawbale cabin for the past 6 years.
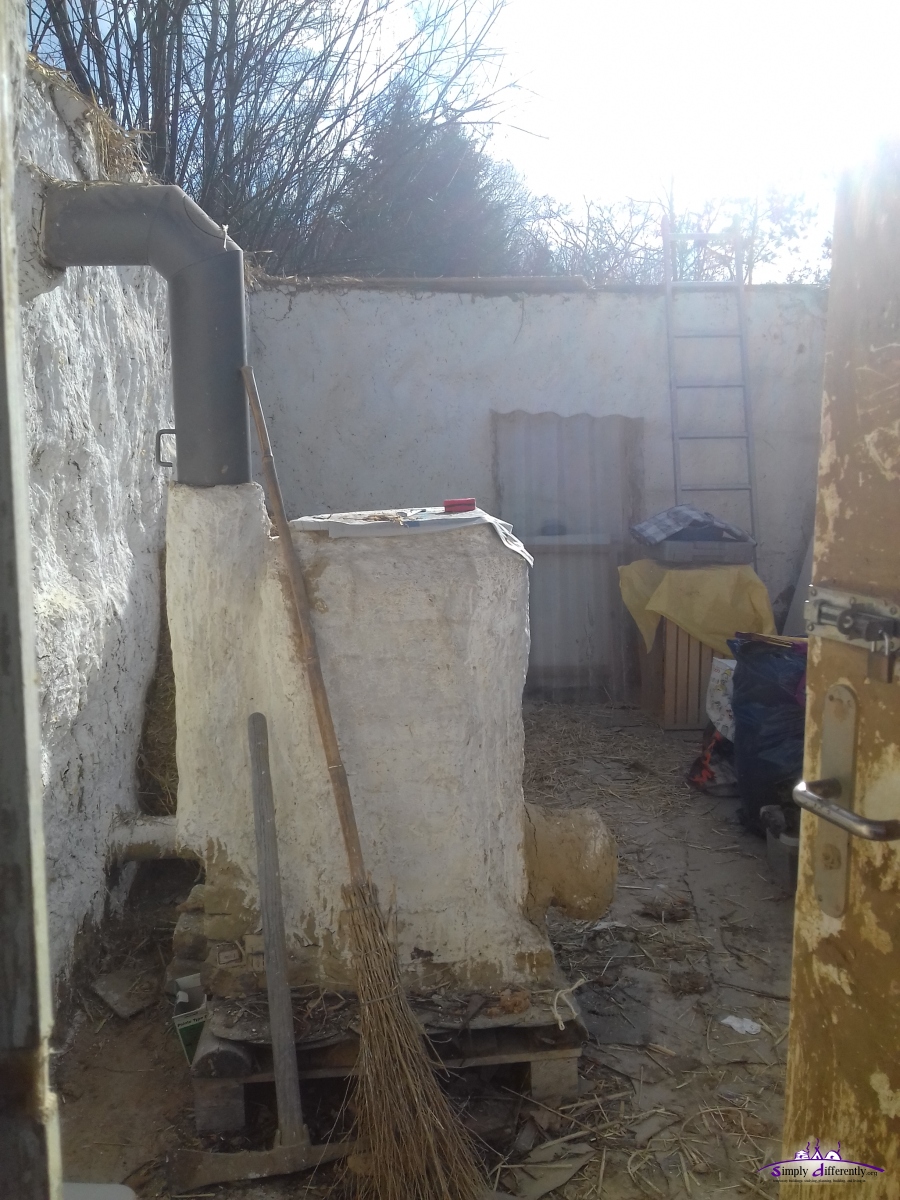
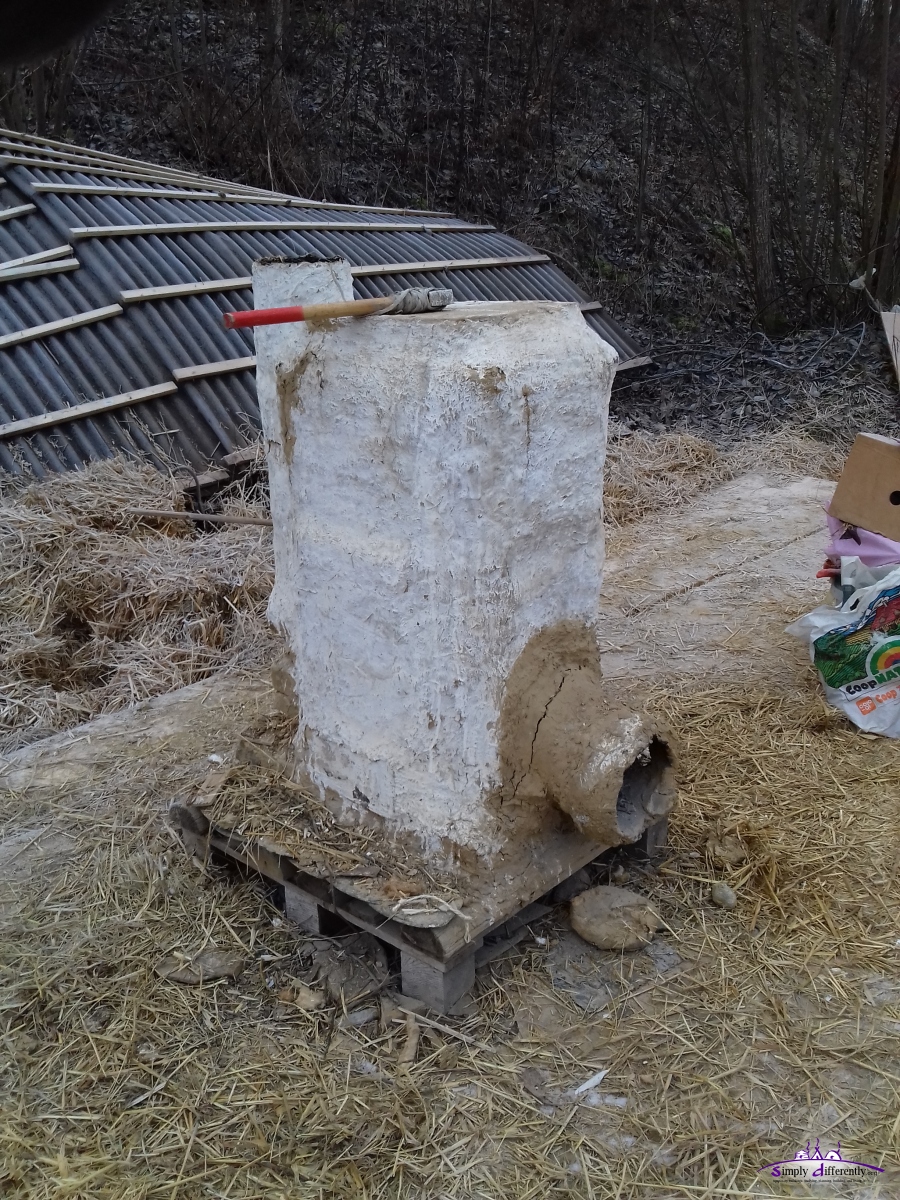
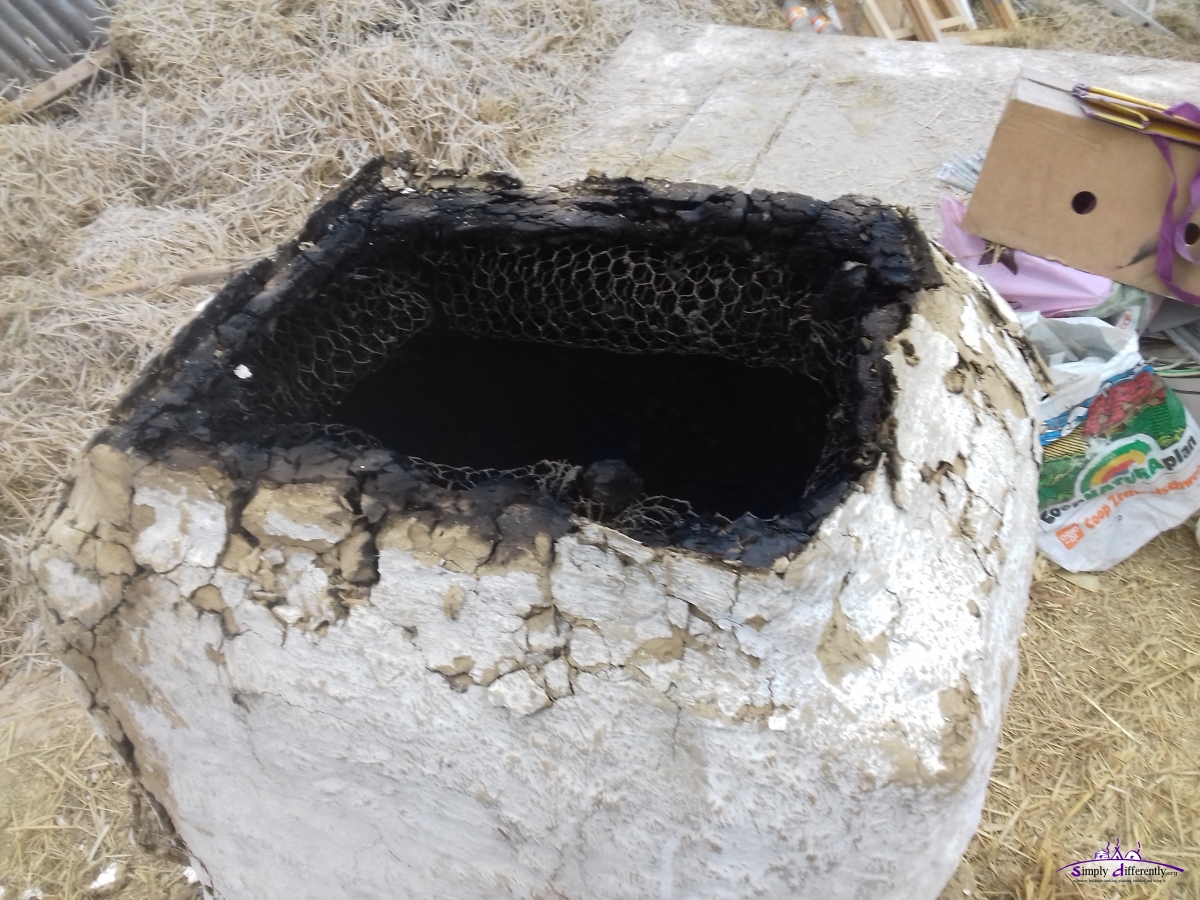
2017/04/12: Earth Oven (1)
A small side project: earth oven, next to the cabin:
- subsoil (beige colored) collected around the cabin (below the brown humus), soaked in water for 1-2 days
- mixed with a bit sand and straw, stamped with the feet until it was keeping form while still be formable (no photos as my hands were full of earth)
- used some cardboard boxes, cut into shape so a nice bow room achieved, second box for the front, taped together
- apprx. 5-6cm thick layer plastered around the form
- apprx 2-3 hours preparation, 1.5 hours plastering and mixing 3 batches on a piece of tarp
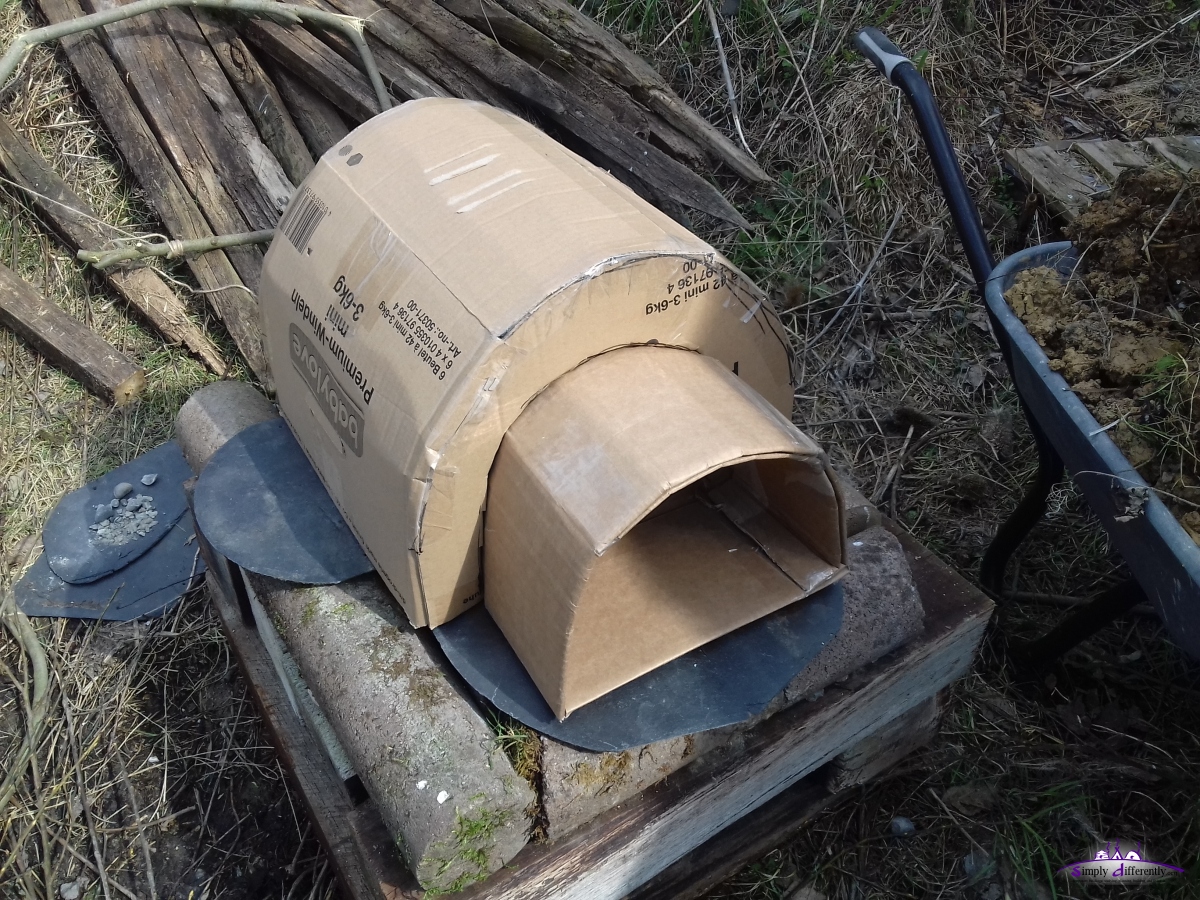
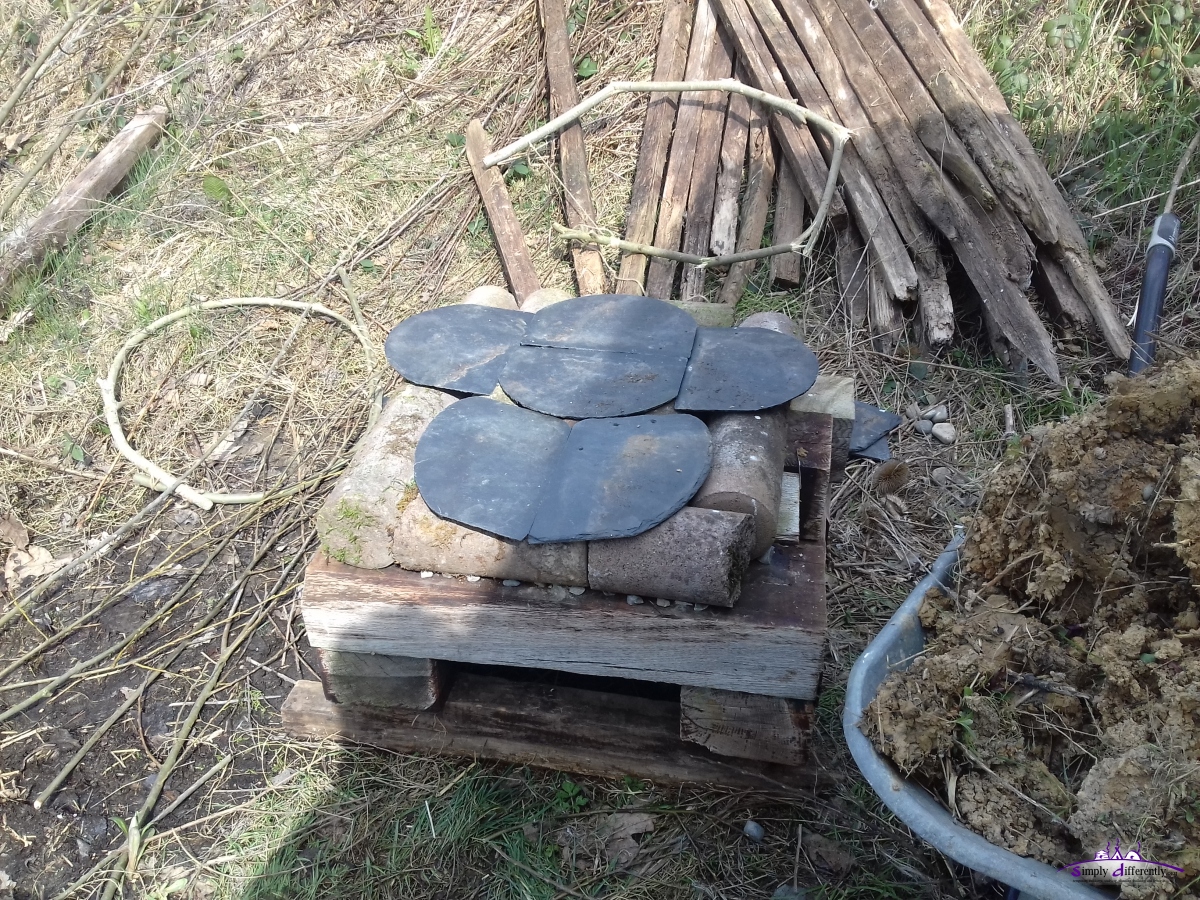
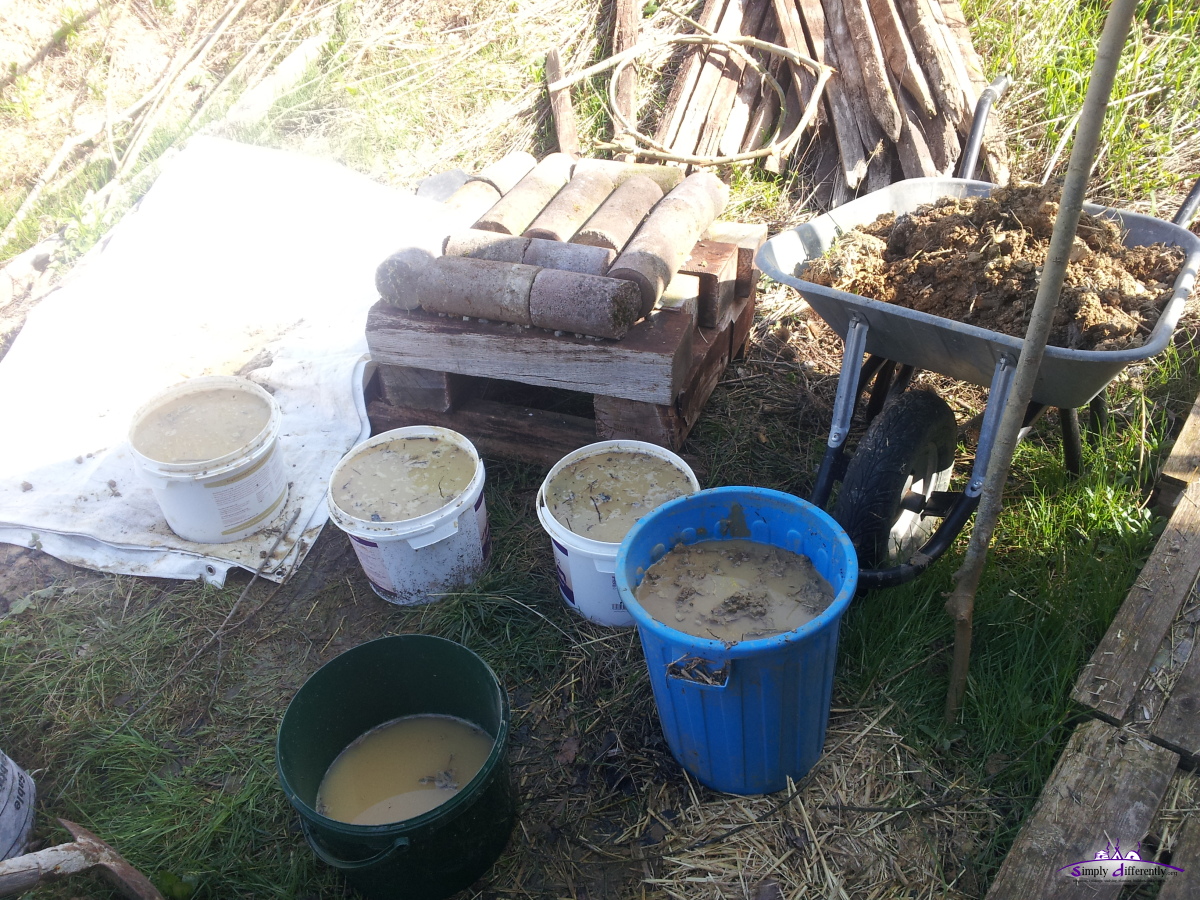

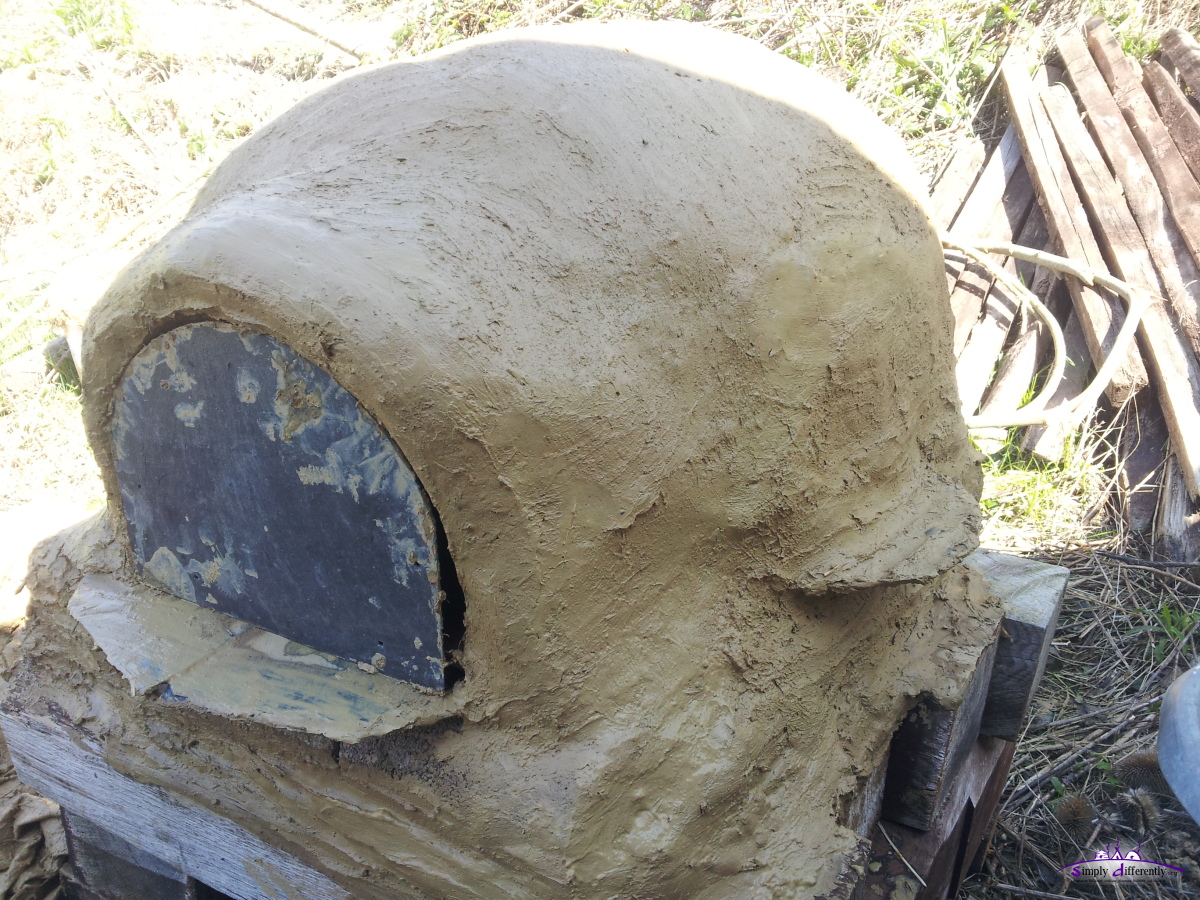


I let it dry for 2 weeks and then fire the interior, and it will burn away the cardboard - update posted later.
2017/04/09: Spring
Nature changing now quickly: warm weather with a bit of rain.
Nature, here north of Switzerland, seems 1 month ahead of its usual schedule.
2017/03/05: Sunny Day
An excerpt of 25 photos of a sequence taken 2017/03/05 ~12:45 every 30 secs
  Sunny day 2017/03/05 |
2017/02/23: Pre-Spring
 |
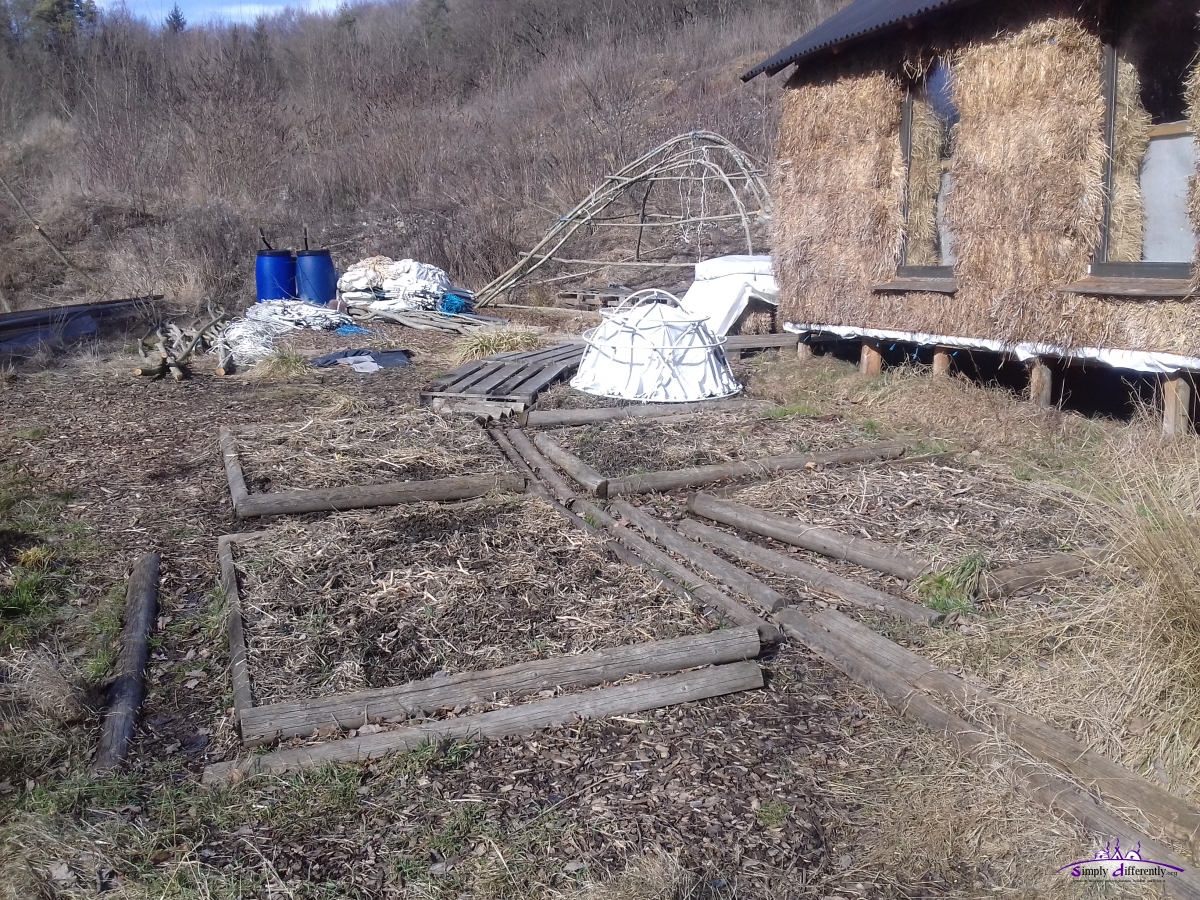
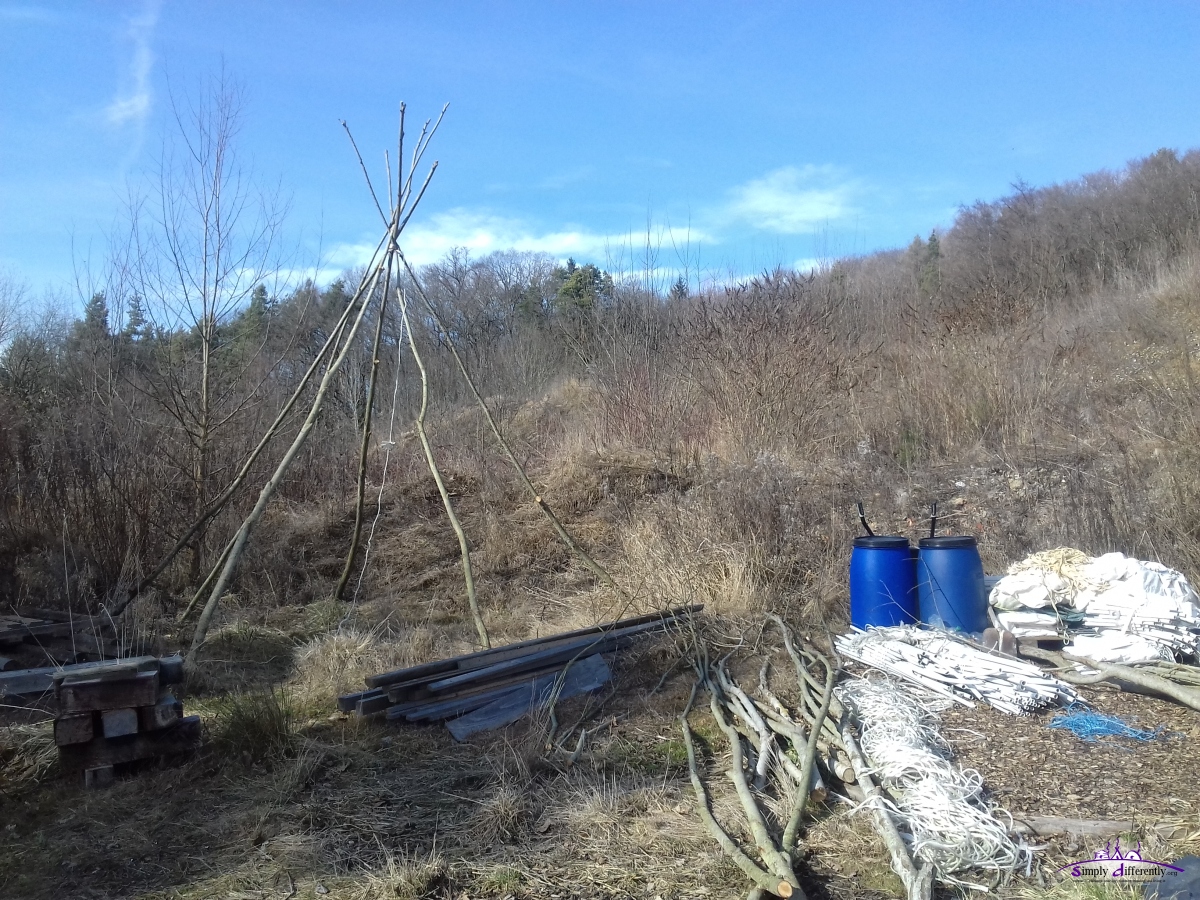
Also most of the trees and bushes have been trimmed, some longer straight branches I put aside for some new smaller constructions:
- bow based tent-like shelter
- small tipi
2017/02/23 14:15
2017/02/23 14:15
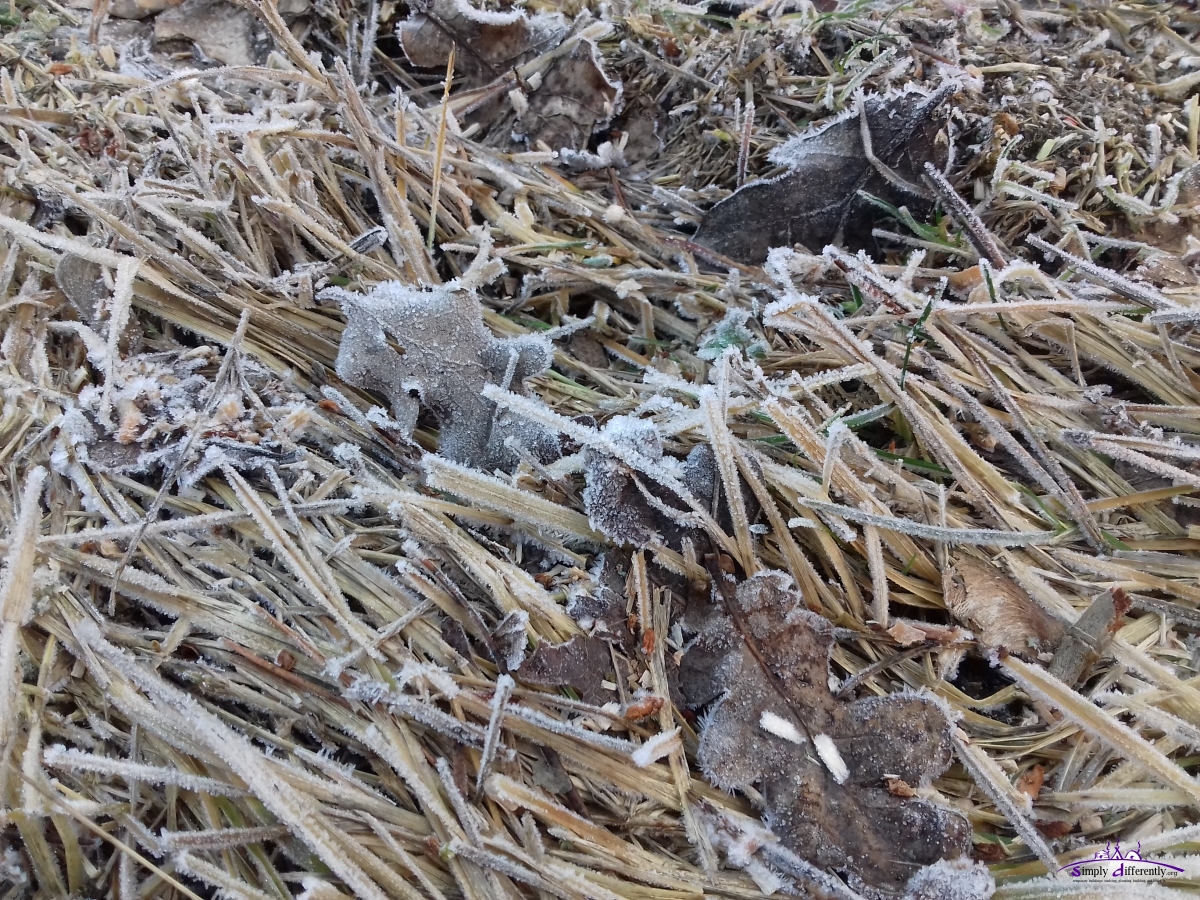
2017/02/15: Icy Morning
|
|
2017/01/05: Winter Arriving
 |
I've have been pondering on invest some more time to improve the cabin the coming spring:
- plaster the interior: reduce interior dust, brighten the interior
- get electricty from the grid (apprx. 150m away)
- heat transfer to store energy (warm water or electricity)
2016/11/19: Cold & Humid
 |
The garden has calmed down, flowers and grass stopped growing; the cut apart left over slowly decomposing.
Two years ago around the same time I just finished the built of the cabin itself, it was mild and dry before it began to rain.
Photo: November 19, 2016 - around 15:30 already in the shadow of the trees / forest in the west, sun not yet set over the ridge farther west.
2016/11/07: First Snow
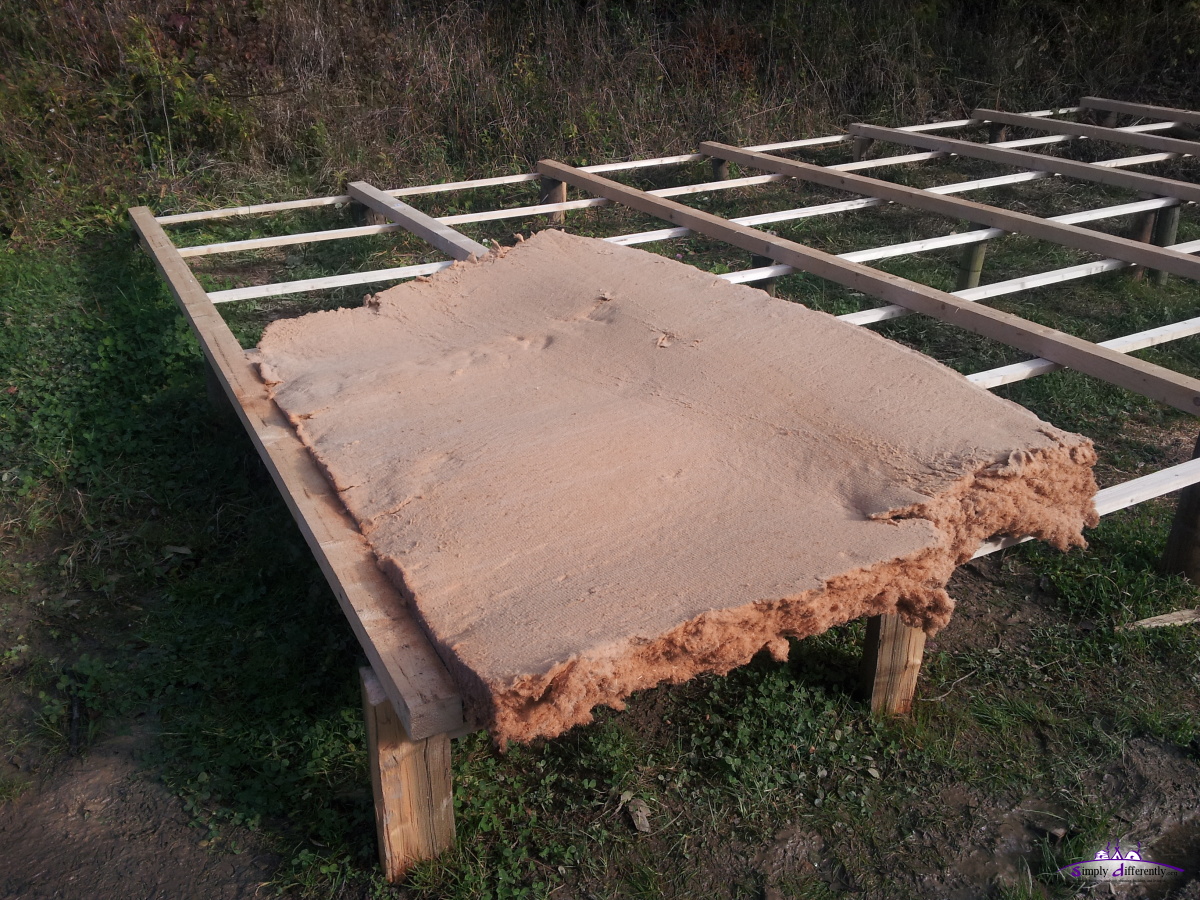
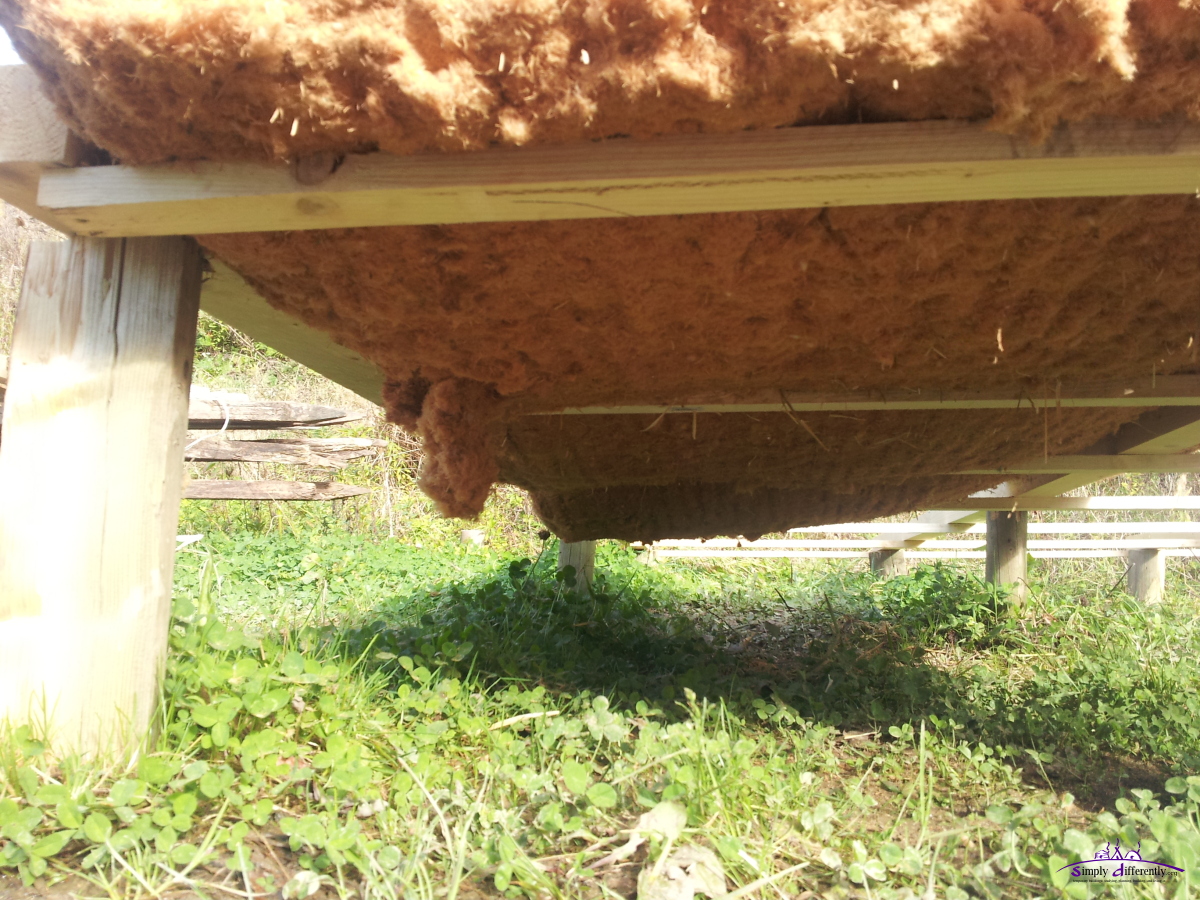
Last night rain turned briefly into snow, just a bit of snow - a few patches over the grass, which melted during the morning away; 6 weeks earlier than in 2015.2016/11/03: Upgrading Floor Insulation
I decided to upgrade the floor insulation for this coming winter 2016/2016 with 35mm thick pressed china grass insulation (198cm x 35cm or 28cm), it is solid enough to serve as floor without additional wood. I also insulated the door with the same parts.
  Additional 35mm thick Floor Insulation |
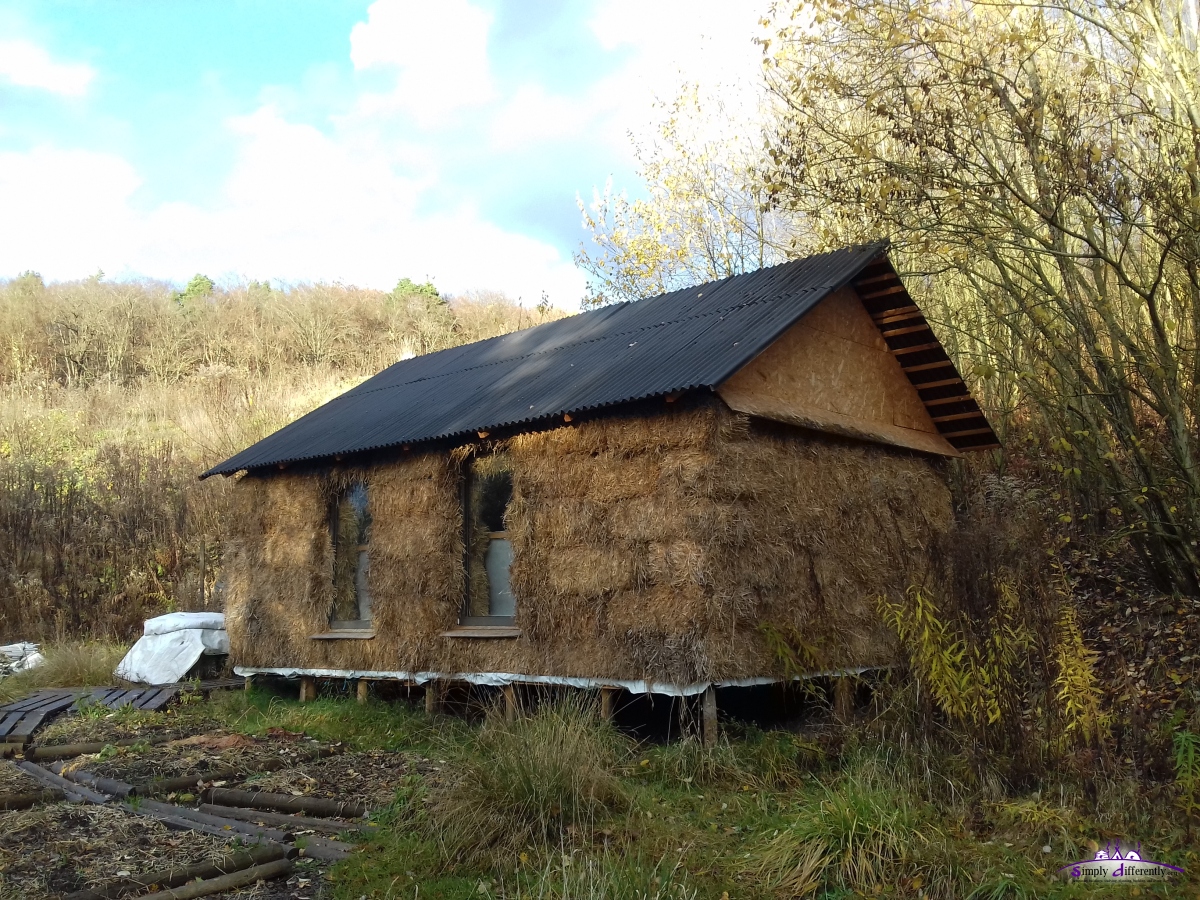
2016/10/12: Fall Approaching
 |
After weeks of warm weather the temperature fell from 25C to 15C rather rapidly within 1-2 days, and regular fog in the morning arrived. Not much rain yet which otherwise is usual in October and November in this region.
The exposed raw strawbales doing fine after nearly 2 years, another month the 2nd anniversary is reached when I will take detailed photos of the strawbales again.


2016/08/14: Summer Time (2)
 |
Until ~14:00 the the sun doesn't reach the front of the cabin, and it's nicely cool inside the cabin, yet, once the sun reaches the front the inside warms up significantly, through the windows (the shades are inside).
2016/07/25: Summer Time
 |
The grass around the cabin slowly reaches the strawbales, and insects might more easily reach the bales - so I likely will cut the grass around.
Also the small garden began to do well, planted vegetables are growing well - assuming the soil has been balancing itself:
- tomatoes: growing well
- potatoes: growing well
- zucchini: late planting (seed into the soil) grows well, others vanished and did not grow well
- rhubarb: growing slow, next year possible to harvest, not this year
Since the soil in front of the cabin is humid I did not have to water the garden at all.
2016/05/22: Bare Strawbales After 18 Months
All 4 photos were taken apprx. 1.5m off the ground:
2016/05/22 15:50
2016/05/22 15:50
2016/05/22 15:50
2016/05/22 15:51
There is a slight dark shade on the strawbale, at the close up the "shade" is made up by small dark spots on the straw. So the change is very minimal, more long term exposure is required to estimate the longevity of the bare strawbale cabin.
|
|


Btw, the green tone of the "East side" comes from the grass behind the cabin reflecting green to the strawbale wall.
2016/05/21: Summer Approaching
 |
After a period of 10 days with a lot of rain and lower temperatures of 10-15°C sunny days with up tp 25°C.
I started a small garden in front of the cabin, but the earth with horse manure isn't mature yet for vegetables:
- rhubarb: does well
- squash/pumpkin: too early to tell
- zucchini: doesn't do well, some leaves turned yellow despite sufficient water in the ground, new leaves are green again
- tomatos: too early to tell
each bed has 3 layers
- sand/earth mix layer at the bottom
- horse manure mixed in
- loose straw on top
the base is a moist or wet ground.
2016/04/12: Preparing Garden
 |
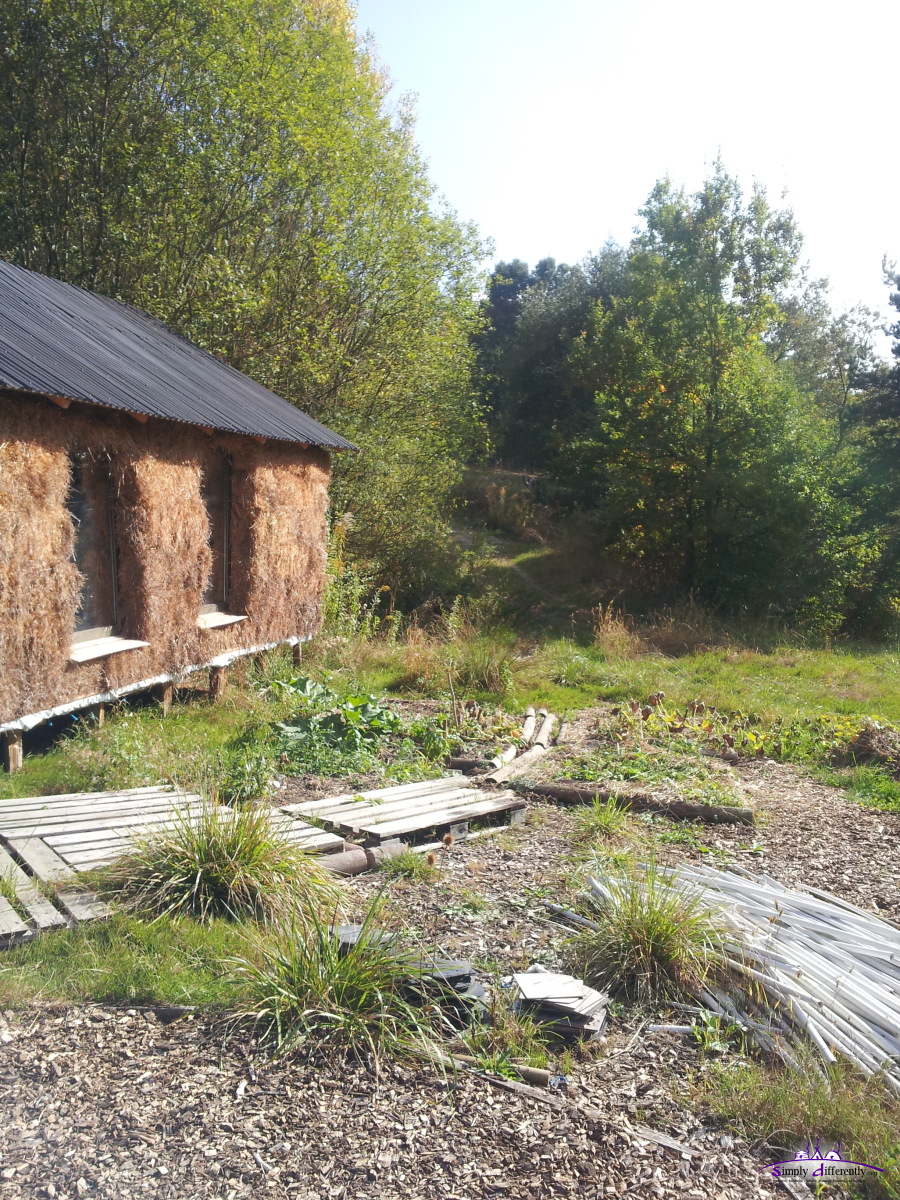
Since the cabin is located on the west slope, the sun reaches the roof and garden beds around noon - will see how it does once I planted some veggies. I also collect some rain from the roof, yet, without dedicate rain channels as for now.
Between March 23 and April 12, just 3 weeks, the change in nature is significant:
- in the background the forest is significantly more green
- the grass in front of the cabin is grown significantly
2016/03/23: Spring Approaching
 |
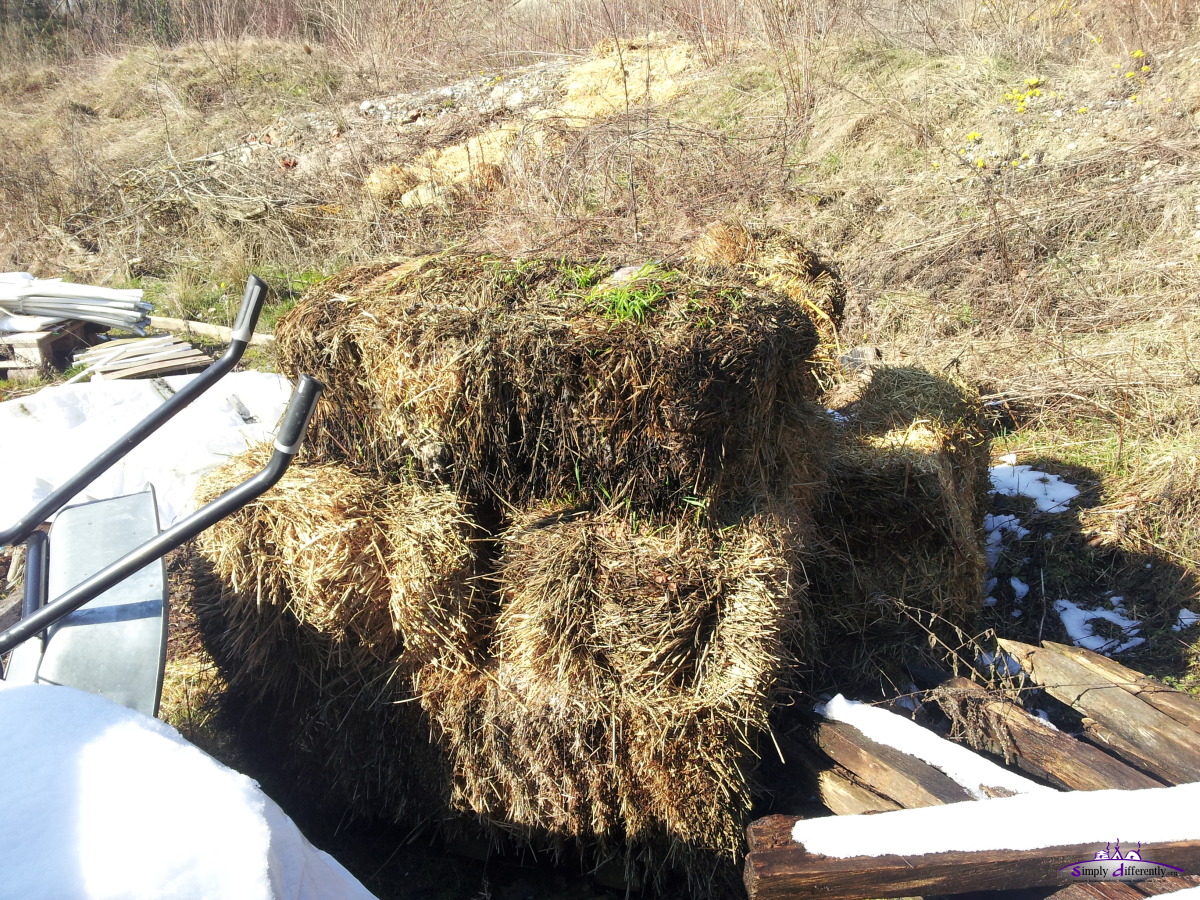  Rotting strawbales due leak of the covering tarp |
I leaned a small wheelbarrow on a pile of covered strawbales, with apprx. 5-10cm space between bales and the wheelbarrow - it began to rot just at that space; microclimate with lack of proper air circulation seems to affect bare strawbales greatly.
April is a rainy month in central Europe - so once April and part of May passed I photograph the bales of the cabin close-up and compare with previous photos I made.
2016/02/18: No Winter
 |
About 10 days ago we had a winter storm "Susanna" approaching from south-west, 80-100km gusts over period of ~18 hours on and off, and the cabin maintained itself.
2016/01/16: Winter Arrived
 |
The straw on the north side is a bit darker due the humid weeks - will see if it will reverse due the drier and colder days ahead.
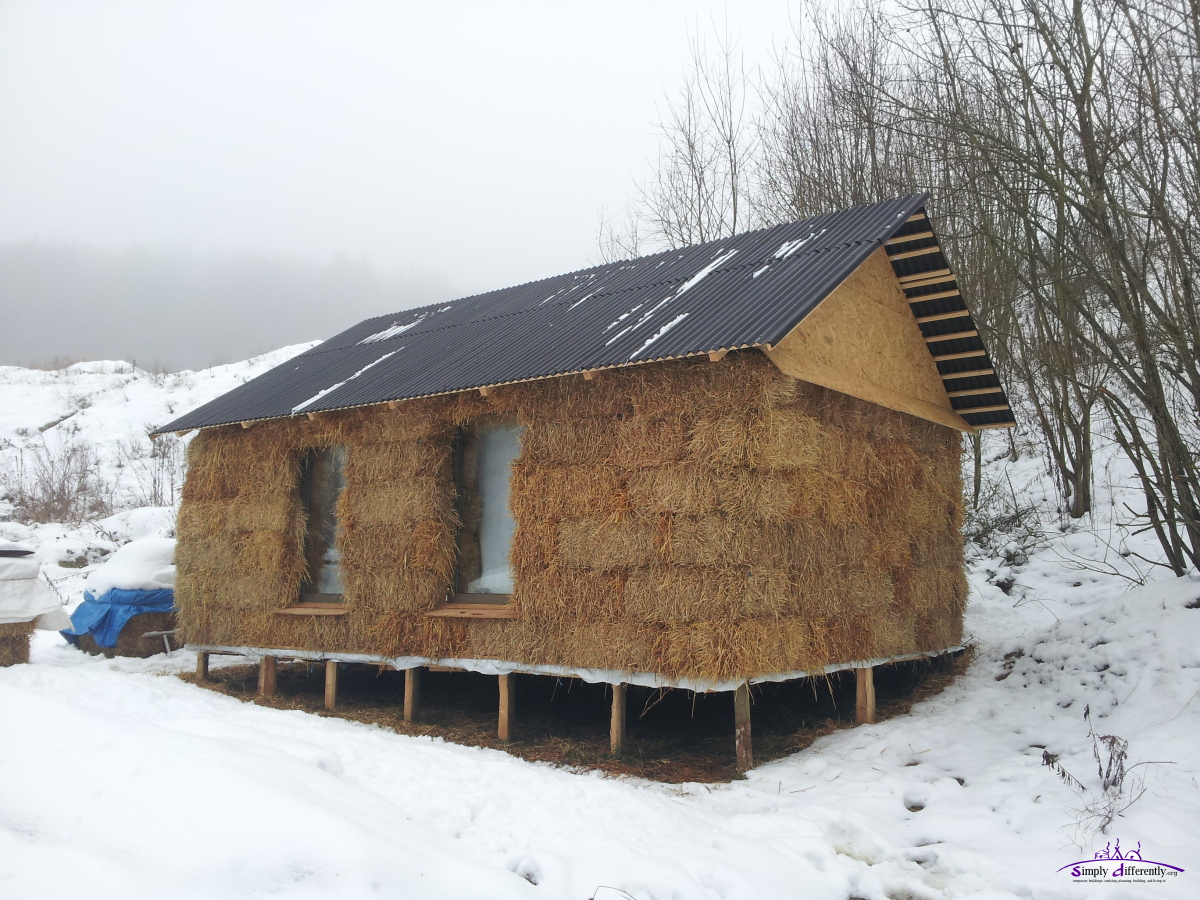
2015/11/18: One Year of Cabin, Mild Weather Continued
 |
A bit more than a month until lowest sun path (December Solstice), before the daylight extends again.
2015/10/29: Fall
 |
I noticed the northern side of the cabin slightly darker, with some slight mold; the west and southern side still like color as in the summer.
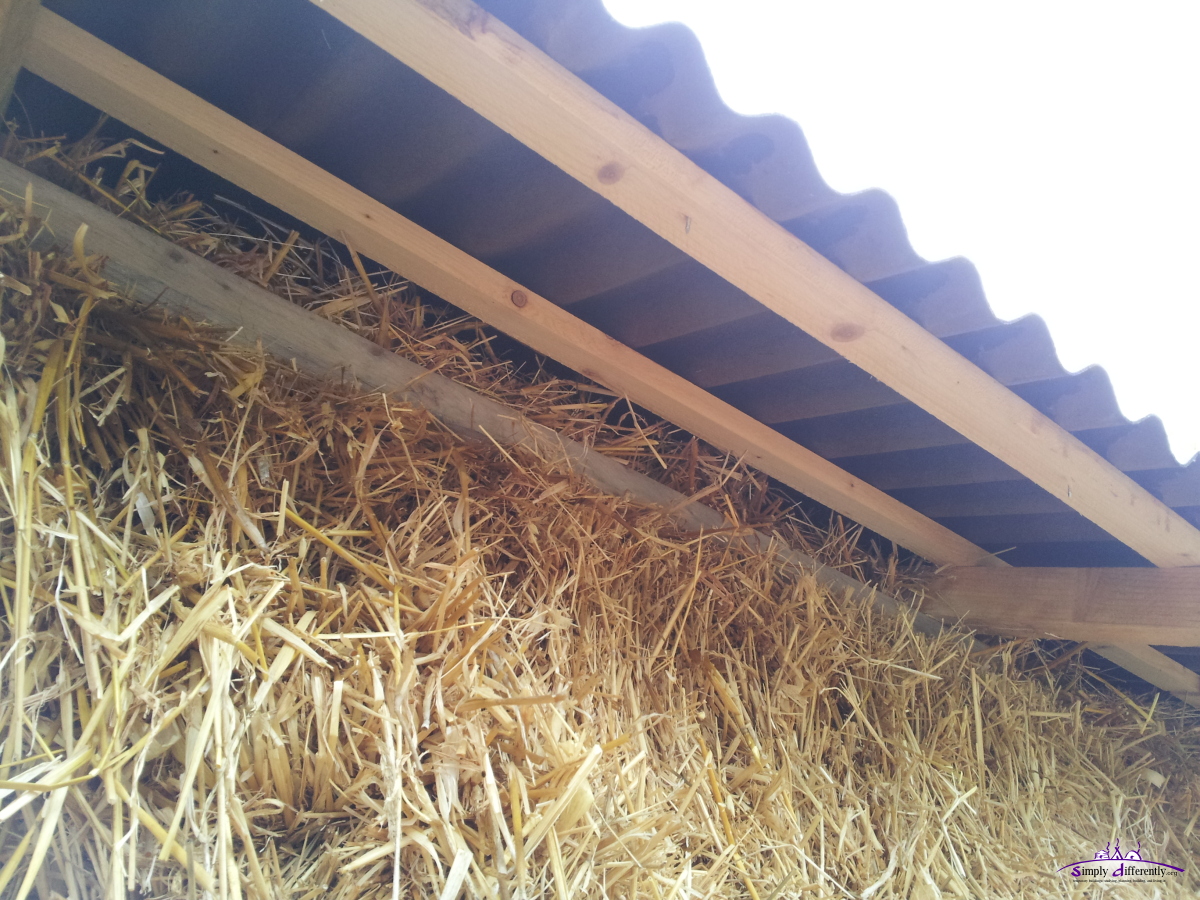
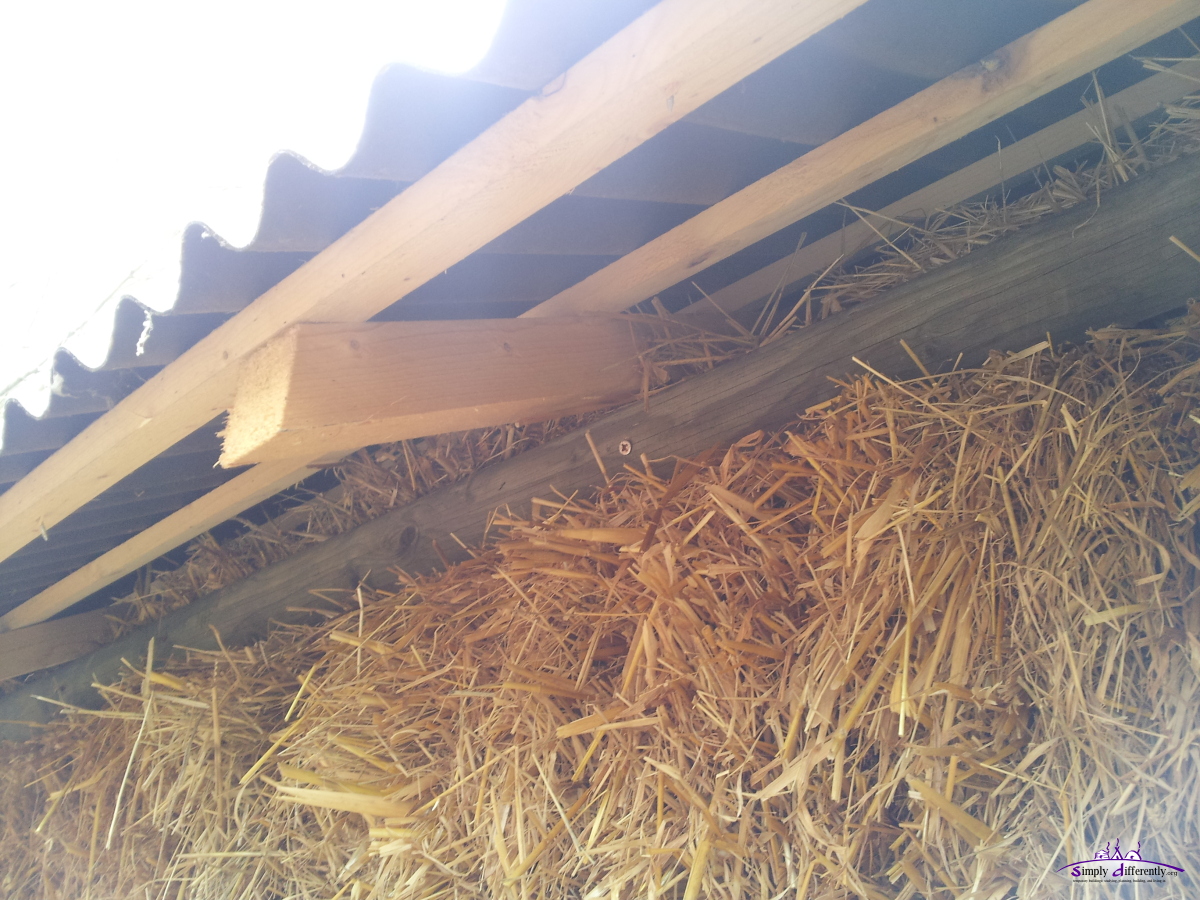
A small "upgrade" I did a few weeks ago: closing the gap at the back (east-side) just at the roof/wall junction, which otherwise was open straw compressed between the ceiling beams, and now a ~6cm line of wood:
|
|
2015/06/26: Summer Time
 |
2015/04/30: Springtime
 |
2015/01/04: Warm Day
 |
A low pressure system with strong winds and rain went over the region last night, and decimated most of the snow, but left the soil very damp. The temperature raised up to ~8C° in the sunshine. The snow which slid from the roof remained in front and in the back.
Heating
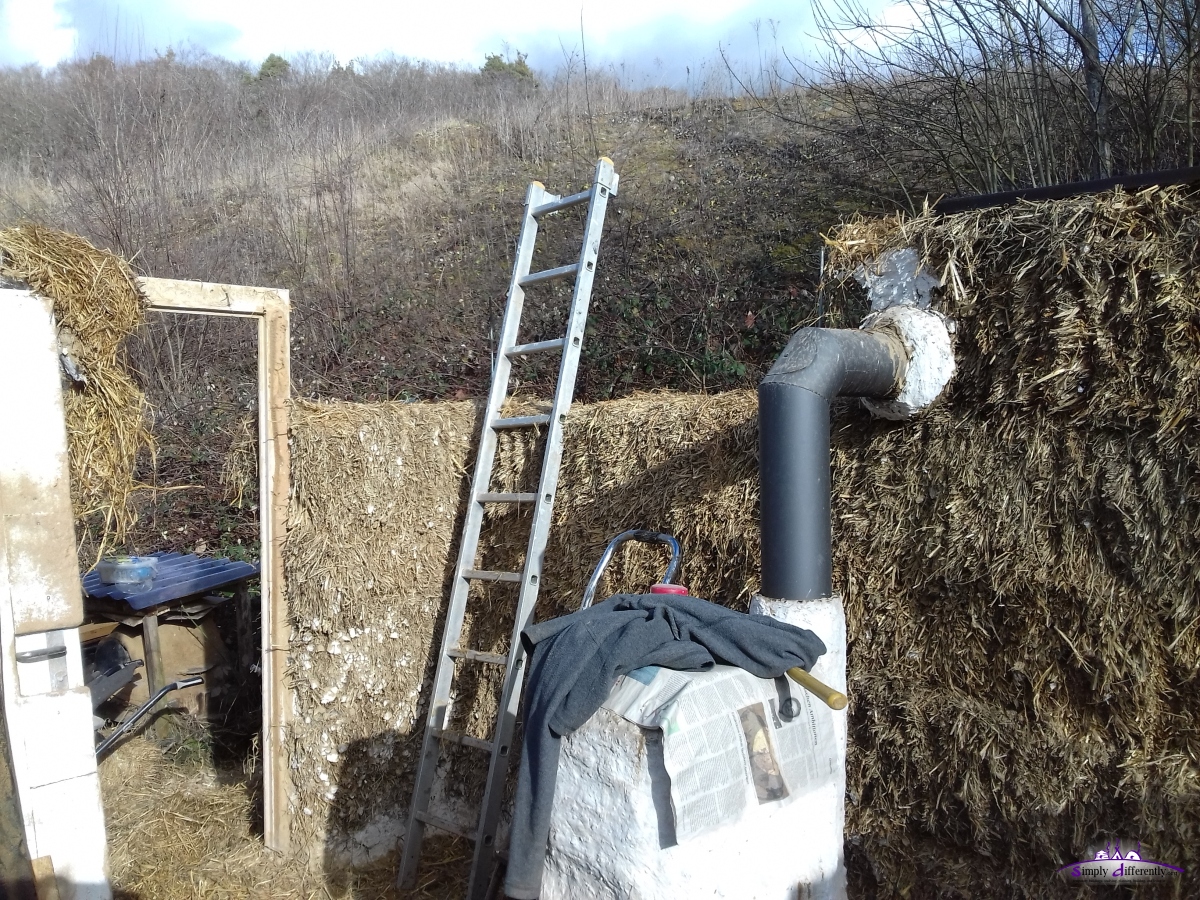
The gas heater I obtained isn't doing the expected: it heats the air quickly, but it won't last due the minimal thermal mass as I realized. The insulation of the cabin isn't as tight as I planned (still needs work), but this is just part of the problem.
A real oven radiates the heat off its thermal mass, and carbin monoxide mostly exits through the pipe, whereas the gas heater leaves carbon monoxide inside the room and needs proper supervision.
So a real oven would have been more suitable, even for just 2-3 months use during winter time, after that it won't be of use for me.
Ideally would be a light stove with sufficient thermal mass, e.g. using water for the thermal mass instead of heavy stones.
- Gas Heater: very light (2kg), inexpensive (EUR 70), no pipes, easy source of propane gas (11kg = EUR 20)
- Ordinary Oven: heavy (80kg mininum), variable price (free - EUR 600), requires pipe system, easy source of wood (1 ster = EUR 50)
- Light Oven: light, inexpensive (DIY), requires pipe system, easy source of wood (1 ster = EUR 50)
1 ster = loose 1 m3 wood
A "Light Oven" I envision a brick based rocket stove, which can be assembled on site and disassembled when taking down the habitat again, and only transport the pipe system. The thermal mass would increased with heat resistant water canisters positioned close to the oven.
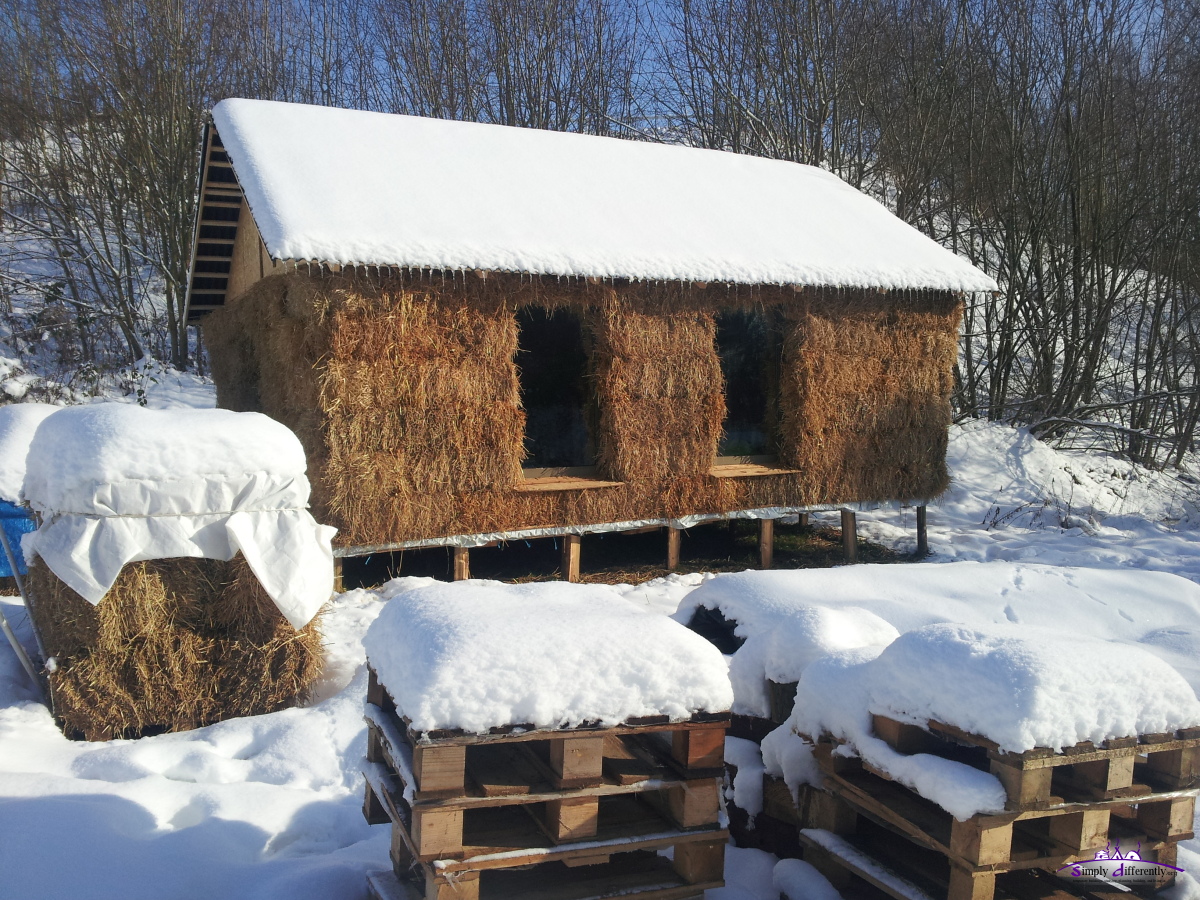
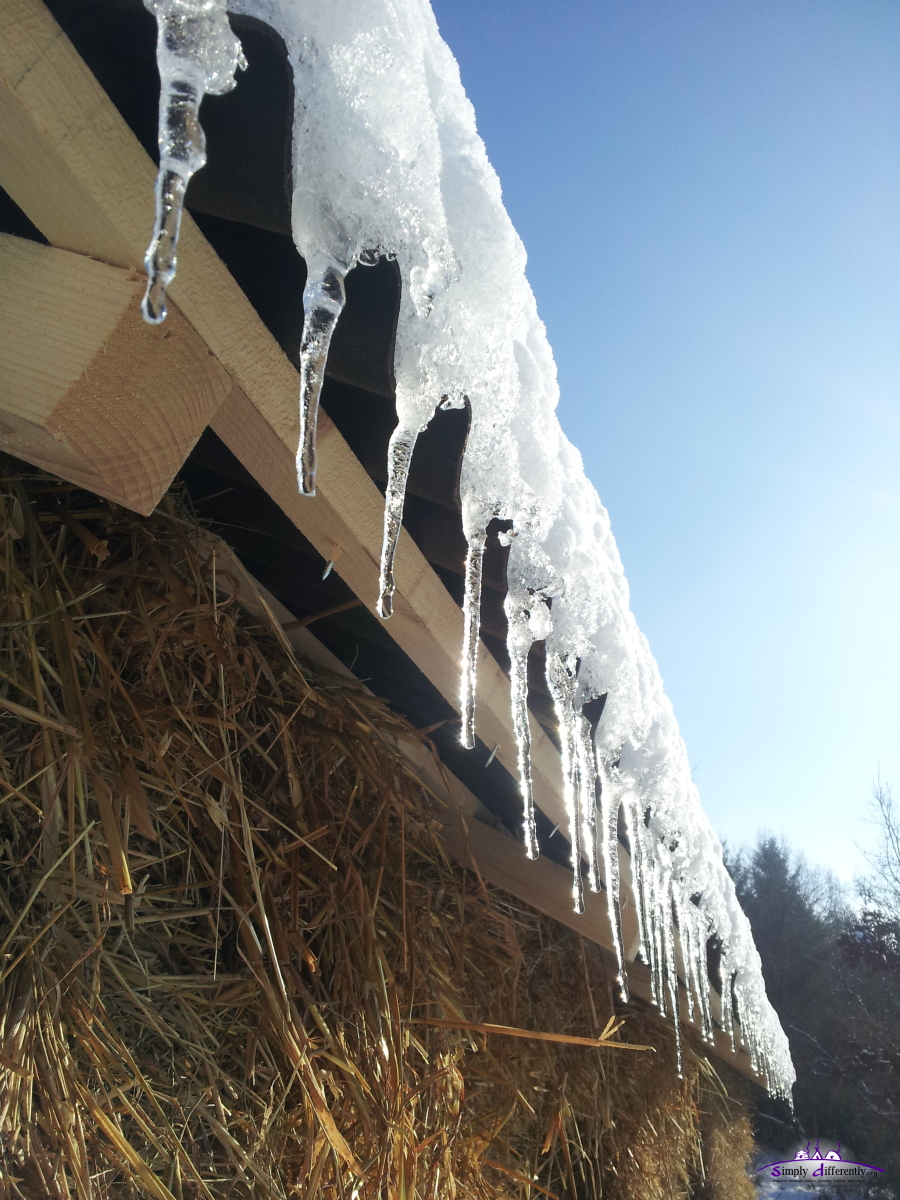
2015/01/03: Snow Slide Down
 |
2015/01/01: New Year
|
|
2014/12/31: Week with Snow
  December 31, 2014 |
- just 10cm insulation of the floor
- loose straw filling the gaps of the ceiling construction, a compromise to increase overall static
The next weeks I gonna try to fix the weak points of the insulation.
One night was -15C, and inside the temperature dropped to approx. -5C and liquids froze in the bottles, definitely something I did not expect to happen.
The next days positive Celsius degrees are expected, with rain - it will be important for me to observe how the melting and slide down of the snow ice combo of the roof occurs, e.g. the weight will first increase of the snow, until the ice underneath detached of the roof and perhaps ice and snow in one go slides down.
2014/12/27: First Snow
 |
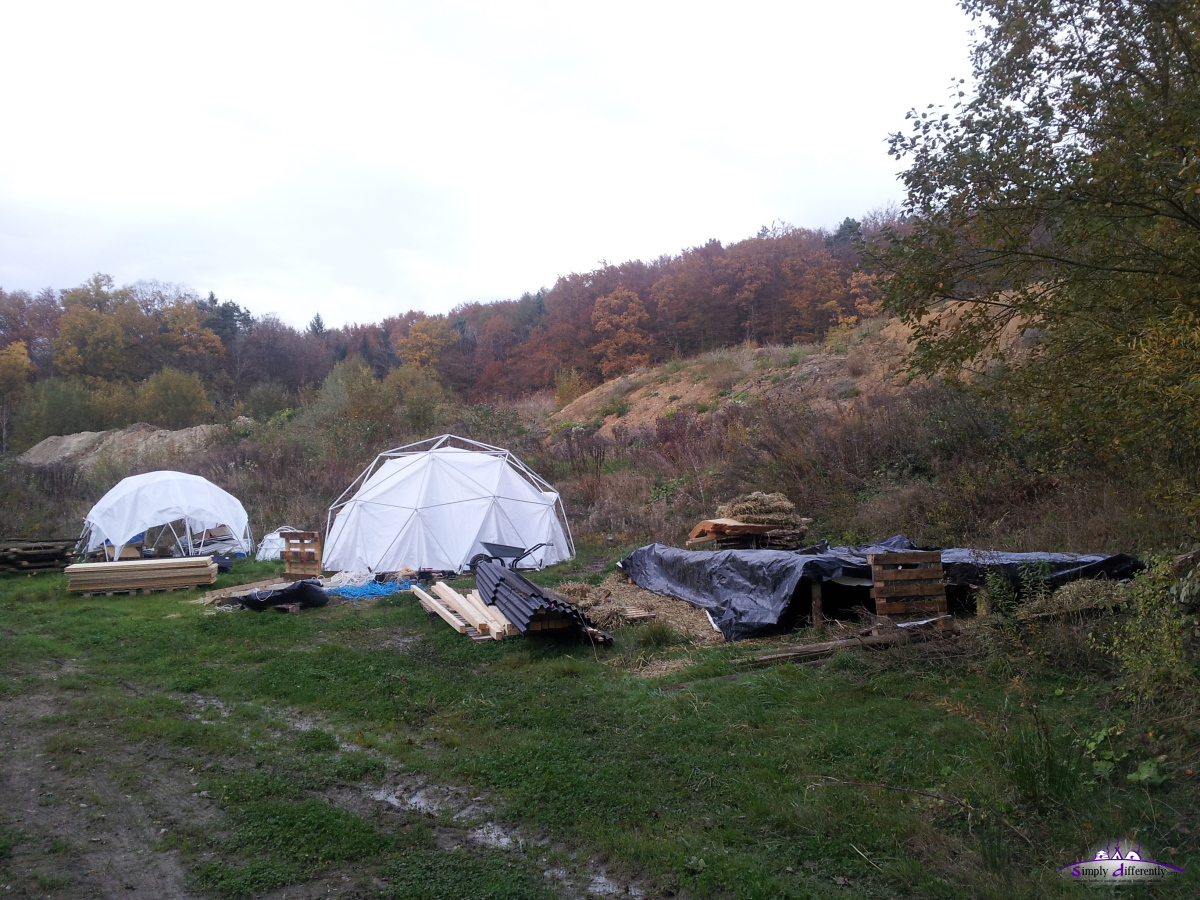
I was away a few days and when I came back today and the two PVC domes (LC 3:3:2 and 2V geodesic) nearby crashed due the weight of the snow; I gonna fix them tomorrow or so.
Temporary buildings need on-site presence to take care of them for severe weather conditions, the strawbale cabin definitely is more solid and requires less "care" on-site.
2014/12/23: Walk Around
A brief 3min walk around, no spoken comments, getting a sense of the size of the cabin, texture and feel of the bare strawbales, a brief view of the inside etc.
2014/12/19: Fine Tuning
 |
I bought a gas heater (EUR 60) as I didn't want to install a wood stove / oven; but since it was rather mild the last days (5-12C) and partially sunny, there was no need to heat yet. The gas heater is for exterior use mainly so I have to be carefully to use inside (carbon monoxide poisoning) and properly vent. Two tests I did of heating the room within 10-15min from 5C to nearly 18C, so I assume with lower temperatures the period of running the gas heater will be around 30min or so per day at sub zero (Celsius) days outside, to reach 15C interior; will document this later.
Last week I had the first mouse entering the cabin, from the top, where loose straw was used to patch the gap from the wodden beams under the ceiling - so I added more straw and compressed it further. It was a compromise I made, it increased the ceiling stability, but introduced a gap where loose straw was required to be used (8cm thick portions of a bale).
A few days ago some brief windy rain occured and did wet the south-west side of the cabin, after a few hours it dried off again.
It will be interesting to observe change of the color and material (straw) over the period of weeks and months - one of the main aims of this project to observe long(er) term use of bare strawbales in construction.
2014/11/28: Sunny Afternoon
Today the sky cleared in the afternoon:
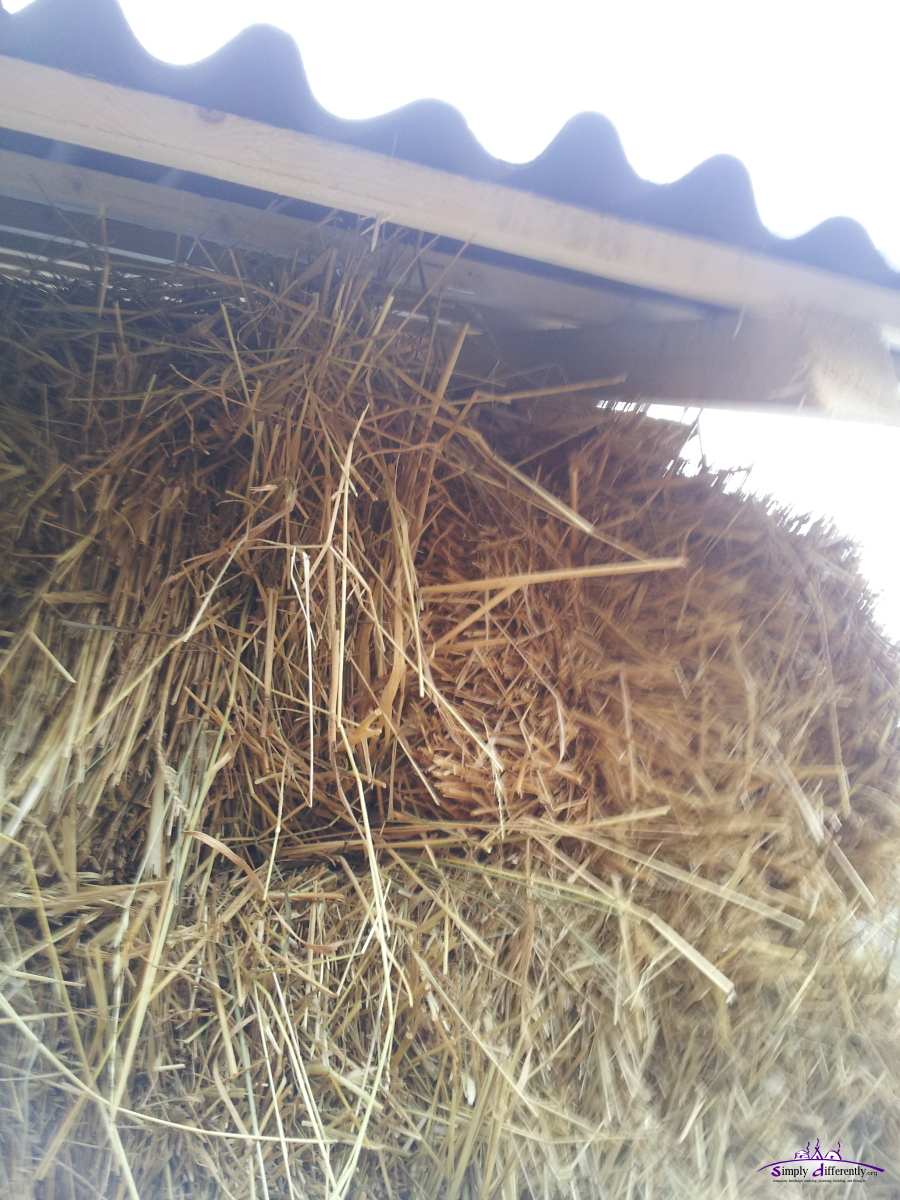
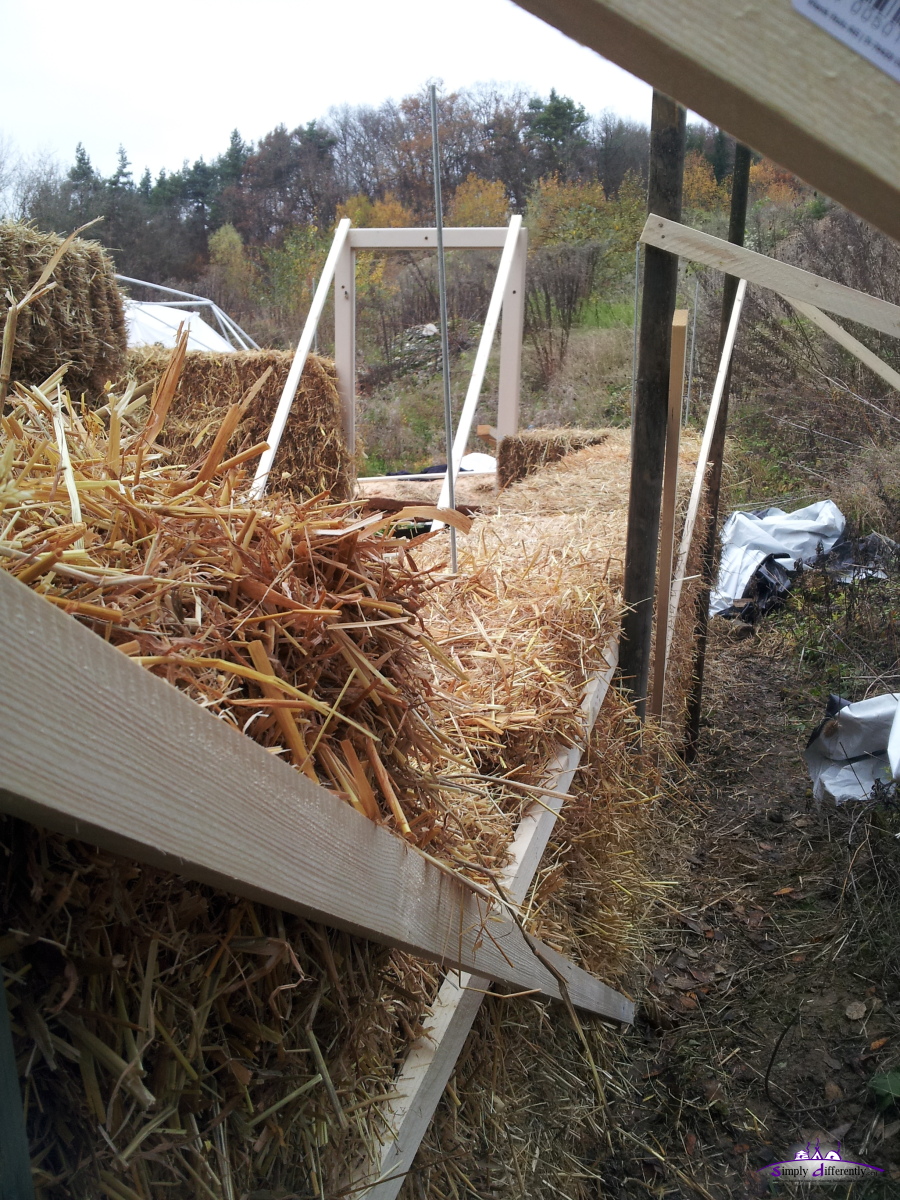
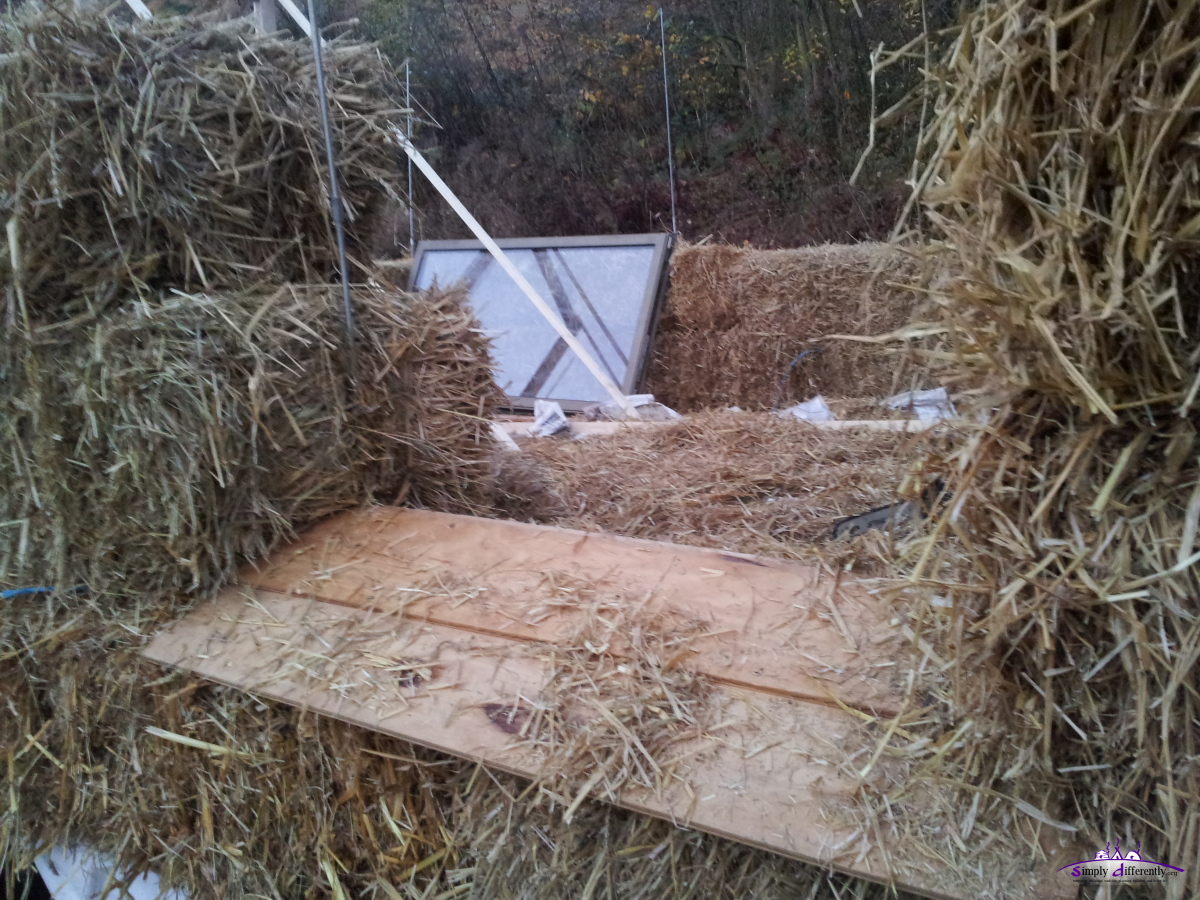
And I continued to close the ceiling / roof gap with OSBs, here the south side:
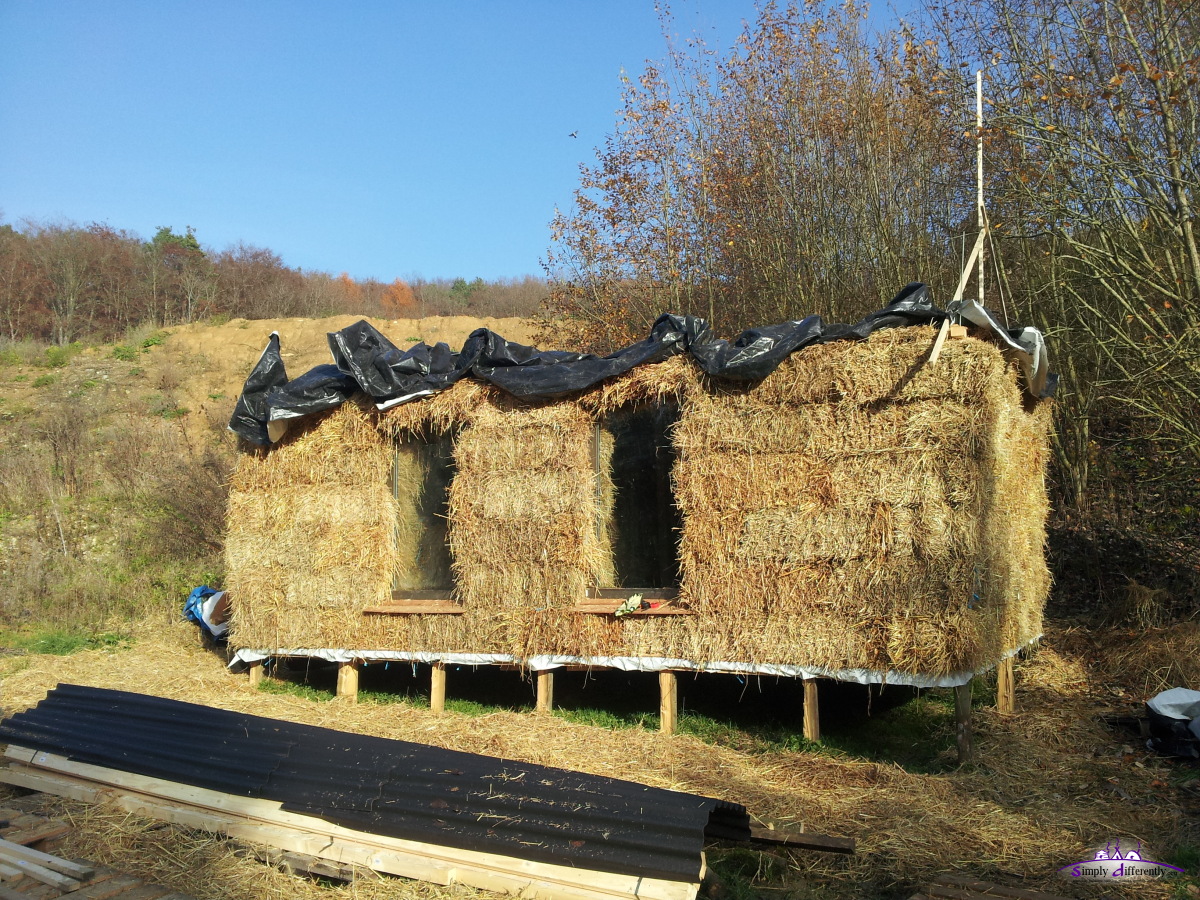
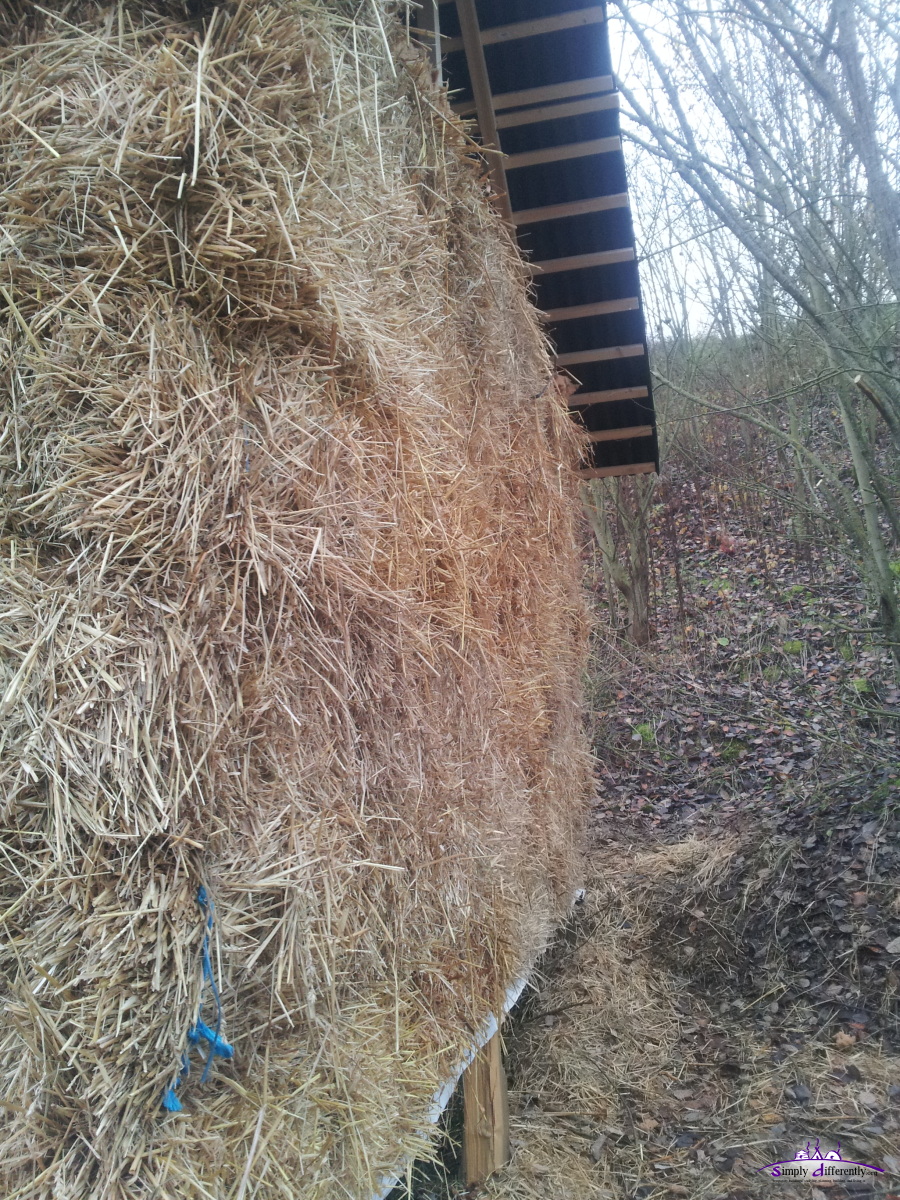
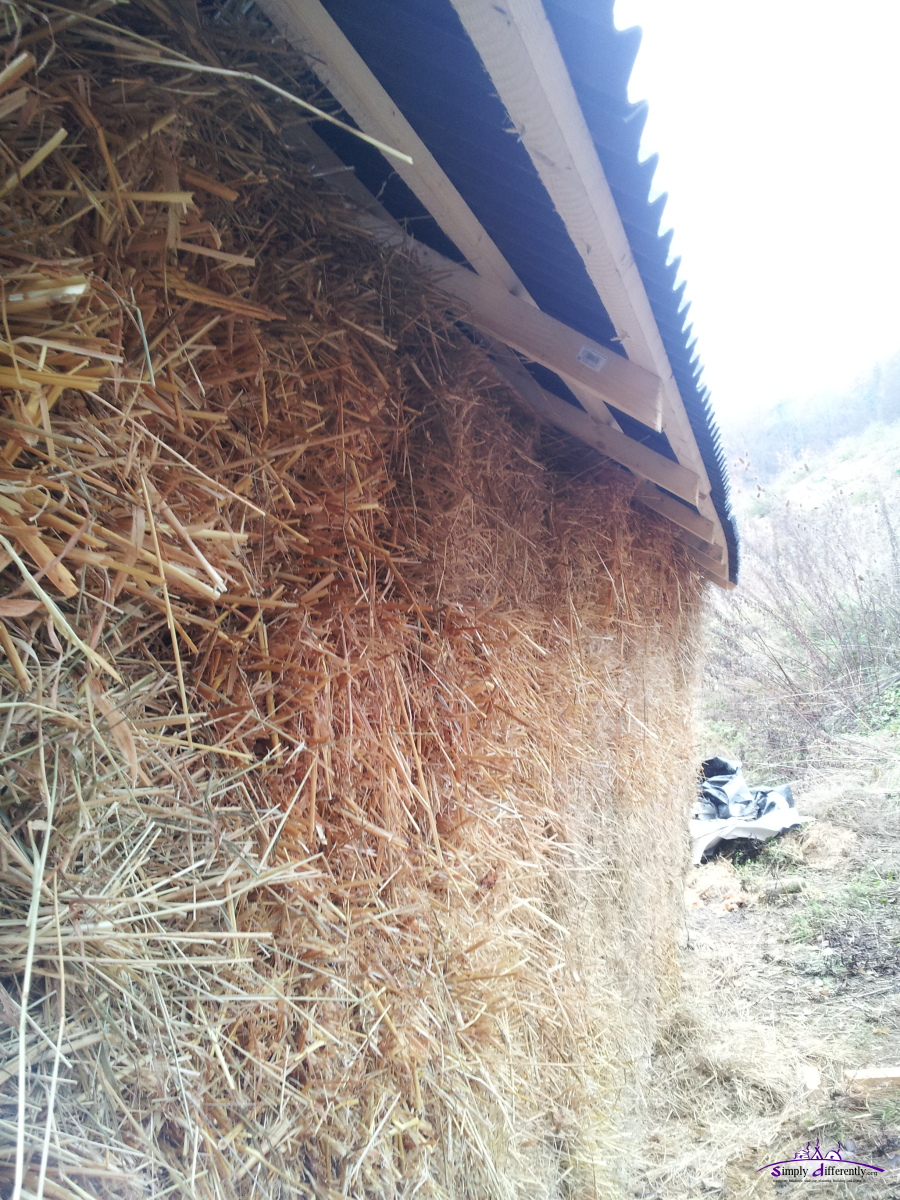
By chance, without planning actually, the height of the triangle is 1.30m or ~ 2x 0.675m so two lanes of OSB fit nicely - the left over I reuse for the north side. The details of the rain runway below the OSB triangle I will do tomorrow - it's very important that rainfall reaching the triangle flows down, and then over the strawbale and not into them.
2014/11/27: Cleaning Up
Afternoon I spent cleaning up the surrounding and collect left overs of the construction, patch some more holes between the bales and make some more photos: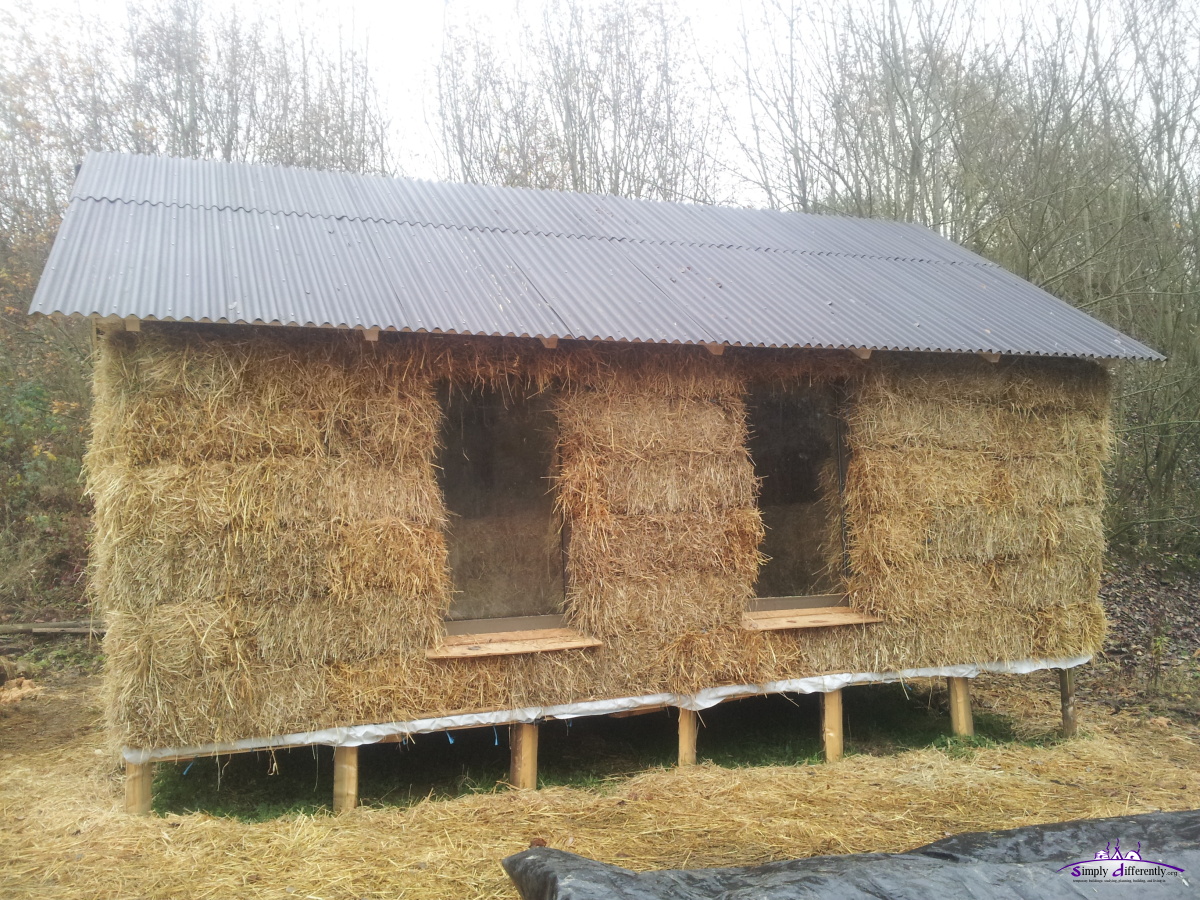


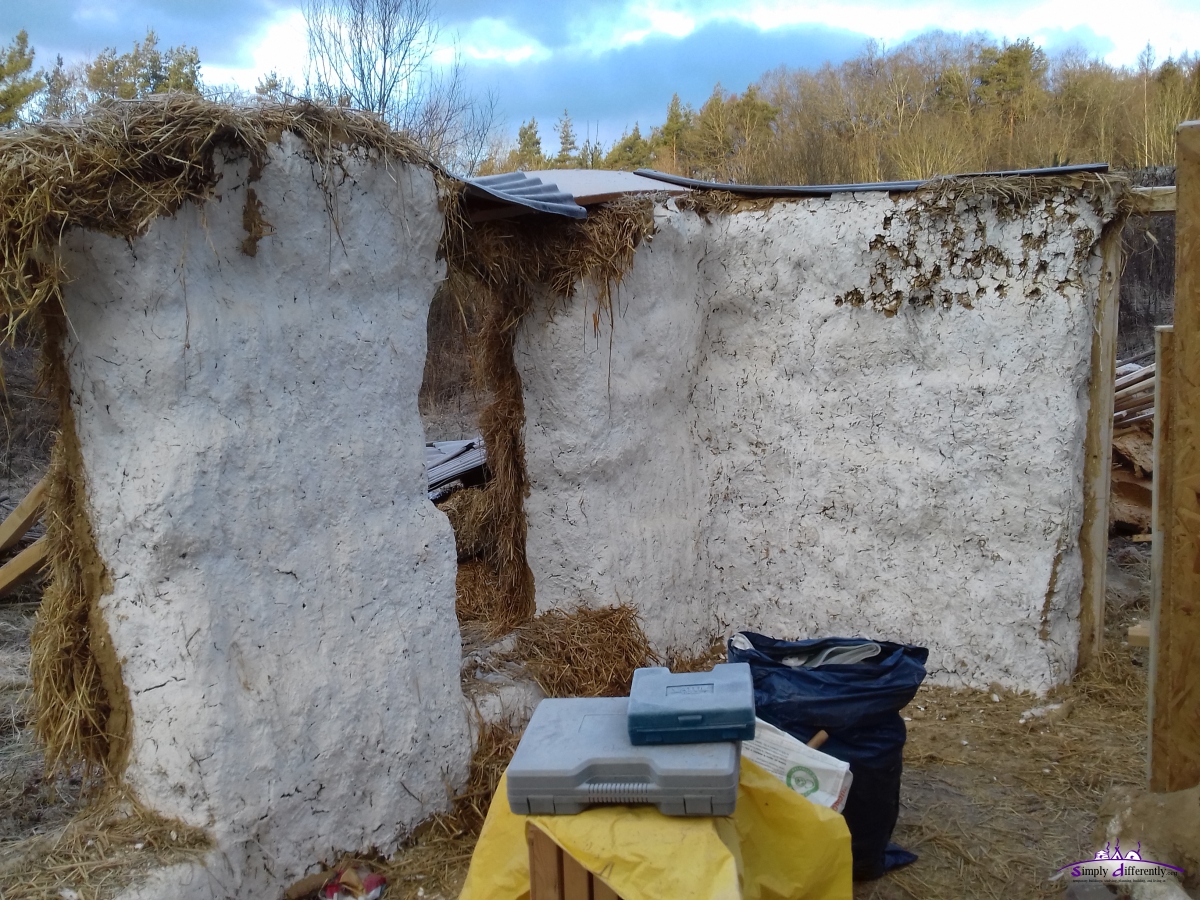
I spent the last night in the cabin, and it sensed some straw dust, also visible with the LED light. Also at the morning it's a bit too dark for my taste, coming from translucent PVC canvas of the geodesic dome, and hearing nature direct whereas the cabin is almost like a sound studio, completely sound proof. To light up the interior, I'm pondering on some ways to plaster the inner walls with some bright or white surface, in a manner which if the cabin is taken down, the strawbales can be still used again - so some rather natural material then.
So far I haven't decided on the actual details of how to seal the air triangle under the roof, the south side might be sealed well, as it's the main "weather" (wind & rain) exposure. The north side with the door and its roof triangle I like to keep accessible, e.g. with a small door. Most storms come from south west or north west, since the slope the cabin is east to west down, so the east side is quite well protected from winds or storms.
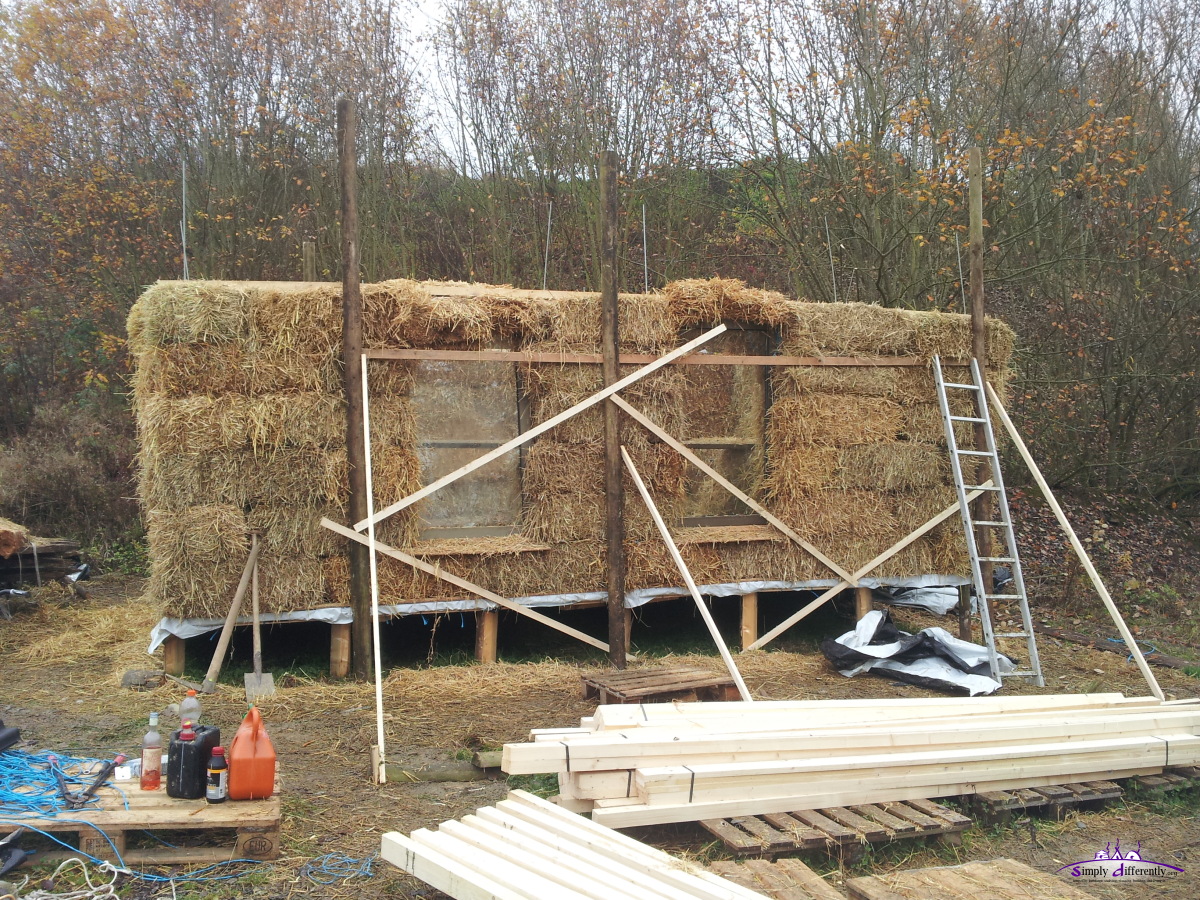
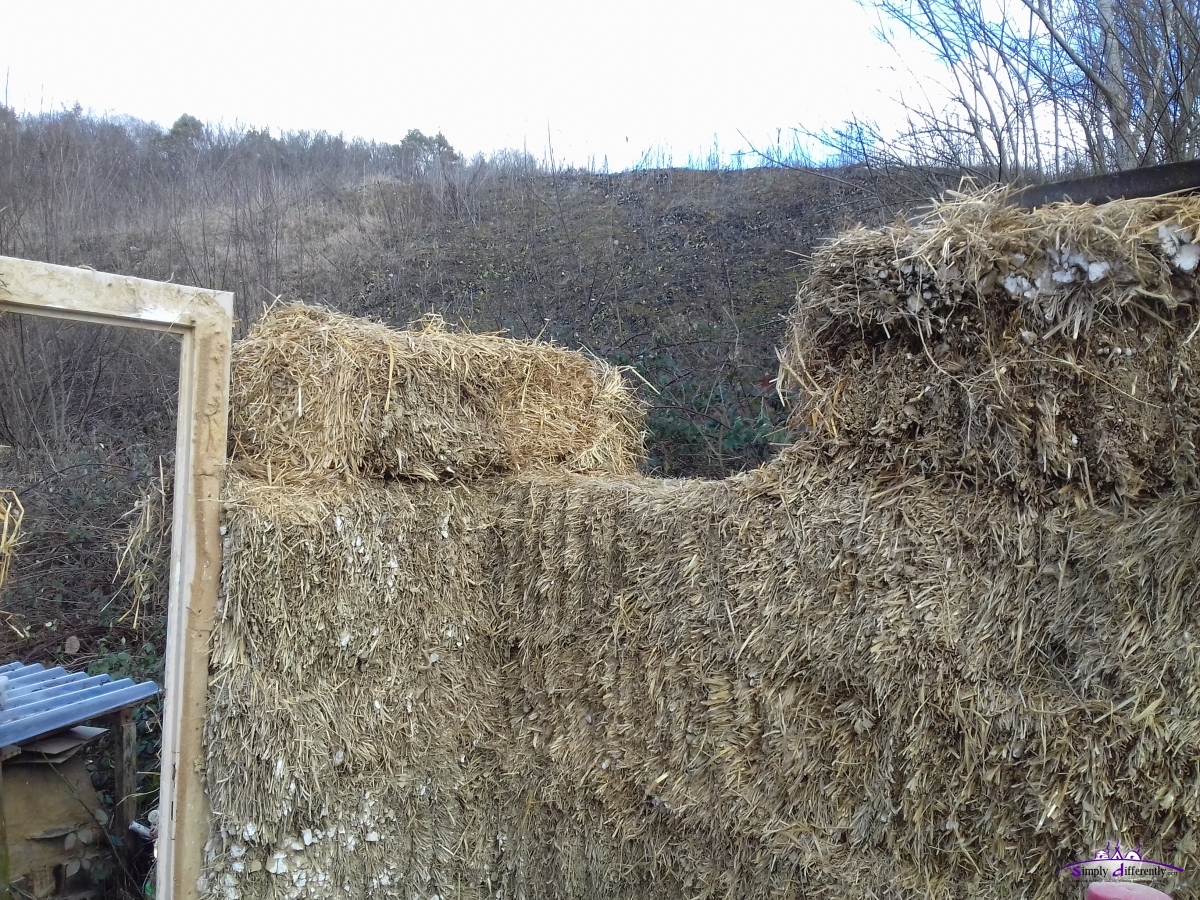
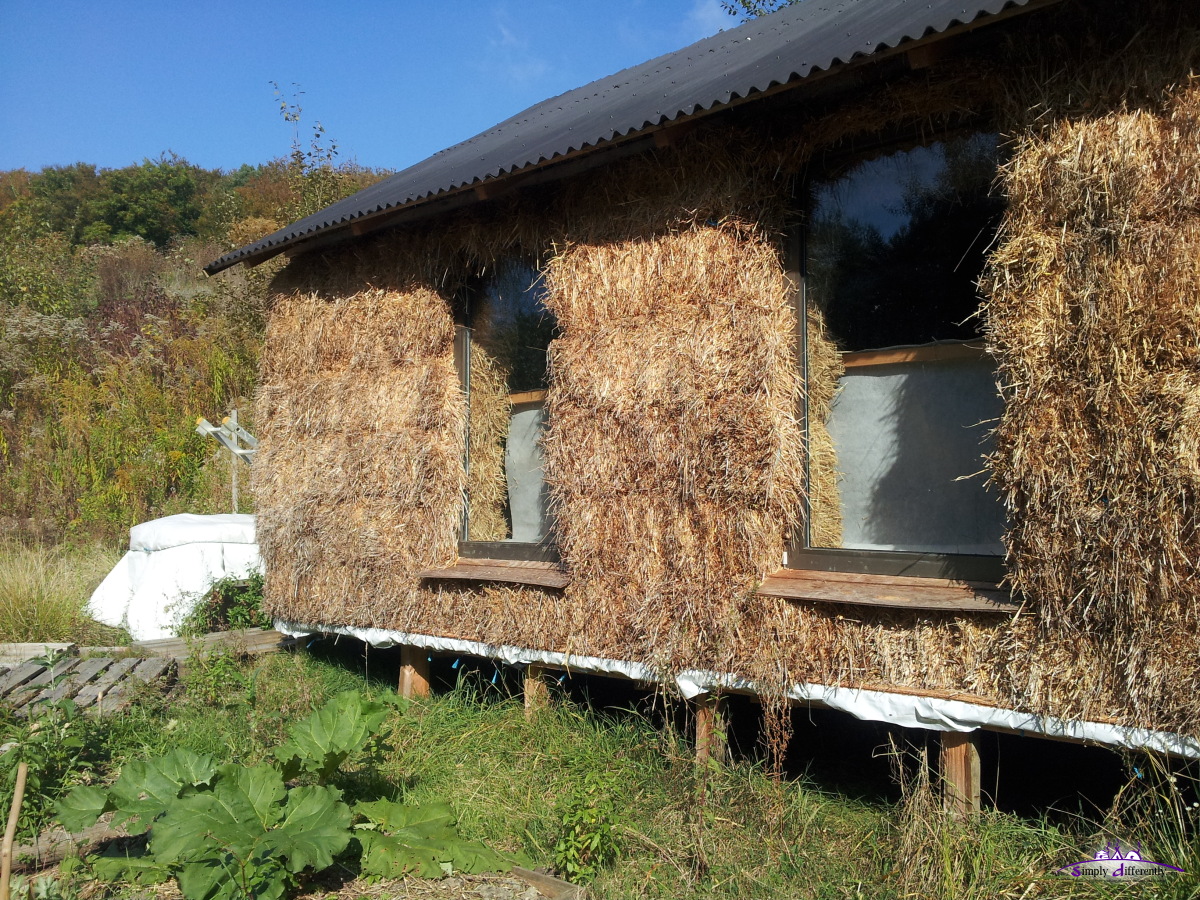
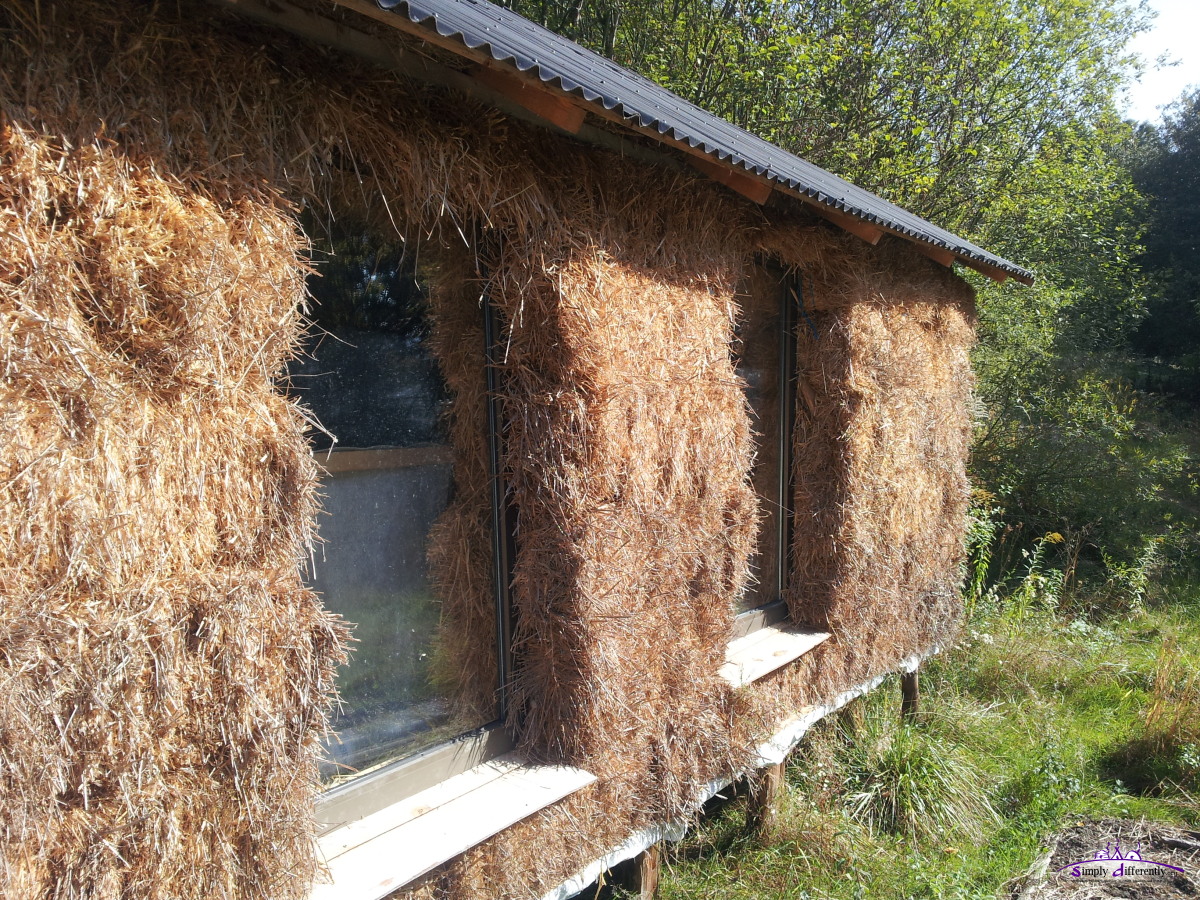
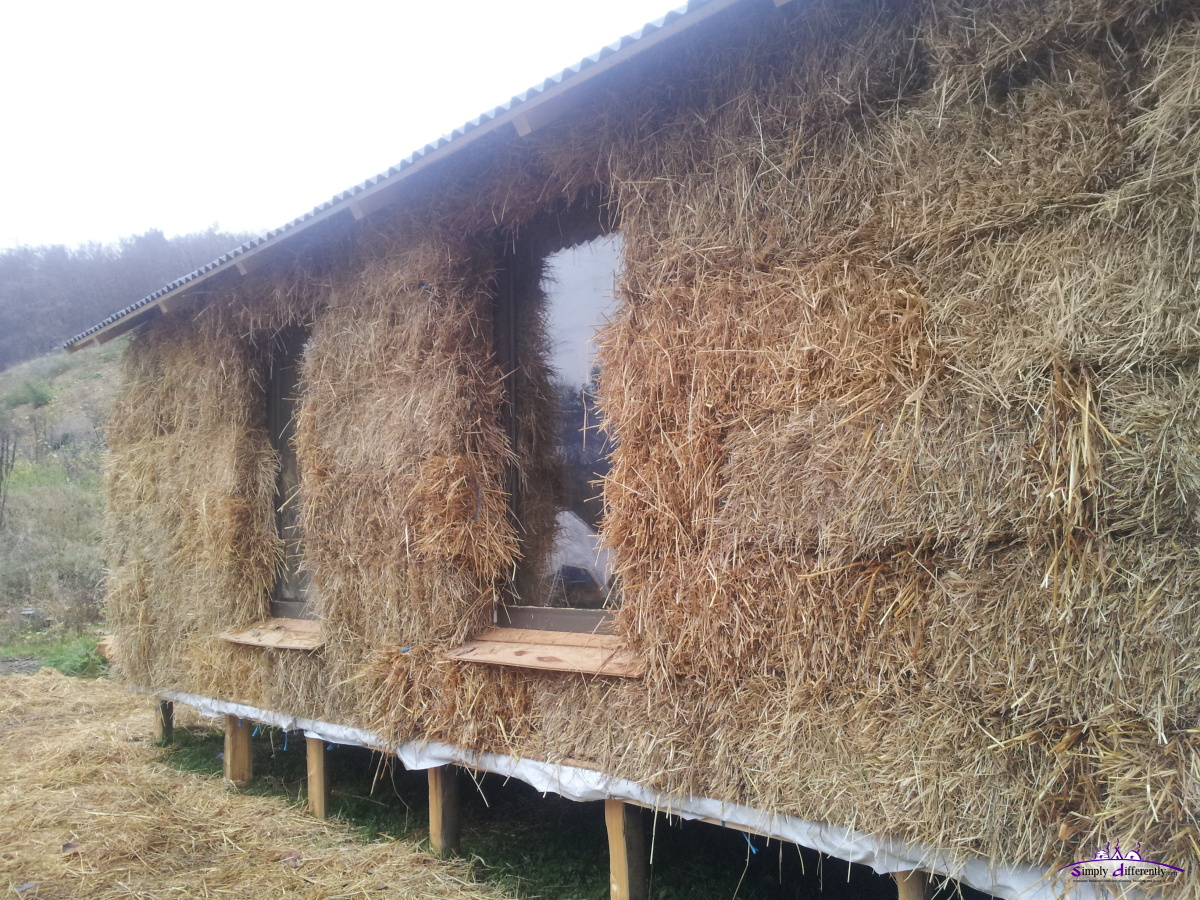
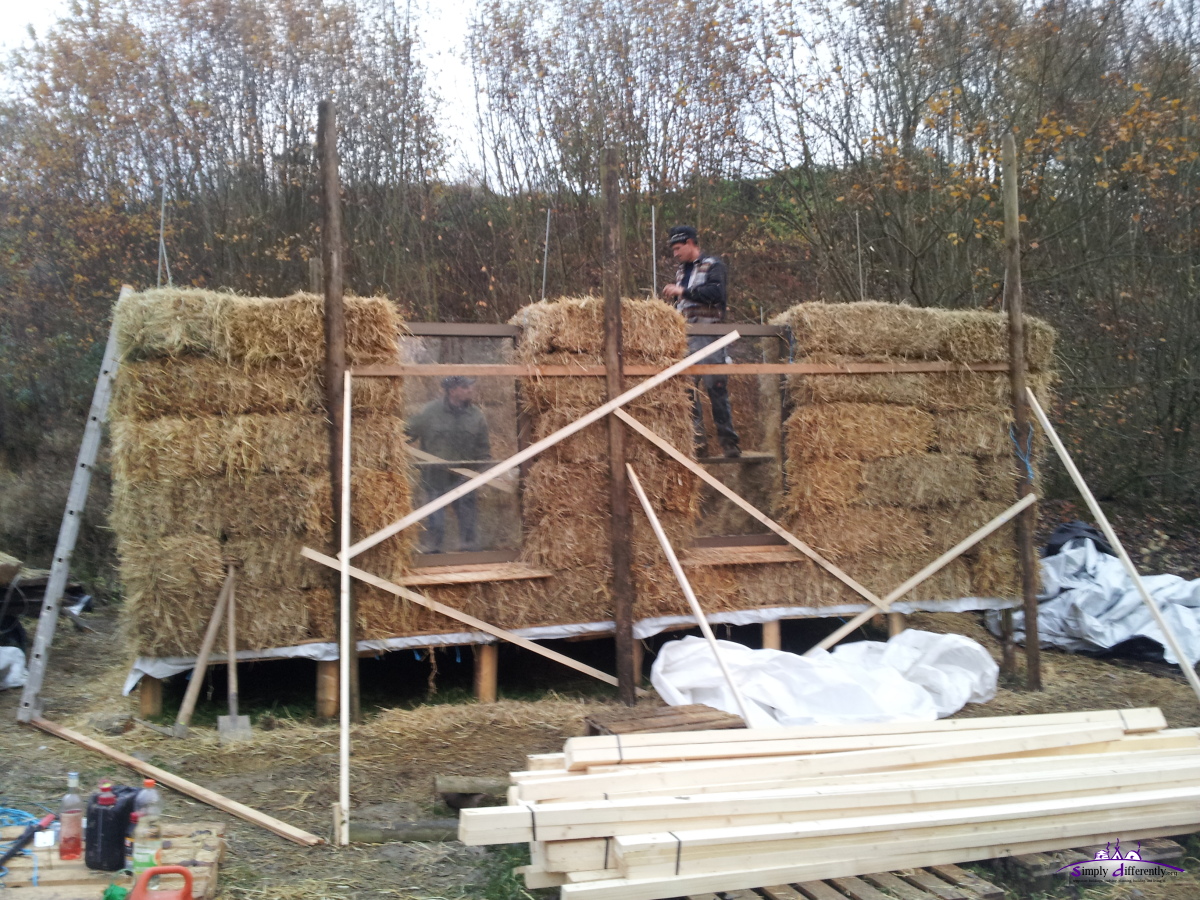
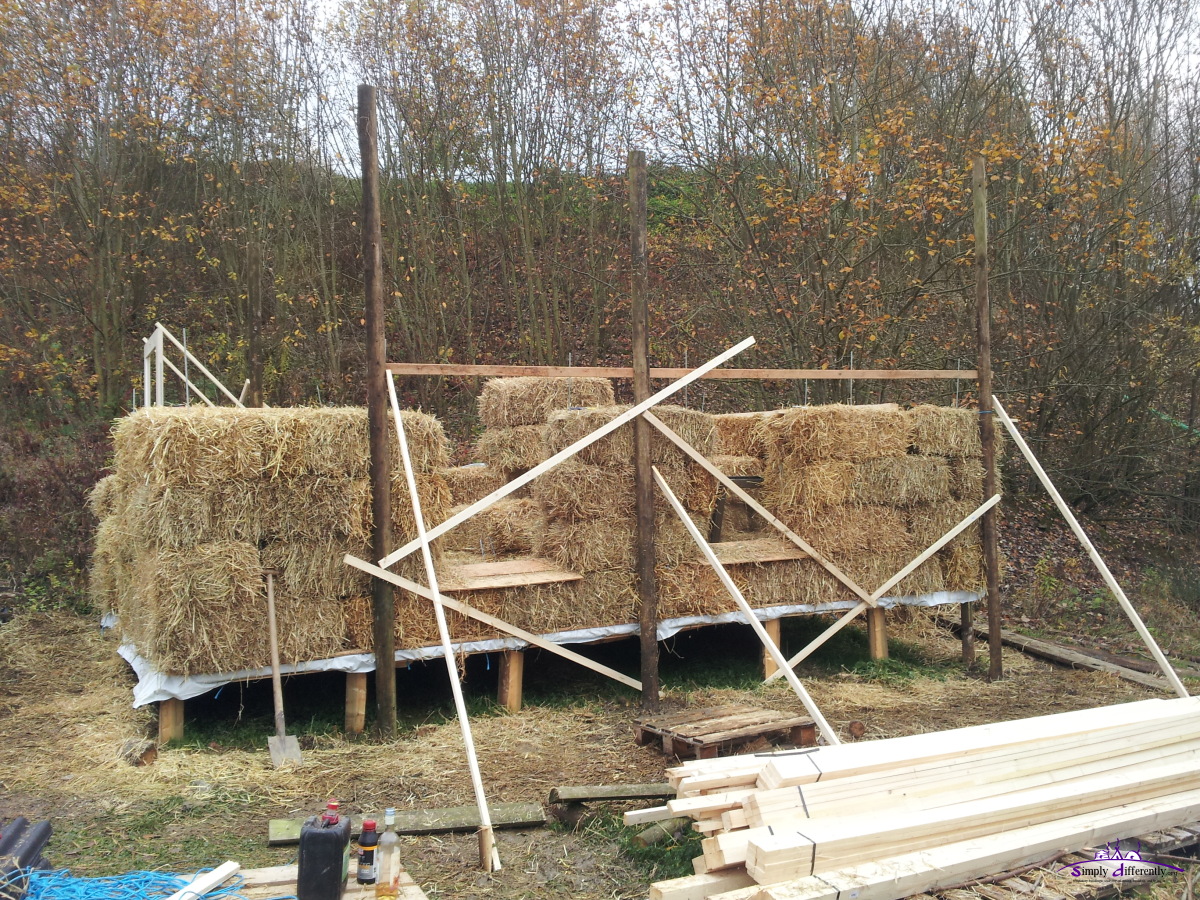
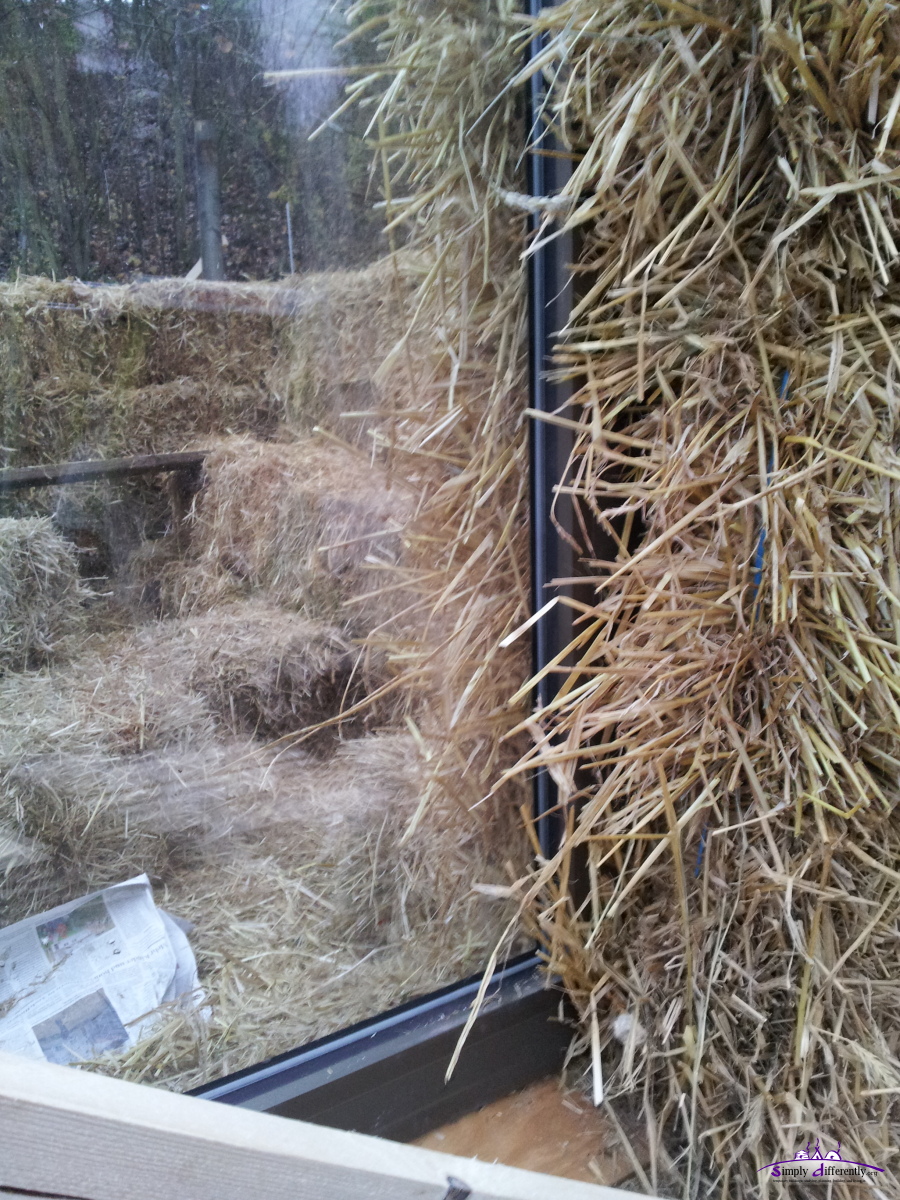
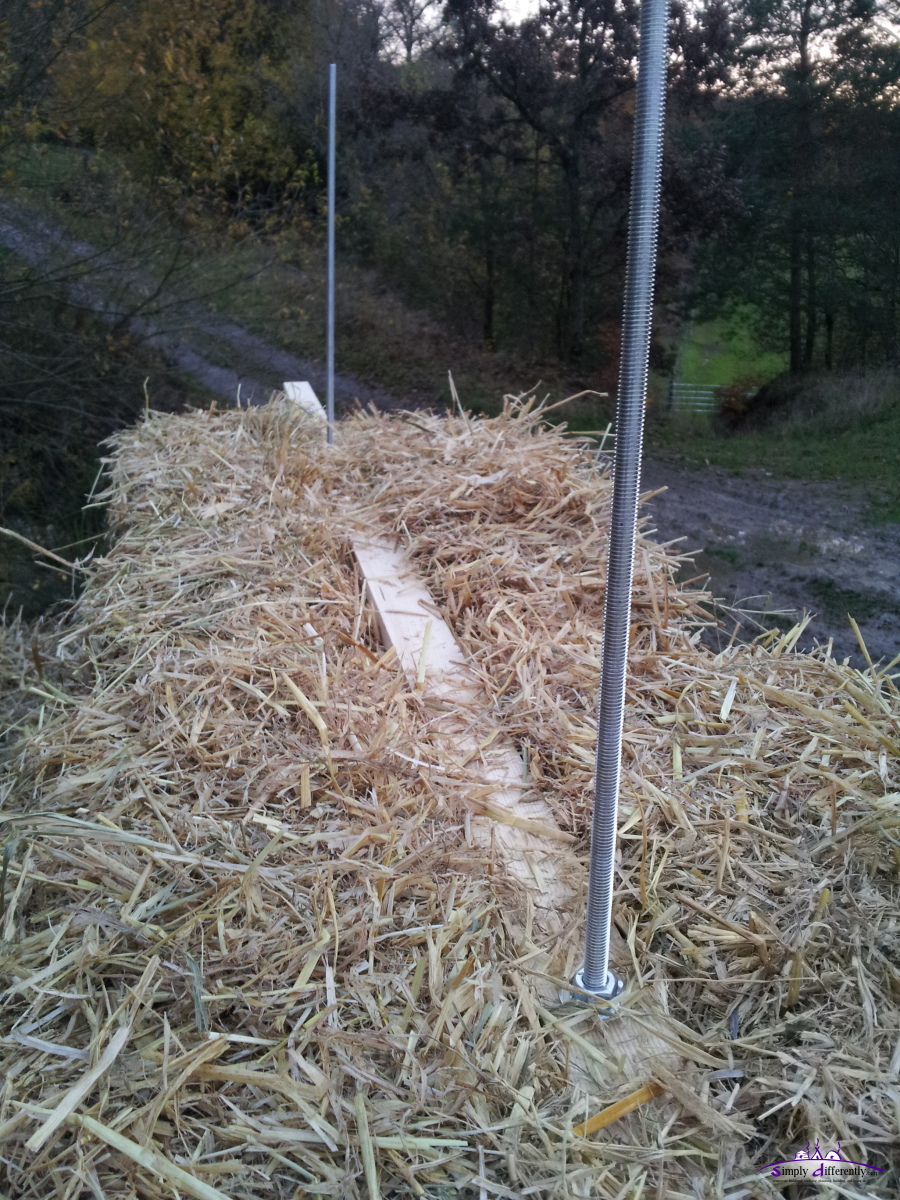
The backside of the cabin, the 6m long wall is a bit wobbly at the center, e.g. gives in apprx. 2cm with some pushing, the ends near the corners / edges do not move at all. Since the windows are at the front, where winds or storms will reach the cabin, they actually provide some stability with the threaded rods so close by (see illustrations/plans for details).
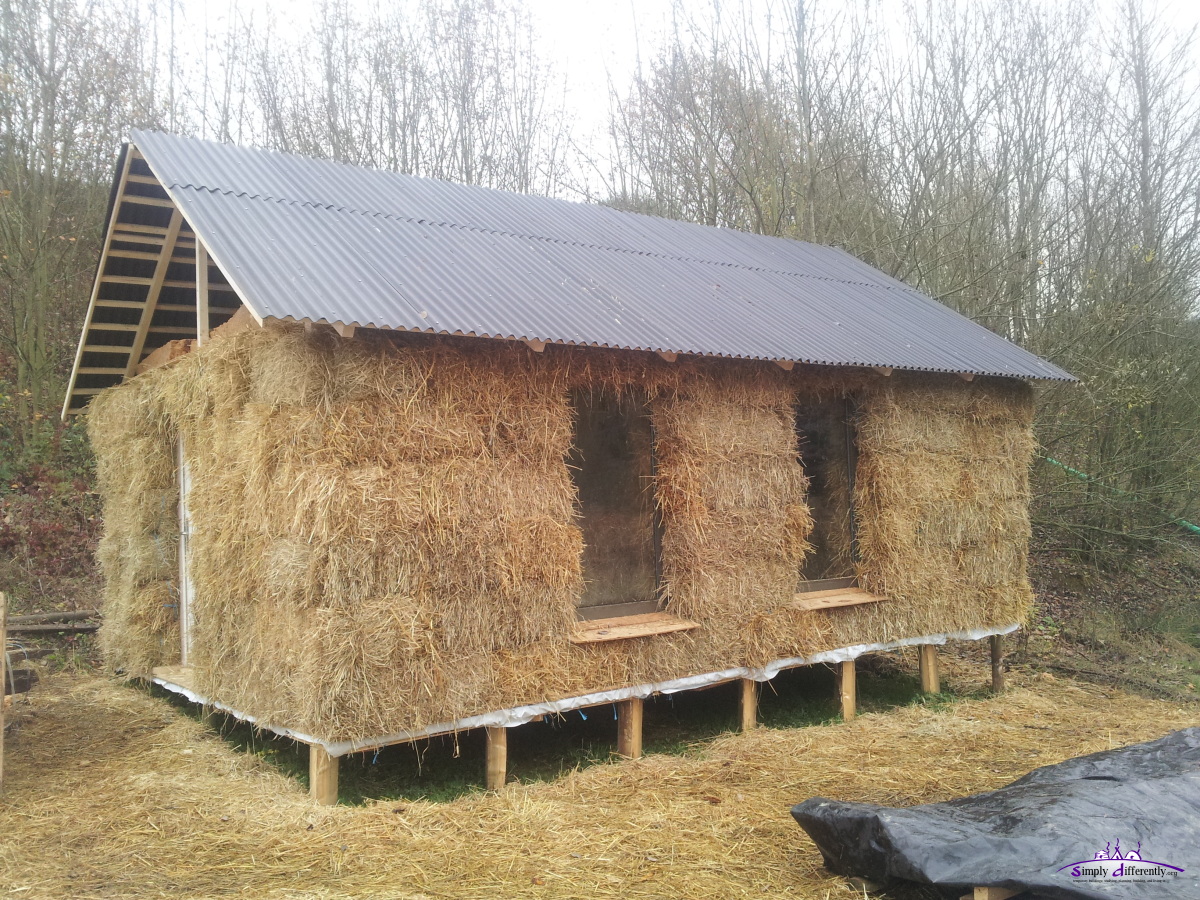
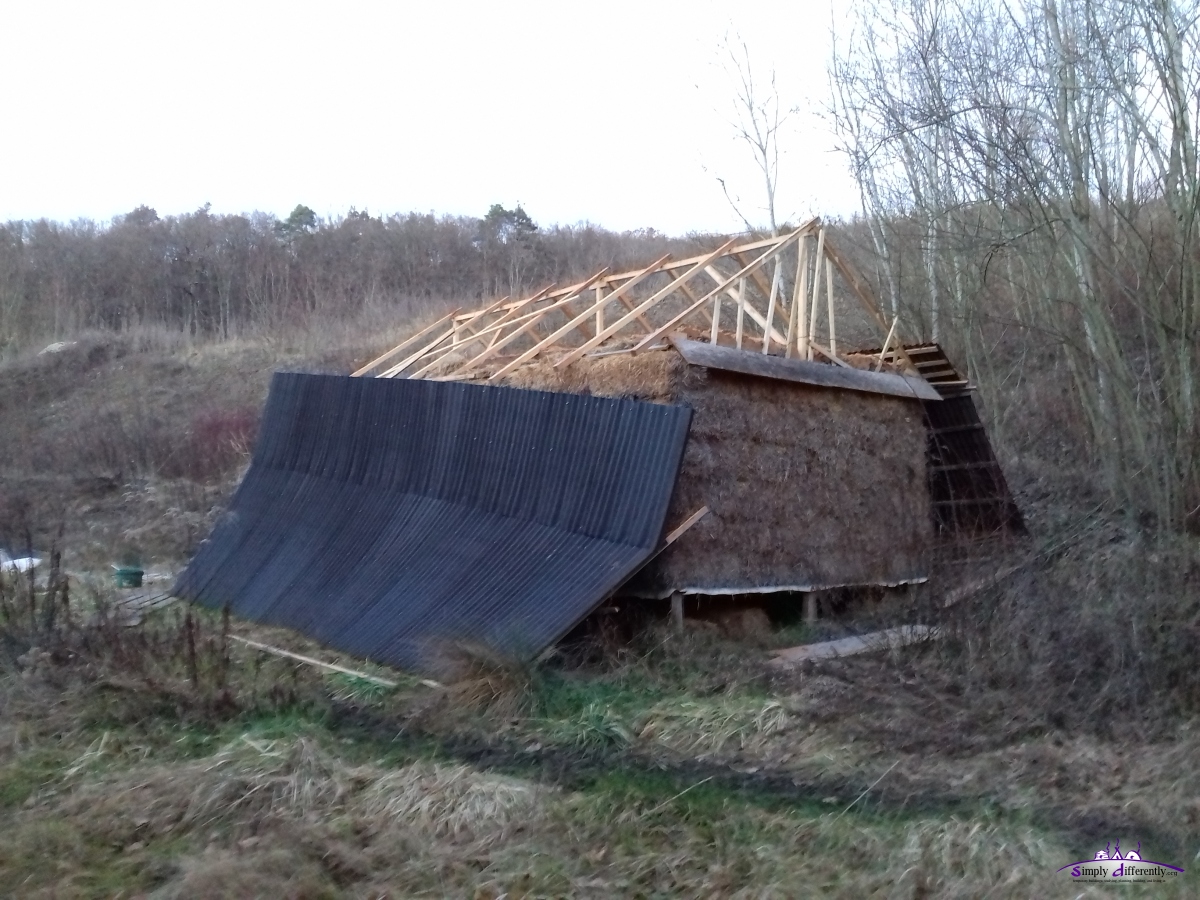
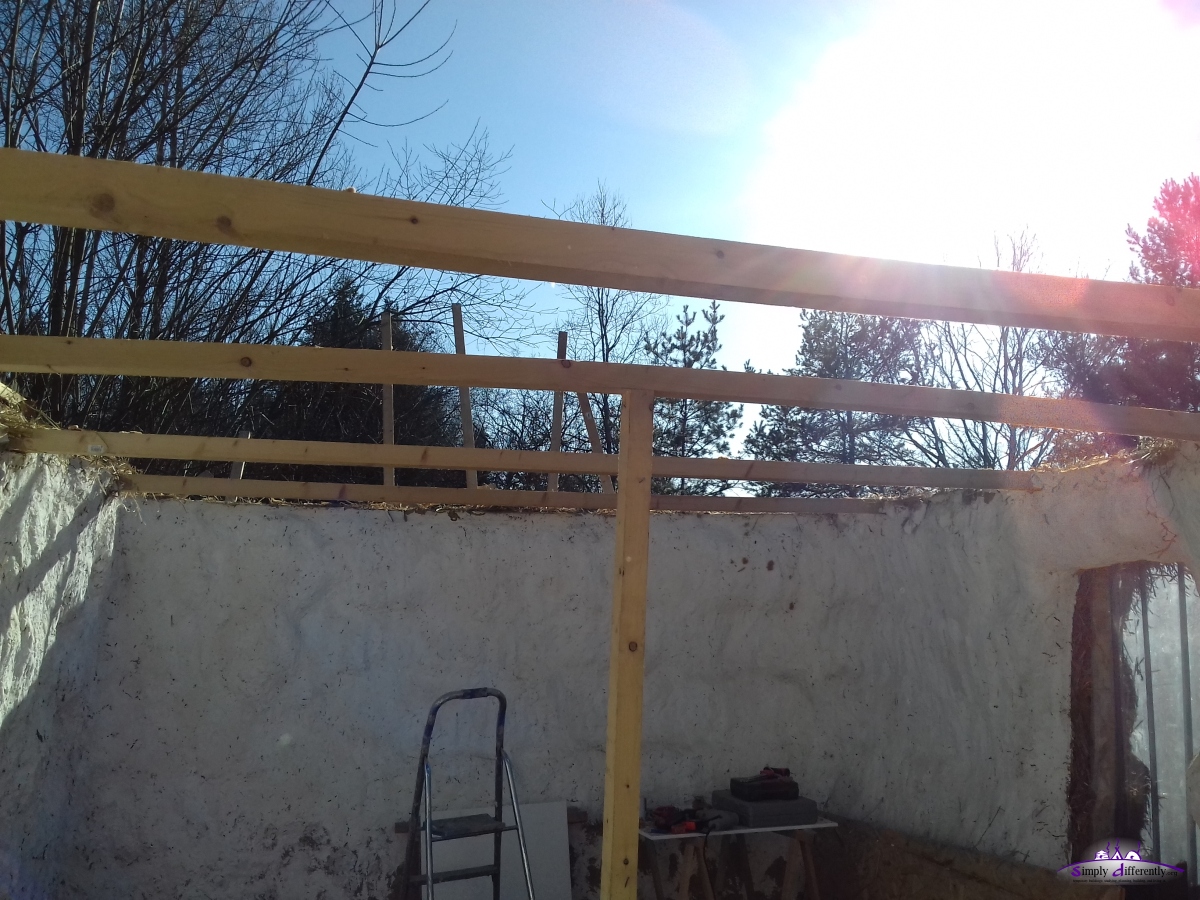
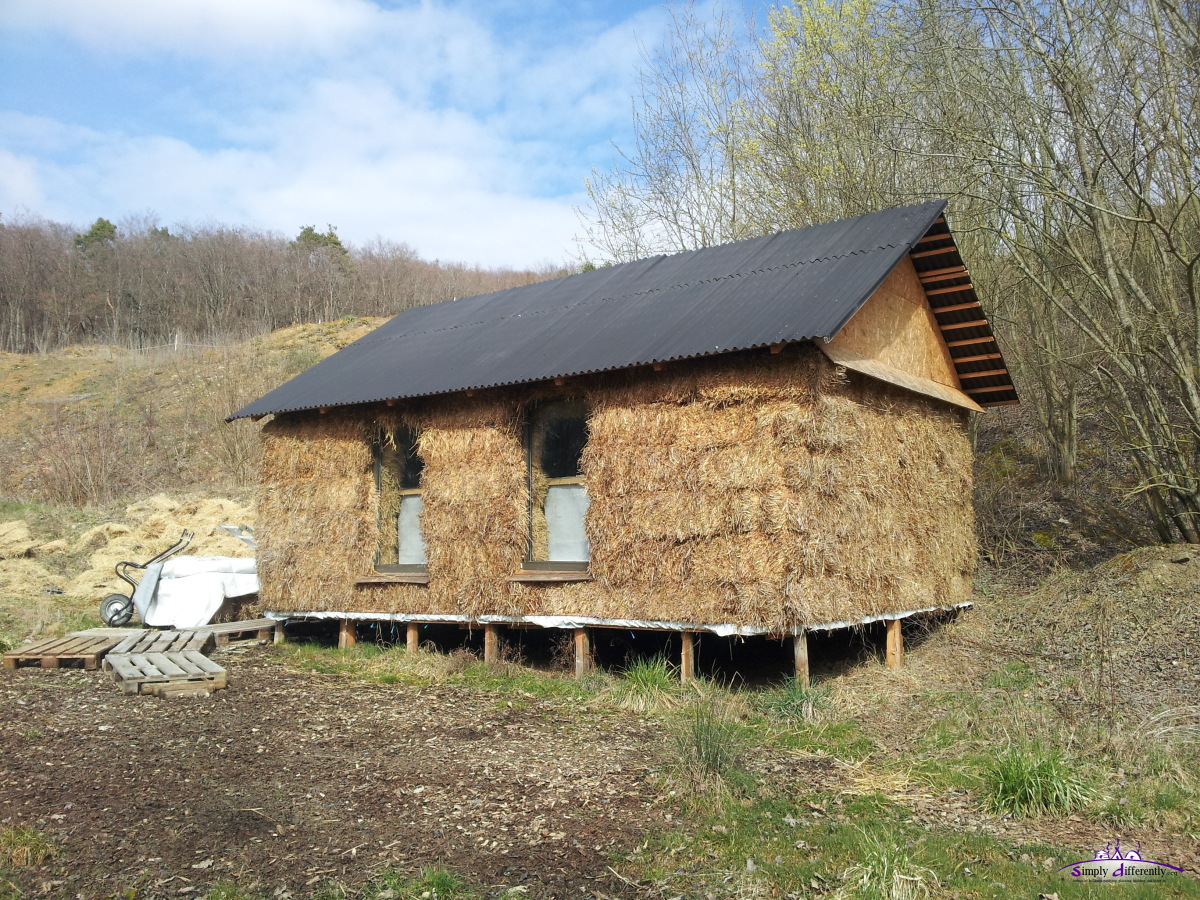
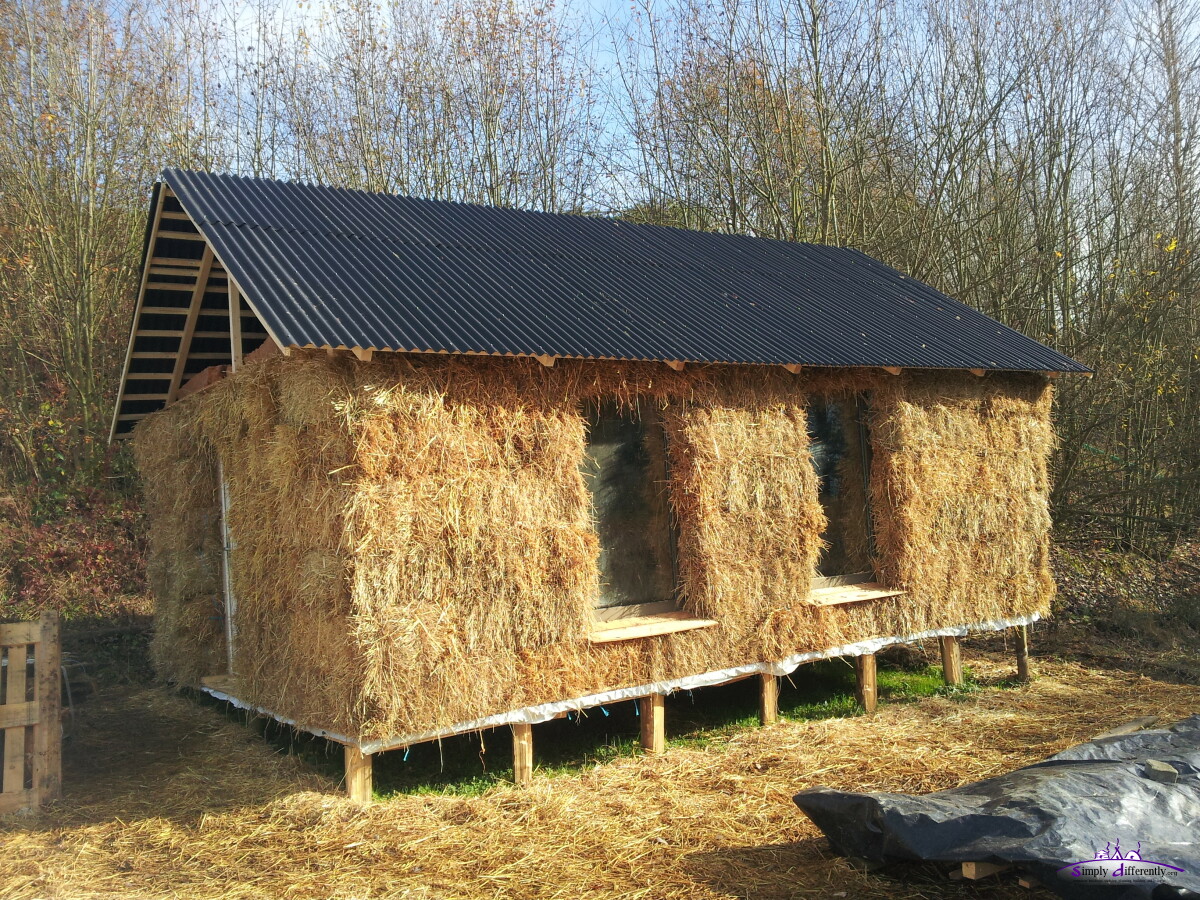
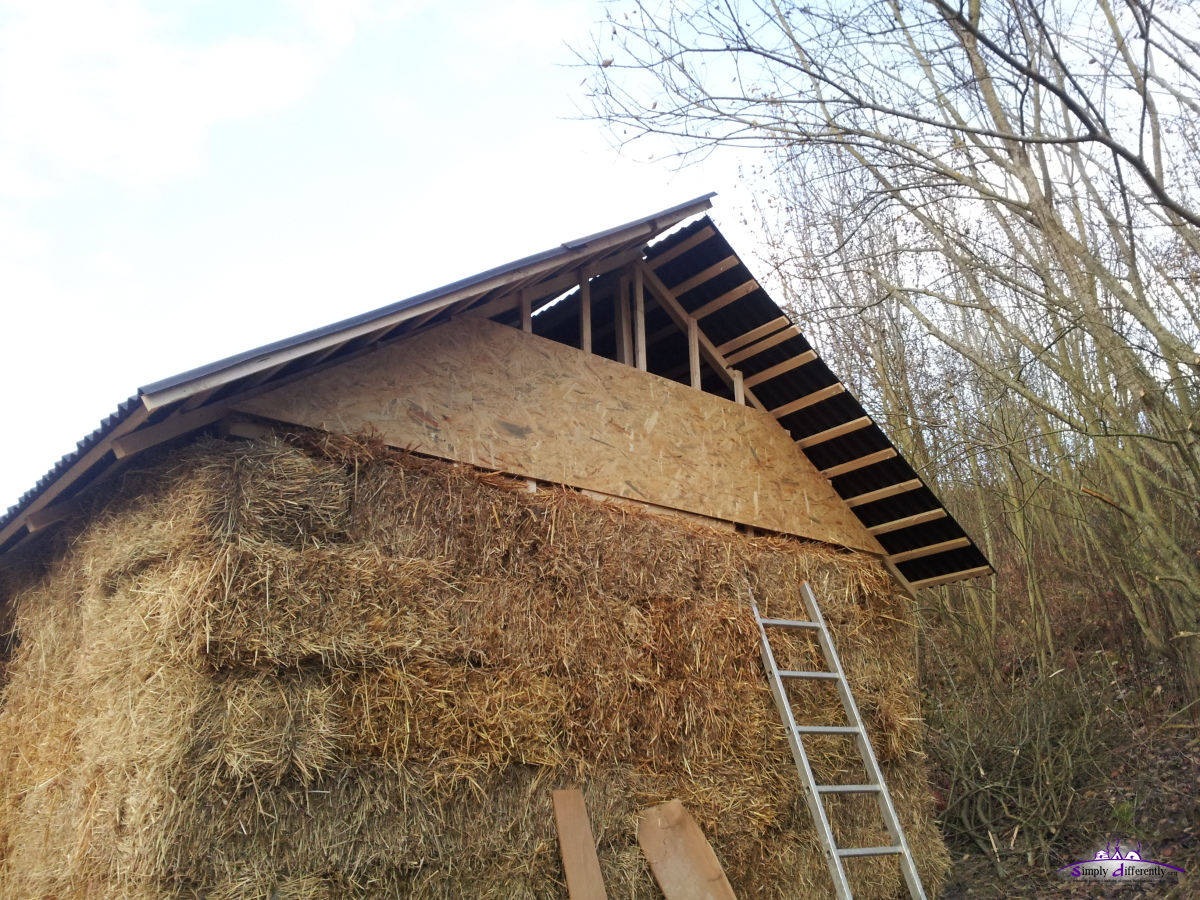
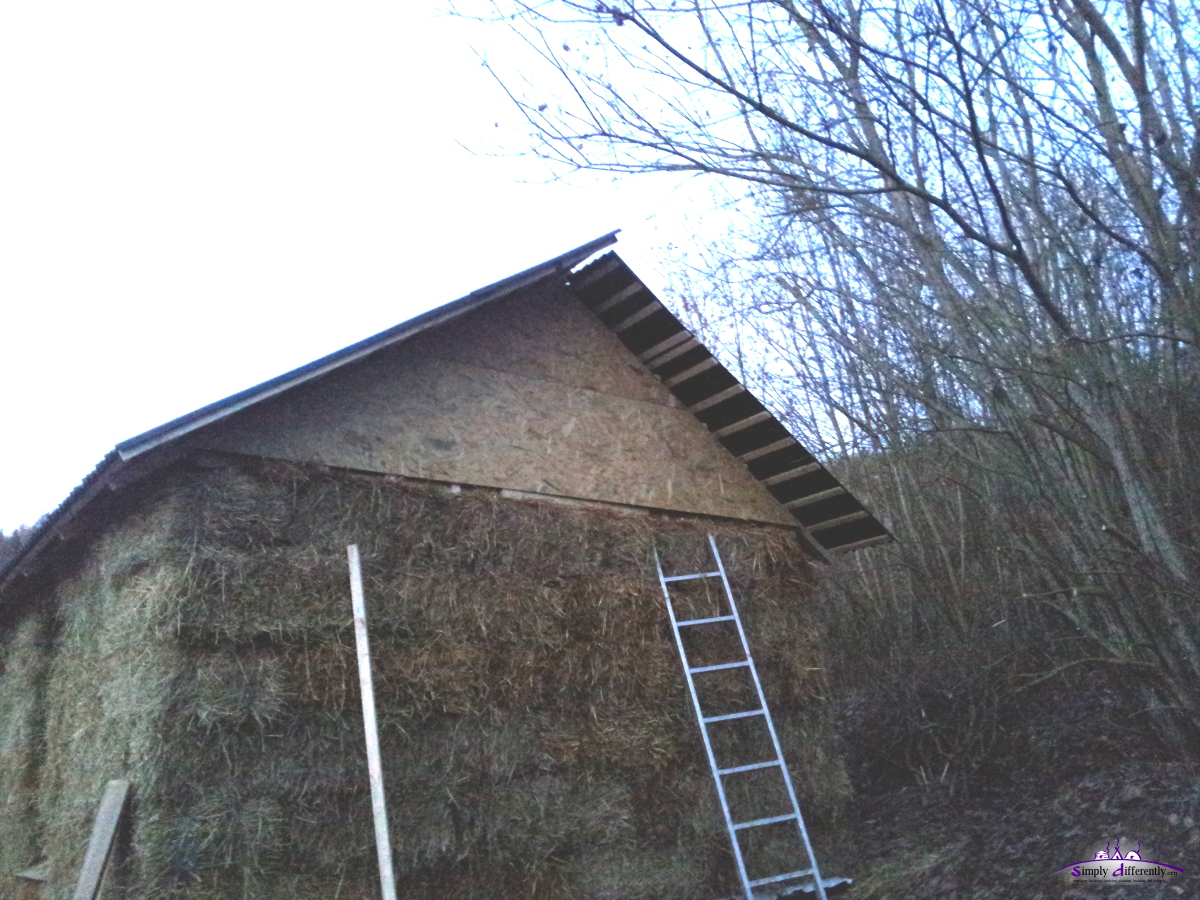
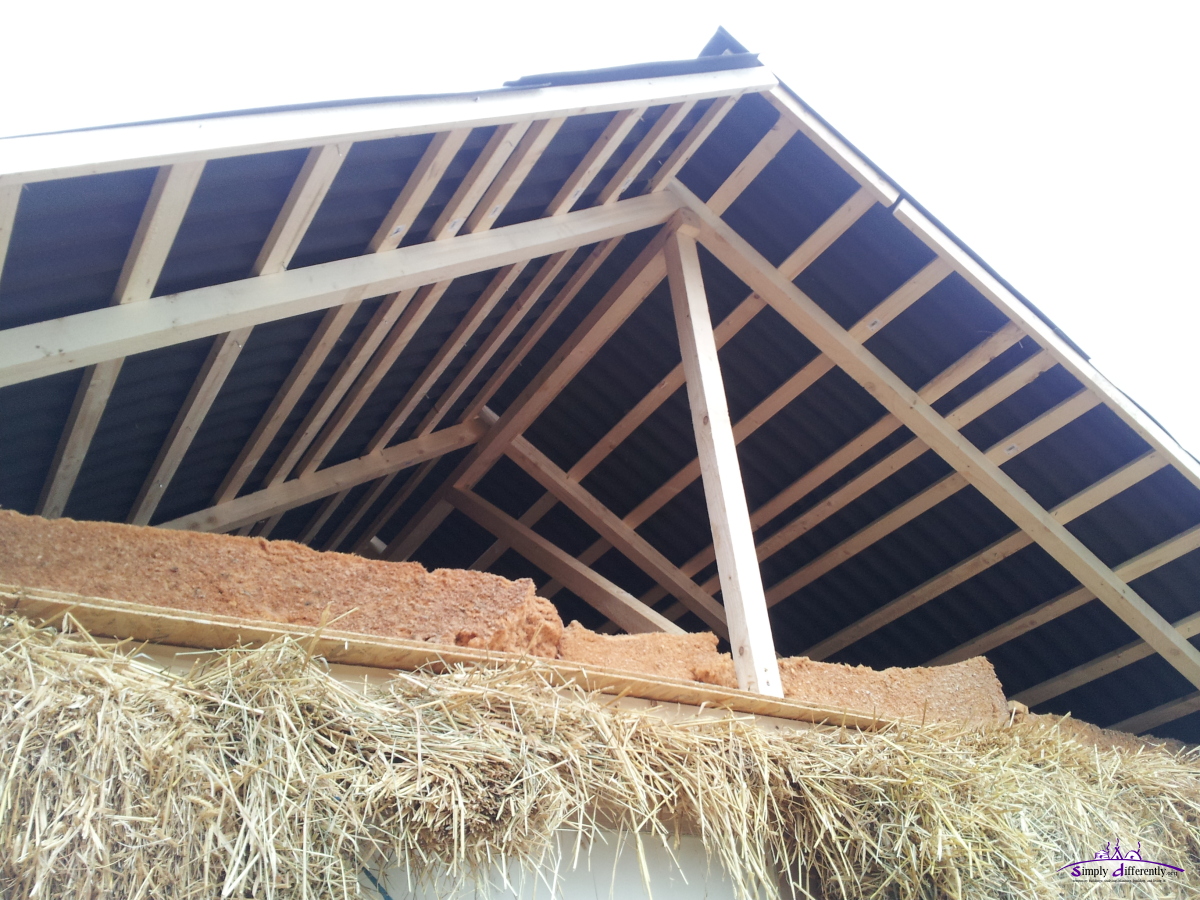
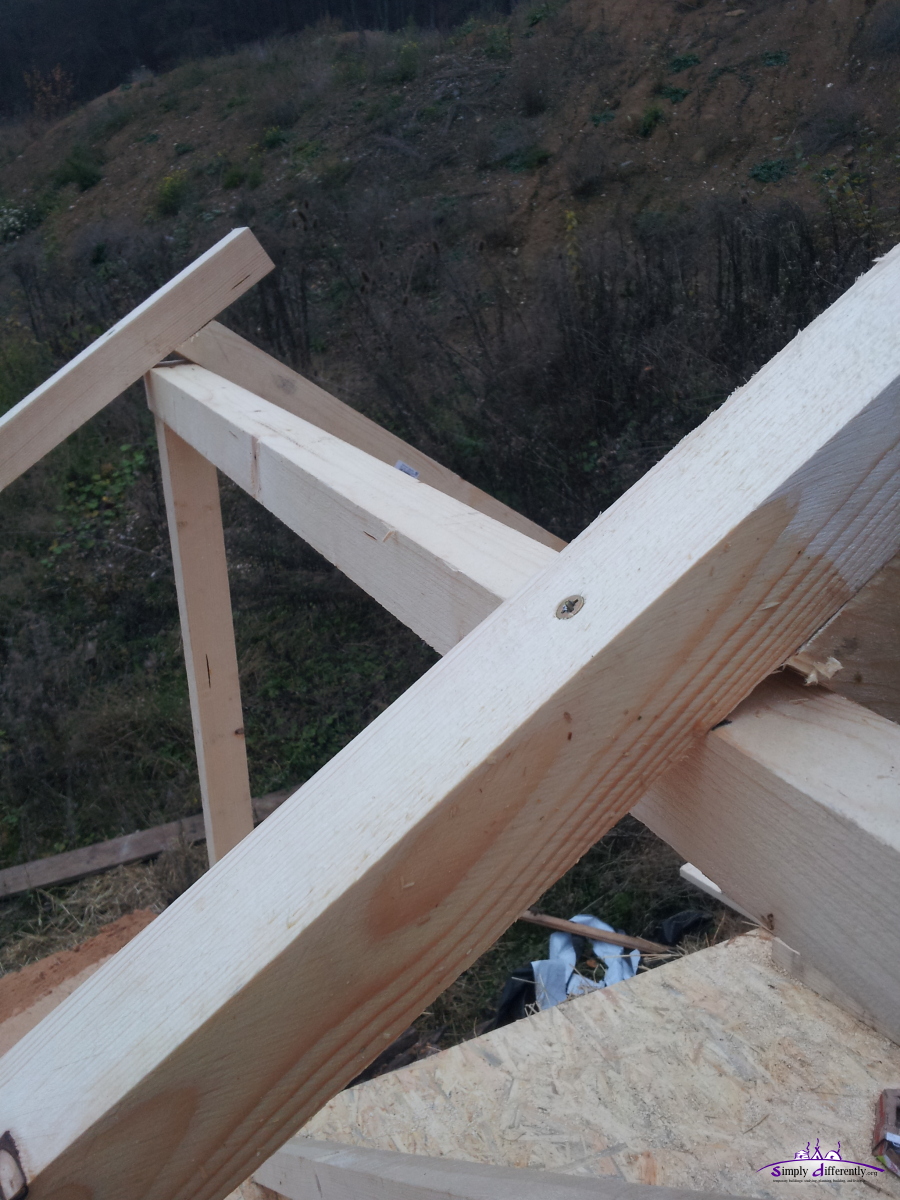
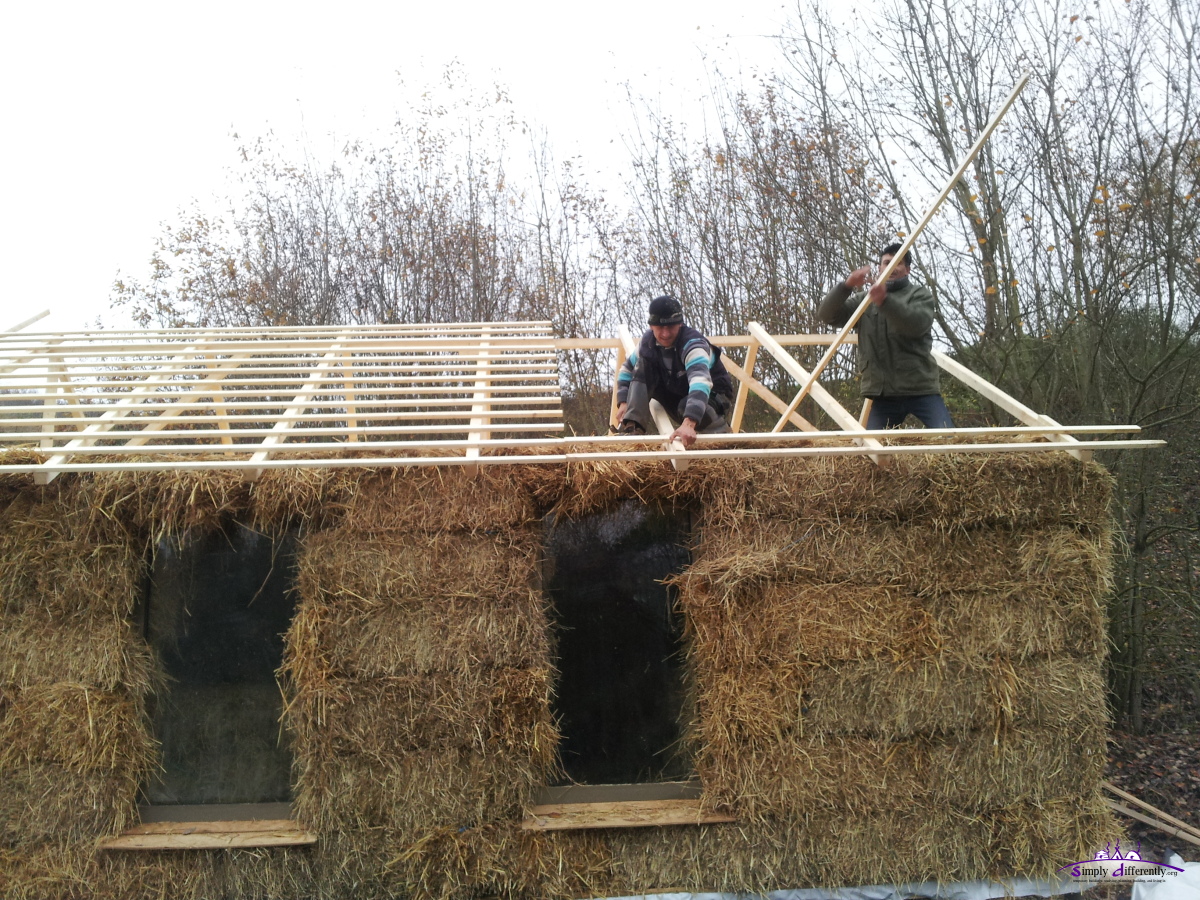
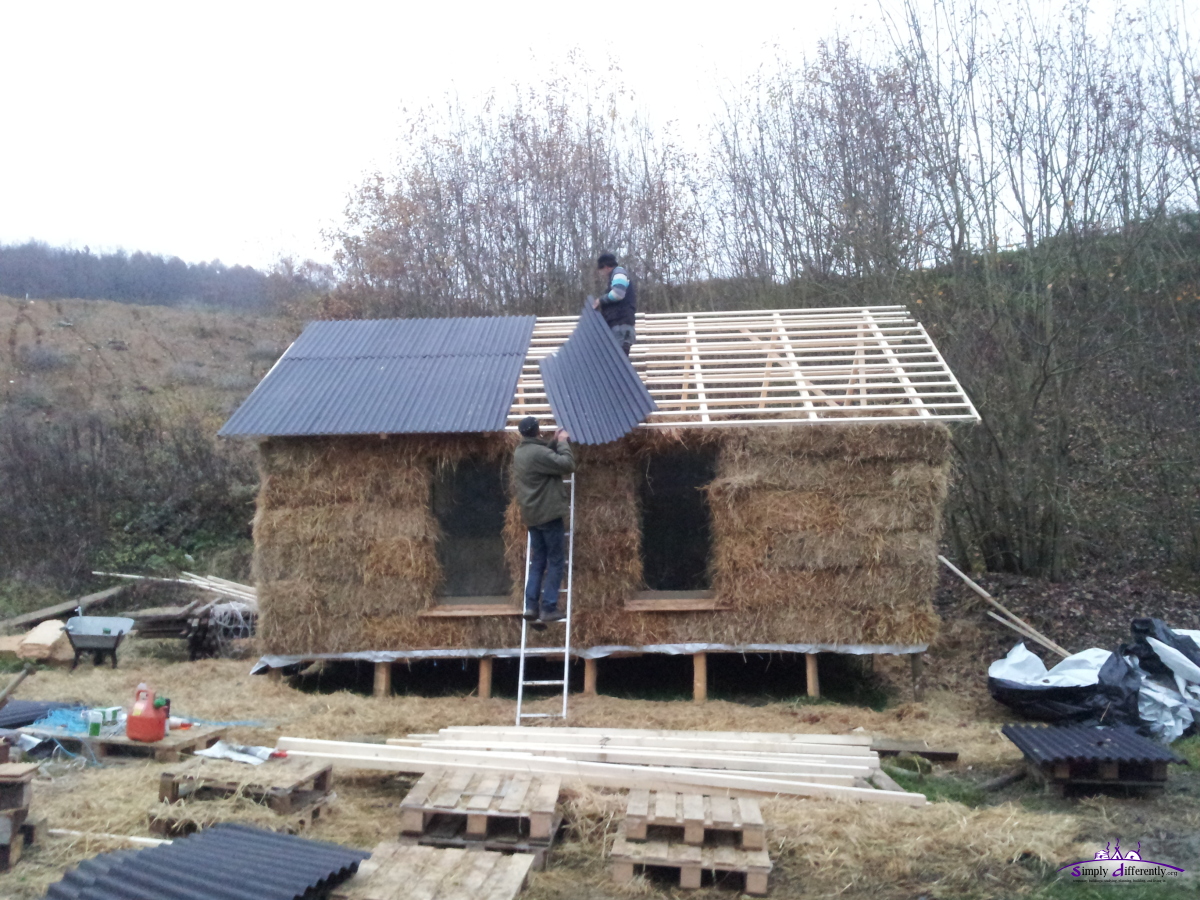
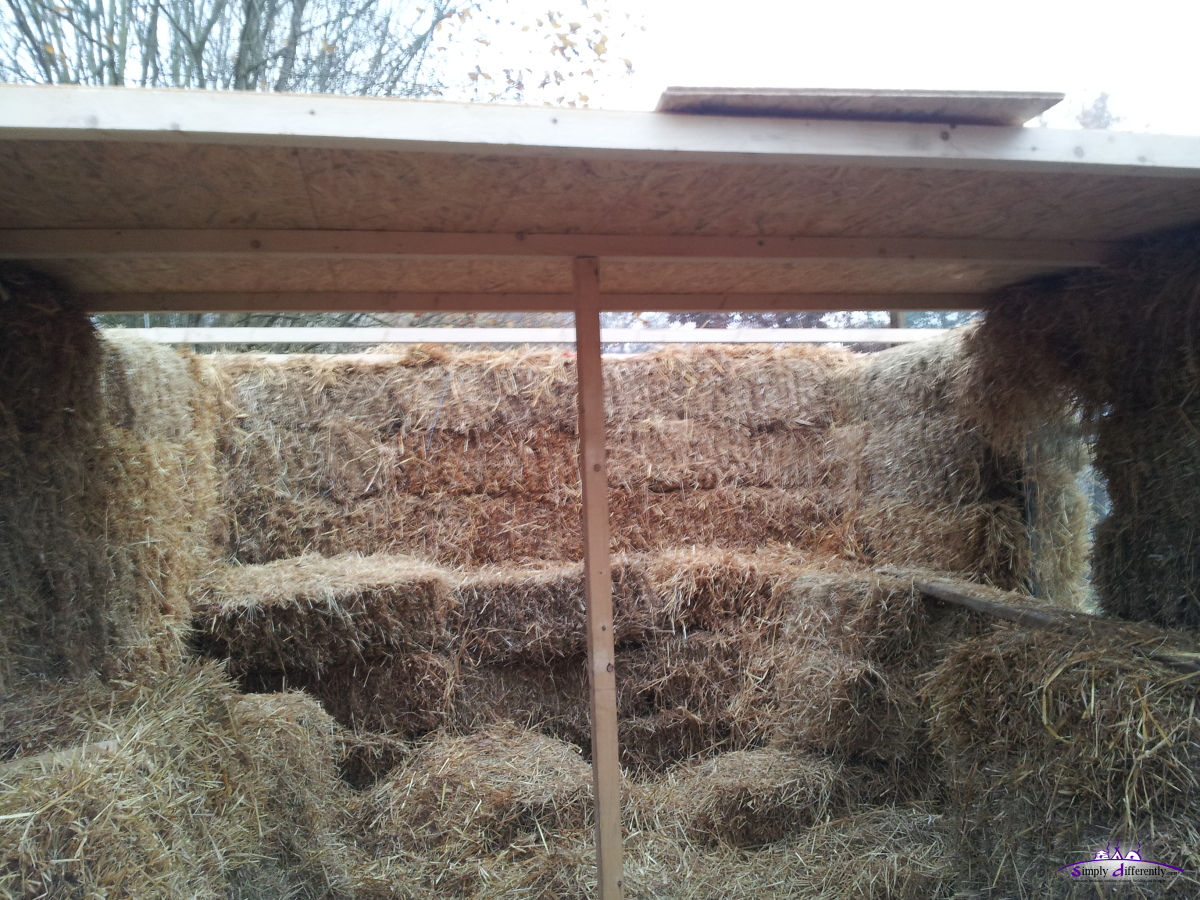
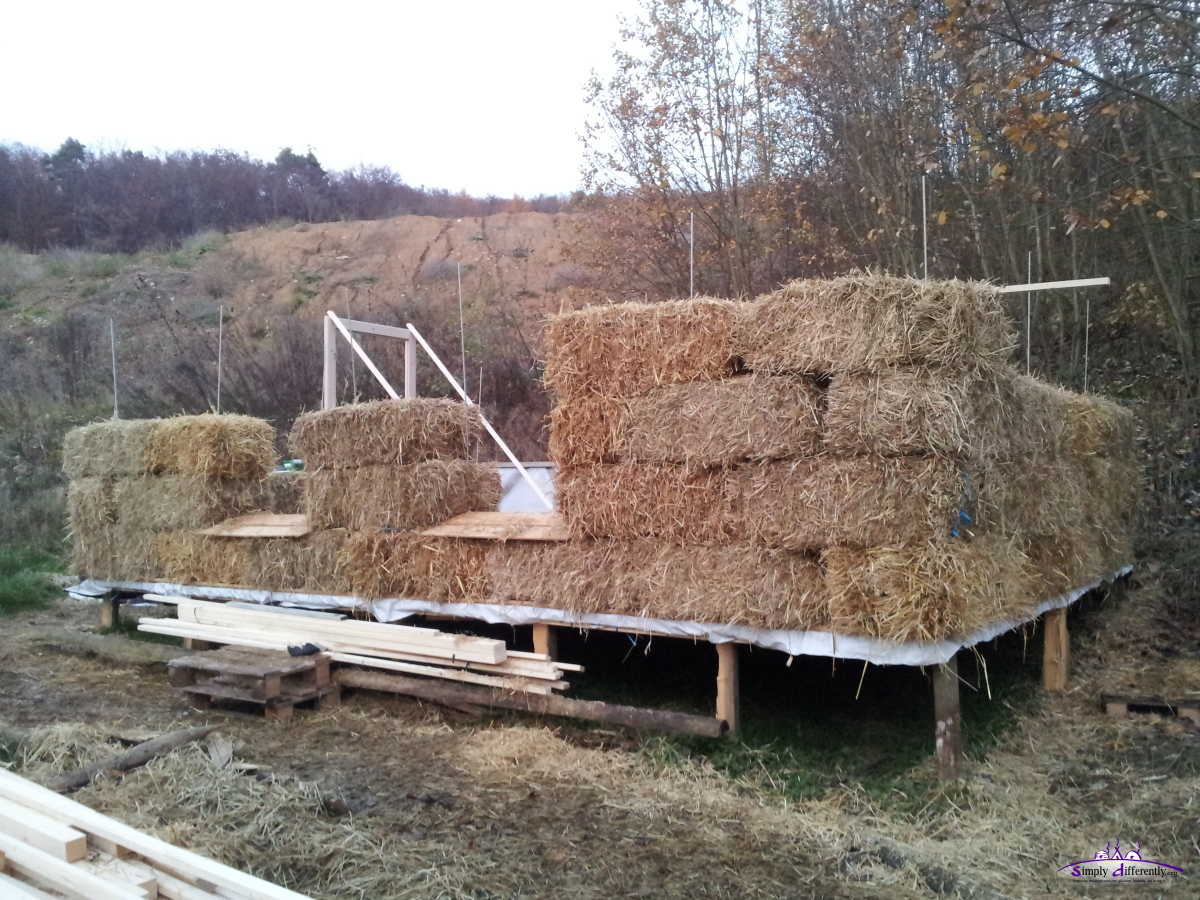
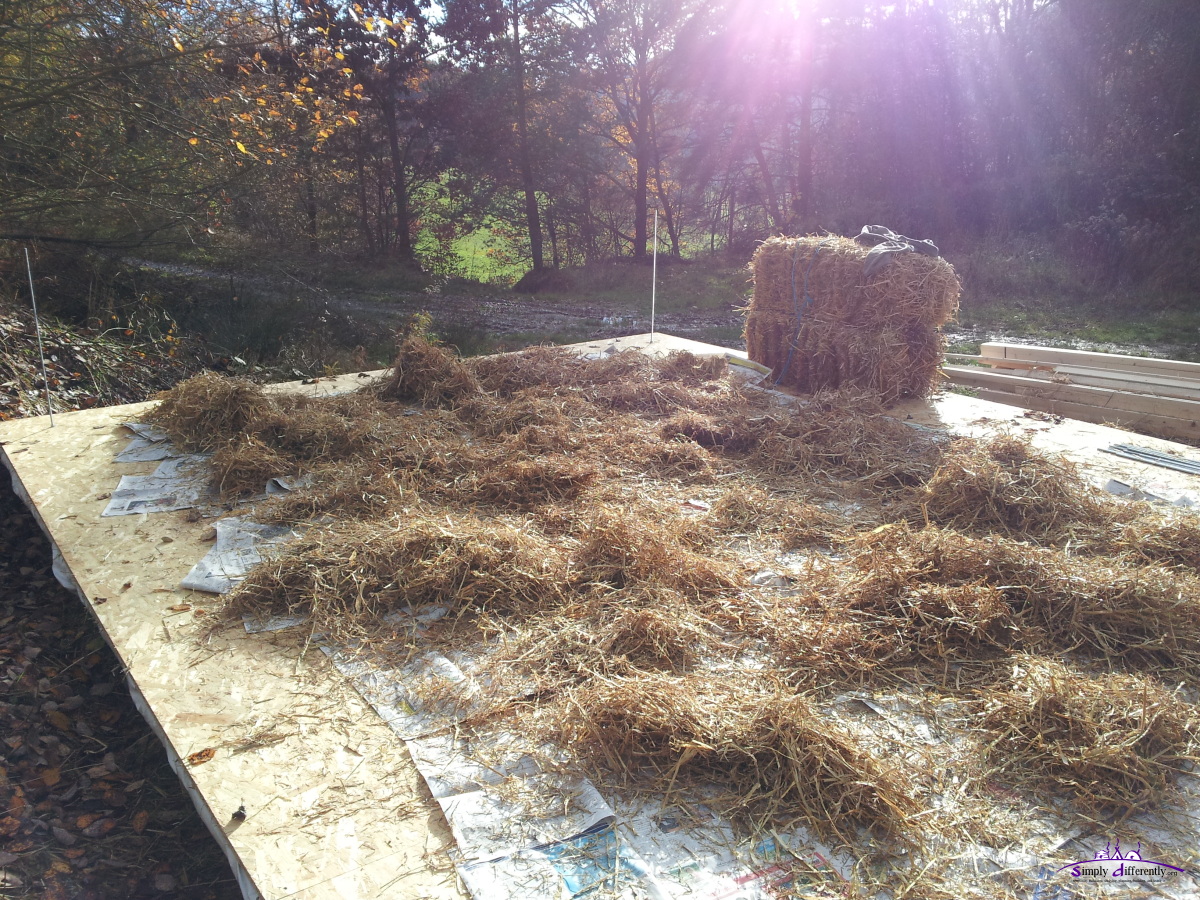
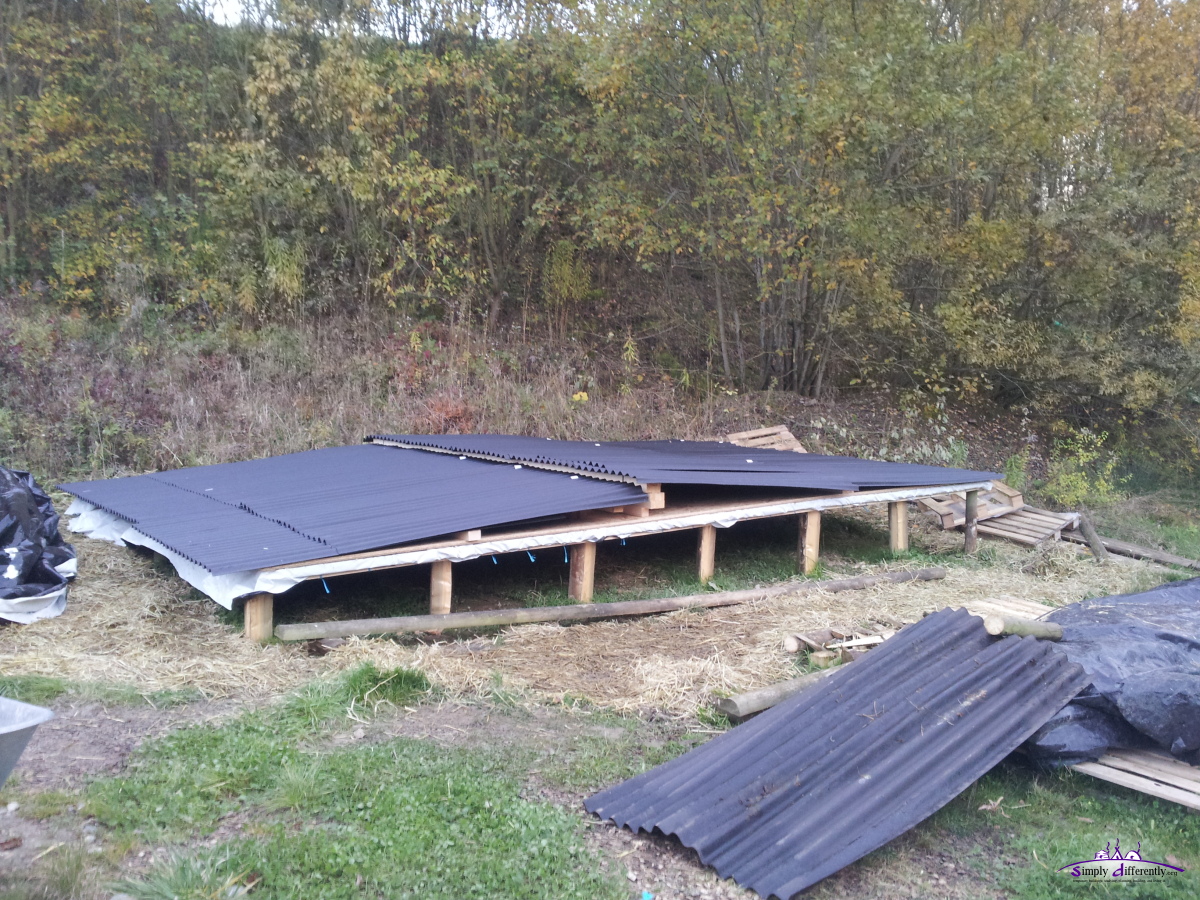
2014/11/26: Roof Complete
  Roof finished |
As next we moved the China Grass matts, which I have had available, but I could have used also layers of compressed straw evenly distributed over the OSB ceiling.
2014/11/26 13:42

2014/11/26 14:49

2014/11/26 15:08
2014/11/26 15:38

2014/11/26 16:16
It was a foggy day and no rain, only in the only early morning, but not while construction.
What's left to do externally, which I do myself, is
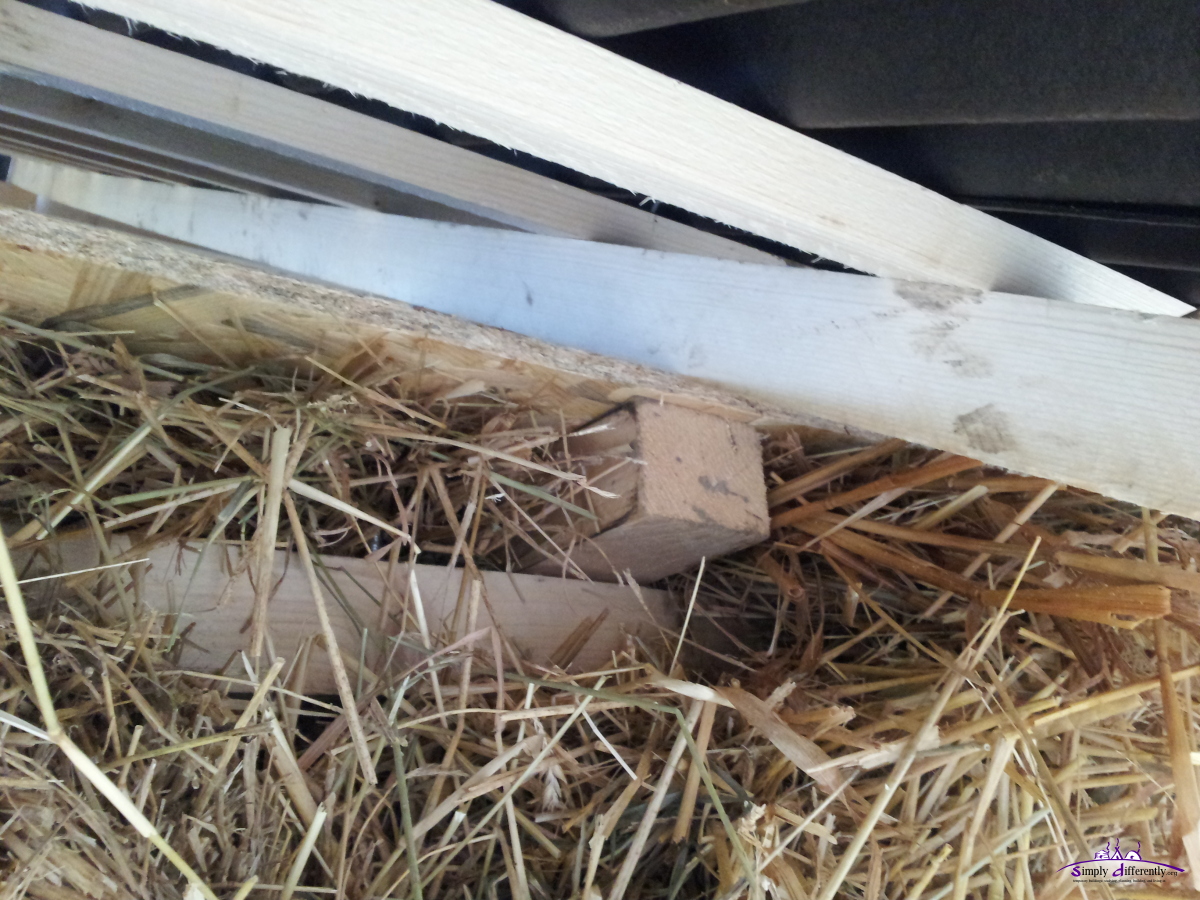
- closing the triangle gap below the roof and the ceiling, as strong winds might otherwise lift the roof away, so I need to block the gap, and
- perhaps put a small door so I can enter up there later as well.
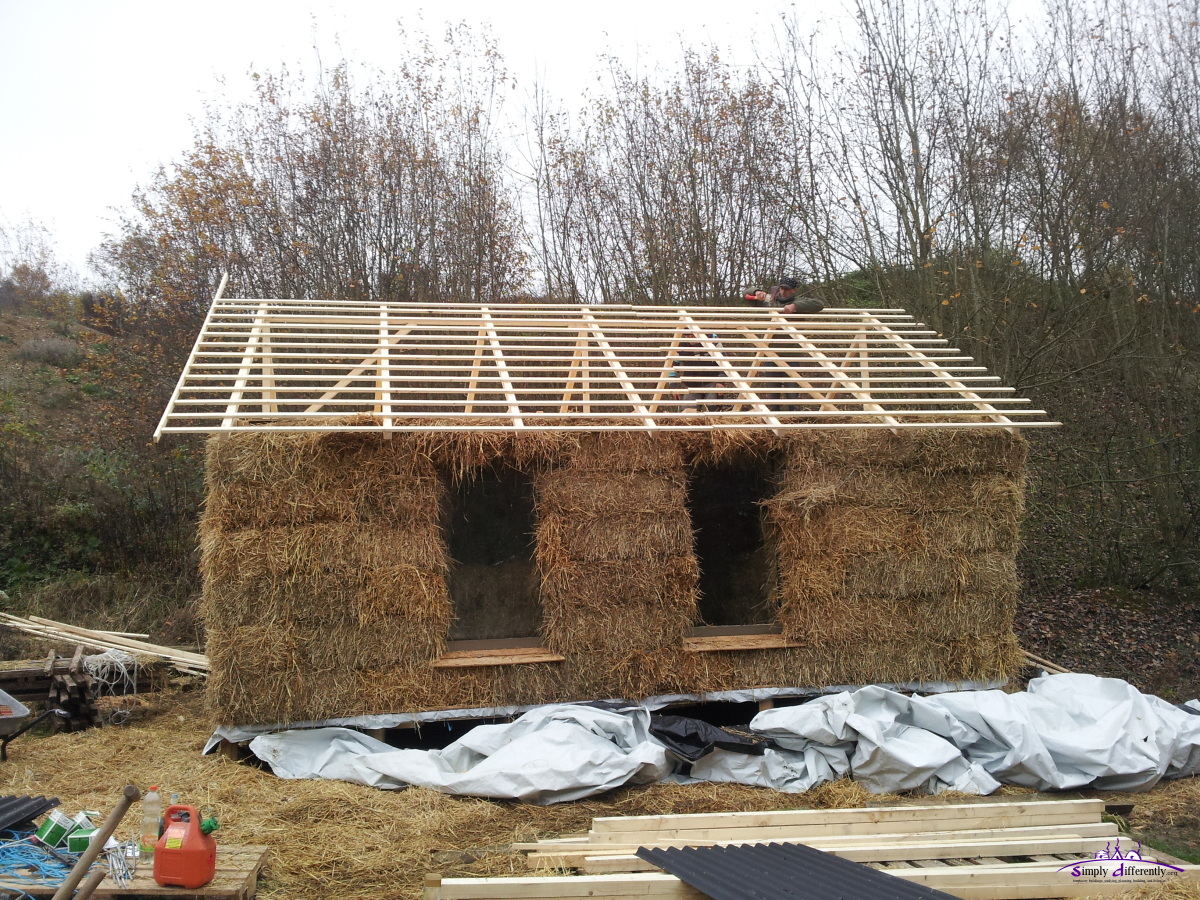
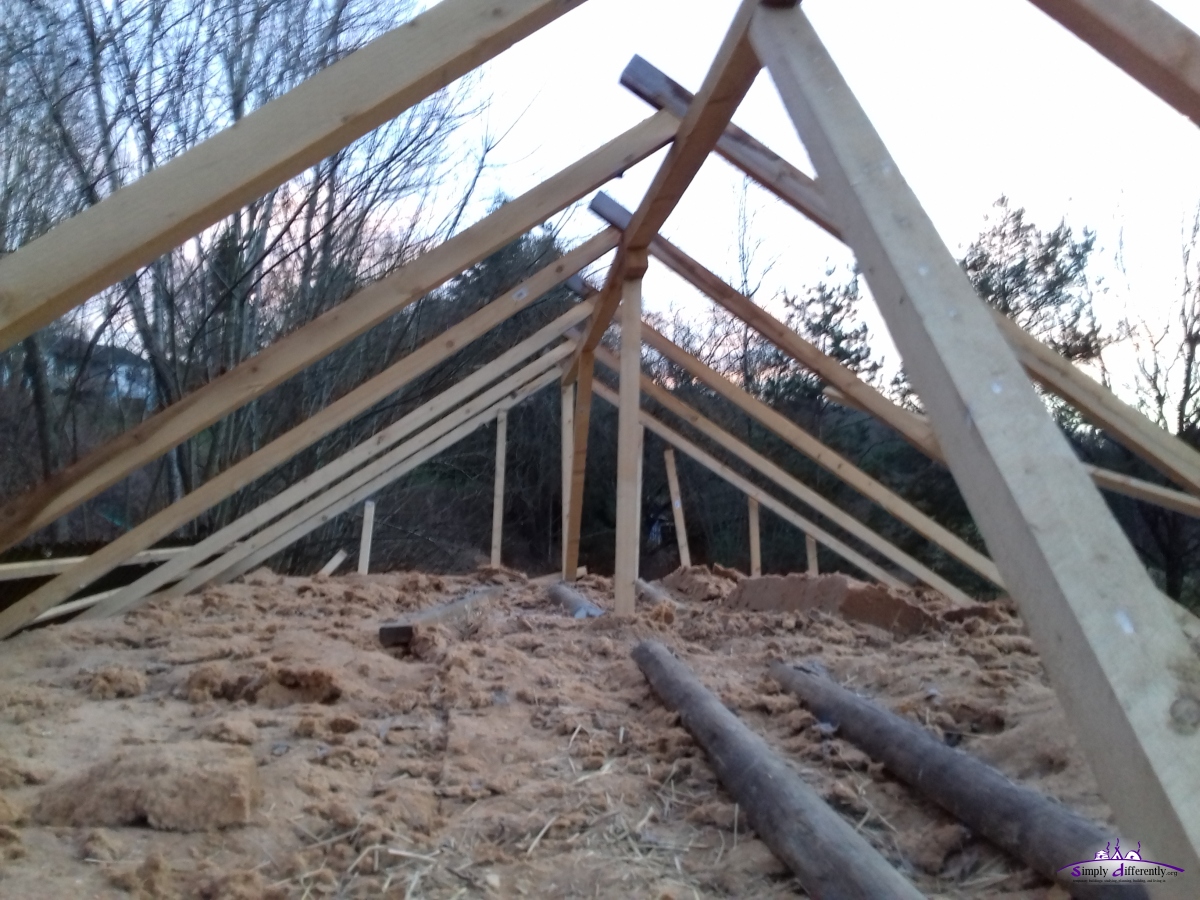
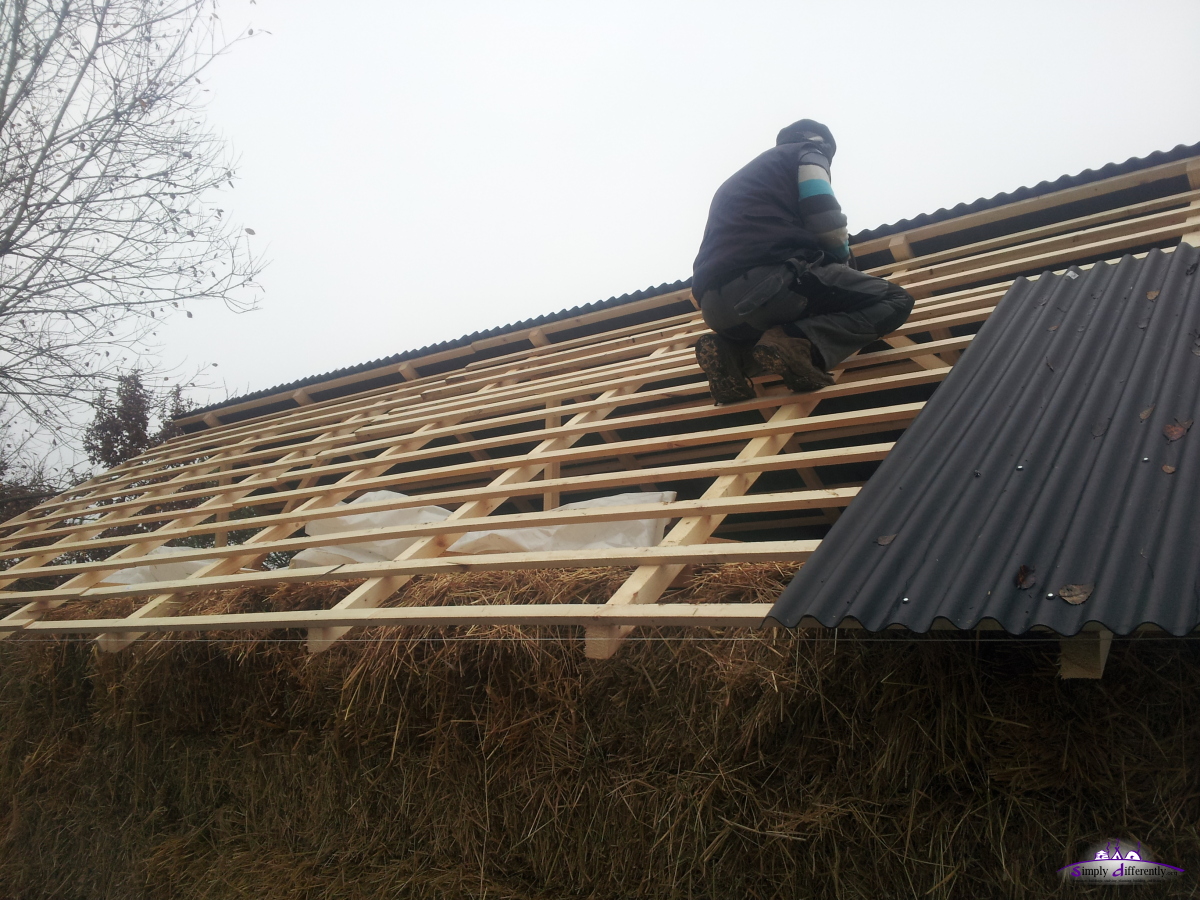
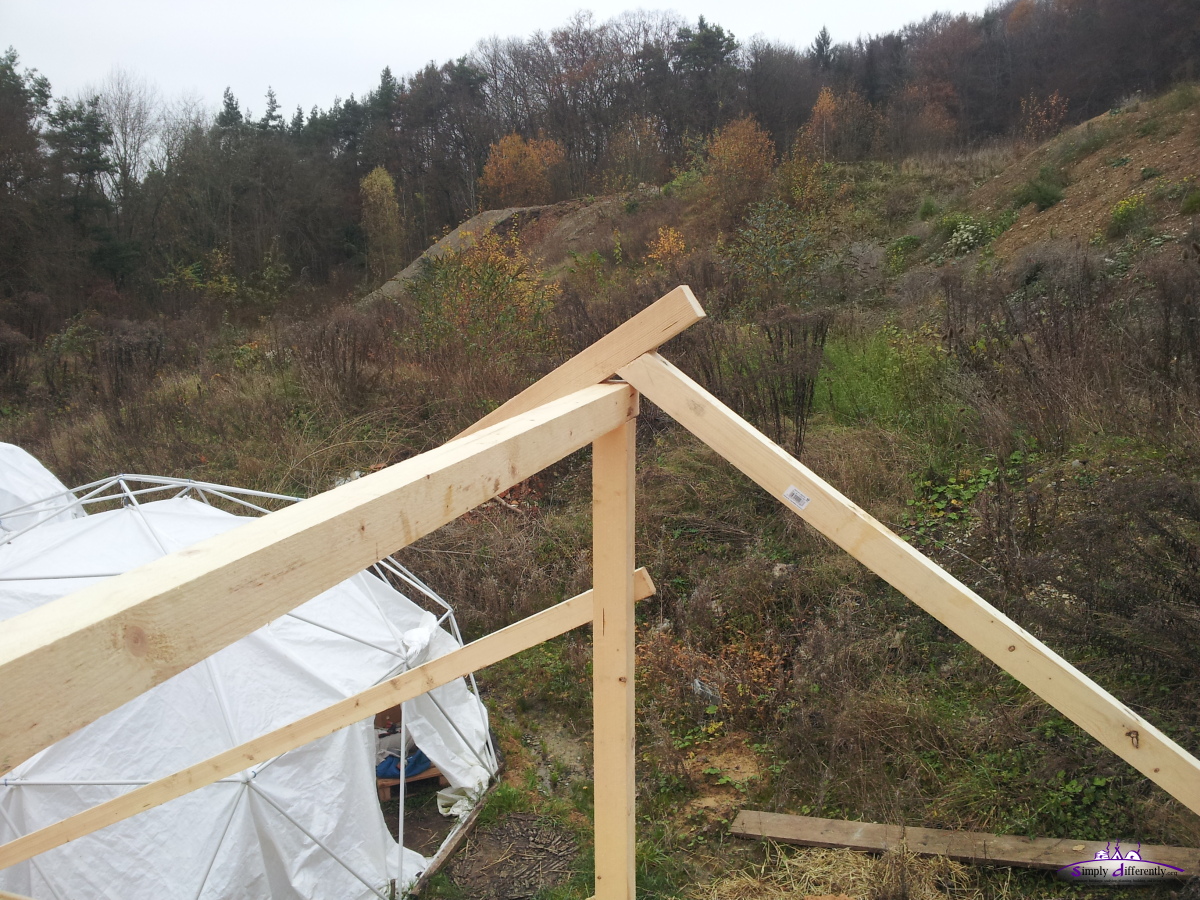
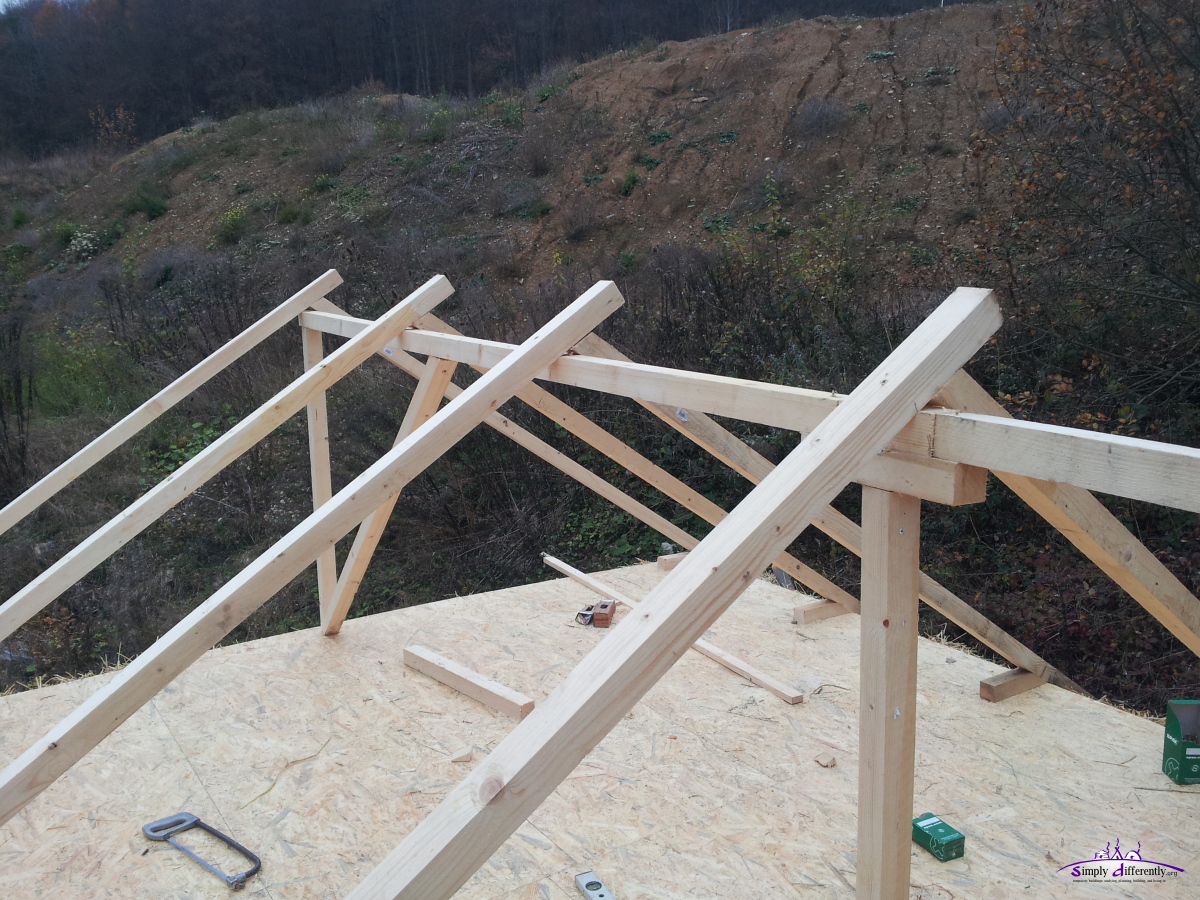
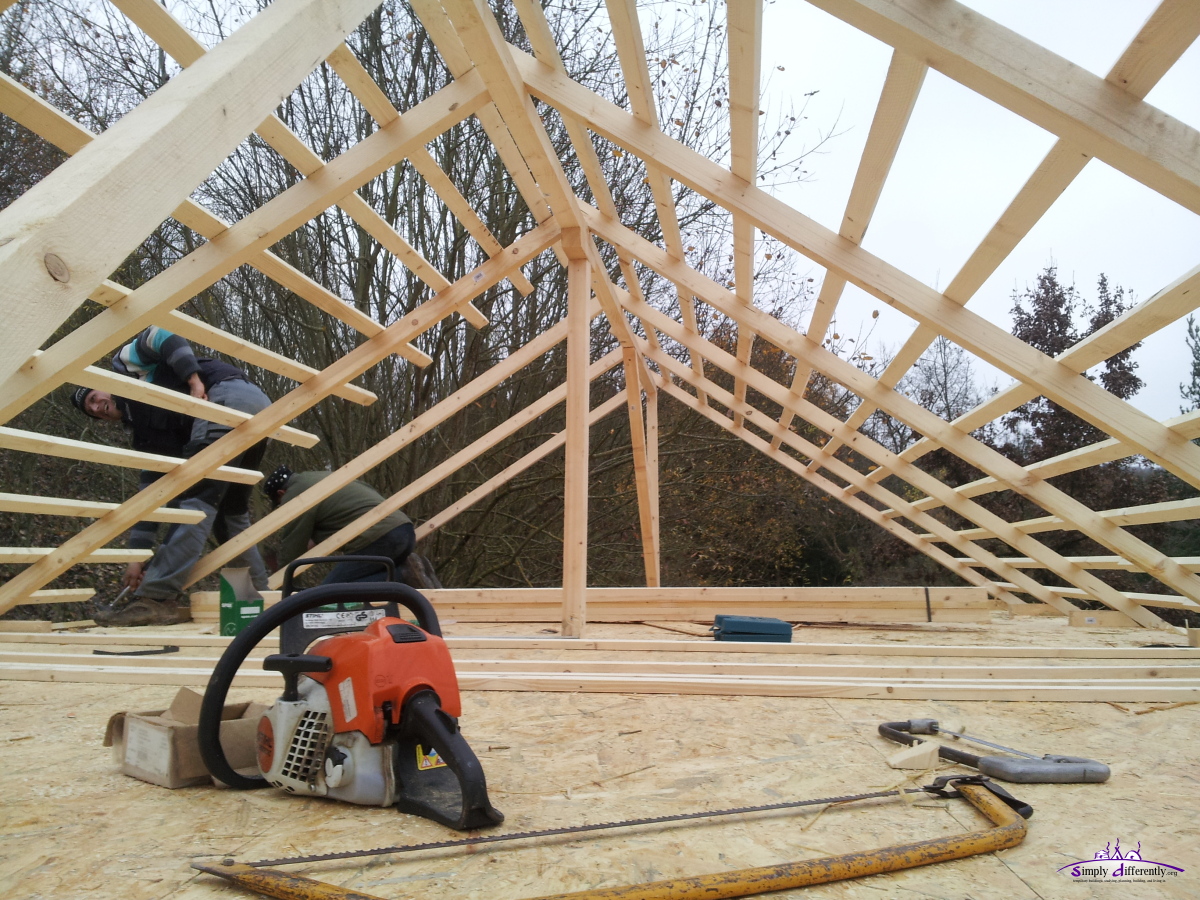
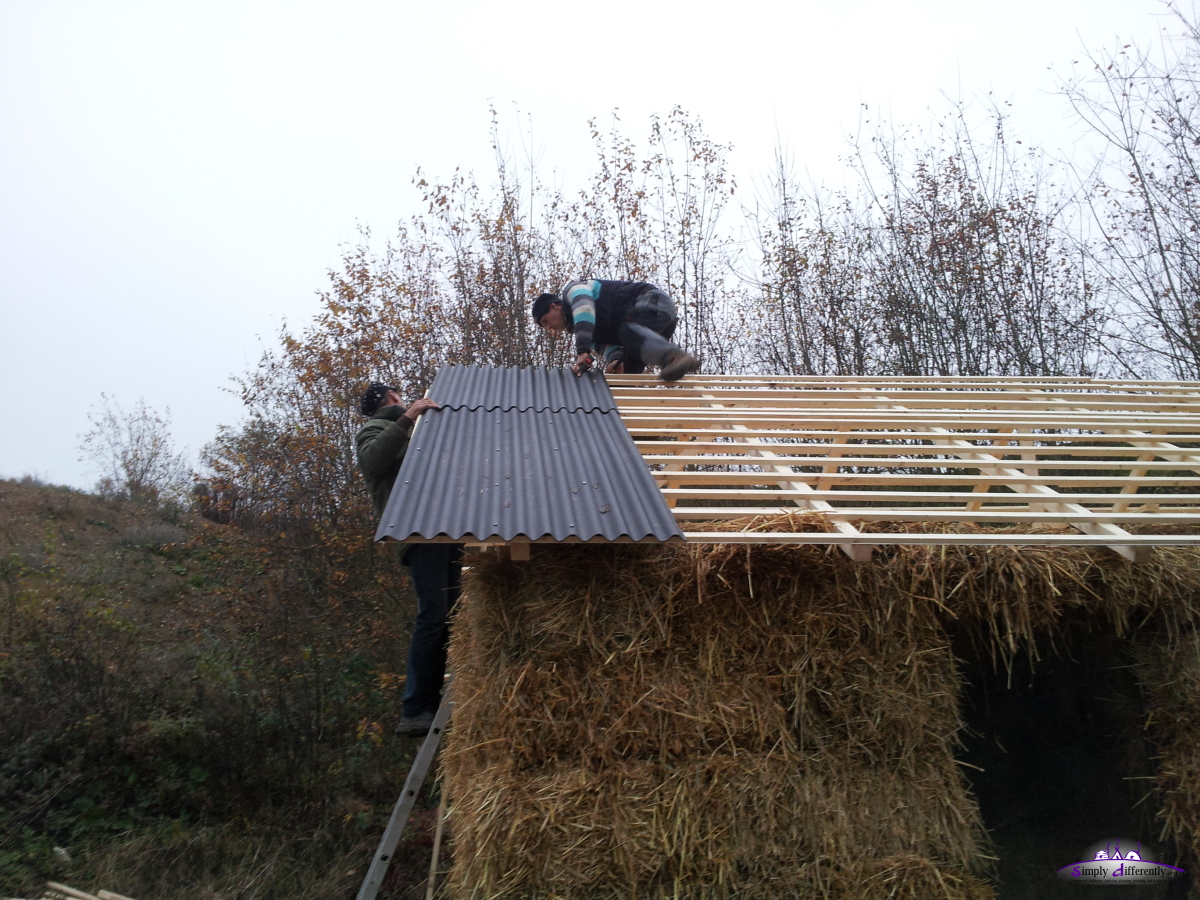
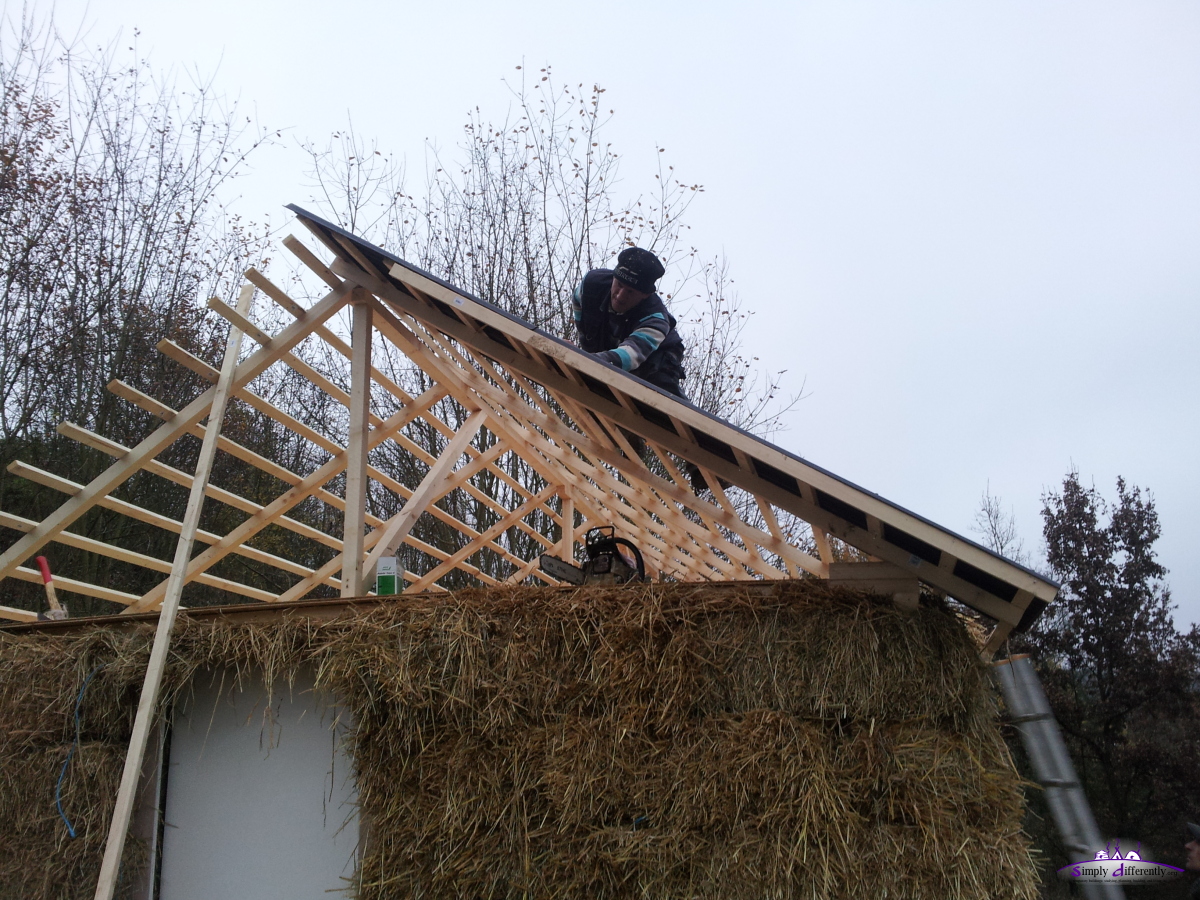
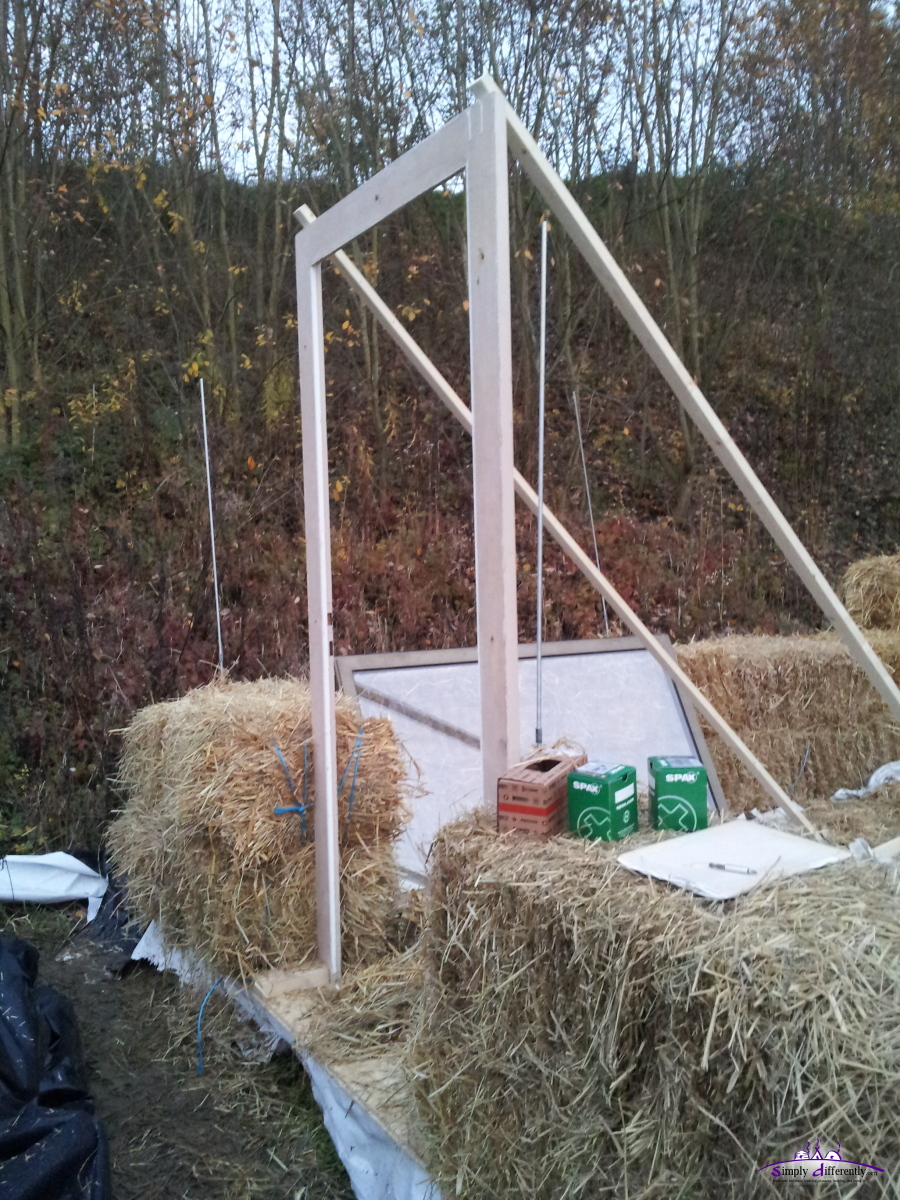
2014/11/25: Roof Almost Done
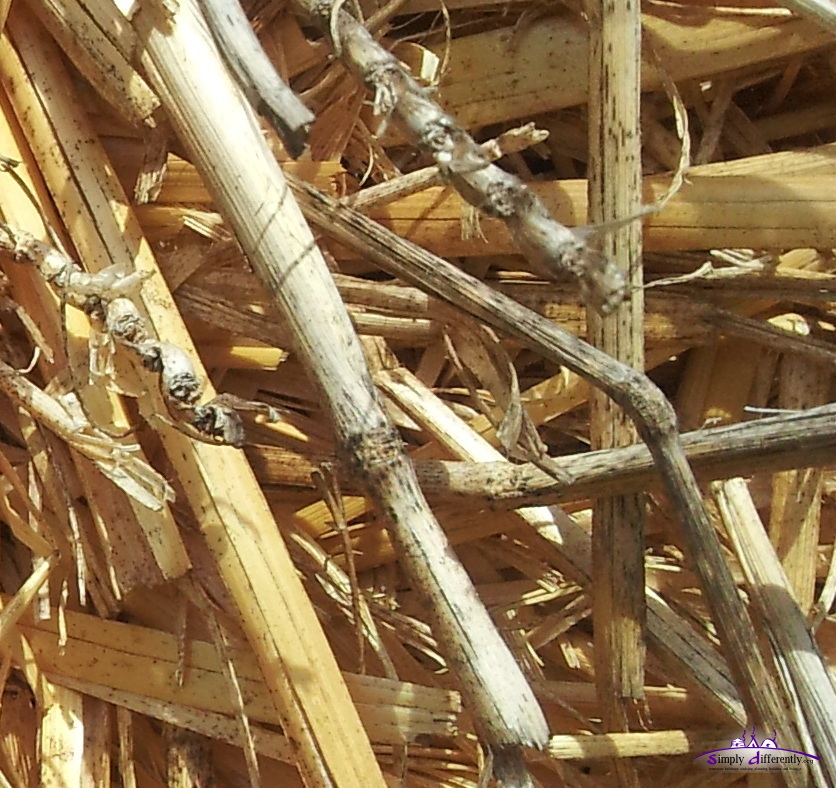
After some measurements the main skeleton of the roof was done, mostly using 5.8cm x 5.8cm x 3m beams. A 10cm extension was required for the horizontal support of the roof, as the walls slighly "V". The smaller 4.8cm x 2.4cm horizontal 4m + 3m supporting wood was aligned with 20cm spacing, a bit narrow for my taste, yet, one of the helpers recommended it - at the rather steep angle I thought 30cm would be sufficient, and enough space to slip through whole attaching the bitumen sheets. Once the skeleton was done, the bitumen sheets were attached, west slide: 2m + 1.2m bitumen sheet, 10cm overlap, and 5cm extension above and below => 3.0m. We just finished the west slide around 17:15, with some LED light attached the last sheet, and covered the east side with some PVC for the night.
2014/11/25 13:32
2014/11/25 13:35

2014/11/25 14:15
2014/11/25 14:19
2014/11/25 15:04
2014/11/25 15:08
2014/11/25 15:20
2014/11/25 16:13
2014/11/25 16:35
It was 7-8C with high fog and some north wind, fine to work like that. Tommorrow alike weather is forecast, but then some rain is expected the day after tomorrow - definitely time to finish the roof. What's left to do: east slide of the roof finishing, and then China Grass matts for the ceiling insulation. I will eventually close the south side of the roof, and make a small door on the north side, so I potentially can reach under the roof and above the ceiling later, not that I will use it as storage space, as the China Grass matts are quite fragile and won't last when stepping on them. And then the internal setup, with a bed, a desk, perhaps part of a kitchen section.
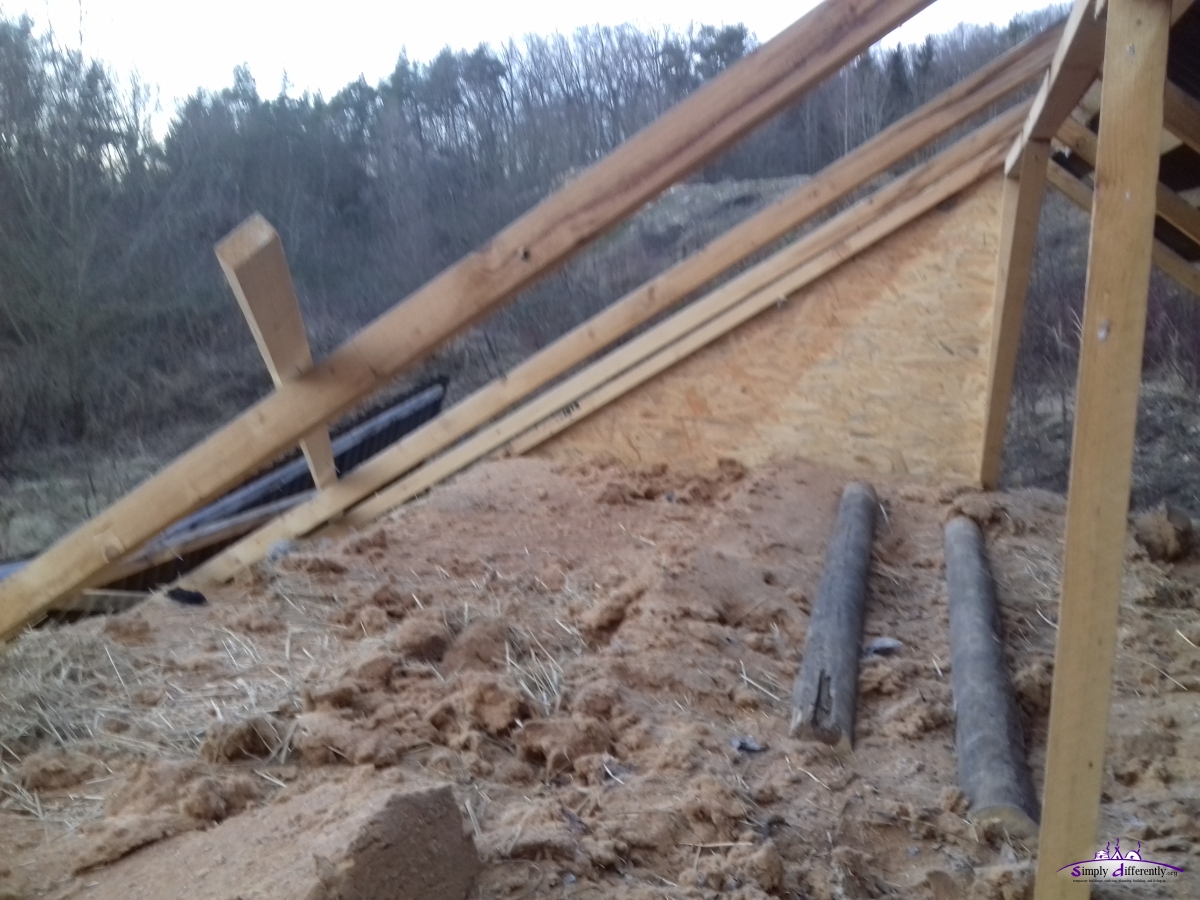
2014/11/24: Roof Started
|
2014/11/24 16:28

2014/11/24 16:29
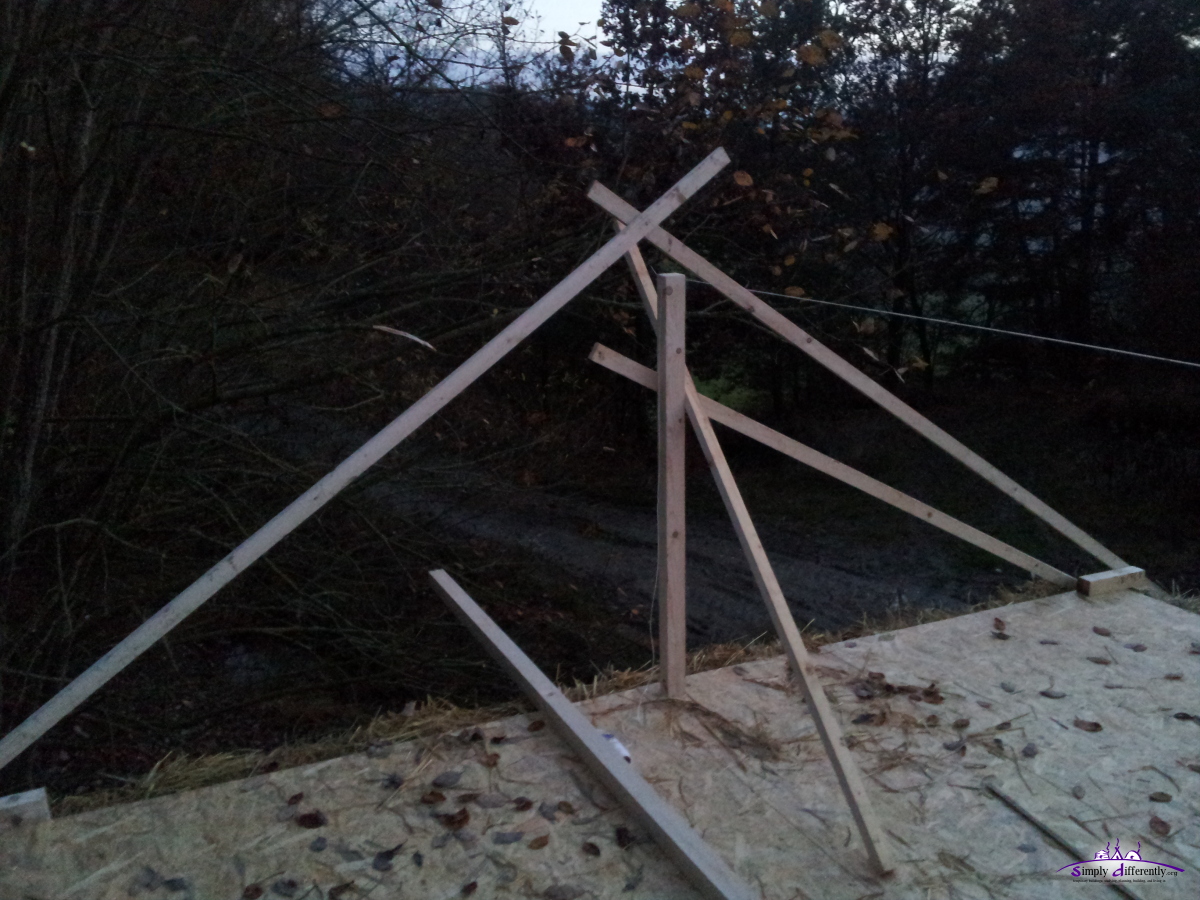
2014/11/24 17:02
I decided on the final roof design:
- west slide: 300cm (wood) + 10cm sheet overlap + 5cm bottom extend + 5cm top extend = 320cm (200cm + 120cm)
- east slide: 265cm (wood) + 10cm sheet overlap + 5cm bottom extend = 280cm east side (200cm + 80cm)
Since the bitumen sheets are 200cm long, and overlapping is 10cm vertically (water running down direction), I cut 8 bitumen sheets to 8x 120cm + 8x 80cm.
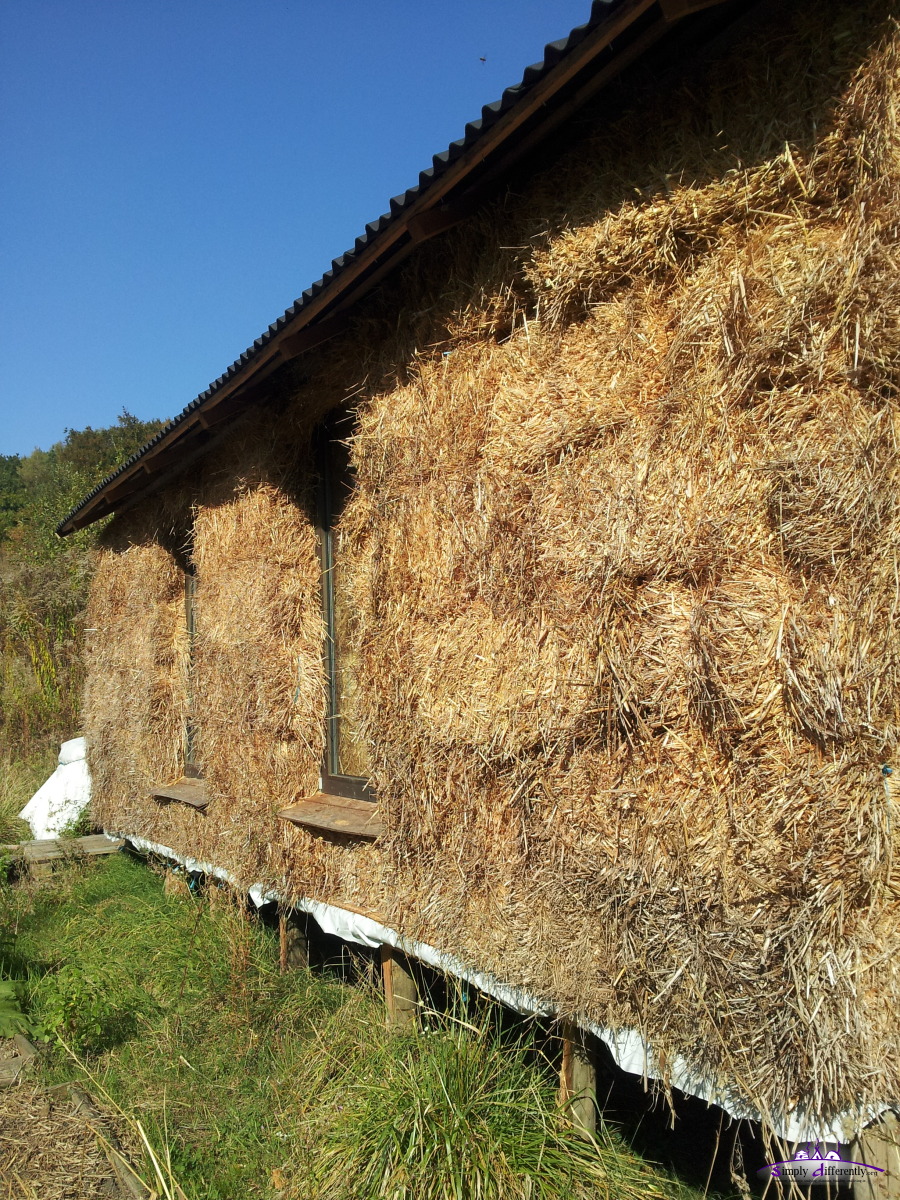
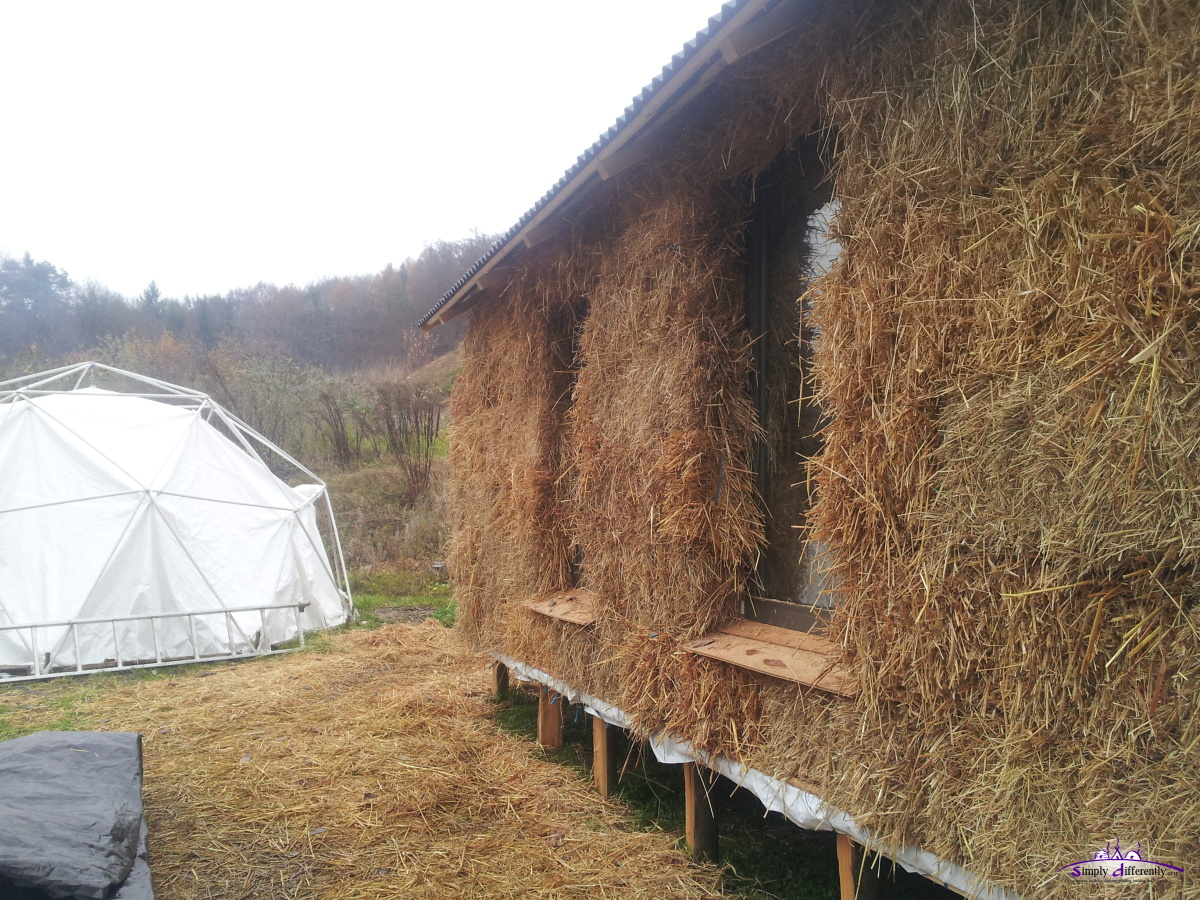
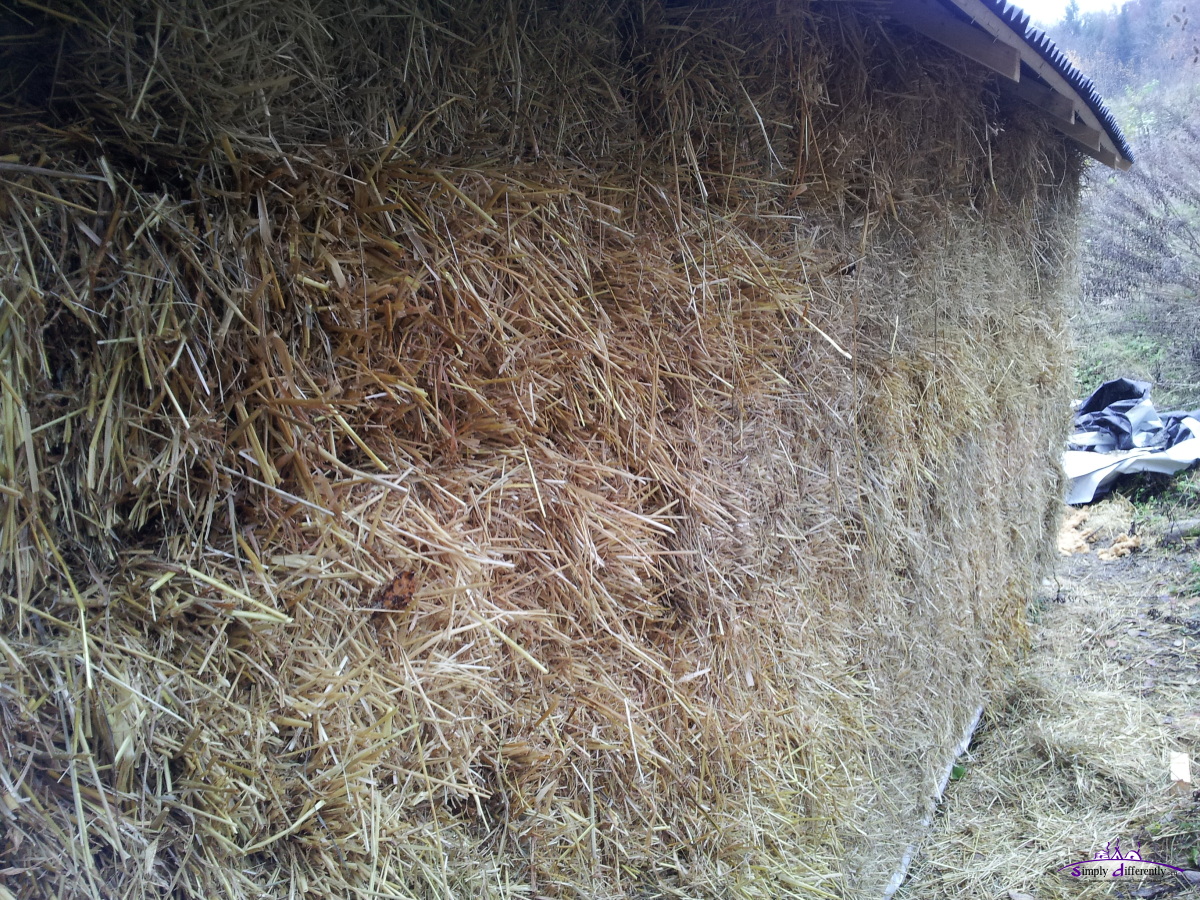
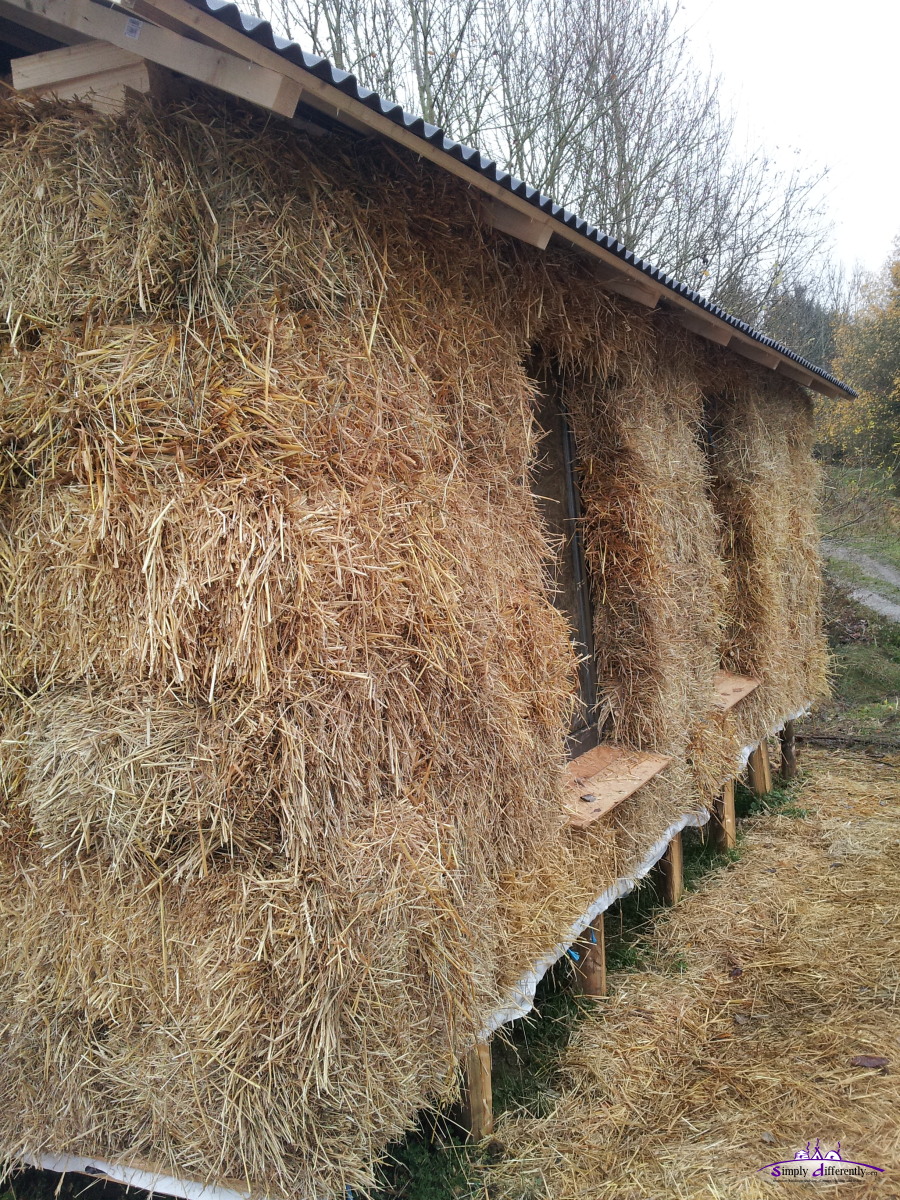
The roof extends about 35cm over the main beams on the top, which compress the bales, plus about 5cm over it. The roof is essential to make sure as little as direct rainfall exposed, yet, it can be fully prevent as heavy winds and rain storms - so this will be the main experiment: how does a bare strawbale cabin maintain itself in moderately humid climate like flatland of Switzerland (apprx. 700m above sea level).
Yesterday was all day long fog, today sunlight most of the day, and then some clouds covered the blue sky - the brief sunlight warmed up the inside of the cabin and it was noticeable warmer inside than outside, the ceiling not yet insulated.
I'm definitely curious how good the actual and final insulation works I decided:
- floor: compressed straw => apprx. 10cm thick
- walls: bare strawbales (95cm x 35cm x 50cm) => apprx. 50cm thick walls
- ceiling: compressed China Grass matts => apprx. 15cm thick
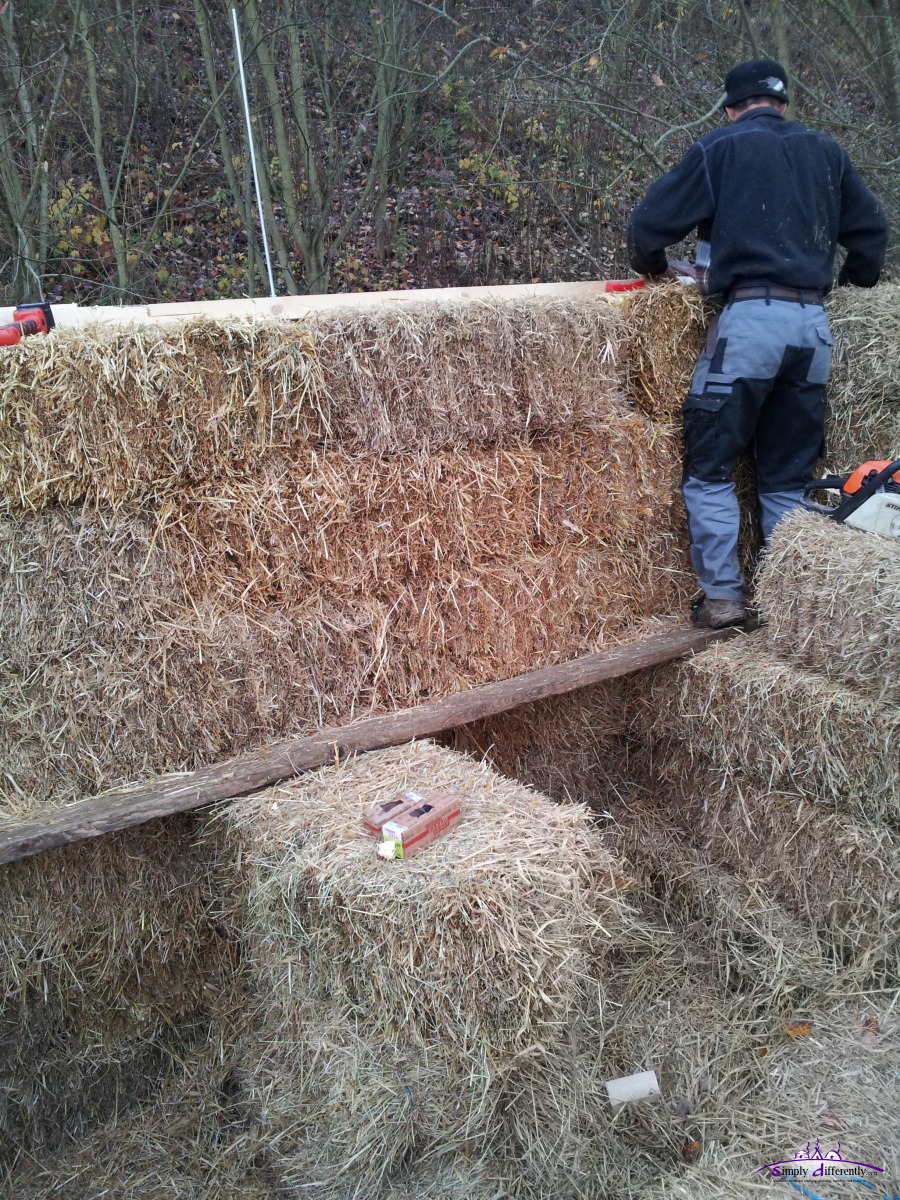
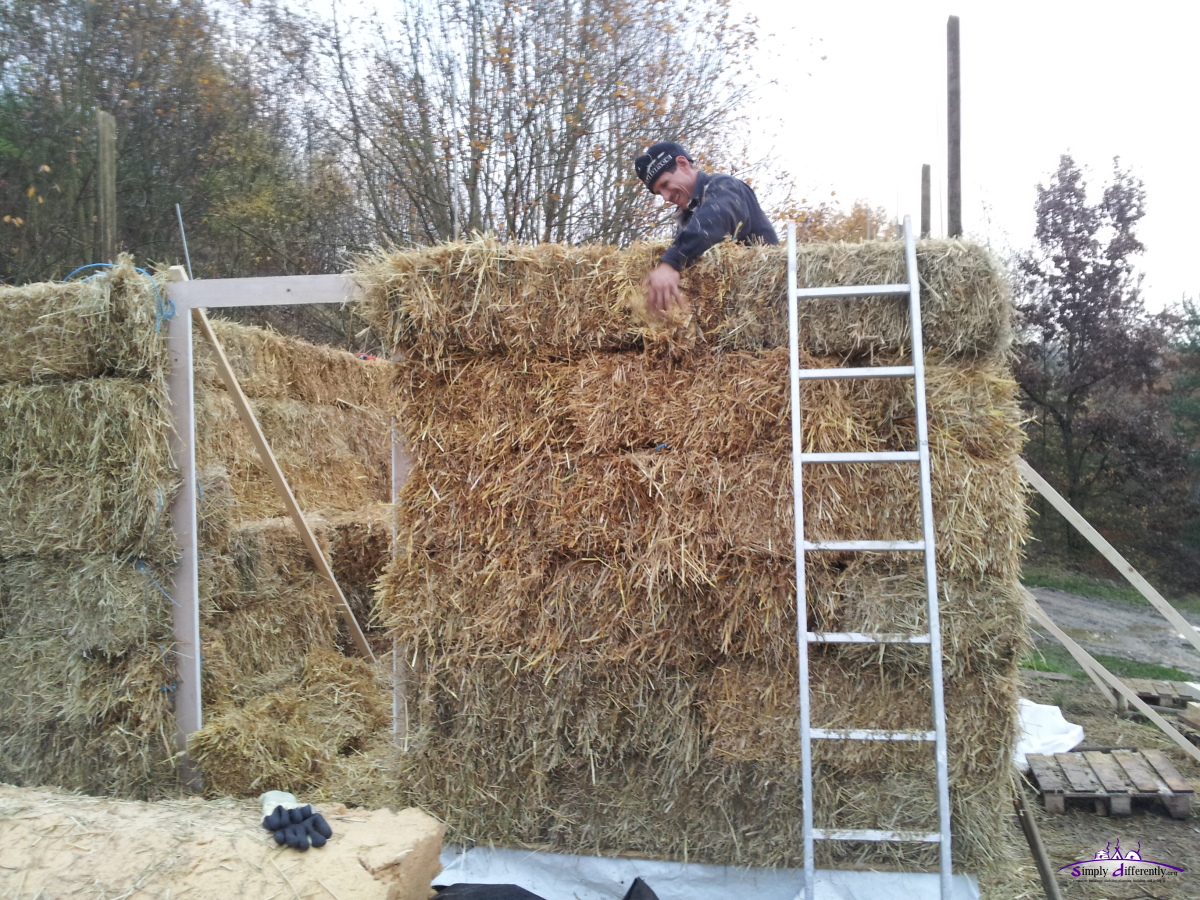
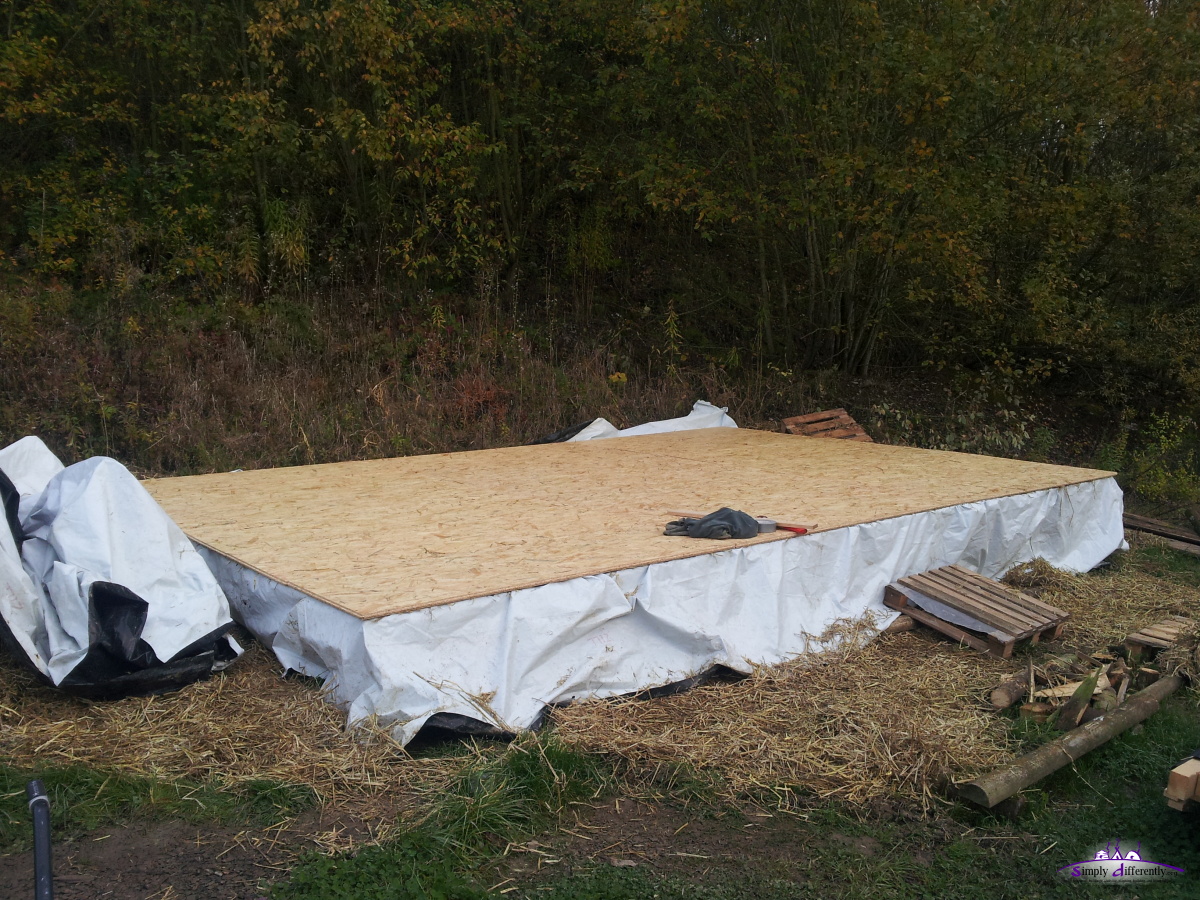
2014/11/22: Ceiling Done
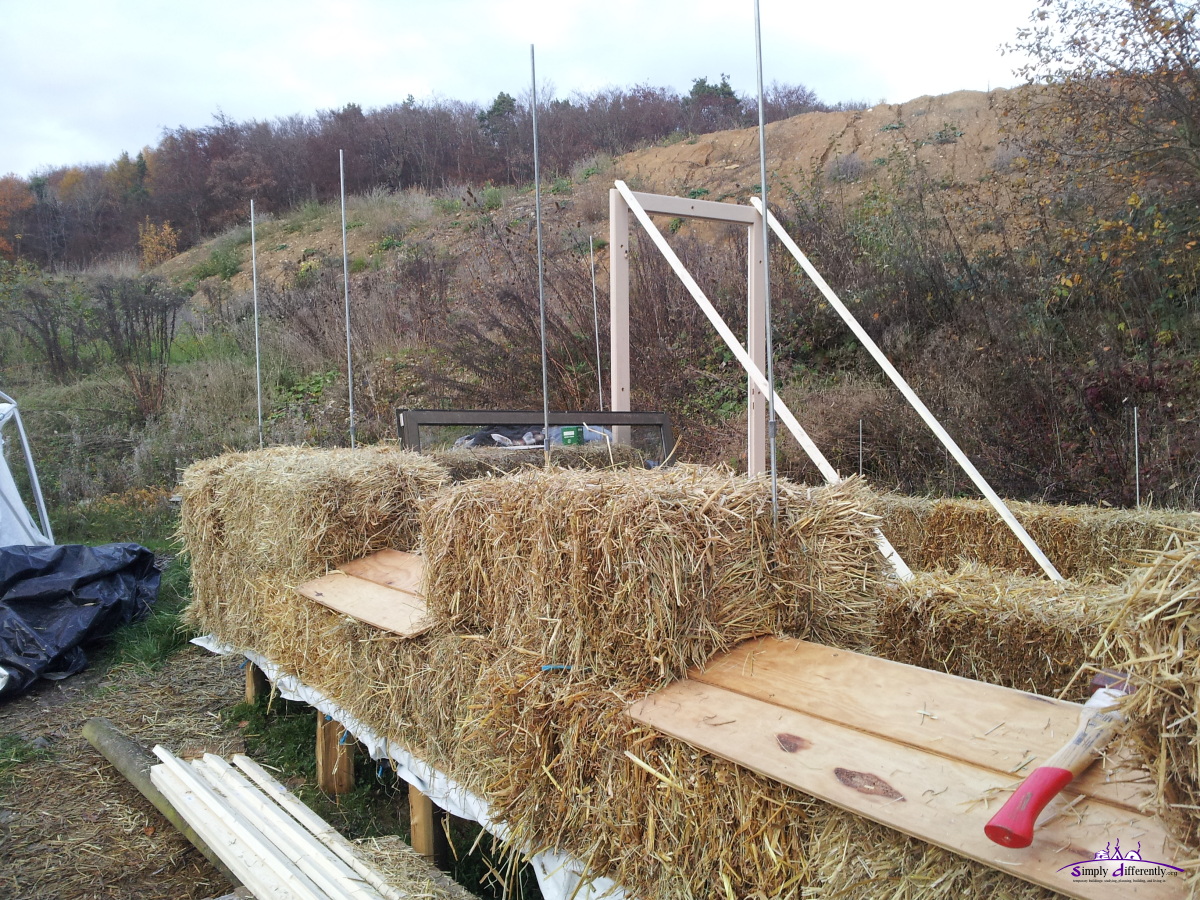
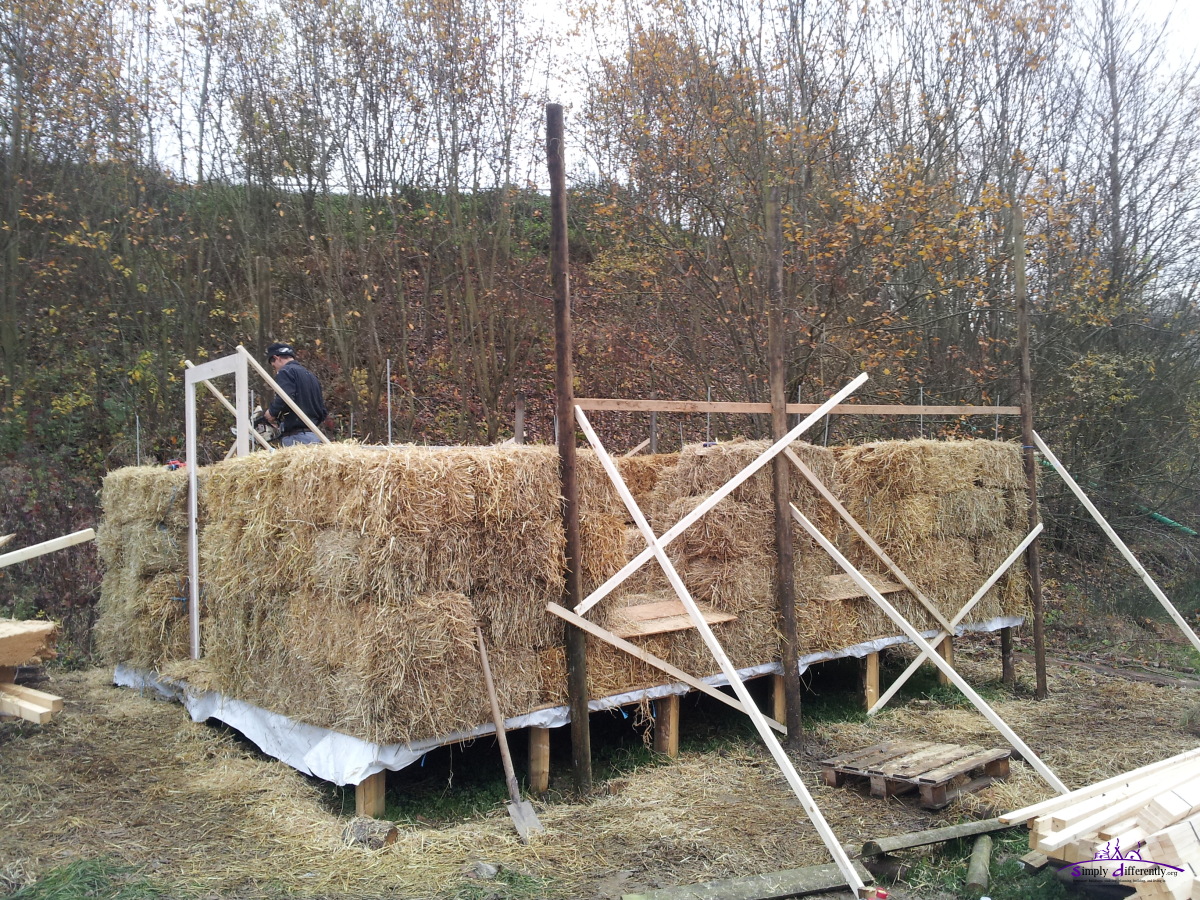
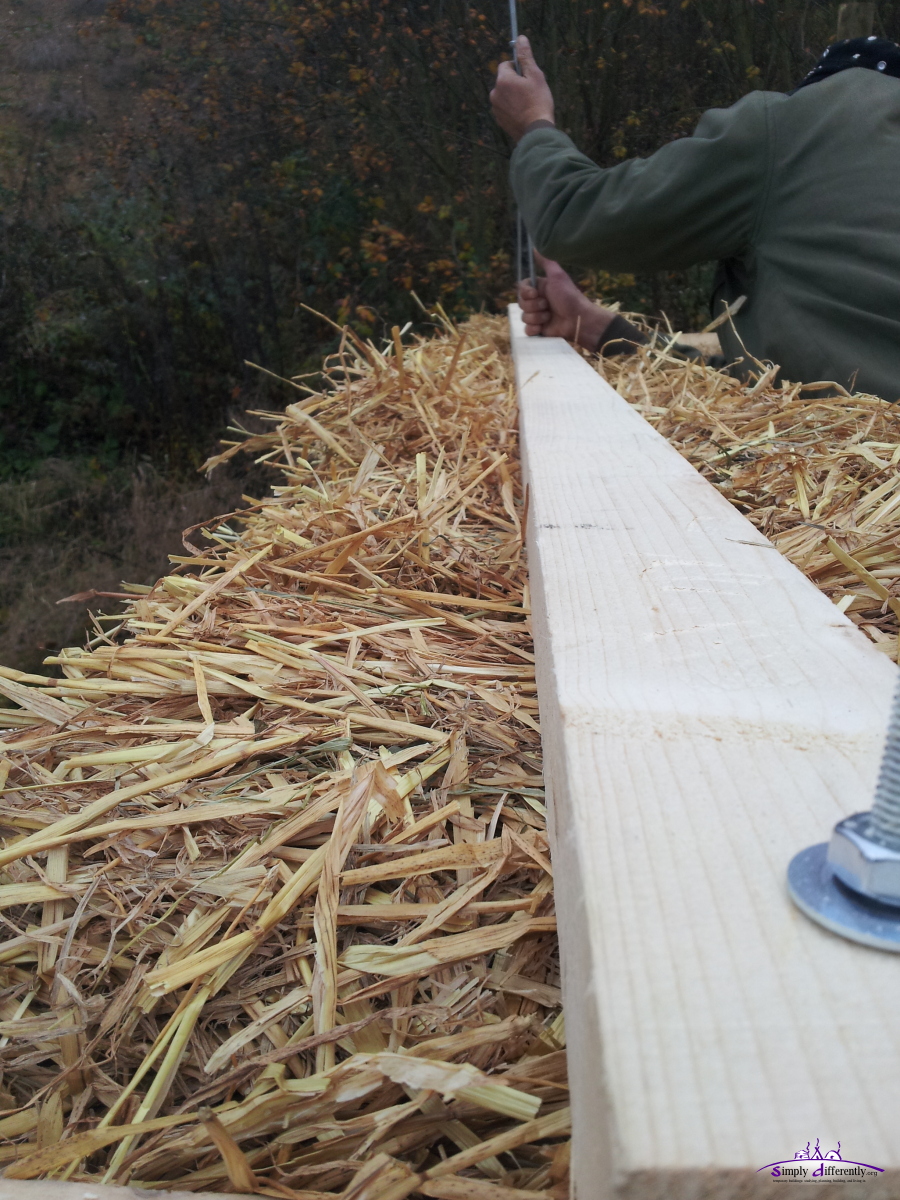
Today we finished the compression wood on top, fixated the door and added the supporting beams which hold the OSB composed ceiling, 18 x 2.05m x 0.675m. The walls were slightly twisted, which meant the corners aren't prefect right angle anymore - with a proper supporting structure this would have happened, but the walls were off about 3-5cm with 210cm height. Also, the threaded rods didn't go up straight, as we often moved the strawbale a bit to fit best and so misaligned the rods a bit. The vertical support for the back and front wall helped a lot, perhaps next time also proper edges would have to maintain the right angles consistently.
While building, Cyprian changed his mind, and meant that the agreed plan for the supporting ceiling structure needs to be changed - which meant a slightly higher ceiling, and some spaces which required bushels of straw to fill - so I agreed with the idea, as it meant additional 5cm ceiling height, yet, some lose straw required to fill the gaps. Again, we started around 13:00 and finished 17:15, and covered all with a big PVC cover again. All day long we had fog, just after 17:30 I could briefly see dark blue sky the fog barely vanishing.
2014/11/22 13:54

2014/11/22 14:59
2014/11/22 16:19
Tomorrow I work alone again, and likely prepare things so Monday the external part of the cabin is finished - it took much longer than anticipated, mainly because small details which show up during the construction needed to be addressed and good solution to be developed. I definitely benefit from the expertise of the two helpers in regards raising the walls.
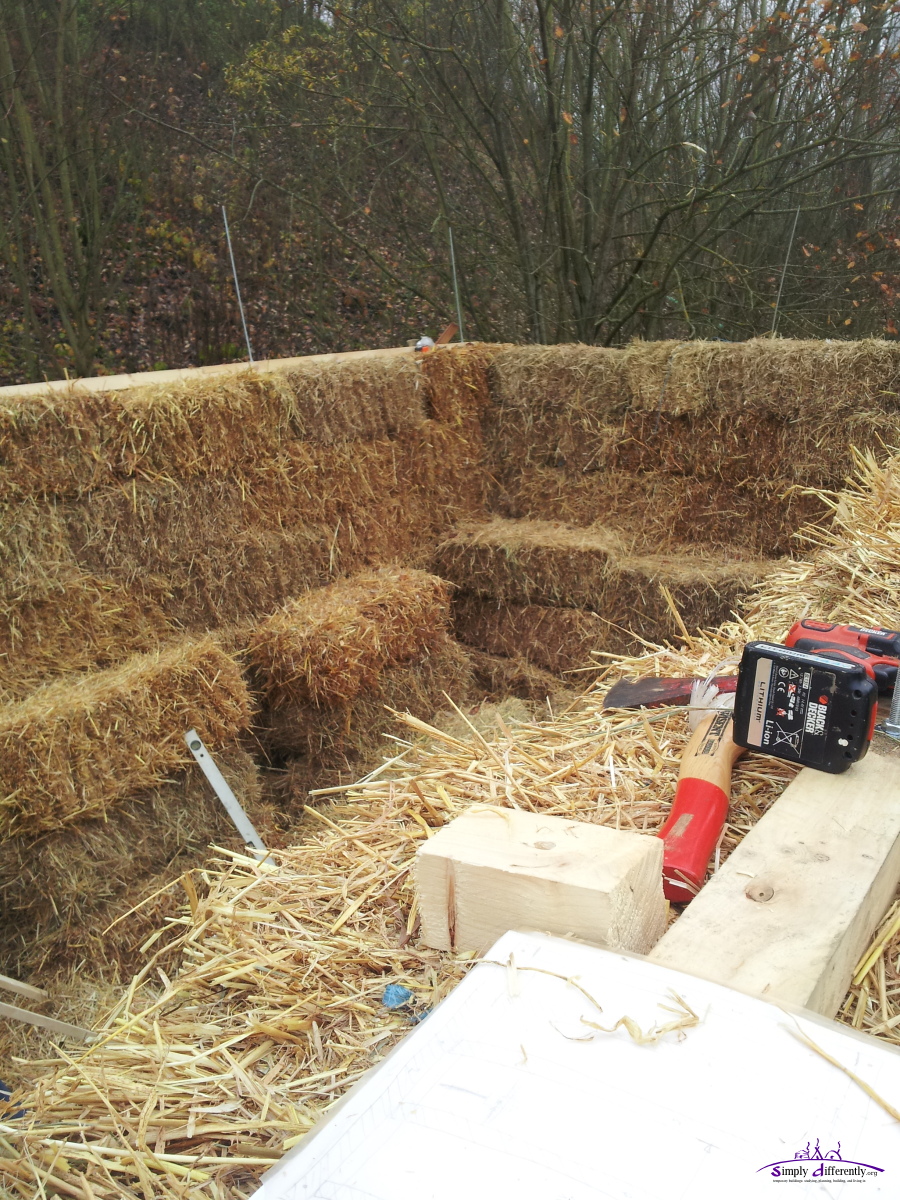
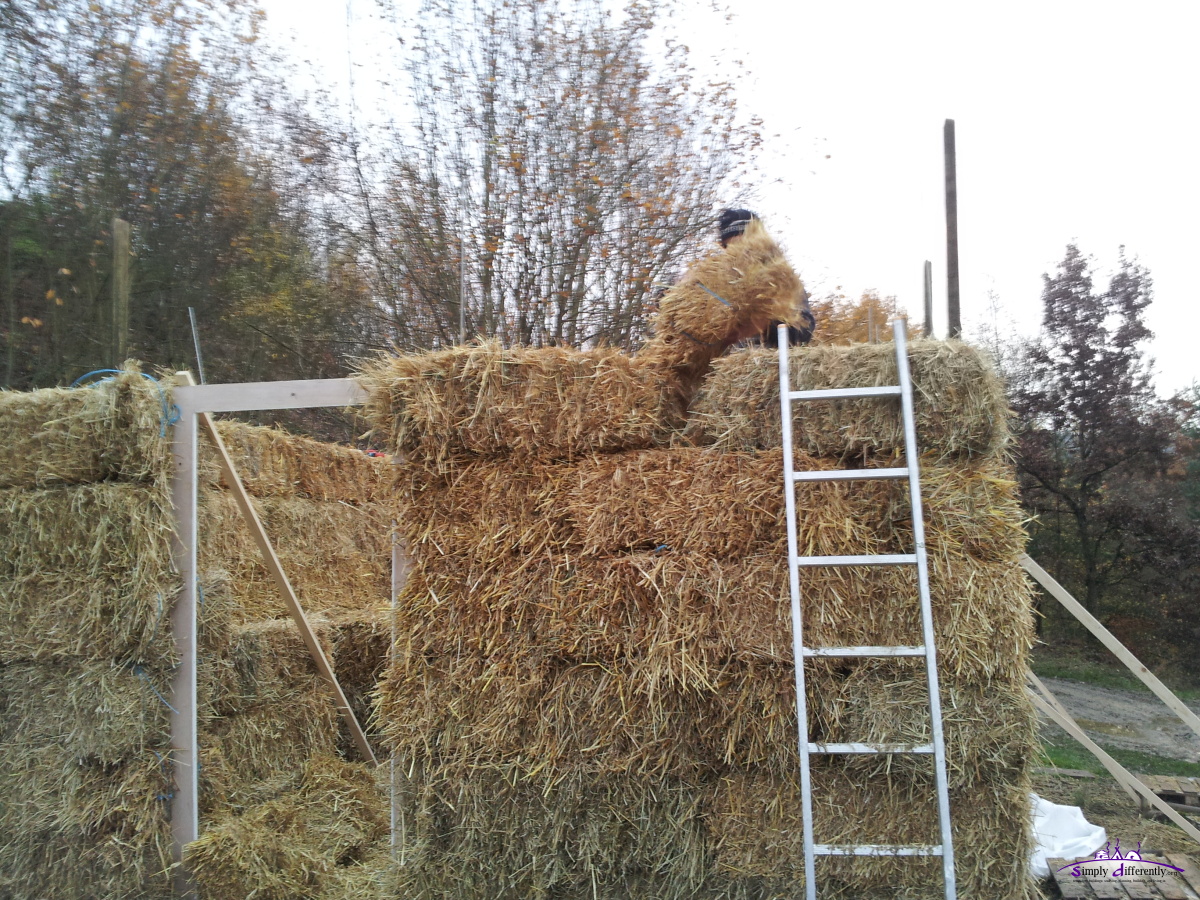
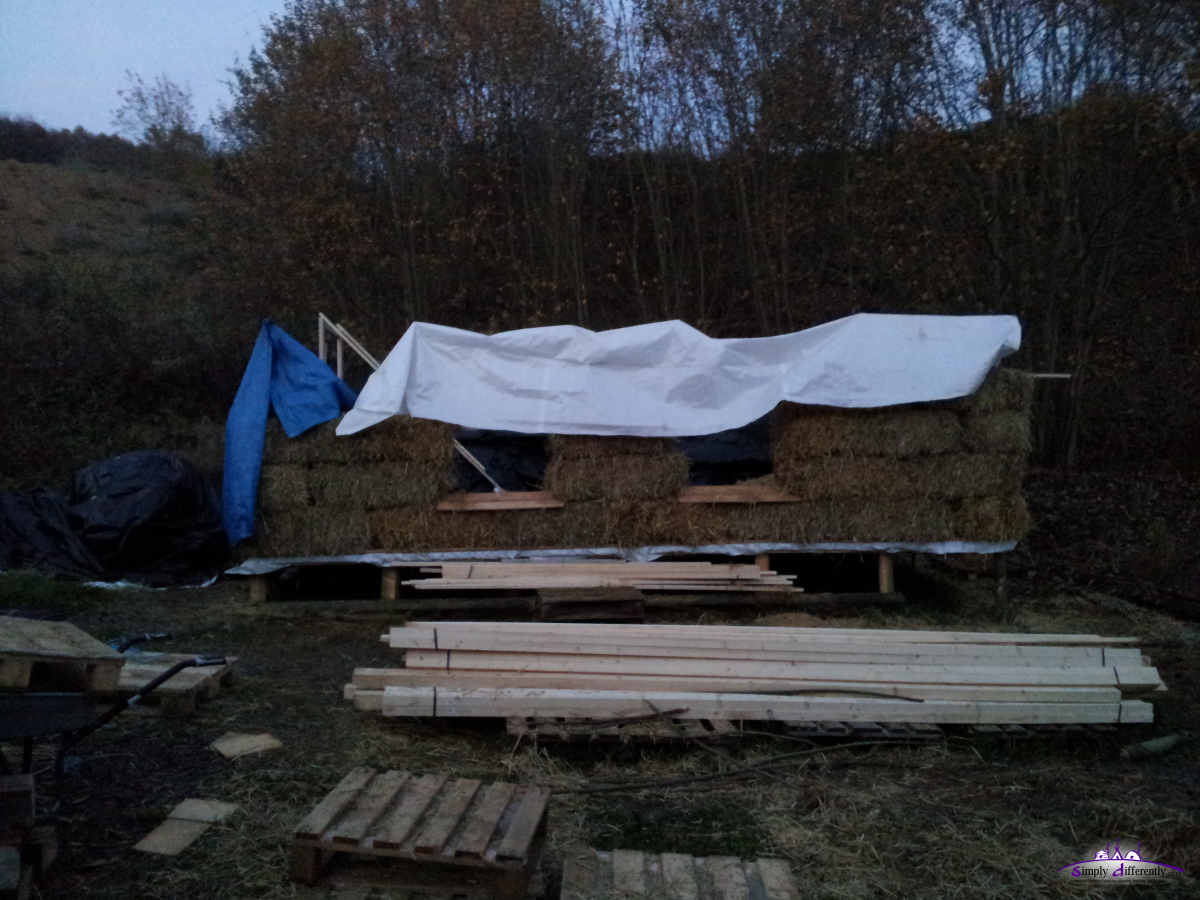
2014/11/21: Finishing the Walls
  Foggy morning, walls raised, no ceiling yet |
My helpers are only available in the afternoon, and there was a bit rain in the afternoon, which slowed down the work today, but we succeeded to finish the wall, and put the final wood at the back and front to compress the 2 long walls.
I didn't photograph the final state of today as it was already dark - so far the insulation above the windows are done as well.

2014/11/21 14:30
2014/11/21 15:50
2014/11/21 16:30
2014/11/21 16:30
2014/11/21 16:31
Tonight some possibility of brief rain exist, so I covered the entire structure with several PVC canvas. I expect the ceiling to be done by tomorrow evening, and Sunday I likely work alone for the roof. By Monday evening I expect the cabin to be finished externally.
2014/11/20: Continue Building the Walls
Today we did continue raising the walls, finishing the first bottom 4 layers and compress them with 4.8cm x 2.4cm laths.
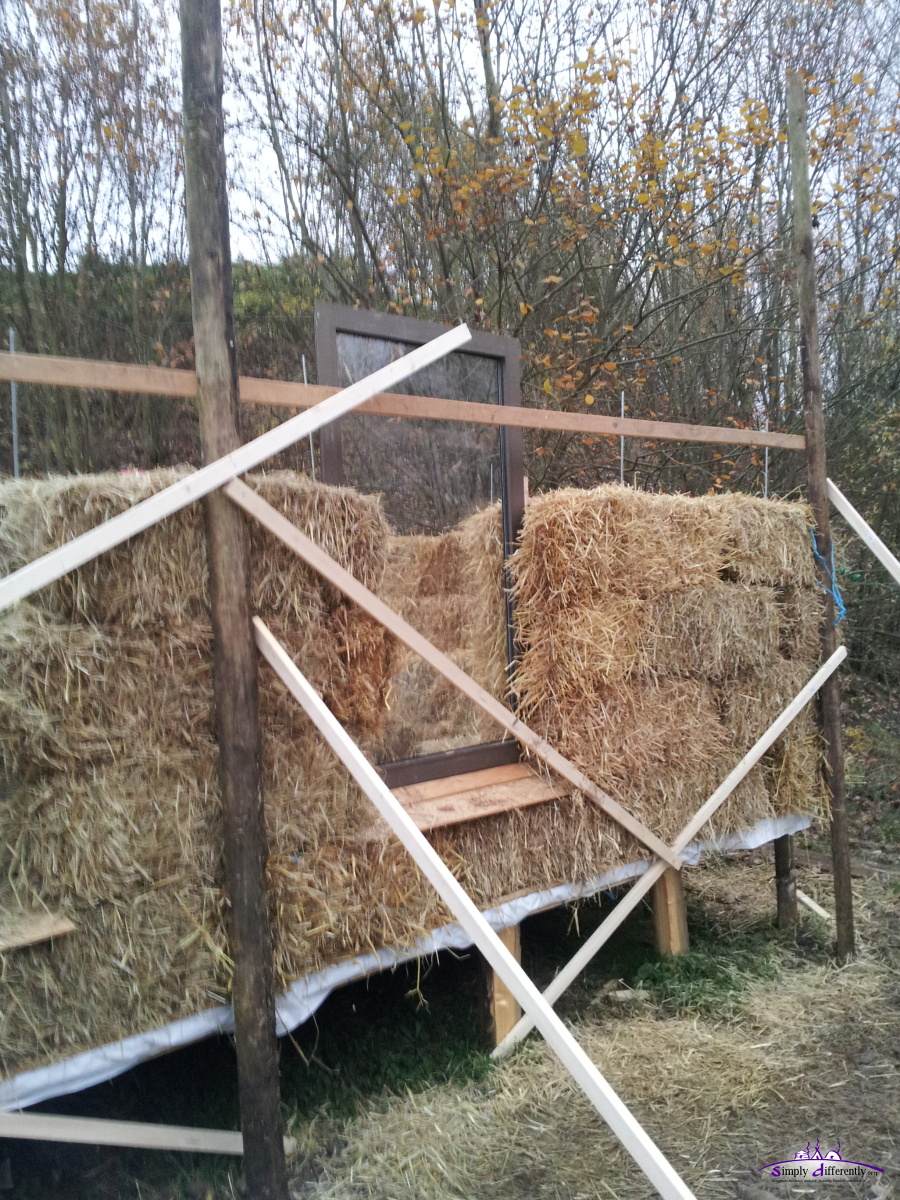
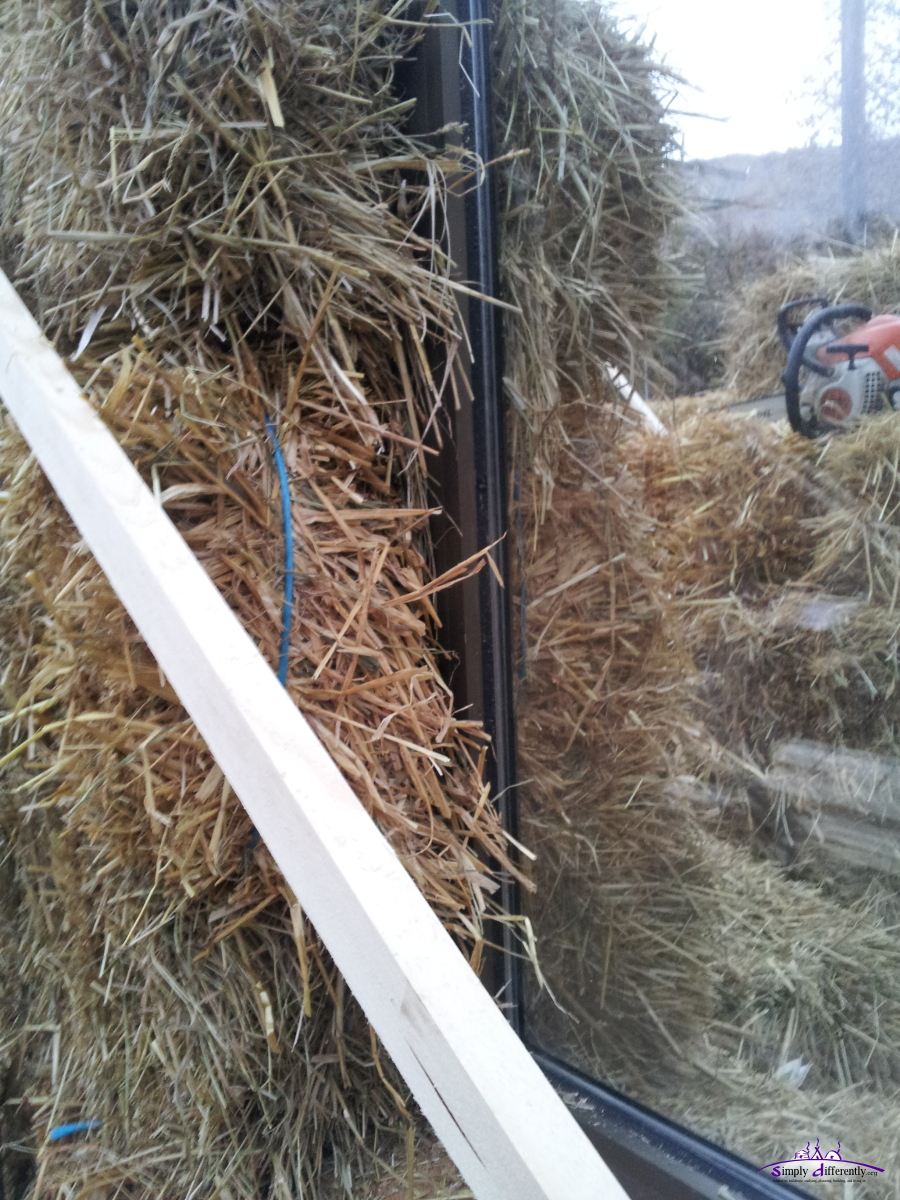
Cutting a small ridge so the laths sink well into the bales, so the 5th layer lays properly on the 4th and the lath is well embedded - without the ridge the lath would introduce instability for the next layer. In other to continue layer 5, Cyprian decided to mount vertical support laths, so the next layers properly align vertically - they will be taken away once the wall is finished and the ceiling is mounted. Also, the two heavy windows we mounted, rather jammed between the bales with threaded rods near by, and I used two wodden pins and hammered them into the bales, which worked quite well.
2014/11/20 14:07

2014/11/20 14:08
2014/11/20 15:07

2014/11/20 15:46
2014/11/20 16:40
2014/11/20 16:40
Compressing the 4 layers together took quite some, as the bottom layers needed to be align quite well so the overall walls remain stable. Once the 4 layers were compressed, it took just 30mins to mount the 5th layers (no photos as it was already too dark). In other words, once you have a good start of the wall, actually positioning the bales goes rather quickly. The door and windows yet demand 1/2 or 1/3 or custom sized bales, which take some time. Since the bales aren't precise, one has to bind the custom bales on site and on demand.
Also, a small note, the corners are very stable, they won't tilt even an centimeter when pushing them any way, whereas the wall between the windows is quite wobbly, as well the 6m long wall at the back. The expectation that once the ceiling is mounted, the stiff structure which allows to mount the ceiling, gives the overall cabin more stability, in particular the parts which are still a bit wobbly - we will see.
Tomorrow overcast with brief rain is possible, which poses some risk while raising the wall and have the bales exposed. I have to quickly respond cover the entire structure with a cover.
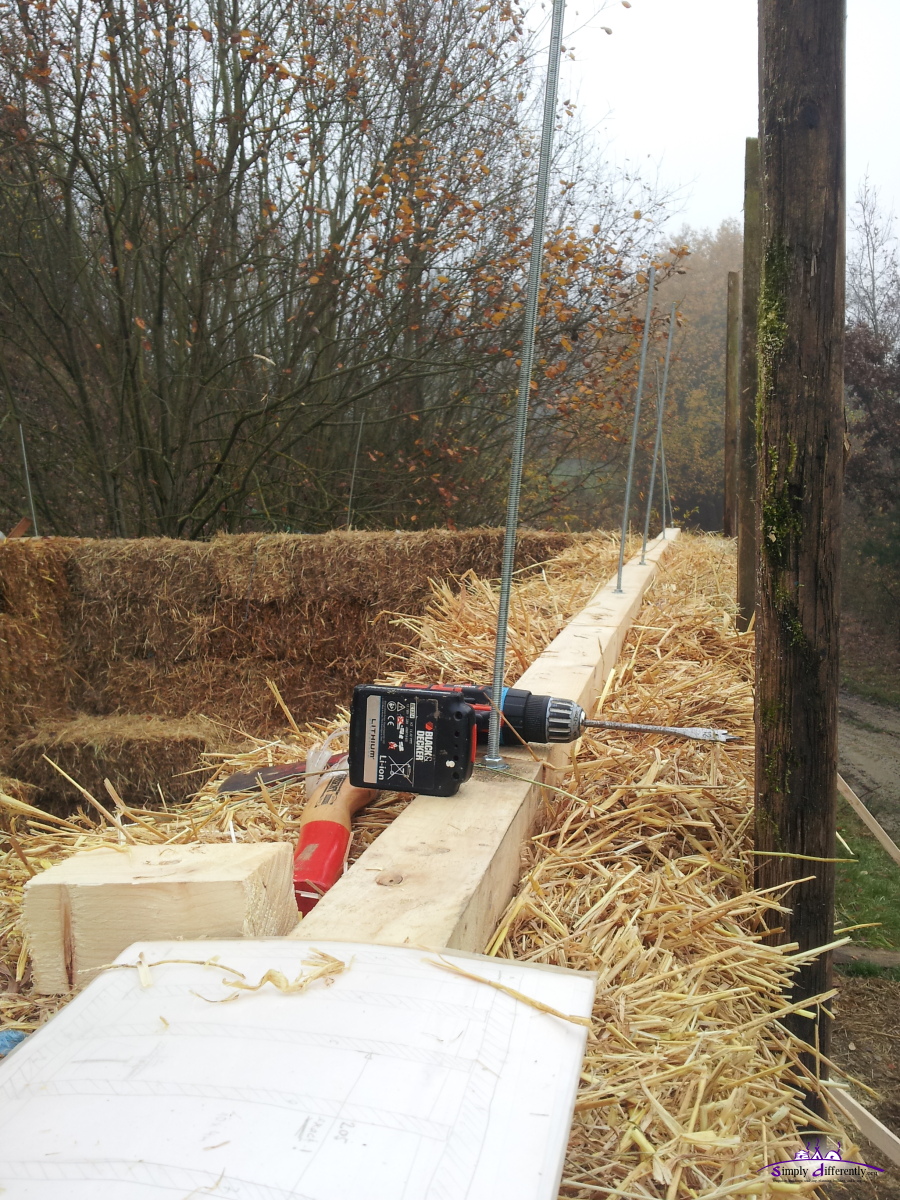
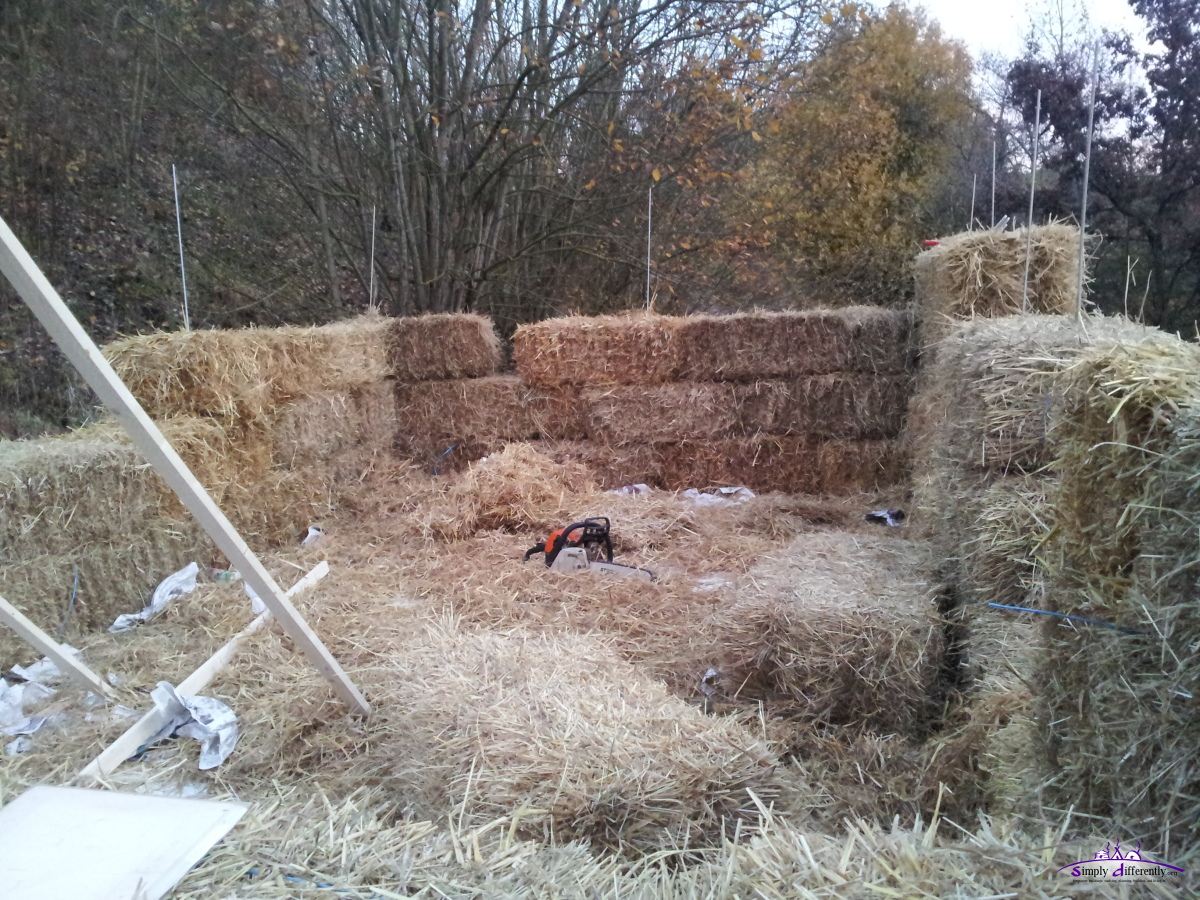
2014/11/19: After Rainy Days, Starting Strawbale Walls
  Done for today, 4 hours work |
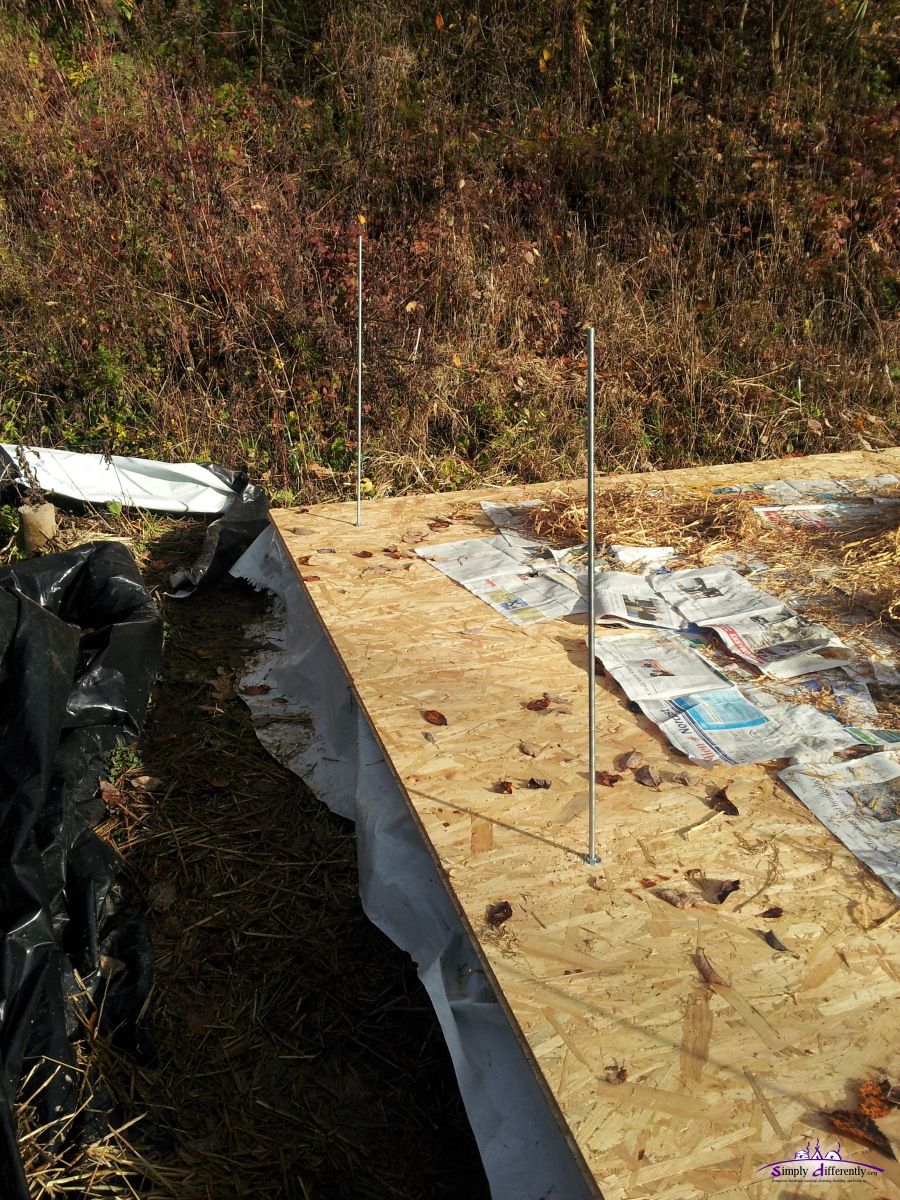
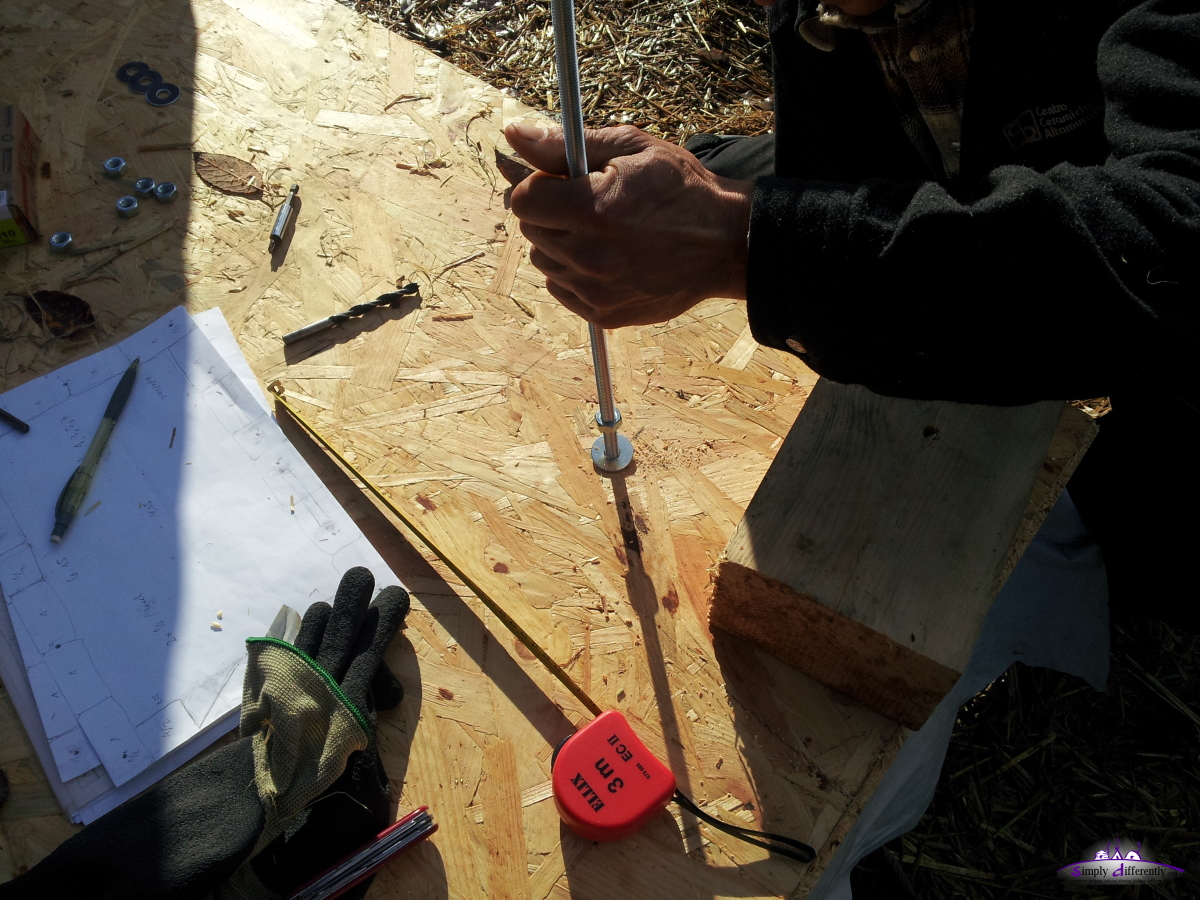
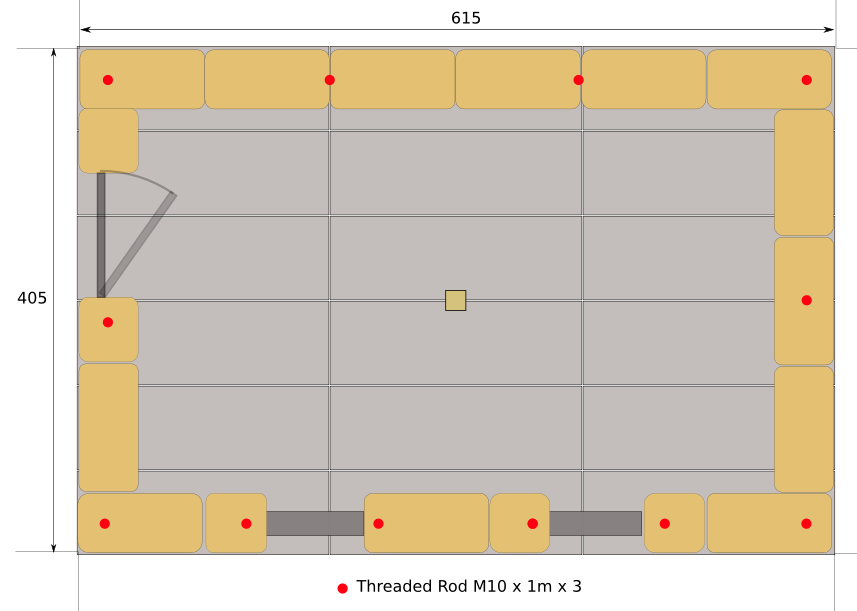
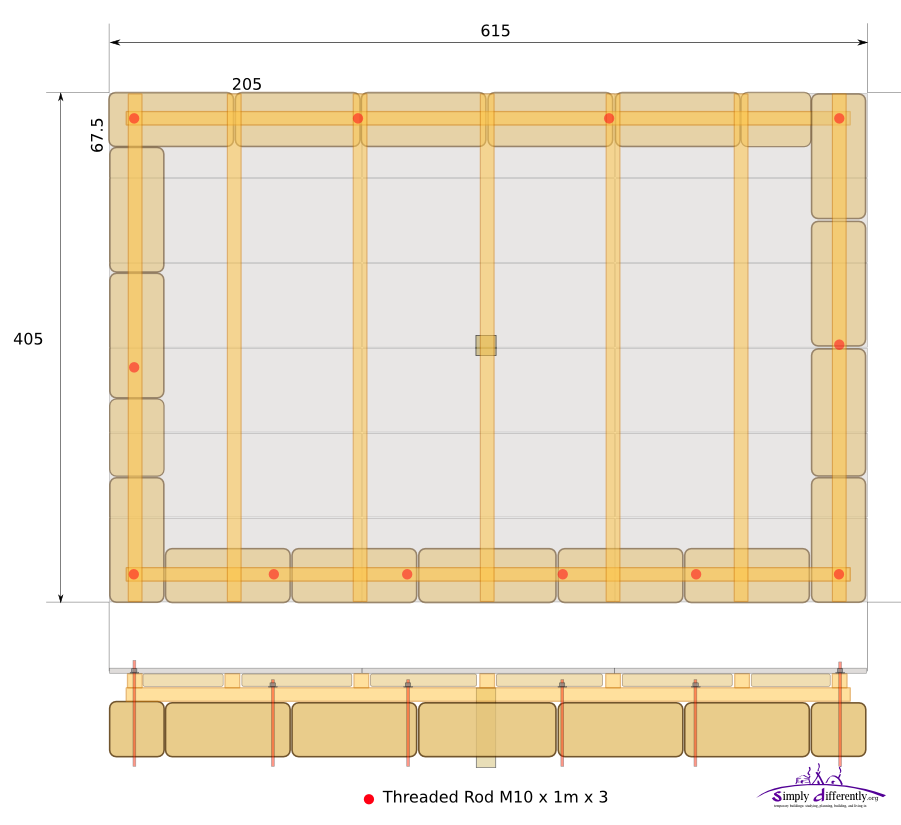
- threaded rods (M10 x 1m) anchored on the floor
- laying out first strawbales at the corner, and working to the center of each side, and fill remaining with partials of a strawbale
- we decide to make 4 layers around the 2 windows quickly, so they can be mounted without support
- the door frame was moved slightly, now 1m away from the back; 1m is roughtly the width of a strawbale
- there are some gaps seen, which I gonna fill manually with small straw bushels
2014/11/19 13:15
2014/11/19 13:53
2014/11/19 14:02

2014/11/19 14:29
2014/11/19 16:03
2014/11/19 16:46
2014/11/19 16:55
2014/11/19 16:55
2014/11/19 16:56
2014/11/19 17:06
Sunny afternoon was pleasant, it warmed up and I started to work in the t-shirt only - around 16:00 the sun set behind the small mountain ridge and it began to cool off quickly. Around 17:00 we stopped as it quickly darkened. The next days are expected with no rain but fog, and likely no direct sunlight reaching the ground.
2014/11/18: Sorting Strawbales
I took the afternoon to sort all ~180 strawbales:- heavy and compact bales first to use (layer 1)
- good strawbales, a bit ligther as next (layer 2-5)
- moderate good strawbales, light, well bound (layer 6&7)
- and putting aside bad strawbales (~10 bales)
A few strawbales I fixed by re-binding, using additional cords to make it strong again. As mentioned, since I didn't instruct the local farmer to press bales for actual building, the bales are quite light (~15kg) and not that strong.
The advantage of light bales is that the decided procedure using threaded rods to compress bottom 4 layers and then top most (7th) layer again - that the rods can penetrate the strawbales with a bit effort and keeping them straight while pushing down (M10 x 1m are ok, perhaps M12 x 1m would be better choice for next time).
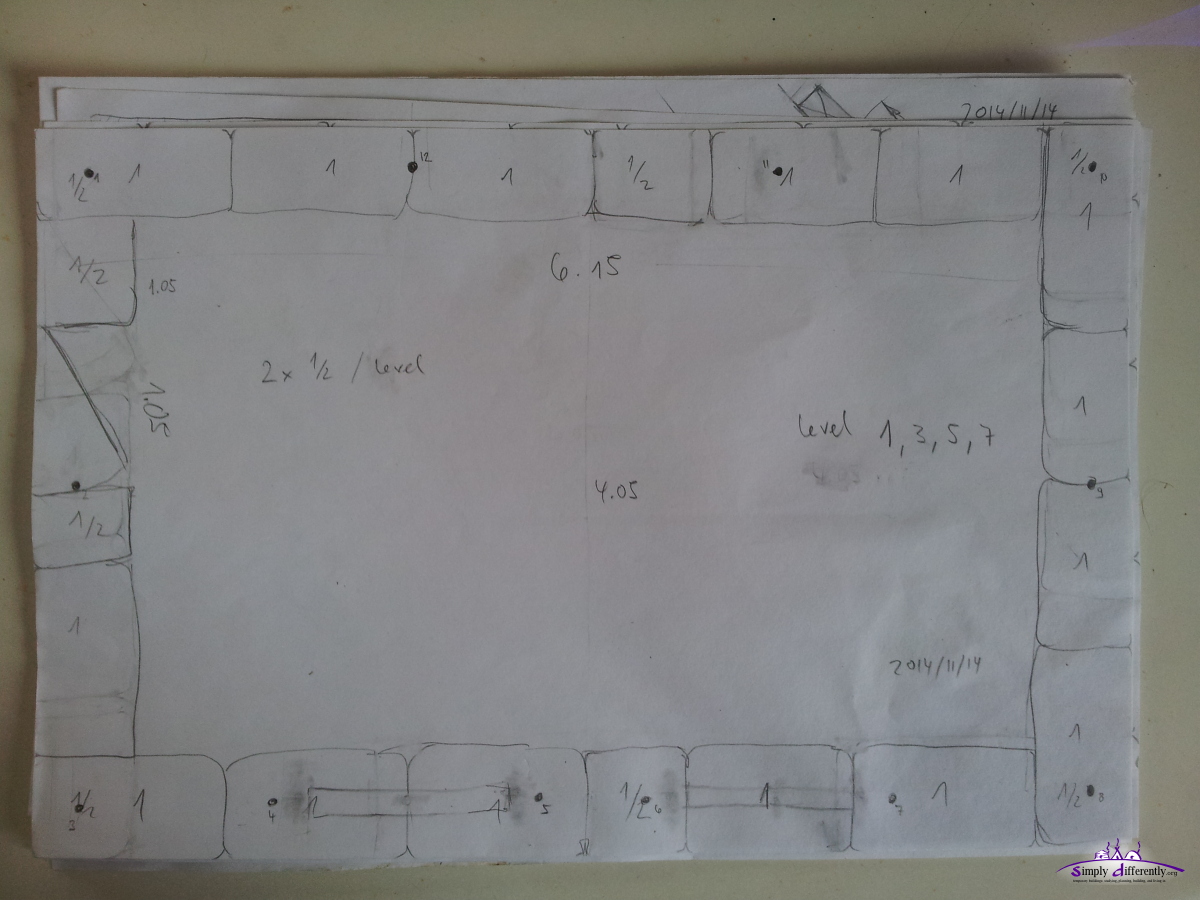
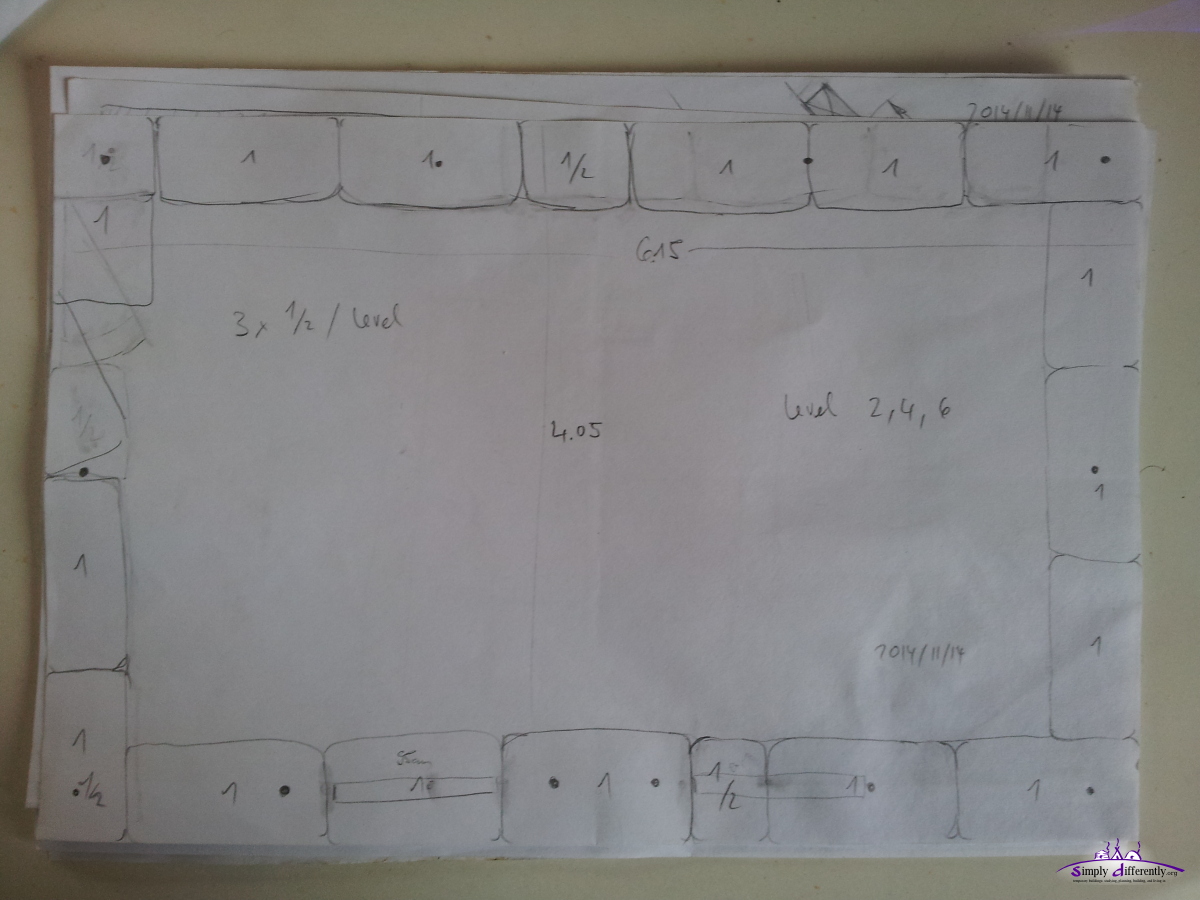
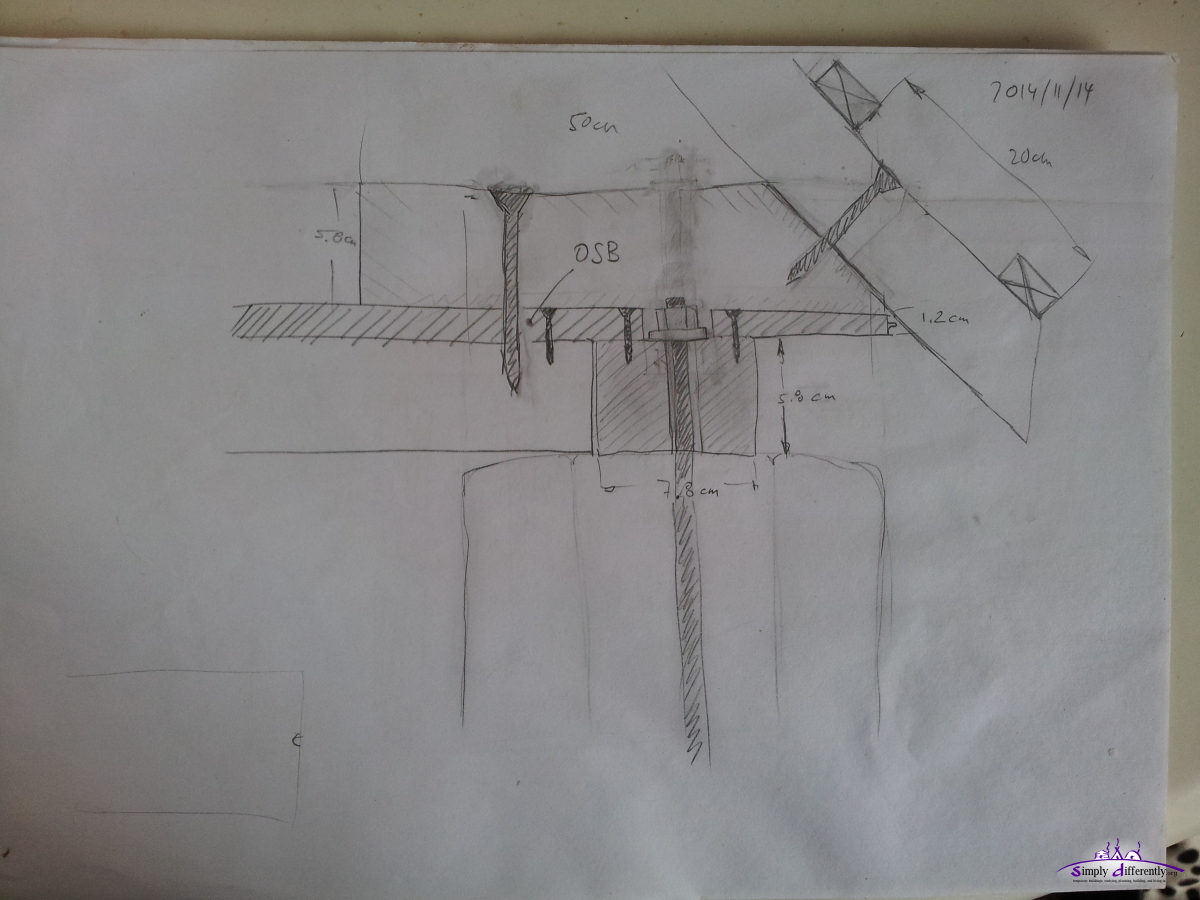
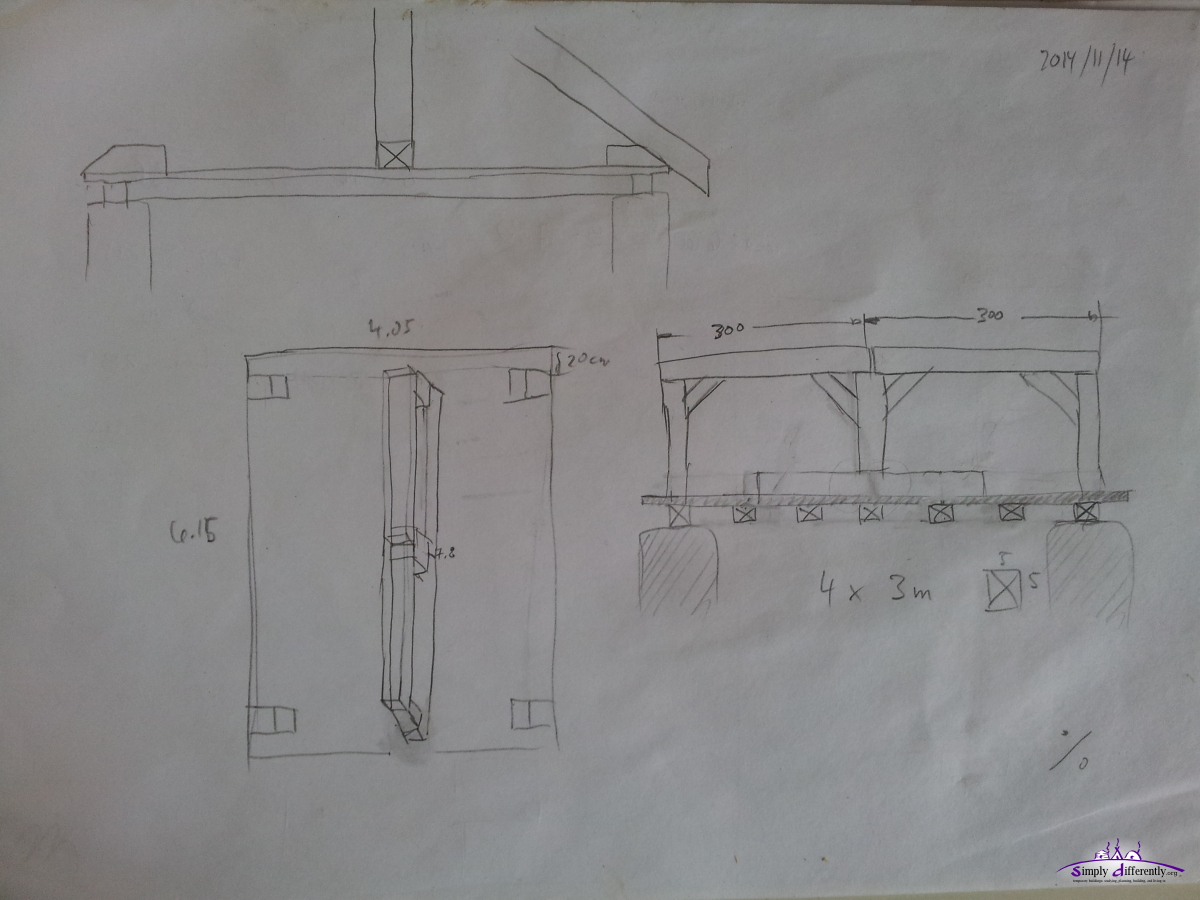
2014/11/14: Planning Procedure
Today I drew some more detailed plans how to proceed building the cabin:

2014/11/12: Planning the Walls
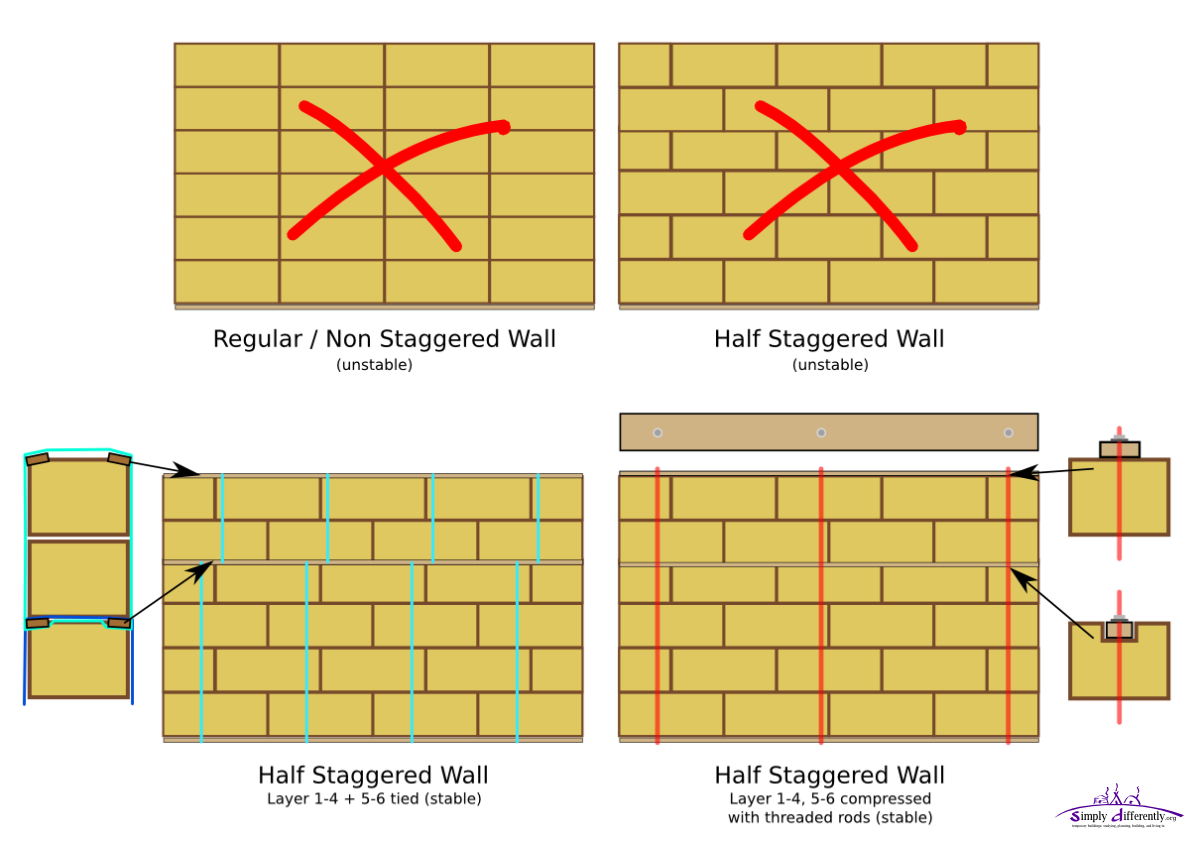
 Options to build Strawbale Wall |
Options:
- putting bales straight on top of each other: highly unstable, 3-4 layers might work
- putting bales half-way shifted or staggered on each layer (like putting together a brick wall), 4 layers might work
- putting bales half staggered half-way, first 4 layers tied together, next 2 layers tied on top of 4th layer: 6-7 layers might work
Some of tests I made:

2014/11/12 11:20
2014/11/12 11:33
2014/11/12 11:53

2014/11/12 11:57
Yet, even the last option gave some improvement, I decided to go with following solution:
Stabilize the wall each 2m distance 3m long M10 threaded rods (total 30 x M10 x 1m, Euro 1.40 / pc) vertically positioned and using nuts at the bottom and top: under the floor, and on top a long piece of wood which presses then the 6 or 7 layers of bales together.
It keeps the bales and wall therefore in position, and gives the possibility to compress the layers together in a controlled way (height-wise). It's a bit more overhead than I anticipated, but I think it makes the cabin sturdy and less prone to become unstable.
The door I use is exactly 210cm in height, its frame to be precise, so I pondered on follow options:
- 6 layers give apprx. 210cm height, when compressed going near 200cm, and missing 10cm: making door open to outside instead of inside, having 10cm reach over the bales on top.
- 7 layers give apprx. 240cm height, when compressed going near 230cm, still well over 210cm of the door frame, ability to keep the door opening to the inside - filling the expected gap above the door frame of 10-20cm with straw and/or wood.
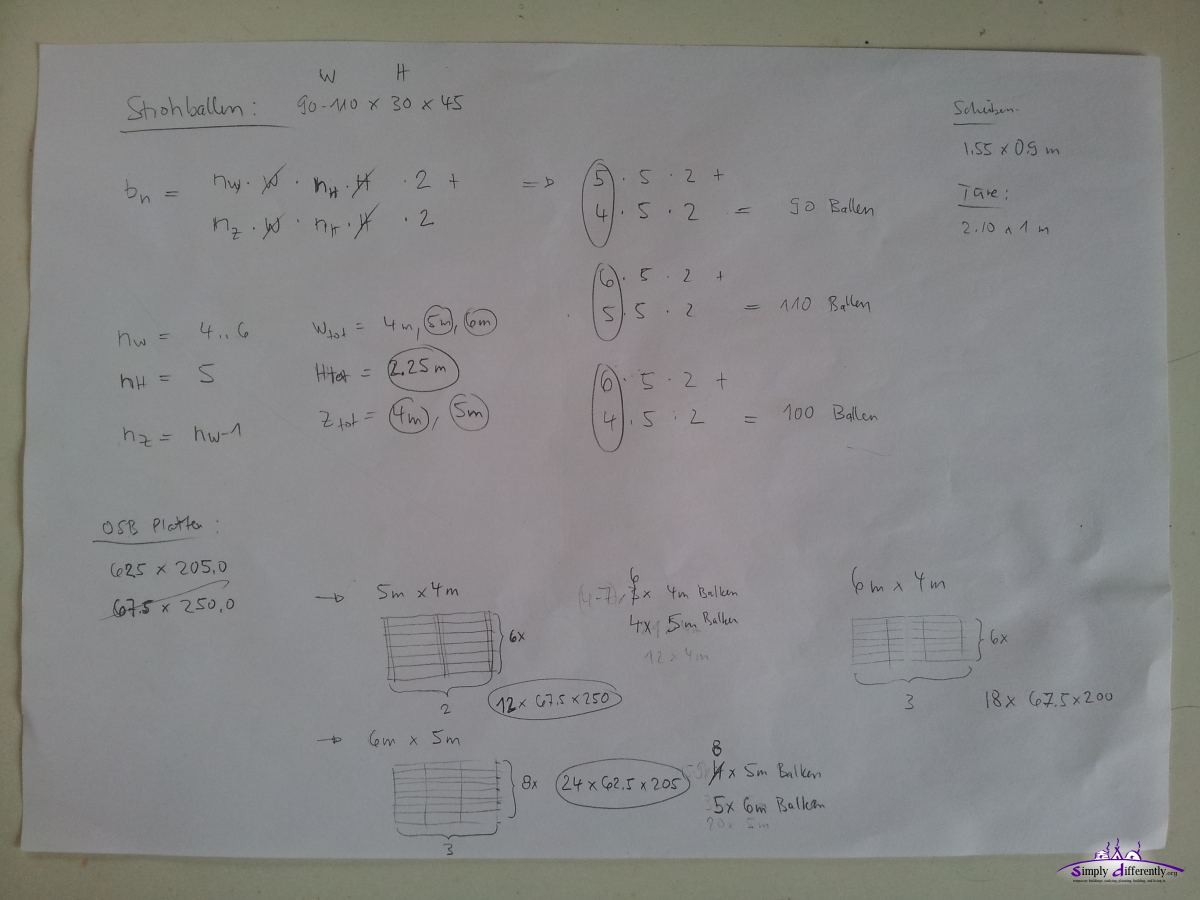
and I likely go with the 2nd option using 7 layers, as 6 layers with resulting 200cm ceiling height is a bit low for my taste, and I have sufficient amount of bales spare.
With apprx. 23 bales per layer, and 7 layers I reach total of apprx. 161 bales (2.4 tons).
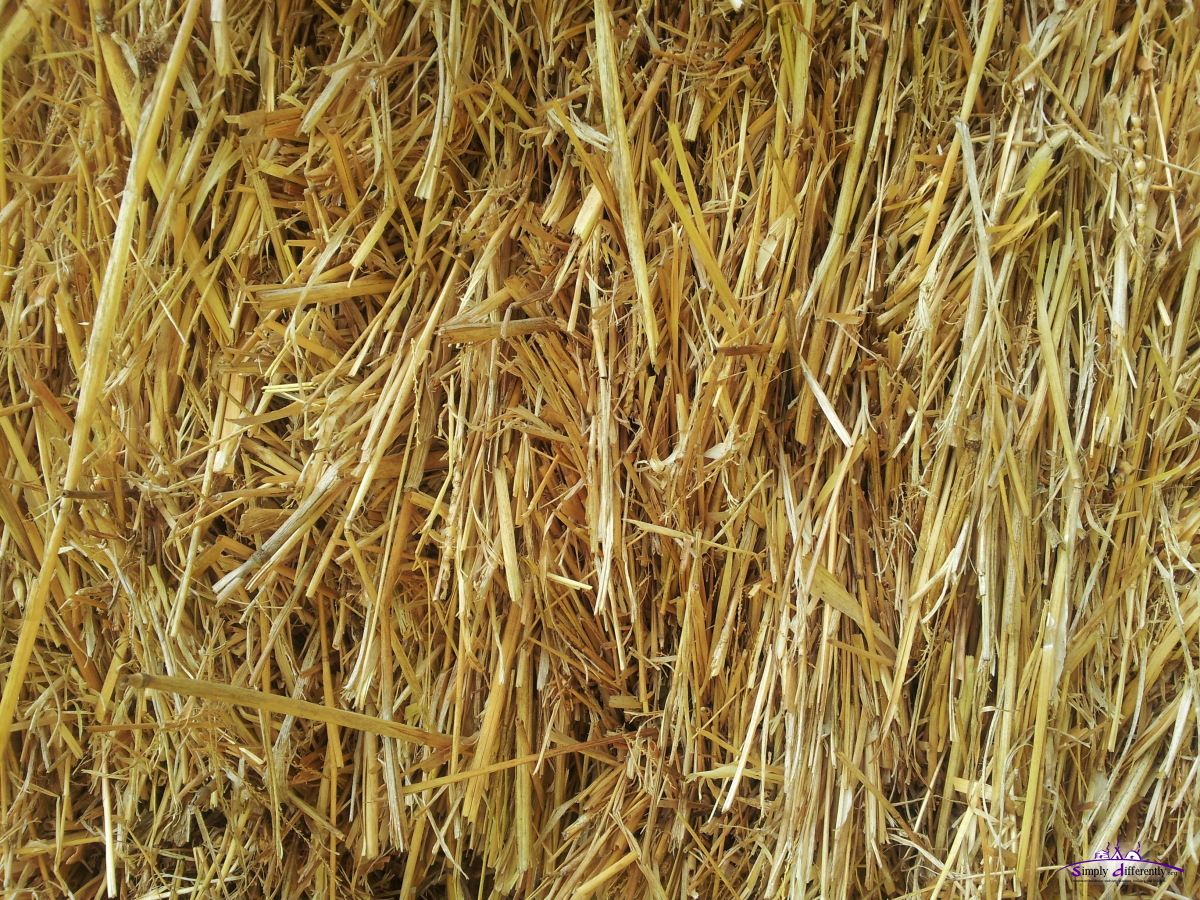
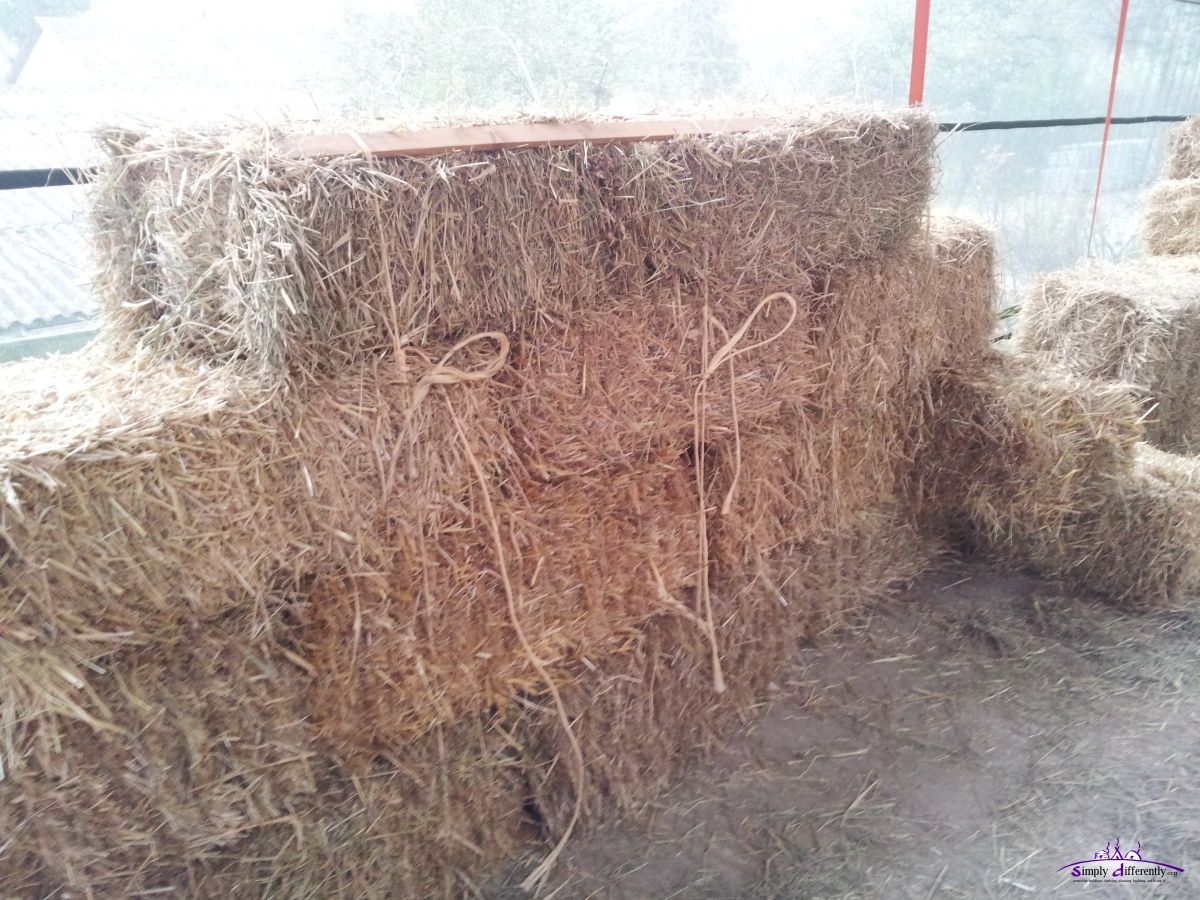
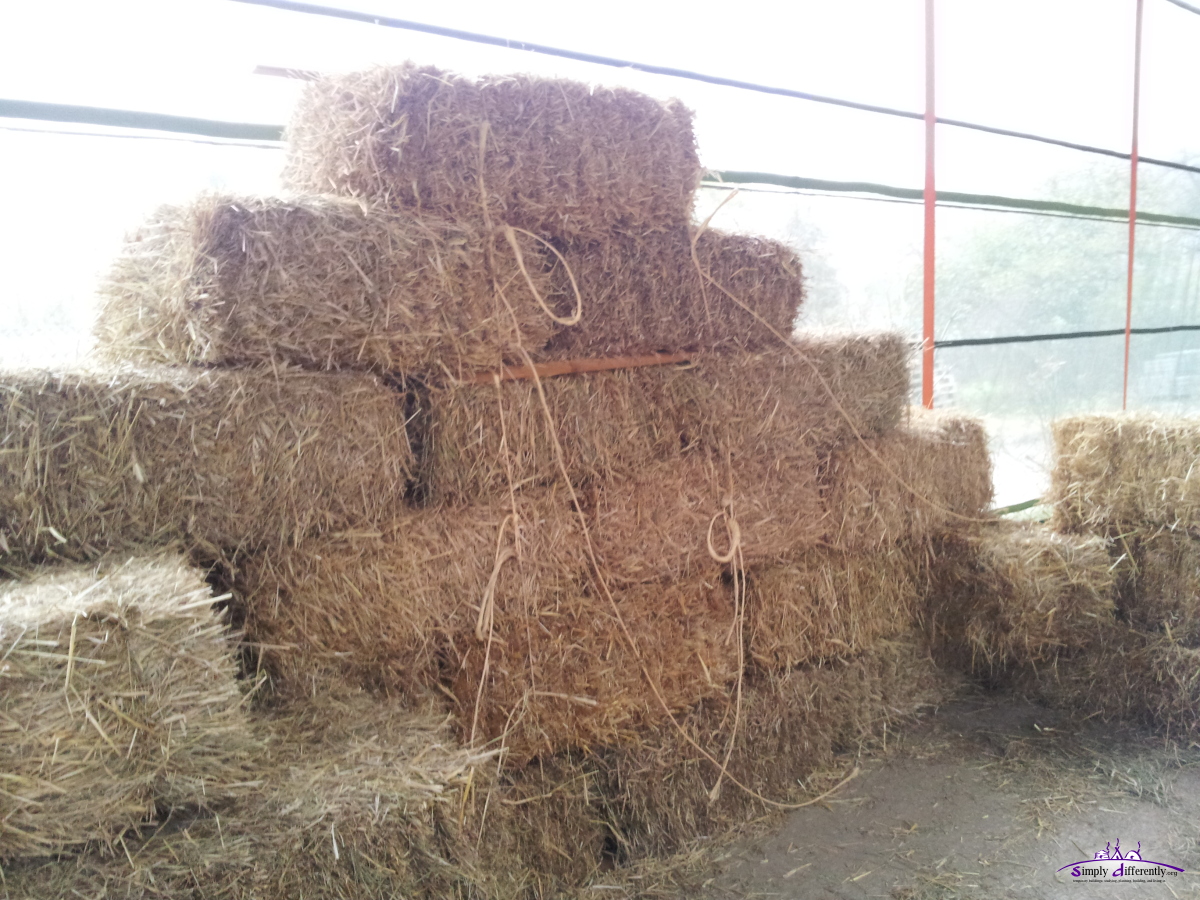
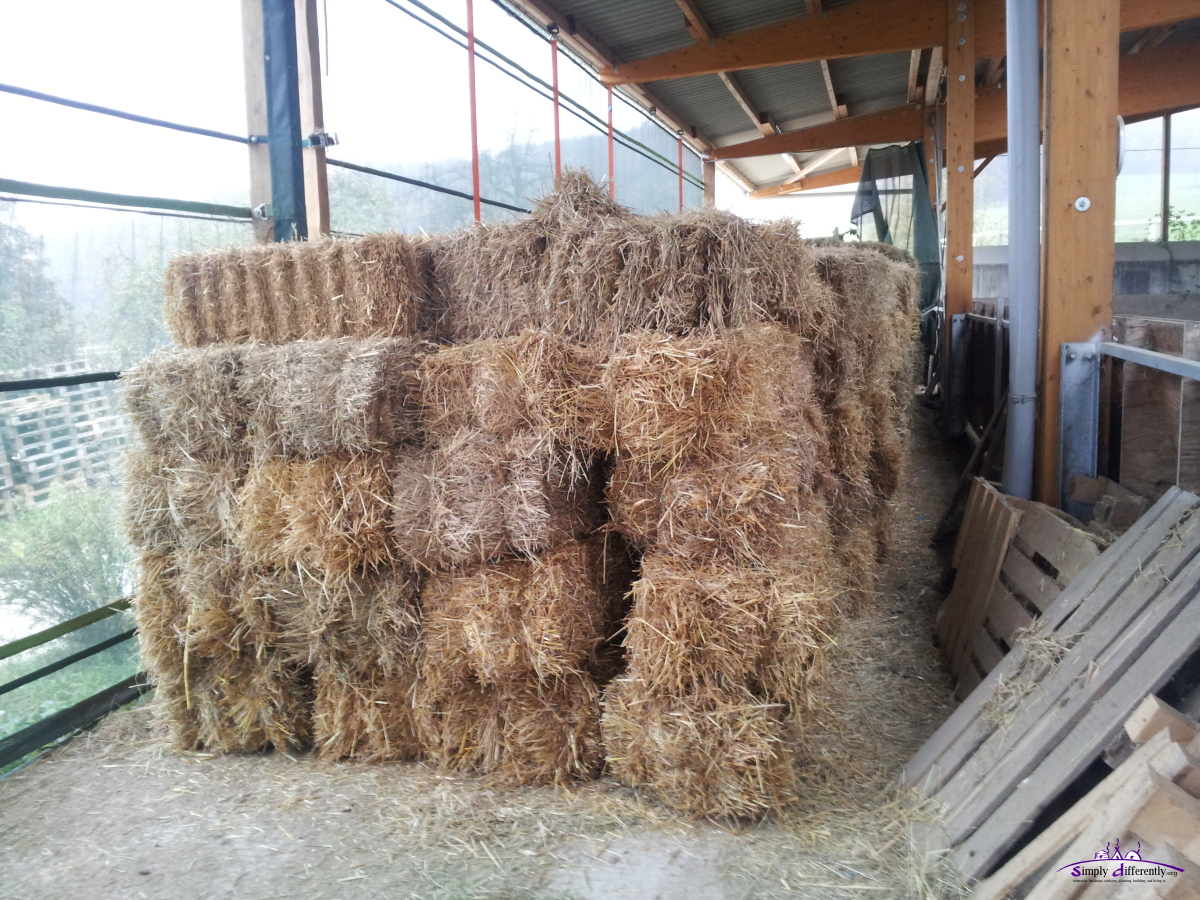
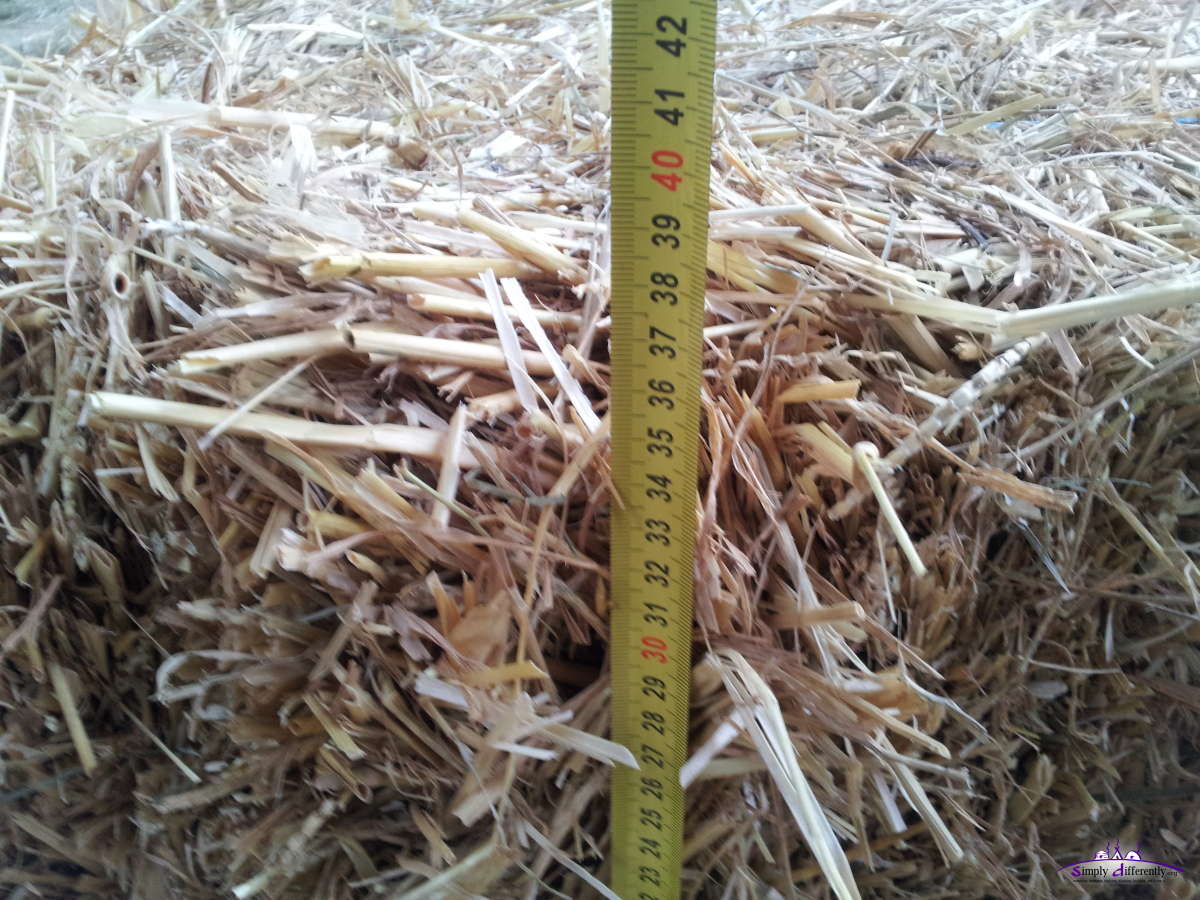
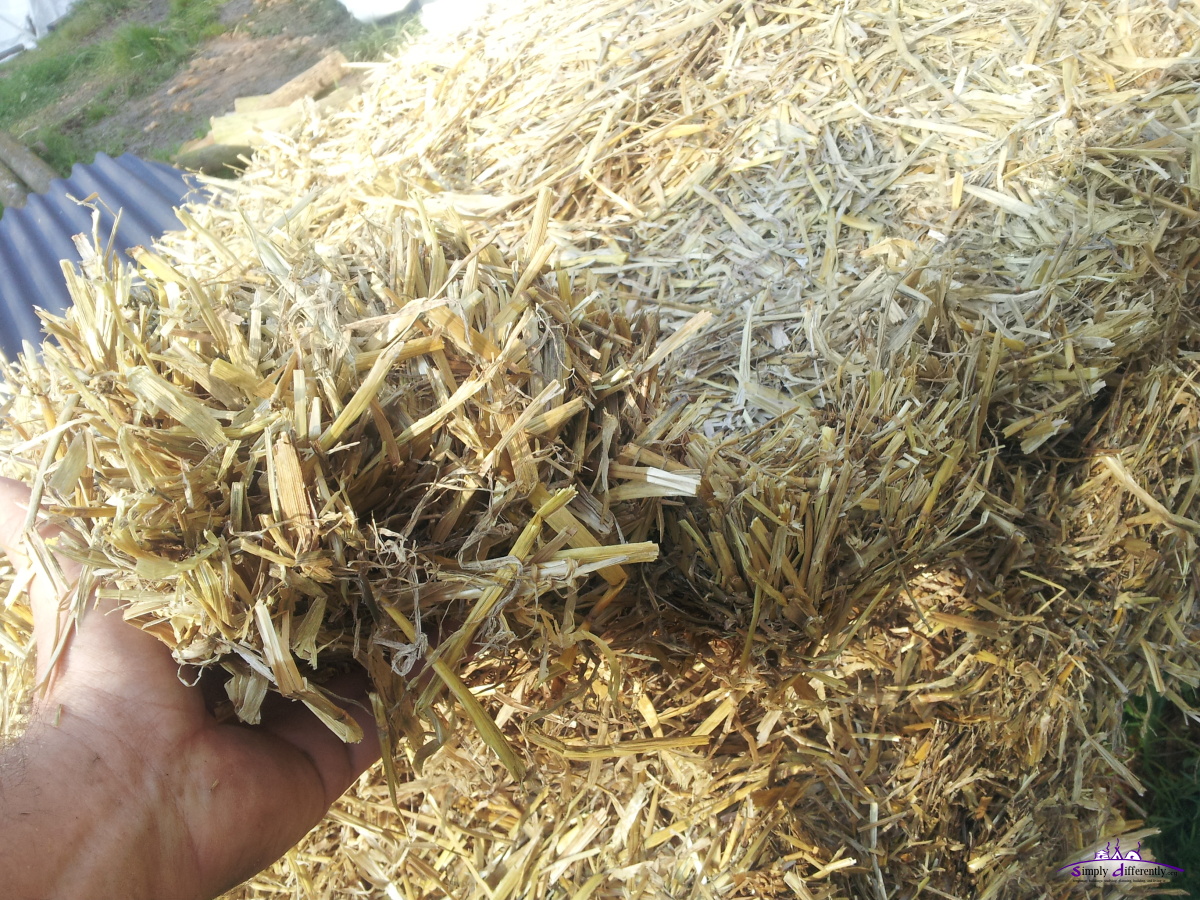
2014/11/08: Strawbales Arrived
Today, after weeks of delay, the strawbales arrived - so called "small" strawbales, as nowdays "large" 400kg heavy strawbales are sold. I've got apprx. 180 strawbales in this shipment:
2014/11/09 14:00
2014/11/09 14:01
2014/11/09 14:02

2014/11/09 14:02

2014/11/09 14:02
2014/11/09 14:03
2014/11/09 14:03
 Frontside of Strawbale |
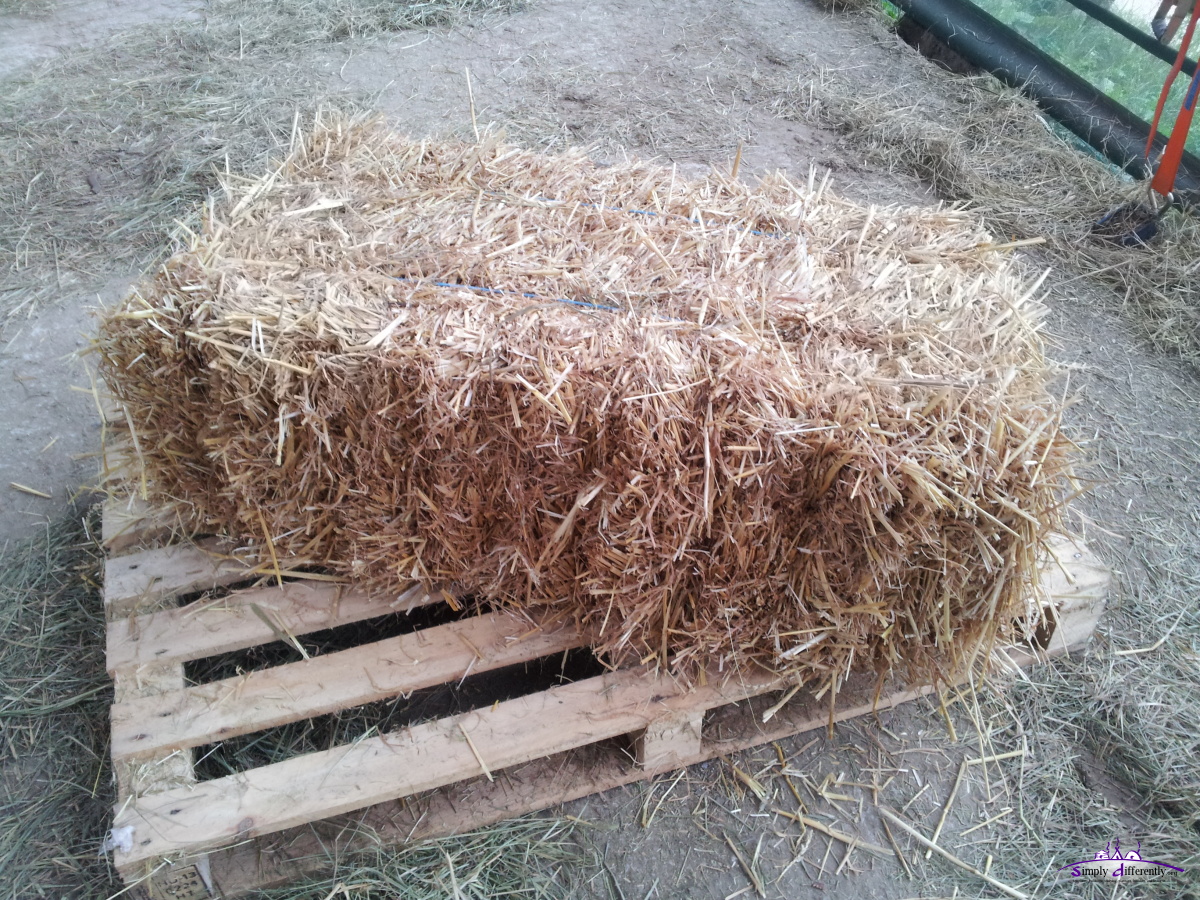
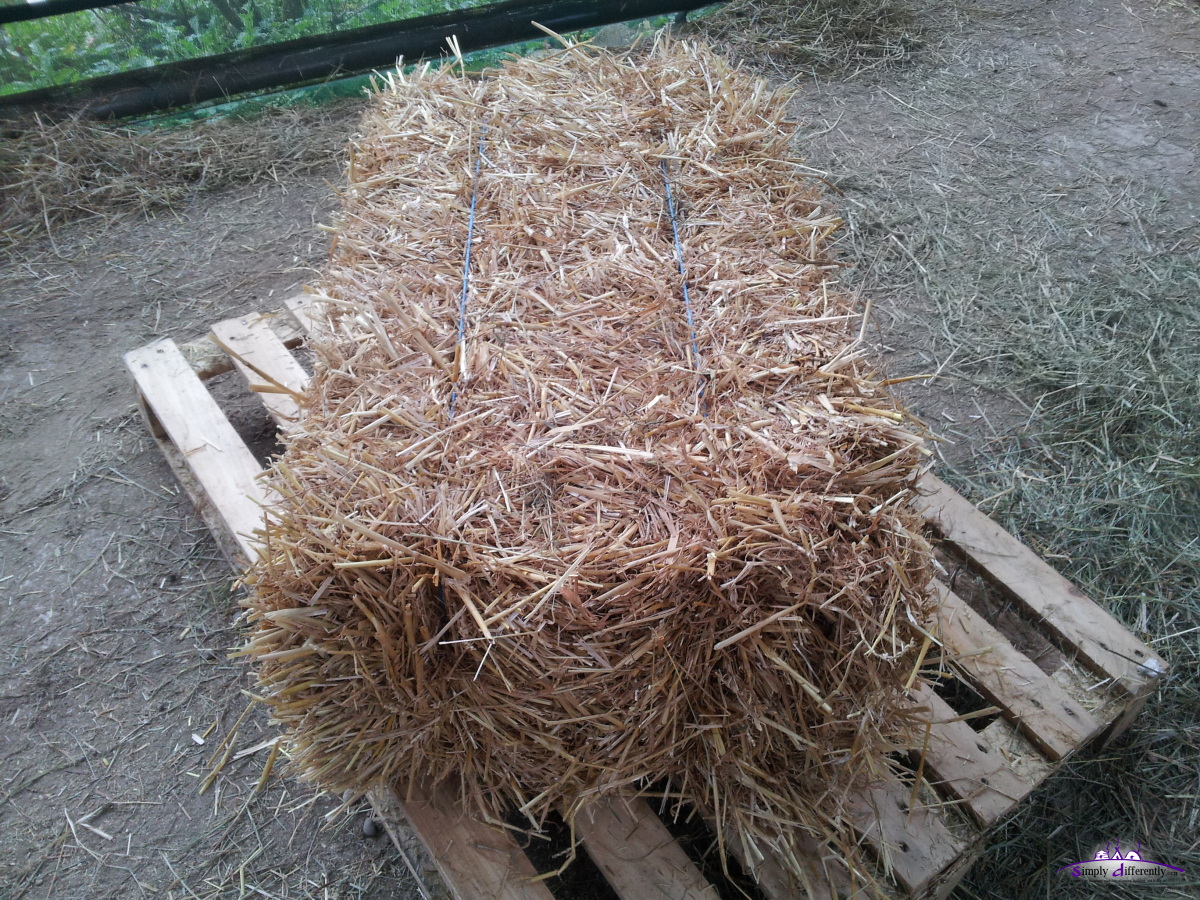
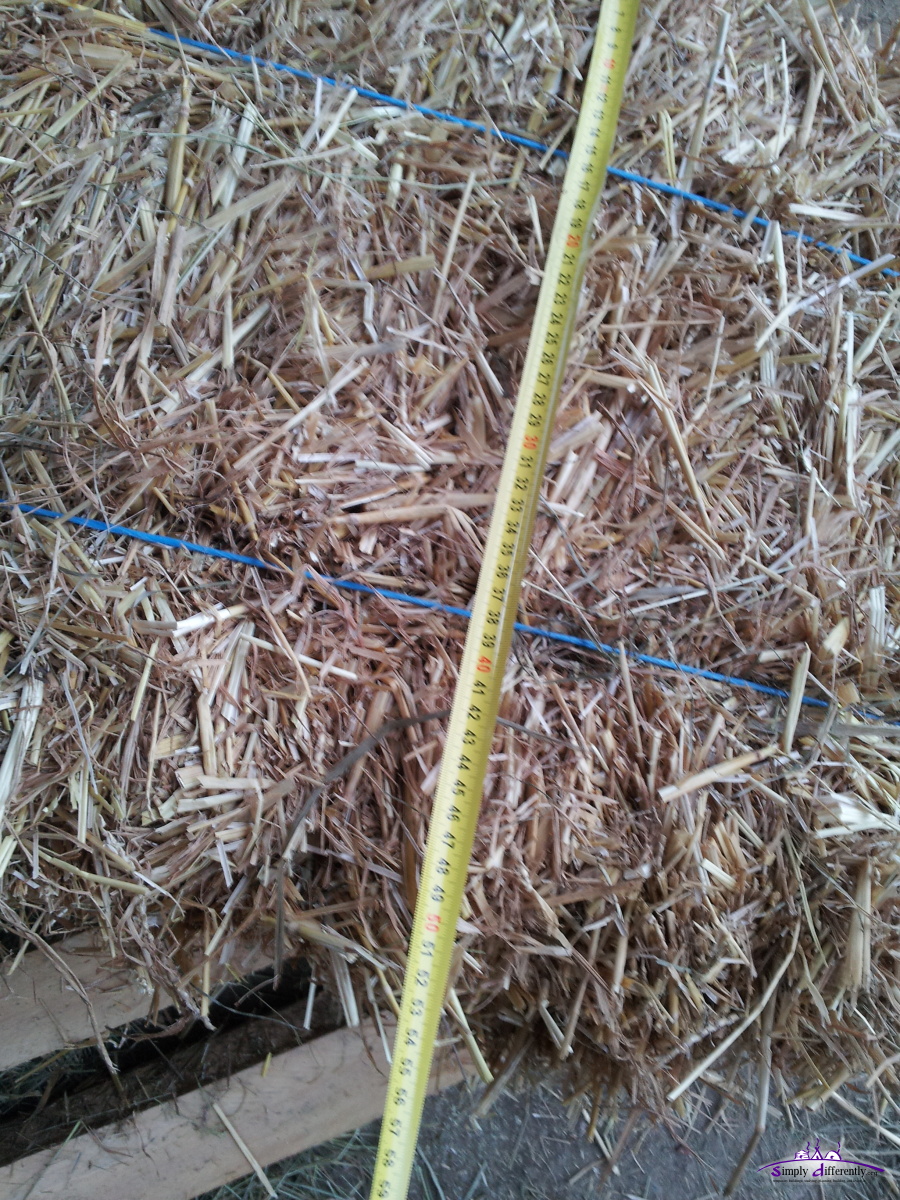
- Width x Height x Depth: 95cm x 38cm x 58cm (0.21m3)
- Cords: 2 (blue)
- Weight: ~15kg (rather loosely pressed)
- Year of Straw: 2013 (2 years old straw)
I call the "Frontside" where the straw is bent, and "Backside" where the straw is cut and the hollow diameter of the straw exposed - the backside will likely reside inside of the cabin, whereas the frontside outside.
The strawbales are made from 2013 straw, and did cost Euro 3.00 per bale, which is rather expensive, as 1-2 months ago straw 100kg was Euro 8 which are 4-5 heavy bales (Euro 2.00), or ~6 light bales (Euro 1.35). I've got also got rather light bales, apprx. 15kg. The farmer informed me, if I told him ahead, he would have pressed heavier and compacter bales for me.
About 10% of the bales are misaligned, and the two cords no longer straight, so I expect to "fix" some of the bales again. Based on the photos you see about 9 layers pressed together - the farmer told me he pressed based on 100cm and the final length of ~90cm came from compression. I also expect about 2cm loss of height when compressed per layer.
So, based on the measure of a sample strawbale I need:
- Width 615cm / 90cm => 7 bales x 2 = 14 bales
- Depth 405cm / 90cm => 4.5 bales x 2 = 9 bales
- which results to ~23 bales per layer
- Height ~210cm / 35cm (compressed) => 6 layers
which results in 6 x 23 bales => 138 bales, about 5 x 3 bales are not needed for door and two windows, which makes 123 bales in total, or apprx. 123 x 15kg = 1.8 tons weight.
Now, the coming week are 1-2 dry days, other days it's exected to rain, so there is enough time to raise the walls, as I expect as my first strawbale cabin I require apprx. 2-3 consective days without rain and fog to raise the wall and assemble the ceiling. The roof can be postponed for a few days.
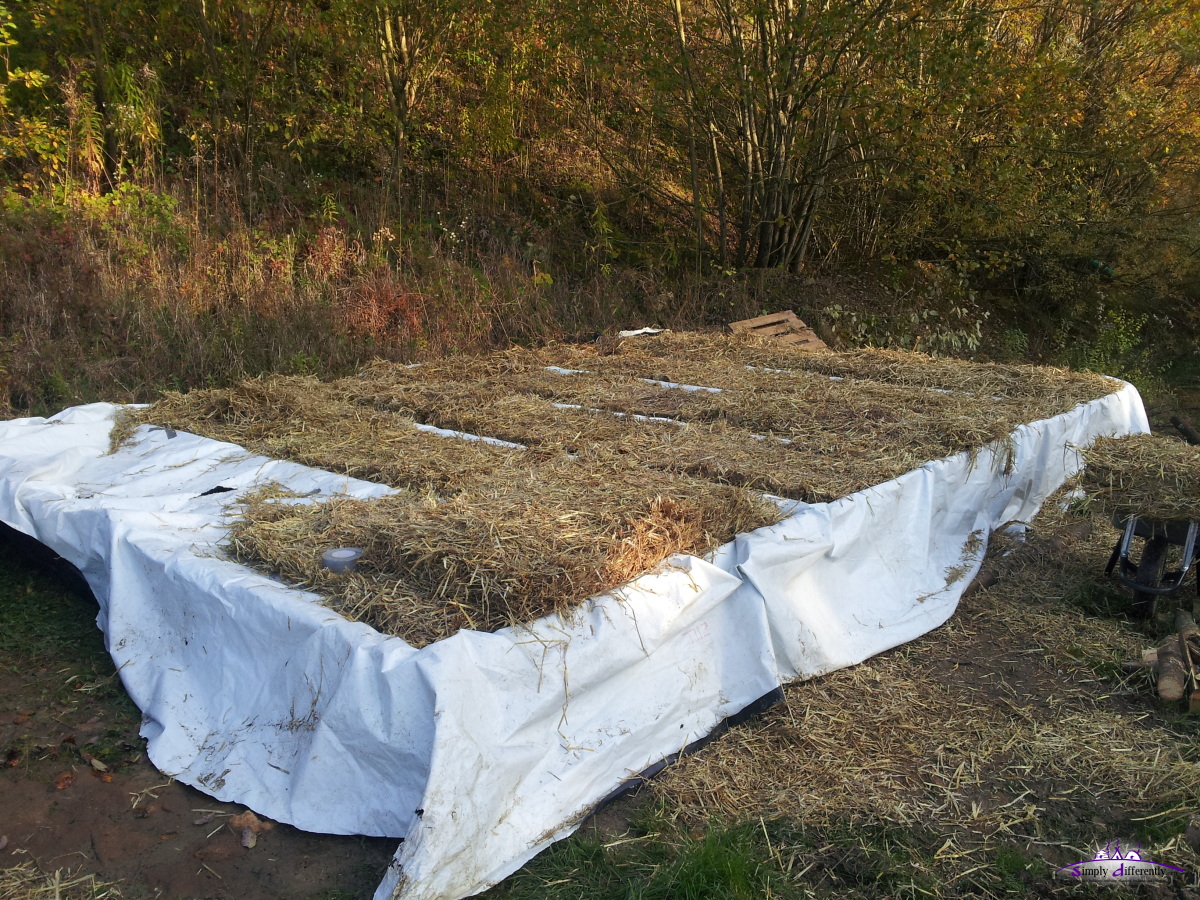
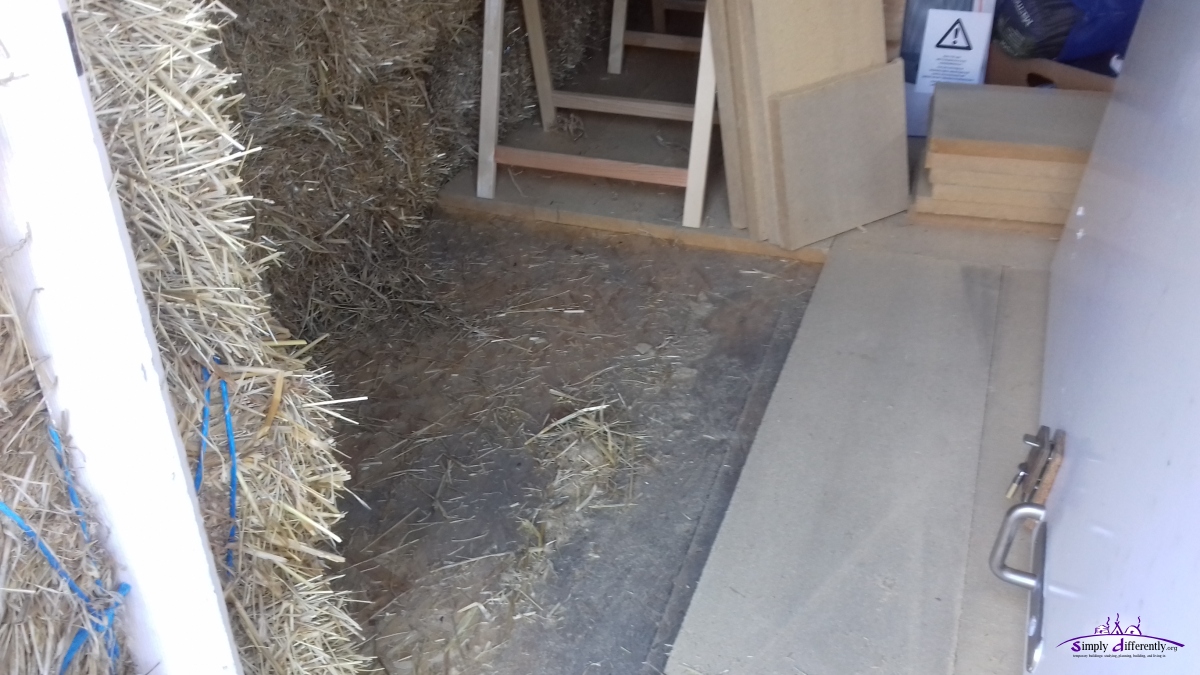
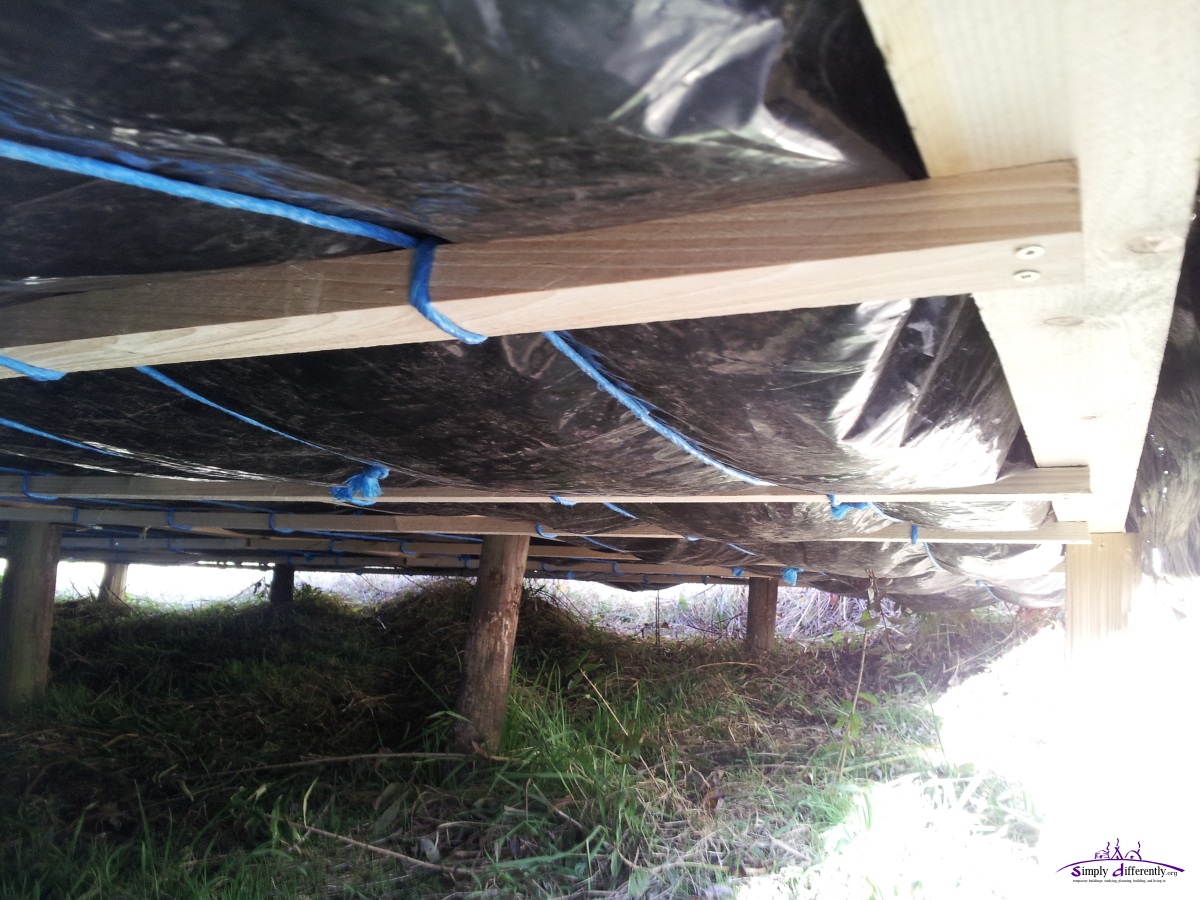
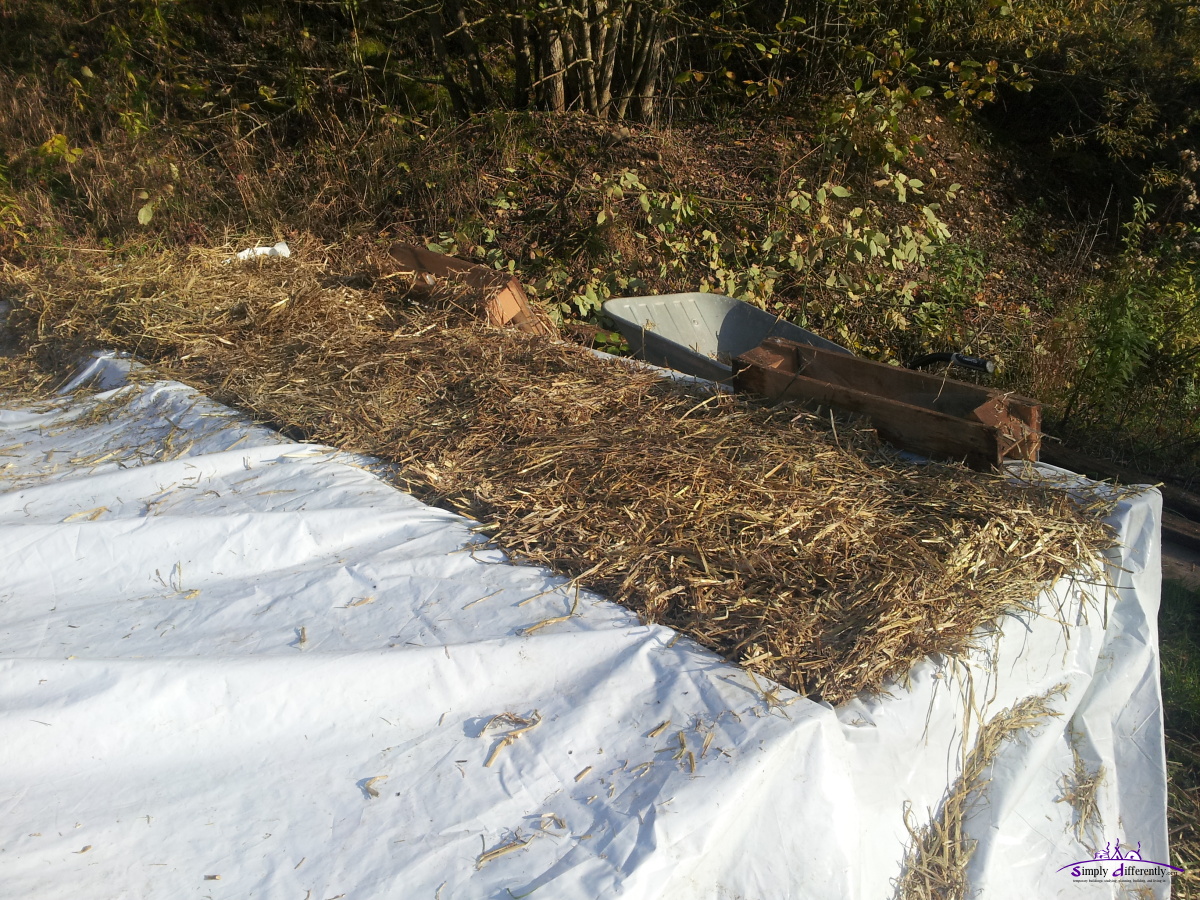
2014/11/07: Fixing Floor Insulation
  Taking out wet straw insulation, and replace with dry one |
2014/11/06: Rainy Days
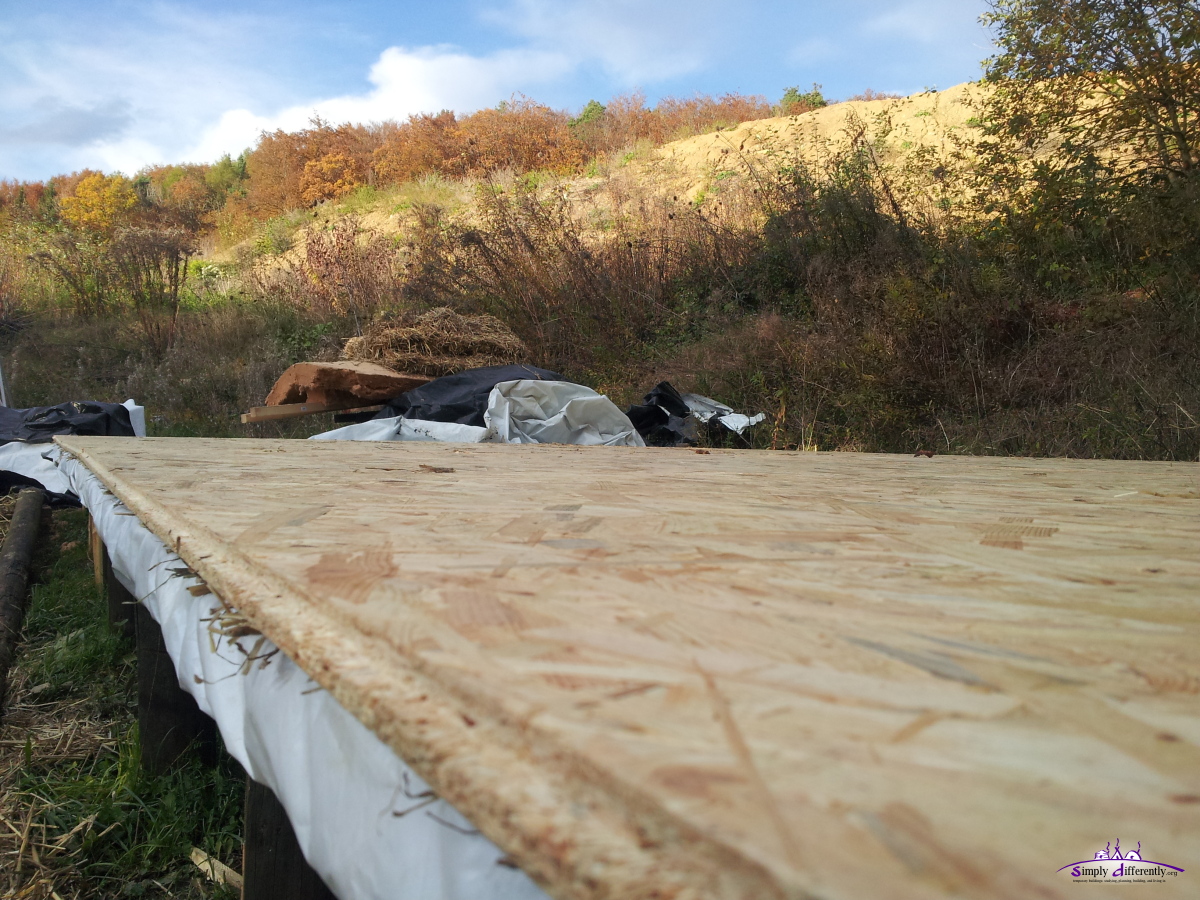
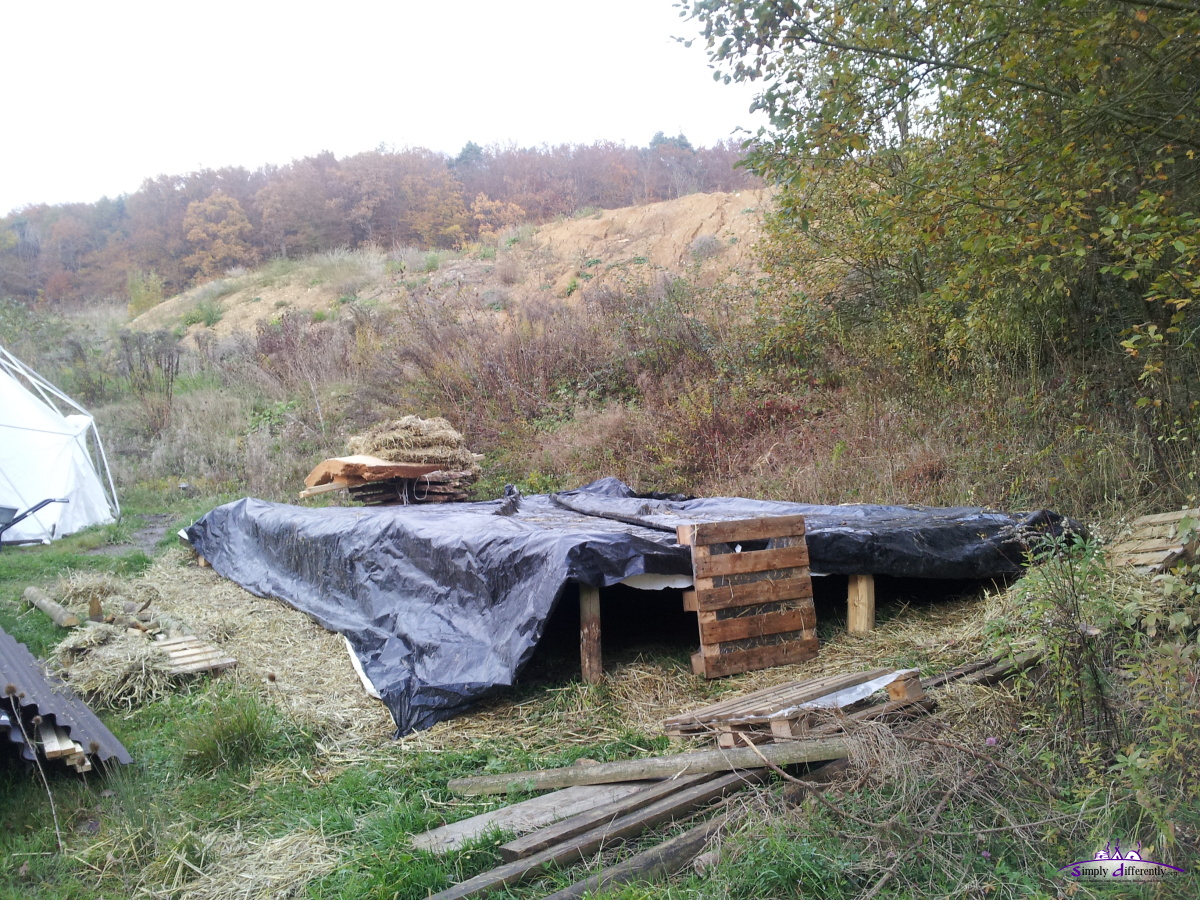
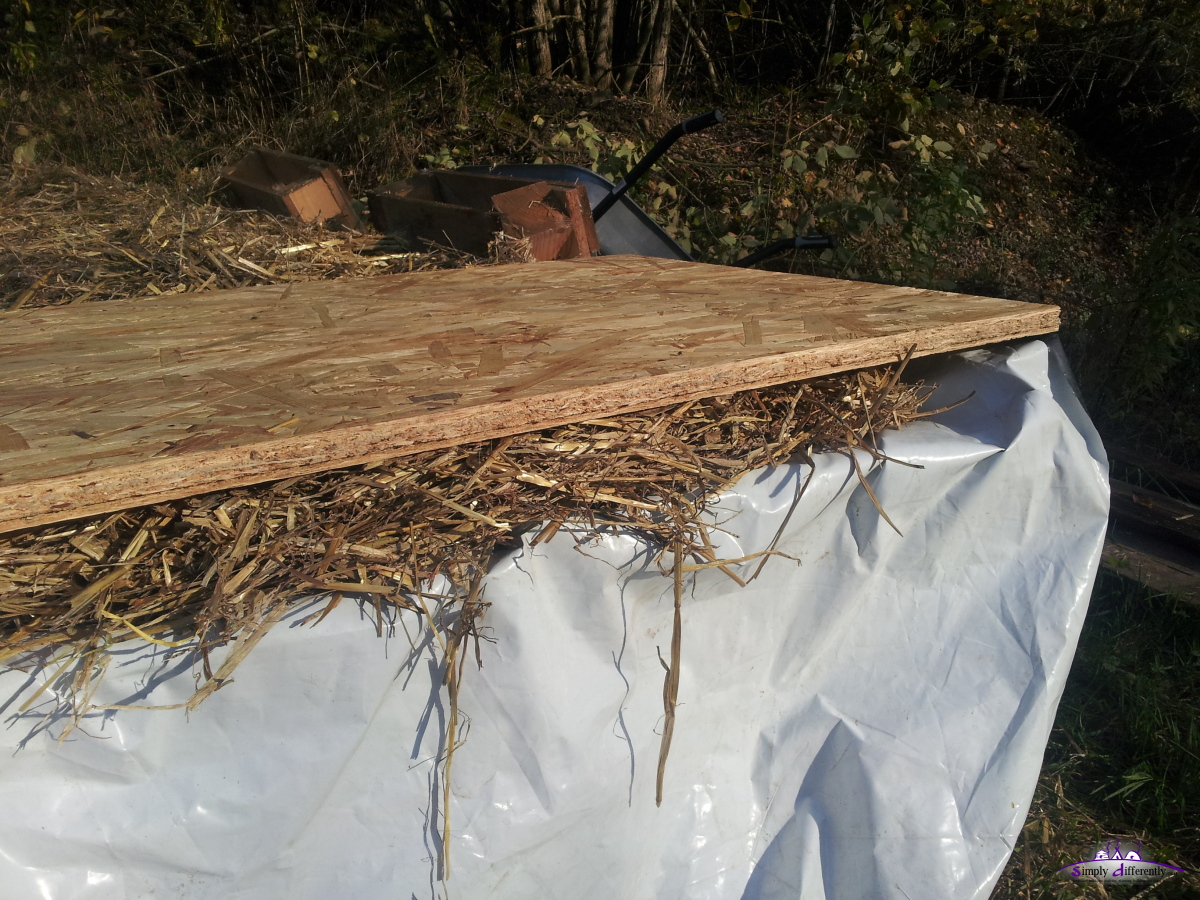
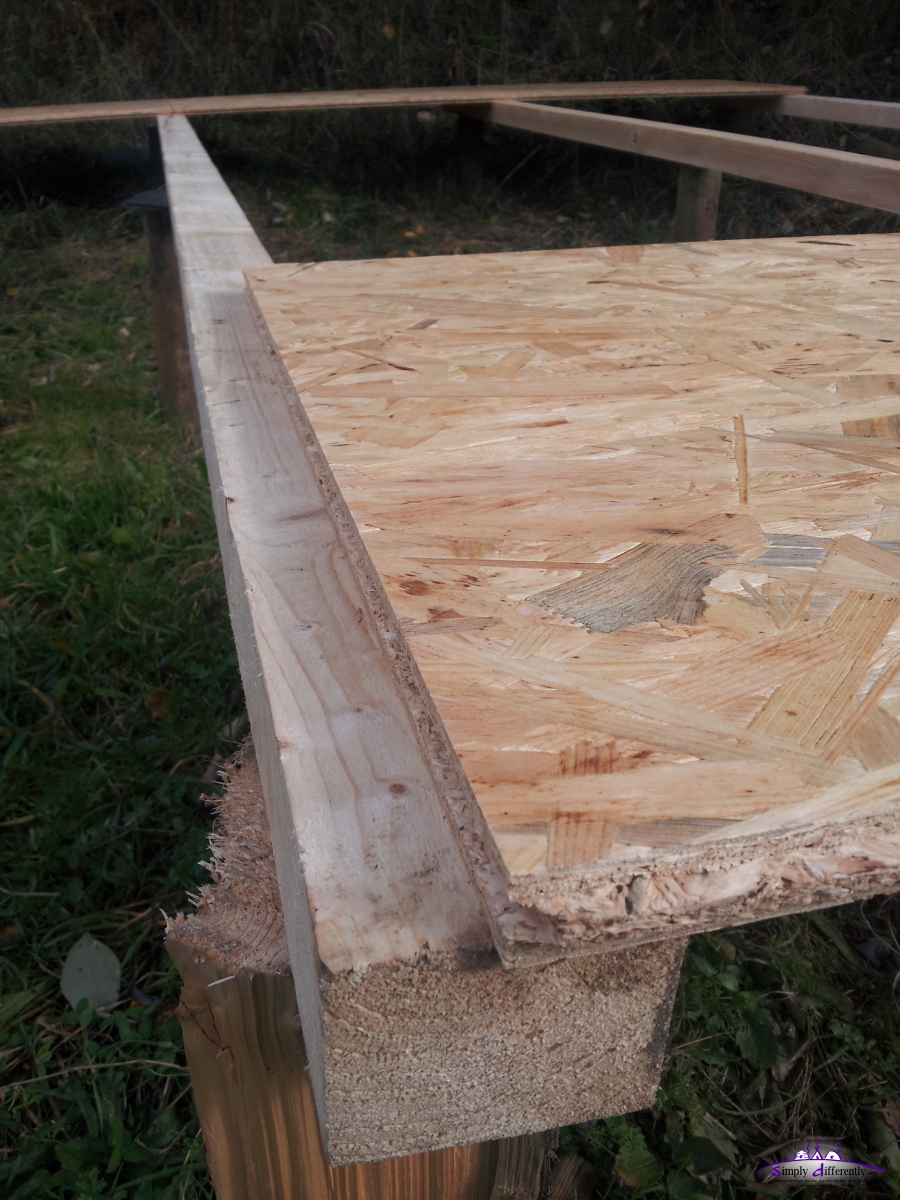
Last night it began to rain intensesivly, and one of the bitumen parts bent so some rain water leaked on the new floor and through to the straw insulation, and due to the humidity blocker, could not run away - so I relieved it by poking some holes into the PVC. Yet, I have to remove some OSB and replace the humid or wet insulation straw, before I can continue. The next days will by foggy and partially also rainy - let's see how things go.2014/11/04: Floor Finished
 |
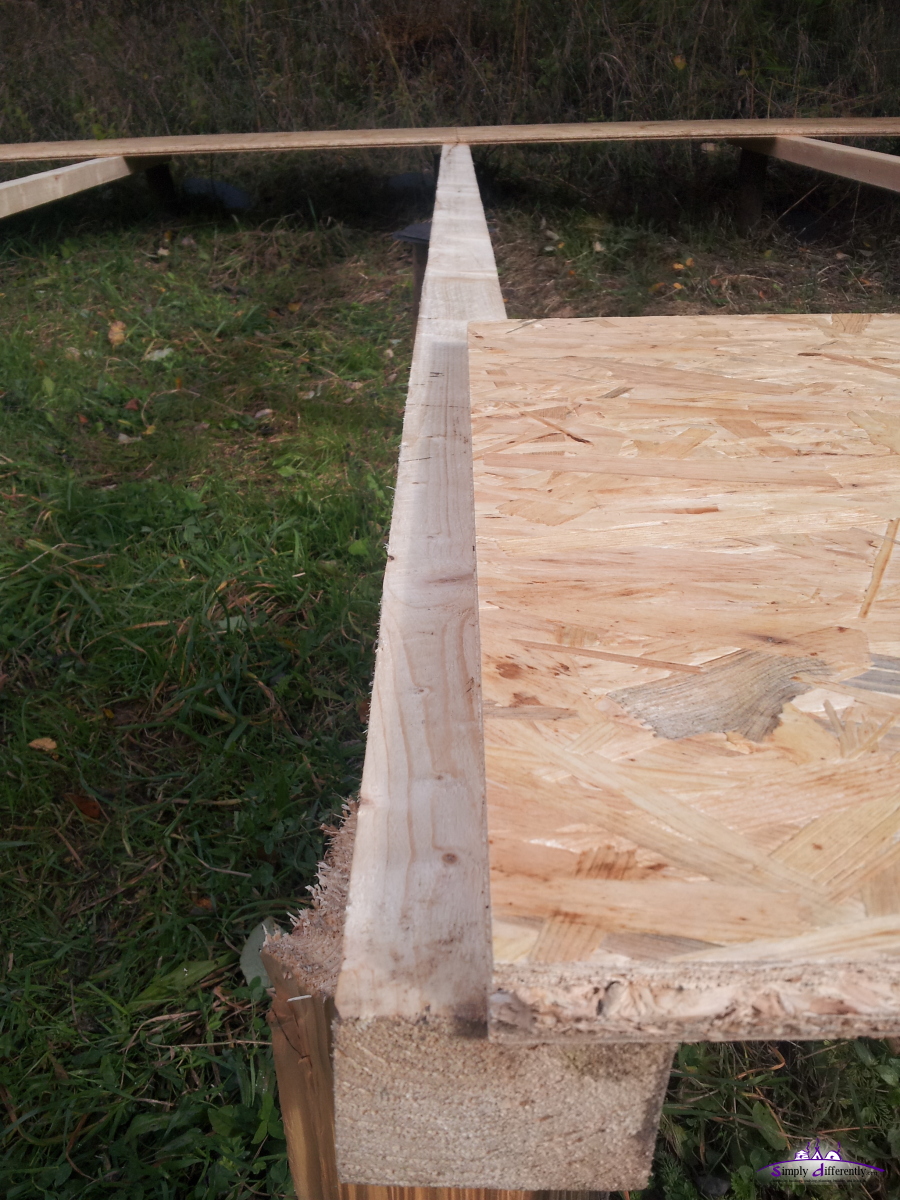
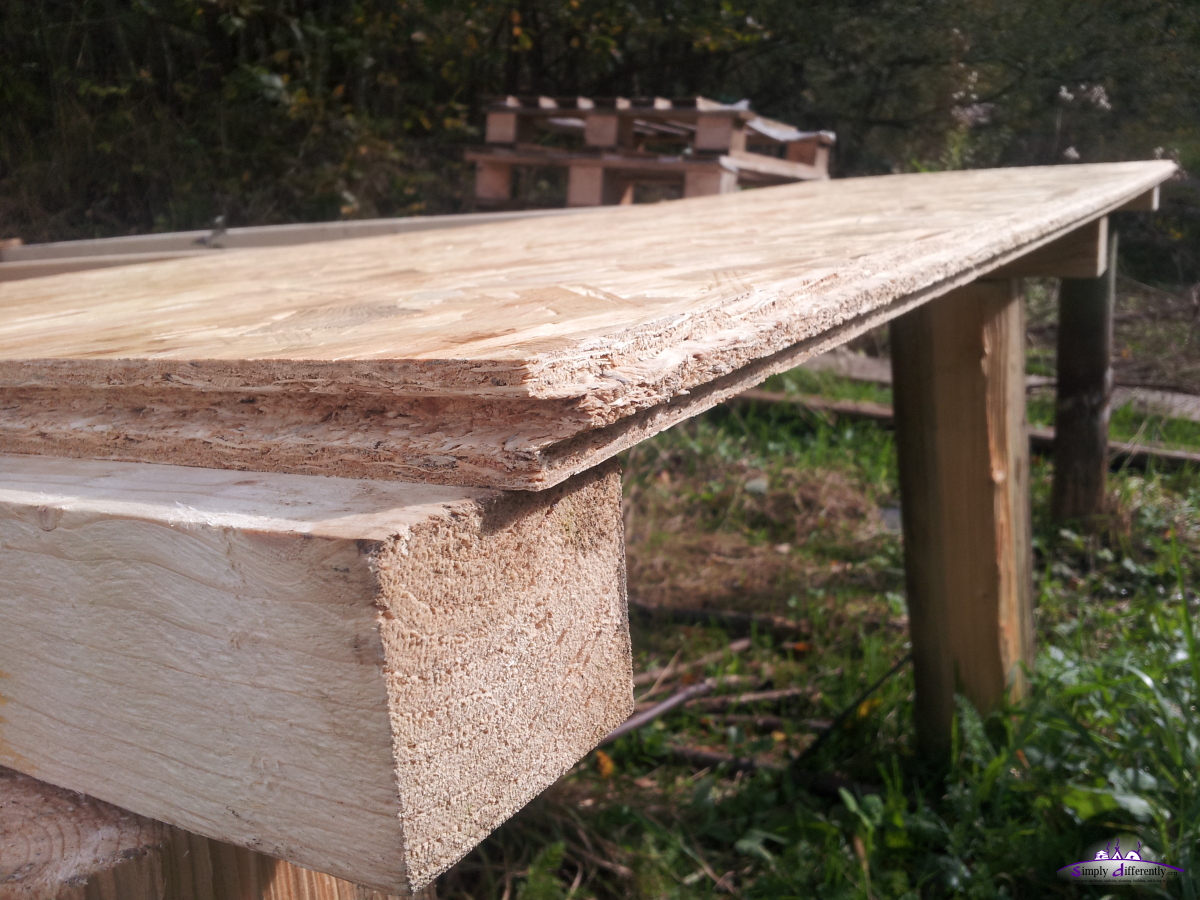
I positioned the OSB as perfect as possible, there were some 1mm gaps at max but mostly I could pushed them closely together, and drilled 35mm screws on the 4m beams underneath, 4 screws per OSB.
As next I cut off the PVC left over and wrapped it under a bit. In order to prepare for the next 1-2 days with some rain expected, I used the bitumen roof parts to cover the floor, as the PVC cover has some holes which would leak water on the floor.

2014/11/04 14:07
2014/11/04 15:34

2014/11/04 15:35
2014/11/04 15:35
2014/11/04 16:46
Tomorrow are finally the strawbale expected, hopefully - yet, the weather as mentioned won't be supportive to continue with the construction, so I wait for 2-3 day window to raise the walls. Once the walls (and door and 2 windows) are raised, the ceiling can be done quickly, and then, so far my plan, construct the roof on top of the ceiling within a day.
2014/11/03: Floor (Continued)
Adding and removing some straw to level it properly, and roughly position the OSBs: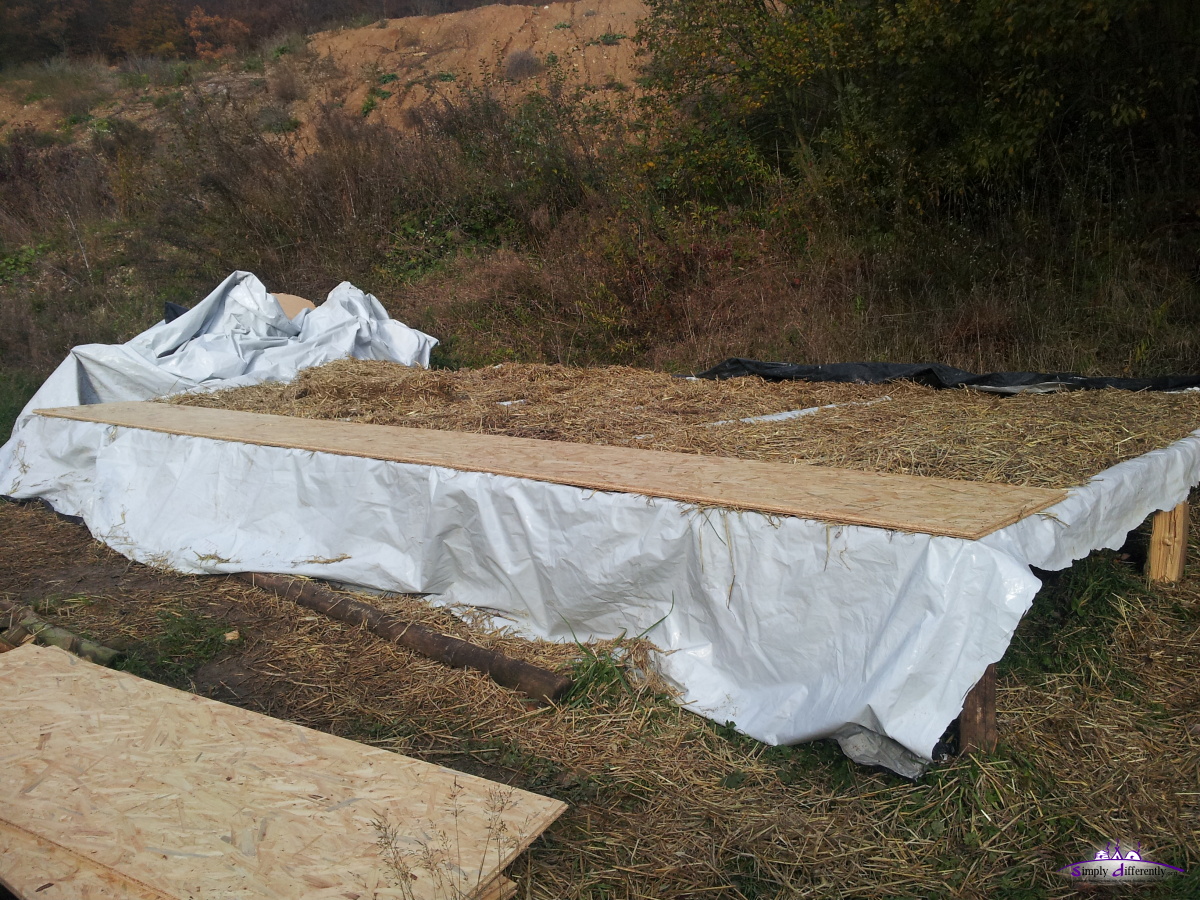
2014/11/03 14:18

2014/11/03 15:48
2014/11/03 15:56
2014/11/02: Floor (Continued)
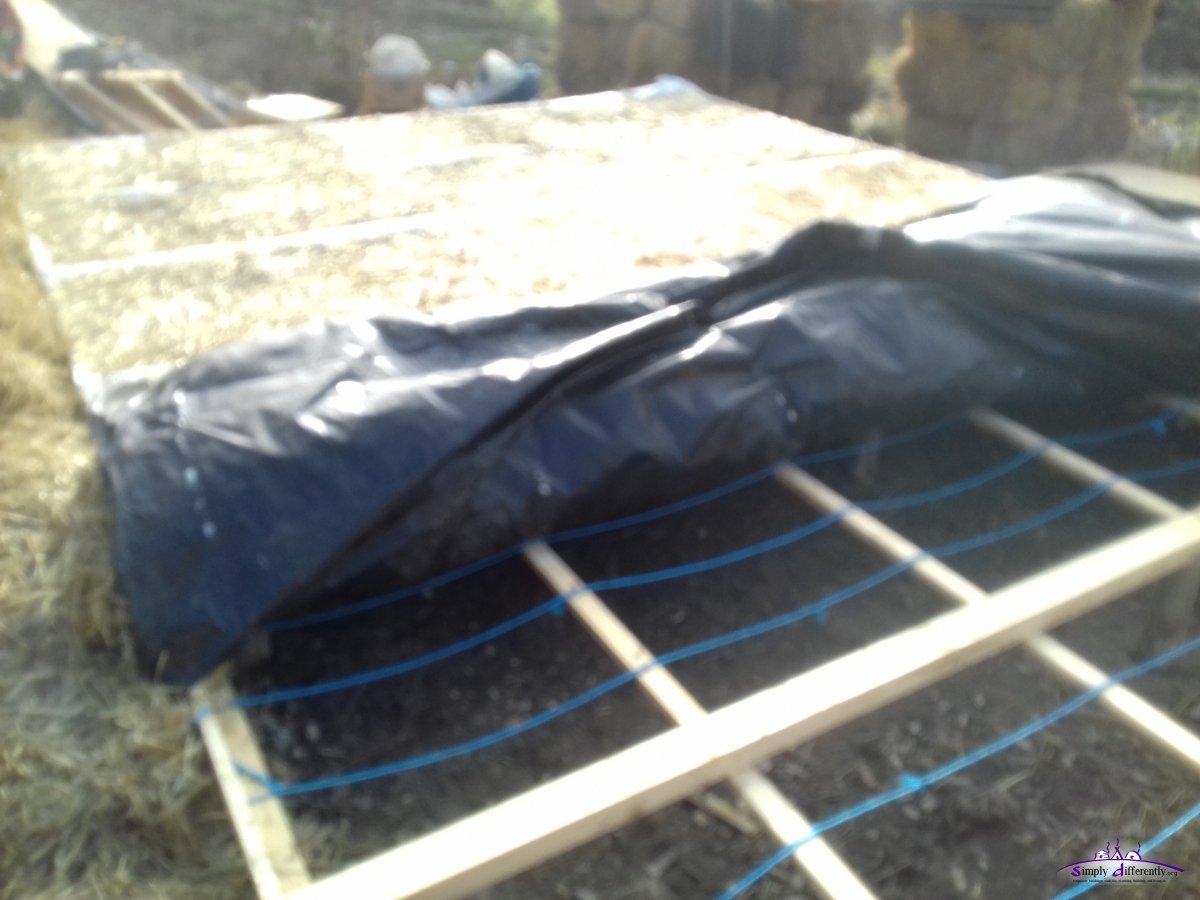
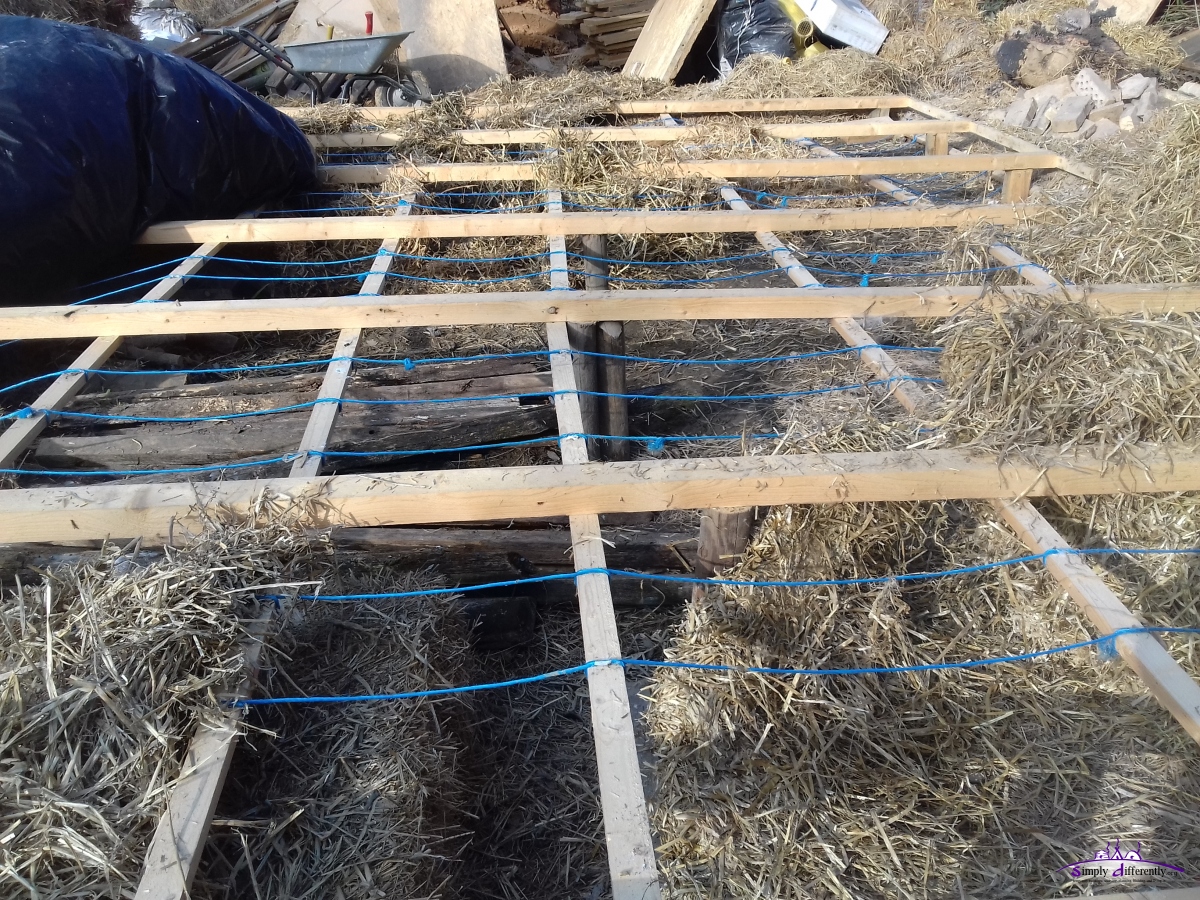
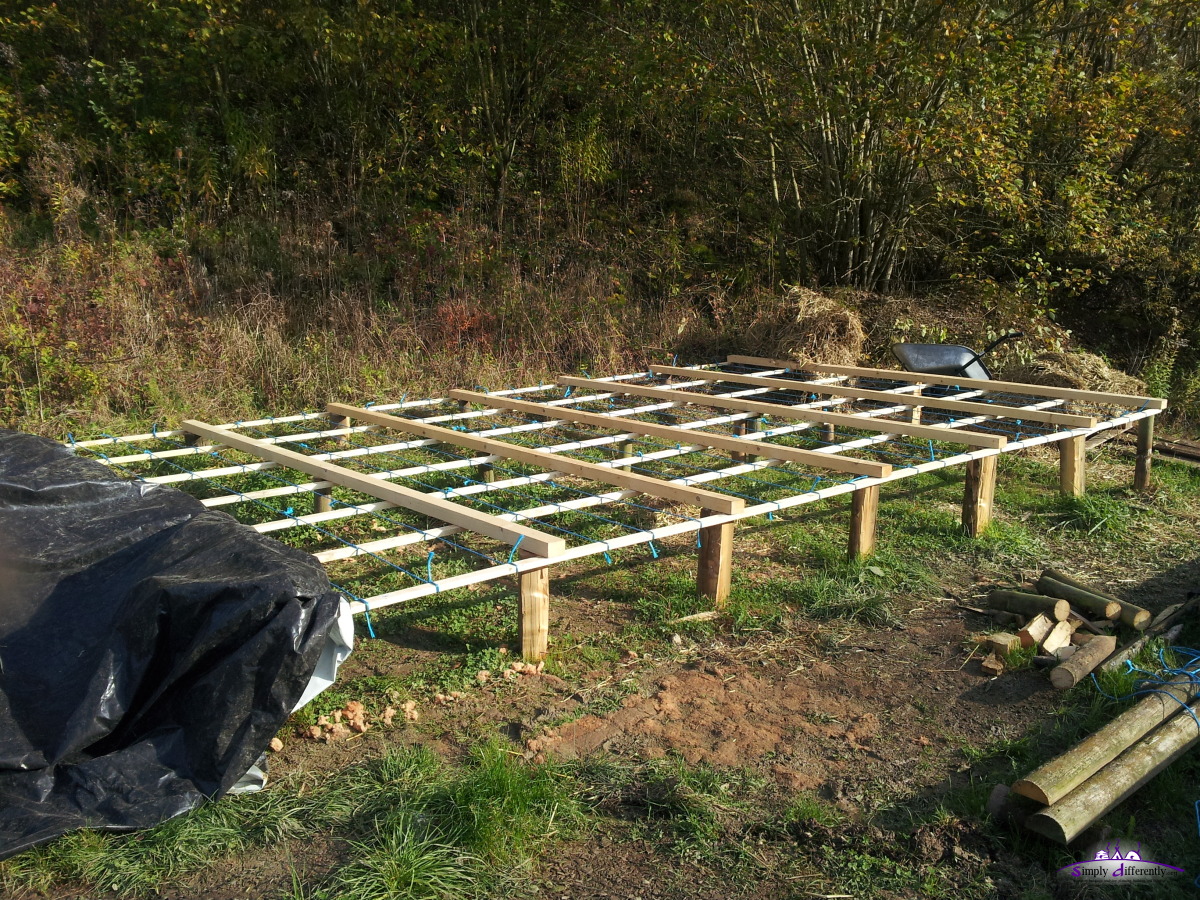
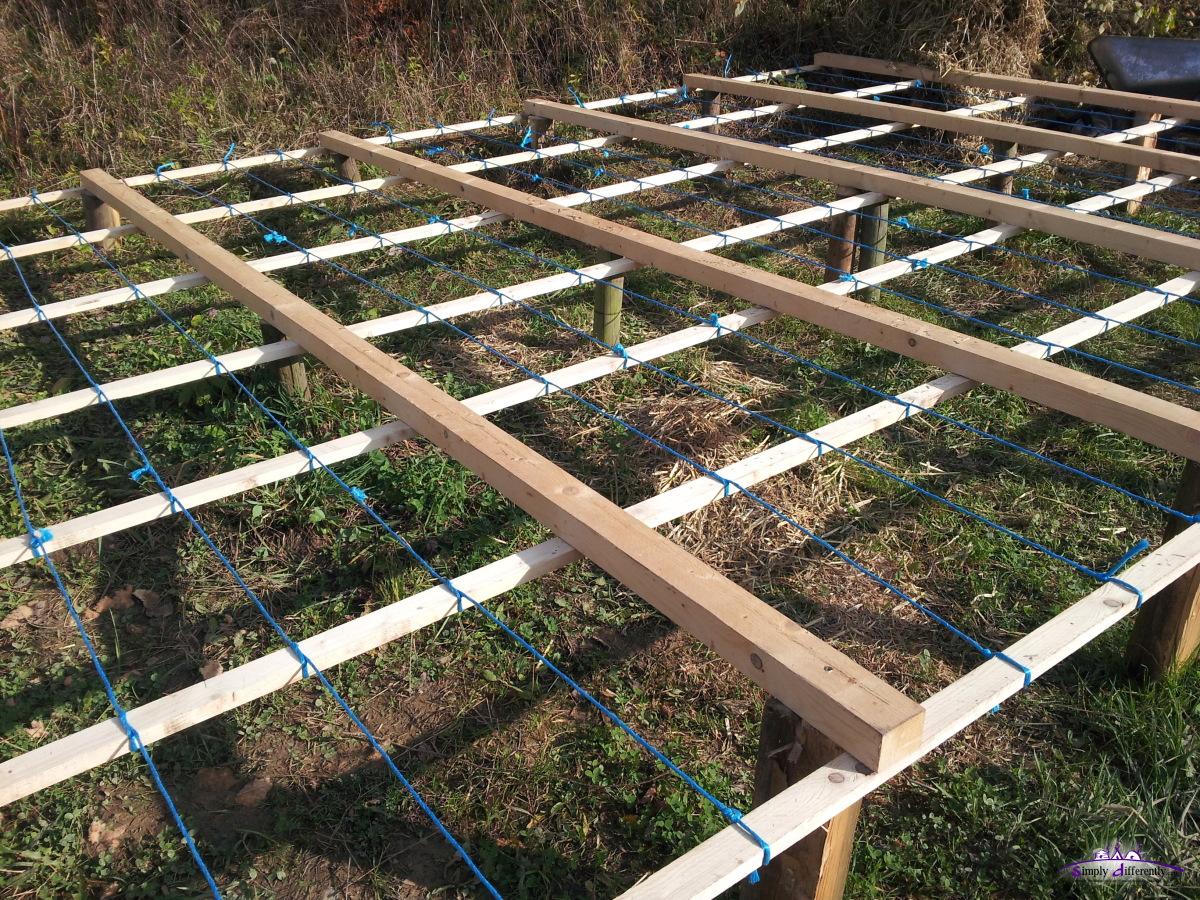
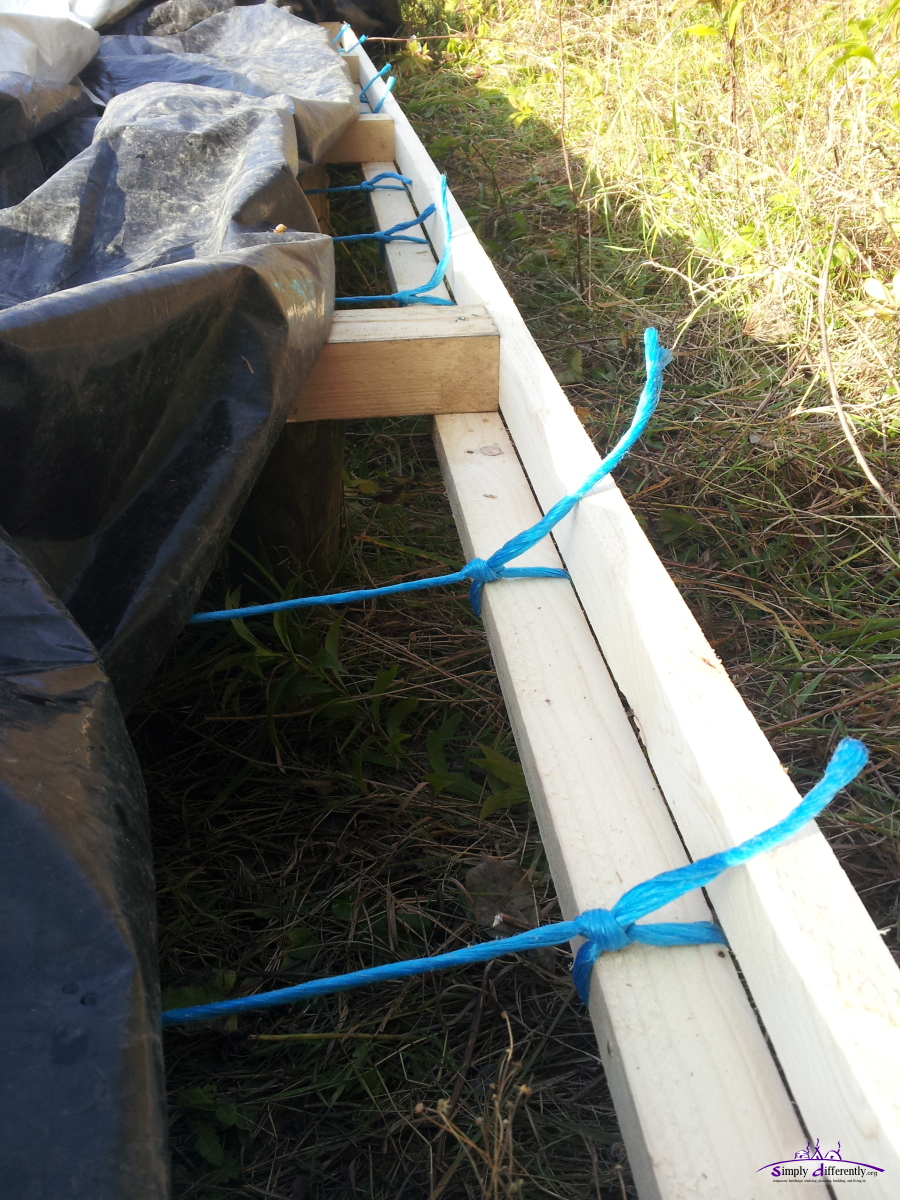
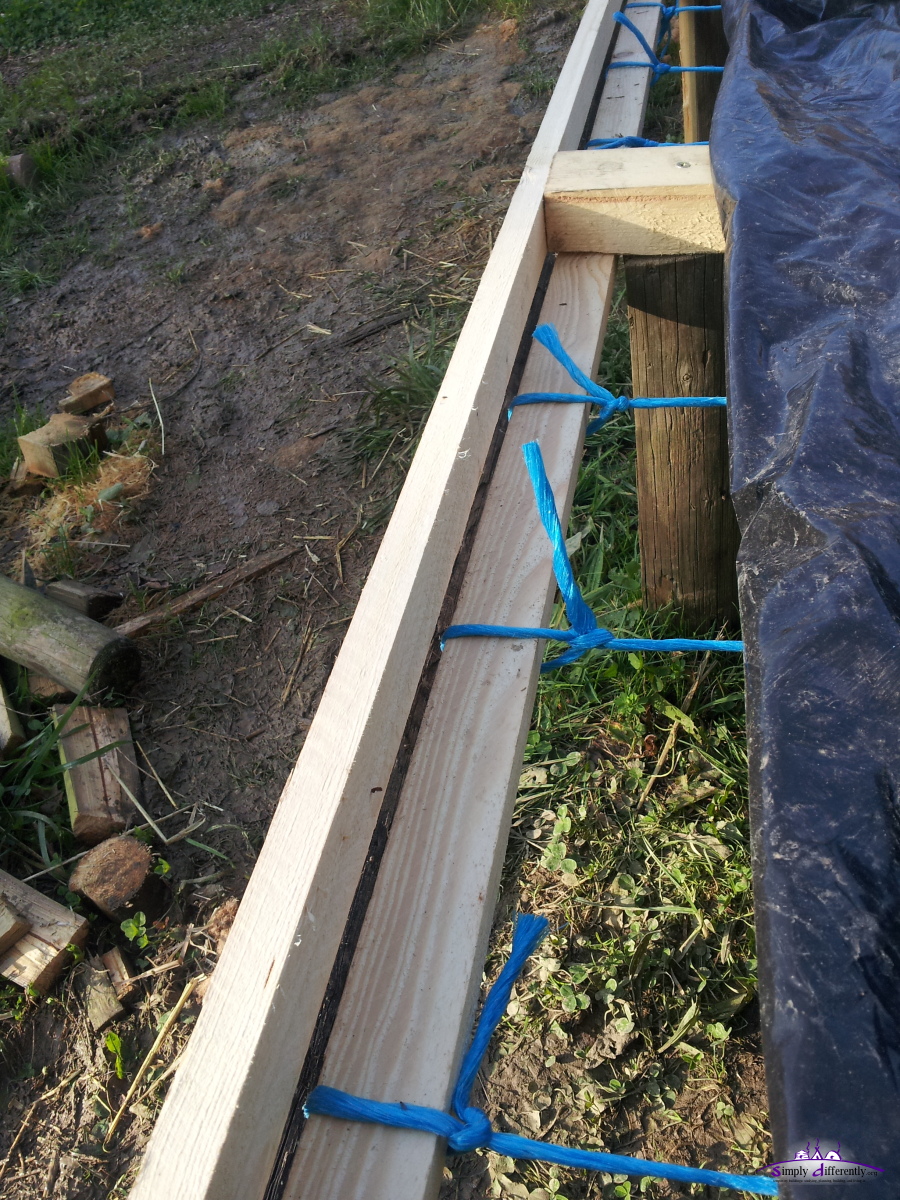
Since the wooden strut as enforcement turned out too thick under the floor insulation, I came up with the idea to use cords to wave a kind of net in between, then the PVC cover, and then the pressed straw layers: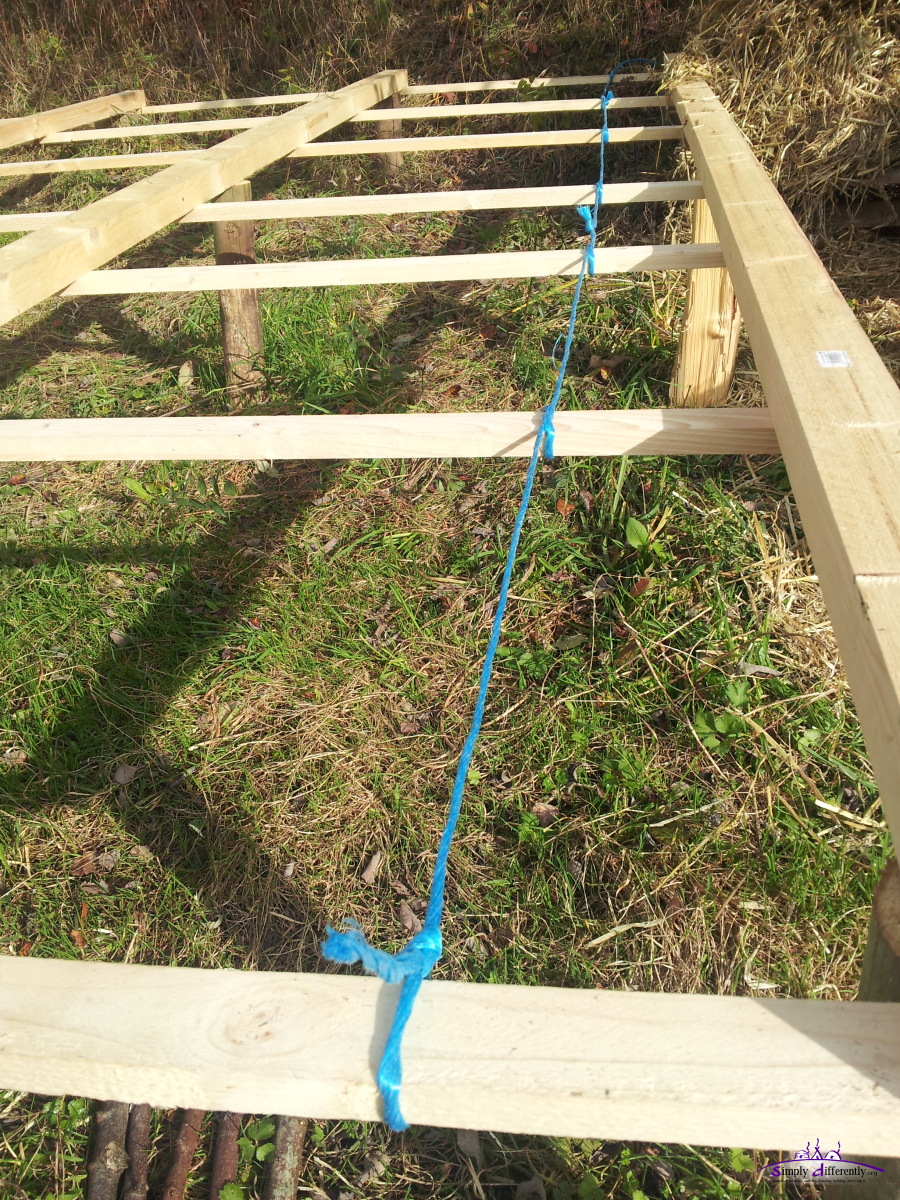
2014/11/02 13:16
2014/11/02 14:02
2014/11/02 14:02

2014/11/02 14:02
2014/11/02 14:36
2014/11/02 14:41
2014/11/02 14:42
2014/11/02 14:52
2014/11/02 15:07
2014/11/02 15:29
I'm going to loose the pressed straw layers so they use up more volume, yet, the OSB can easily press it again, to make sure entire dedicated space is filled with straw.
It's quite foggy at mornings, around 12:30 to 13:00 the sun penetrates the fog and disolves the remaining fog, until 15:30 I have direct sunlight, afterwards the sun sets behind the trees and humidity falls on the surface - so limits the time to work on the cabin to about 2-3 hours per day.
2014/11/01: Floor (Continued)
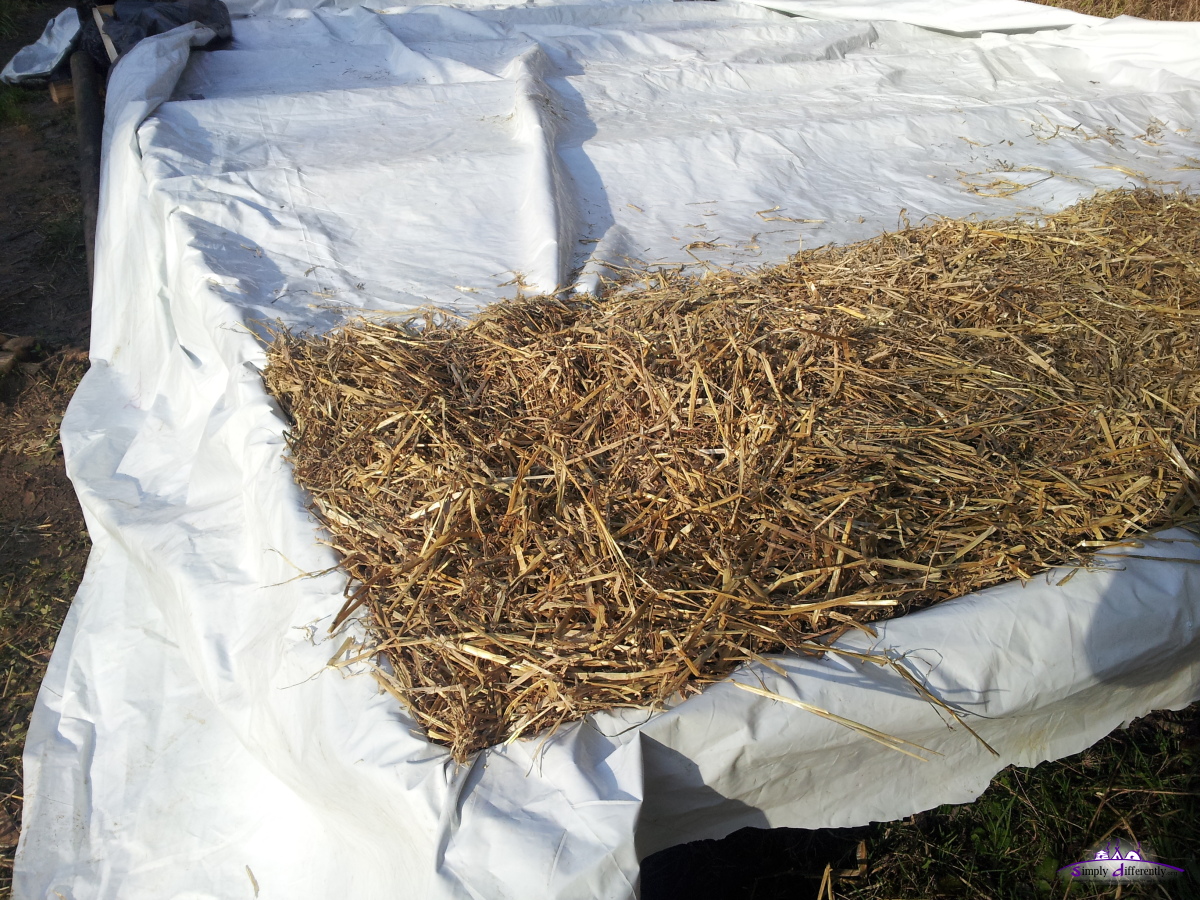
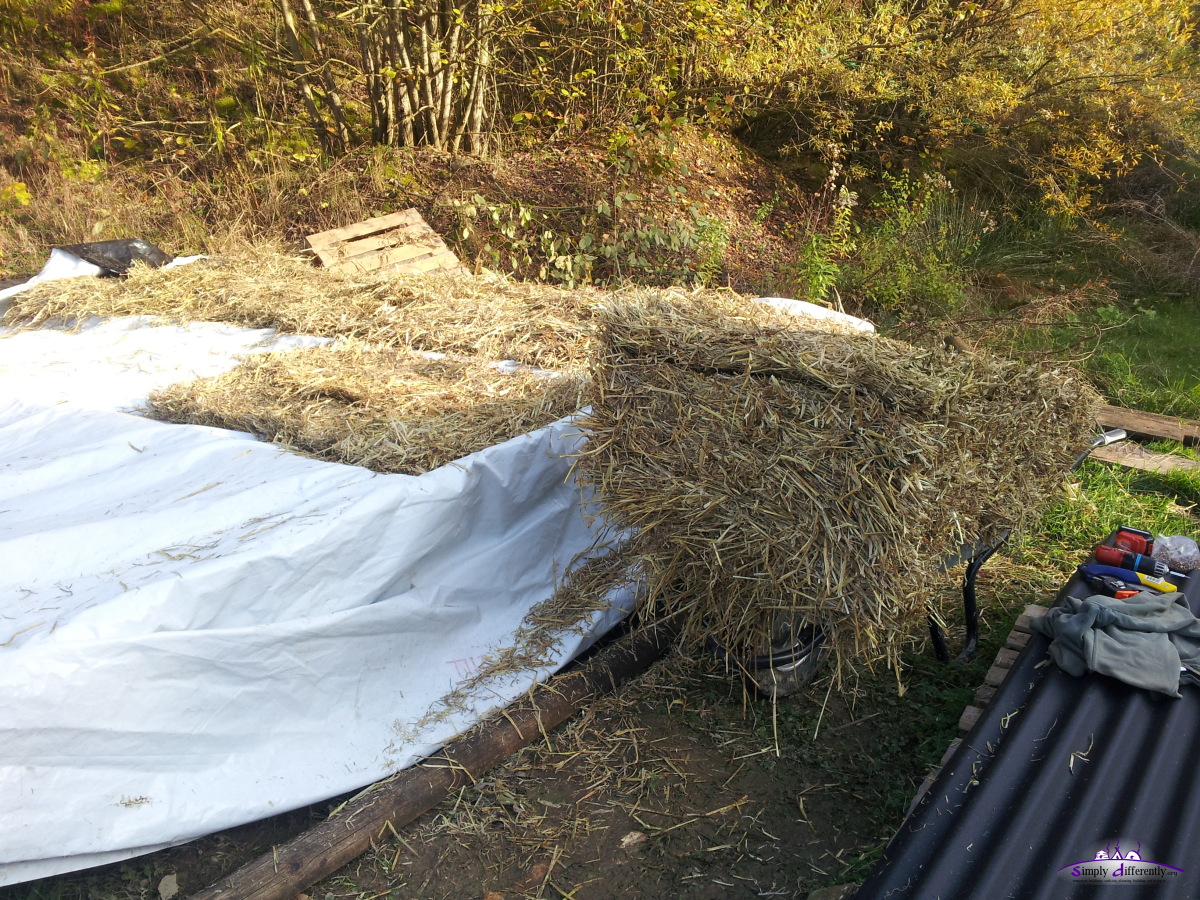
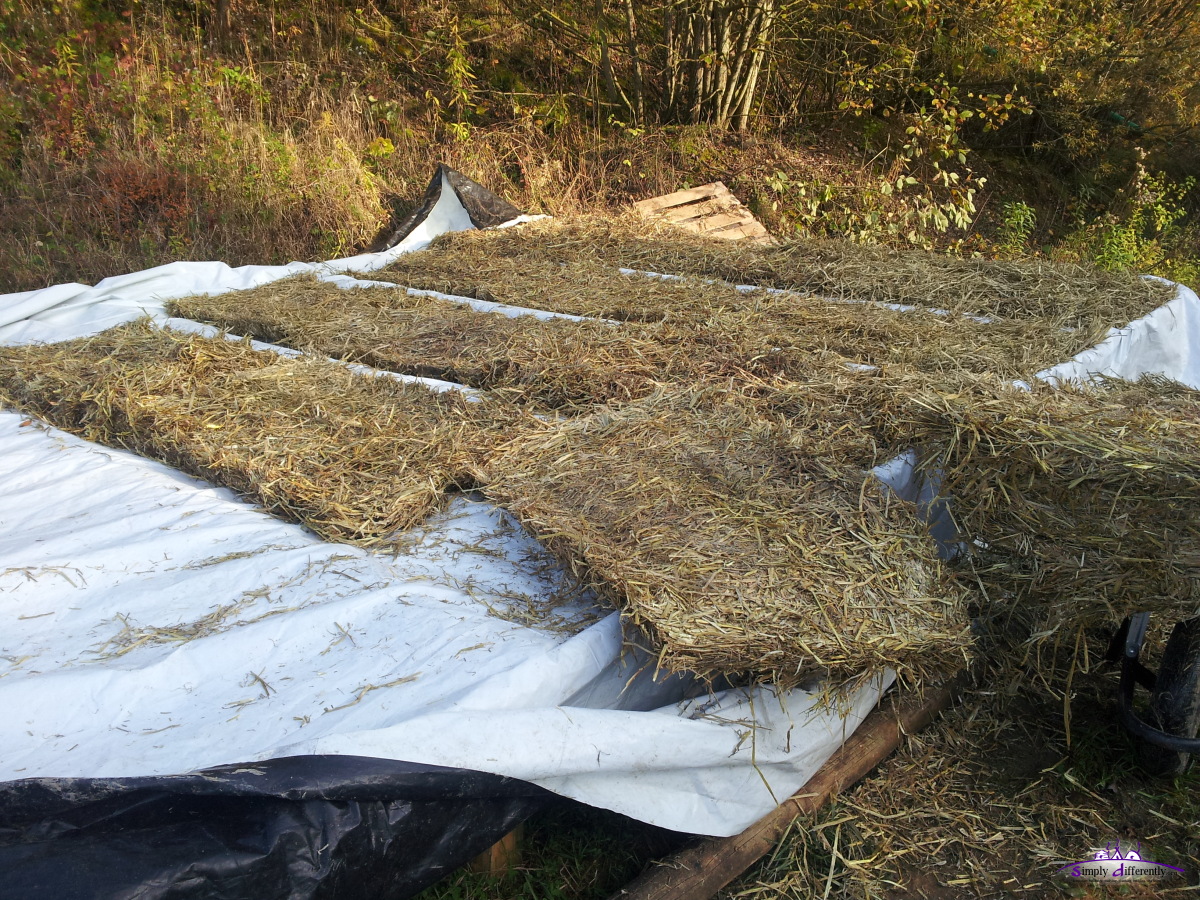
Today I laid a strong PVC canvas over the grid, and laid some straw over it - the pressed straw layer from a large strawbale (1.5m x 0.8m x 0.6m ~ 400kg) is about 90cm wide, and 8cm thick pressed, ideal for my use case. I used 3 layers for one "lane" of my grid. Some additional support is required which I will do with cords tomorrow.
2014/11/01 14:34
2014/11/01 14:34
2014/11/01 14:39
2014/11/01 14:46
2014/11/01 14:46
2014/10/31: Floor (Continued)
I finished the supporting grid for the insulation, and tested with some China Grass based insulation matt - unfortunately it's a bit too thick for my use case: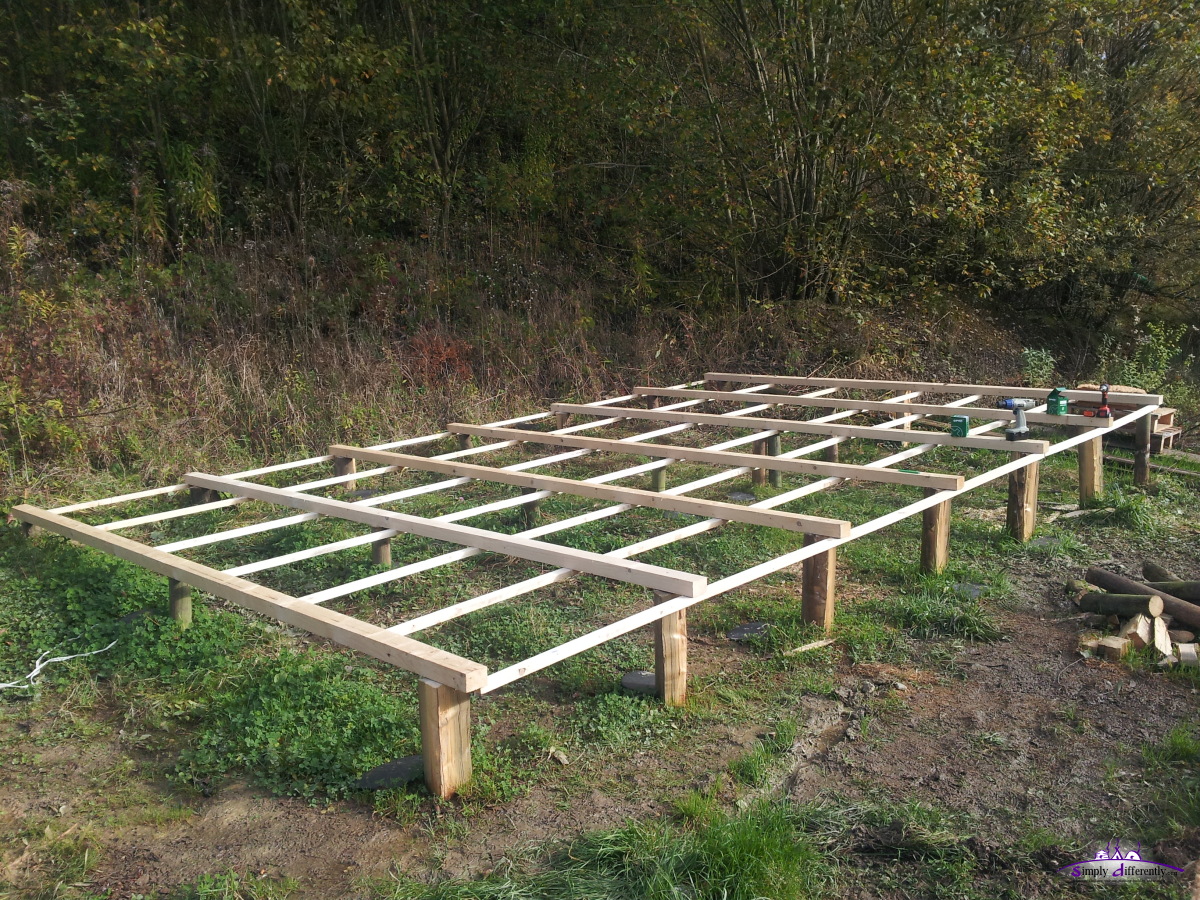
2014/10/31 14:00
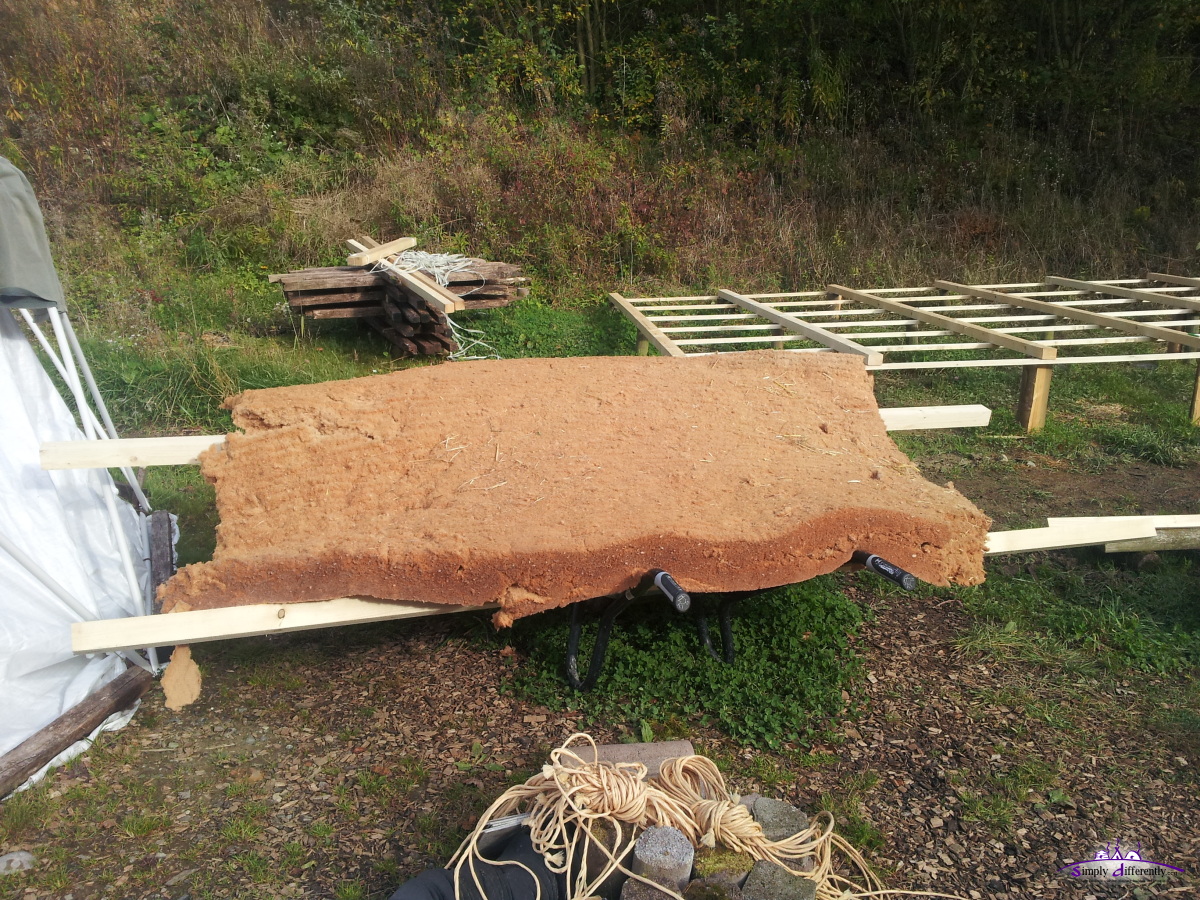
2014/10/31 14:01
2014/10/31 14:23
2014/10/30: Floor (Continued)
I used smaller struts and attached them beneath the main floor beams, to prepare the floor insulation:
2014/10/29 15:01


The idea is to use some plastic and then put the insulation on it and then the floor 22mm thick OSB.
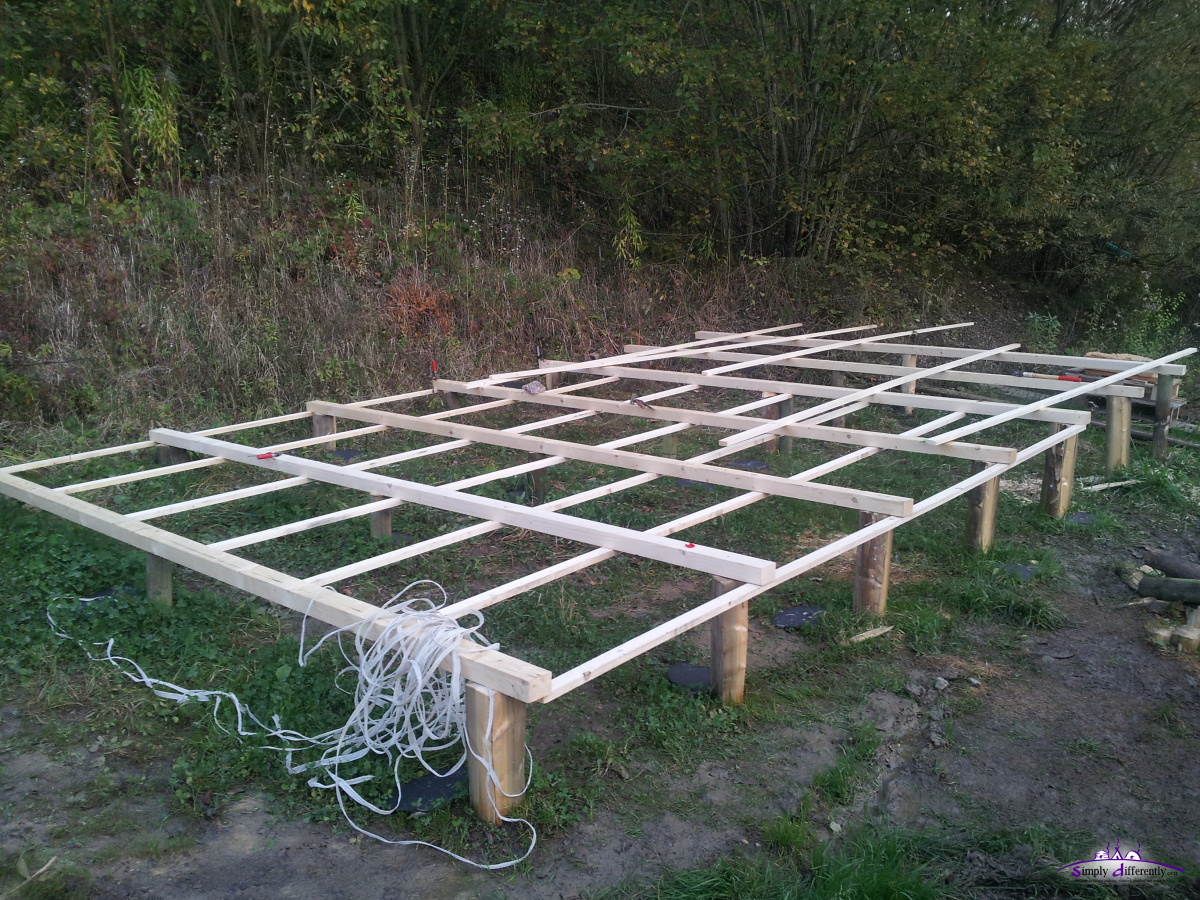
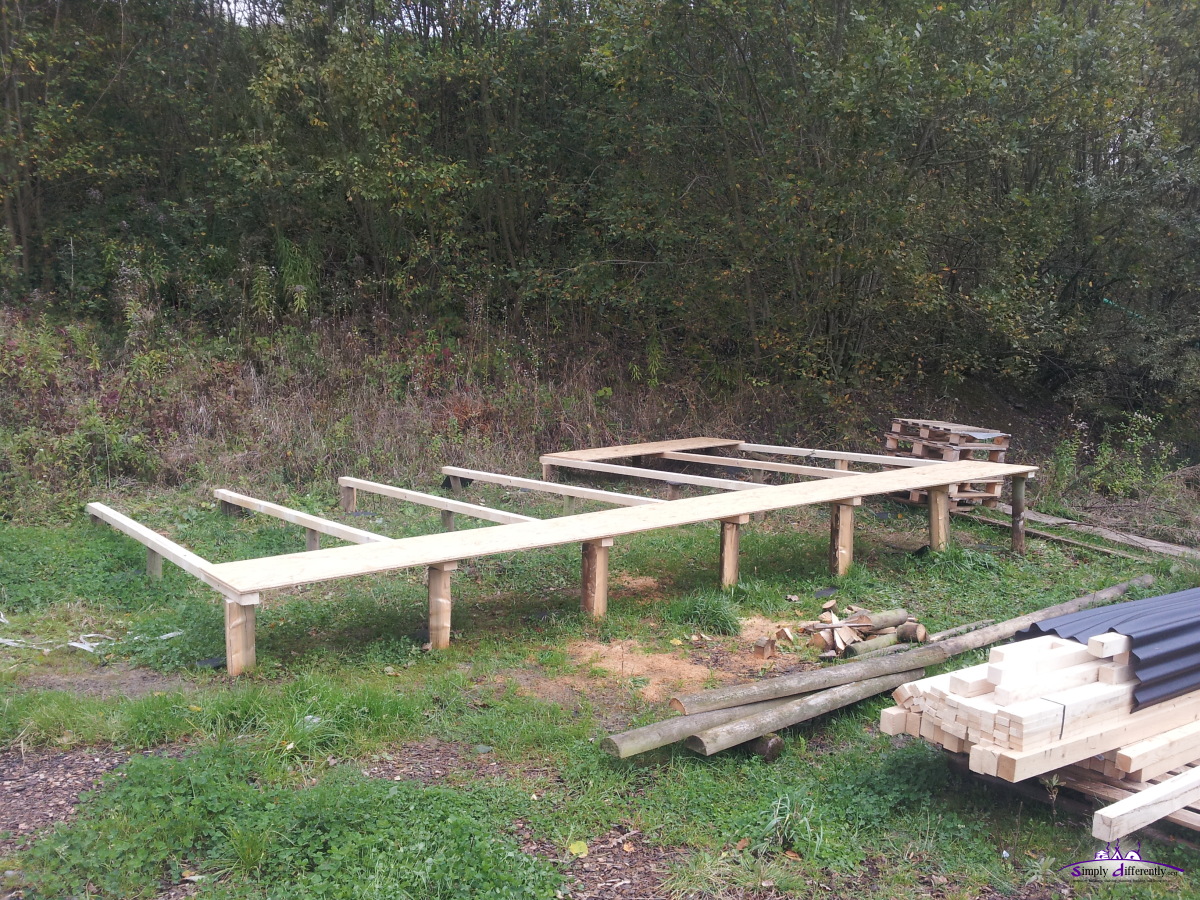
2014/10/24: Floor
The strawbales should arrive within the next week, so I decided to continue with the floor construction:
- precisely aligned the beams, properly parallel with perpendicular alignment for the OSB, +/- 1cm correctness is mandatory, as I don't have much margin
- fixated the 4m beams with 80mm long screws

2014/10/24 13:27
2014/10/24 13:44
2014/10/24 13:57
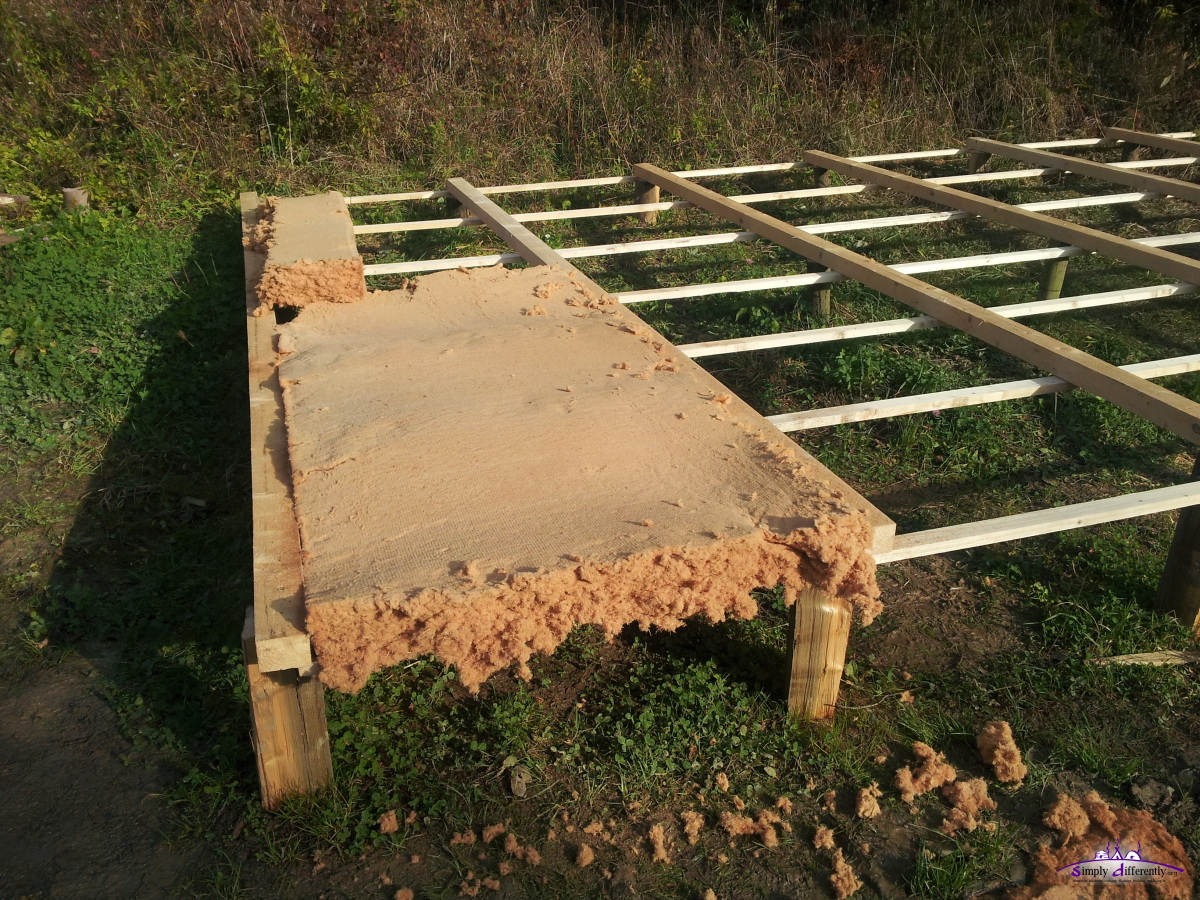
Where I am there are spare insulation material, apprx. 3m x 1.2m and 30cm thick and soft, when transporting they tend to "break" - I gonna try these, and if they don't work I gonna use loose straw to fill the space.
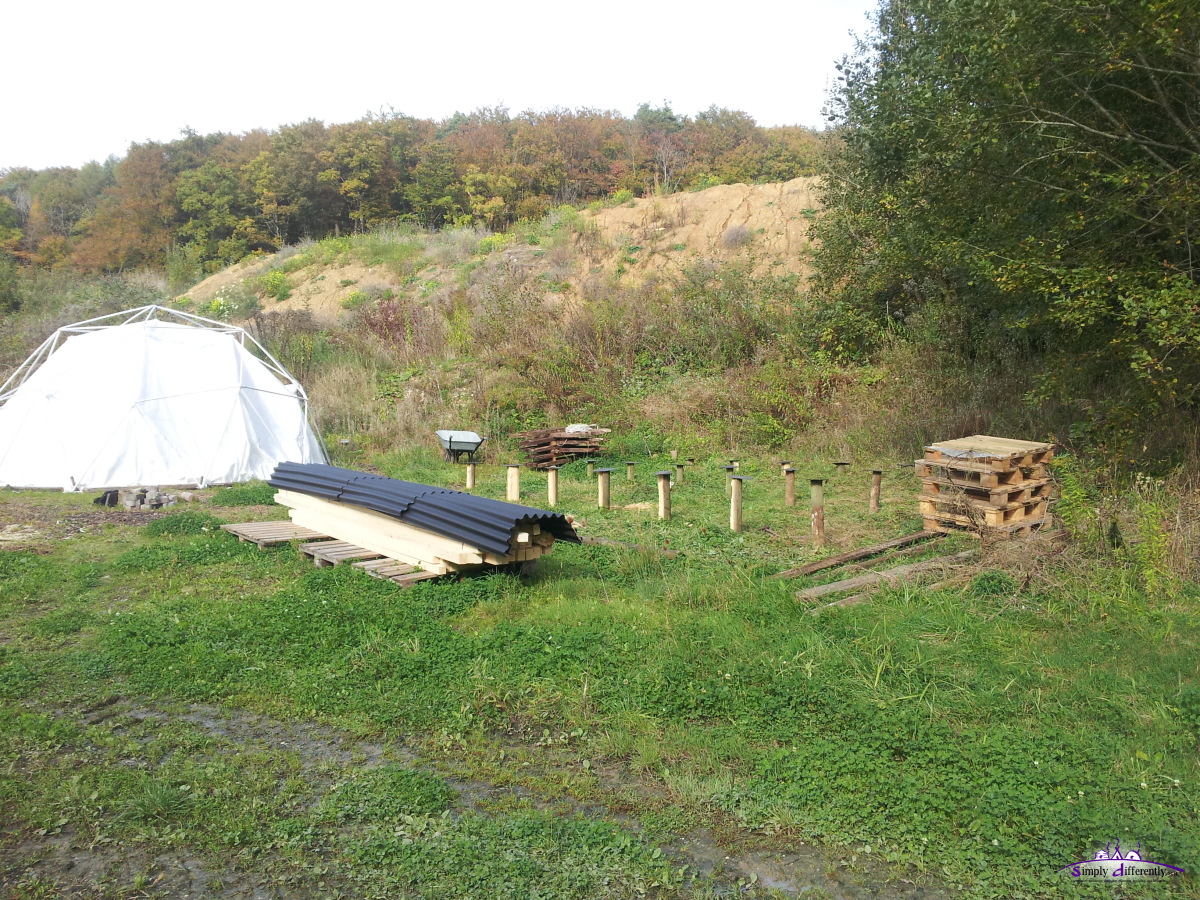
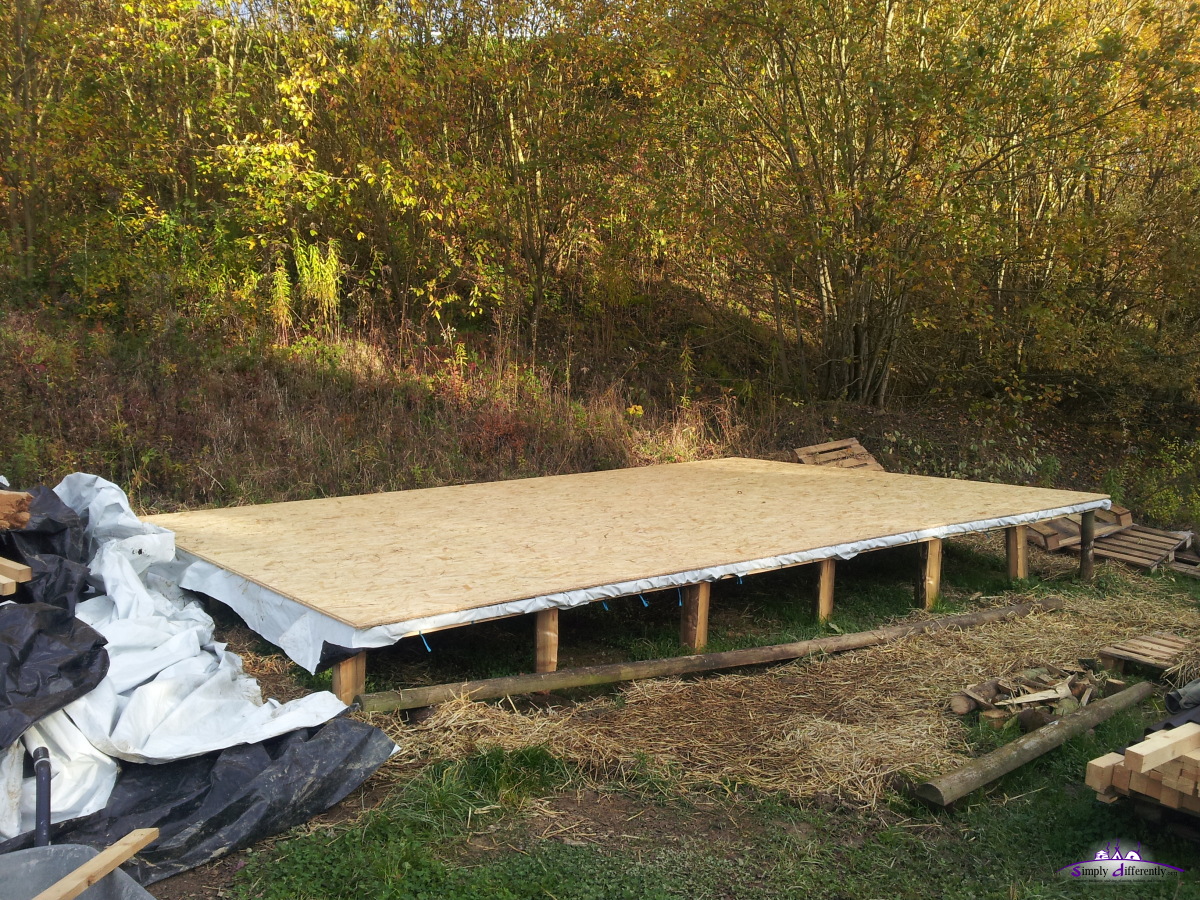
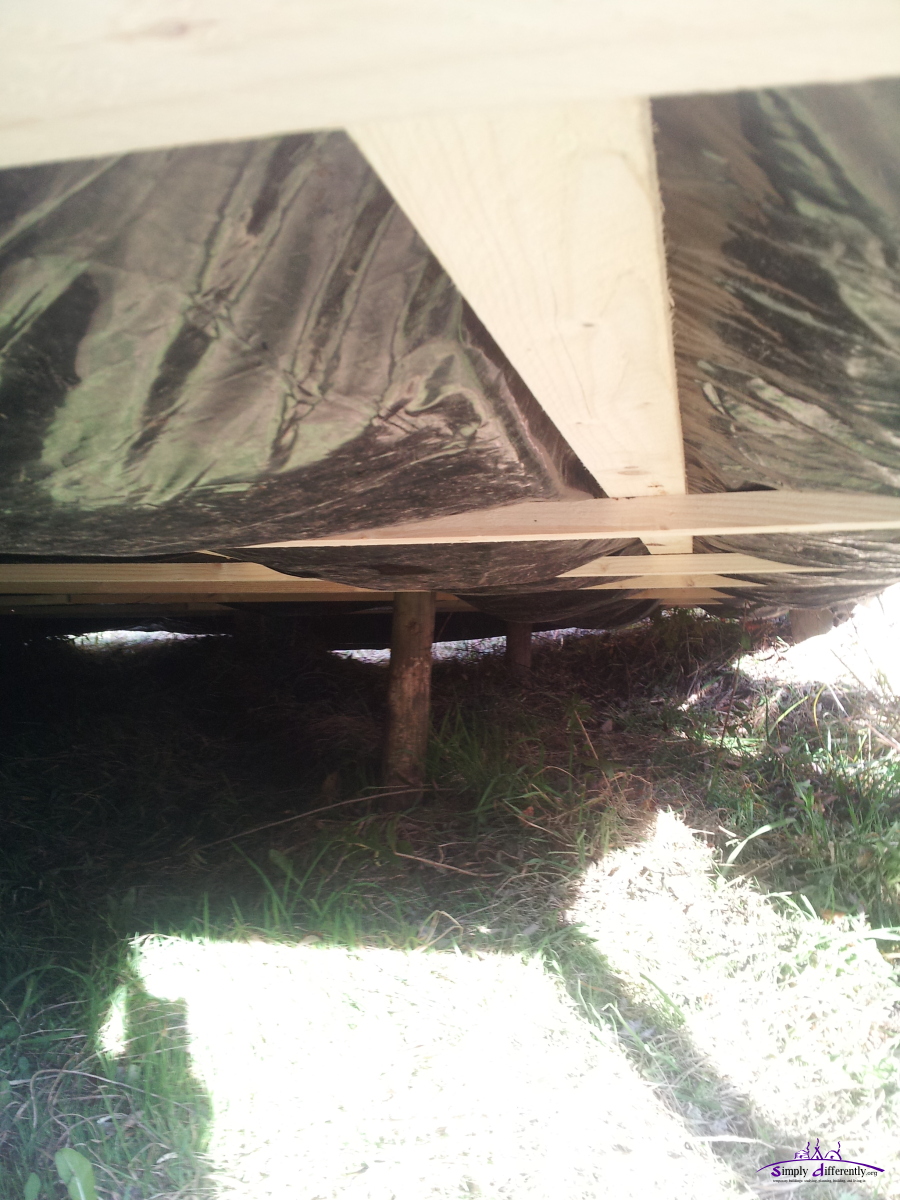
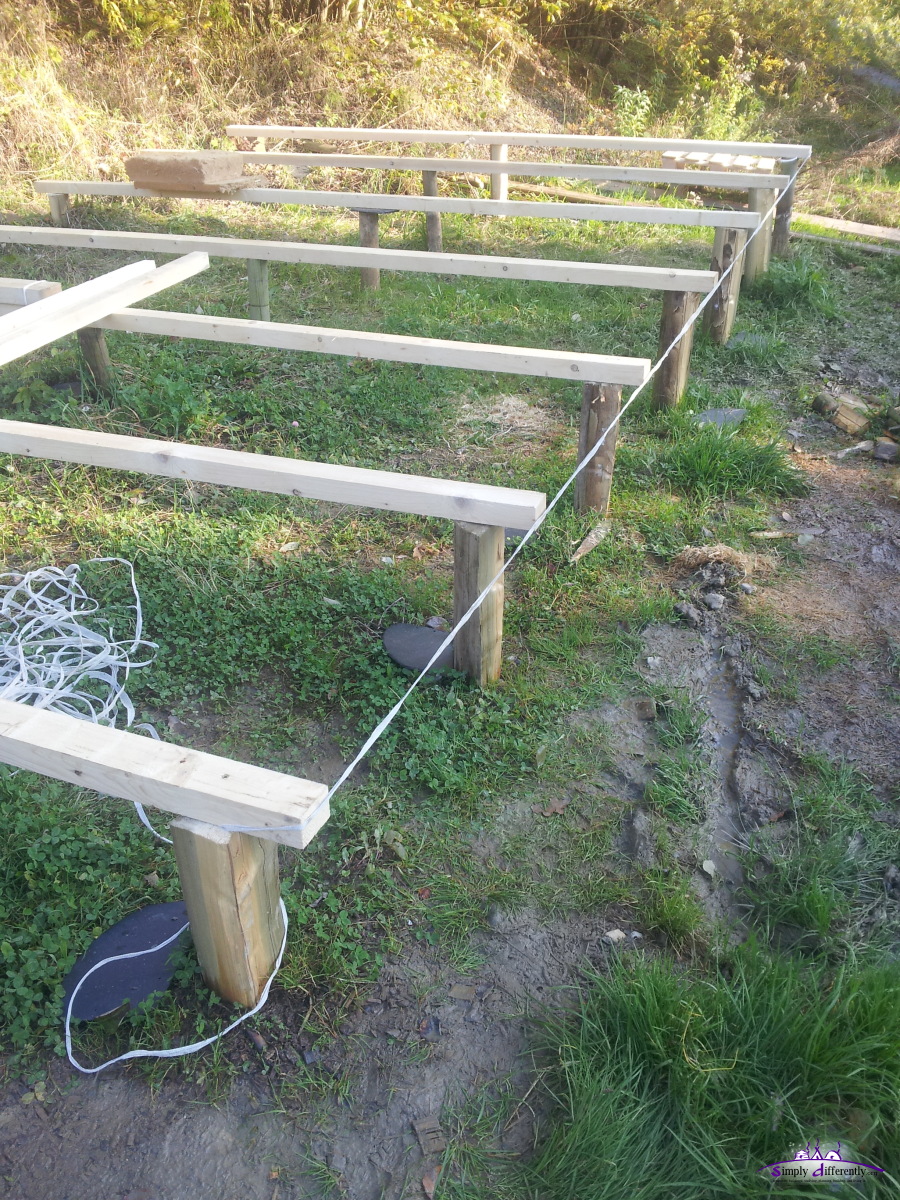
2014/10/12: Ground Poles
 3 x 7 ground poles rammed into the ground, leveling the floor |
  Base Plan |
It was a bit tricky to ensure perpendicularity, but it was achieved by measuring with a cord the diagonal both ways until they were the same length. The distance between the poles were easily to measure. Once they were rammed into the ground, either hammered further or cut and then with a 4m beam leveled until it fit. It was a bit time- and physical strength consuming but forth the efforts.
The next steps I had to postpone as the strawbale delivery was delayed and I planned to build the cabin within a few days with sun and no rain, so I don't have to cover up the unfinished construction.
2014/09/24: Planning
Some notes of mine on paper (also for my own reference):
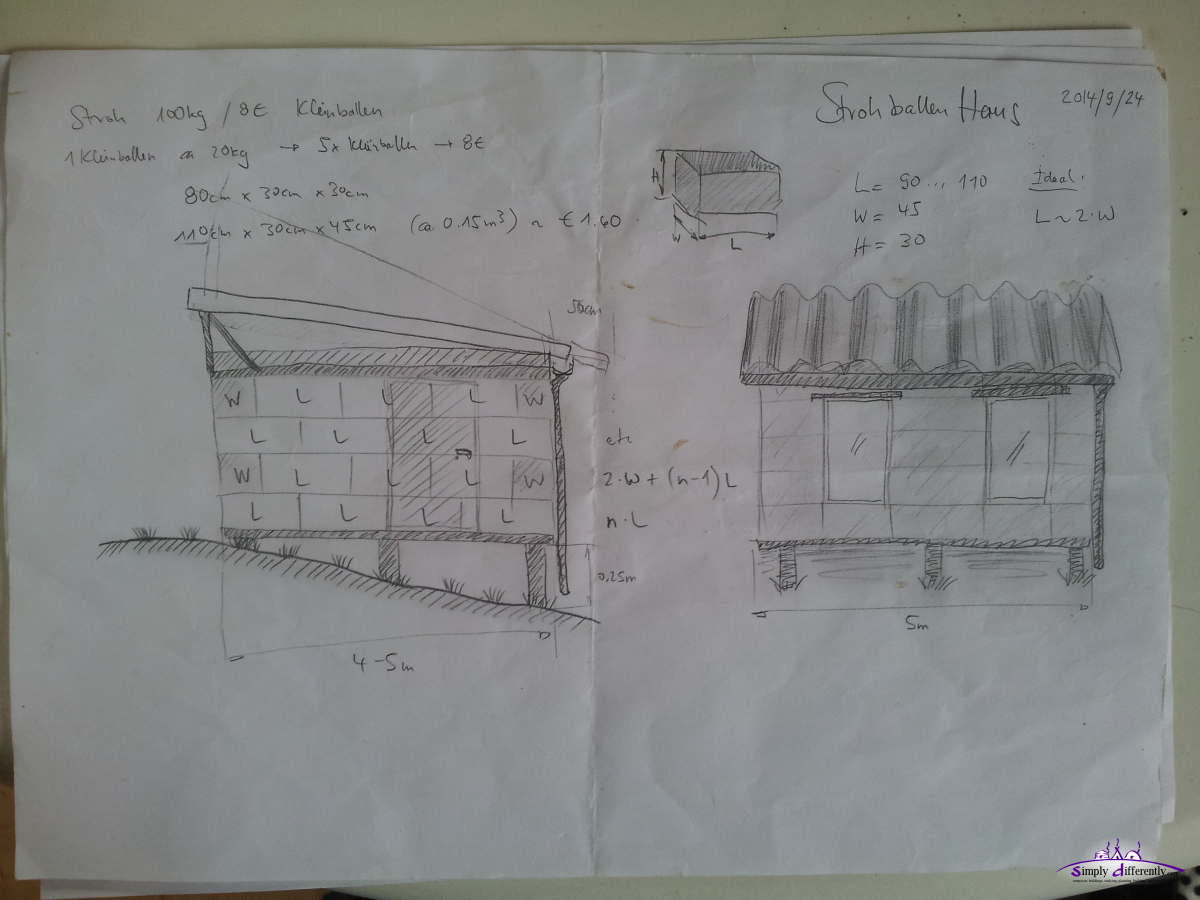
2014/11/03 09:39

2014/11/03 09:39

2014/11/03 09:40
2014/11/03 09:40
and electronic counterpart:

After some pondering I defined the base or floor size based on the OSB and main beams which are 4m long, which made the depth, the width I came up 3x OSB length-wise 3x 2.05m = 6.15m and 6x 0.675m = 4.05m - perfect.