
|
Star Domewritten by Rene K. Mueller, Copyright (c) 2006, last updated Mon, October 8, 2012 The Model
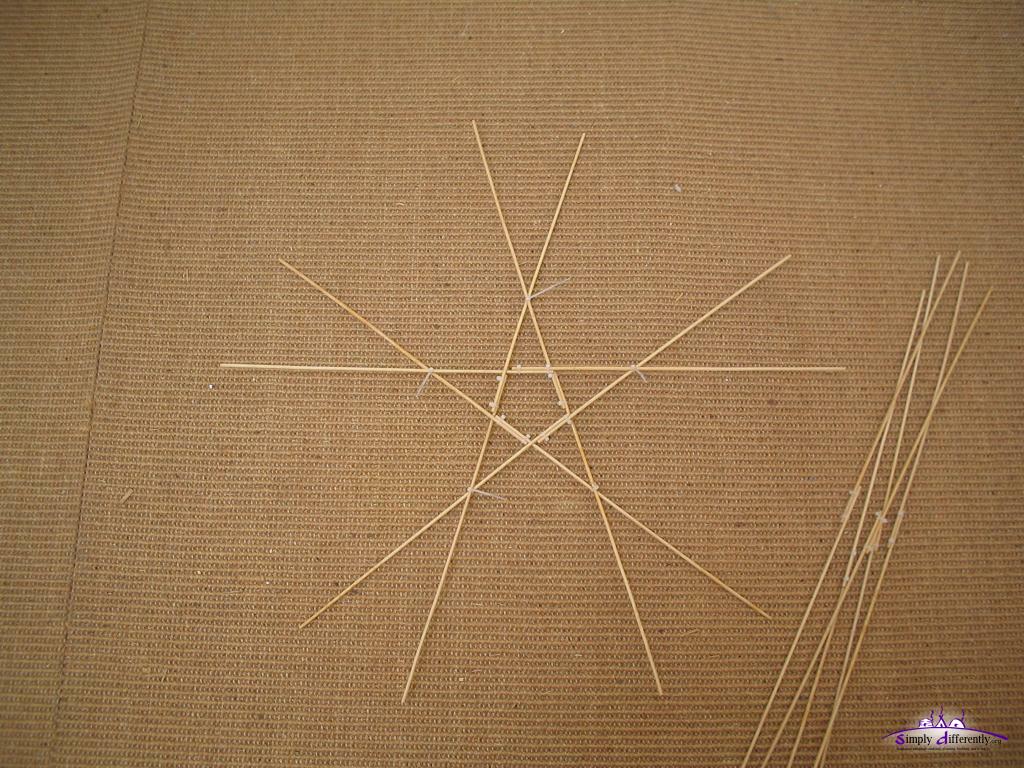
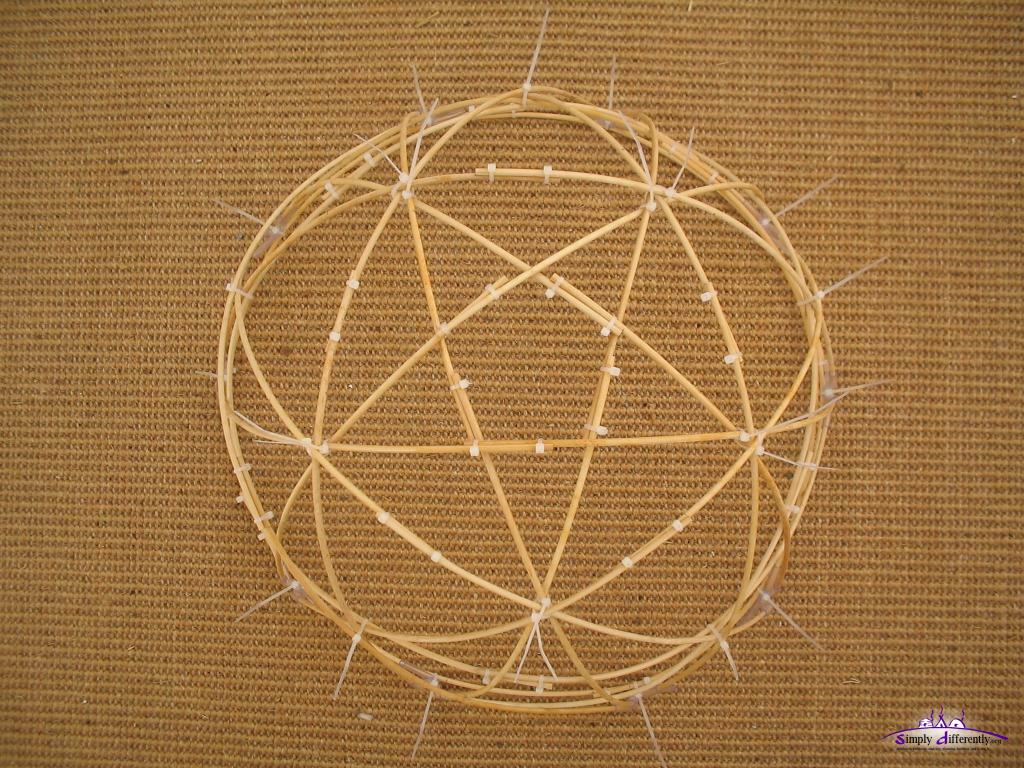
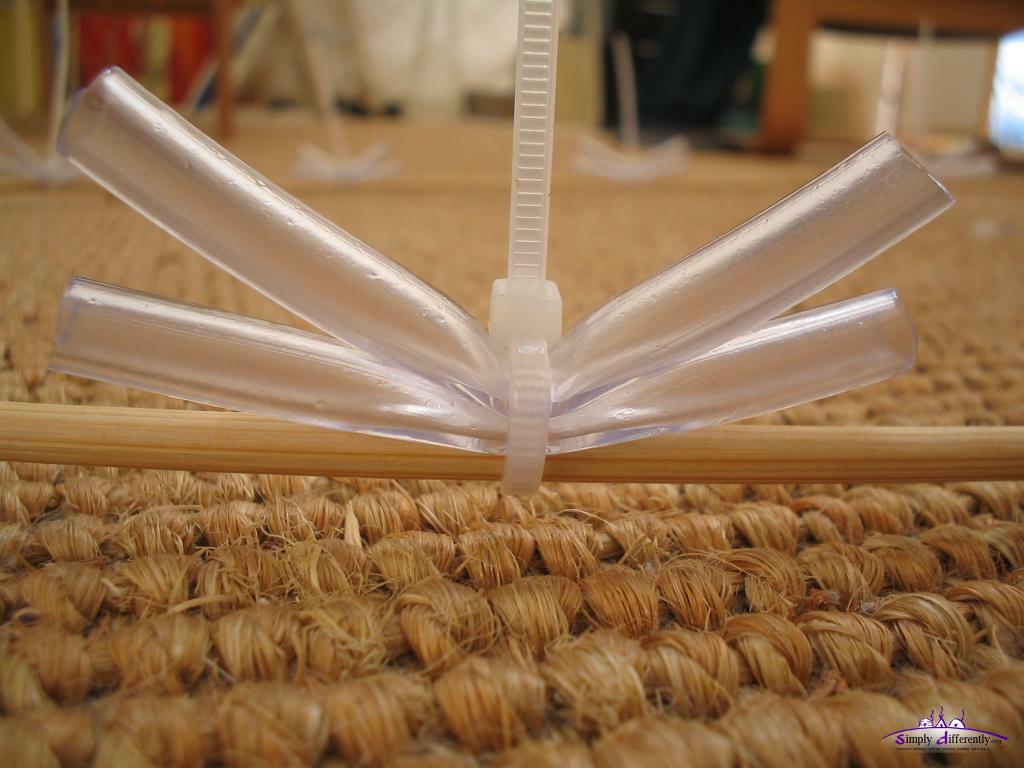
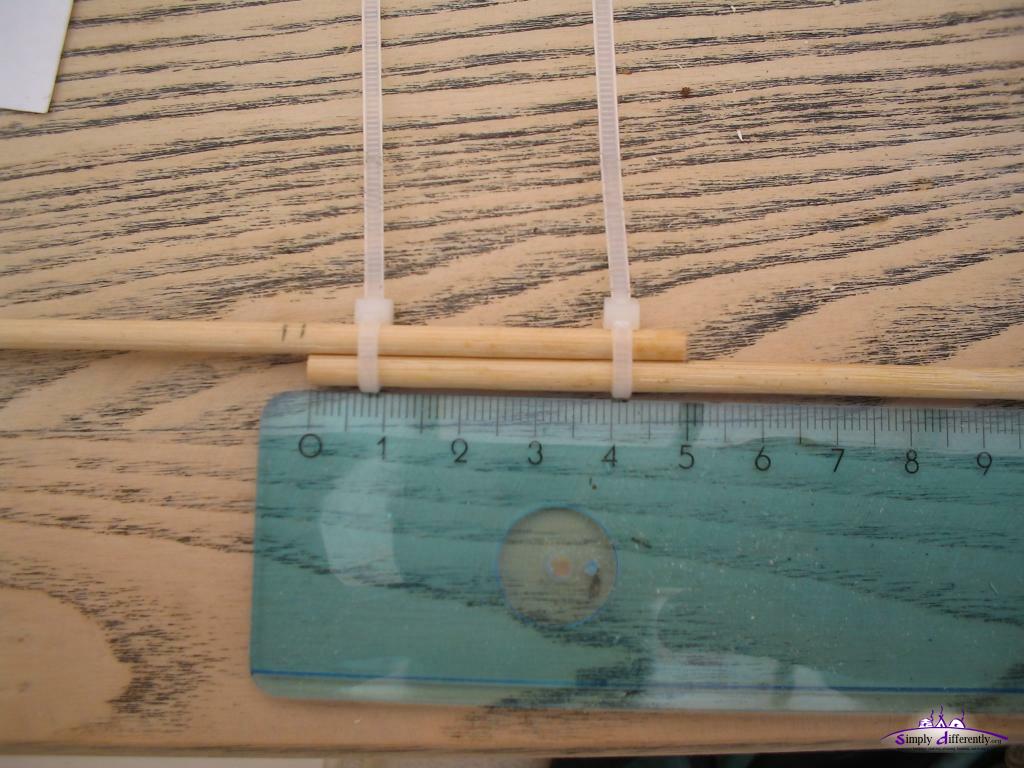 Junction of 5cm as bamboo stick is very stiff 2006/04/14 12:06 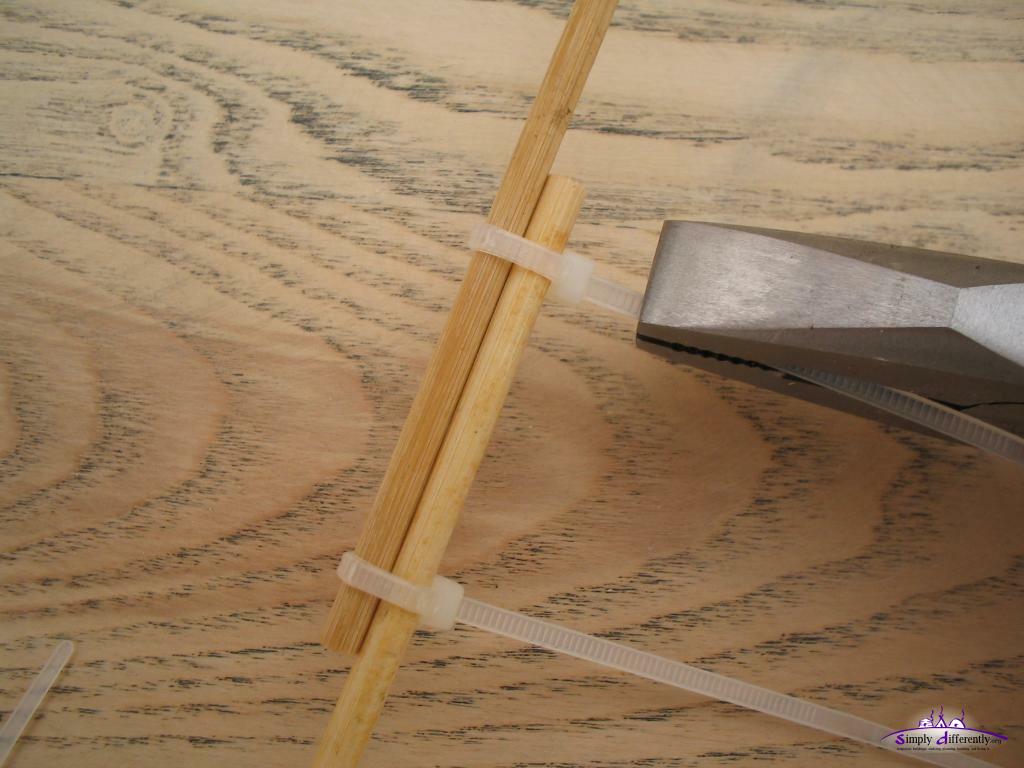 Tightening the cable PVC binder with a pliers 2006/04/14 12:32  Finished the 15 bows, composed by 30 bamboo sticks 2006/04/14 12:34 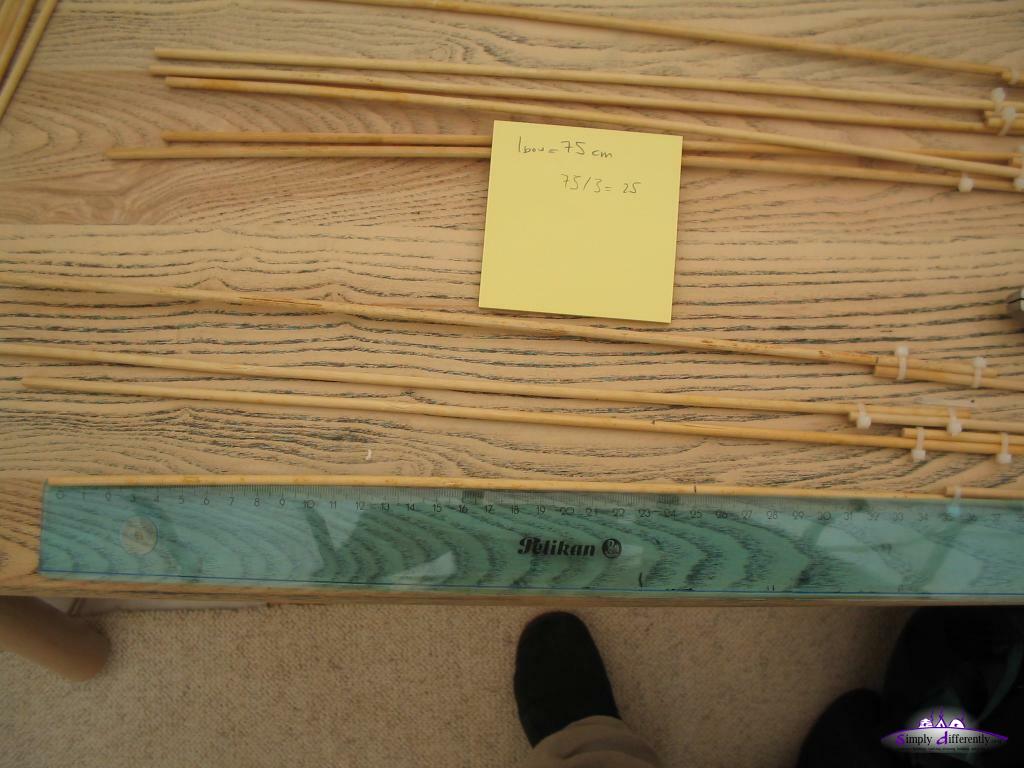 Marking the 10 bows with 25cm marks (3 marks per 75cm) 2006/04/14 12:41  Starting the layout 2006/04/14 12:46 The resulting bows where 40cm x 2 - 5cm as junction: 75cm long. As next I did the layout, forming the pentagram and the pentagon around:
 Pentagram, holding with cable binders, junction at the marks 2006/04/14 12:55 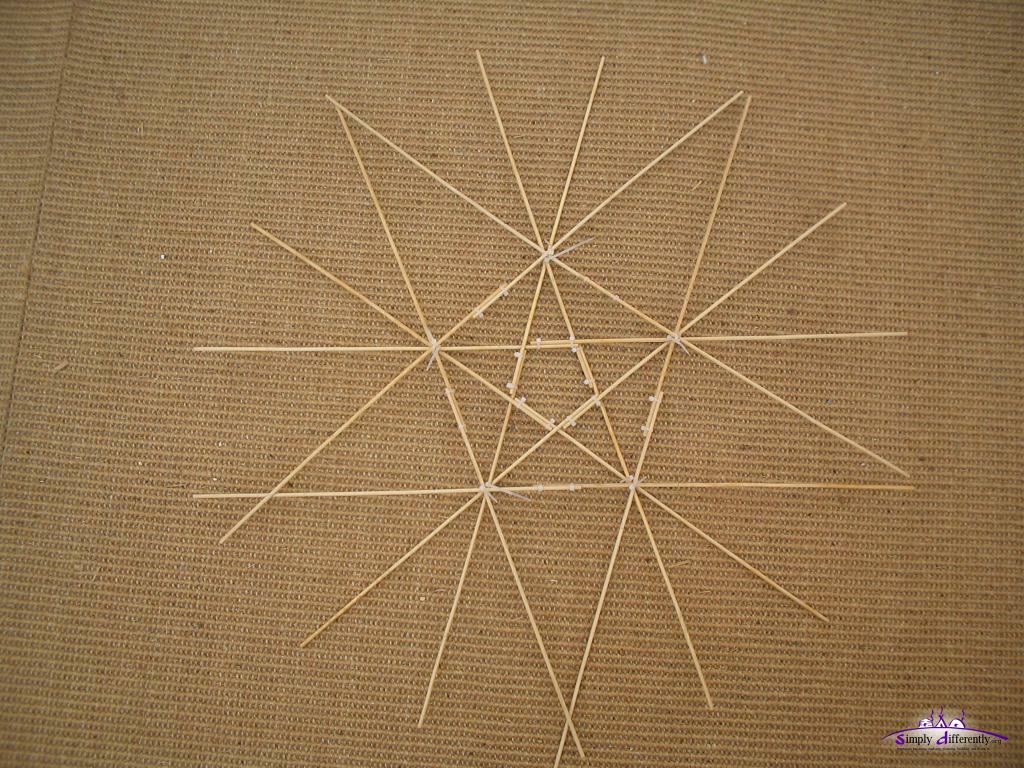 Pentagon surrounding the pentagram, using plastic binder again 2006/04/14 13:00  Closeup double junction 2006/04/14 13:00 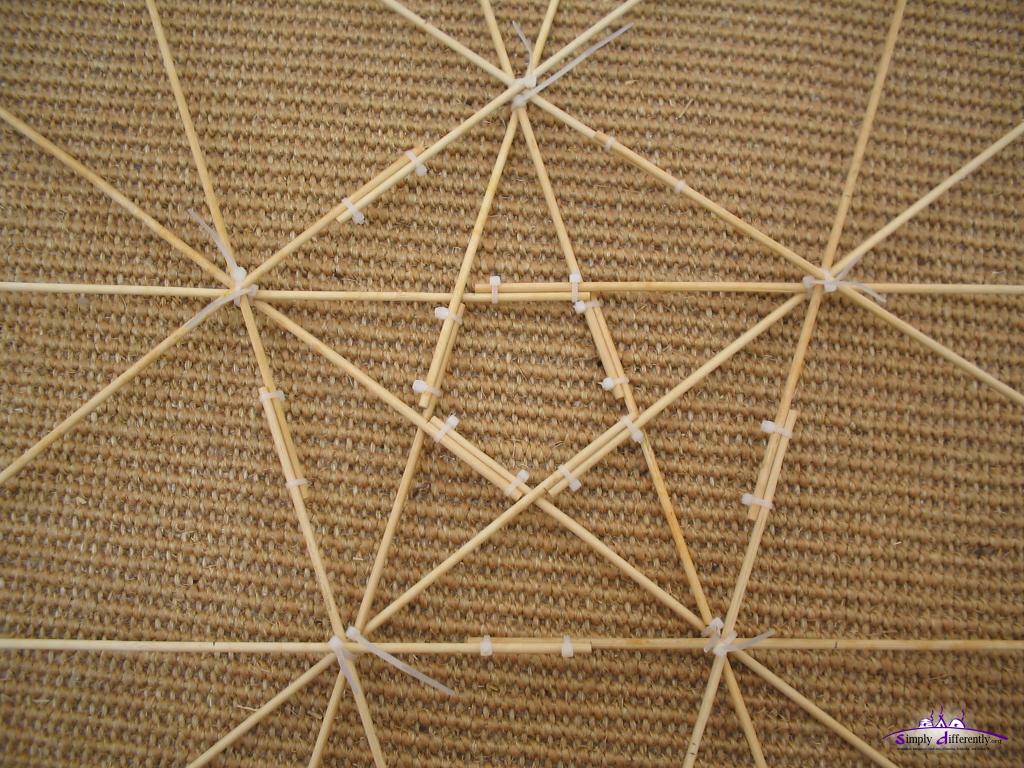 Closeup pentagon surround the pentagram 2006/04/14 13:00
Then I began to put all the open bows to the base:
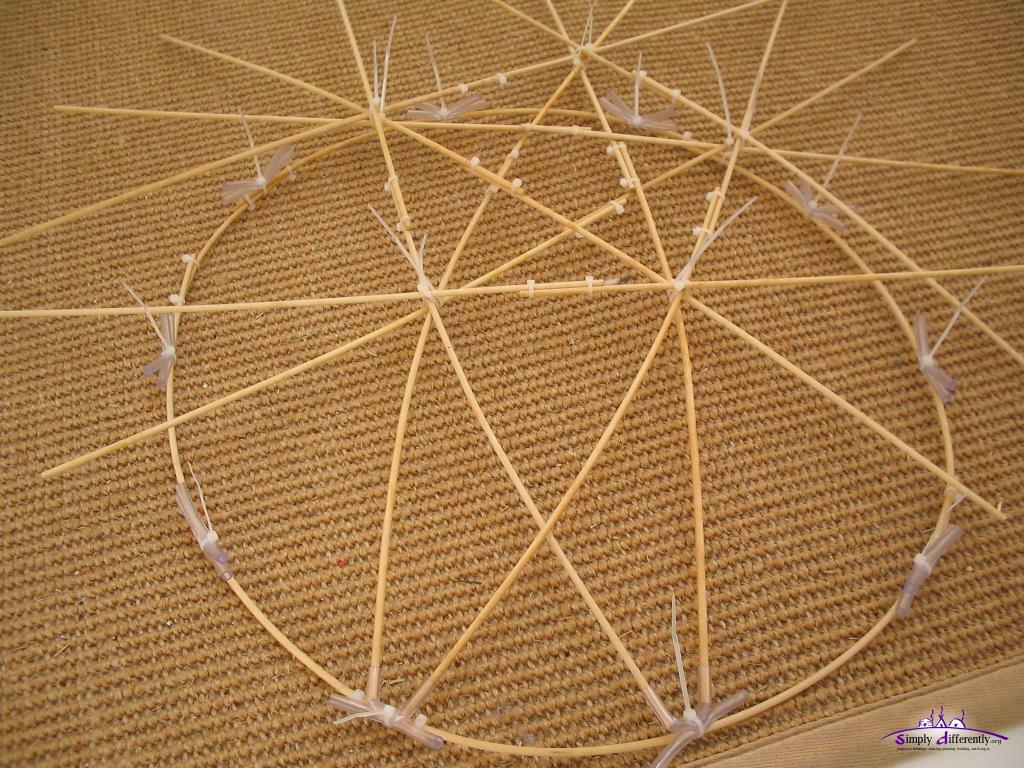 Starting to put the pentagon construct to the base, note the bending 2006/04/14 14:41 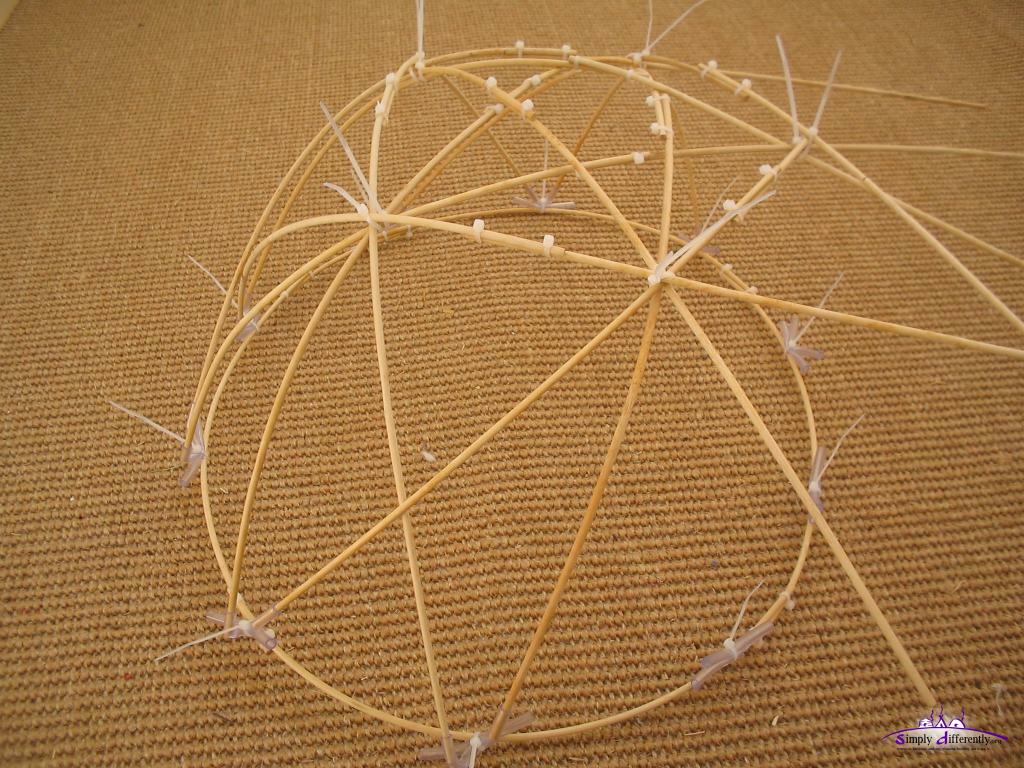 And so forth, step by step 2006/04/14 14:45 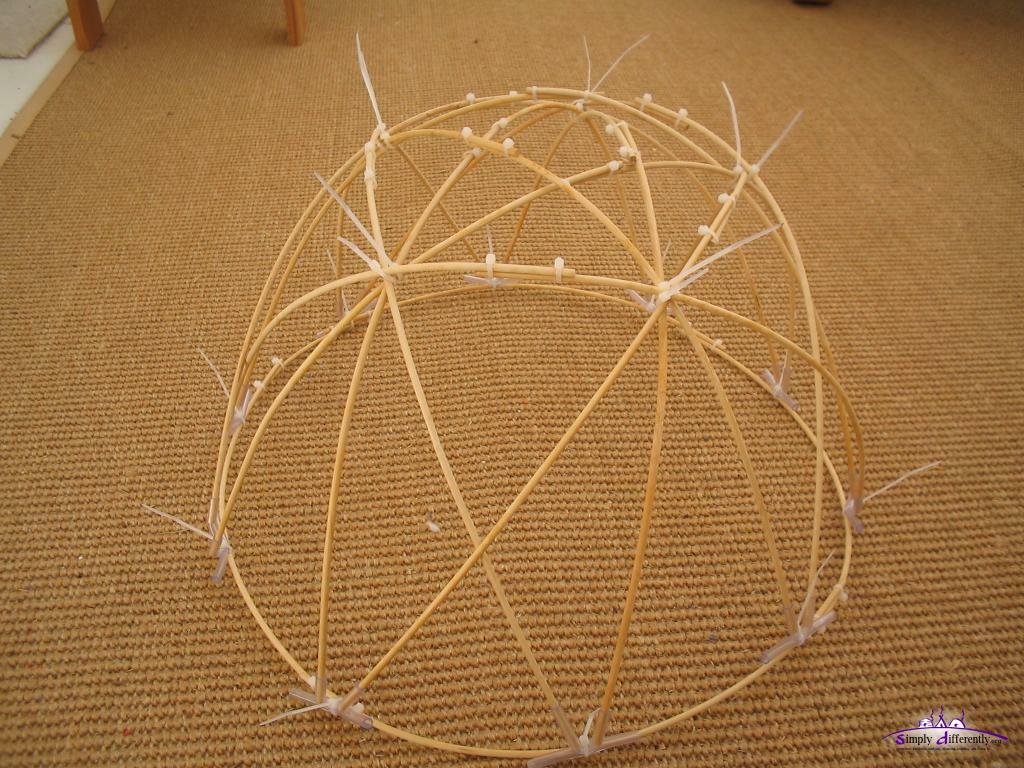 All 10 bows attached, due the stiffness of the bamboo sticks not yet a dome 2006/04/14 14:47 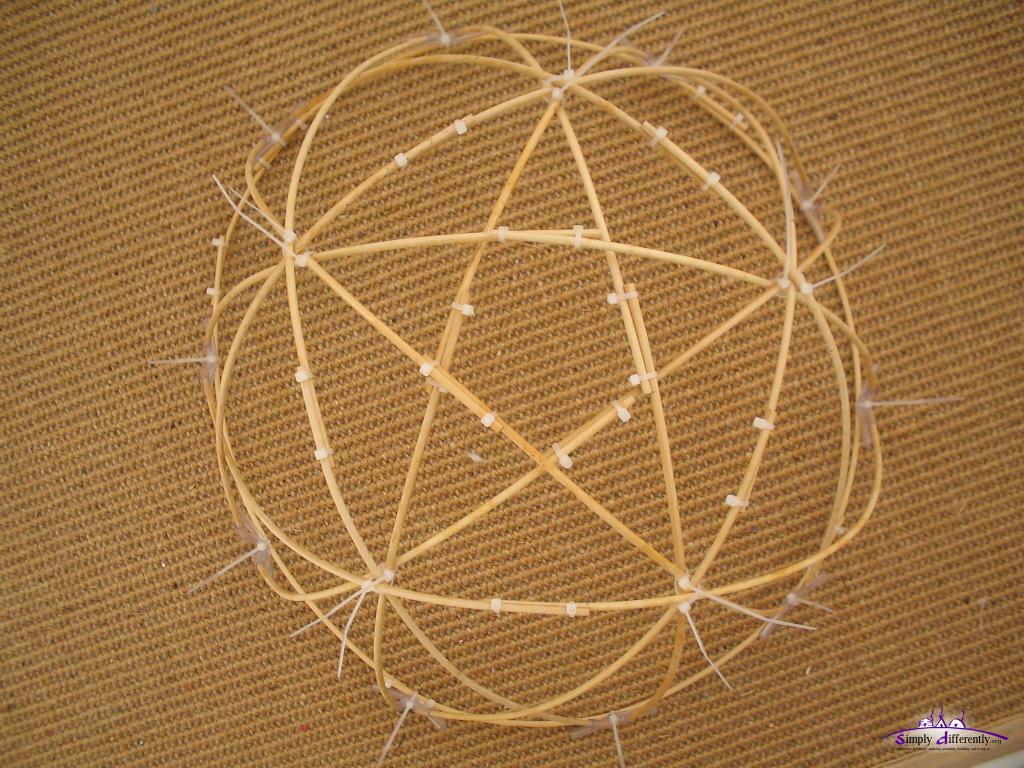 The pentagon star on top 2006/04/14 14:47 As next the 3rd bow for each base need to be attached as well, first I made it go outside of the existing dome, but it didn't fit, so I put the 3rd bow inside to form a better dome (the sticks are hard to bend and rather stiff), the result was a much better dome then.
 Attached the remaining 5 bows to the inside, gets now better in shape to form the dome 2006/04/14 15:06 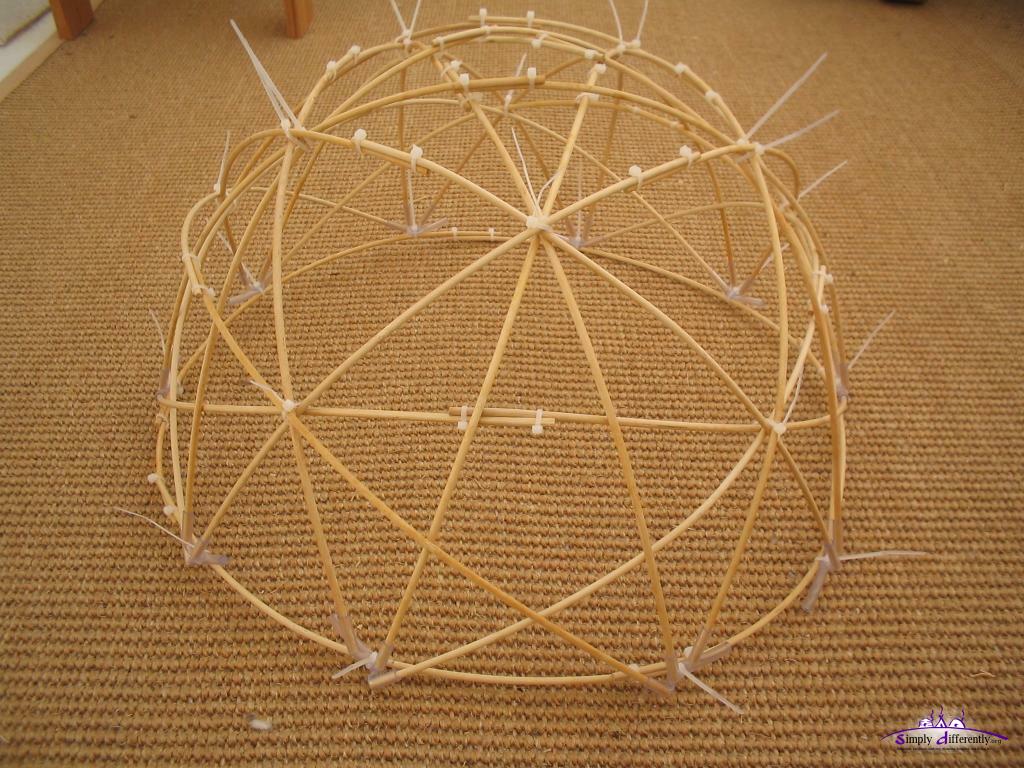 Finished star dome (PVC binders need to be cut short) 2006/04/14 15:06 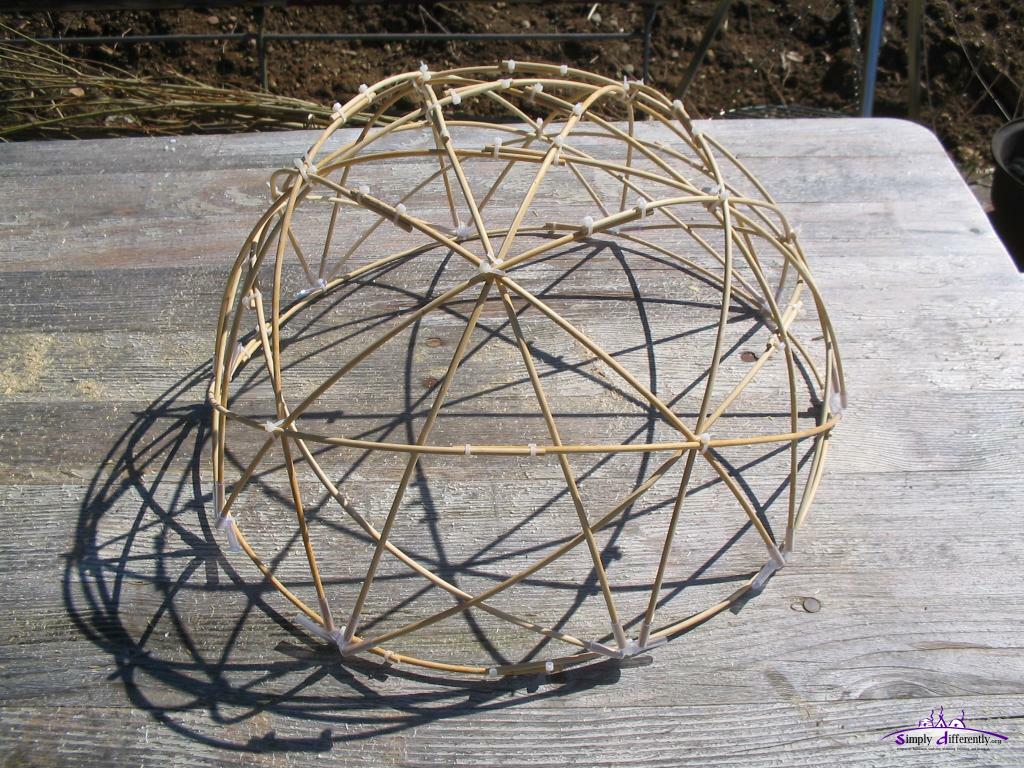 Finished Star Dome Model 2006/04/14 15:09 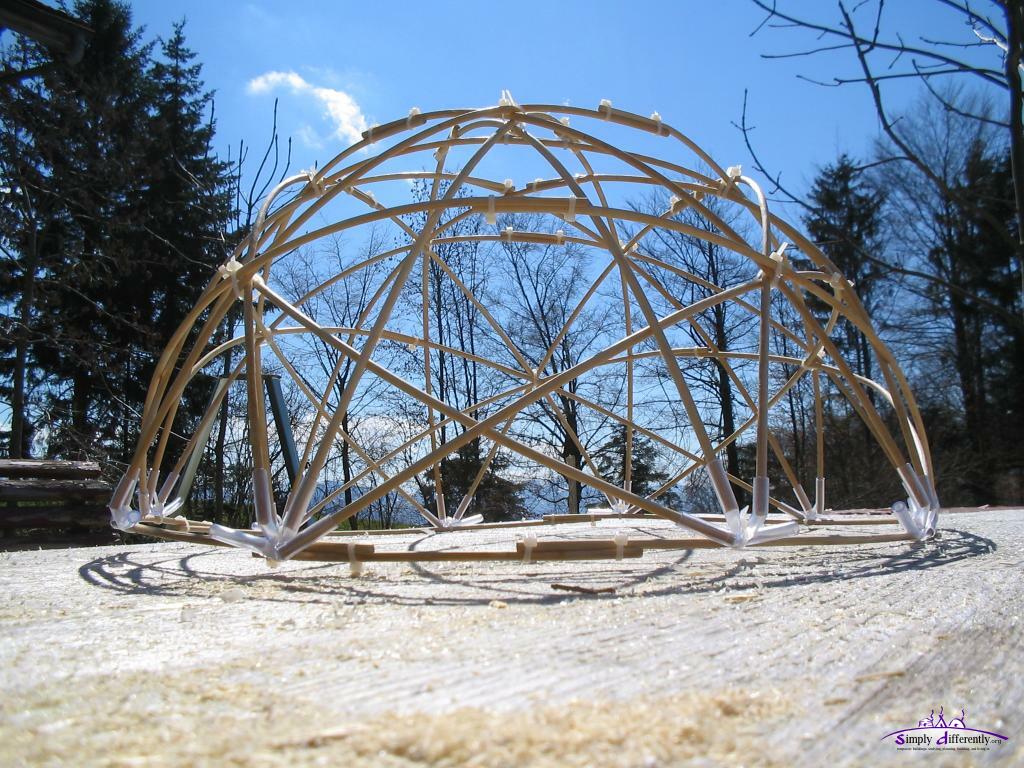 Star Dome Model (1) 2006/04/14 15:10  Star Dome Model (2) 2006/04/14 15:09  Star Dome Model (3) 2006/04/14 15:10 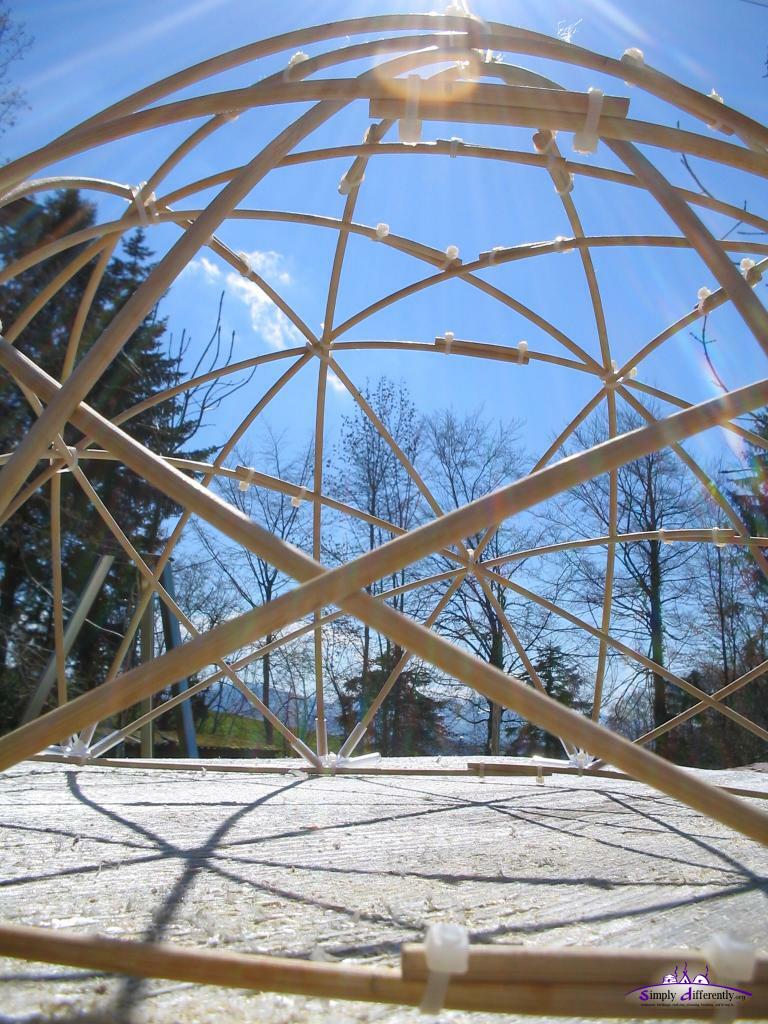 Star Dome Model (4) 2006/04/14 15:10 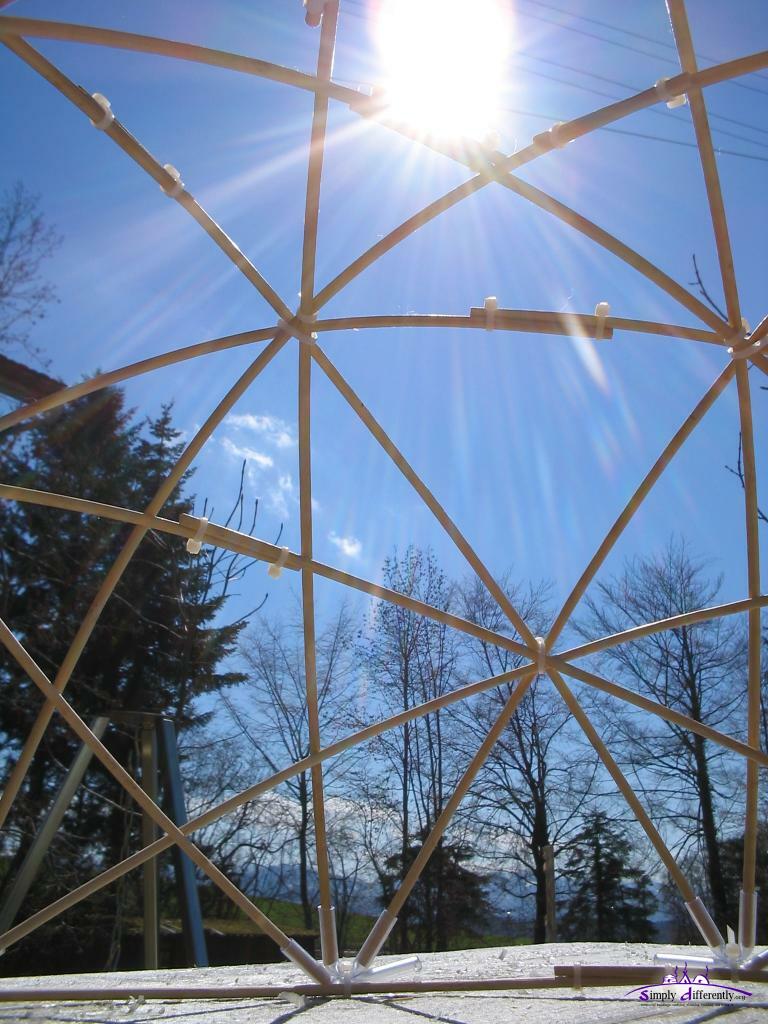 Star Dome Model (5) 2006/04/14 15:10  Star Dome Model (6) 2006/04/14 15:10  Star Dome Model (7) 2006/04/14 15:11 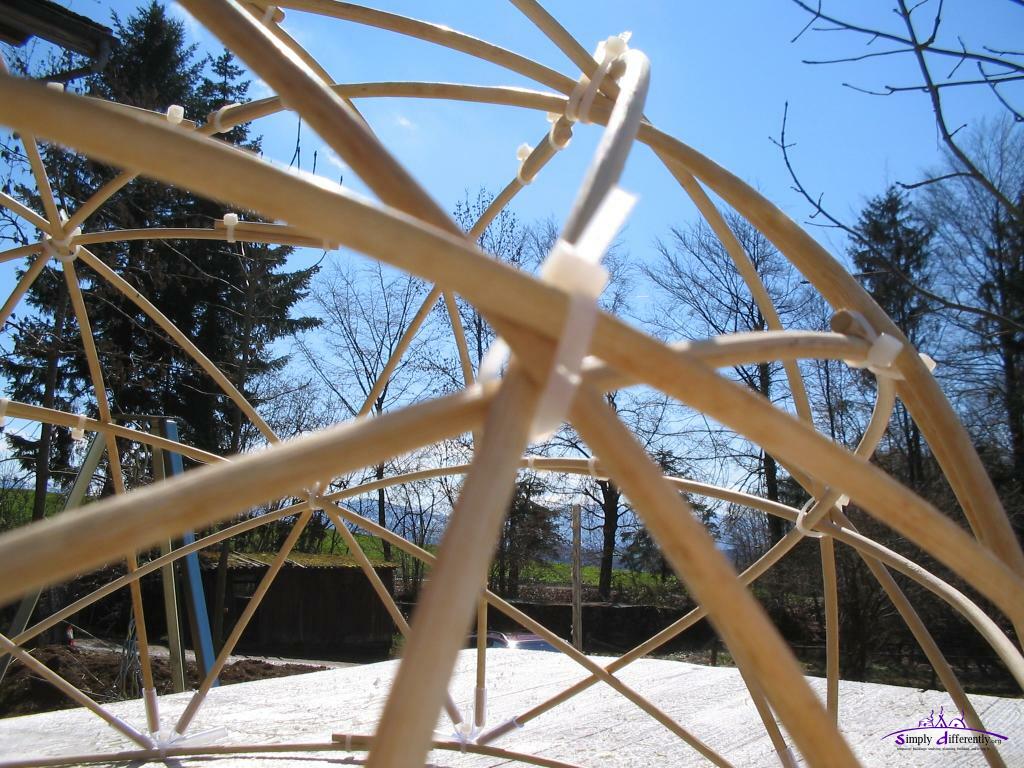 Star Dome Model (8) 2006/04/14 15:11 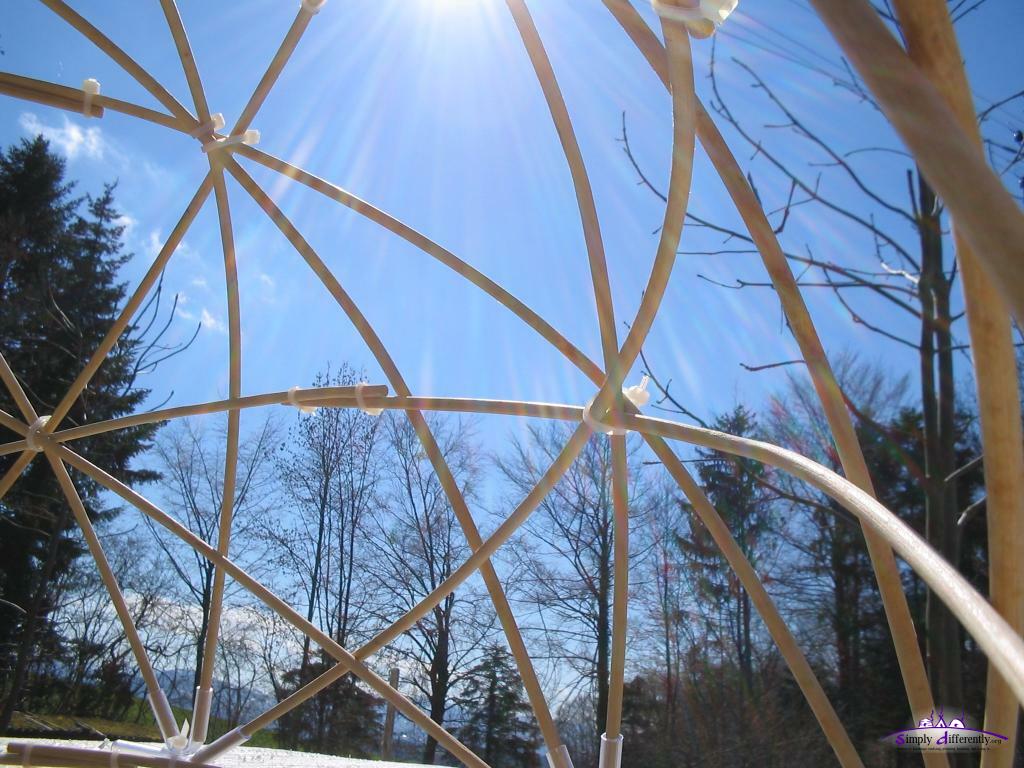 Star Dome Model (9) 2006/04/14 15:11 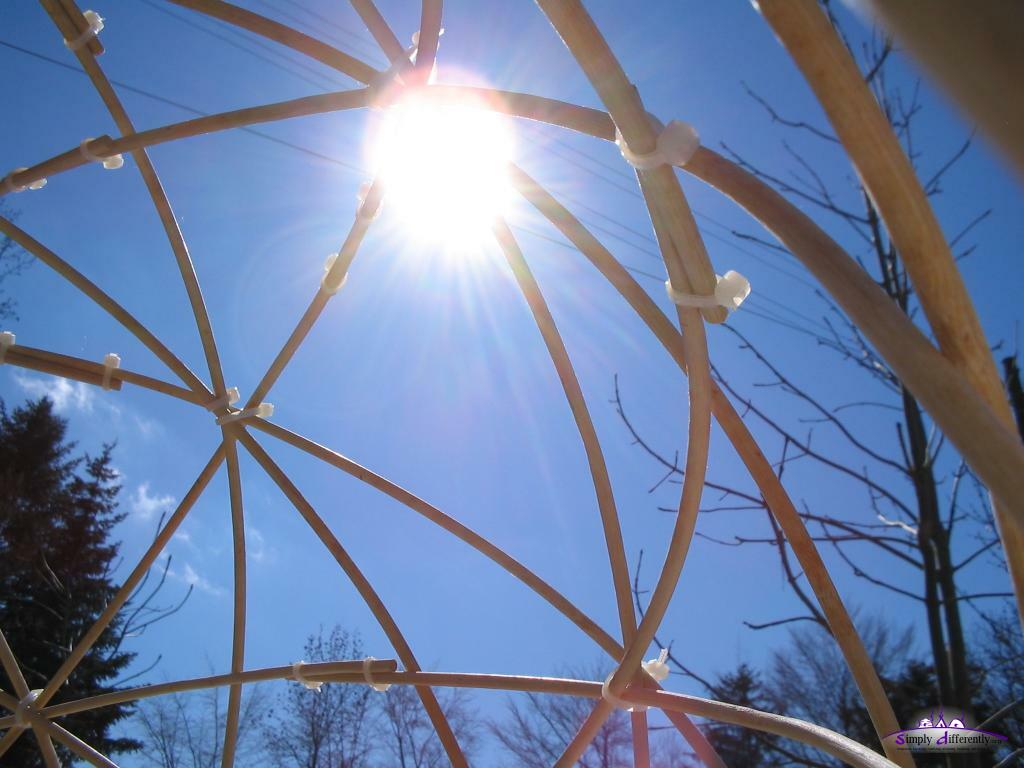 Star Dome Model (10) 2006/04/14 15:11 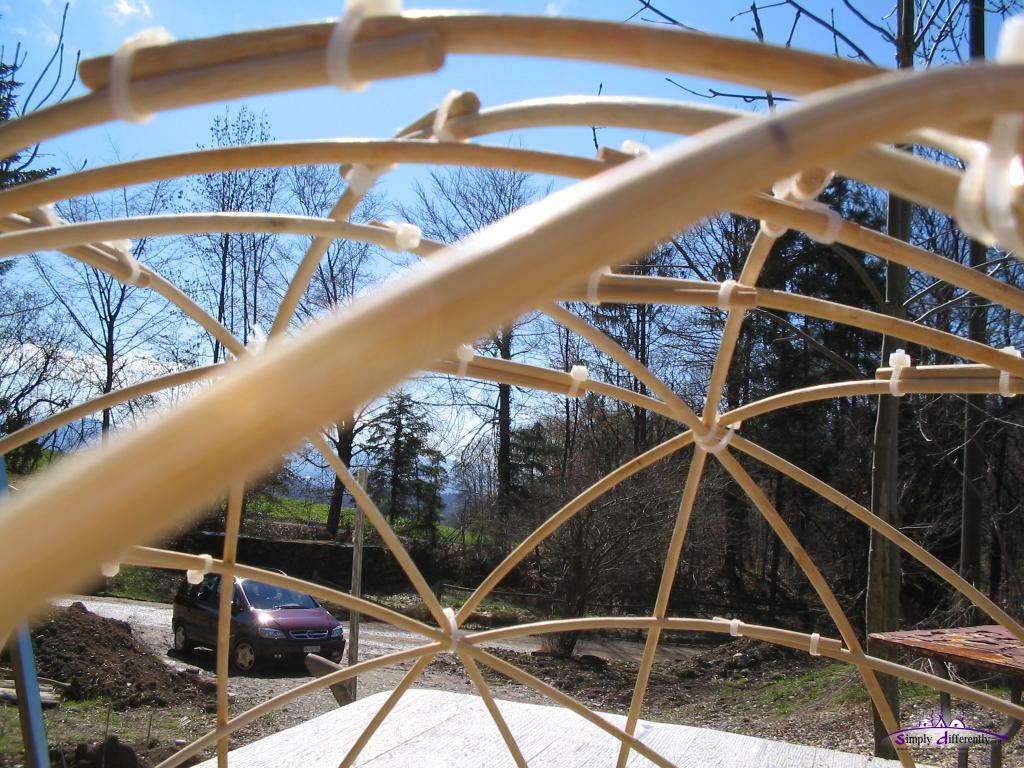 Star Dome Model (11) 2006/04/14 15:11 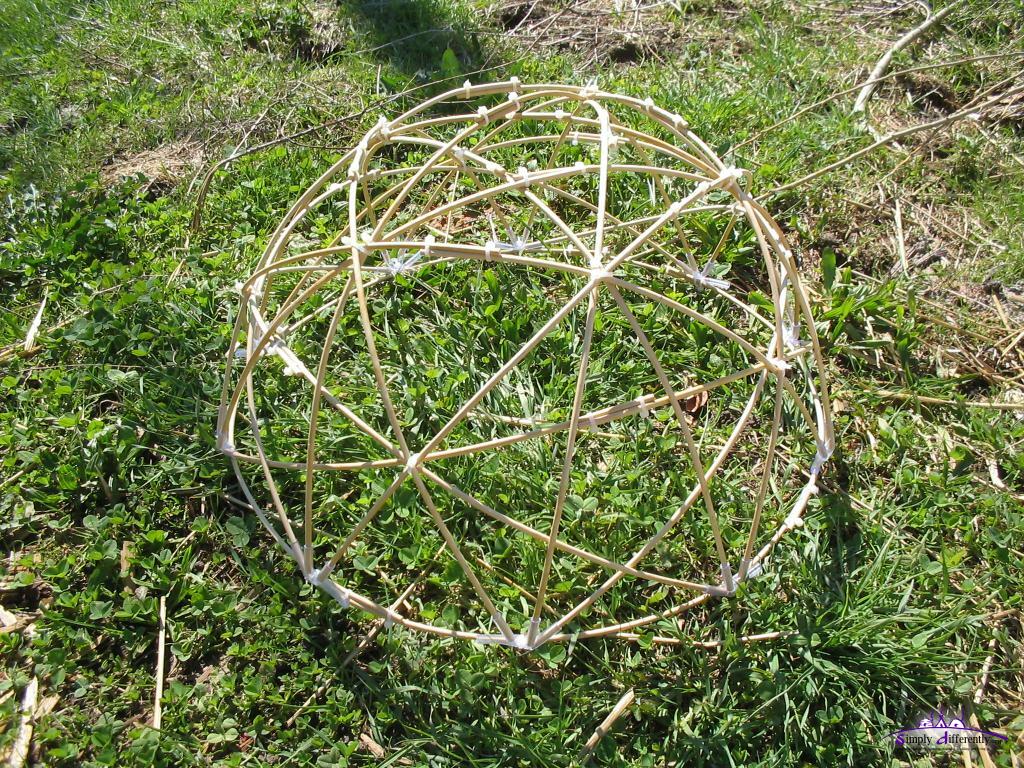 Star Dome Model (12) 2006/04/14 15:12  Star Dome Model (13) 2006/04/14 15:12 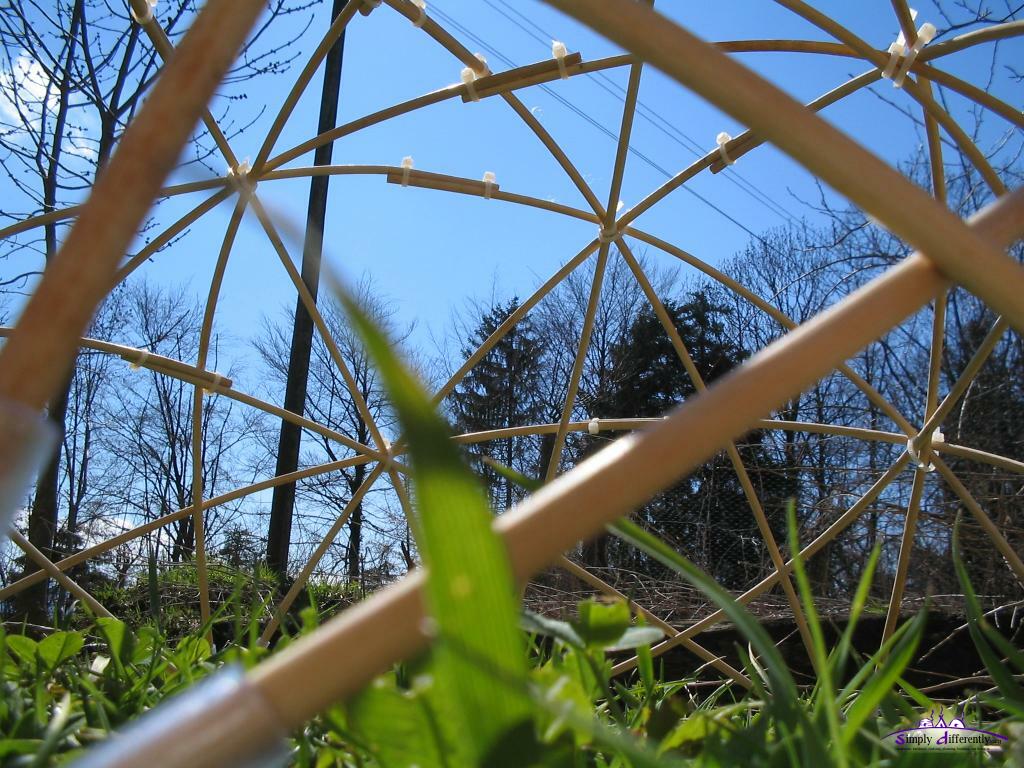 Star Dome Model (14) 2006/04/14 15:12 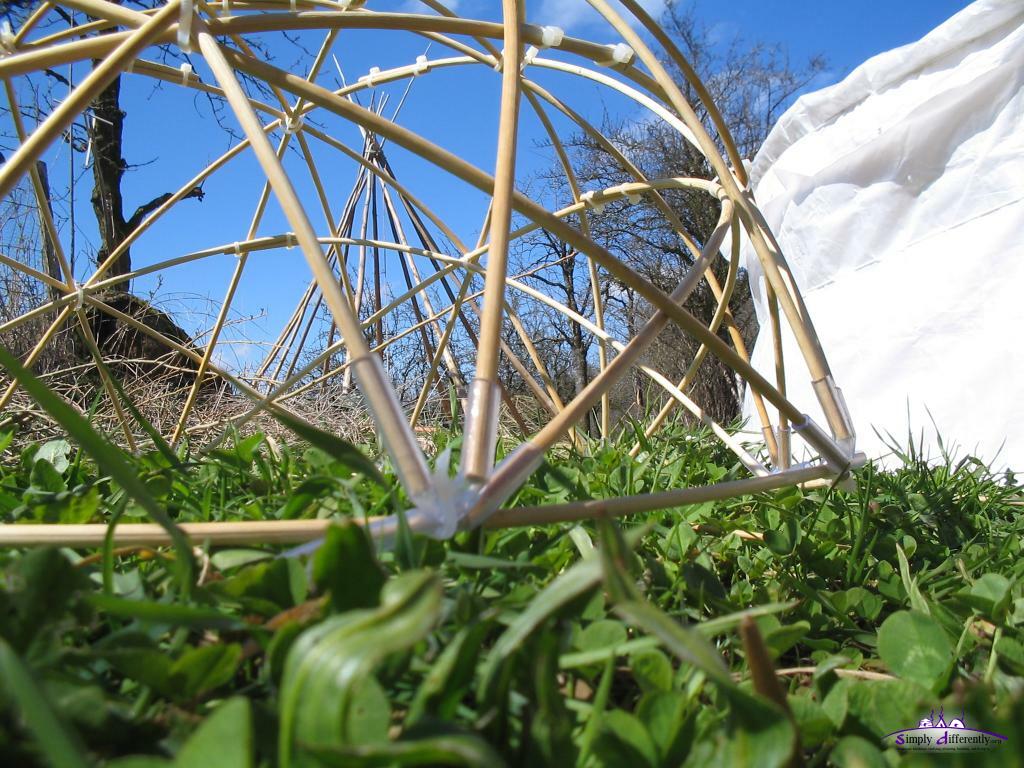 Star Dome Model (15) 2006/04/14 15:12  Star Dome Model (16) 2006/04/14 15:13 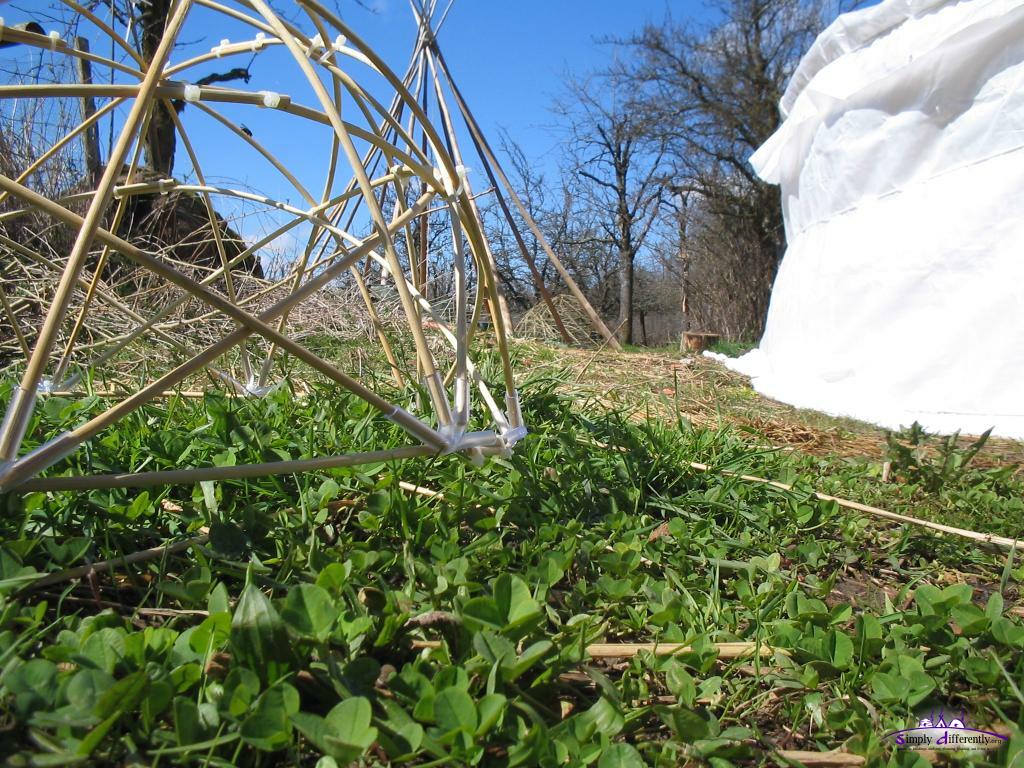 Star Dome Model (17) 2006/04/14 15:13 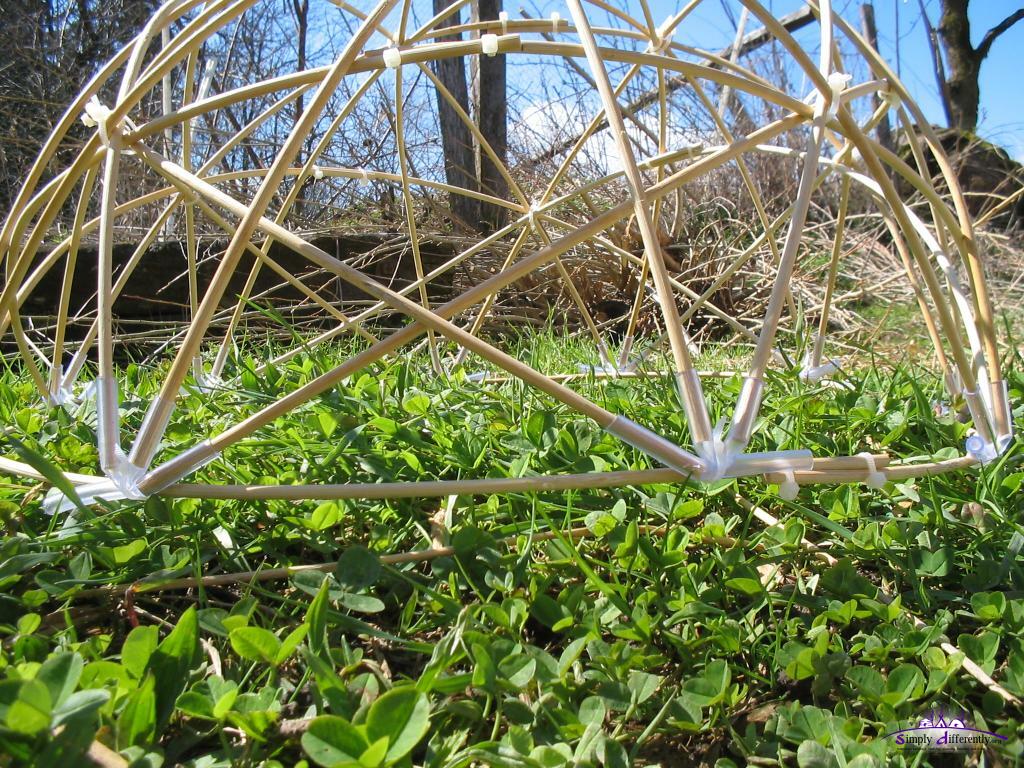 Star Dome Model (18) 2006/04/14 15:13 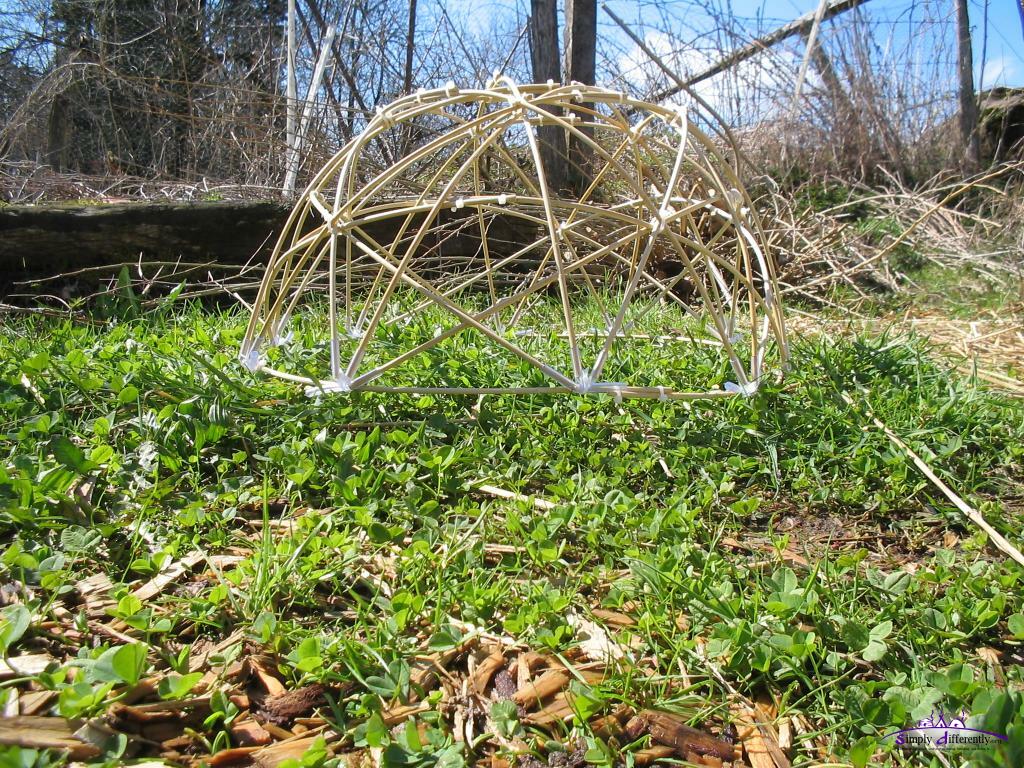 Star Dome Model (19) 2006/04/14 15:13
Todo
Real Life ExampleScott Ford ([email protected]) shared following:
  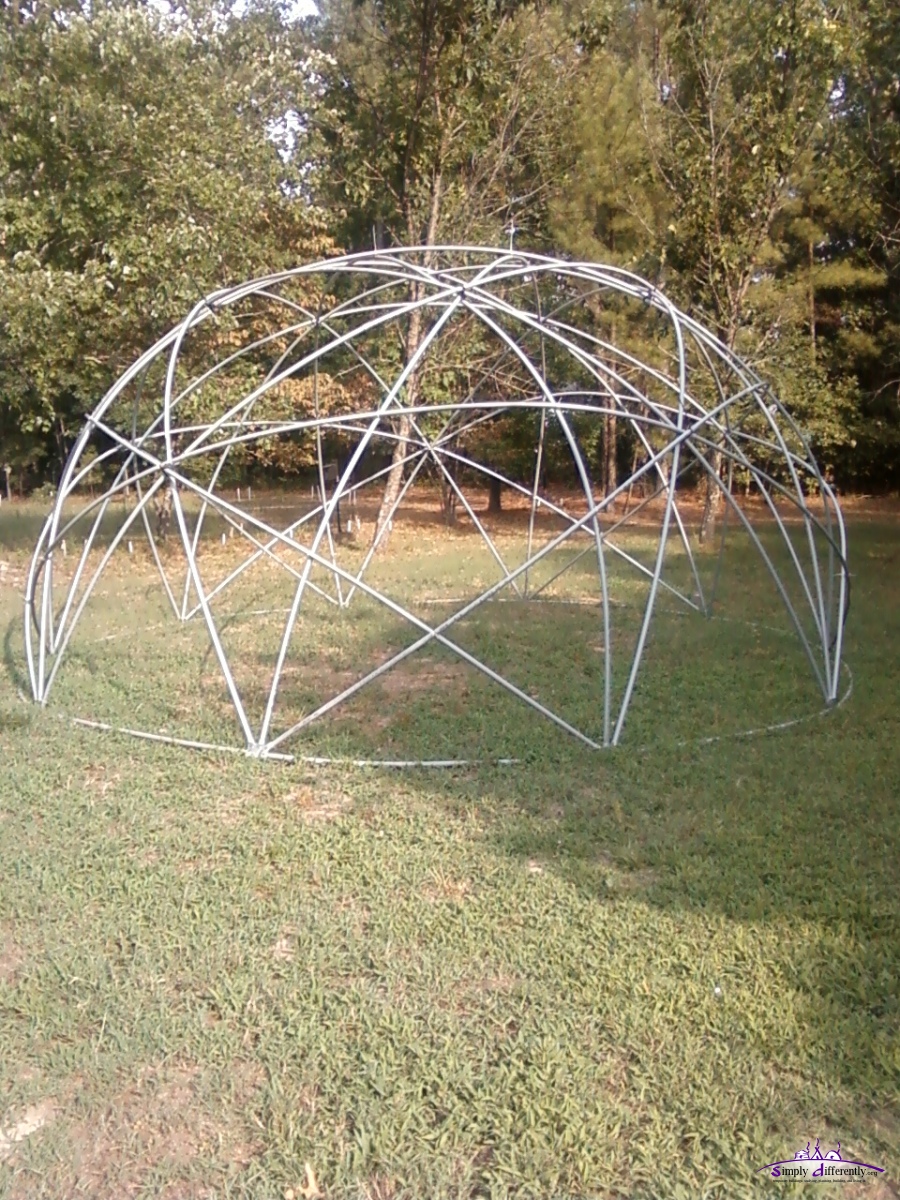 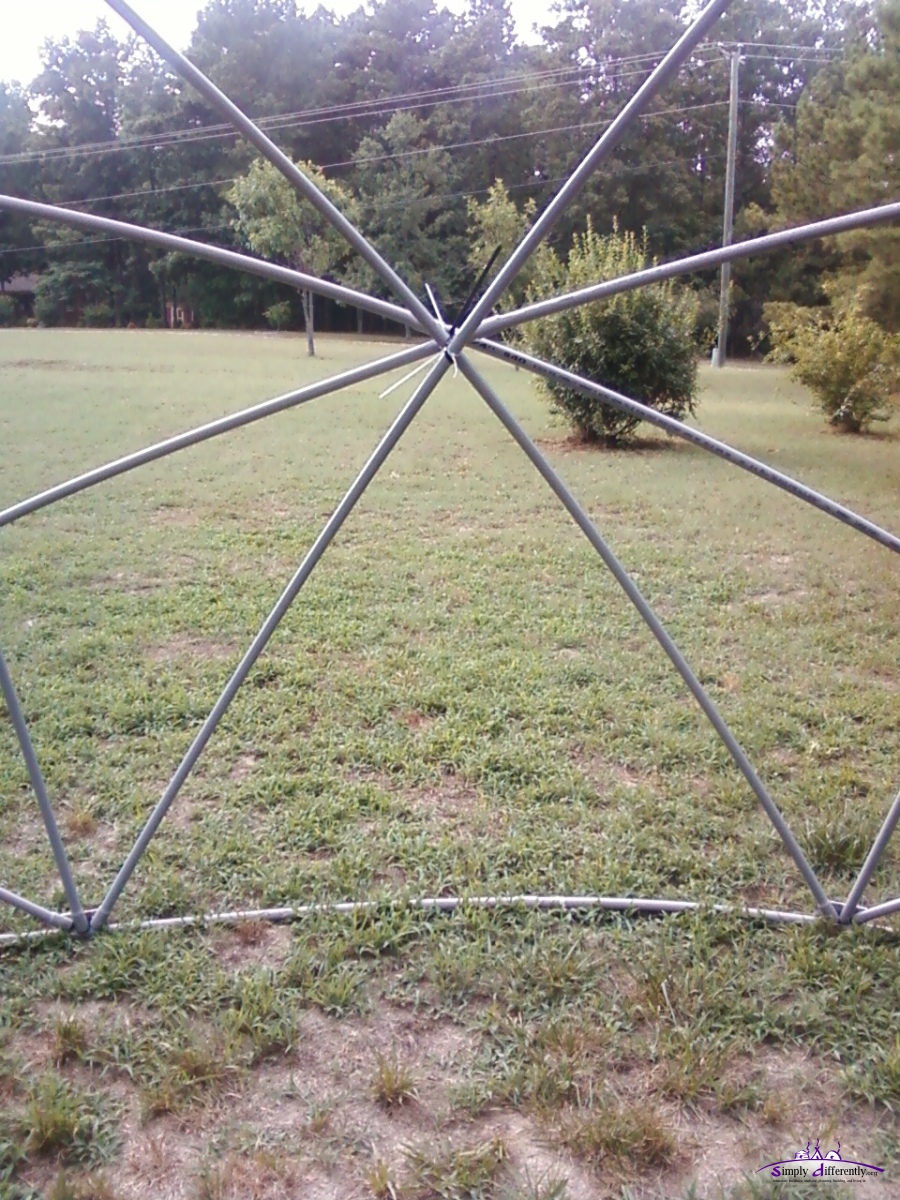 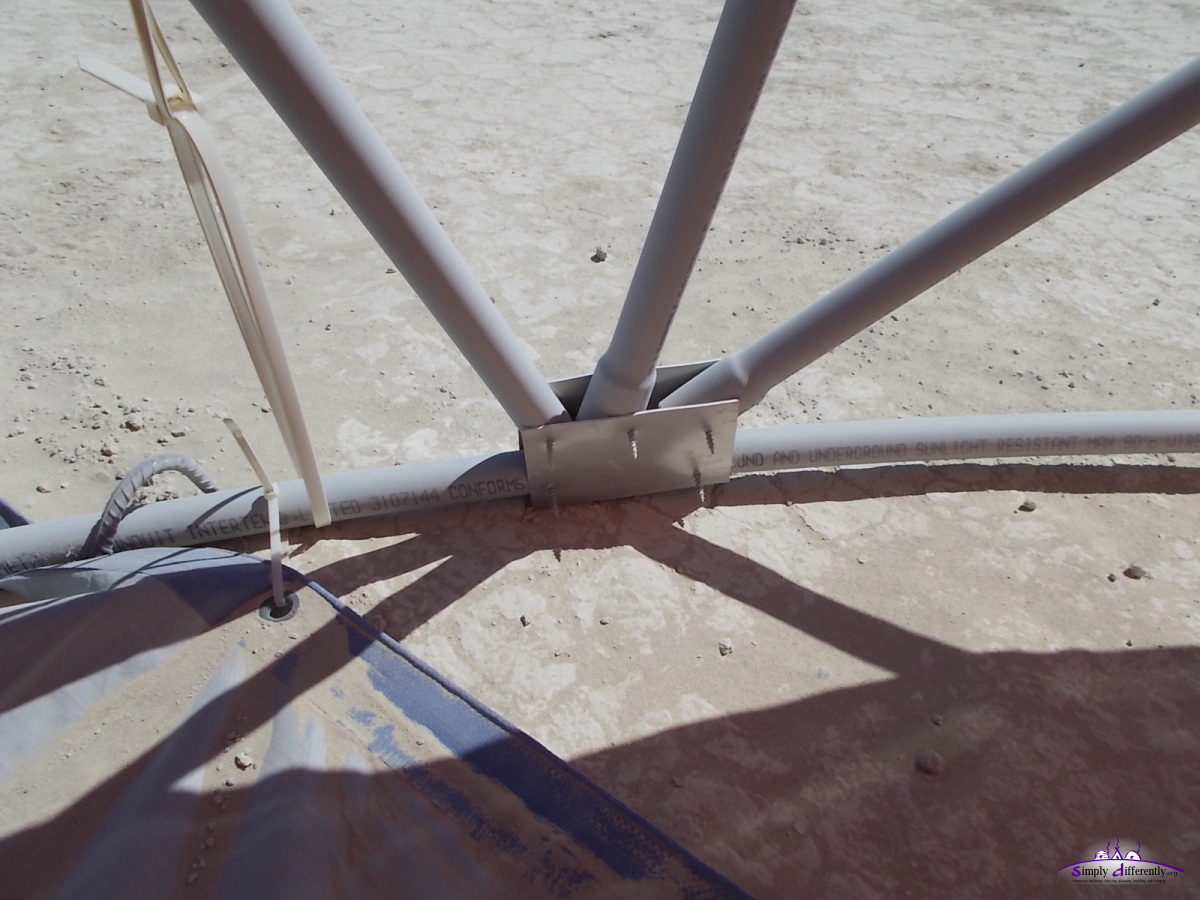   "We used the star dome as a shade shelter for the week at Burning Man (2012). We had a 25 foot diameter parachute stretched over the skeleton. 16" pieces of rebar, driven into the ground, were used to anchor the dome. As a temporary shade shelter the star dome worked perfectly. It took a little over 2 hours to put it up and about an hour to take it down. All of the parts, except for the cable ties, were salvageable and can be used again. It is relatively light-weight (less than 100 pounds for the entire kit). It withstood sustained 45 mph winds with no issues. Links
Content:
|


| Home | · | About | · |  Tipi | · |  Yurt | · |  Dome | · | Features | · | Gallery |


Creative Commons (CC) BY-SA-NC 2005-2017, developed, designed and written by René K. Müller
Graphics & illustrations made with Inkscape, Tgif, Gimp, PovRay, GD.pm
Web-Site powered by FreeBSD & Debian/Linux - 100% Open Source